Expandir um volume no vSphere e num SO (EN)
271 visualizações
Objective
We will demonstrate how to use vSphere and OS management tools to add space to your virtual disks for both Windows and Linux.
This guide offers you a step by step study case to achieve this objective.
Requirements
- Being an administrative contact of your Hosted Private Cloud infrastructure to receive login credentials
- A user account with access to vSphere (created in the OVHcloud Control Panel)
Instructions
Before proceeding with this type of change, we recommend a full backup or a clone of the virtual machine.
Windows VM
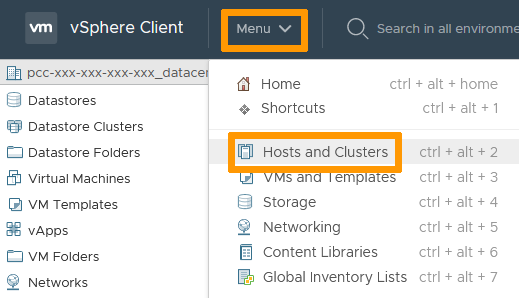
In the vSphere interface menu, go to the Hosts & Clusters dashboard.
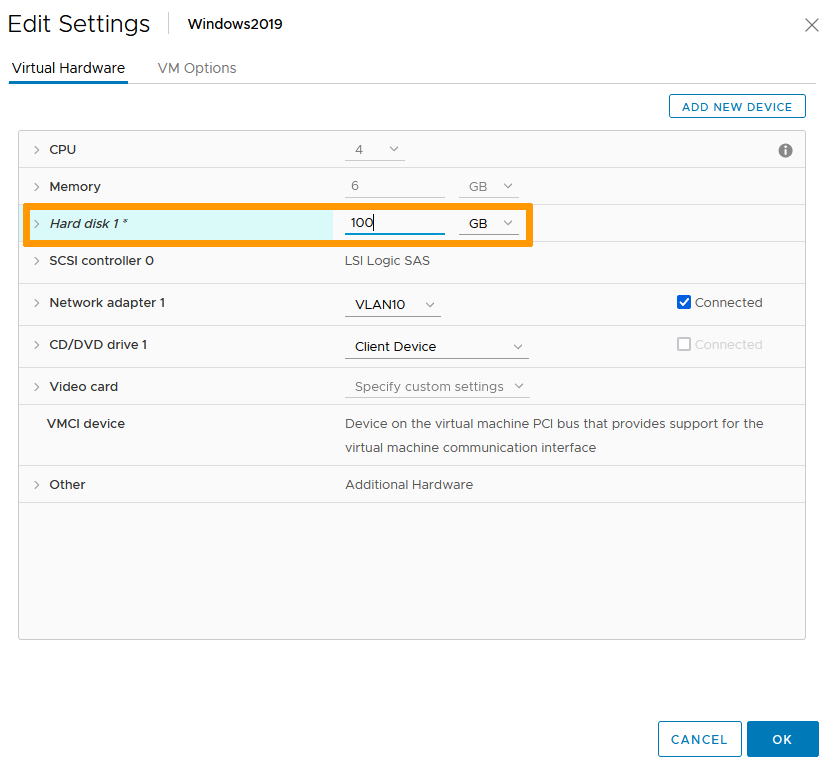
On the left side, navigate to the VM you wish to modify, right click on it and select Edit Settings.

Find the disk you are extending and modify the size value as needed (in our case, we changed the value from 80 to 100 GB).
Click OK.
You can verify the change was applied in your recent tasks view.

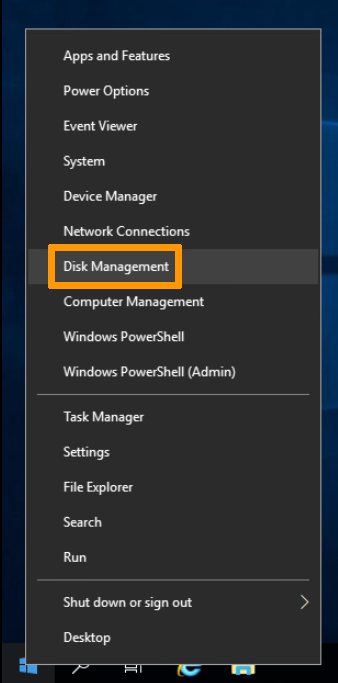
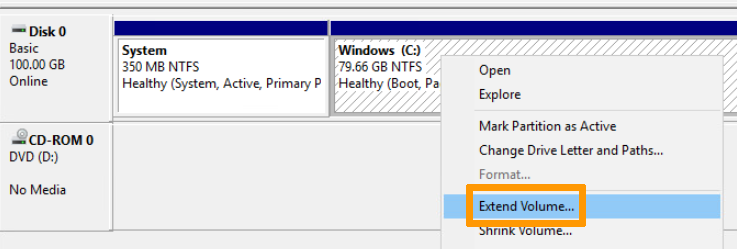
Log on the VM and go to the "Disk Management" console.
One simple way to do it is to right click on "Start" and select Disk Management.
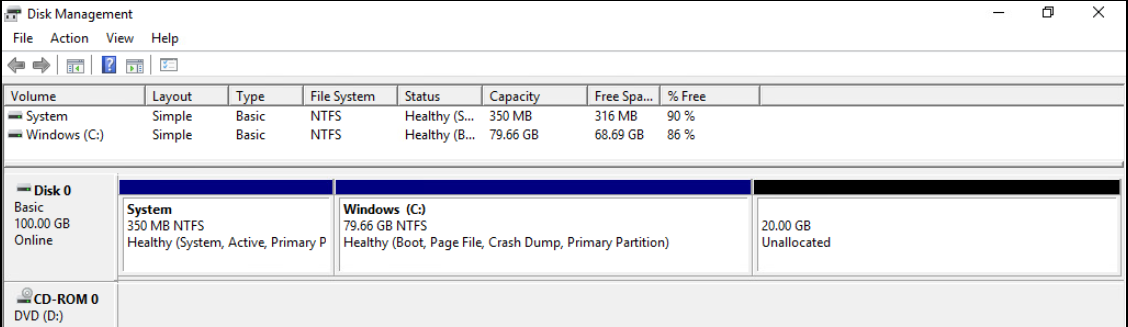
In the management console, you can see there is 20GB of unallocated space, corresponding to the space added to the virtual disk previously.
Right-click the existing logical disk and select Extend Volume.
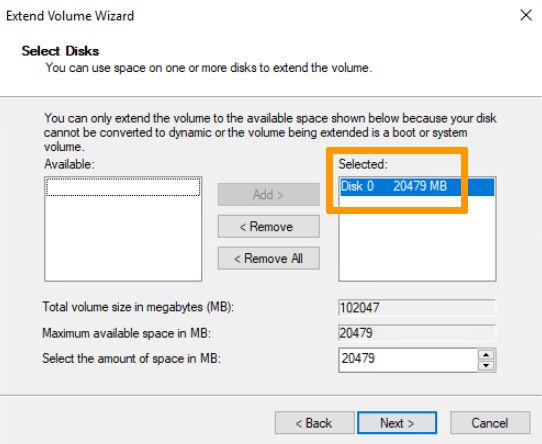
Click Next in the first wizard window.
In the second window, the whole available space will be selected by default. It can be modified if needed. Click Next.
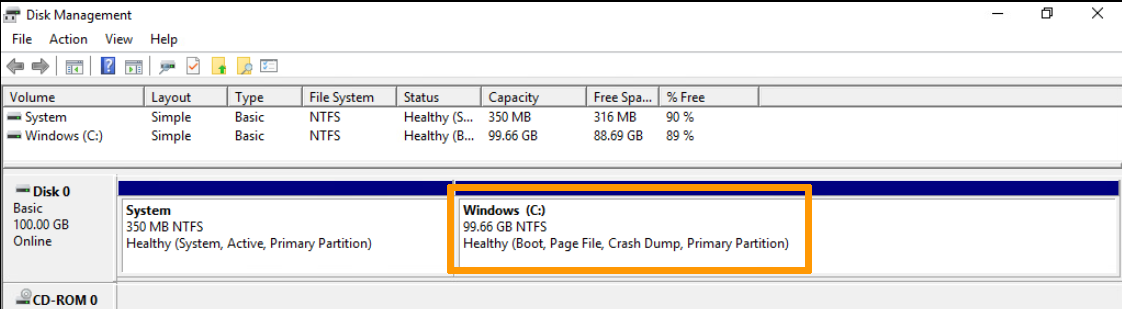
Click Finish in the last window.
You can now see your disk fully extended and available.
Linux VM
For Linux VMs, we'll use a partition utility. There are many available products and we do not recommend any over the others. Our use of GParted LiveCD is in no way an endorsement. For creating an ISO library and mounting an ISO to a VM, refer to How to connect an ISO image to a VM.
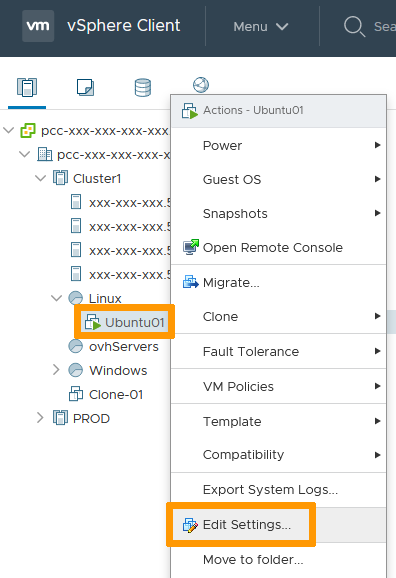
In the vSphere interface menu, go to the Hosts & Clusters dashboard.
On the left side, navigate to the VM you wish to modify, right-click it and select Edit Settings.
Connect the utility ISO to your VM (How to connect an ISO image to a VM).
Find the disk you are expanding and modify the size value as needed (in our case, we changed the value from 20 to 70 GB).
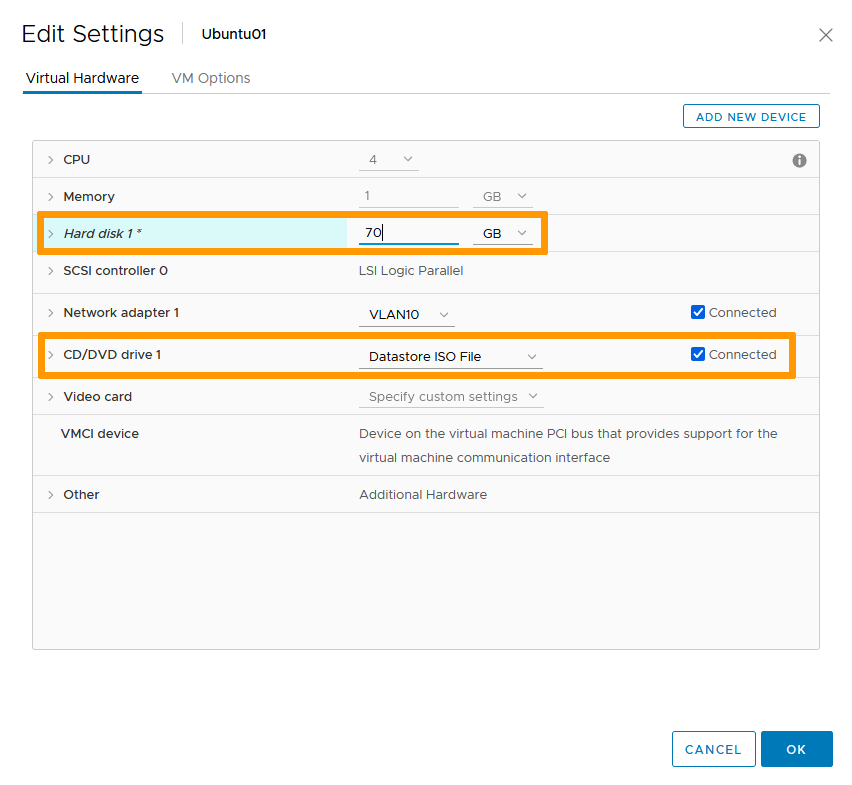
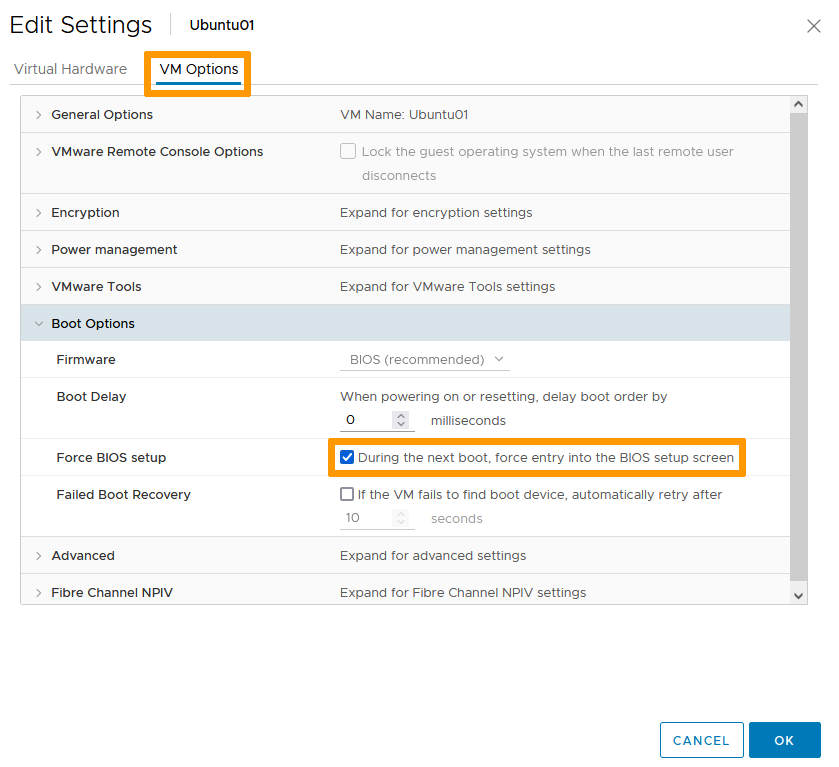
In the VM Options tab, check the "During the next boot, force entry into the BIOS setup screen" box so you can boot on the partition utility.
Click OK.
You can verify the change was applied in your recent tasks view.

Boot (or reboot) the VM and start the partition utiliy.
Refer to the software developer documentation to boot and get to the management console.
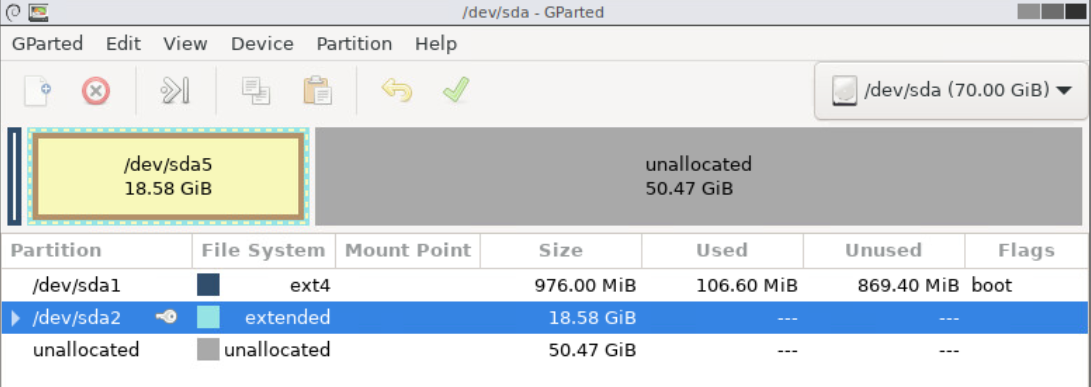
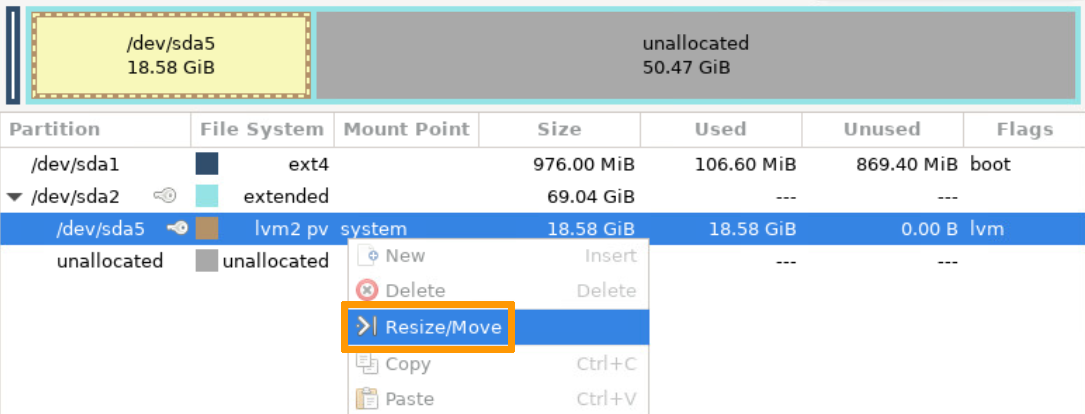
In the management console, you can see there is 50GB of unallocated space, corresponding to the space added to the virtual disk previously.
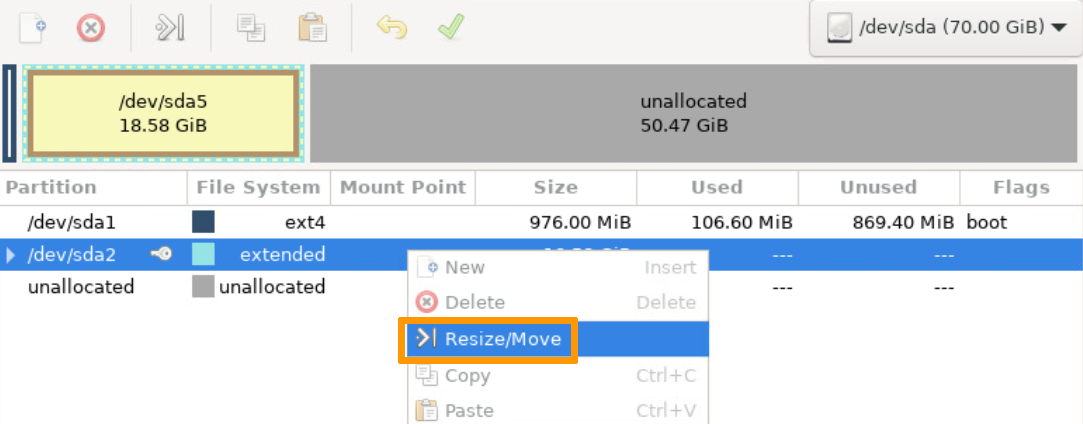
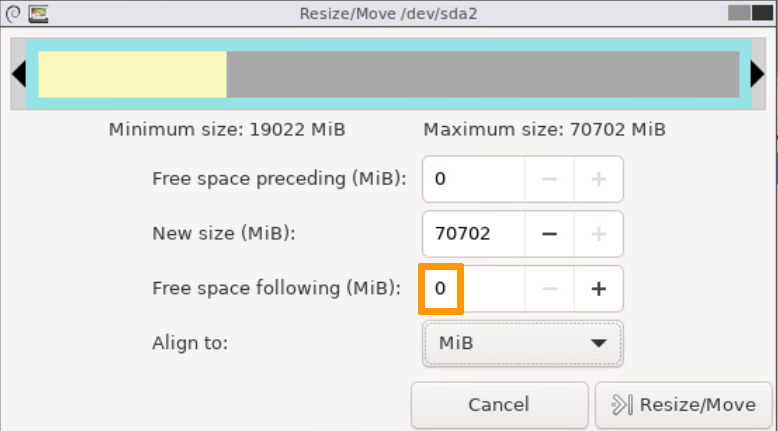
Right-click the existing logical volume and select Resize/Move.
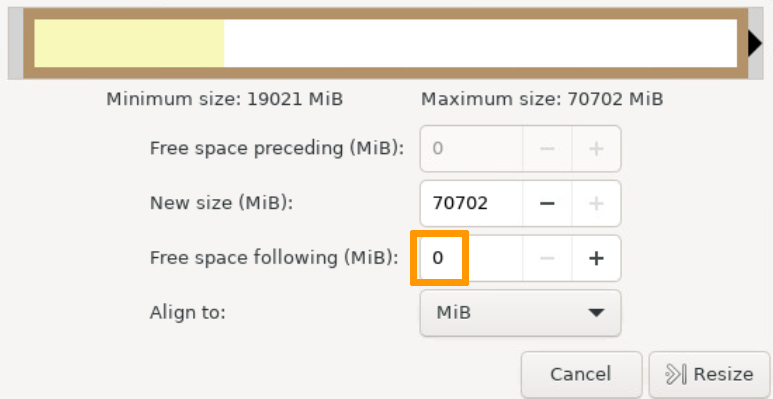
Drag the right arrow to select the whole available space or type 0 in the "Free space following" field.
Click Resize/Move.
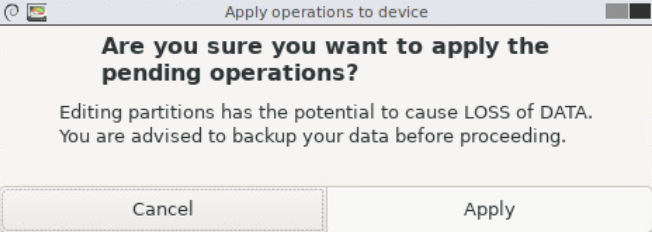
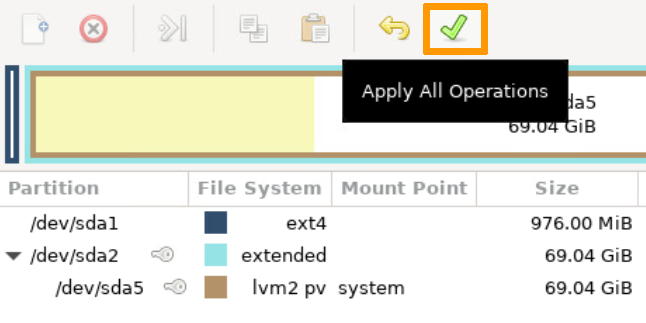
Click the green checkmark to apply all operations.

Click Apply to confirm.
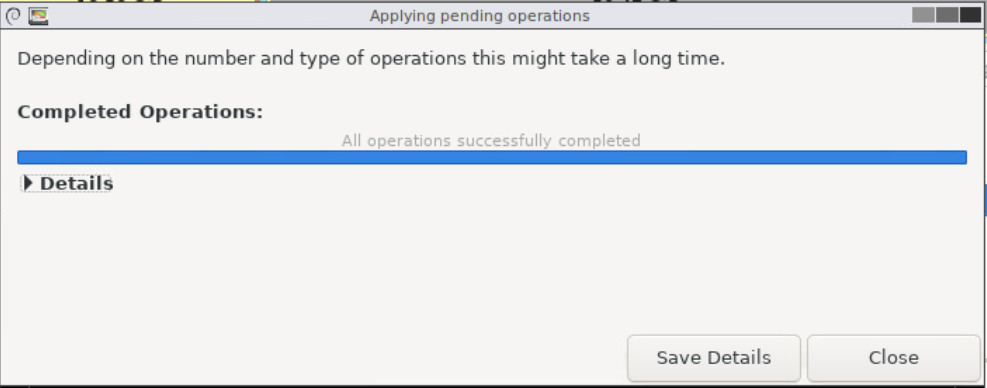
Click Close when done.
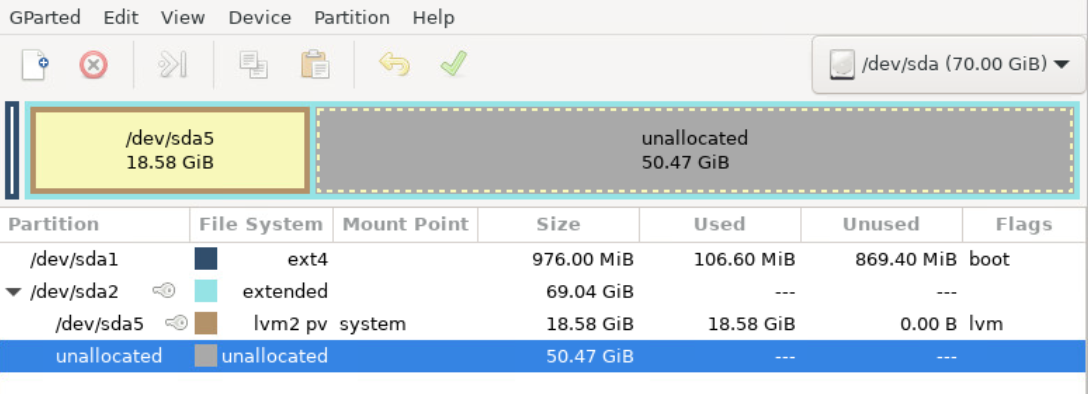
You can now see your volume contains the unallocated space.
We still need to apply the space to the disk.
Right-click the existing disk and select Resize/Move.
Drag the right arrow to select the whole available space or type 0 in the "Free space following" field.
Click Resize.
Click the green checkmark to apply all operations.
Click Apply to confirm.
Click Close when done.
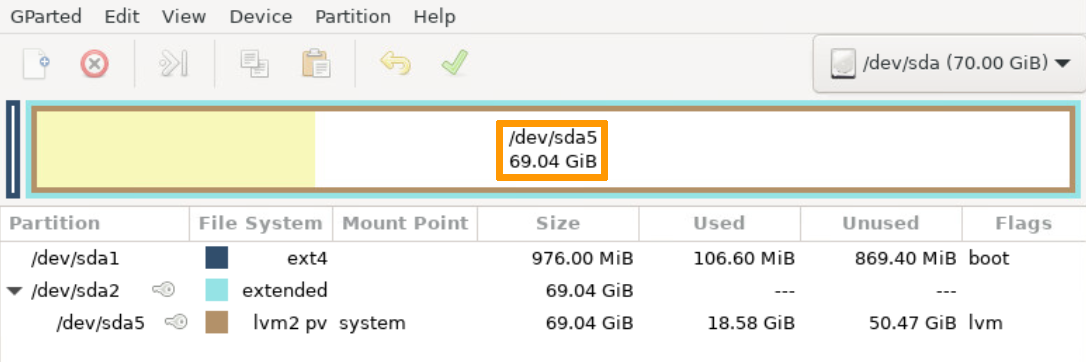
You can now see your vitual disk is extended and ready for use.
Go further
Join our community of users on https://community.ovh.com/en/.

