Gestão das máquinas virtuais (EN)
406 visualizações
Objective
Find out how to manage virtual machines in a Nutanix cluster, and how to create and migrate a virtual machine.
OVHcloud provides services for which you are responsible, with regard to their configuration and management. It is therefore your responsibility to ensure that they work properly.
This guide is designed to assist you as much as possible with common tasks. Nevertheless, we recommend contacting a specialist provider if you experience any difficulties or doubts when it comes to managing, using or setting up a service on a server.
Some software requires a licence such as Microsoft products, so make sure that all installed systems and software have these licences.
Requirements
- a Nutanix cluster in your OVHcloud account
- You must be connected to Prism Central on the cluster
Overview of Virtual Machine Management in Prism Central
The Nutanix system uses the same interfaces to manage storage and virtualisation, it can be installed with multiple hypervisors (Hyper-V, VMware ESXi, AHV). AHV comes with Nutanix without the need to purchase additional licences for the hypervisor.
The OVHcloud solution is delivered with the AHV hypervisor.
AHV enables:
- Using virtual machines on Windows and Linux.
- Migrating virtual machines from one node to another in a cluster.
- Micro-segmentation and network security between virtual machines using Flow software.
The Move tool makes it easy to migrate existing virtual machines in other environments (ESXi, Hyper-V & AWS) to Nutanix and its AHV hypervisor.
For more information on AHV, see the Go further section of this guide.
Instructions
The following instructions show the creation of a virtual machine in Windows Server 2022 and the migration of a virtual machine.
Creating a Virtual Machine for a Windows 2022 Operating System
Installing a virtual machine on Windows Server 2022 requires a particular setup because Microsoft does not provide the driver for the AHV hypervisor disk controller.
Creating a Windows Server 2022 VM
In the left-hand menu of Prism Central, expand Compute & Storage and click VMs
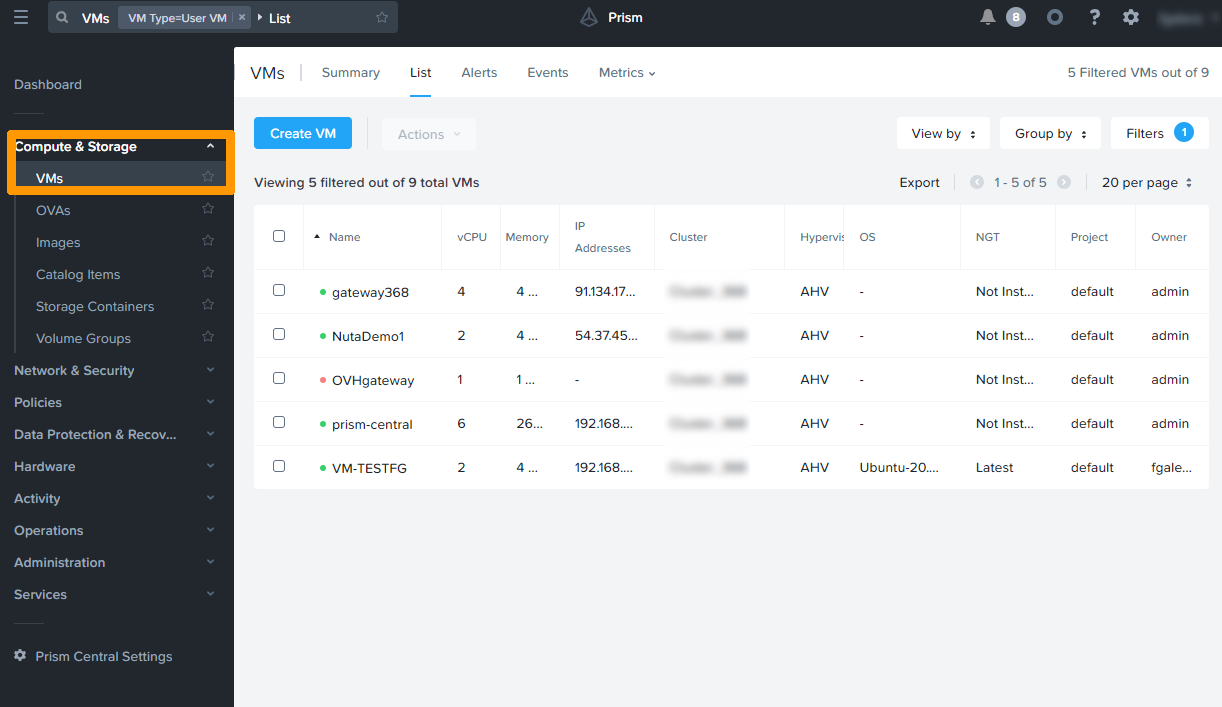
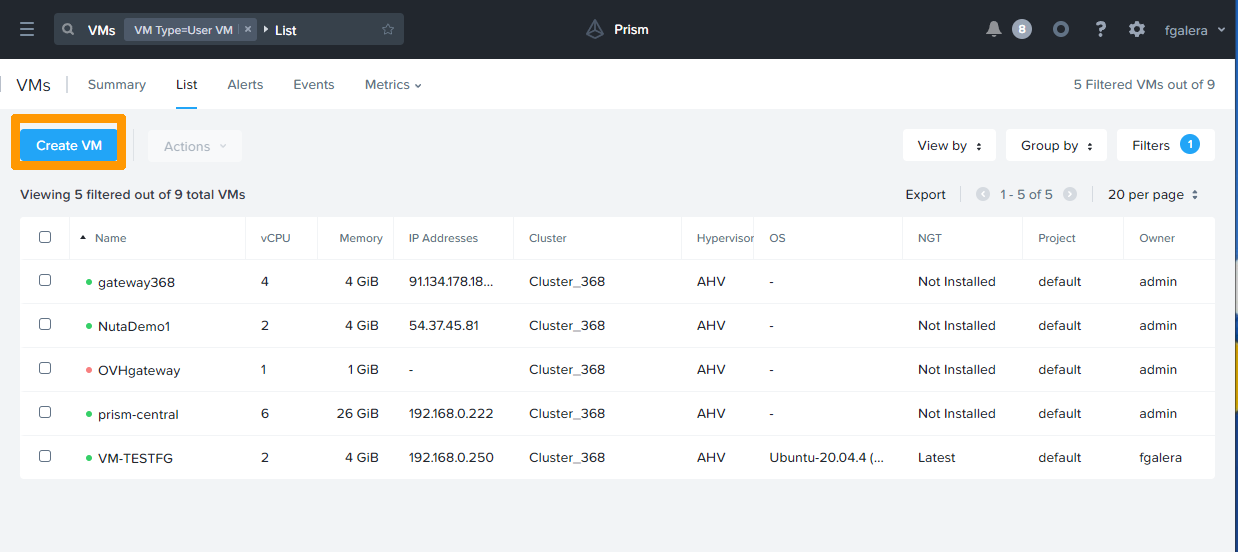
Click the Create VM button.
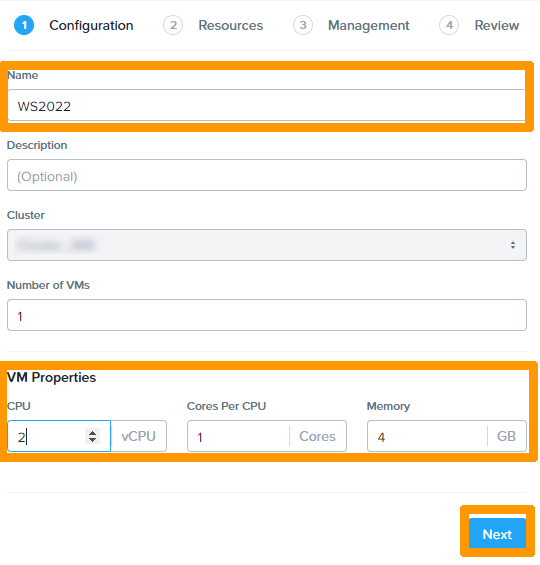
Type a name in Name, choose the options in VM Properties and click Next
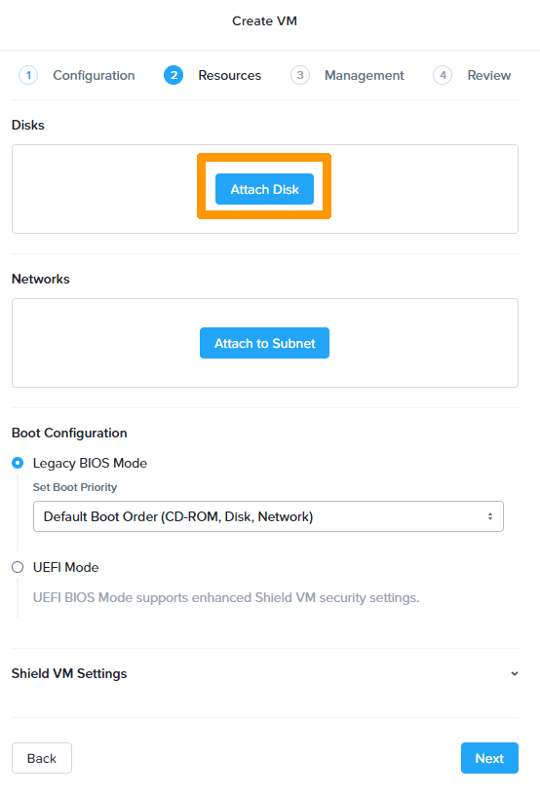
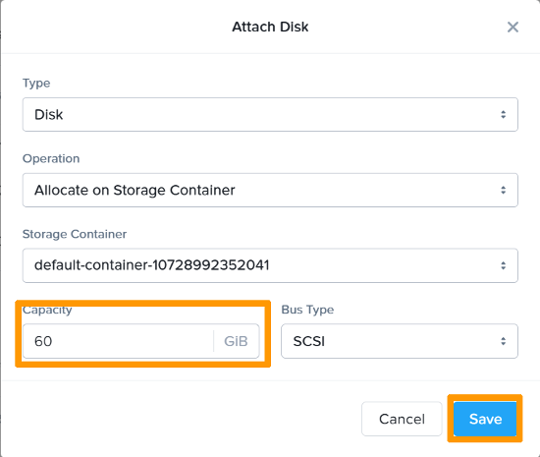
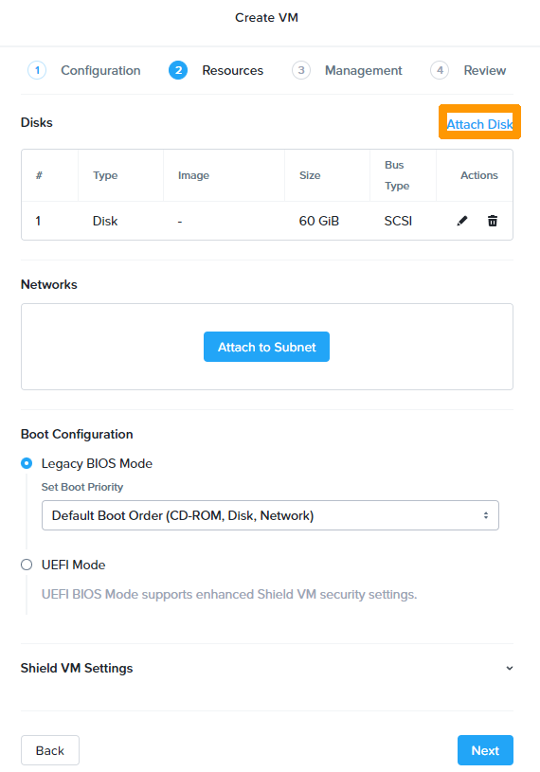
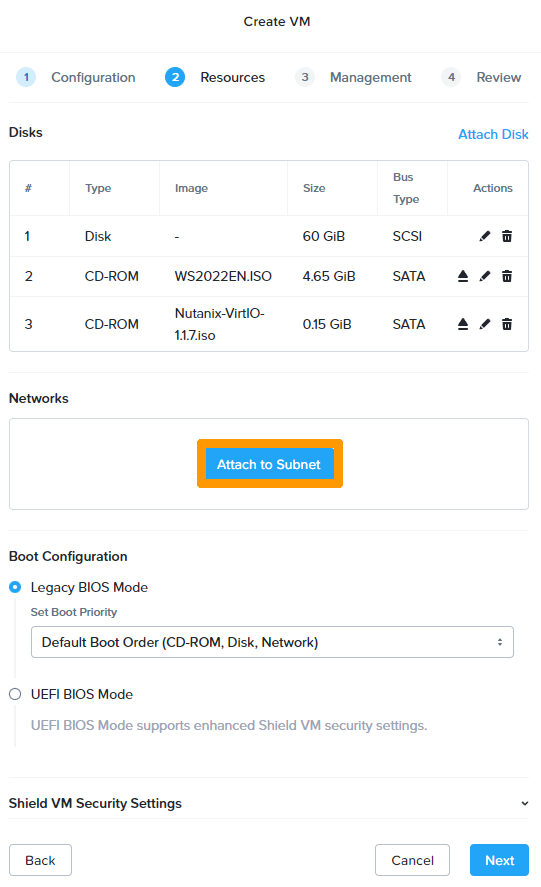
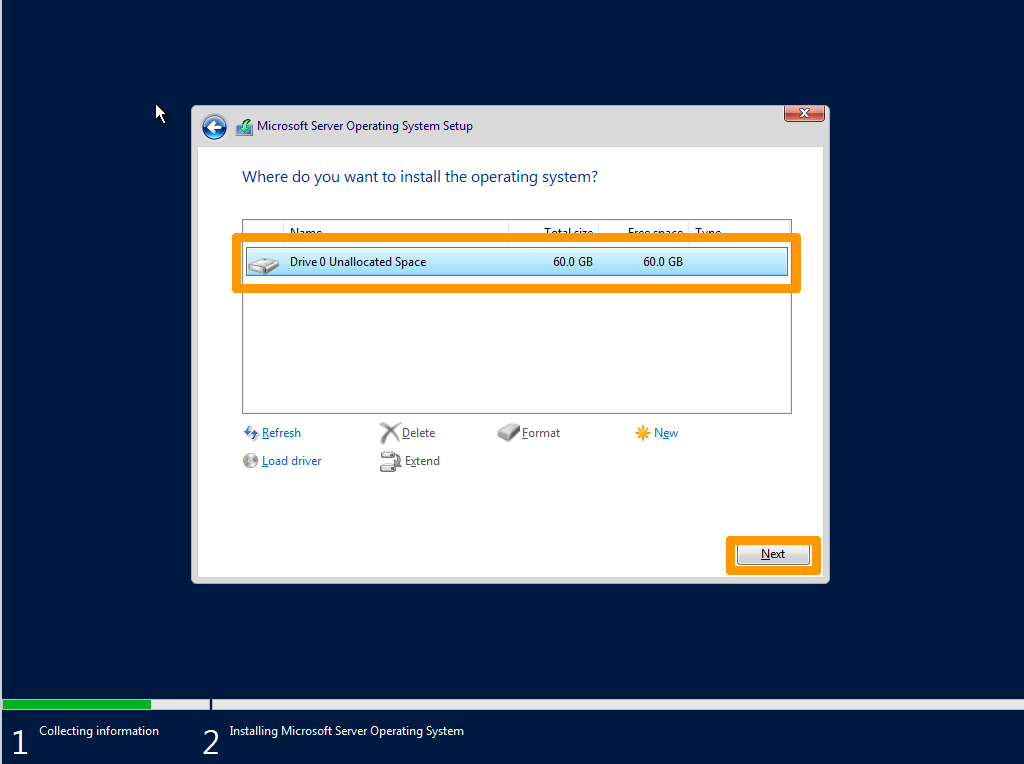
Adding a system disk
Click the Attach Disk button.
Enter 60 in the Capacity field and click Save to create a 60 GB disk.
Adding Windows Server 2022 Installation ISO Image
The image must be imported before it can be used in a new virtual machine.
For more information on importing images, see the Go further section of this guide.
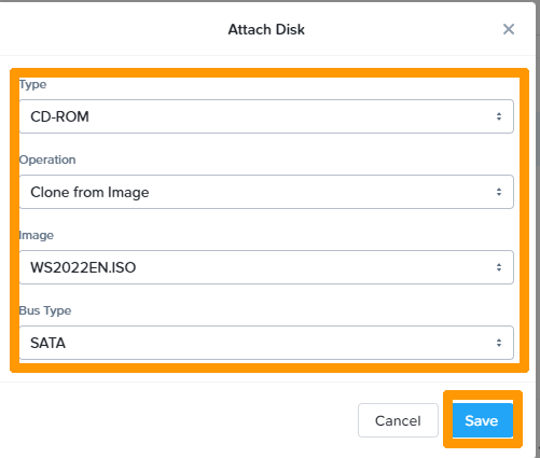
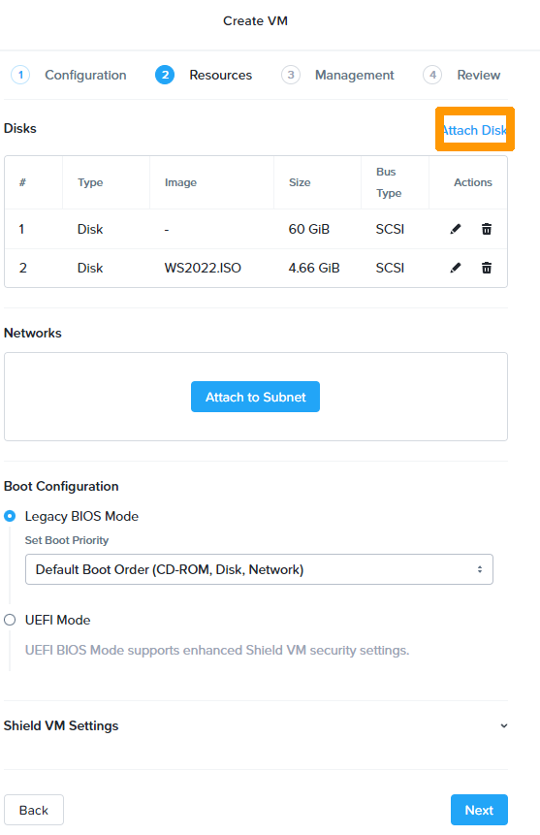
Click Attach Disk.
Change the Type settings to CD-ROM, Operation to Clone from Image, Image to WS2022EN.ISO.
Click Save.
Adding an ISO image containing AHV-specific drivers
This image contains the disk controller driver and should also be imported. It is available on the Nutanix website if you have a Nutanix customer account.
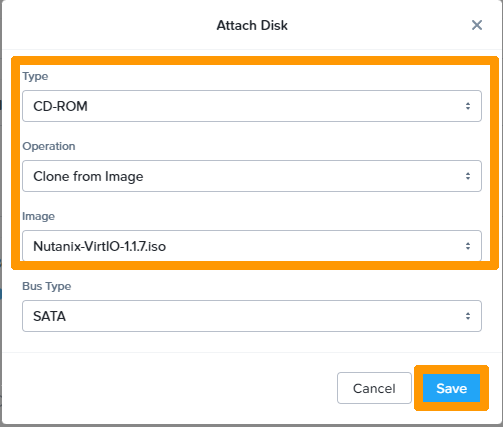
Click Attach Disk.
Change the Type settings to CD-ROM, Operation to Clone from Image, Image to Nutanix-VirtIO-1.1.7.iso.
Click Save.
Network configuration
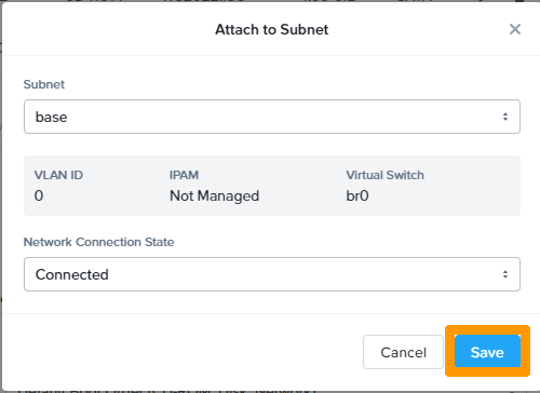
Click Attach Subnet.
Leave the default fields and click Save.
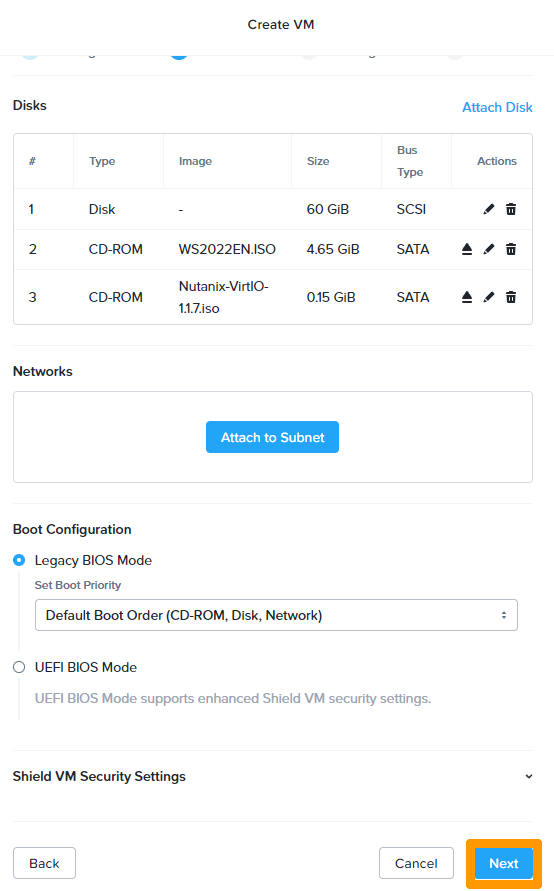
Click Next.
Select your timezone and click Next.
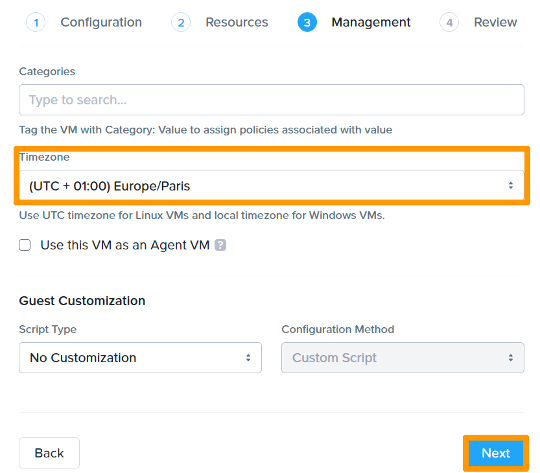
Click Create VM.

The newly created virtual machine will then appear in the dashboard.
 .
.
Windows Server 2022 setup
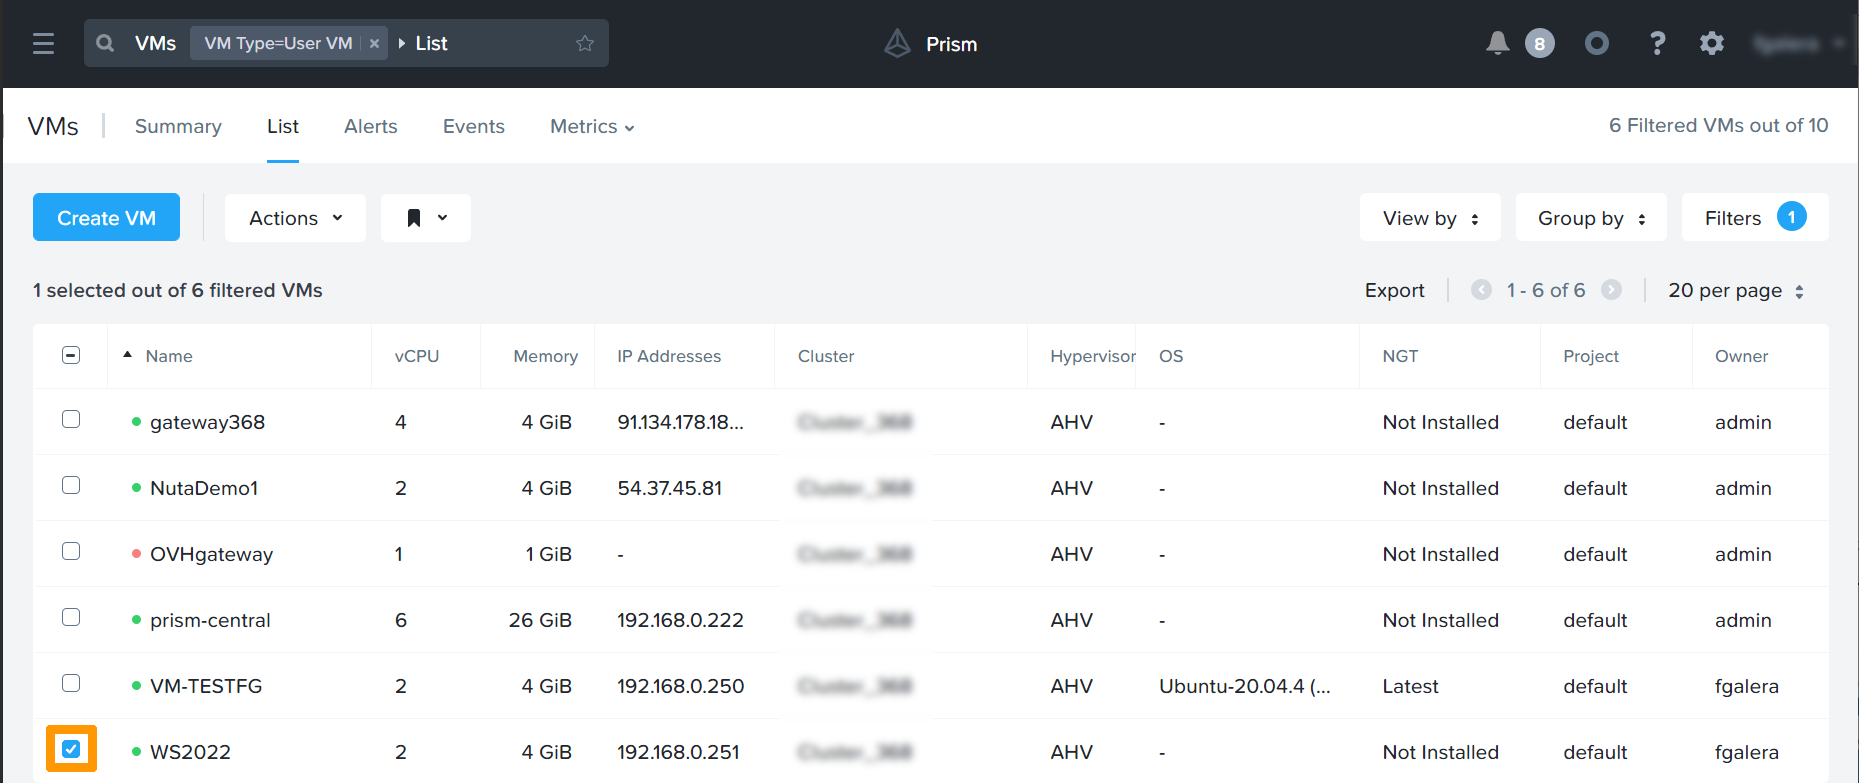
Select the virtual machine on which you want to install Windows Server 2022, by ticking the box to the left of the VM.
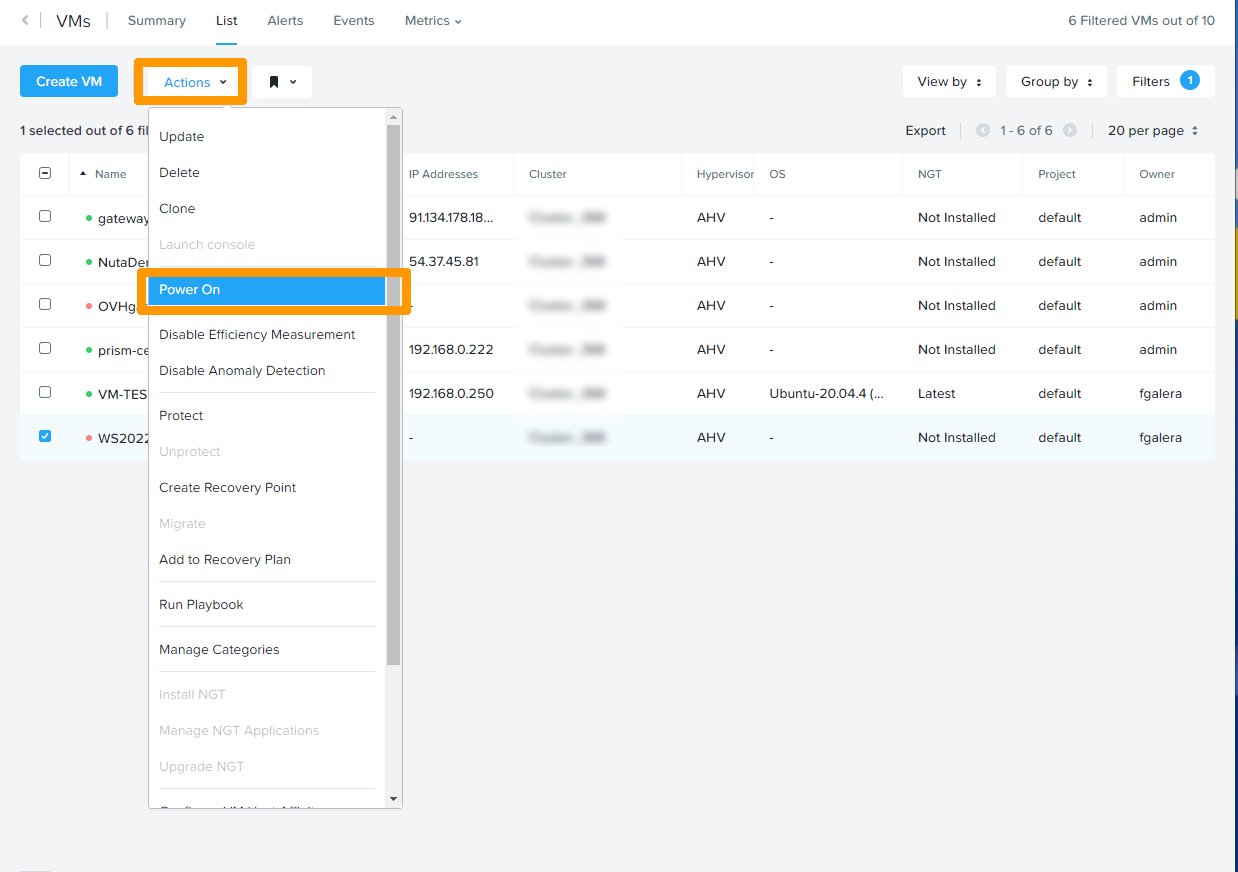
Powering on the virtual machine
Click the Actions menu then Power ON.
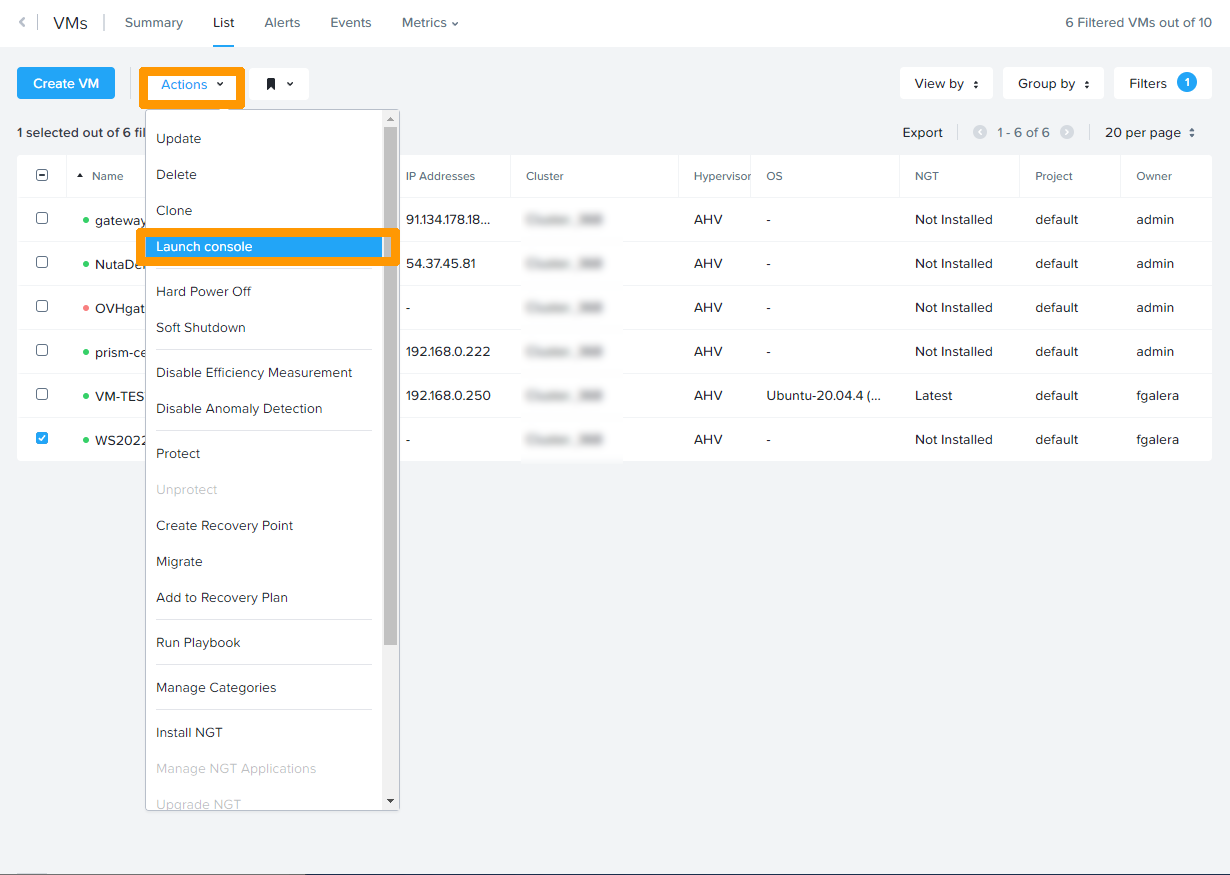
Launching the console
Click the Actions menu then Launch Console.
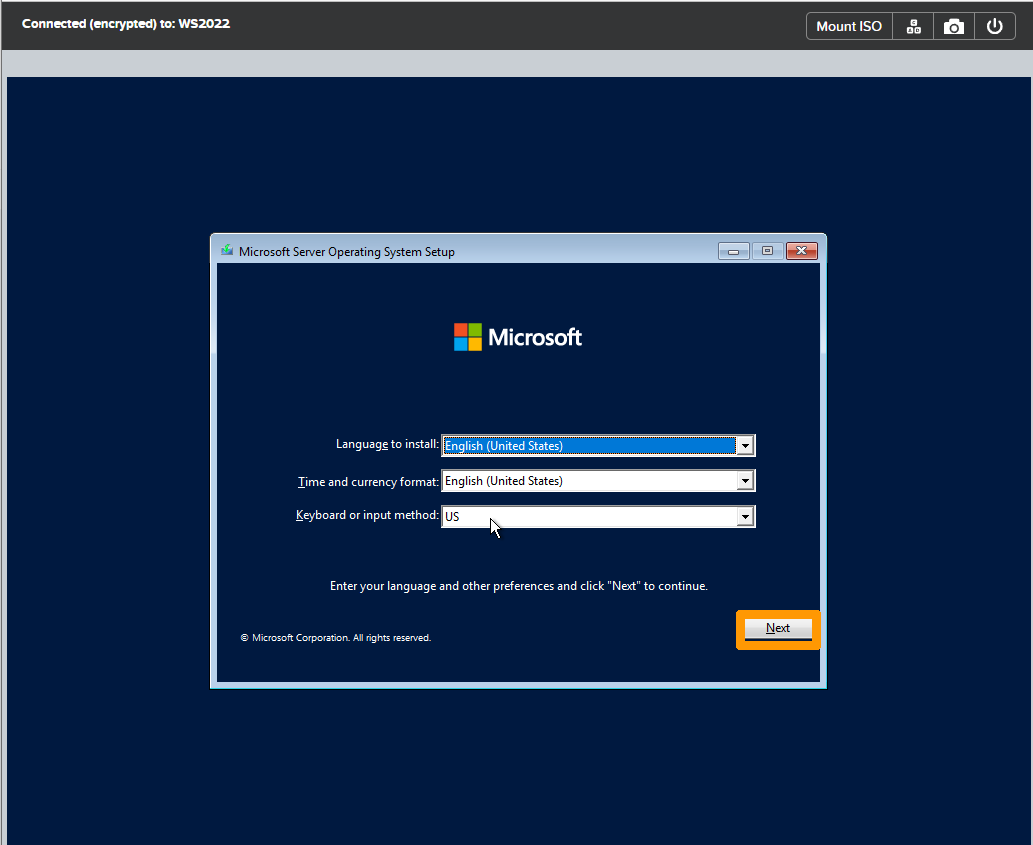
Starting the installation
Choose your local settings and click Next.
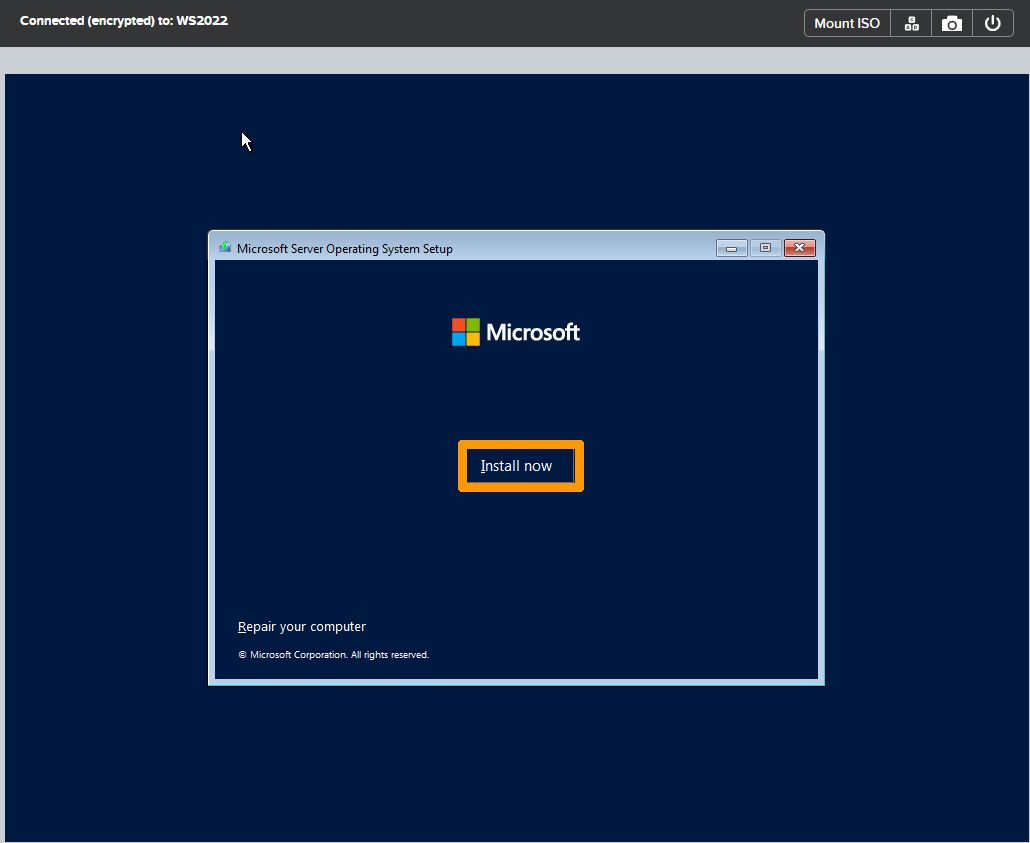
Click Install now.
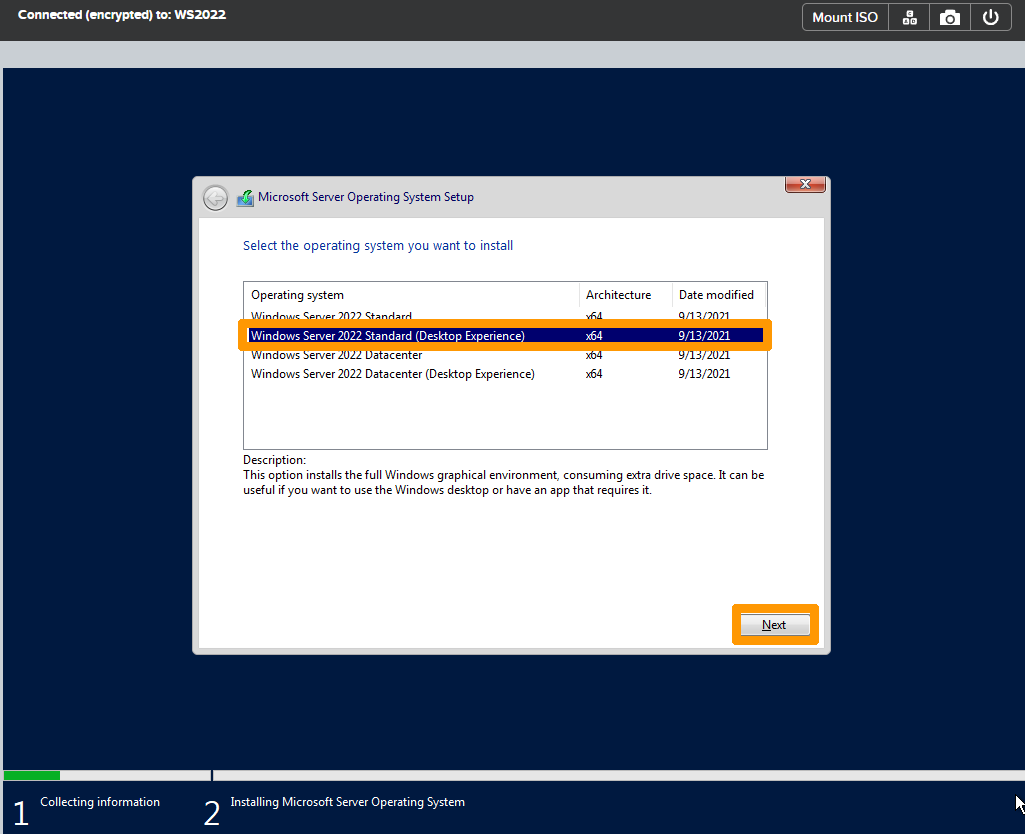
Select Windows Server 2022 Standard (Desktop Experience) and click Next.
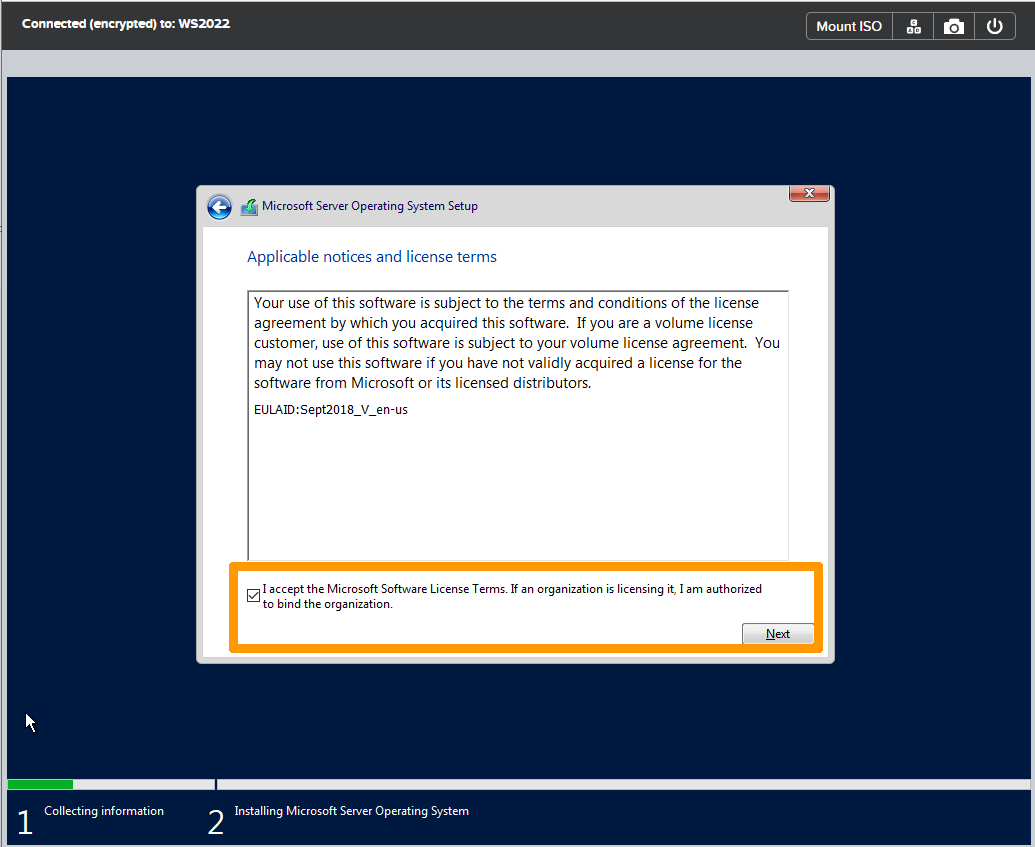
Review the Microsoft software licence terms and conditions, accept them and click Next.
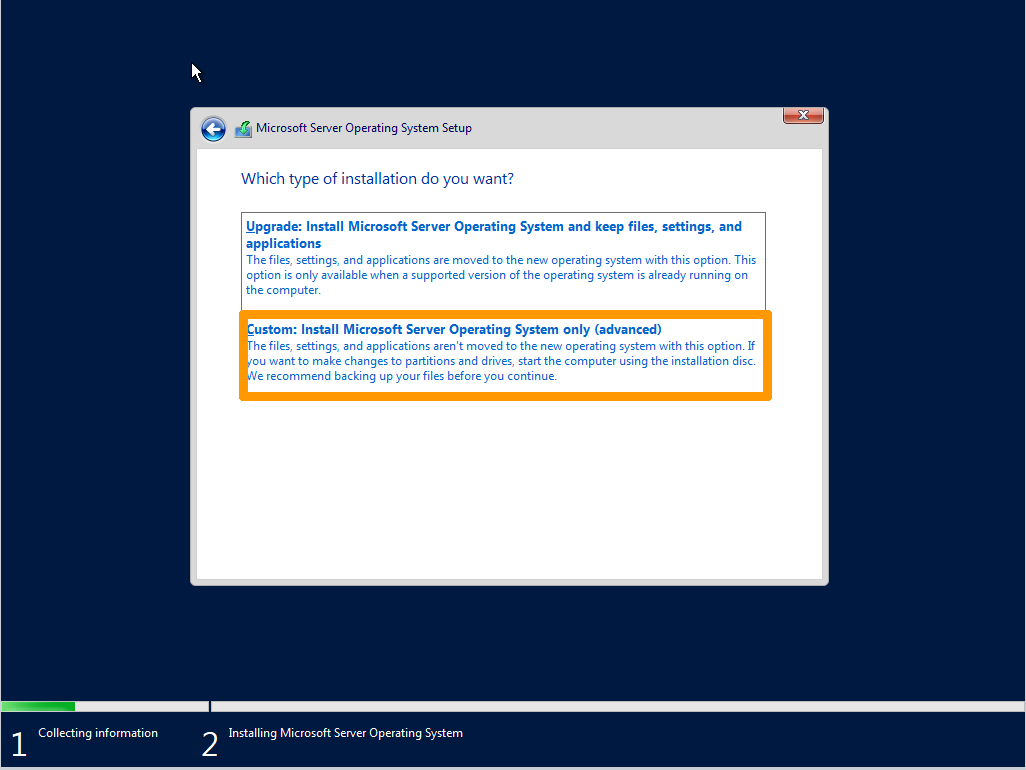
Click Custom: Install Microsoft Server Operating System only (advanced).
Click on Load driver.
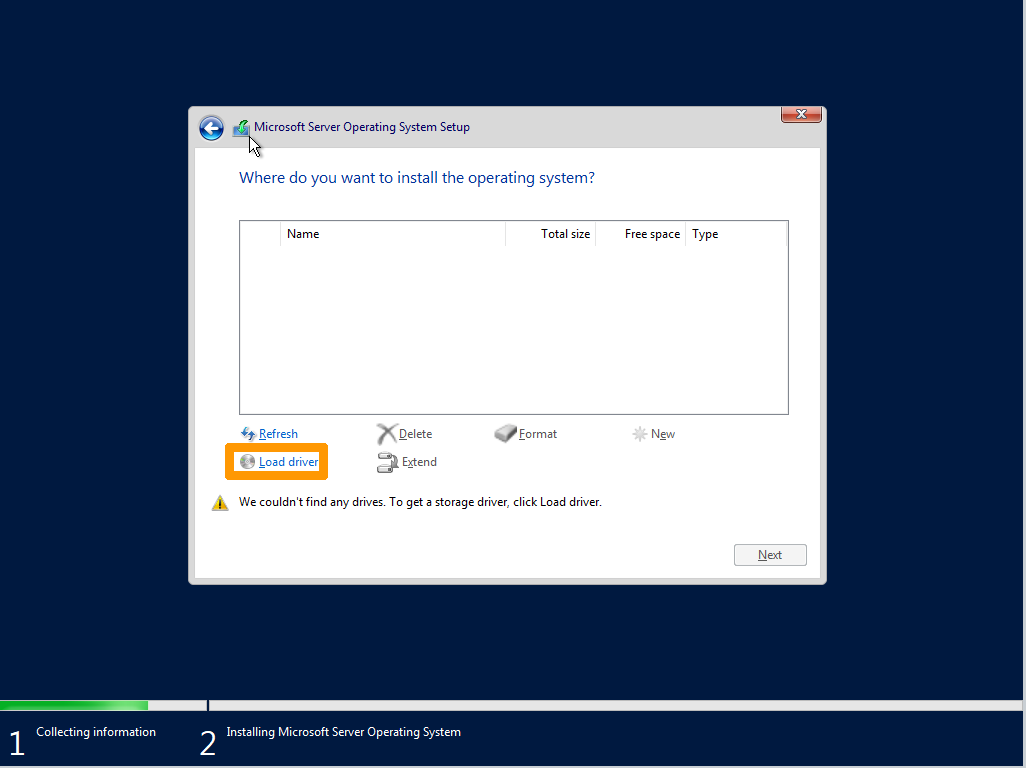
Click Browse.

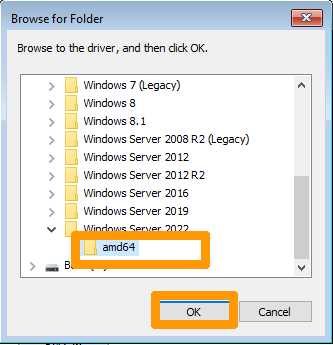
Select the correct folder e:\Windows Server 2022\amd64 and click OK.
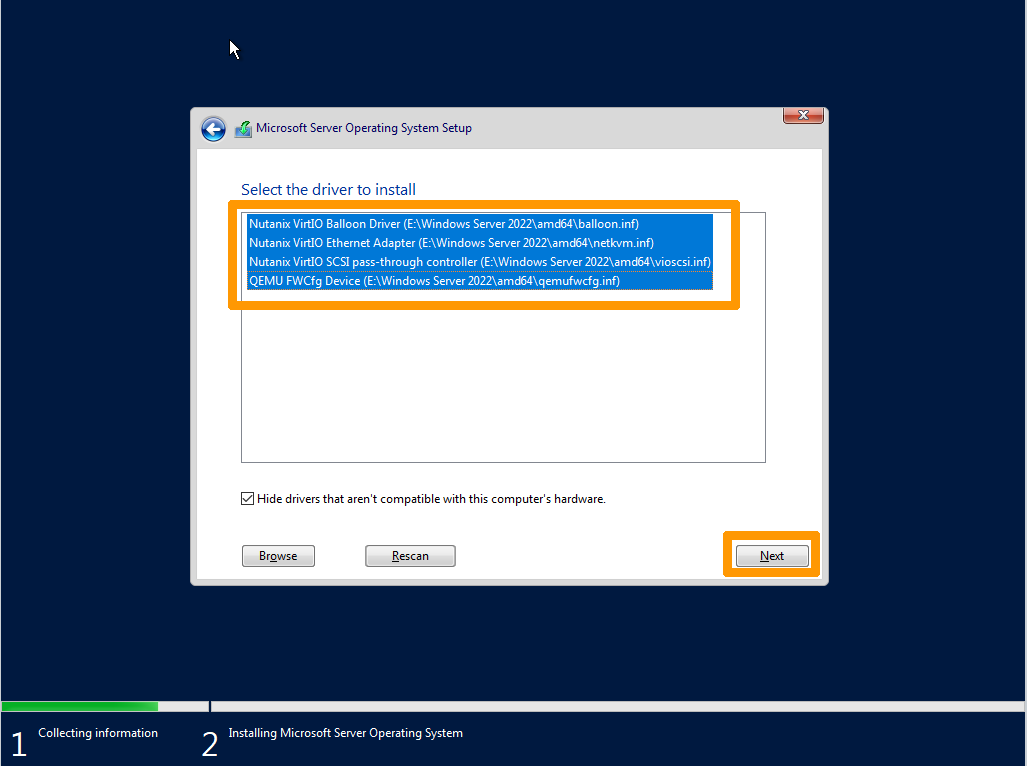
Select these drivers:
Nutanix VirtIO Balloon DriverNutanix VirtIO Ethernet AdapterNutanix VirtIO SCSI pass-through controllerQEMU FWCfg Device
Click Next.
The 60 GB disk will appear, click Next.
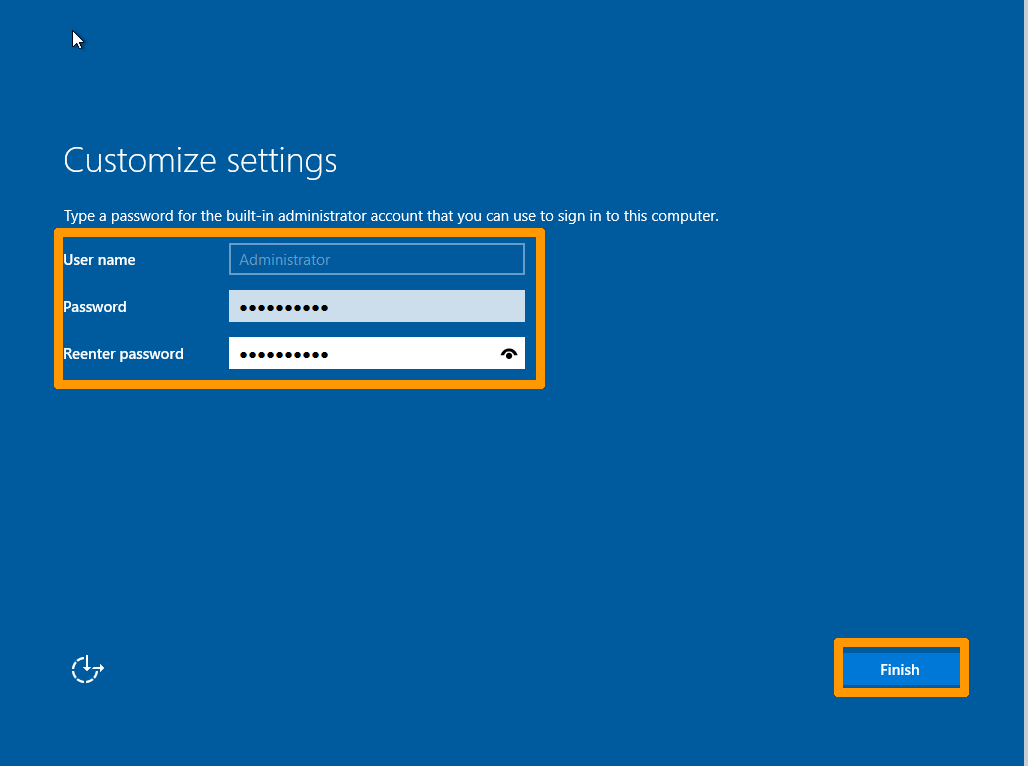
Enter and confirm the password in both fields and click Finish.
Windows Server 2022 and WS2022 specific drivers for the AHV hypervisor have been installed.
Installing NGT (Nutanix Guest Tools)
NGT are tools that enable better interaction with Nutanix, particularly in terms of backups and snapshots.
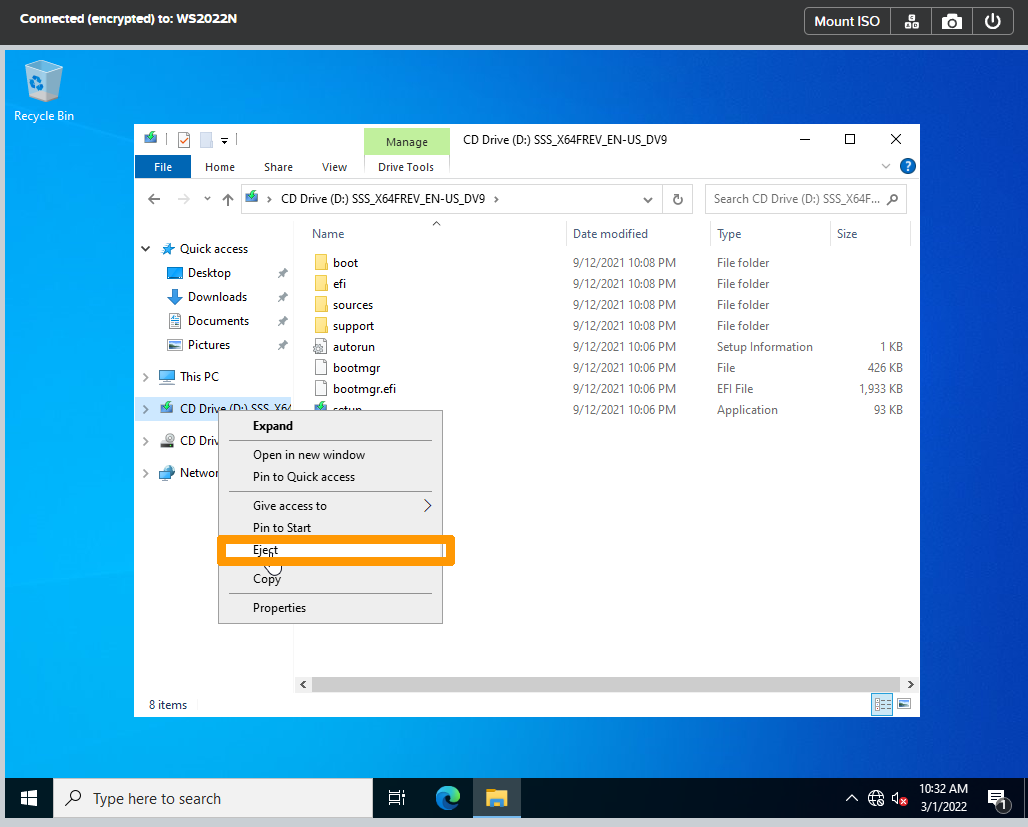
Start the virtual machine console, right-click a CDROM drive, and click Eject.
Go back to Prism Central and select the virtual machine.
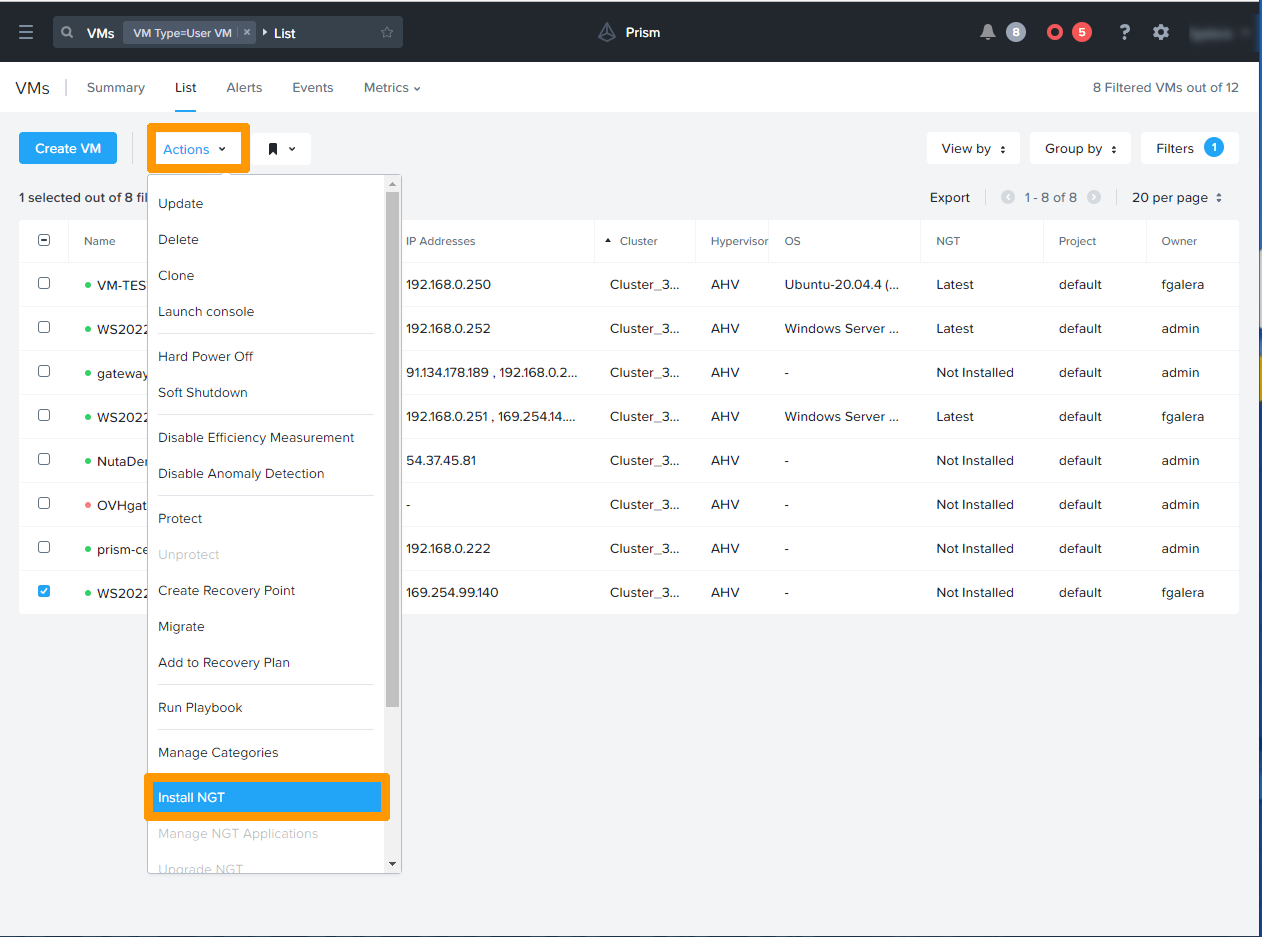
On the Actions menu, click Install NGT.
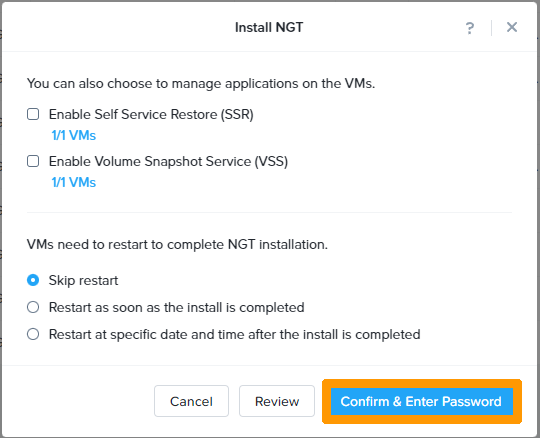
Click Confirm & Enter Password.
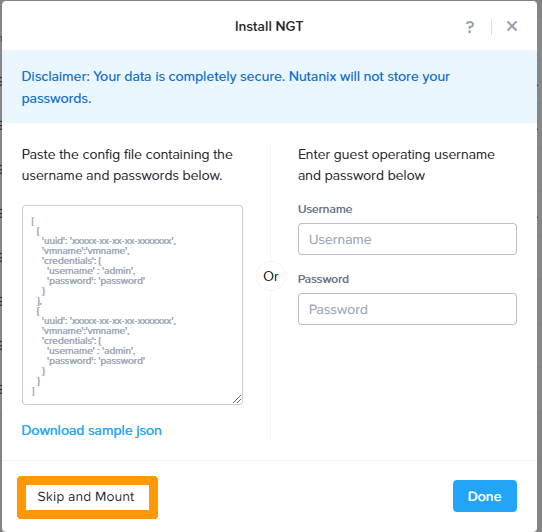
Click Skip and Mount.
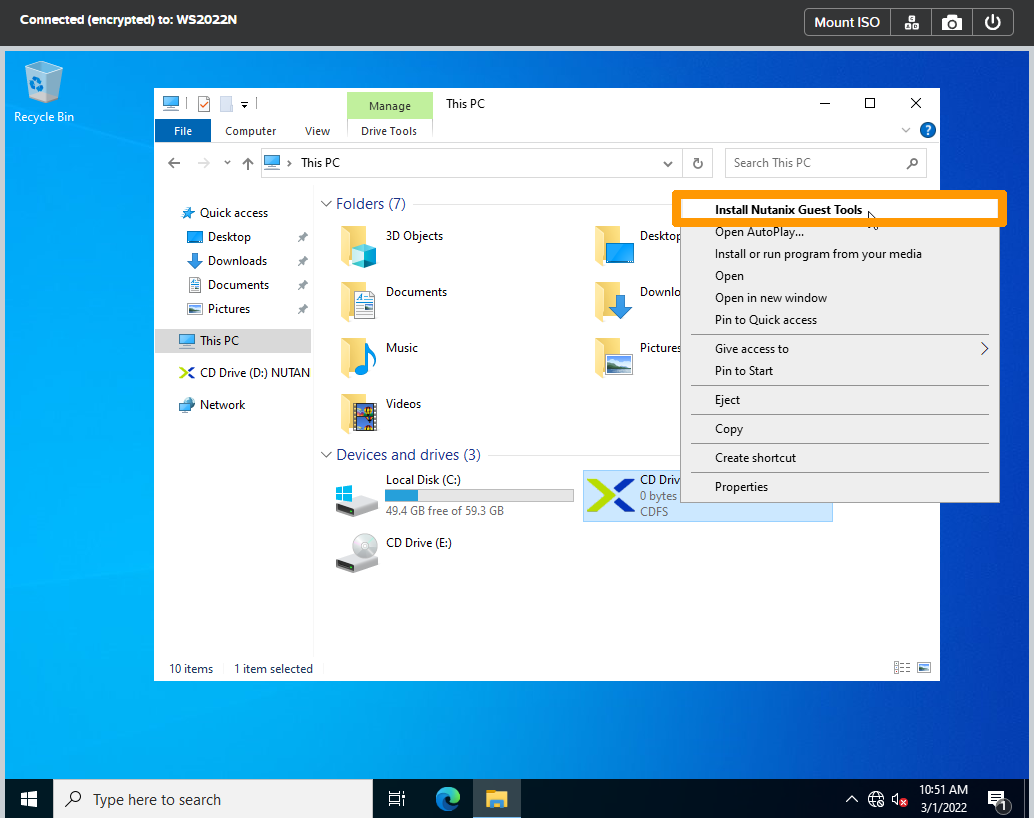
Return to the virtual machine console and right-click the CDROM drive containing the NGT.
Click Install Nutanix Guest Tools.
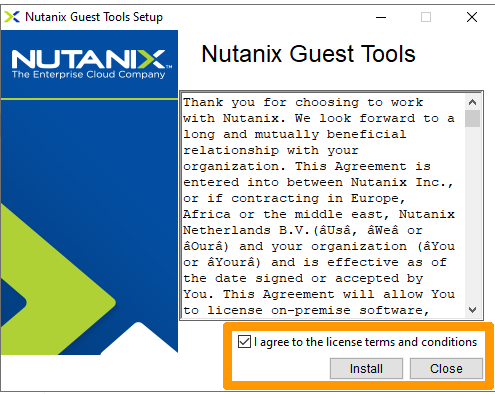
Review the terms and conditions, accept them, then click Install.
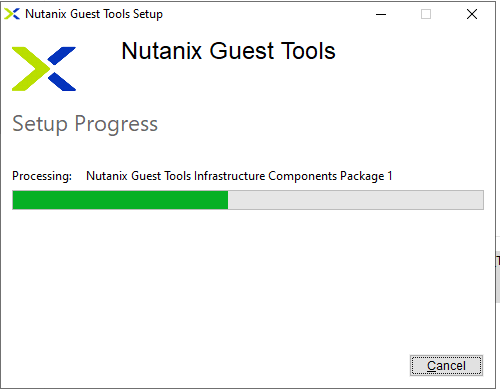
The installation will then begin.
Once the installation is complete, close the installation wizard using the Close button.
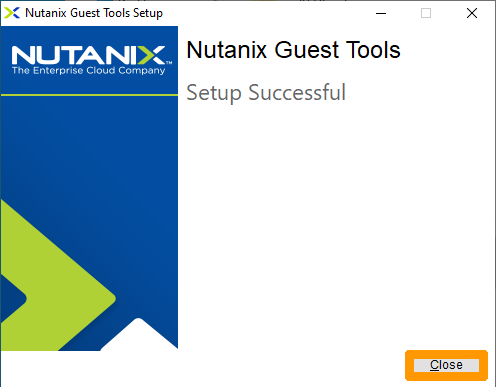
The installation of a virtual machine on Windows is then complete.
Migrating a virtual machine
Migrating a virtual machine involves moving a hot VM from one node to another in a cluster.
If you have several clusters and the appropriate licences, you can also migrate a VM from one cluster to another.
This guide only shows you how to migrate a VM within the same cluster.
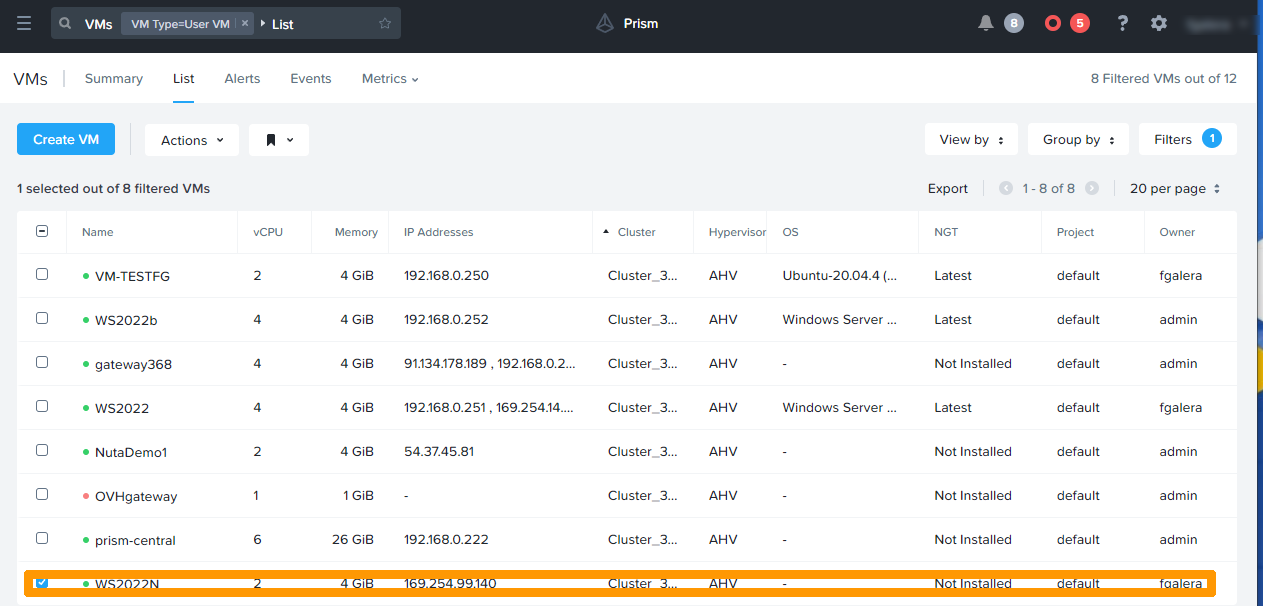
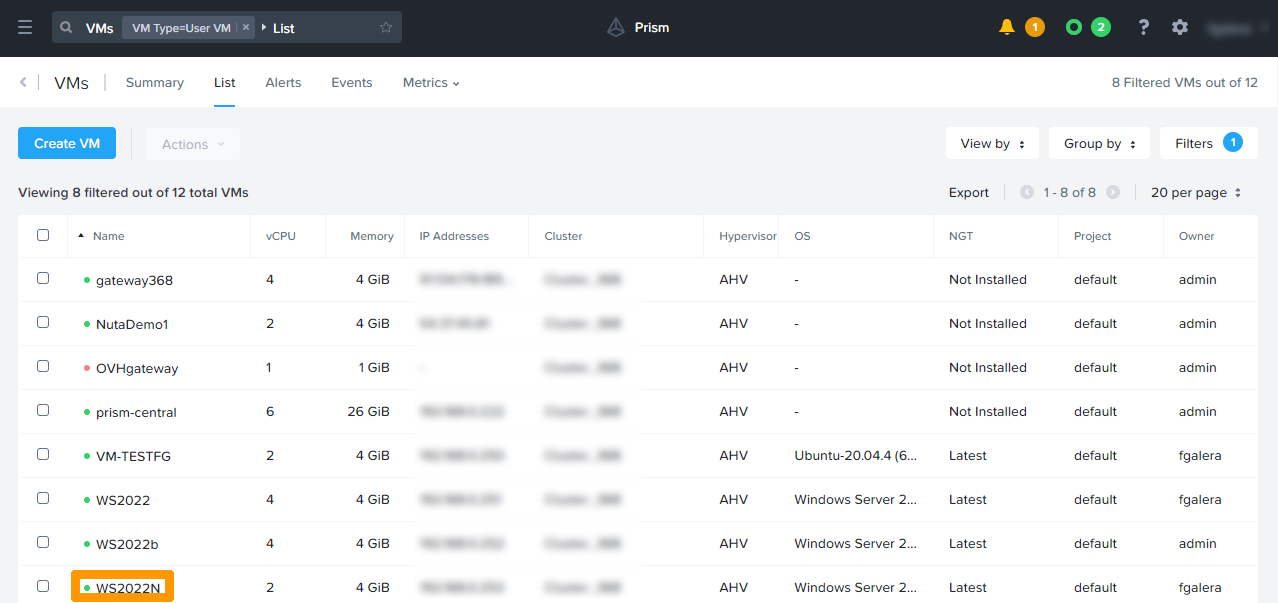
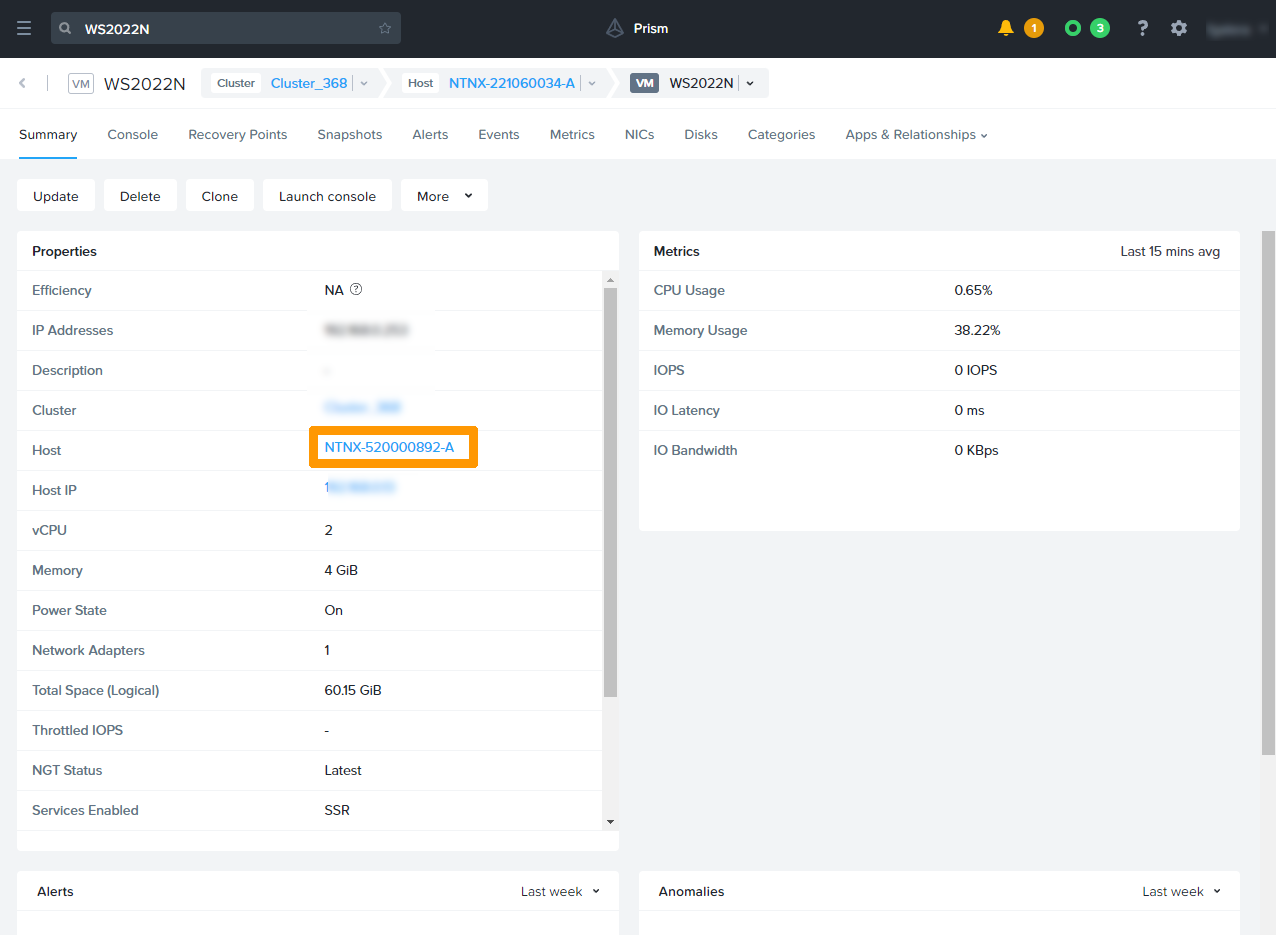
In Prism Central VM Management, click WS2022N.
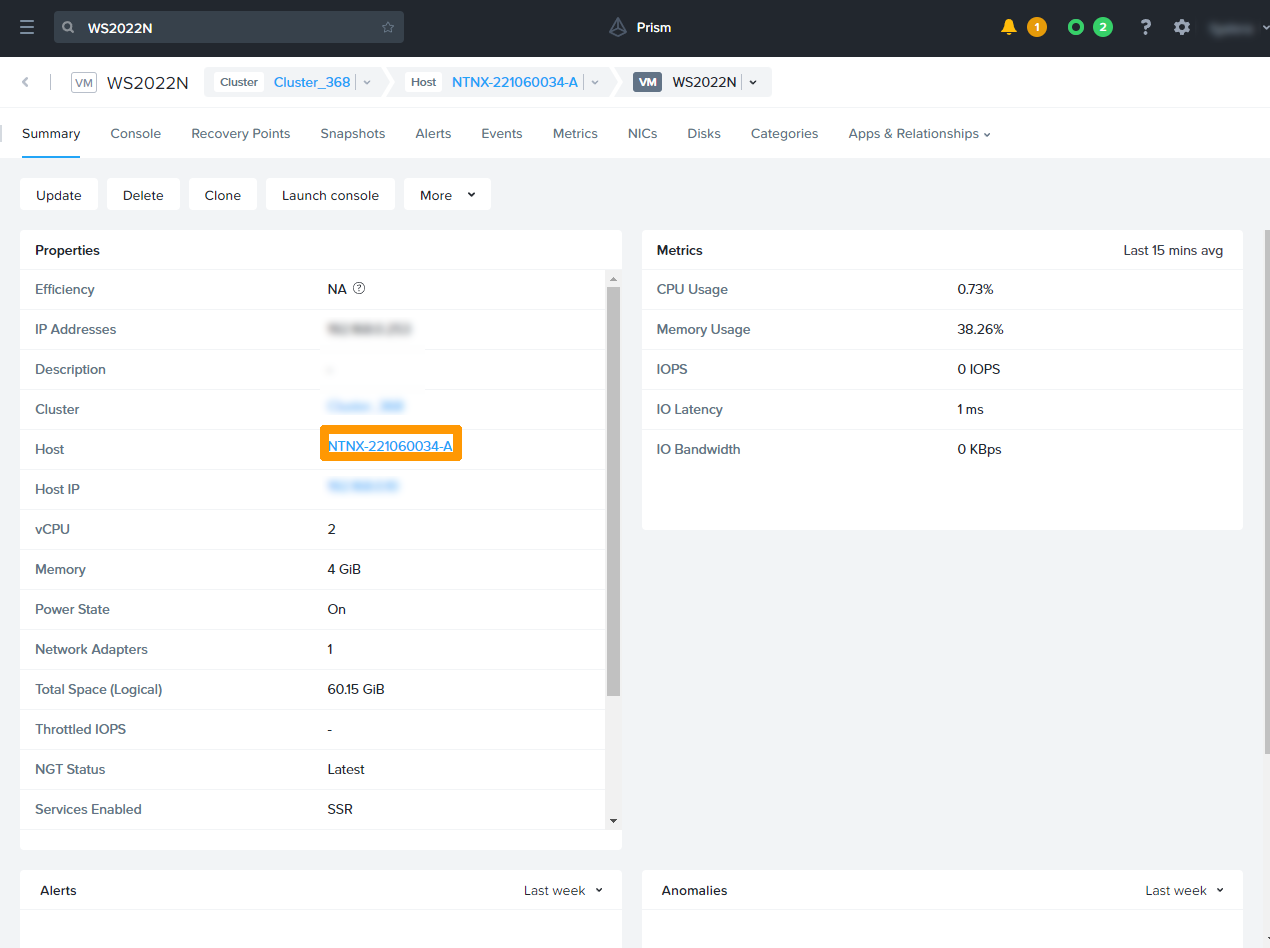
Check which node the VM is currently running on. It is displayed next to Host.
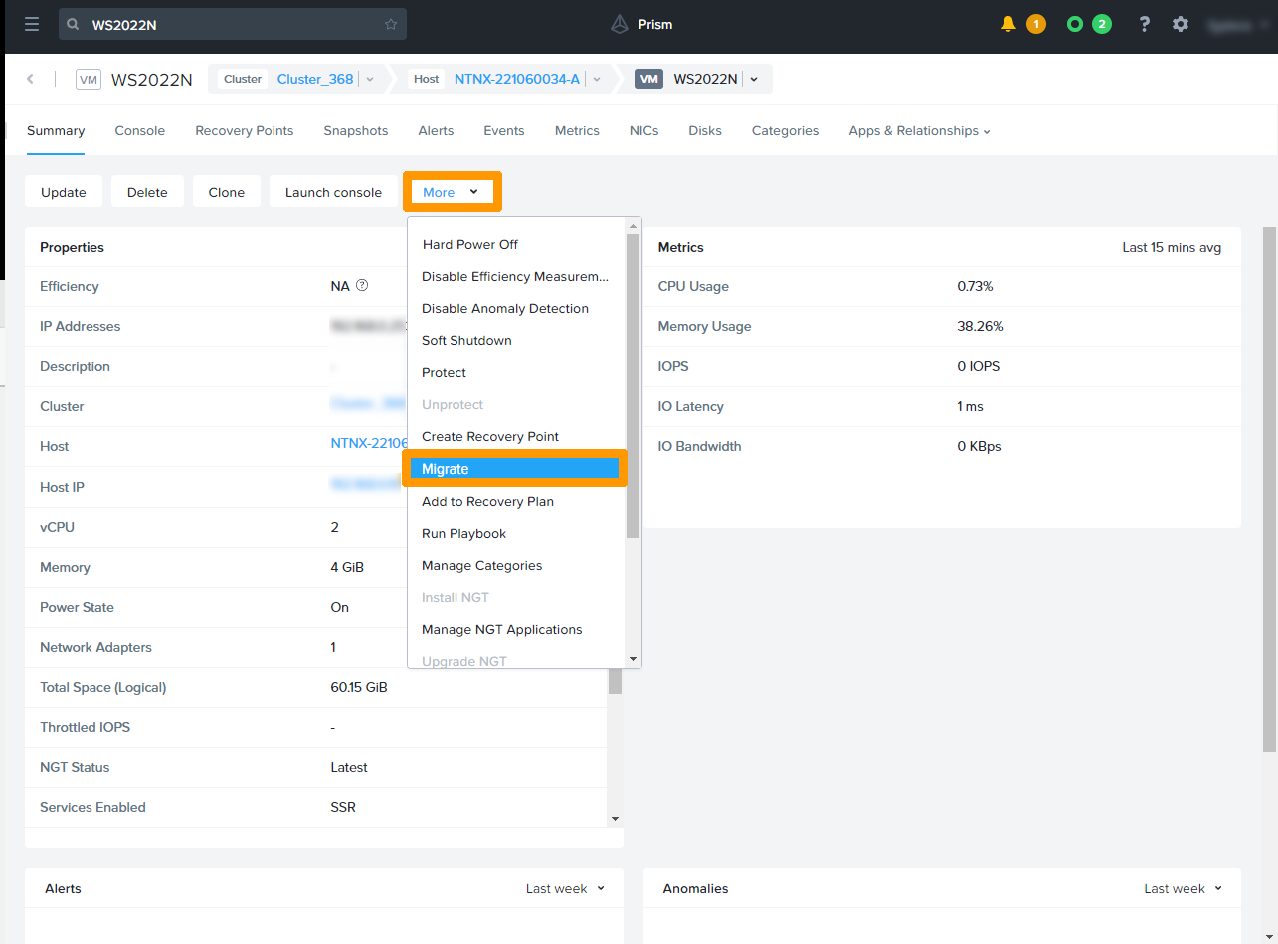
Click the More button, then Migrate.
Choose a destination node.
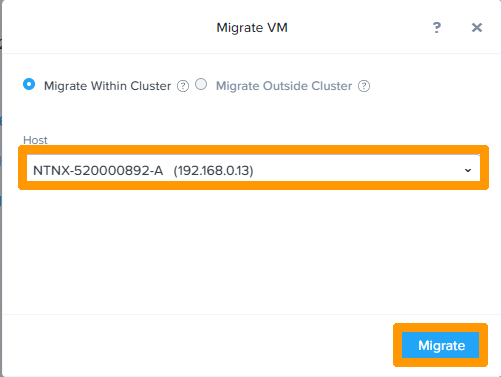
The name of the new node will appear in front of Host if the migration is complete.
Go further
Presentation of a Nutanix cluster
If you need training or technical assistance to implement our solutions, contact your sales representative or click on this link to get a quote and ask our Professional Services experts for assisting you on your specific use case of your project.
Join our community of users on https://community.ovh.com/en/.

