Zaawansowana replikacja z Leap (EN)
220 wyśw.
Objective
This guide details how to set up advanced replication and disaster recovery plans with Nutanix Leap in Prism Central.
Introduction
Nutanix Leap allows:
- Asynchronous and synchronous replication based on the chosen licence pack
- Test replicas
- Advanced disaster recovery plans with virtual machine startup and, in some cases, cluster-to-cluster failover automation (only with synchronous replication and a cluster witness)
- a destination to the Nutanix cloud with Xi Leap (note that this solution is not available with licences provided by OVHcloud)
OVHcloud provides services for which you are responsible, with regard to their configuration and management. It is therefore your responsibility to ensure that they work properly.
This guide is designed to assist you as much as possible with common tasks. Nevertheless, we recommend contacting a specialist provider if you experience any difficulties or doubts when it comes to managing, using or setting up a service on a server.
Requirements
- Two Nutanix clusters in your OVHcloud account
- Access to the OVHcloud Control Panel
- Access to your clusters via Prism Central
- An interconnection between two clusters, for example using these technologies:
- via an IPsec VPN as detailed in the guide Interconnecting IPsec between two sites
- or via a vRack connection.
- Prism Central needs more resources depending on the mode:
- Single Mode: 4GB additional RAM.
- Scale Mode with 3 Prism Central virtual machines: 8 GB additional RAM per virtual machine.
Instructions
Our Disaster Recovery Plan via Nutanix Leap will be set up between two clusters, both of which are located in remote OVHcloud datacentres, one in Canada and the other in France. The two clusters are connected by an IPSec VPN with this network configuration:
- Cluster administration LAN in France: 192.168.0.0/24.
-
Cluster administration LAN in Canada: 192.168.10.0/24.
-
Production LAN for VMs, common to both clusters: 192.168.50.0/24 on VLAN 50.
- Test LAN common to both clusters: 192.168.51.0/25 on VLAN 51.
Commissioning of Nutanix Leap
Adding an iSCSI IP address on each cluster
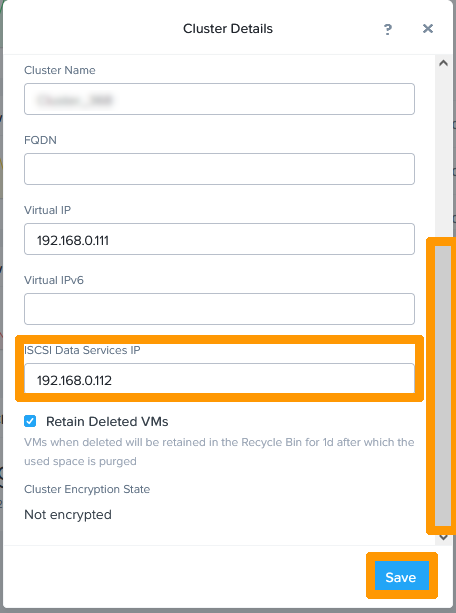
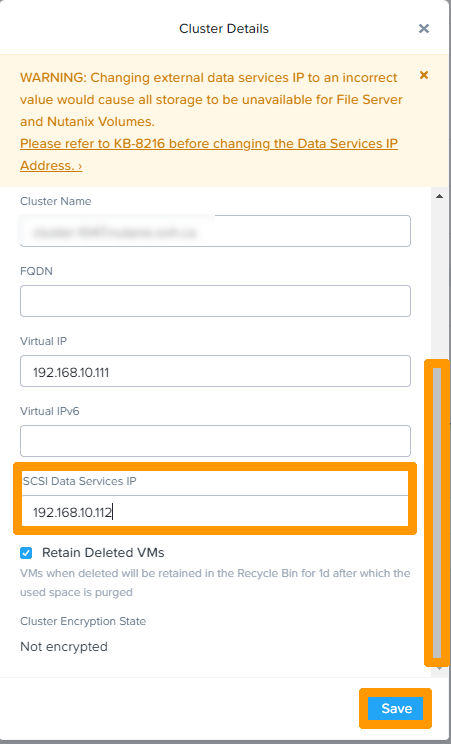
Before you enable Nutanix Leap, you must add an IP address for iSCSI connections on each cluster.
Using Prism Central, connect to Prism Element on the cluster in France. You can use the Nutanix Hyperconvergence guide for more information.
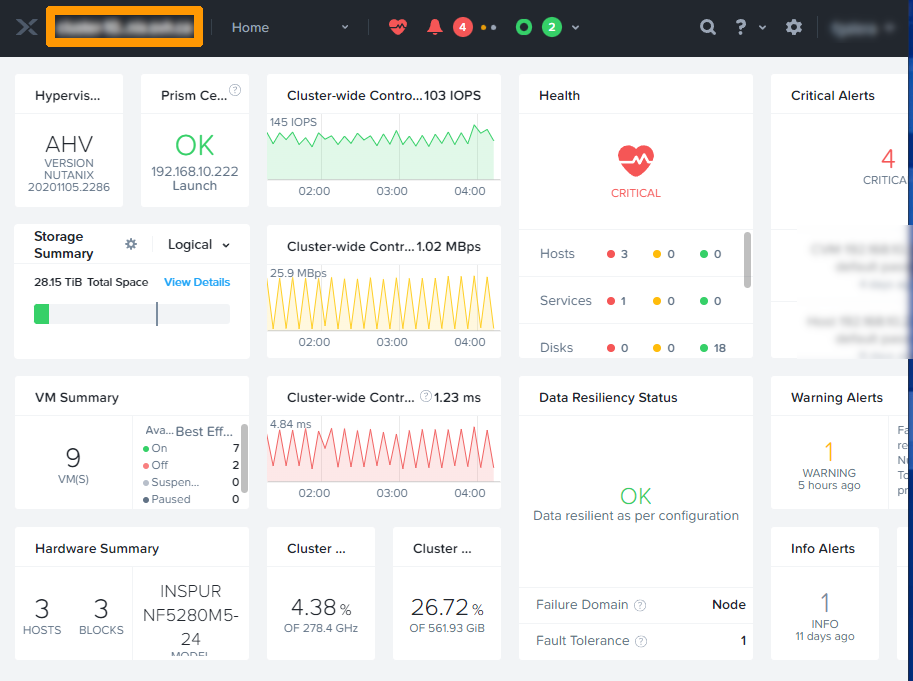
In the top left-hand corner of the Prism Element dashboard, click the cluster name.
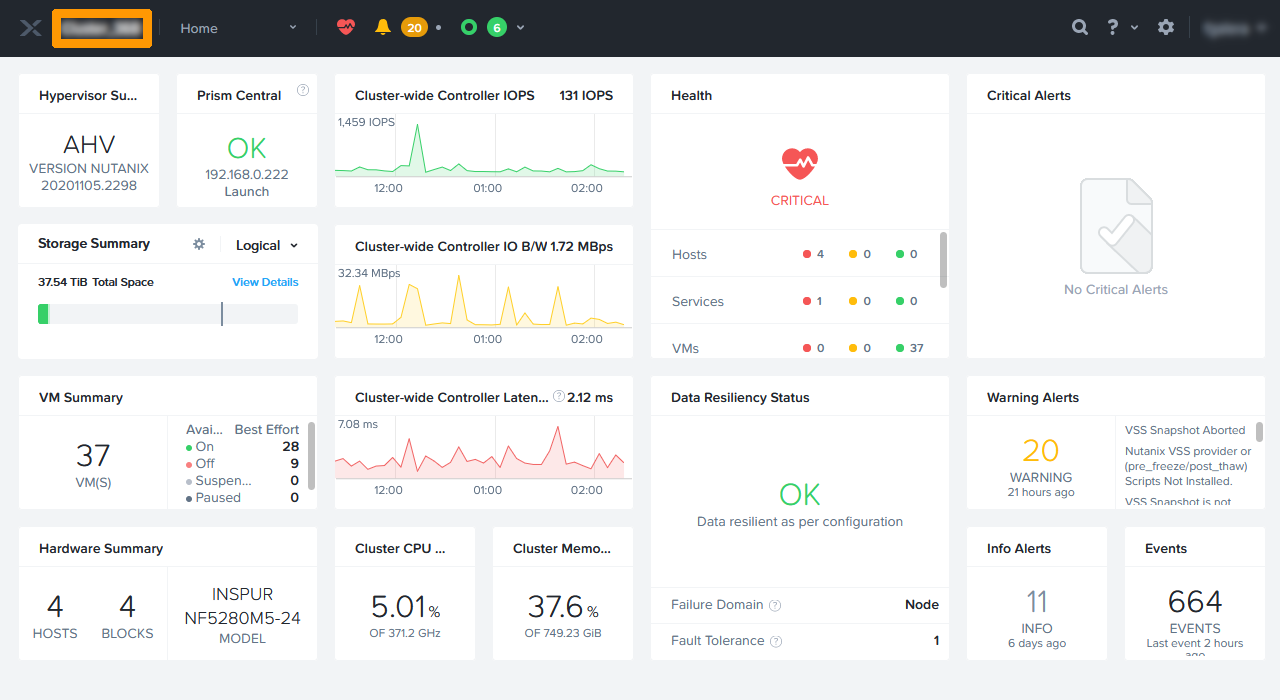
Check the IP address in the iSCSI Data Service IP field.
Also via Prism Central, now perform the same operation on the cluster in Canada.
In the top left-hand corner of the Prism Element dashboard, click The cluster name.
Check the IP address in the iSCSI Data Service IP field.
Enabling Leap
Go back to the Prism Central interface for the cluster in France.
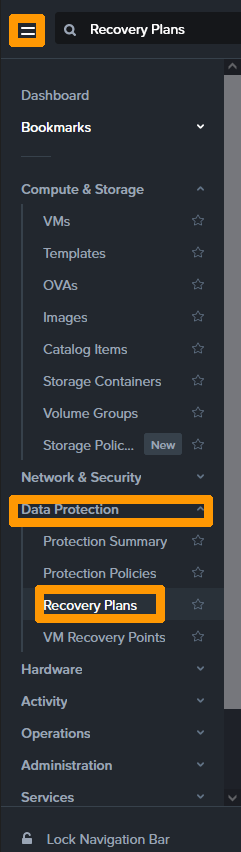
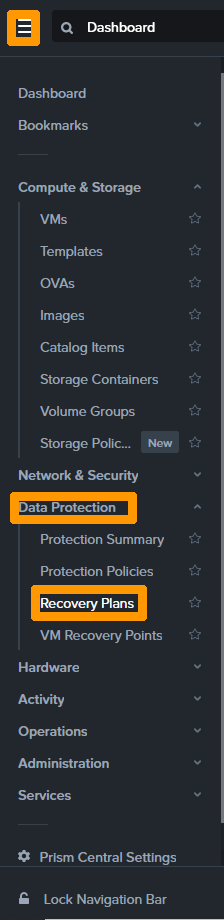
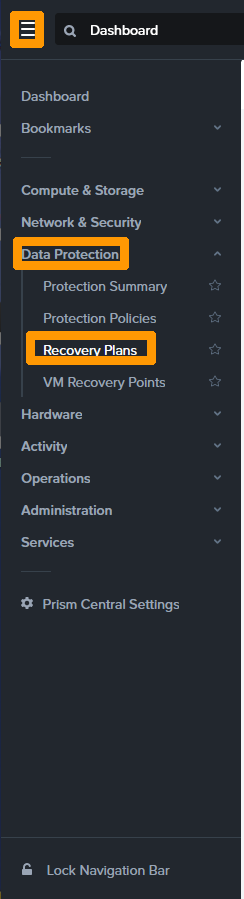
From the main menu, click Recovery Plans in the Data Protection submenu.

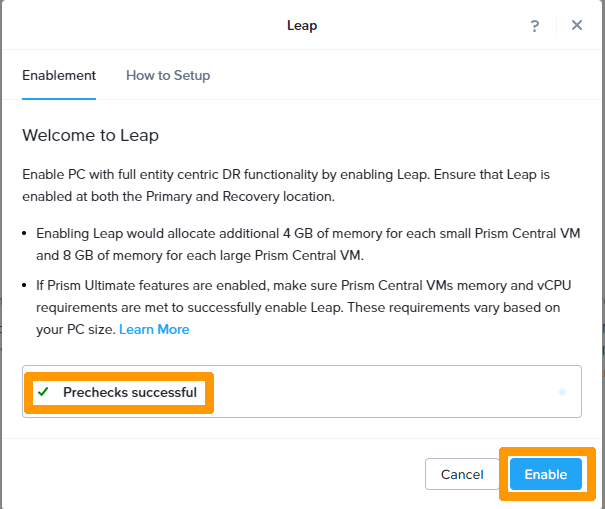
Click Enable Leap.
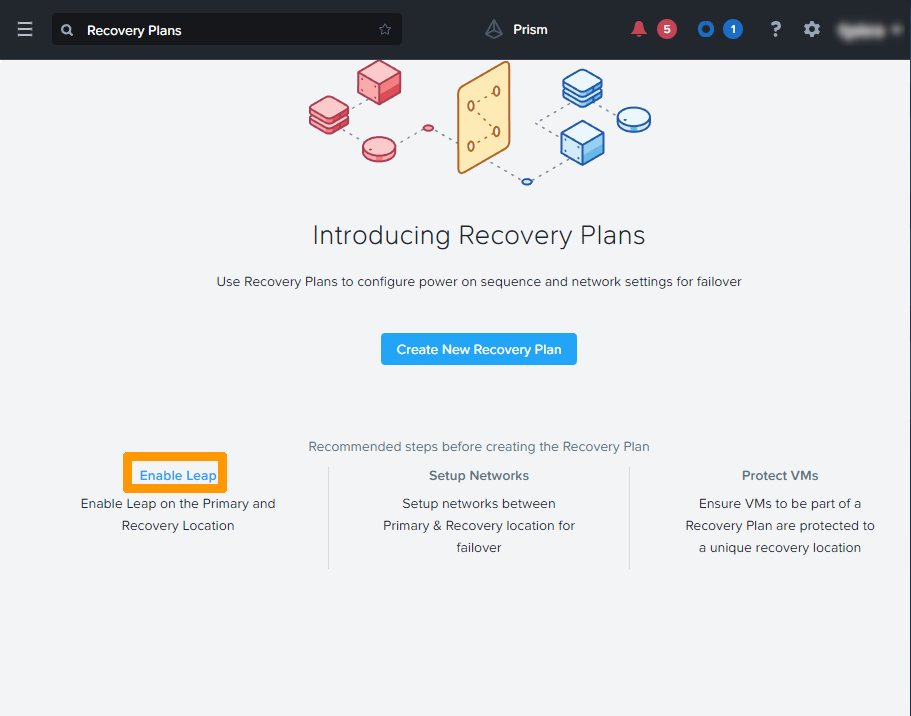
When you see Prechecks successful, click Enable.
Now go back to the Prism Central interface of the cluster in Canada and do the same.
Click Recovery Plans.
Click Enable Leap.
Again, when Prechecks successful appears on the screen, click Enable.
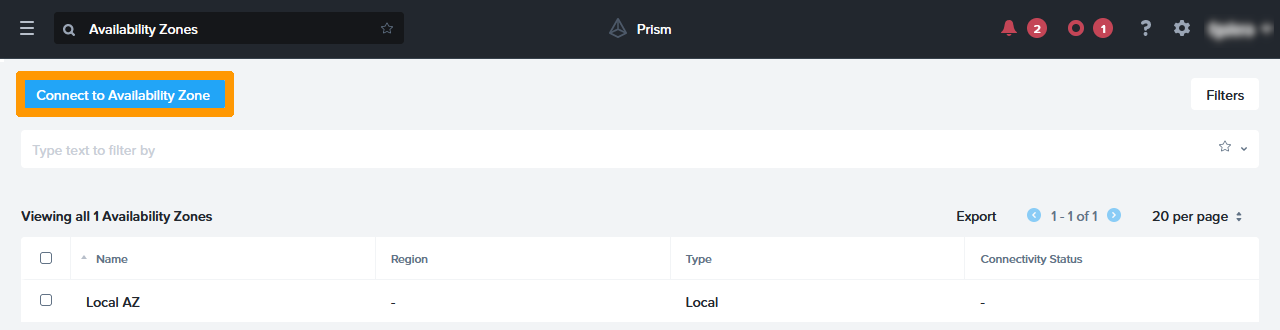
Each cluster now has an Availability zone, which allows them to be interconnected.
Connecting both clusters.
Stay on Prism Central in the cluster in Canada.
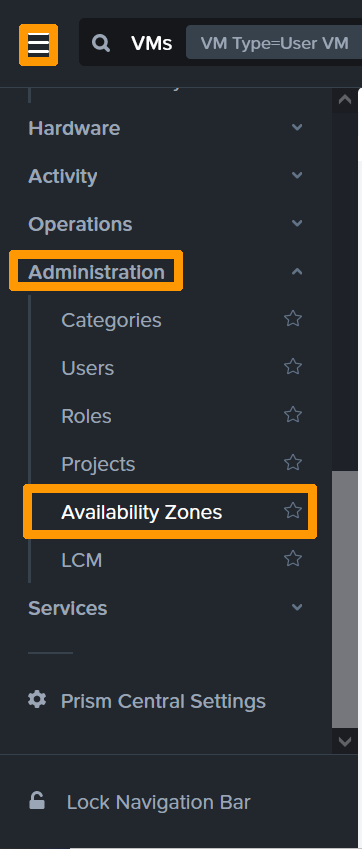
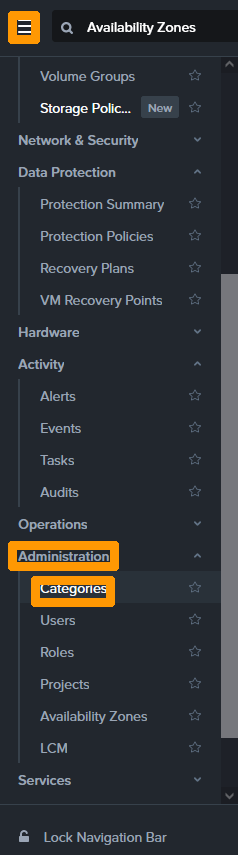
From the main menu, click Availability Zones under Administration.
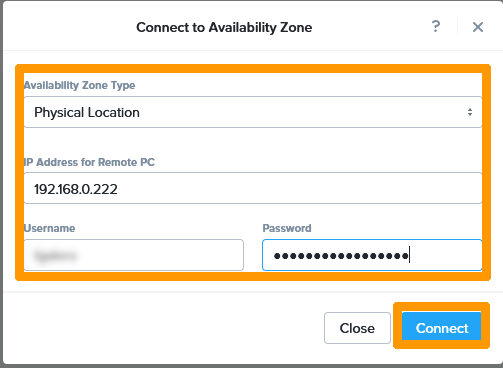
Then click Connect to Availability Zone.
Enter this information:
- Availability Zone Type:
Physical Location. - IP Address for Remote PC:
IP address of the remotePrism Central. - Username:
RemoteCentral Prism administrator account. - Password
RemoteCentral Prism account password.
Then click Connect.
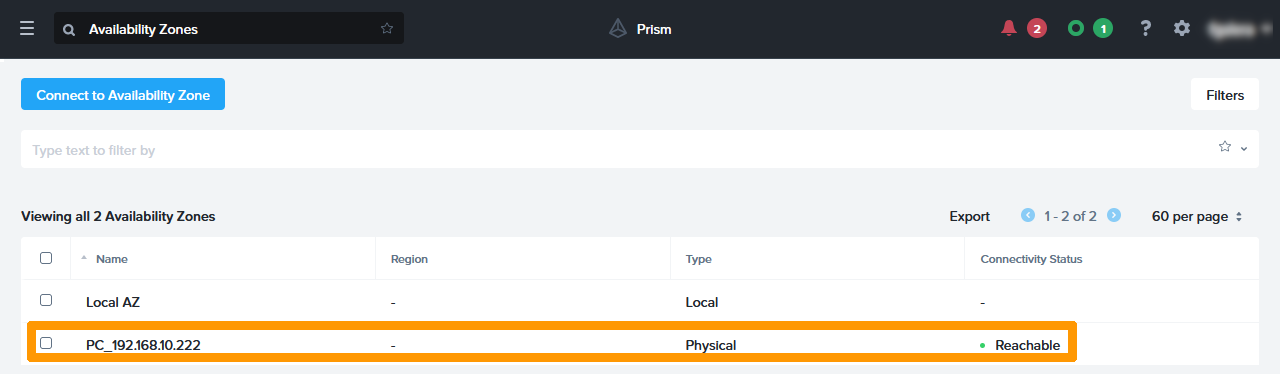
The remote cluster is named after the private IP address of the Prism Central in France, preceded by PC_.
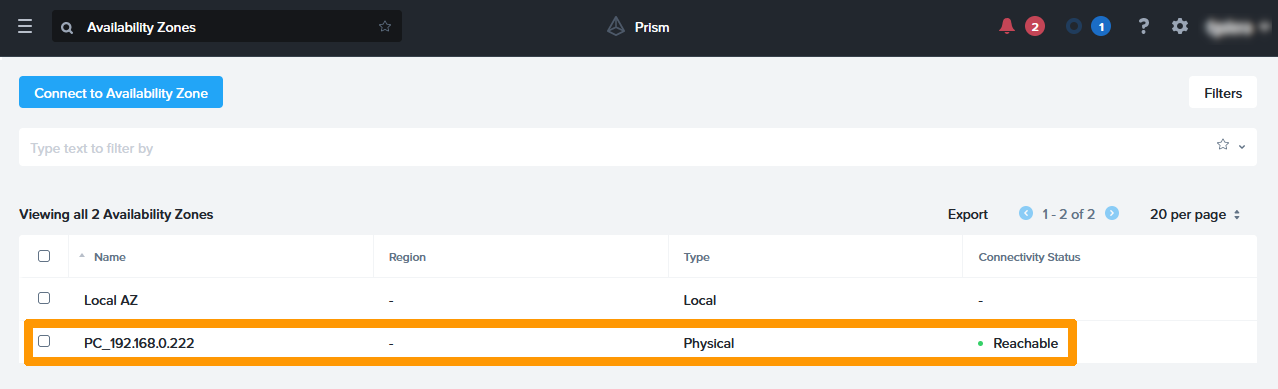
Connect to the cluster in France with Prism Central.
From the main menu, click Availability Zones on the Administration submenu. You will see that the remote site in Canada appears with the private IP address of the Prism Central in Canada preceded by PC_.
Implementation of replication from Canada to France
Virtual machines that will be protected with Nutanix Leap should not be members of a Domain Protection created from Prism Element. There is a procedure on the Nutanix website to perform this migration: Migrating from a Domain Protection.
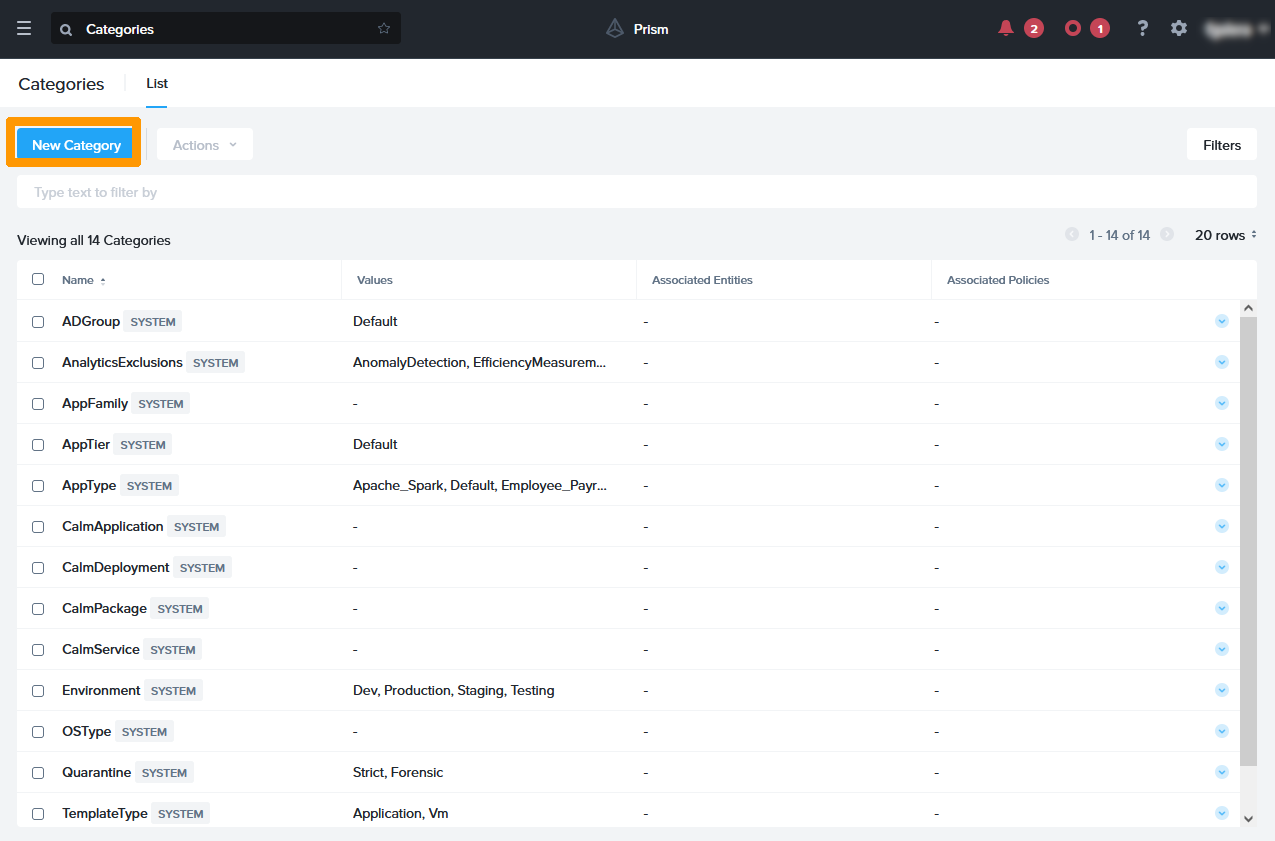
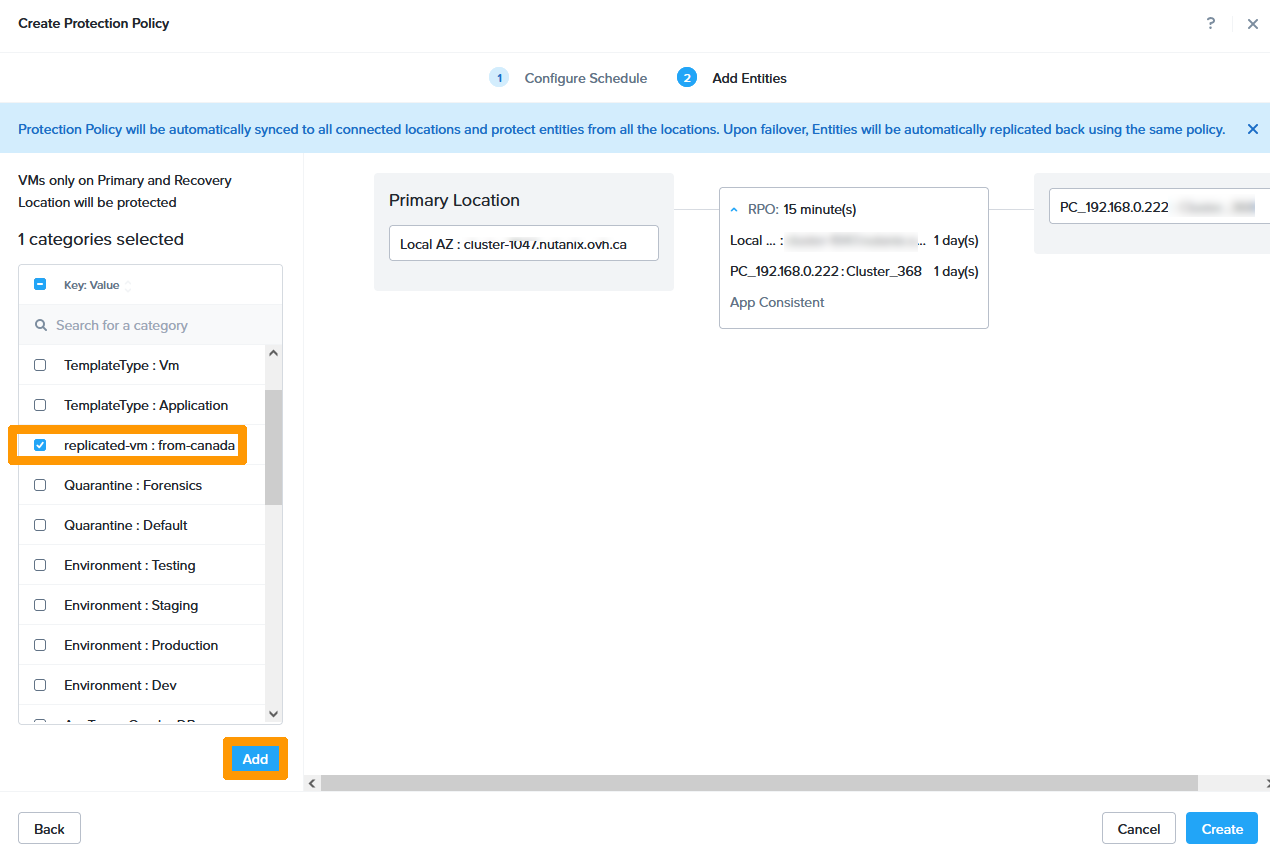
Creating a category containing the virtual machines to replicate
From the main menu, click Categories on the Administration submenu.
Click New Category.
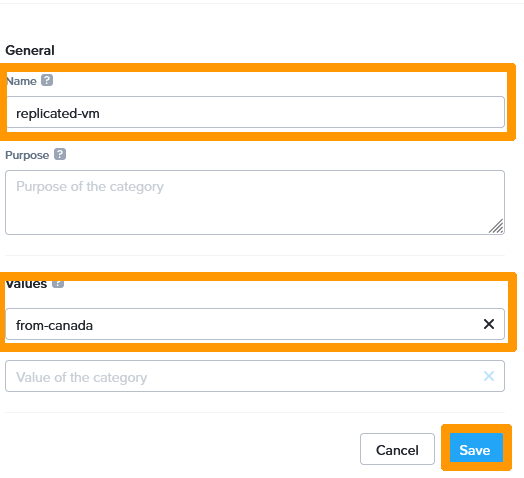
Enter this information:
- Name:
replicated-vm - values:
from-canada
Then click Save.
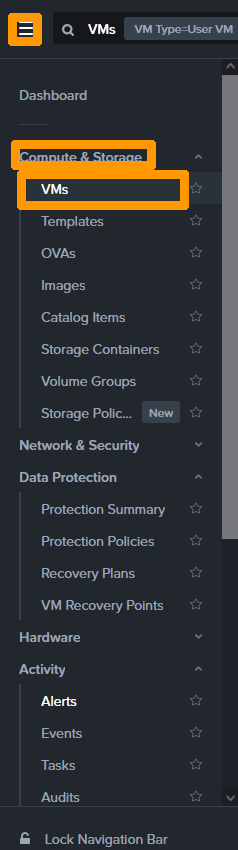
Go back to the main menu and select VMs under Compute and Storage.
Select the virtual machine by using the check box to its left, then click the Actions button.
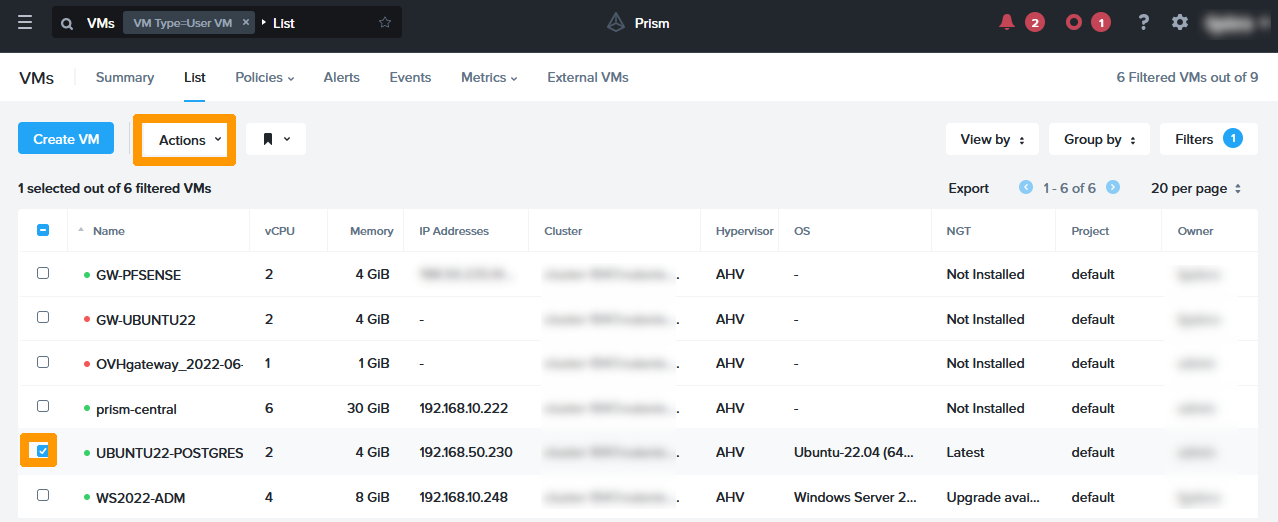
In this menu, click Manage Categories.
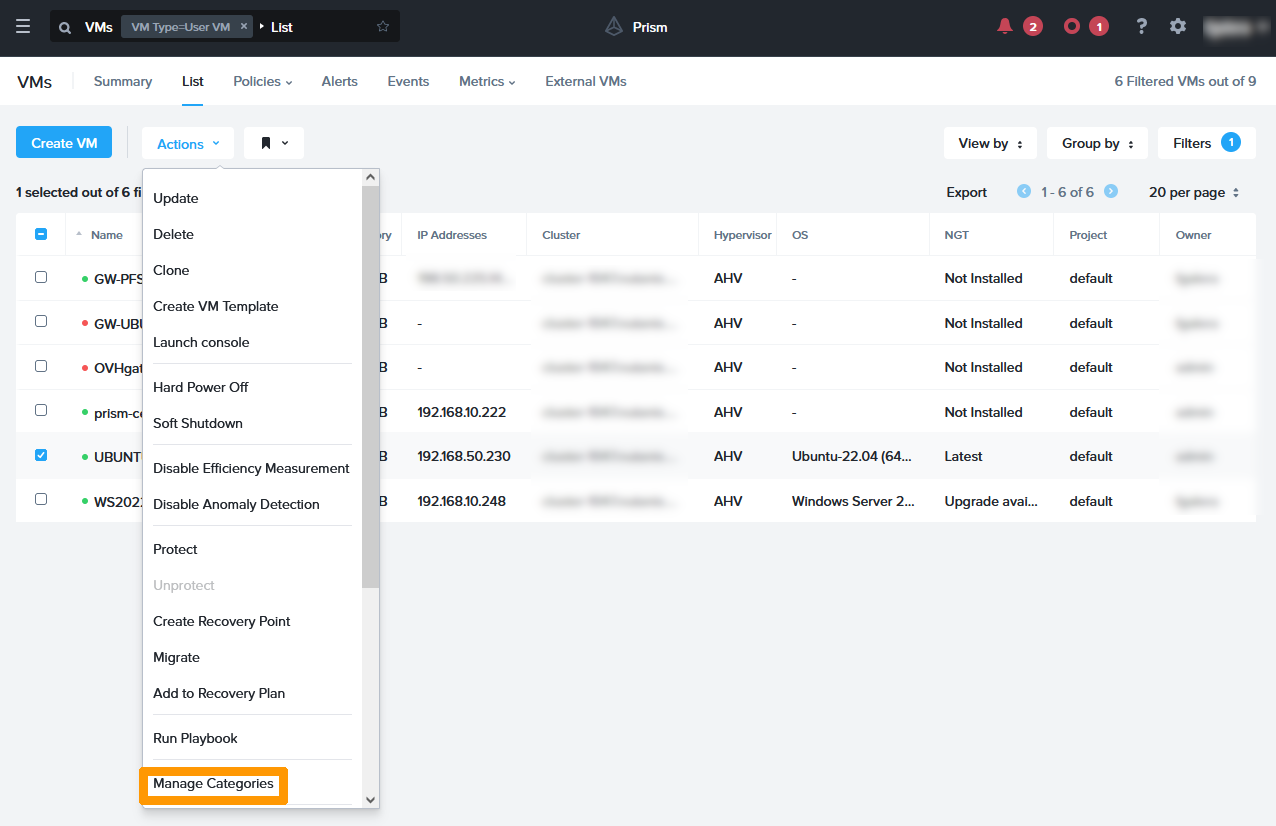
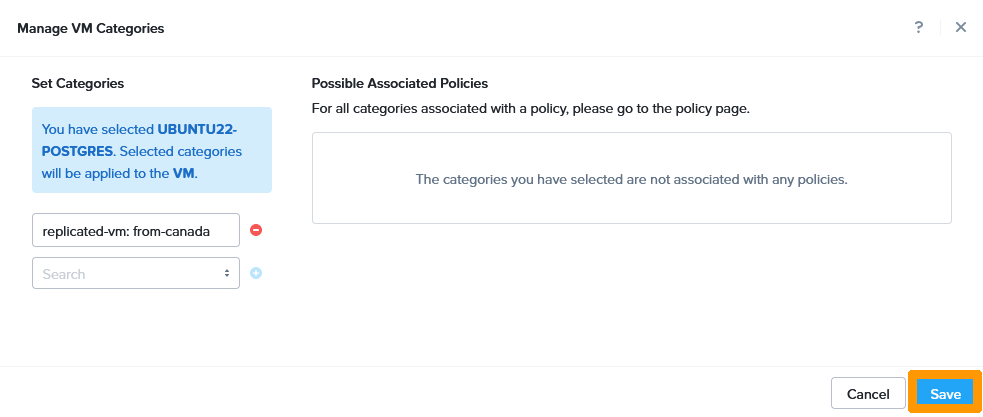
Select the category you created and click the blue + button.

Click Save.
Creating the protection policy
A protection policy creates a scheduled replication between two Availability zones. You can choose this type of schedule depending on your licence:
- asynchronous every hour
- nearsync between 1 and 15 minutes
- synchronous with a delay of 0 seconds (this mode requires a network latency of less than 5ms between the two clusters)
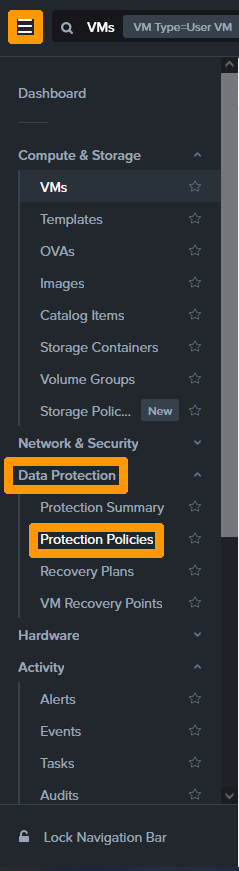
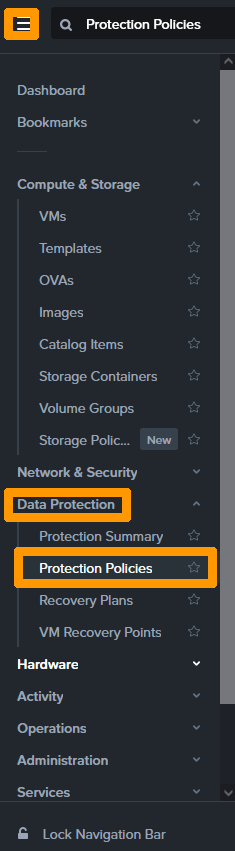
From the main menu, click Protection Policies under Data Protection.
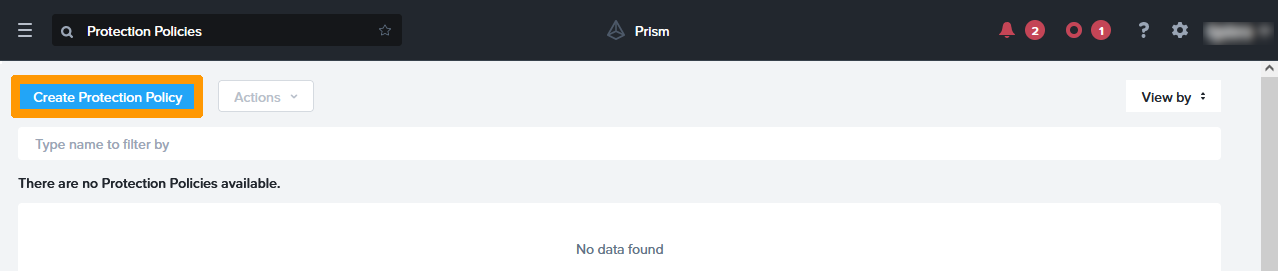
Click Create Protection Policy.
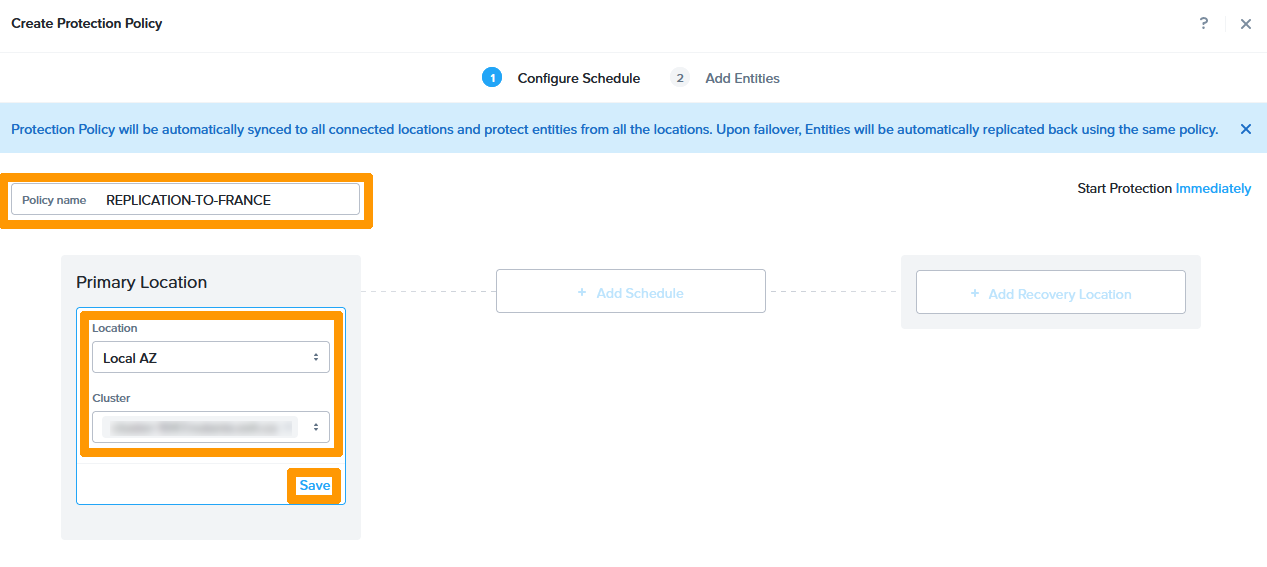
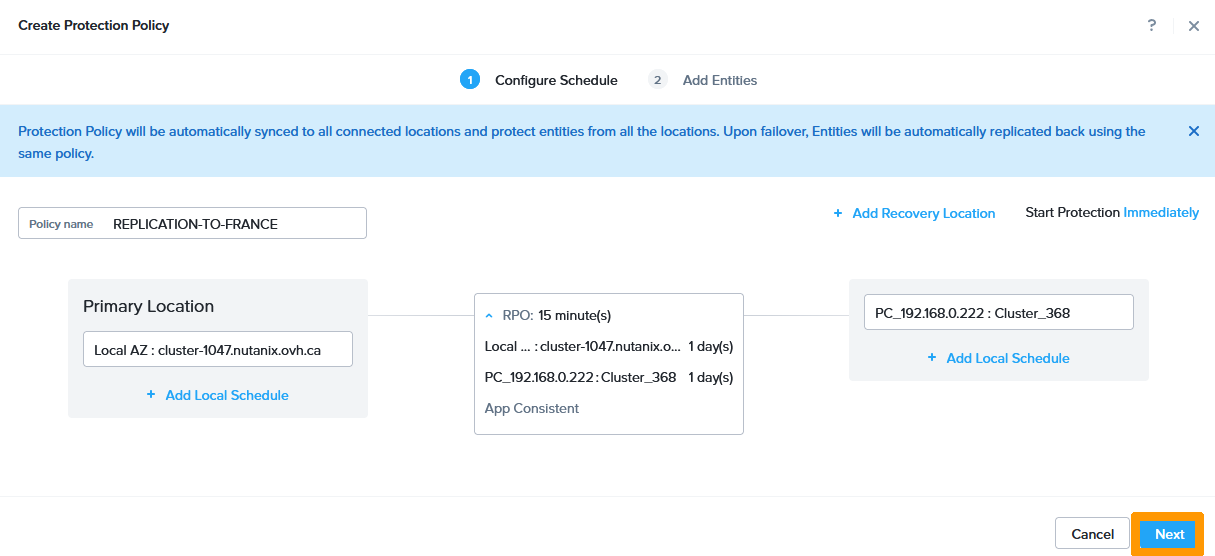
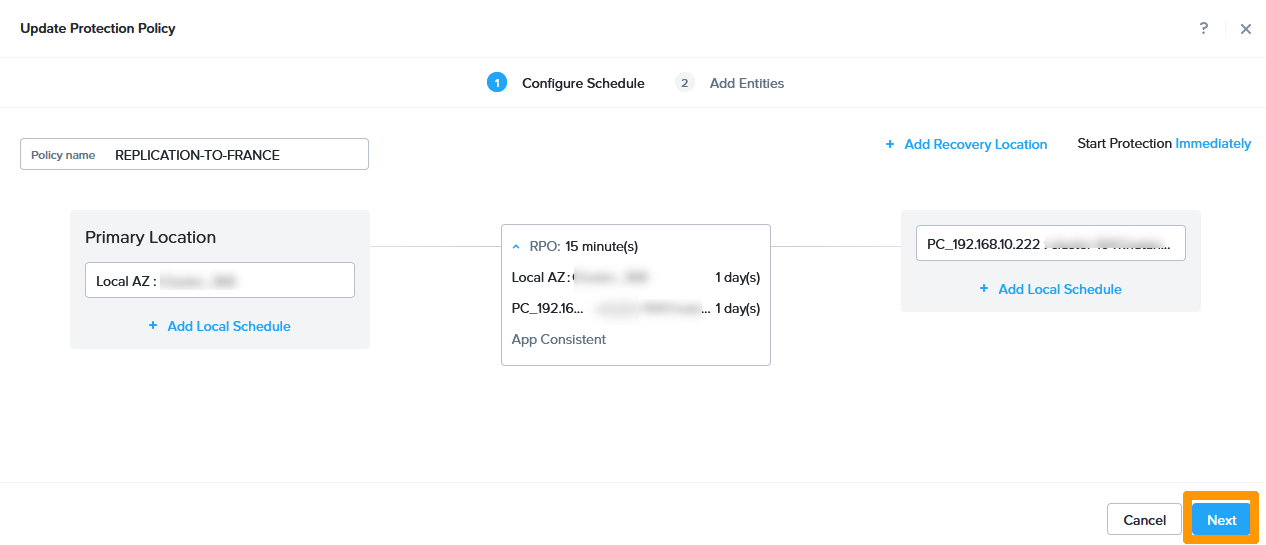
Enter a name in the Policy name field.
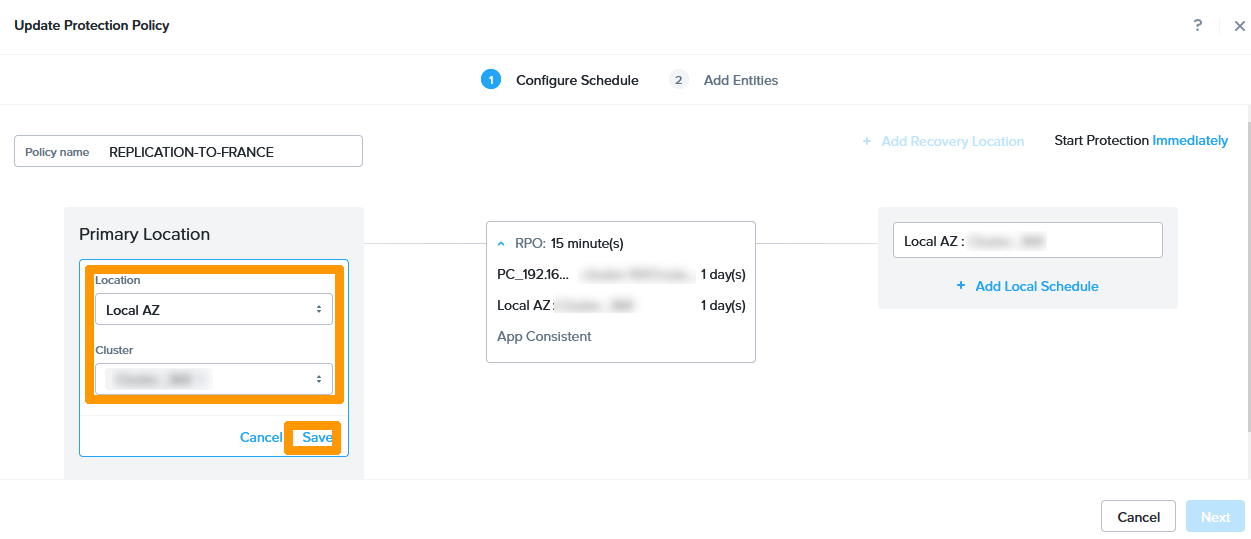
In the Primary location box, choose these options:
- Location:
Local AZto choose the zone containing the local cluster. - Cluster:
Cluster containing the virtual machines to be replicated.
Click Save.
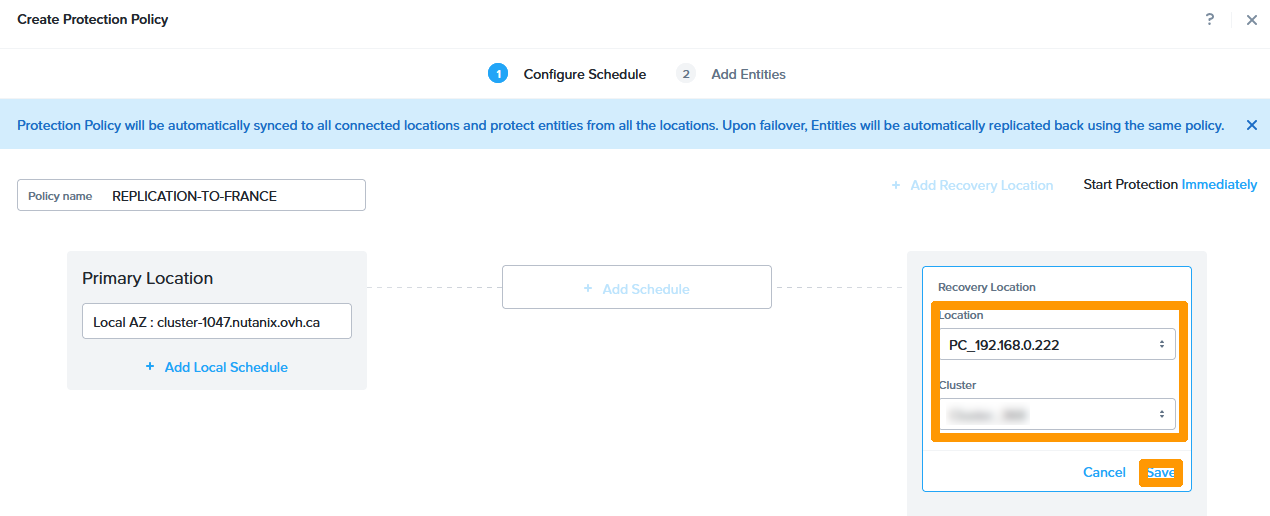
In the Recovery location frame, choose these options:
- Location:
Remote cluster zone. - Cluster:
Destination cluster.
Click Save.
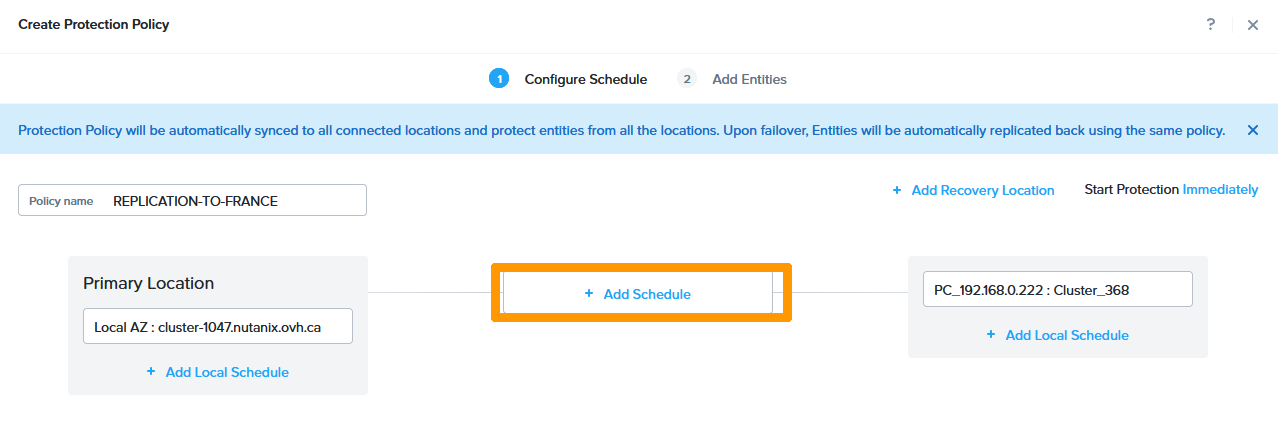
Then click + Add schedule.
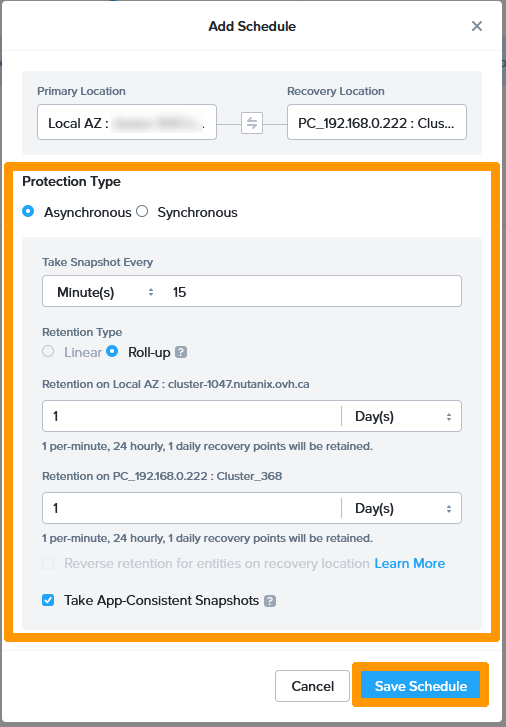
Choose Asynchronous as Protection Type.
Change the Take Snapshot Every option to Minutes: 15 to do nearsync replication.
Select the Take App-Consistent Snapshots checkbox and click Save Schedule.
Click Next.
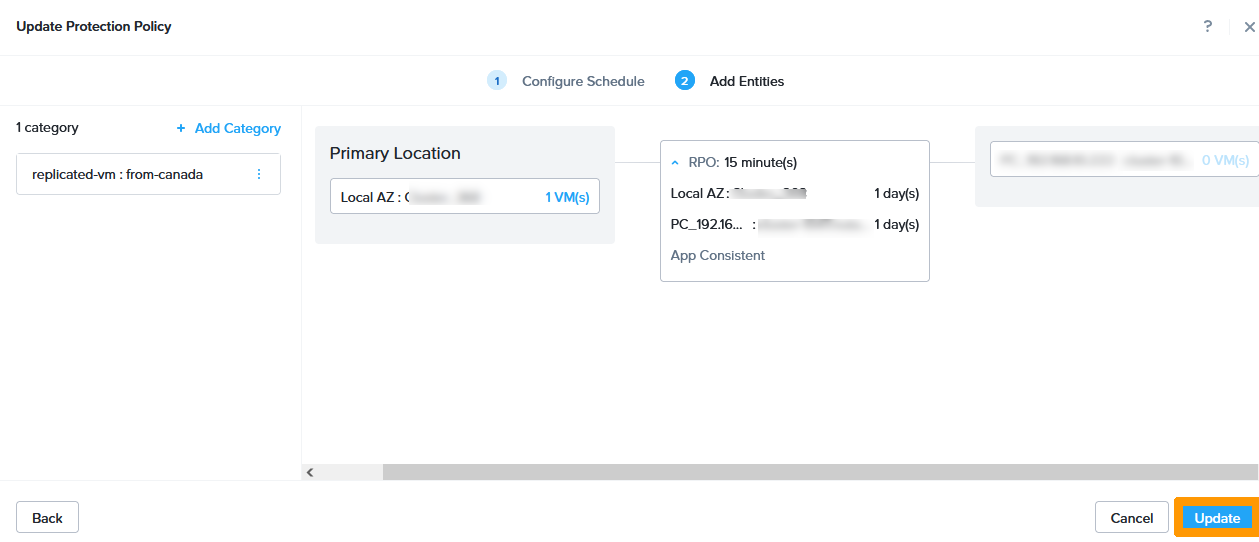
Select the category where the virtual machine was added and click Add.
Click Create.
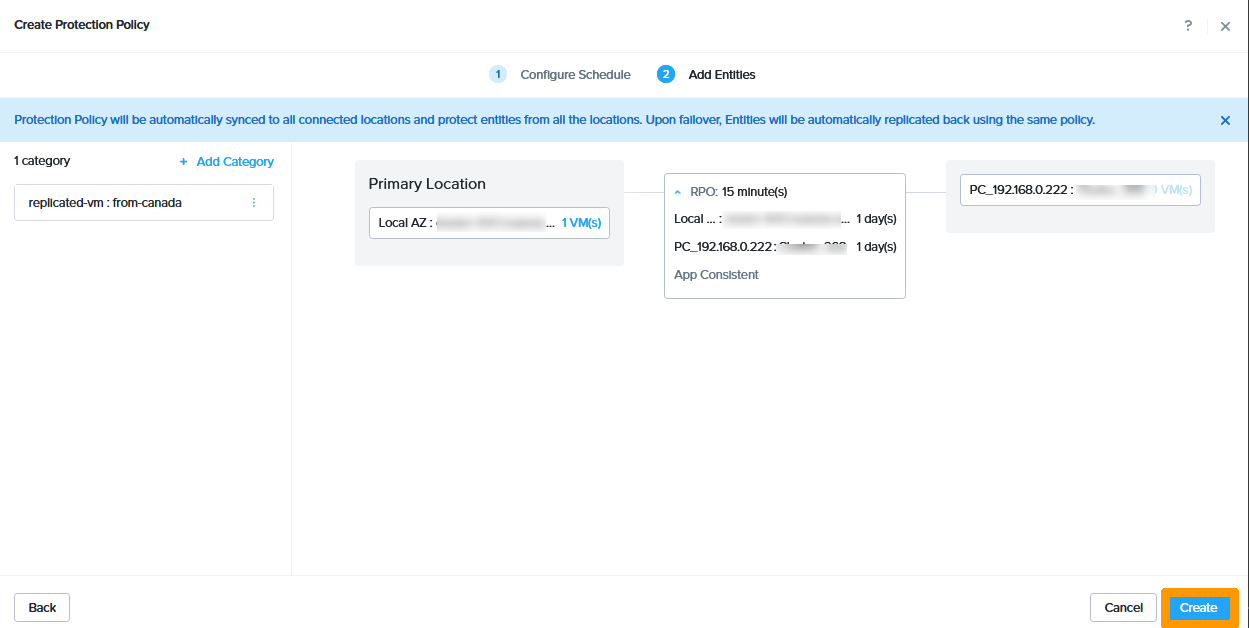
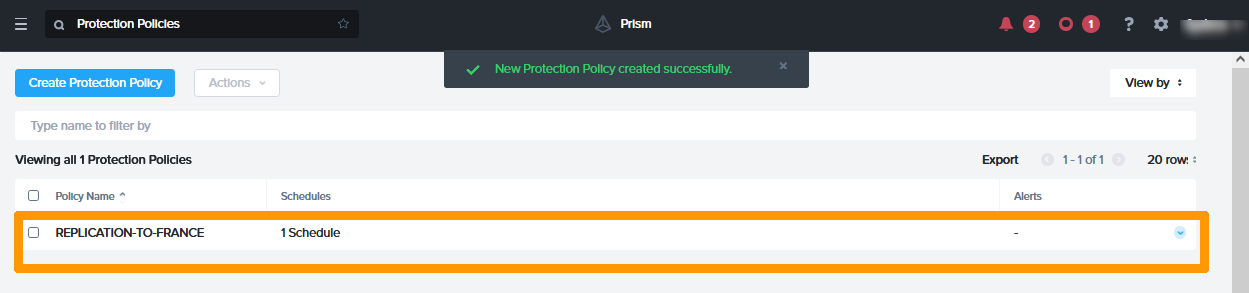
The protection policy is enabled and appears in the Protection Policies dashboard.
Disaster Recovery Plan Management
Introduction
Disaster recovery plans can be created with various options:
- Manually launch disaster recovery plan if there is no cluster witness.
- Synchronous replication disaster recovery plan automation with a cluster witness.
- Choose how virtual machines start when the disaster recovery plan is activated with the ability to run a script.
In our example, this will be a manual disaster recovery plan that includes automatic startup of virtual machines.
Creating Disaster Recovery Plan
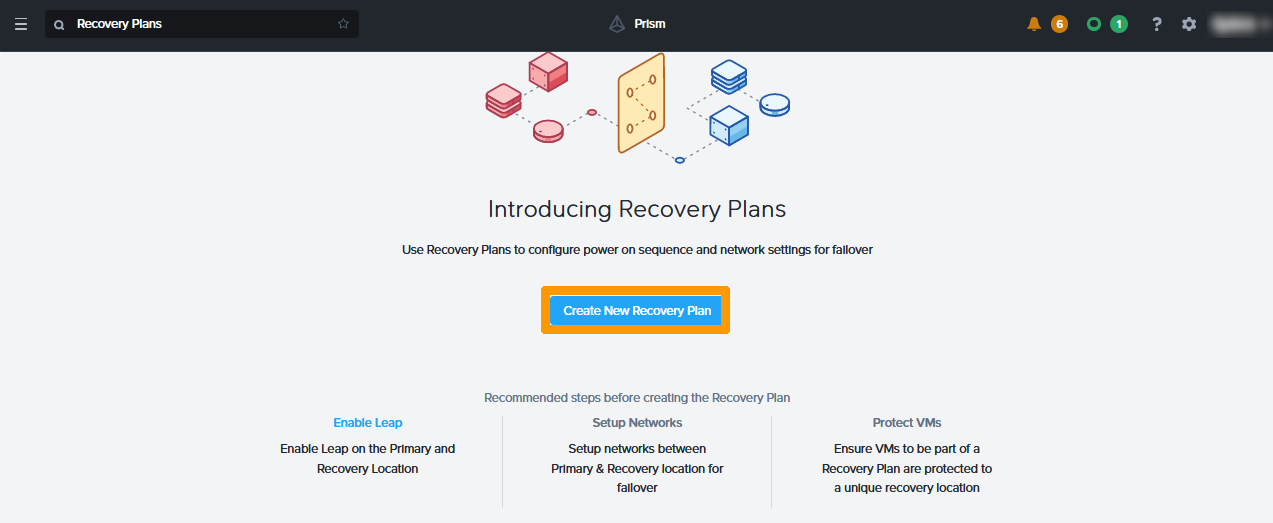
From the main menu, choose Recovery Plans under Data Protection.
Click Create New Recovery Plan.
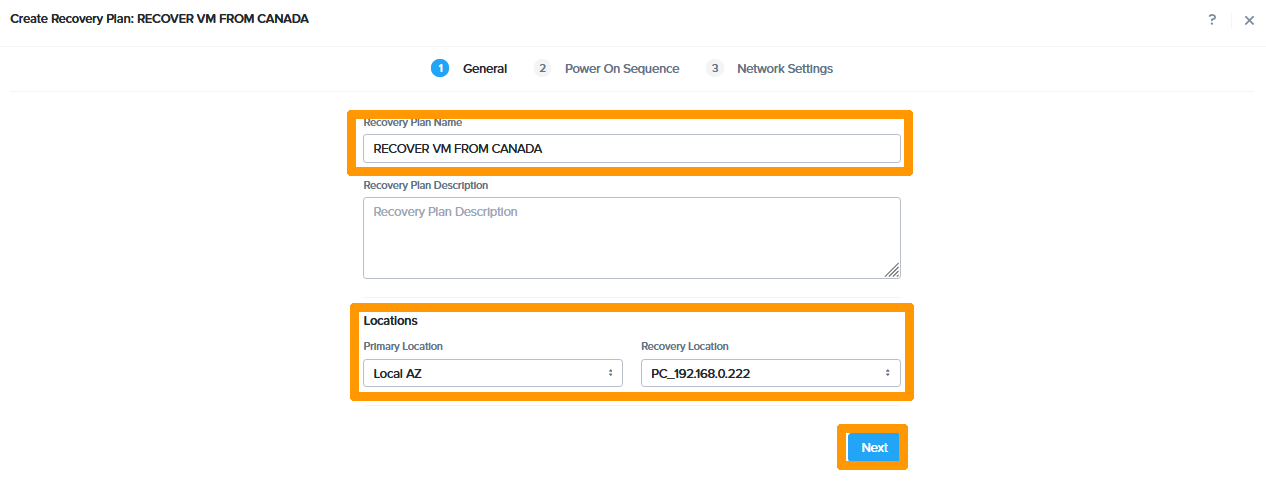
Enter these values:
- Recovery Plan Name:
the name of the disaster recovery plan. - Primary Location:
Local AZto choose the zone containing the local cluster. - Recovery Location:
Name of the Remote Areathat will be used for the disaster recovery plan.
Click Next.
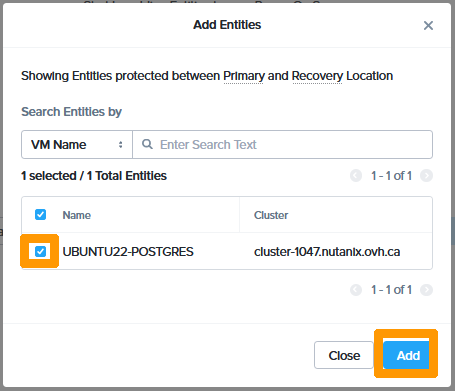
Click Add Entities.

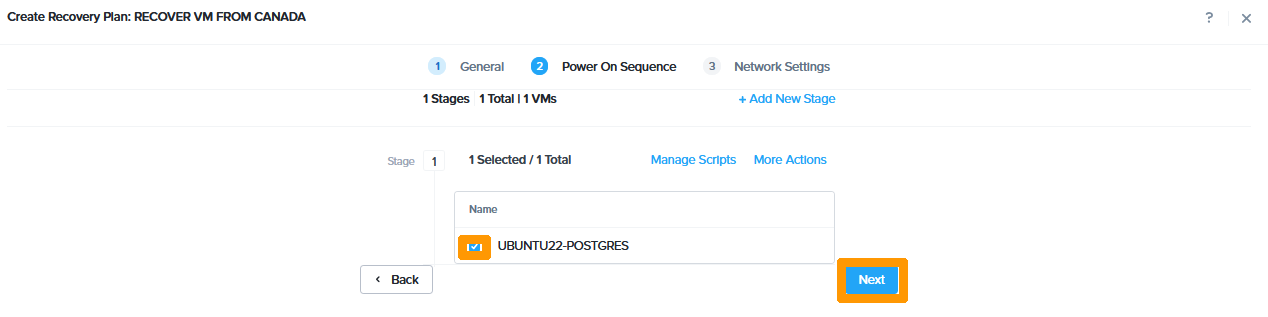
Select the checkbox next to the virtual machine that is part of the disaster recovery plan, then click Add.
Select the checkbox next to the virtual machine that should start automatically when the disaster recovery plan is enabled.
Then click Next.
After reviewing the Disaster Recovery Plan presentation, click OK, Got it.

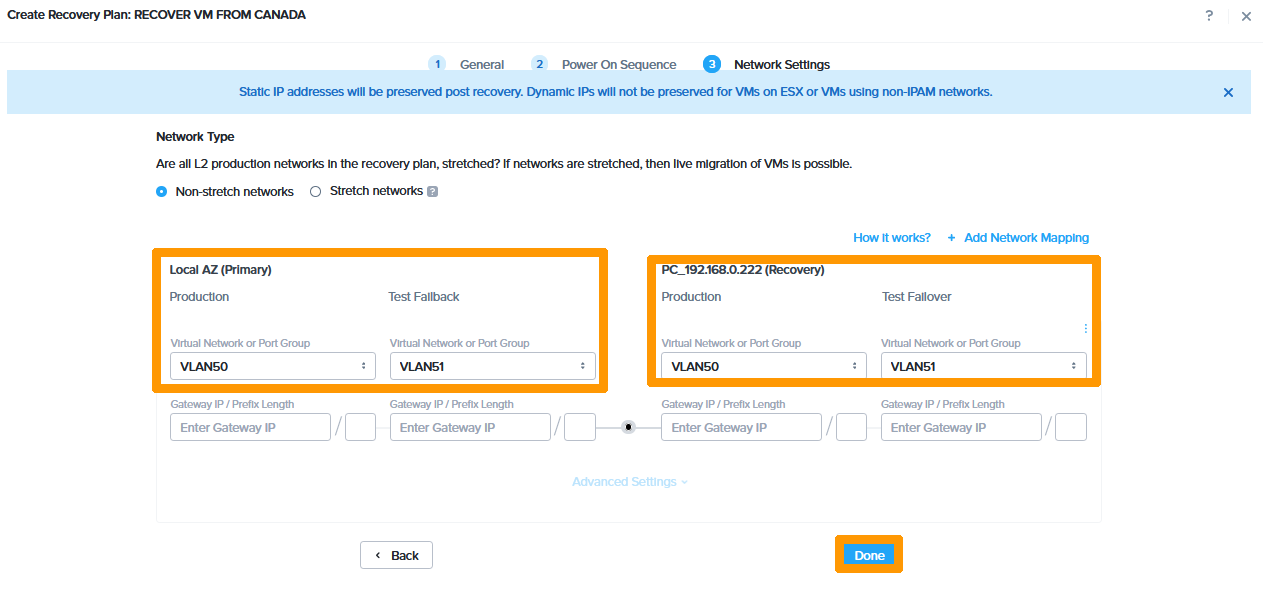
On the primary site, choose these options:
- Production:
Production VLAN - Test Failback:
Test VLAN
On the recovery site, choose these options:
- Production:
Production VLAN - Test Failback:
Test VLAN
Then click Done.
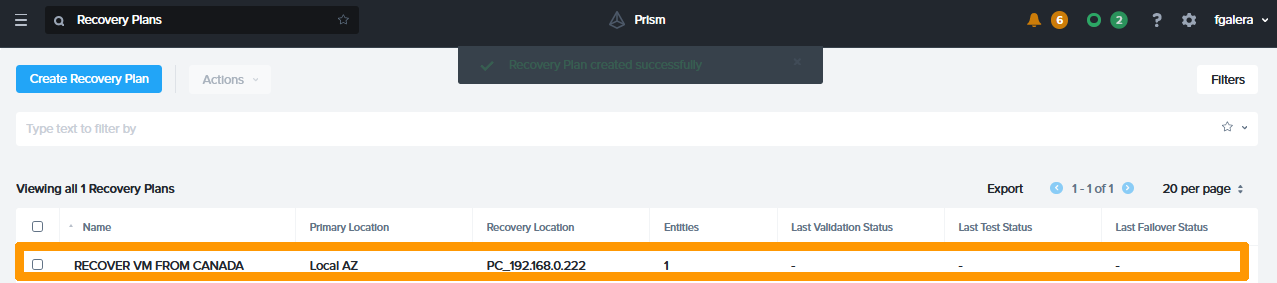
The disaster recovery plan appears in the list.
Scheduled migration
Migrating a site in Canada to France
Connect with Prism Central on the cluster in France to switch the virtual machine from Canada to France.
From the main menu, choose Recovery Plans in the Data Protection section.
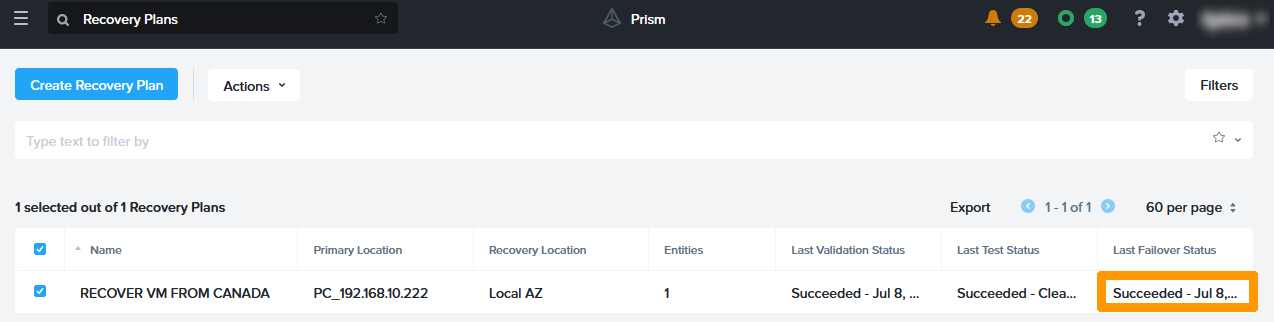
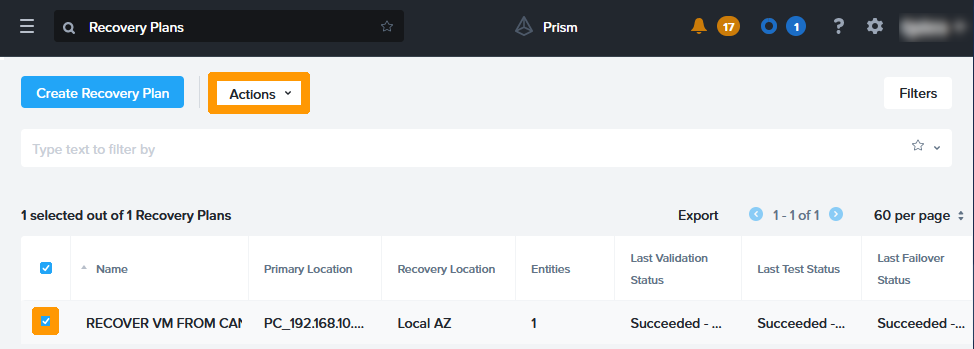
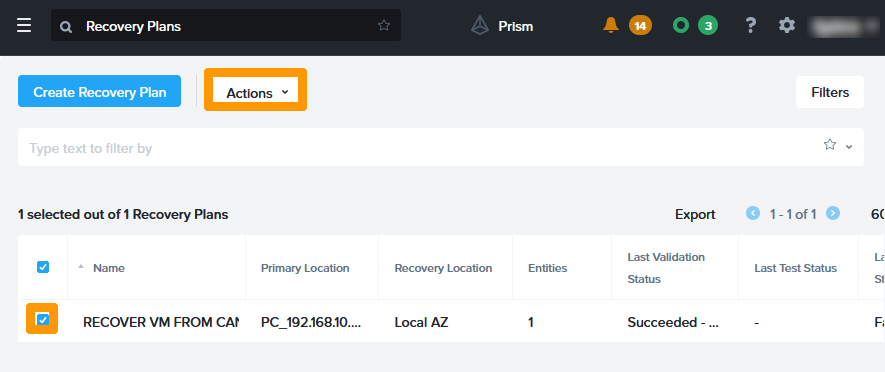
Select the disaster recovery plan by using the checkbox to the left of it, then click the Actions button to open the menu.
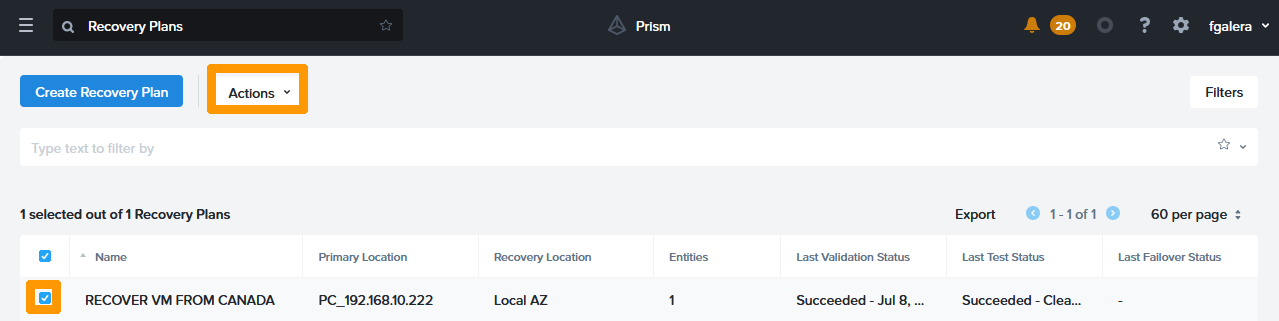
Click Failover.
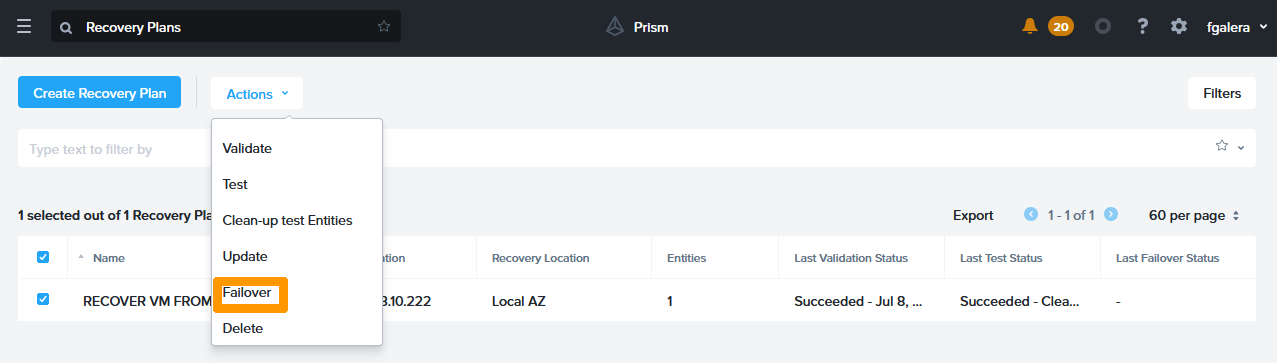
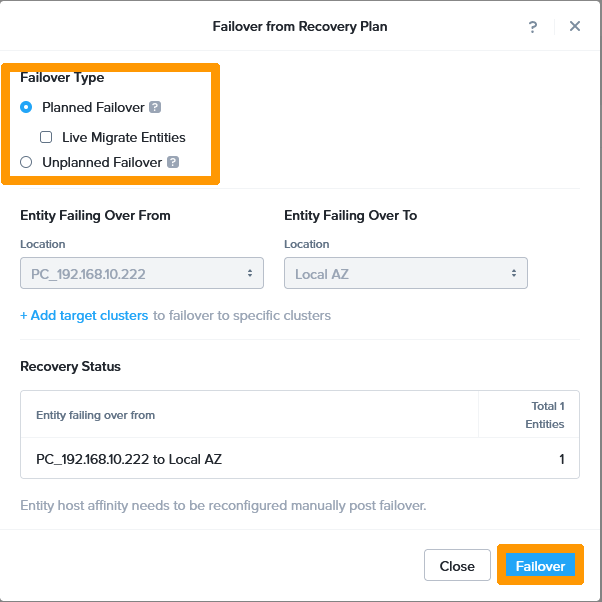
Select Planned Failover as the type of Failover and click the Failover button.
Type Failover in the confirmation field and click the Failover button.
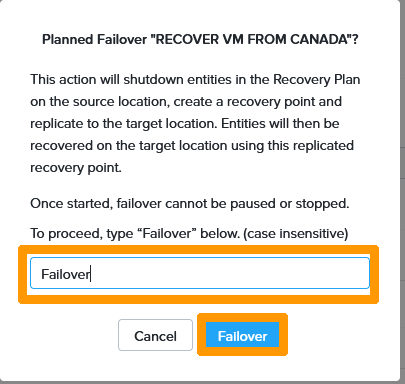
The migration steps are described below:
- Stopping the virtual machine on the original cluster.
- Synchronising the latest changes.
- Deleting the virtual machine on the original cluster.
- Adding the virtual machine on the destination cluster.
- Starting the virtual machine on the destination cluster.
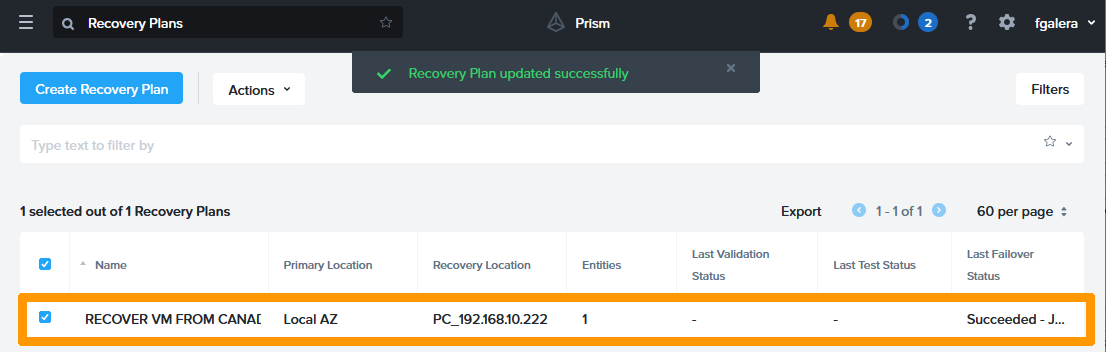
The result of the migration appears in the Last Failover Status column with the status Succeeded if everything went well.
Reverse Replication
In the case of scheduled failover, you must reverse replication to continue to have redundancy between the two sites.
Using Prism Central, log in to the destination cluster in France.
From the main menu, choose Protection Policies from the Data Protection submenu.
Select the checkbox to the left of the protection policy and click the Actions button.
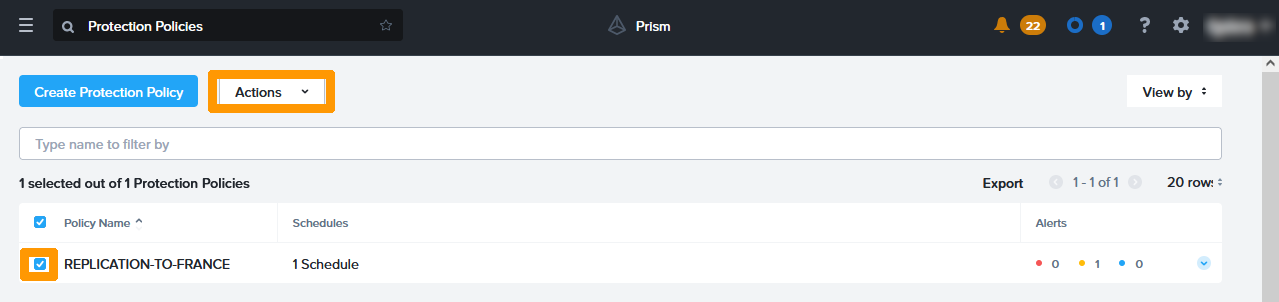
Click the Update button.

Move left under Primary Location until a menu appears. Click Edit.
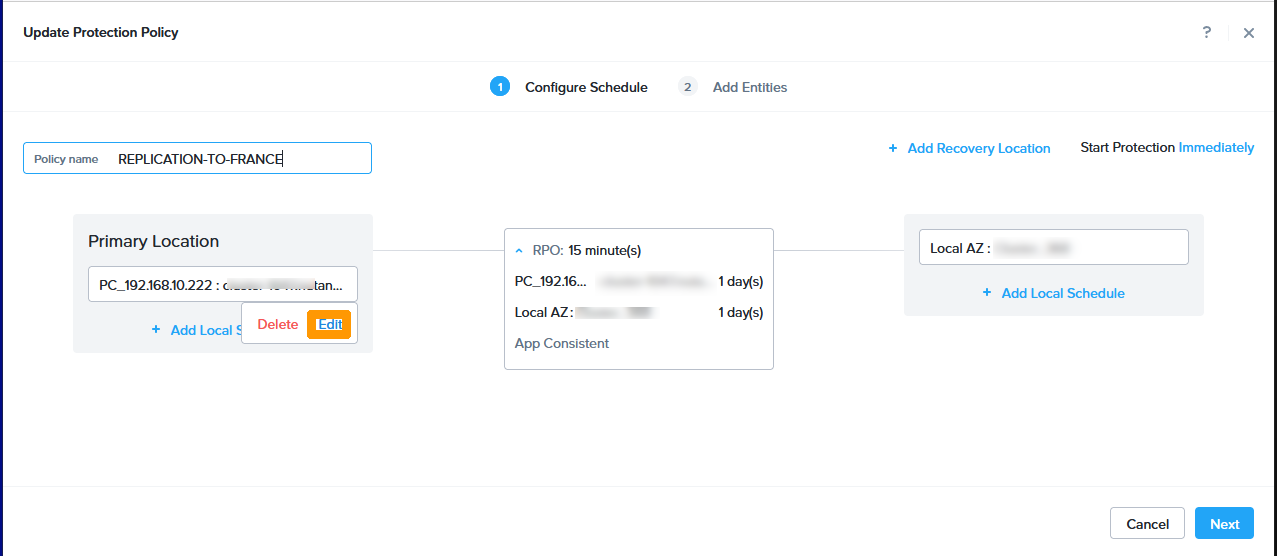
Edit the following information in the Primary Location frame:
- Location:
Local AZ - Cluster:
local area cluster
Then click Save.
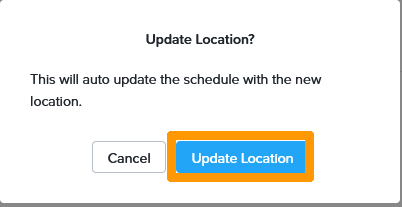
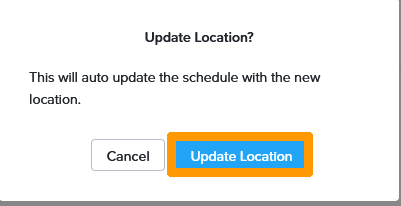
Click Update Location.
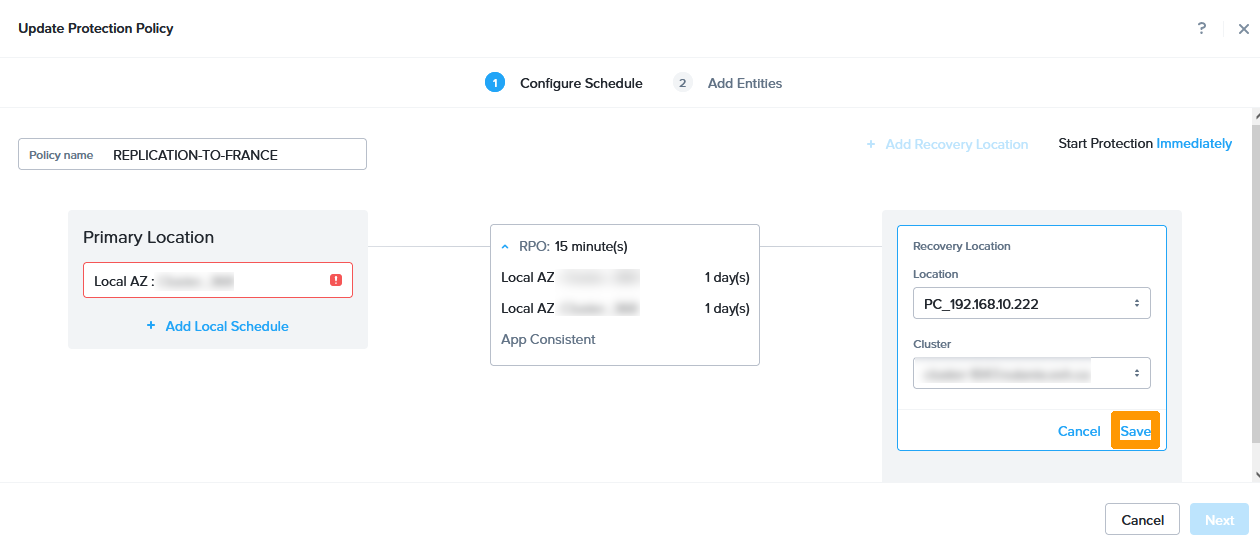
Move to the right below the destination until a menu appears. Click Edit.
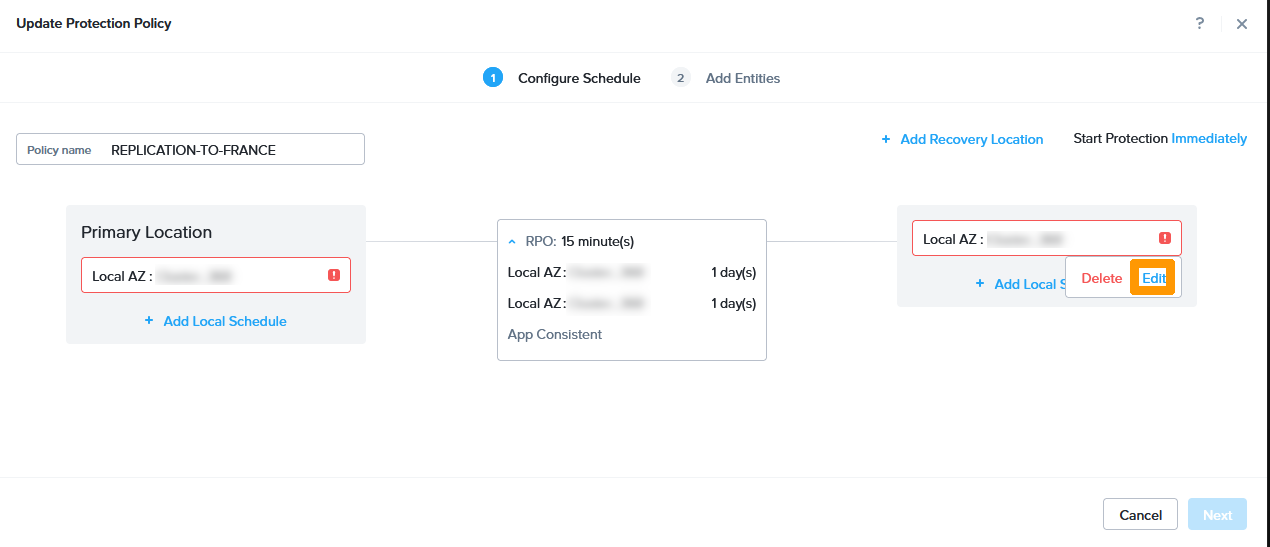
Then edit the following information as part of Recovery Location:
- Location:
destination area. - Cluster:
cluster of the destination area.
Click Save.
Click Update Location.
Click Next.
Click Update to complete the inversion.
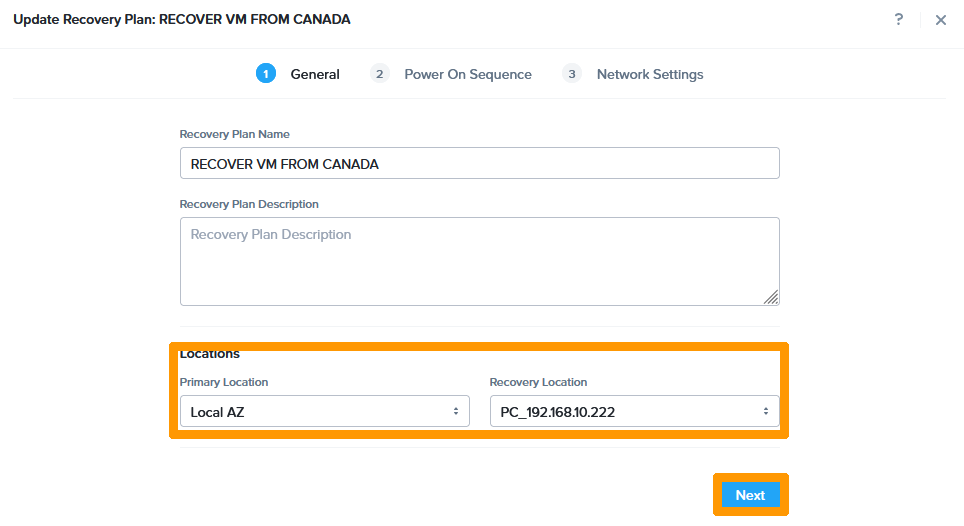
Modifying Disaster Recovery Plan
You must also change the disaster recovery plan by reversing the source and destination.
From the main menu, choose Recovery Plans from the Data Protection submenu.
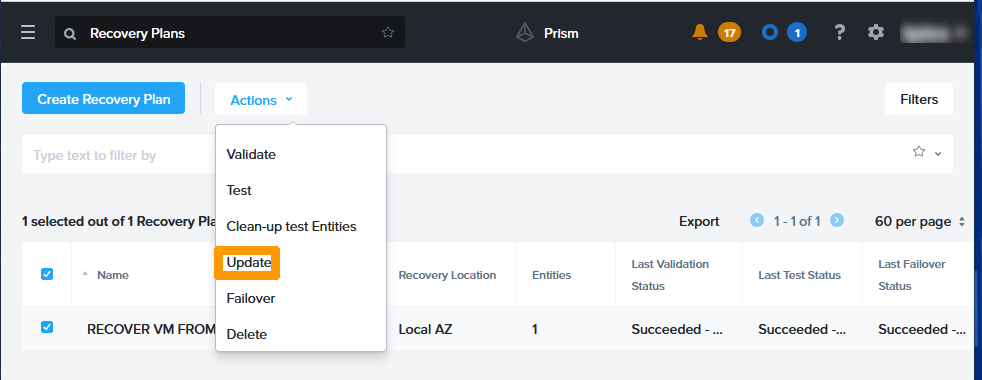
Select the disaster recovery plan by using the checkbox to the left of the plan, then click the Actions button.
From the actions menu, click Update.
In the Primary Location drop-down menu on the left, replace the remote cluster with Local AZ.
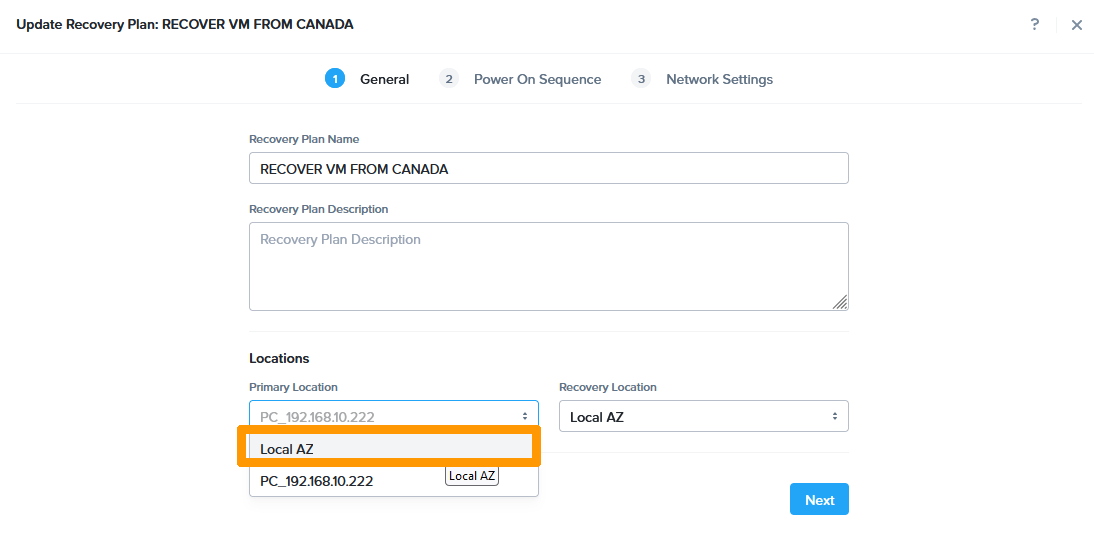
Choose The remote area in Recovery Location on the right instead of Local AZ.
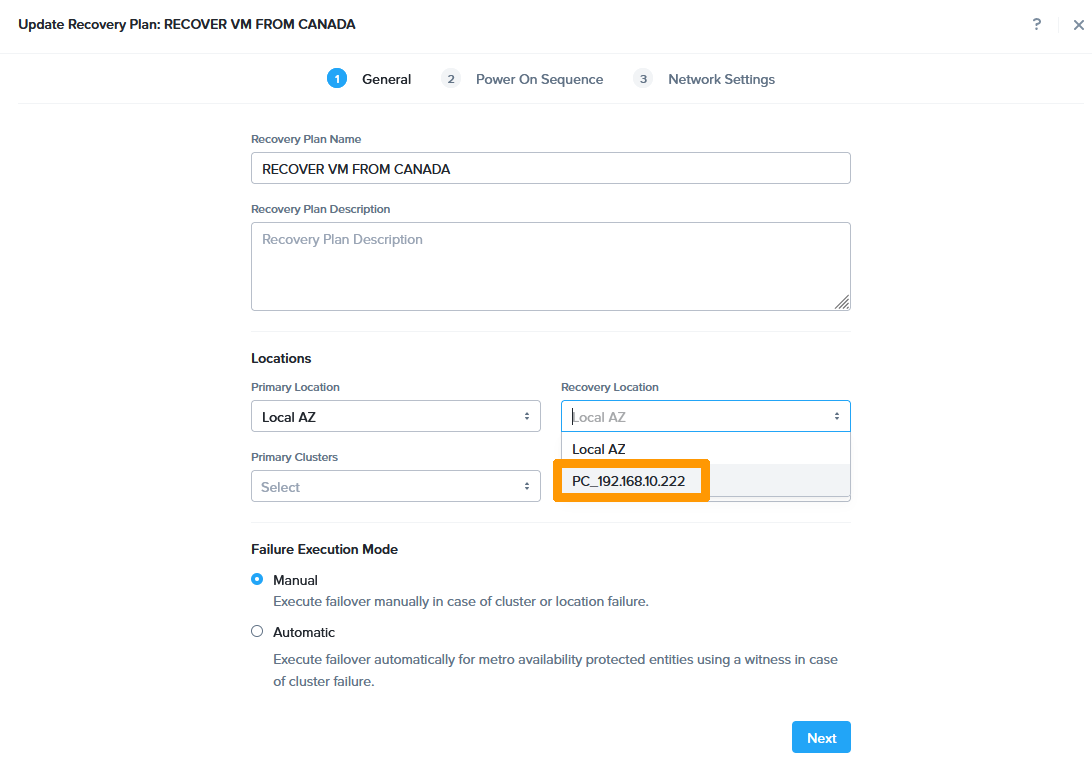
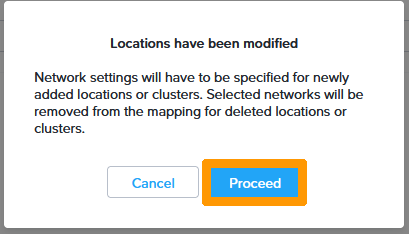
Now that the source and destination of the disaster recovery plan have changed, click Next.
Click Proceed.
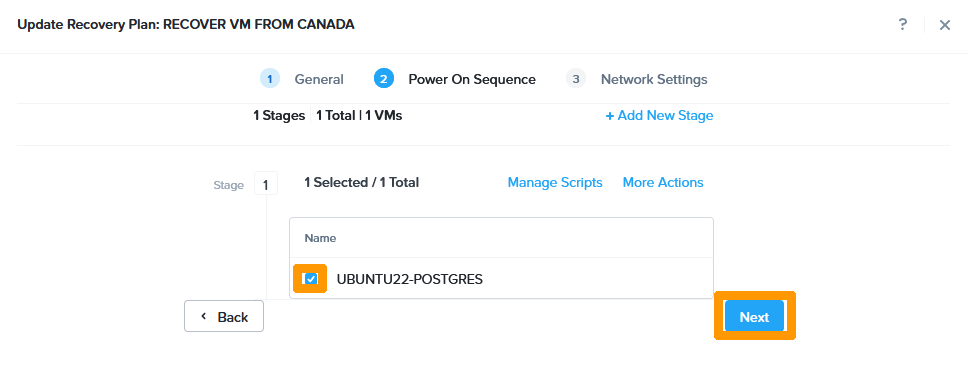
Select the Virtual Machine that you want to start during the disaster recovery plan and click Next.
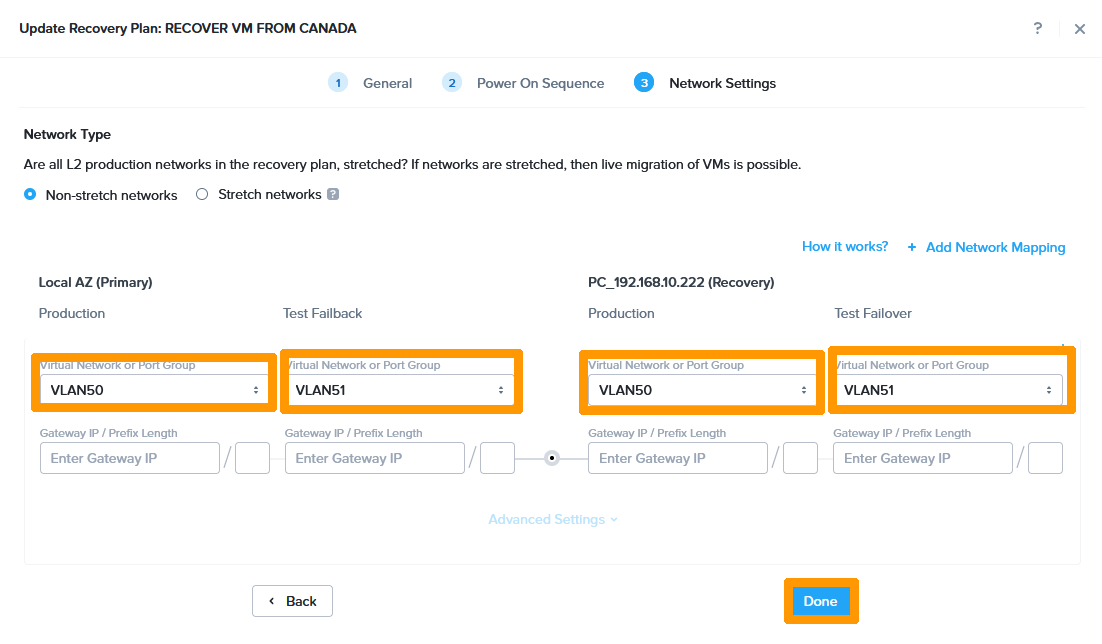
On the primary site, choose these options:
- Production:
Production VLAN - Test Failback:
Test VLAN
At the destination site, choose these options:
- Production:
Production VLAN - Test Failover:
Test VLAN
Then click Done.
The disaster recovery plan has been modified to allow the virtual machines in the cluster to be switched from the French to the Canadian virtual machines.
If you want to return to the original operation, you will need to failover, change replication, and change the disaster recovery plan.
Enabling disaster recovery plan following an incident on the original cluster
The disaster recovery plan is also used in the event of a problem with the original cluster. In this case, the activation will be done without the data modified since the last synchronisation.
If a synchronous replication solution is used, no data loss will occur.
In our case, replication is scheduled every 15 minutes, the risk of data loss can, in the worst case, corresponds to this duration.
From Prism Central, connect to the cluster that is receiving replicas.
From the main menu, choose Recovery Plan from the Data Protection submenu.
Select the Disaster Recovery Plan with the checkbox and click the Actions button.
Choose Failover from the menu.
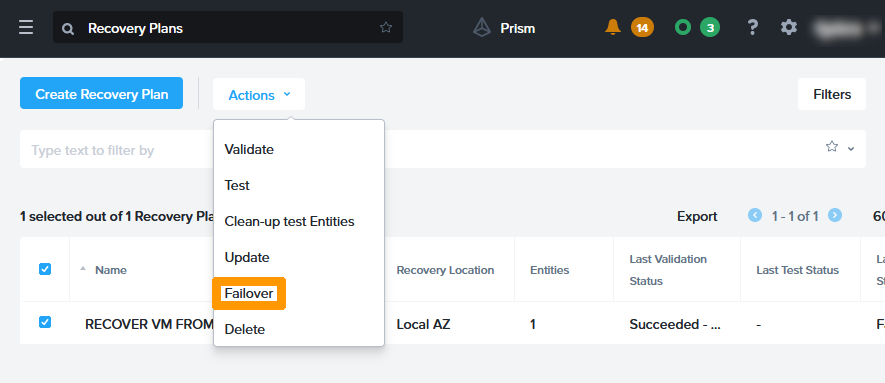
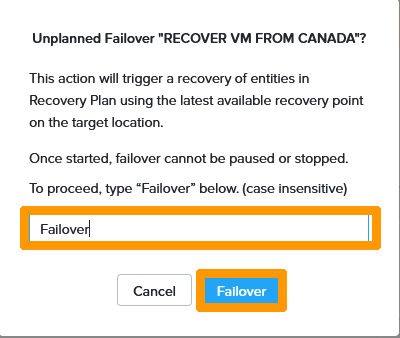
Check Unplanned Failover and click Failover
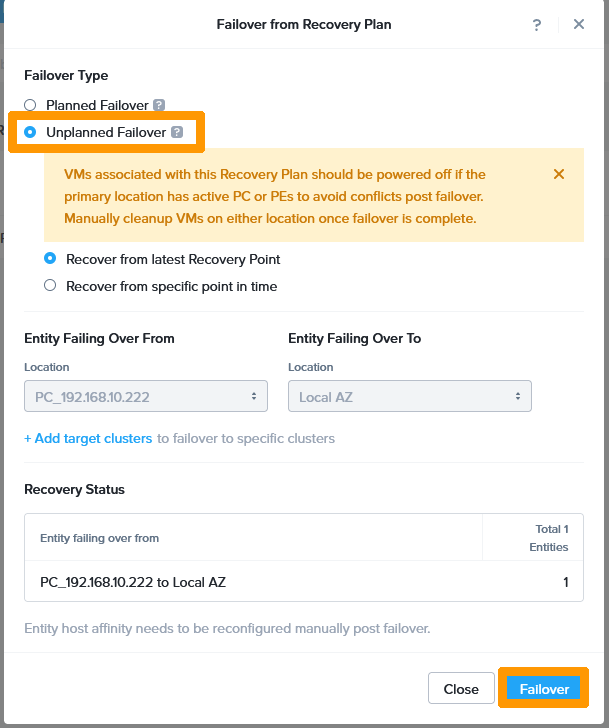
Type Failover in the confirmation field and click Failover
The virtual machine that is a member of the disaster recovery plan will boot to the destination cluster with the contents of the last replication.
Go further
Disaster Recovery Plan on Nutanix
IPsec interconnect between two sites
If you need training or technical assistance to implement our solutions, contact your sales representative or click on this link to get a quote and ask our Professional Services experts for assisting you on your specific use case of your project.
Join our community of users on https://community.ovh.com/en/.

