Połączenie międzysystemowe IPsec między dwiema lokacjami (EN)
486 wyśw.
Objective
This guide will show you how to interconnect two Nutanix clusters, provided by OVHcloud through an IPsec VPN. To do this, we will replace the OVHgateway virtual machines that provide internet access with a gateway under the pfSense operating system.
OVHcloud provides services for which you are responsible, with regard to their configuration and management. It is therefore your responsibility to ensure that they function correctly.
This guide is designed to assist you in common tasks as much as possible. Nevertheless, we recommend contacting a specialist service provider or reaching out to our community if you experience any issues.
Requirements
- Two Nutanix clusters provided by OVHcloud, on different sites
- Access to the OVHcloud Control Panel
- Access to your clusters via Prism Central
- A different private IP addressing scheme applied per cluster
- Being familiar with uses for an IPsec VPN using the Nutanix Disaster Recovery Plan guide
Instructions
In this guide, we will carry out part of the installation on the cluster in Canada, and another part in France. Below is the list of tasks to be performed in stages on each cluster:
Step 1 Solution Overview
Step 2 Gateway Replacement in Canada
Step 2.1 Downloading sources for pfSense installation
Step 2.2 Creating the virtual machine GW-PFSENSE
Step 2.3 Shutting down the virtual machine OVH-GATEWAY
Step 2.4 Retrieving the public address in the OVHcloud Control Panel
Step 2.5 Starting the virtual machine GW-PFSENSE
Step 2.6 Installing pfSense
Step 2.7 Ejecting pfSense CDROM from virtual machine GW-PFSENSE
Step 2.8 Configuring pfSense IP addresses through the console
Step 2.9 Configuring certain options through the Web interface
Step 2.9.1 Changing the default password for pfSense
Step 2.9.2 Adding a rule to allow remote administration from a public address
Step 3 Gateway configuration in France
Step 3.1 Downloading sources for pfsense installation
Step 3.2 Creating the virtual machine GW-PFSENSE
Step 3.3 Shutting down the virtual machine OVH-GATEWAY
Step 3.4 Retrieving the public address on the OVHcloud Control Panel
Step 3.5 Starting the virtual machine GW-PFSENSE
Step 3.6 Installing pfSense
Step 3.7 Ejecting pfSense CDROM from virtual machine GW-PFSENSE
Step 3.8 Configure pfSense IP addresses through the console
Step 3.9 Configuring certain options through the Web interface
Step 3.9.1 Changing the default password for pfSense
Step 3.9.2 Adding a rule to allow remote administration from a public address
Step 4 Setting up IPsec VPN
Step 4.1 Setting Up the site in Canada
Step 4.1.1 Setting up IPsec VPN in France
Step 4.1.2 Adding a firewall rule to allow network flow through IPsec VPN between Canada and France
Step 4.2 Setting up your website in France
Step 4.2.1 Setting up IPsec VPN to Canada
Step 4.2.2 Adding a firewall rule to allow network flow through IPsec VPN between Canada and France
Step 1 Solution Overview
We will interconnect two Nutanix clusters, one in Canada and the other in France, both in OVHcloud data centres.
They each use a different IP address scheme, as follows:
- Cluster in Canada: 192.168.10.0/24
- Cluster in France: 192.168.0.0/24
To allow this configuration, we will replace the OVHgateway virtual machine on each site with a virtual machine with the pfSense operating system, which will continue to provide outbound internet access and manage the VPN tunnel using IPsec.
Step 2 Bridge replacement in Canada
Step 2.1 Downloading sources for pfSense installation
Download an ISO image for the pfSense installation from this link: Downloading pfSense.
Using this documentation, add the pfSense ISO image to your Nutanix cluster.
Step 2.2 Creating the GW-PFSENSE virtual machine
Create a virtual machine with these settings:
- Name:
GW-PFSENSE - Storage1:
60 GB HDD - Storage2:
DVD drive connected to the pfSense ISO file - RAM:
4 GB - CPU:
2 vCPU - Network:
two network cards on the AHV network: **Base**
You can use our guide on virtual machine management to create this virtual machine.

Step 2.3 Shutting down the OVH-GATEWAY virtual machine
To avoid duplicate IP addresses on the network, stop the OVHgateway virtual machine before starting the new virtual machine on pfSense.
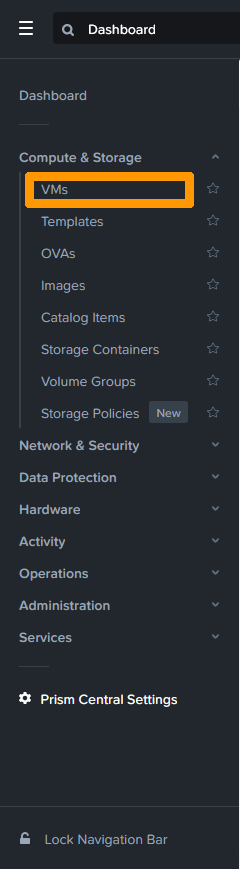
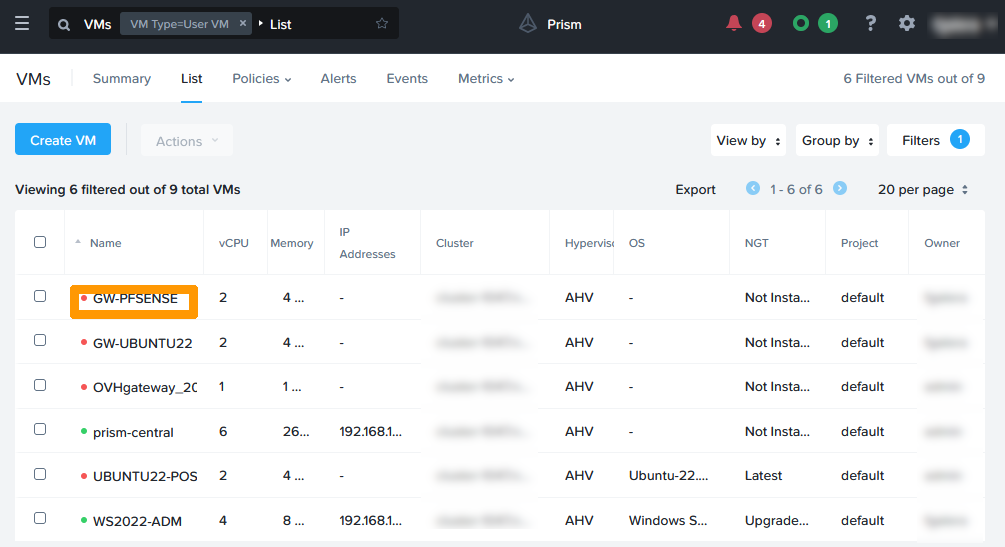
Via Prism Central, click in the top left on the main menu.
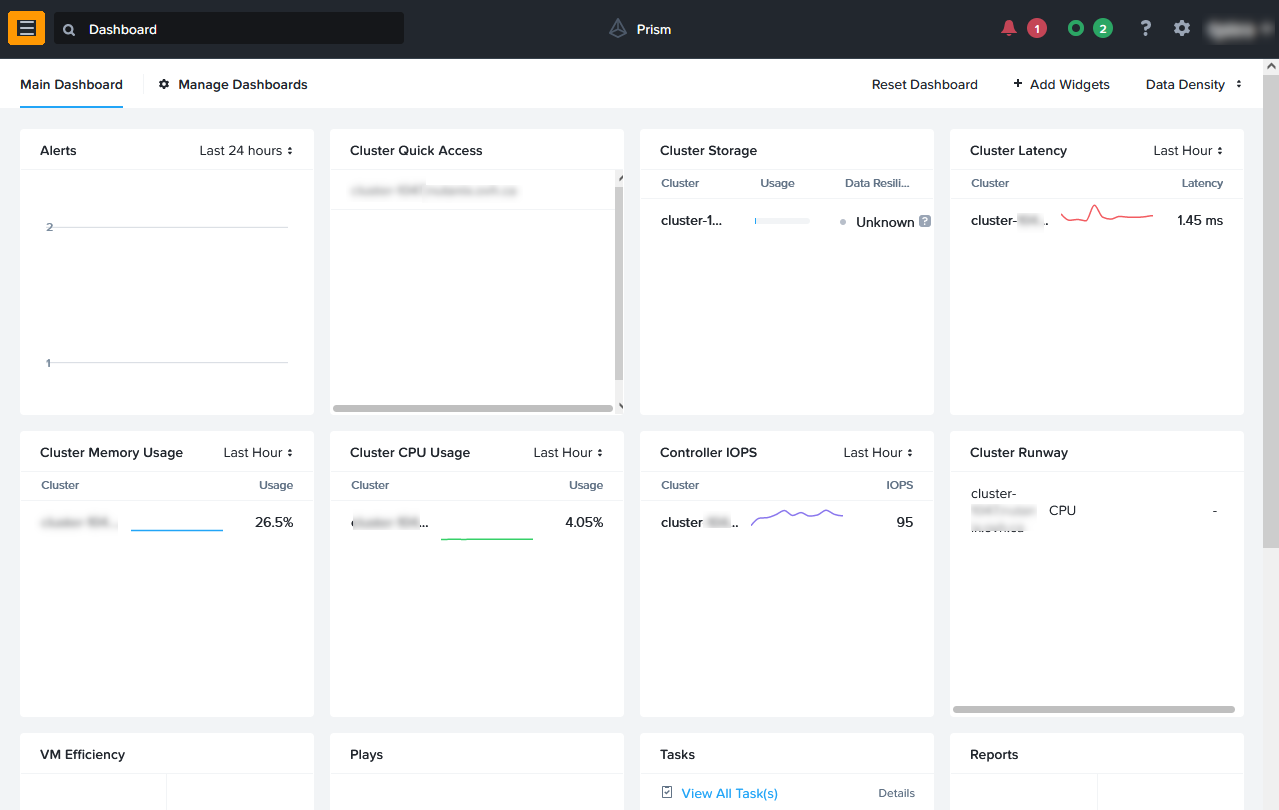
Click VMs.
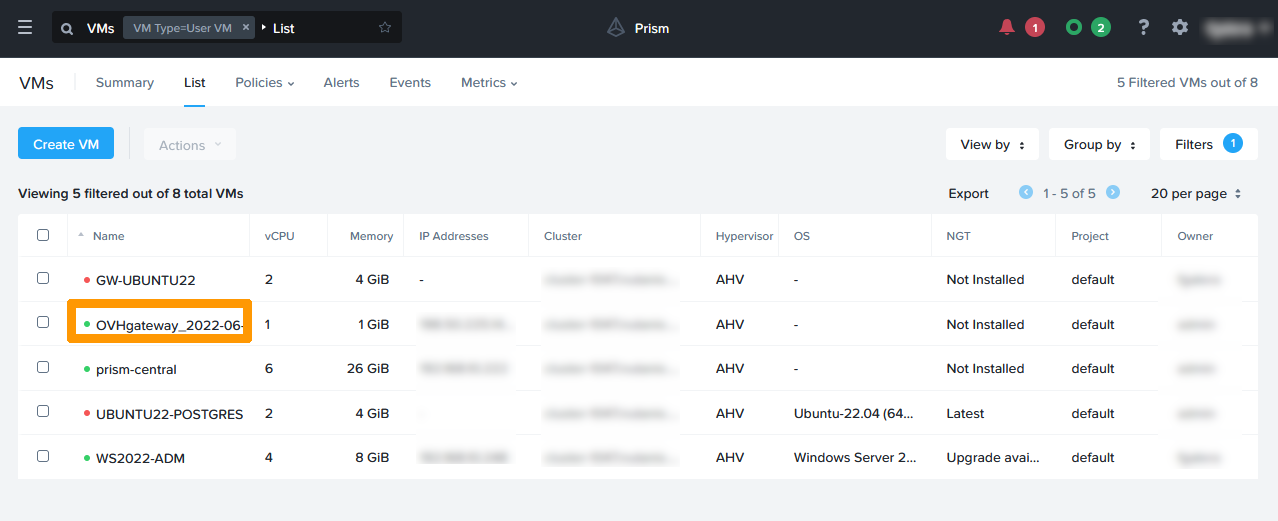
Click on the OVHgateway virtual machine.
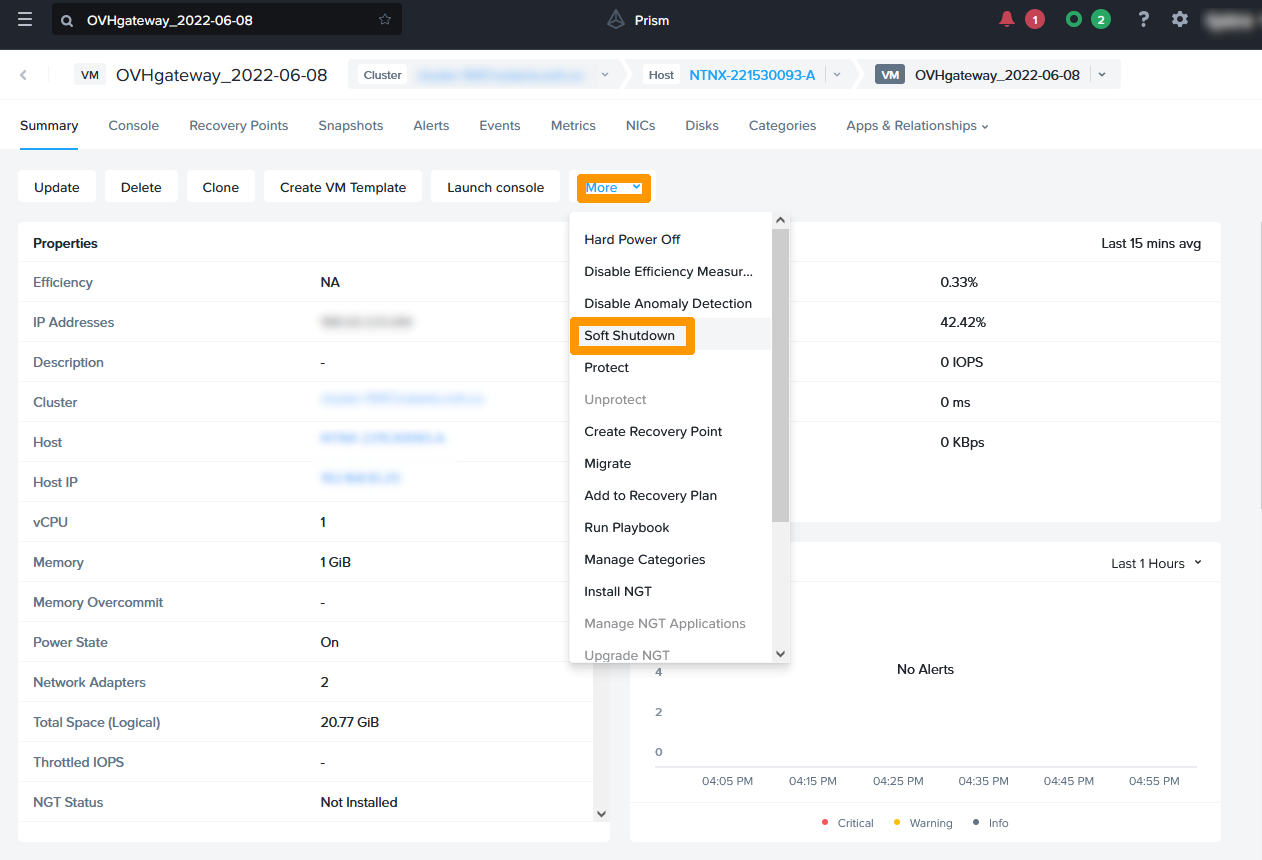
From the More menu at the top, click Soft Shutdown.
Step 2.4 Retrieving the public address in the OVHcloud Control Panel
Retrieve information about the OVHcloud gateway network settings.
Log in to the OVHcloud Control Panel, select your Nutanix cluster, and find the information in the IPFO field.
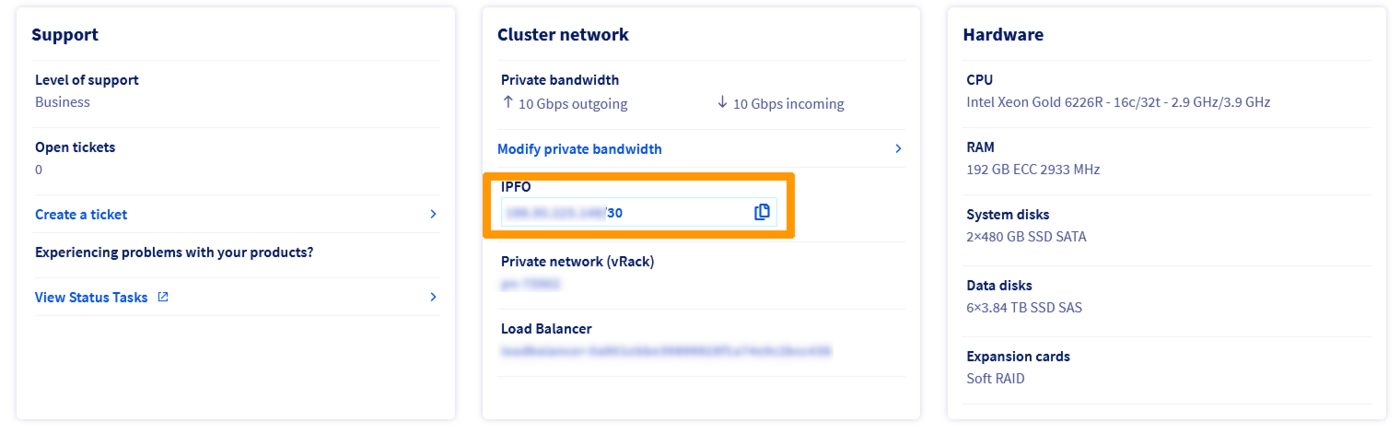
What is called IPFO is a range of 4 addresses. The first and last are reserved, the third is on OVHcloud hardware and serves as an internet gateway. The only usable IP address is the second address in the range.
During installation, we will reuse this information to assign it to the new GW-PFSENSE virtual machine
For example, if the IPFO address displayed on the client site is 123.123.123.4/30, use:
- 123.123.123.5 for the WAN interface address.
- 123.123.123.6 for the gateway on the WAN interface.
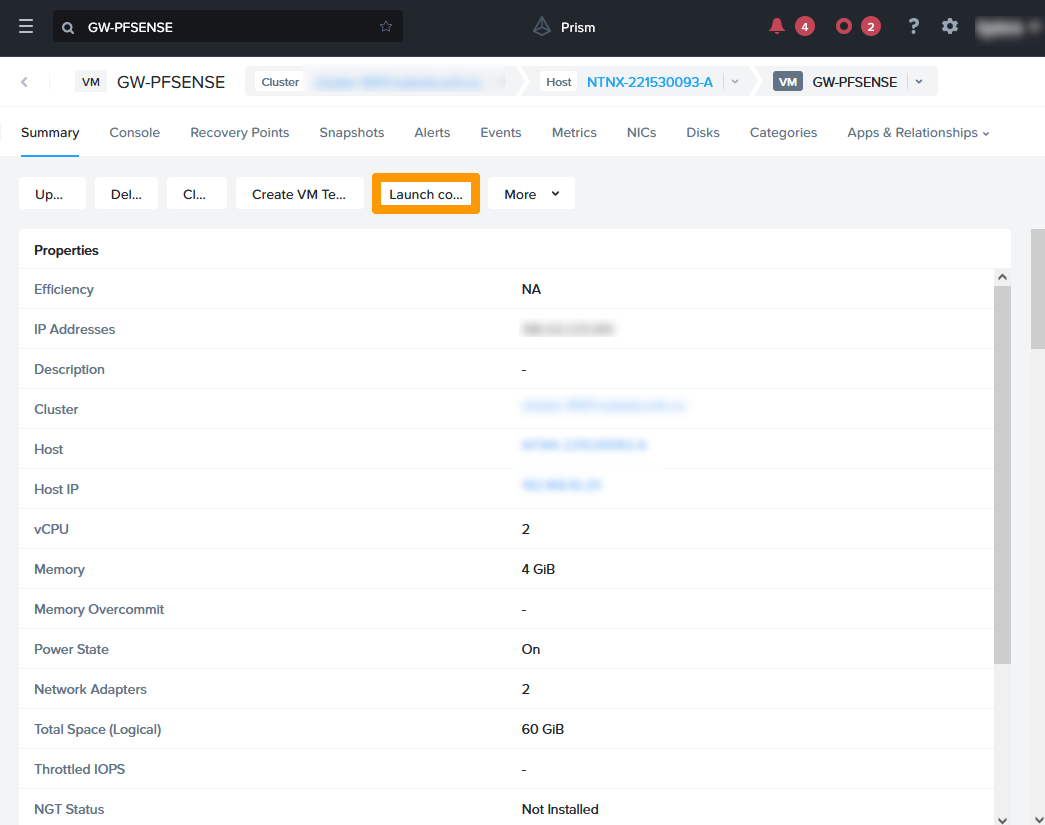
Step 2.5 Start the GW-PFSENSE virtual machine
Go back to virtual machine management in Prism Central and click on GW-PFSENSE.
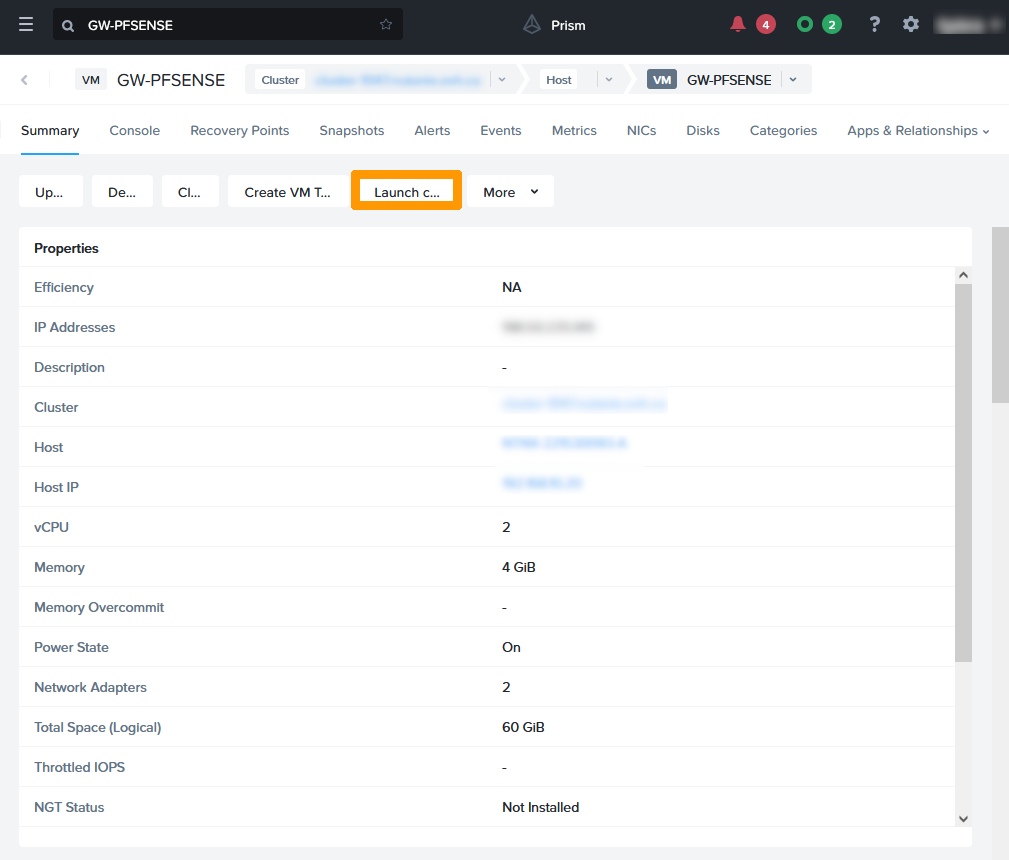
Select Power On from the More menu.
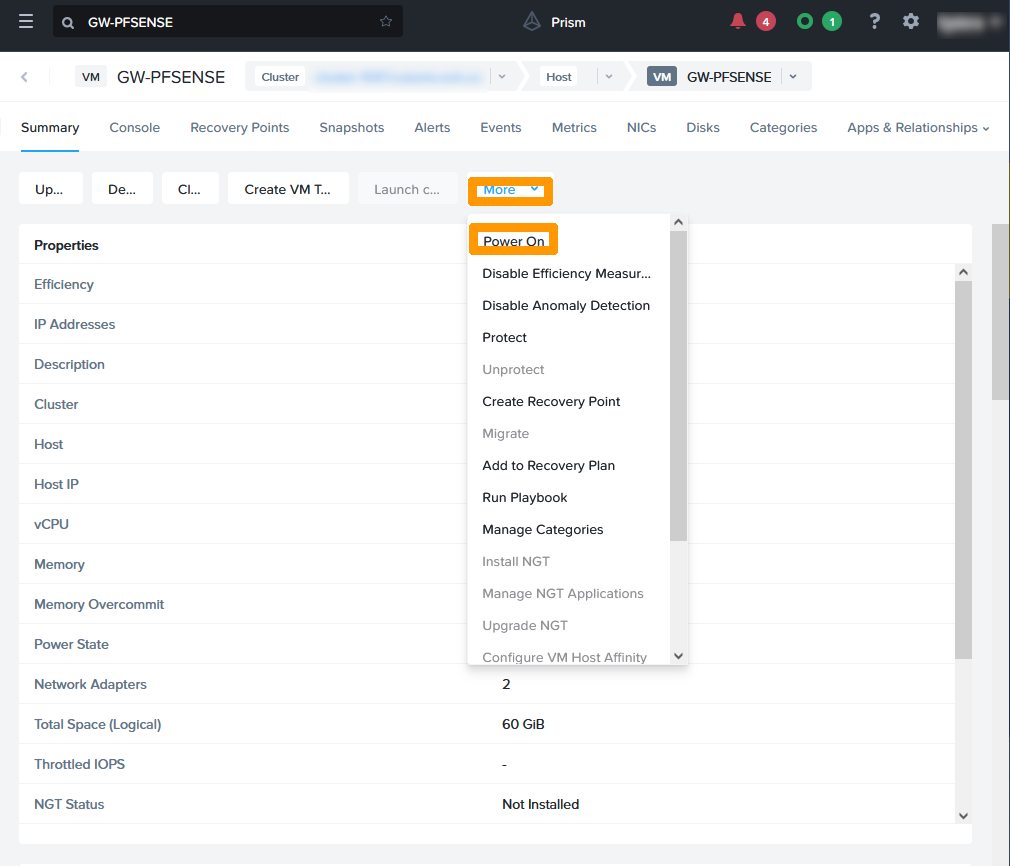
Click Launch console.
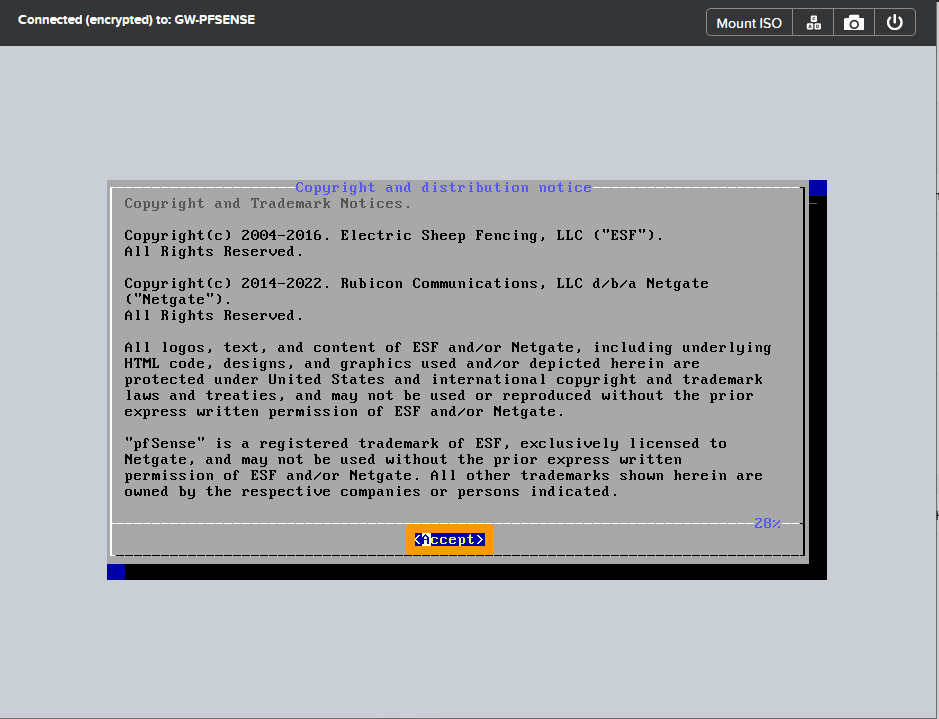
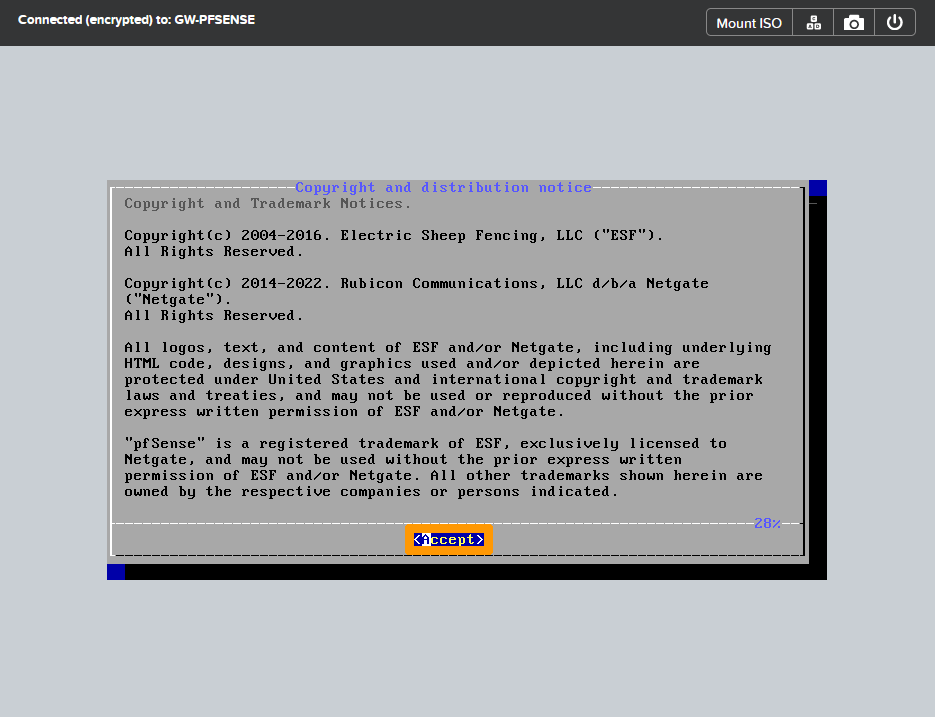
Step 2.6 Installing pfSense
Review the pfSense licence information and press the Enter key to accept it.
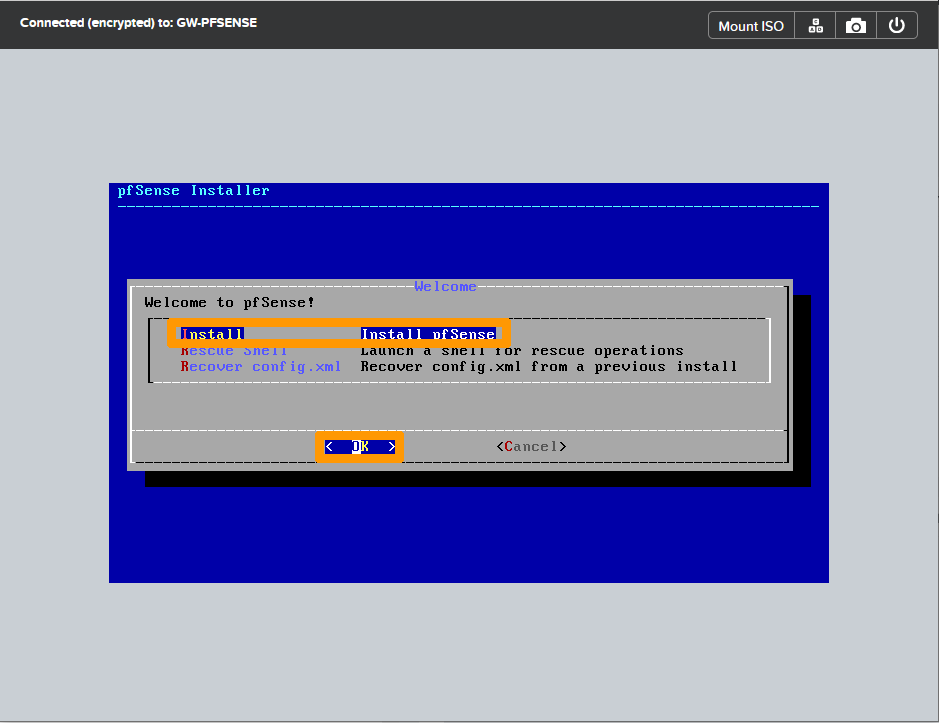
Choose Install, switch to OK with the Tab key and press Enter.
Select Continue with default keymap, go to Select with the Tab key and press the Enter key.

Select Auto (ZFS), switch to OK with the Tab key, and then press the Enter key.
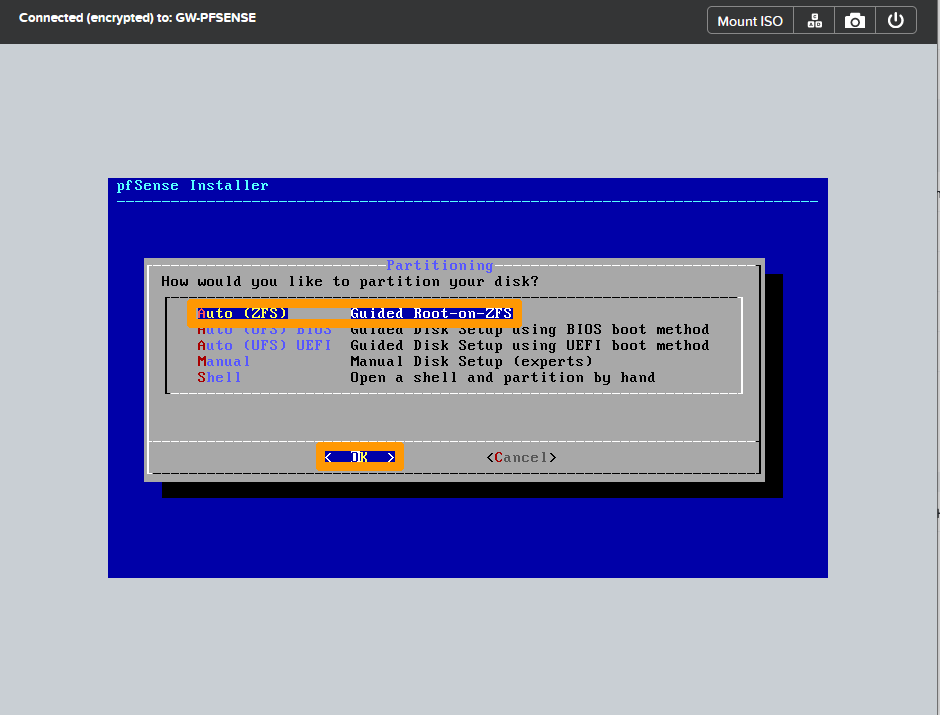
Go to Select with the Tab key and press Enter.
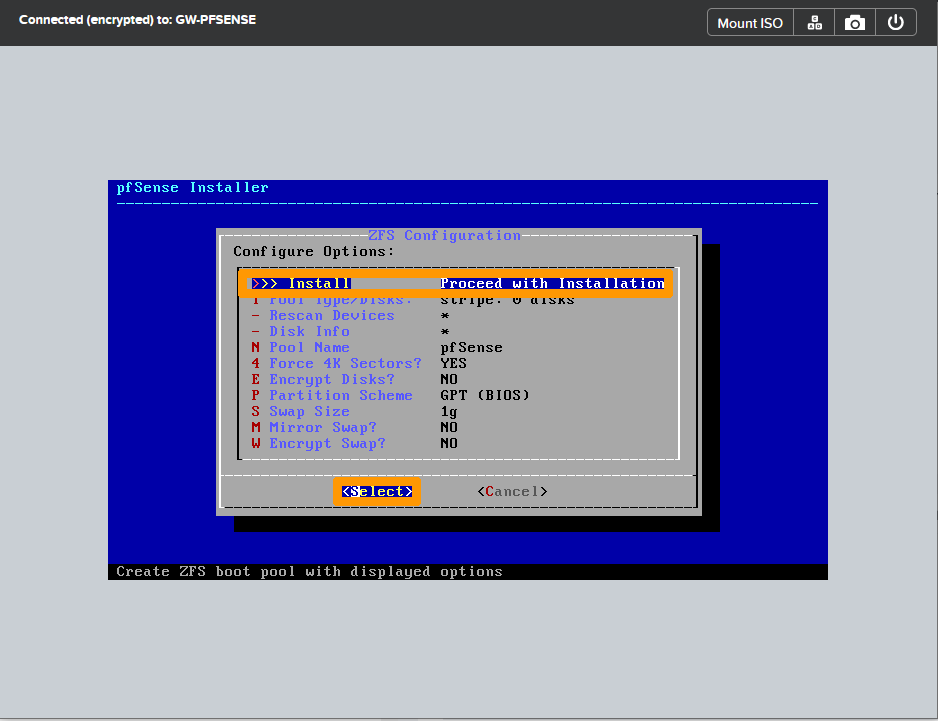
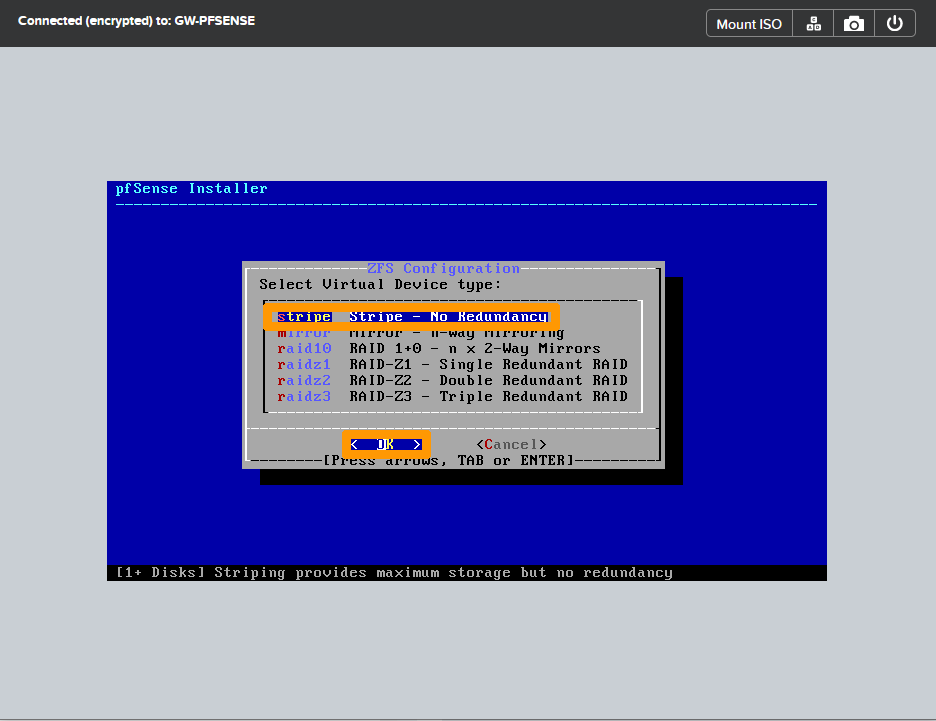
Select Stripe, switch to OK with the Tab key, and then press Enter.
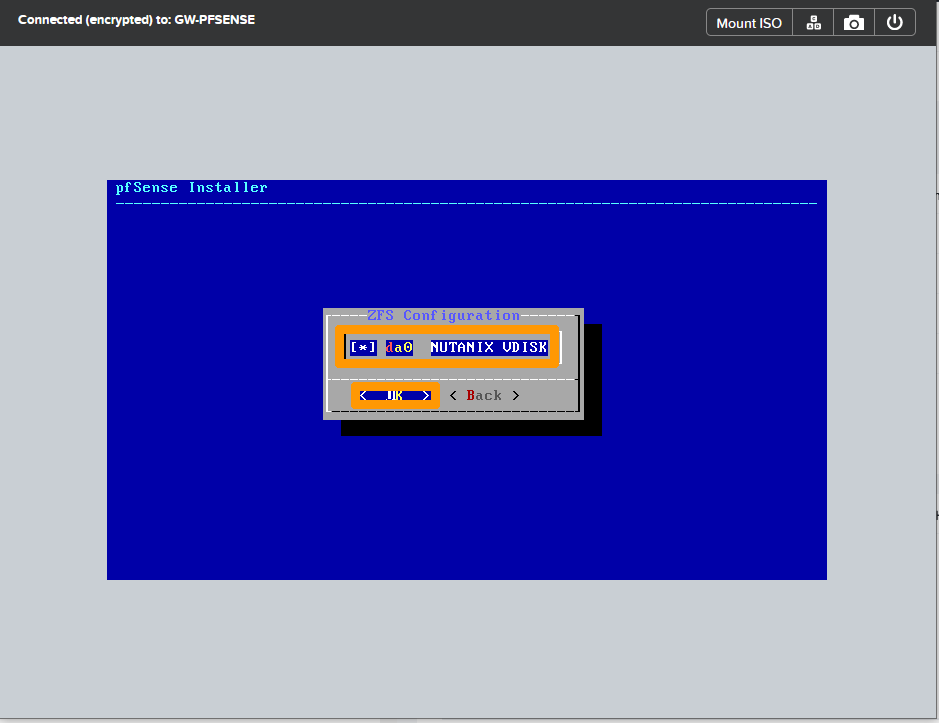
Select NUTANIX VDISK with the Space bar. Then go to OK with the Tab key and press Enter.
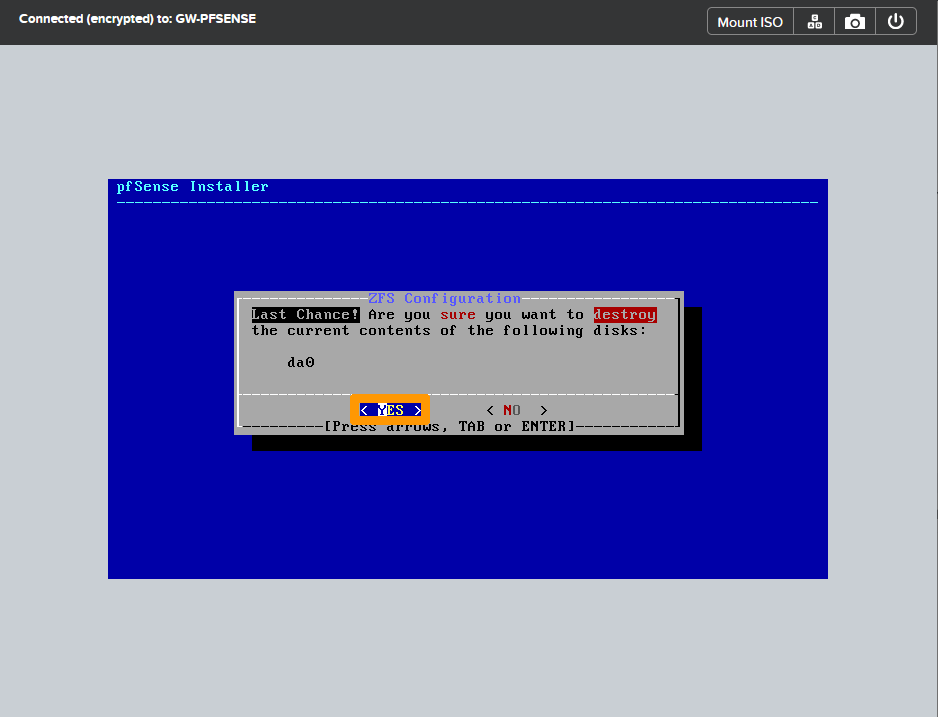
Go to YES with the Tab key and press the Enter key.
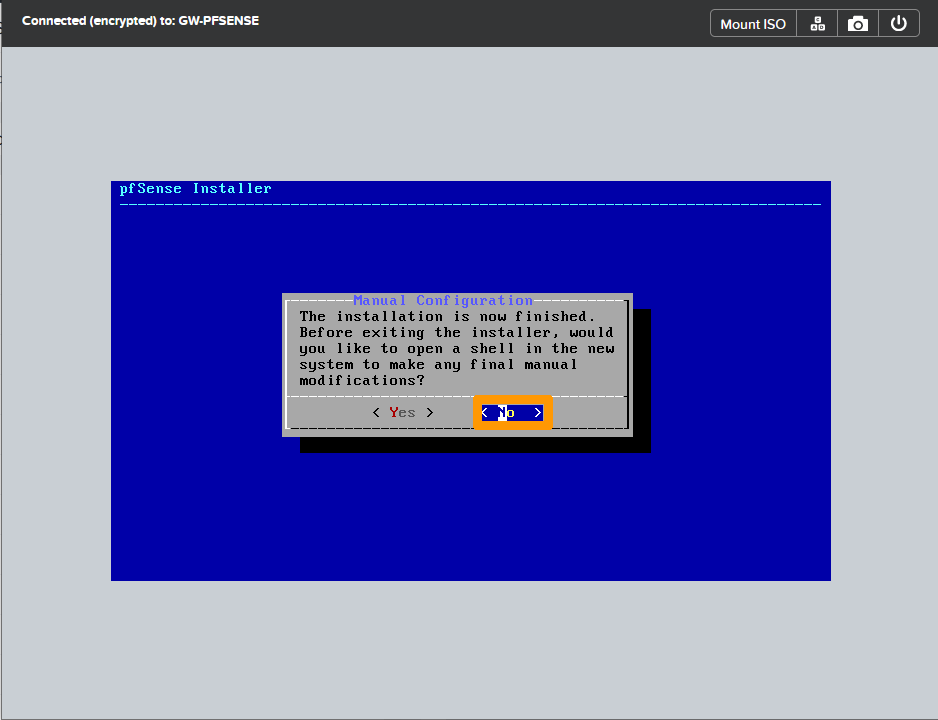
Choose NO with the Tab key and press the Enter key.
Select Reboot and press the Enter key.
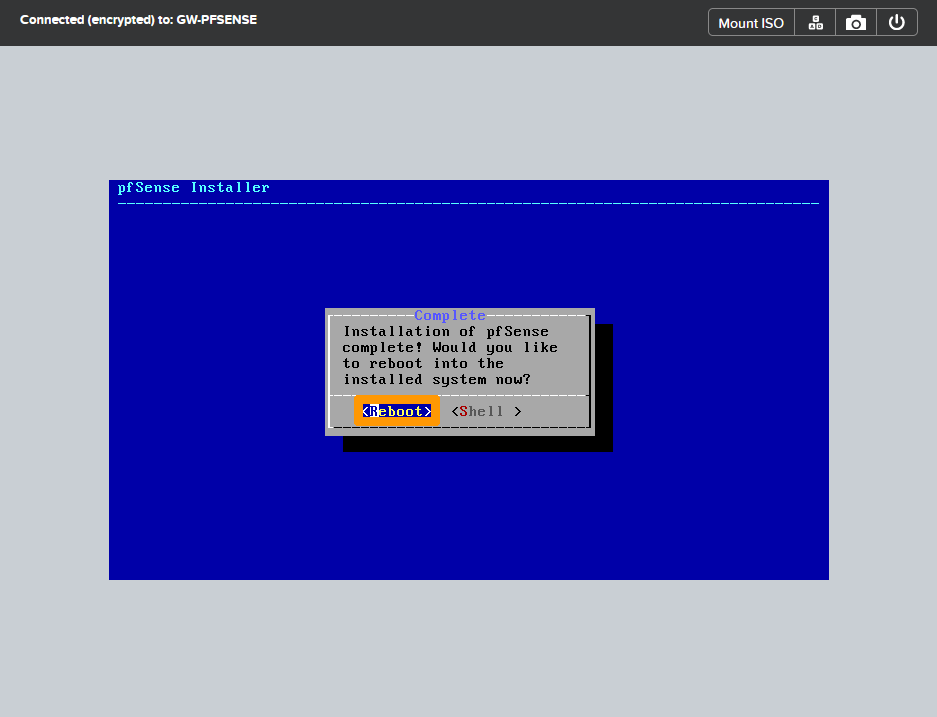
Step 2.7 Eject the pfSense CDROM from the GW-PFSENSE virtual machine
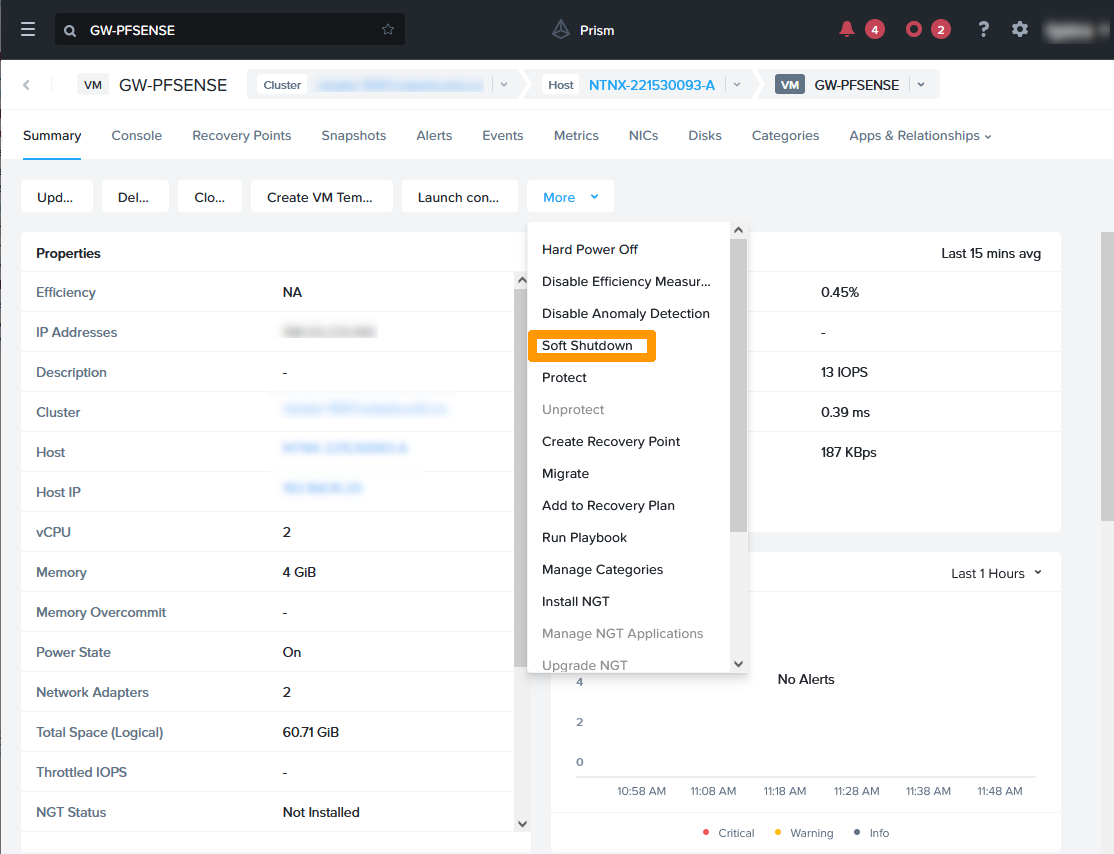
From Prism Central, go back to GW-PFSENSE virtual machine management and perform the following steps to eject the CDROM.
Click on Soft Shutdown in the More menu on the GW-PFSENSE virtual machine to stop this virtual machine.
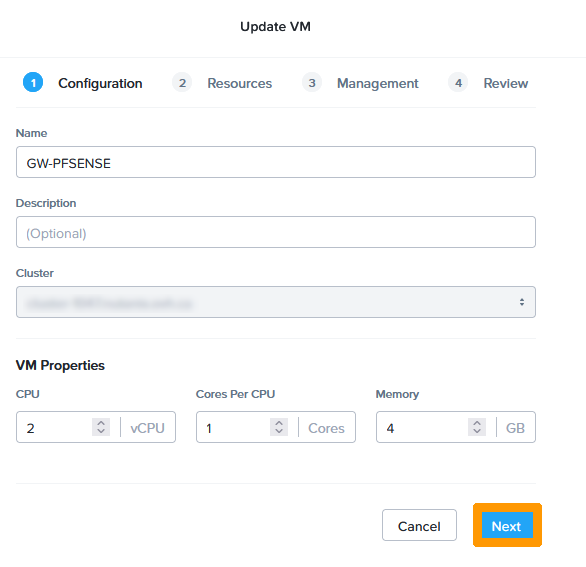
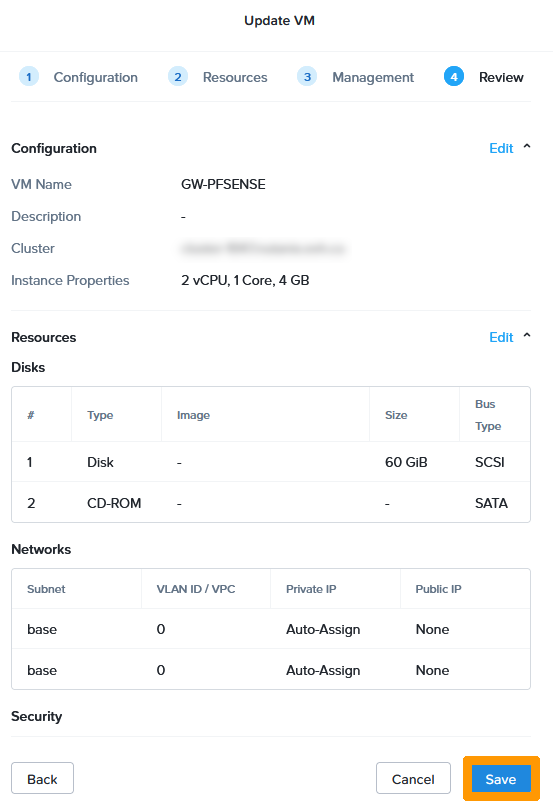
Click Update.
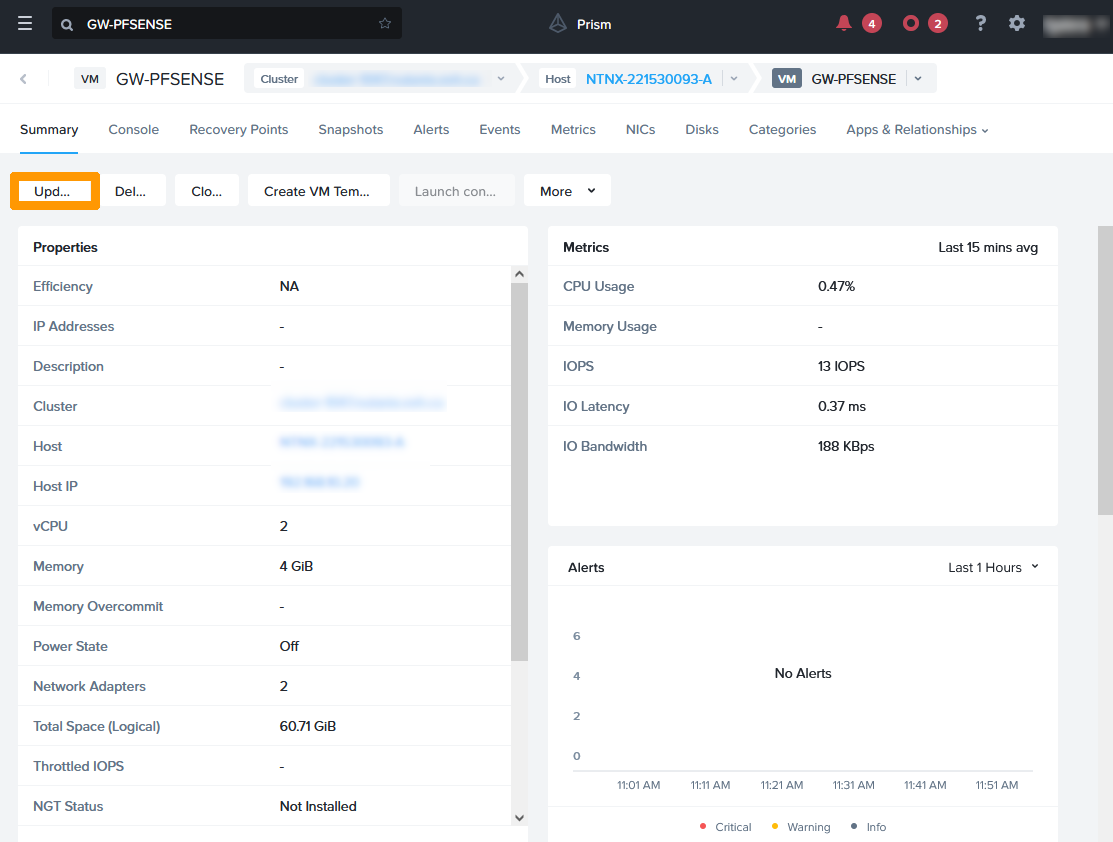
Click Next.
Click the Eject icon next to the CDROM.

Click Next.
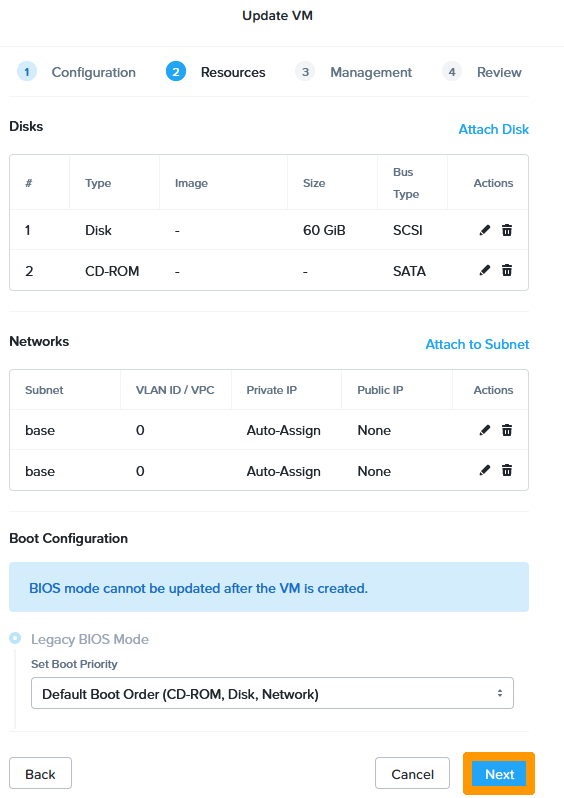
Click Next.
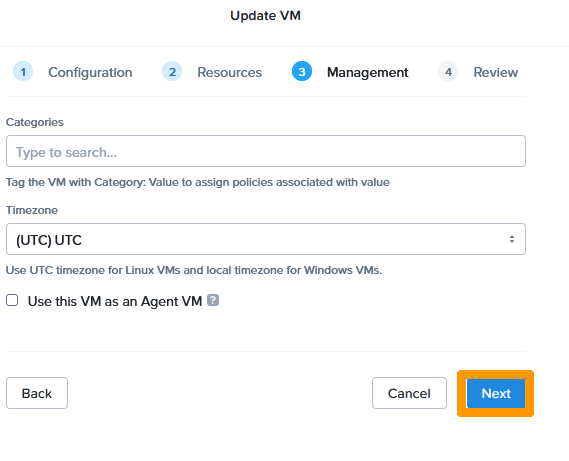
Click Save.
Click Power On in the More menu.
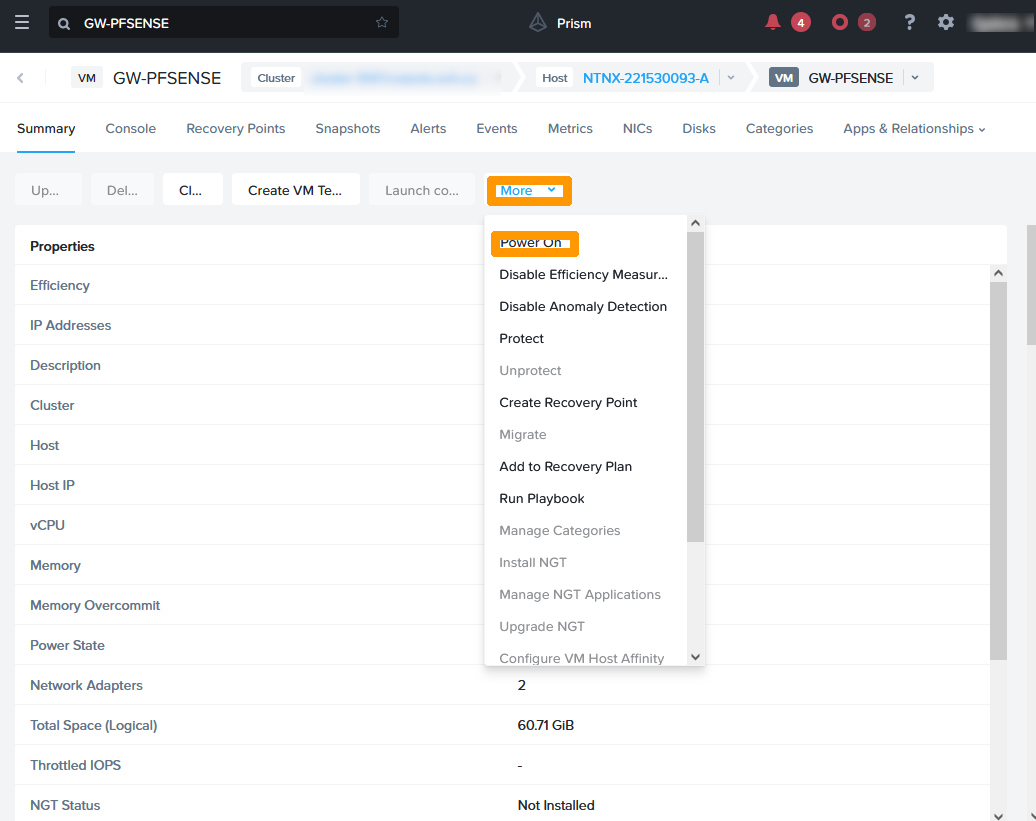
Click Launch Console to continue the installation after startup.
Step 2.8 Configure pfSense IP Addresses Through the Console
We will configure the pfSense gateway IP addresses as follows:
- WAN interface: Use this part of the guide “Retrieving a public address in the OVHcloud Control Panel” to assign the IP address and gateway on this interface.
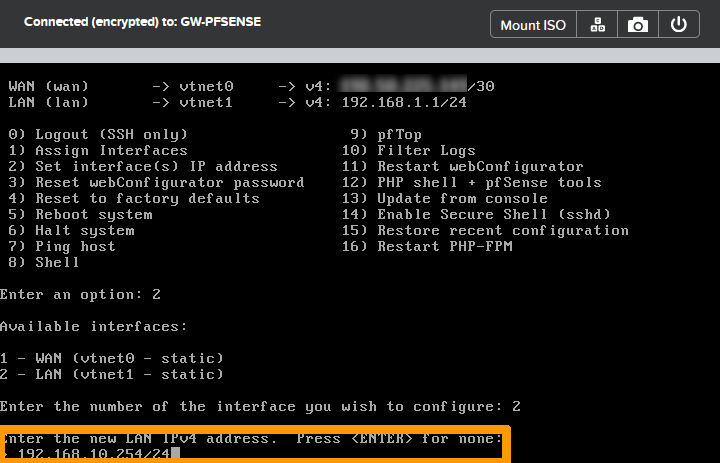
- LAN Interface: 192.168.10.254/24 which is the gateway address of the Nutanix cluster private network followed by the subnet mask.
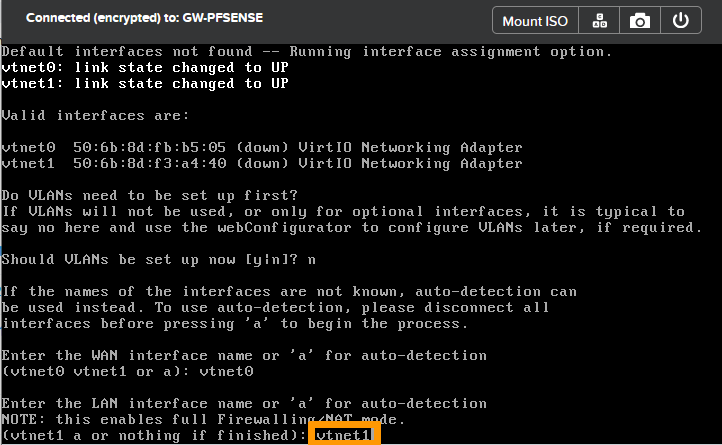
Accept the licence by pressing the Enter key.
Type n and press the Enter key when asked if you need VLANs.
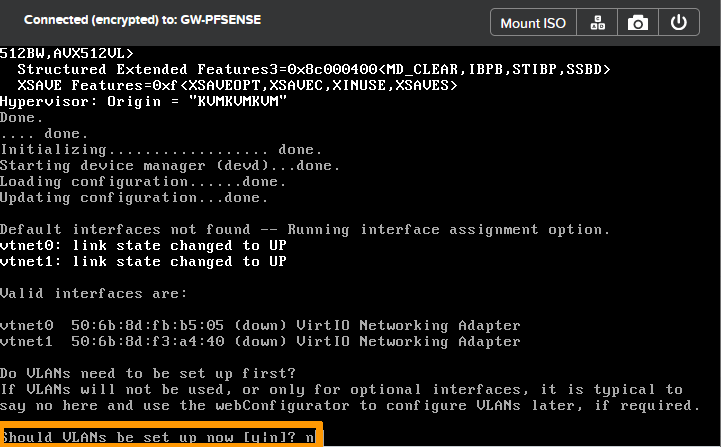
Type vtnet0 as the interface name for the WAN and press Enter.
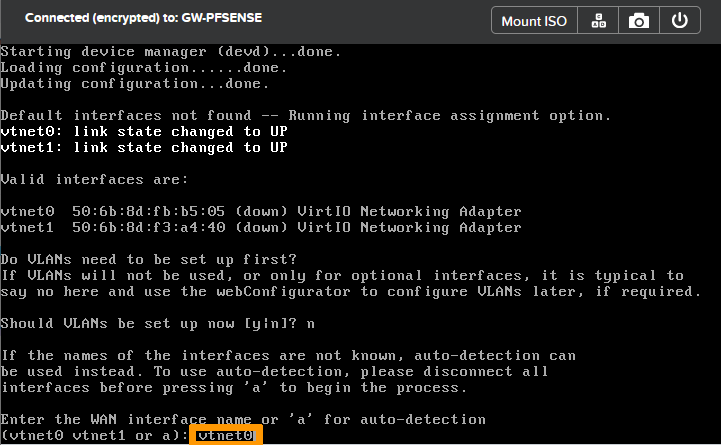
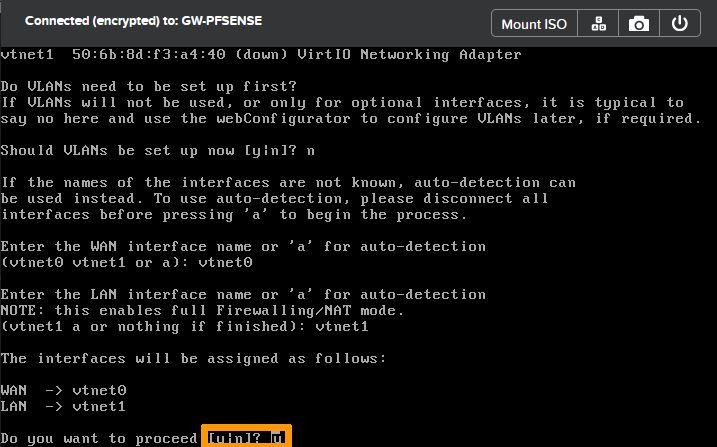
Type vtnet1 as the interface name for the LAN and press Enter.
Confirm the changes by entering y, then press the Enter key.
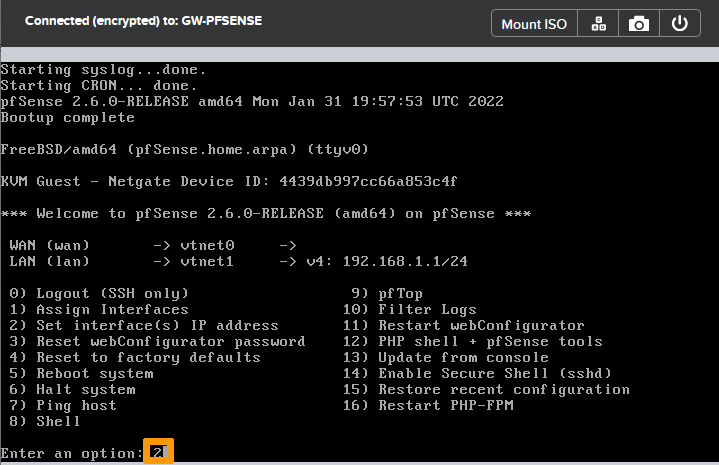
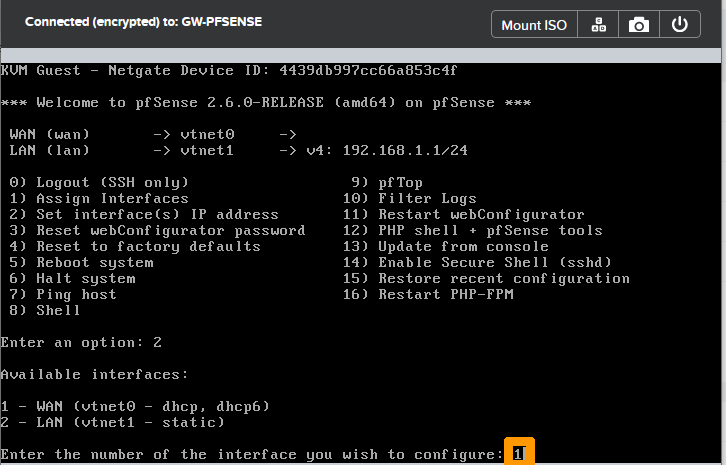
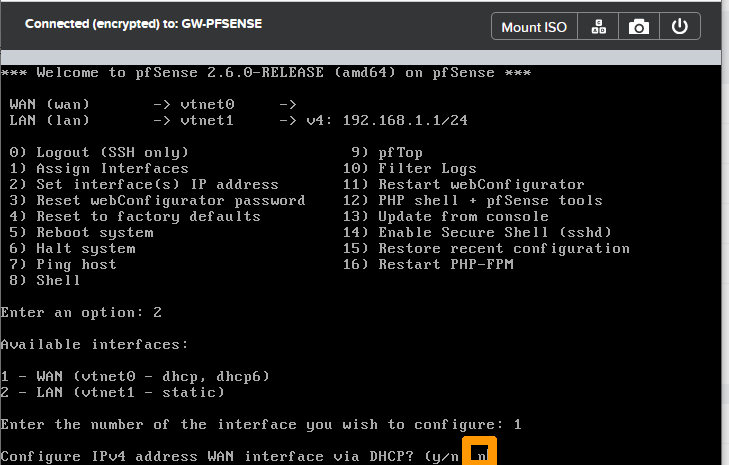
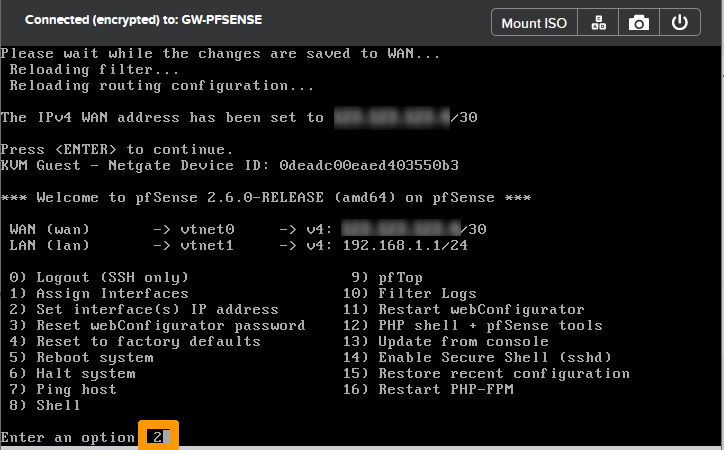
Type 2 to choose Set interface(s) IP address and press Enter.
Select the WAN interface by typing 1 and pressing Enter.
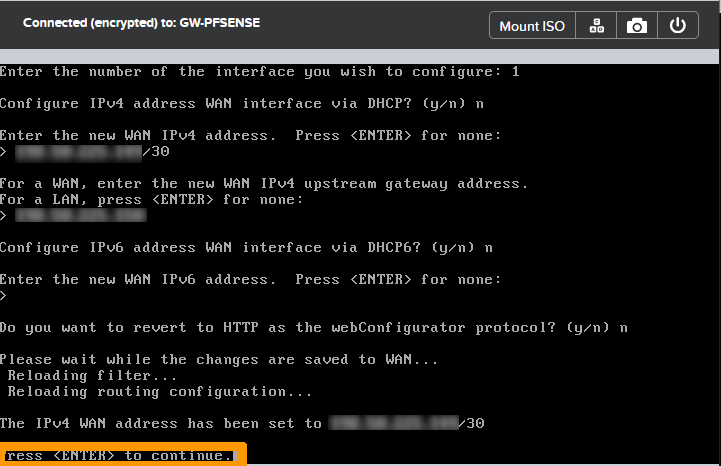
Type n and press Enter when prompted to configure the address by DHCP.
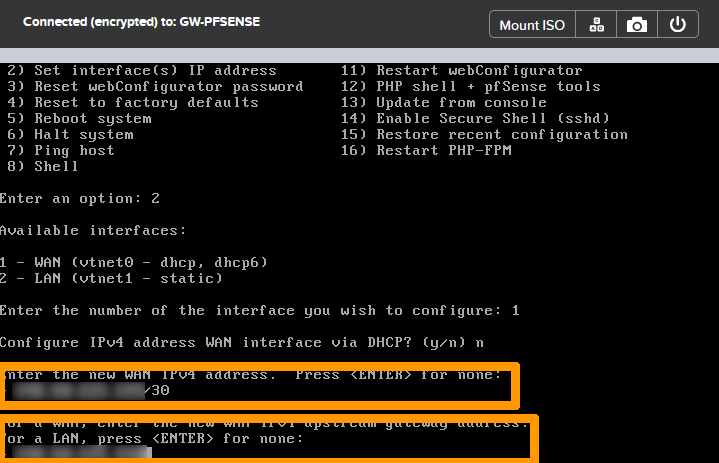
Type the public IP address with the mask and press the Enter key, for example: 123.123.123.5/30.
Then enter the public gateway IP address and press the Enter key, for example: 123.123.123.6.
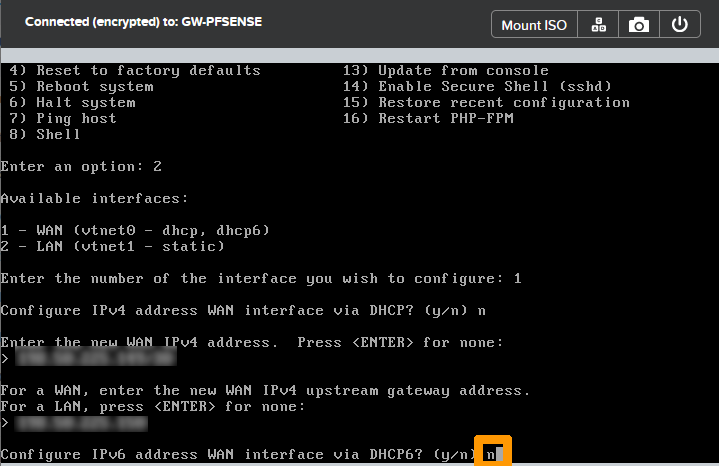
Type n and press the Enter key when the wizard offers you the configuration of the IPv6 address WAN interface via DHCP6.
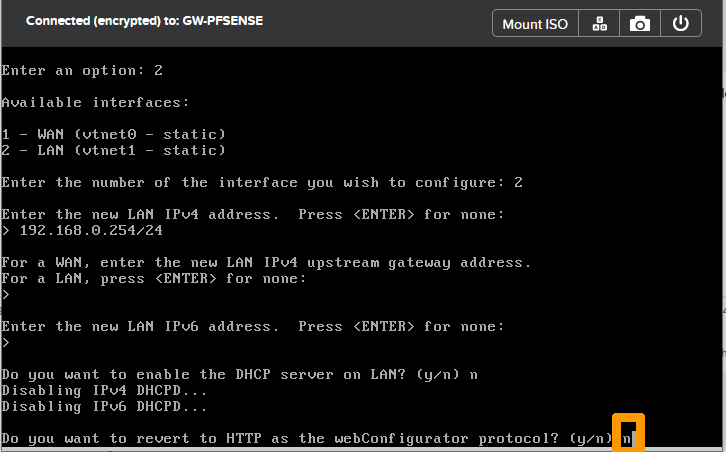
When requested to revert to HTTP as the webConfigurator protocol, type n and press Enter.
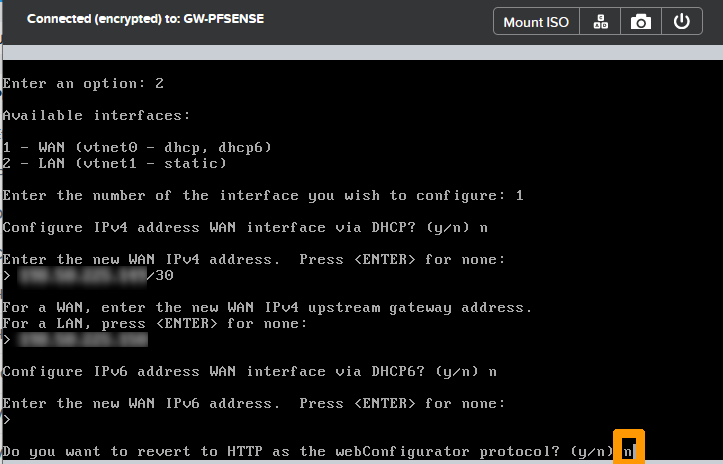
Press Enter to validate the registration of the IP address of the WAN.
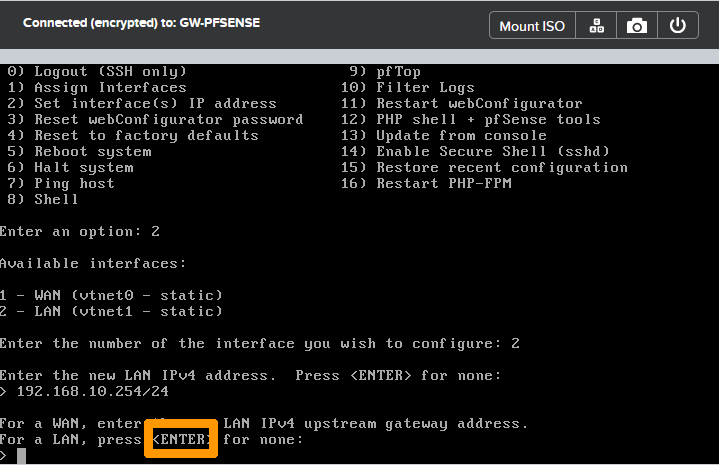
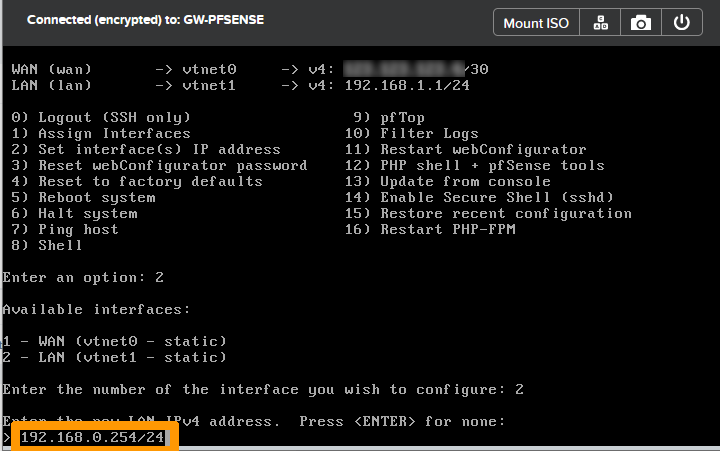
Type 2 and press the Enter key to configure IP addresses.
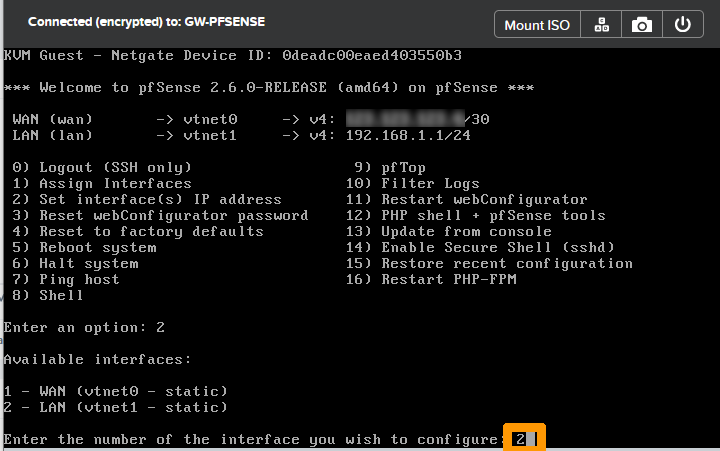
Take option 2 and press the Enter key to change the LAN IP address.
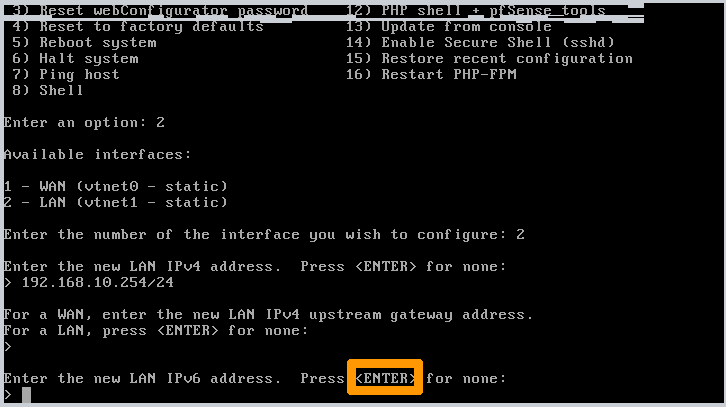
Type the private IP address followed by the mask 192.168.10.254/24 and press the Enter key.
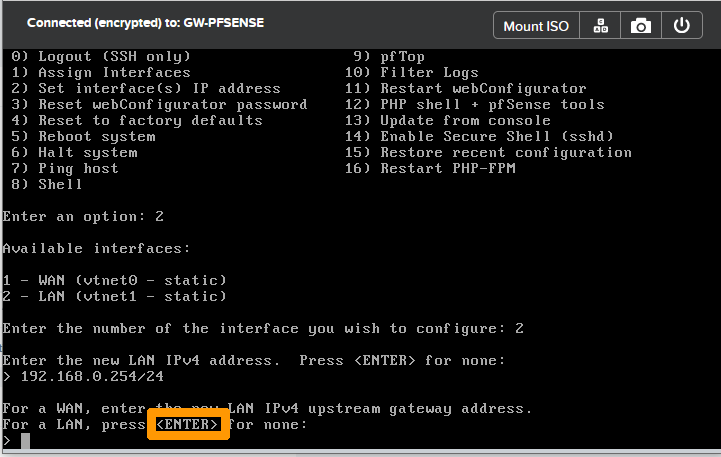
Press the Enter key to not put a gateway on the LAN interface.
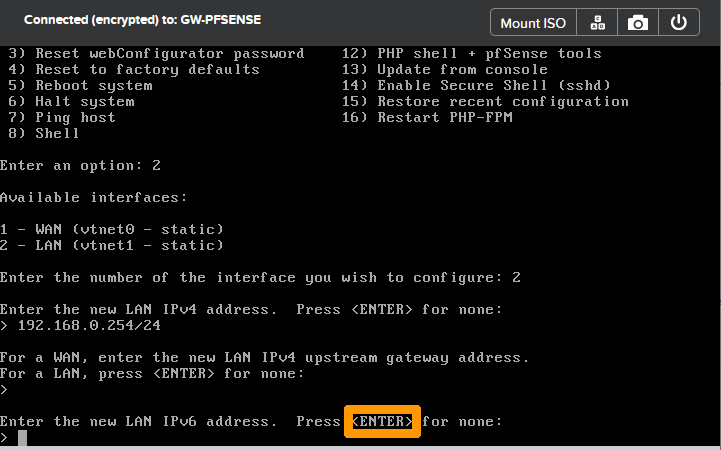
Press the Enter key to disable IPv6 usage.
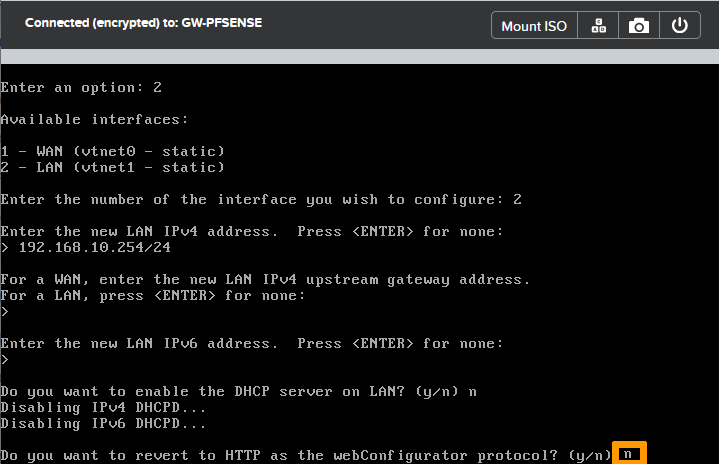
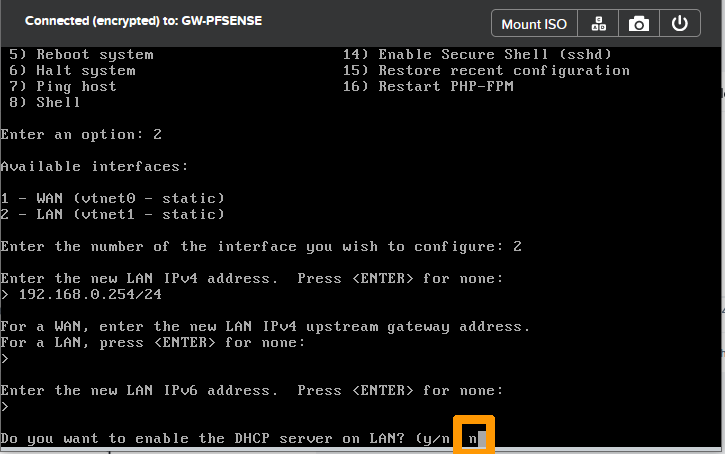
Type n and press the Enter key on the DHCP server activation request.

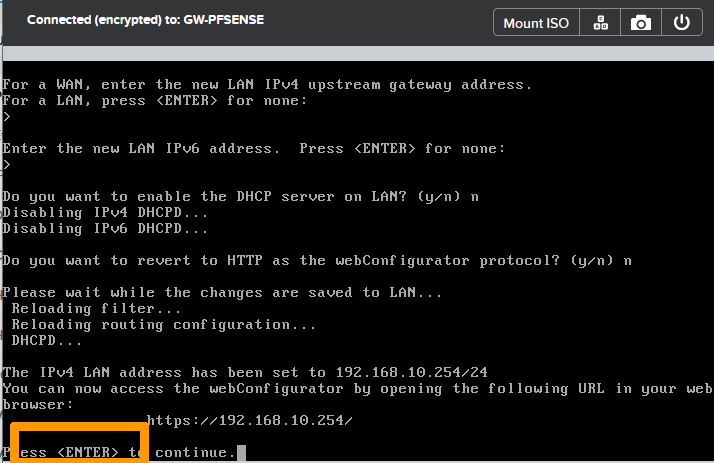
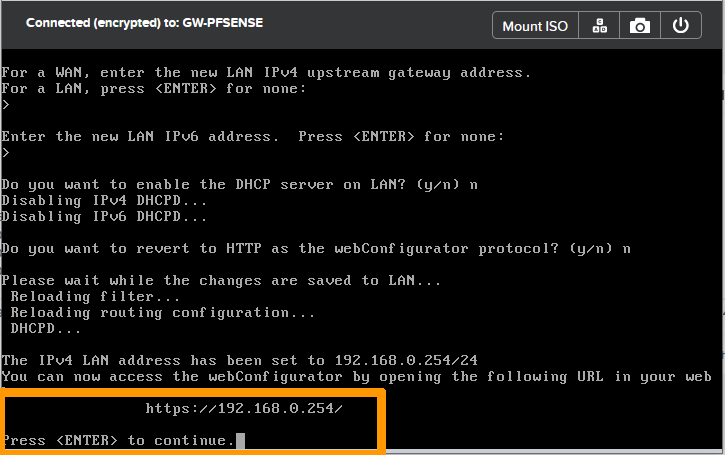
Answer n and press the Enter key when prompted to revert to HTTP as the webConfigurator protocol.
You can now manage the HTTPS gateway on the private network of the Nutanix cluster.
Press the Enter key to complete the command line configuration.
Step 2.9 Configure some options through the web interface
Connect to the pfSense Web Console with the URL https://192.168.10.254 from a cluster virtual machine on the AHV LAN: Base.
Enter the following information:
- User account: admin
- Default password: pfsense
Then click on SIGN IN.

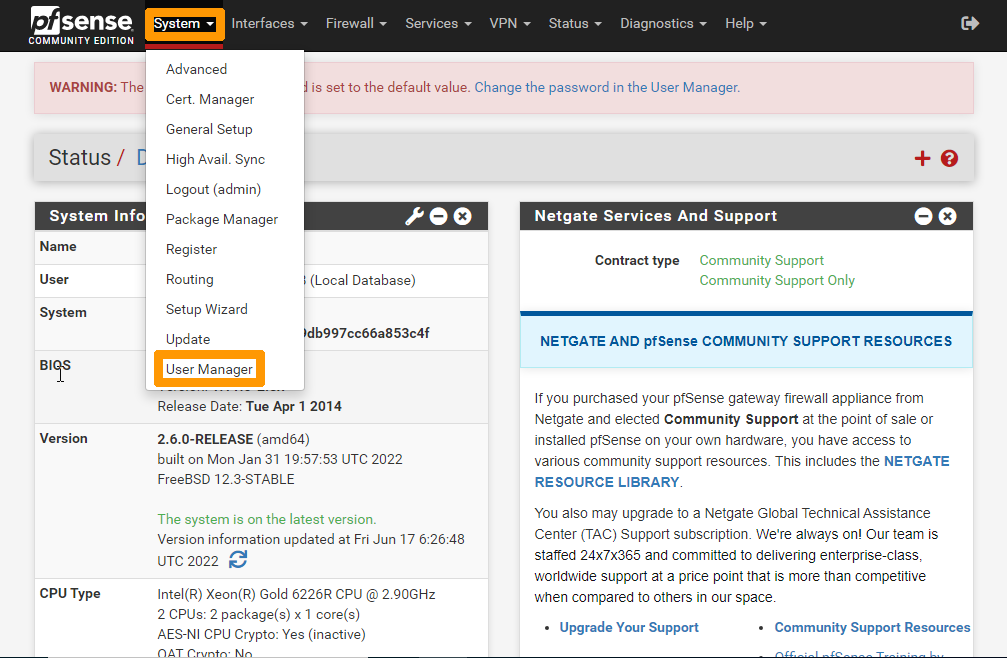
Step 2.9.1 Change the pfSense default password
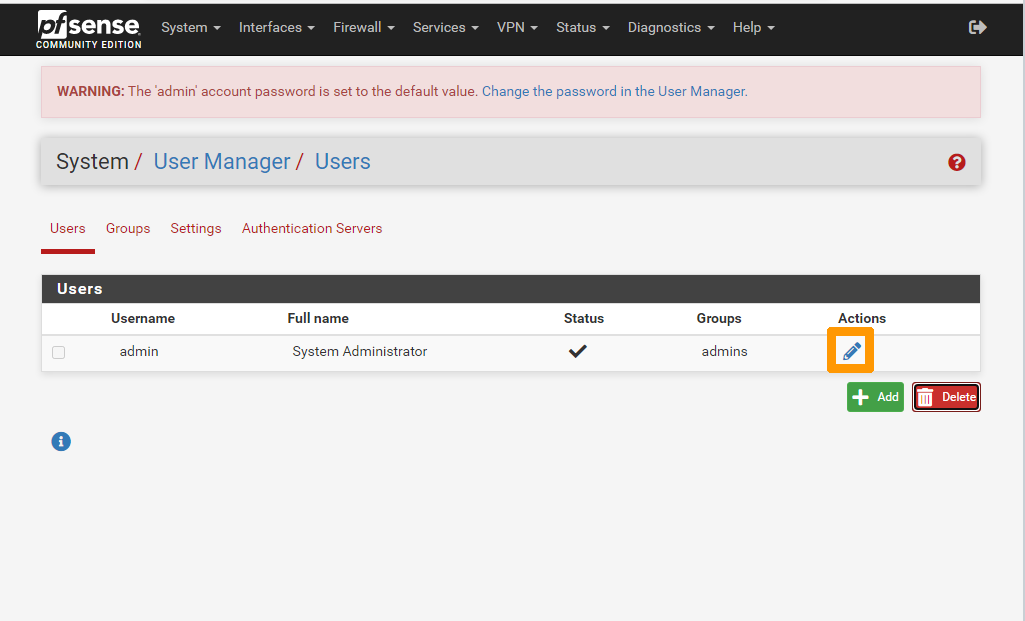
From the System menu, choose User Manager.
Click the Pen icon.
Enter and confirm the password to the right of Password.
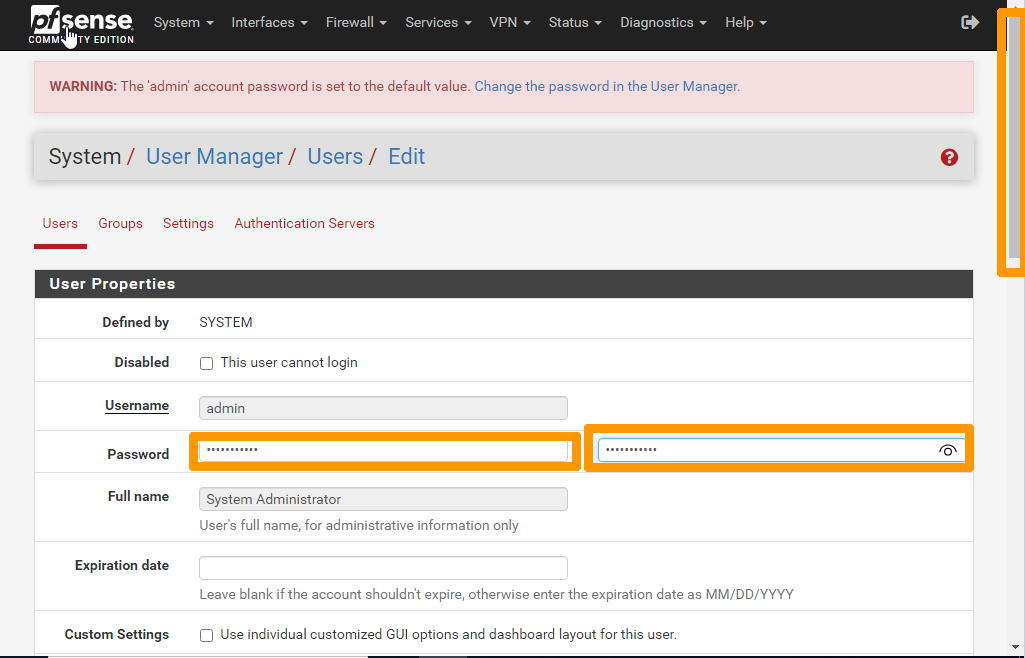
Confirm the changes by clicking Save at the bottom of the menu.
 .
.
Step 2.9.2 Add a rule to allow remote administration from a public address
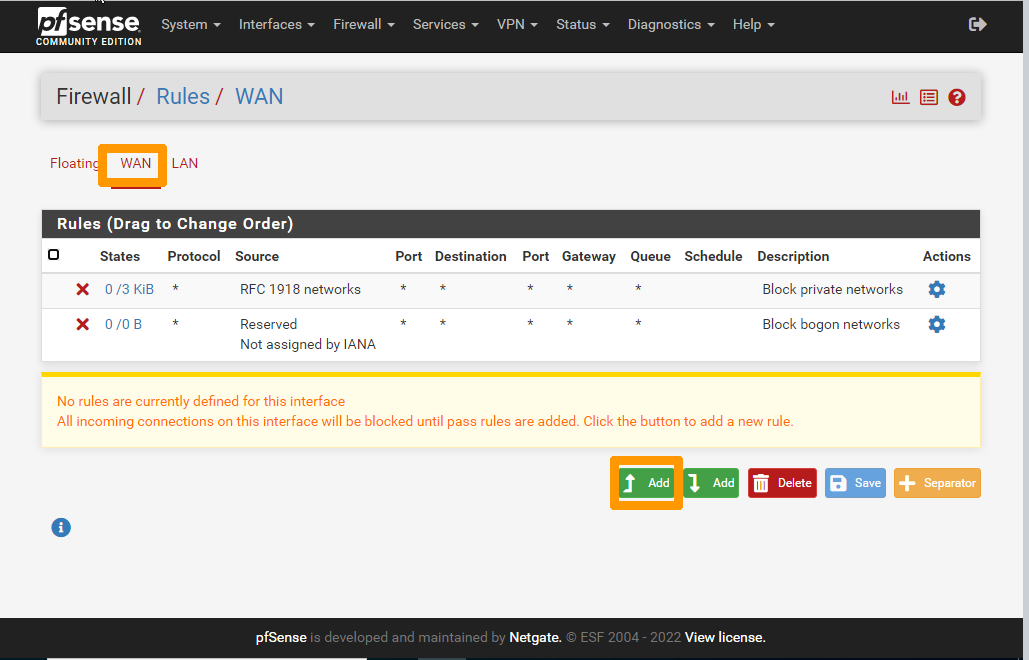
Go to the Firewall menu and choose Rules.
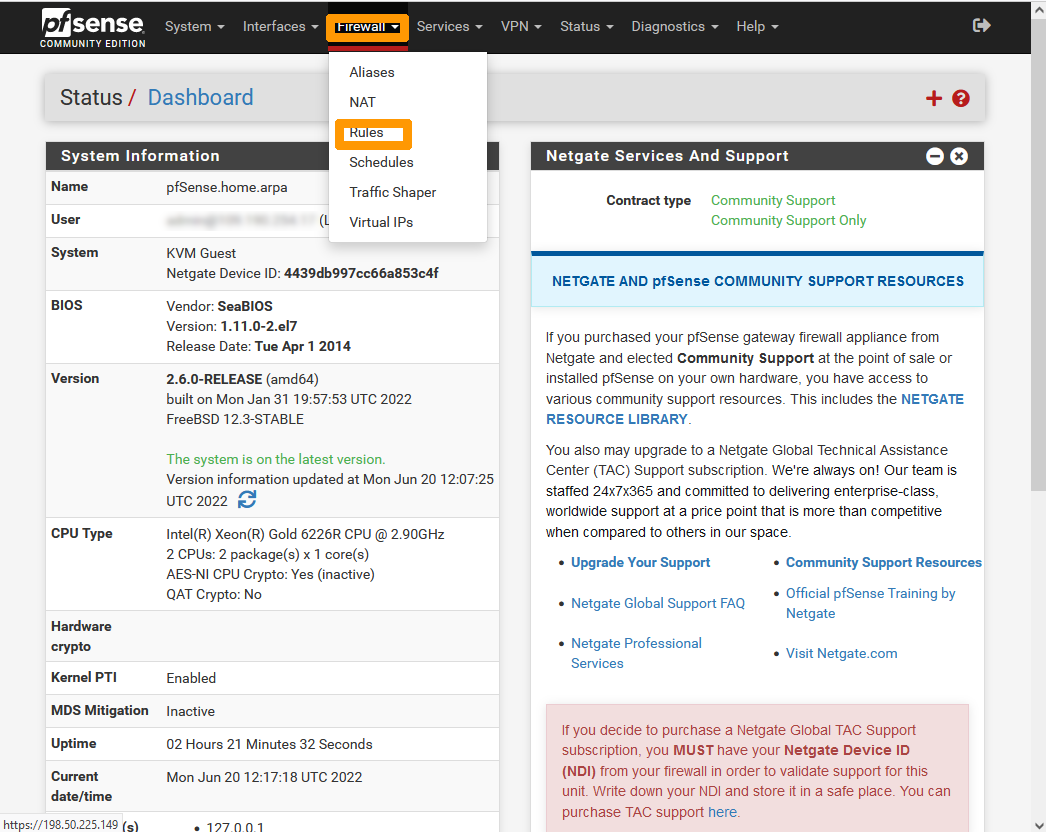
Check that you are on the WAN tab, then click the Add button (at the bottom with the up arrow) to create a firewall rule.
Set these options in the Edit Firewall Rule section:
- Action:
Pass - Interface:
WAN - Address Family:
IPv4 - Protocol:
TCP
Select Single host or alias from the Source drop-down menu and enter the public address that can connect to the pfSense firewall.
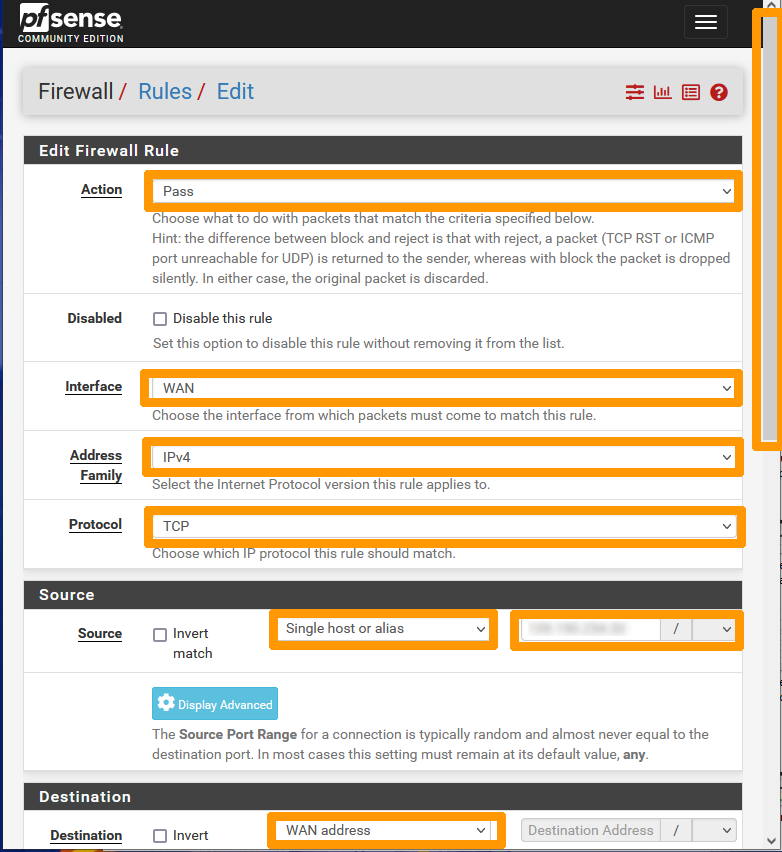
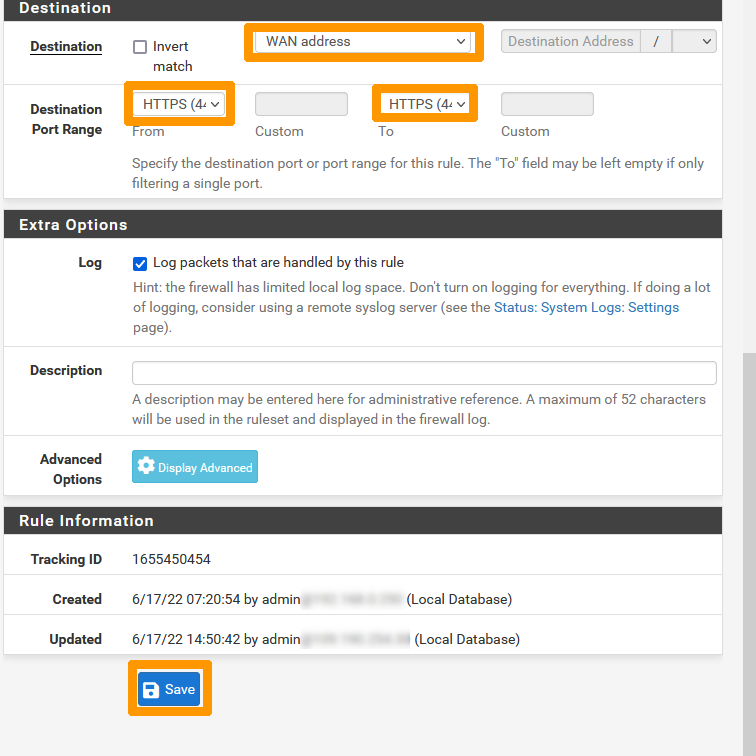
Then set these options in the Destination section:
- Destination:
WAN address - Destination Port Range From:
HTTPS - Destination Port Range To:
HTTPS
Click Save.
Click Apply Changes to activate the rule.
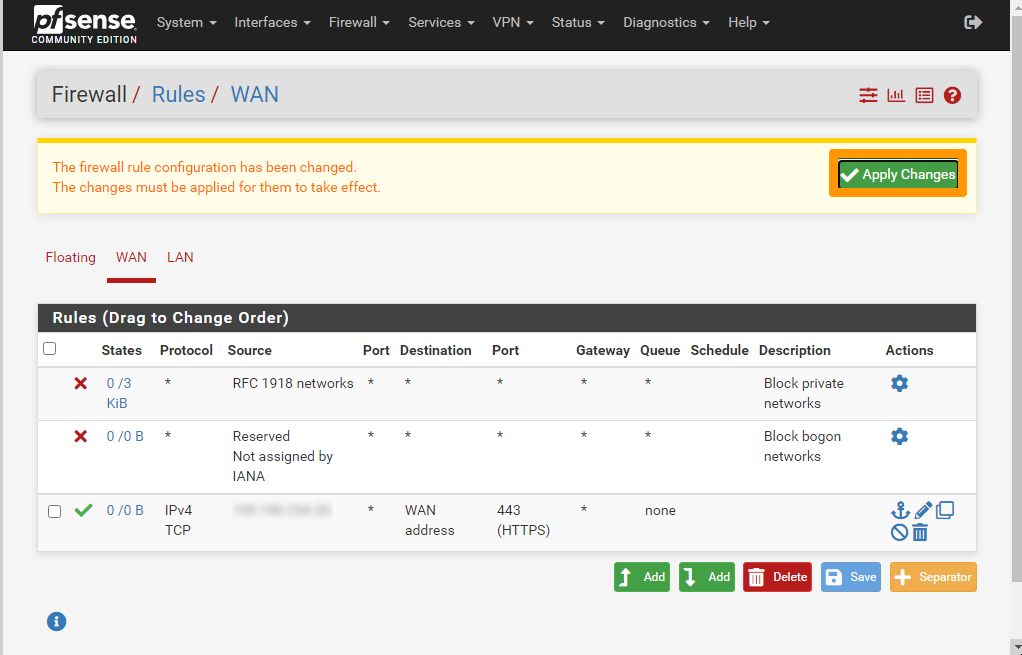
The pfSense administration interface is then accessible from the Internet, only from the authorised network in HTTPS, here https://123.123.123.5.
Step 3 Configuring the gateway in France
We will install the GW-PFSENSE gateway in France on the IP plan 192.168.0.0/24.
Step 3.1 Downloading sources for pfSense installation
Download the ISO image of pfSense installation from this link: Downloading pfSense.
Using this documentation, add the pfSense ISO image to your Nutanix cluster.
Step 3.2 Creating the GW-PFSENSE virtual machine
Create a virtual machine with these settings:
- Name:
GW-PFSENSE - Storage1:
60 Go HDD - Storage2:
DVD drive connected to pfSense ISO image - RAM:
4 GB - CPU:
2 vCPU - Network:
two network cards on the AHV network: **Base**
You can use our guide on virtual machine management to create this virtual machine.
Step 3.3 Shutting down the OVH-GATEWAY virtual machine
To avoid duplicate IP addresses on the network, stop the OVHgateway virtual machine before starting the new virtual machine on pfSense.
Via Prism Central, click in the top left on the main menu.
Click VMs.
Click the OVHgateway virtual machine.
From the More menu at the top, click Soft Shutdown.
Step 3.4 Retrieving the public address in the OVHcloud Control Panel
Retrieve information about the OVHcloud gateway network settings.
Log in to the OVHcloud Control Panel, select your Nutanix cluster, and find the information in the IPFO field.
What is called IPFO is a range of 4 addresses. The first and last are reserved, the third is on OVHcloud hardware and serves as an Internet gateway. The only usable IP address is the second address in the range.
During installation, we will reuse this information to assign it to the new GW-PFSENSE virtual machine
For example, if the IPFO address displayed on the client site is 123.123.123.4/30, use:
- 123.123.123.5 for the WAN interface address;
- 123.123.123.6 for the gateway on the WAN interface.
Step 3.5 Start the GW-PFSENSE virtual machine
Go back to virtual machine management in Prism Central and click on GW-PFSENSE.
From the More menu, click Power On.
Click Launch console.
Step 3.6 Installing pfSense
Review the pfSense licence information and press the Enter key to accept it.
Choose Install, click OK with the Tab key, and then press Enter.
Select Continue with default keymap, go to Select with the Tab key and press the Enter key.
Select Auto (ZFS), click OK with the Tab key, and then press the Enter key.
Press Select with the Tab key and press Enter.
Select Stripe, press OK with the Tab key, and then press Enter.
Select NUTANIX VDISK with the Space bar. Then click OK with the Tab key and press Enter.
Go to YES with the Tab key and press the Enter key.
Choose NO with the Tab key and press the Enter key.
Select Reboot and press the Enter key.
Step 3.7 Eject the pfSense CDROM from the GW-PFSENSE virtual machine
From Prism Central, go back to GW-PFSENSE virtual machine management and perform the following steps to eject the CDROM.
Click Soft Shutdown via the More menu on the GW-PFSENSE virtual machine to stop this virtual machine.
Click Update.
Click Next.
Click the Eject icon next to the CDROM.
Click Next.
Click Next.
Click Save.
Click Power On in the More menu.
Click Launch Console to continue the installation after startup.
Step 3.8 Configure pfSense IP Addresses Through the Console
We will configure the pfSense gateway IP addresses as follows:
- WAN interface: Use this part of the guide “Retrieving a public address in the OVHcloud Control Panel” to assign the IP address and gateway on this interface.
- LAN interface: 192.168.0.254/24 which is the gateway address of the Nutanix private network followed by the subnet mask.
Accept the licence by pressing the Enter key.
Type n and press the Enter key when querying for VLANs.
Type vtnet0 as the interface name for the WAN and press Enter.
Type vtnet1 as the interface name for the LAN and press Enter.
Confirm the changes by entering y and press the Enter key.
Type 2 to choose Set interface(s) IP address and press Enter.
Select the WAN interface by typing 1 and press Enter.
Type n and press Enter when prompted to configure the address by DHCP.
Type the public IP address with the mask and press the Enter key. For example, 123.123.123.5/30.
Then enter the public gateway IP address and press the Enter key. For example, 123.123.123.6.
Answer n and press the Enter key when prompted to configure the IPv6 address WAN interface via DHCP6.
When prompted to revert to HTTP as the webConfigurator protocol, type n and press Enter.
Press Enter to validate the registration of the IP address of the WAN.
Type 2 and press the Enter key to configure IP addresses.
Take option 2 and press the Enter key to change the LAN IP address.
Type the private IP address followed by the mask 192.168.0.254/24 and press the Enter key.
Press the Enter key to avoid putting a gateway on the LAN interface.
Press the Enter key to disable IPv6 on the LAN interface.
Type n and press the Enter key on the DHCP server activation request.
Answer n and press the Enter key when prompted to revert to HTTP as the webConfigurator protocol.
You can now manage the gateway in HTTPS on the private network.
Press the Enter key to complete the command line configuration.
Step 3.9 Configure some options through the web interface
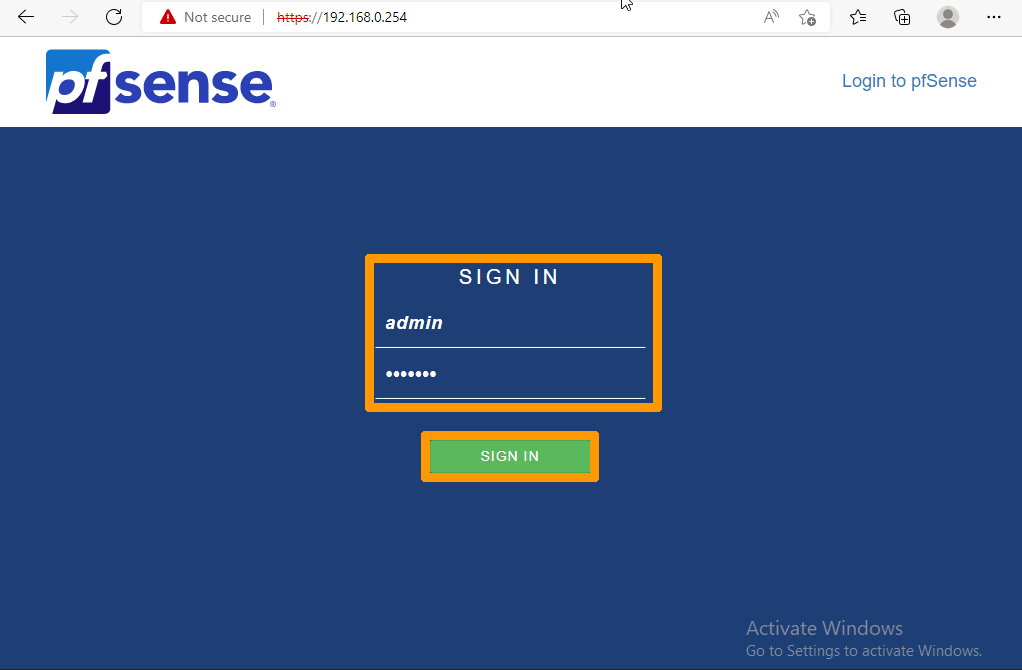
Connect to the pfSense Web Console with this URL https://192.168.0.254 from a virtual machine on the AHV LAN: Base.
Enter this information:
- User account: admin
- Default password: pfsense
Then click SIGN IN.
Step 3.9.1 Change the pfSense default password
From the System menu, choose User Manager.
Click the Pen icon.
Enter and confirm the password to the right of Password.
Confirm the changes by clicking Save at the bottom of the menu.
.
Step 3.9.2 Add a rule to allow remote administration from a public address.
Go to the Firewall menu and choose Rules.
Check that you are on the WAN tab, then click the Add button (at the bottom with the up arrow) to create a firewall rule.
Choose these options from Edit Firewall Rule:
- Action:
Pass - Interface:
WAN - Address Family:
IPv4 - Protocol:
TCP
Select Single host or alias from the Source drop-down menu and enter the public address that can connect to the pfSense firewall.
Add these options in Destination:
- Destination:
WAN address - Destination Port Range From:
HTTPS - Destination Port Range To:
HTTPS
Click Save.
Click Apply Changes to activate the rule.
The administration interface of pfSense is then accessible from the Internet, on the authorised network via this URL https://WANaddress, here https://123.123.123.5.
Step 4 Setting up the IPsec VPN
Now that the two gateways have been replaced, we will configure the IPsec VPN to allow communication between the two clusters.
Step 4.1 Setting Up the Site in Canada
Step 4.1.1 Set up IPsec VPN in France
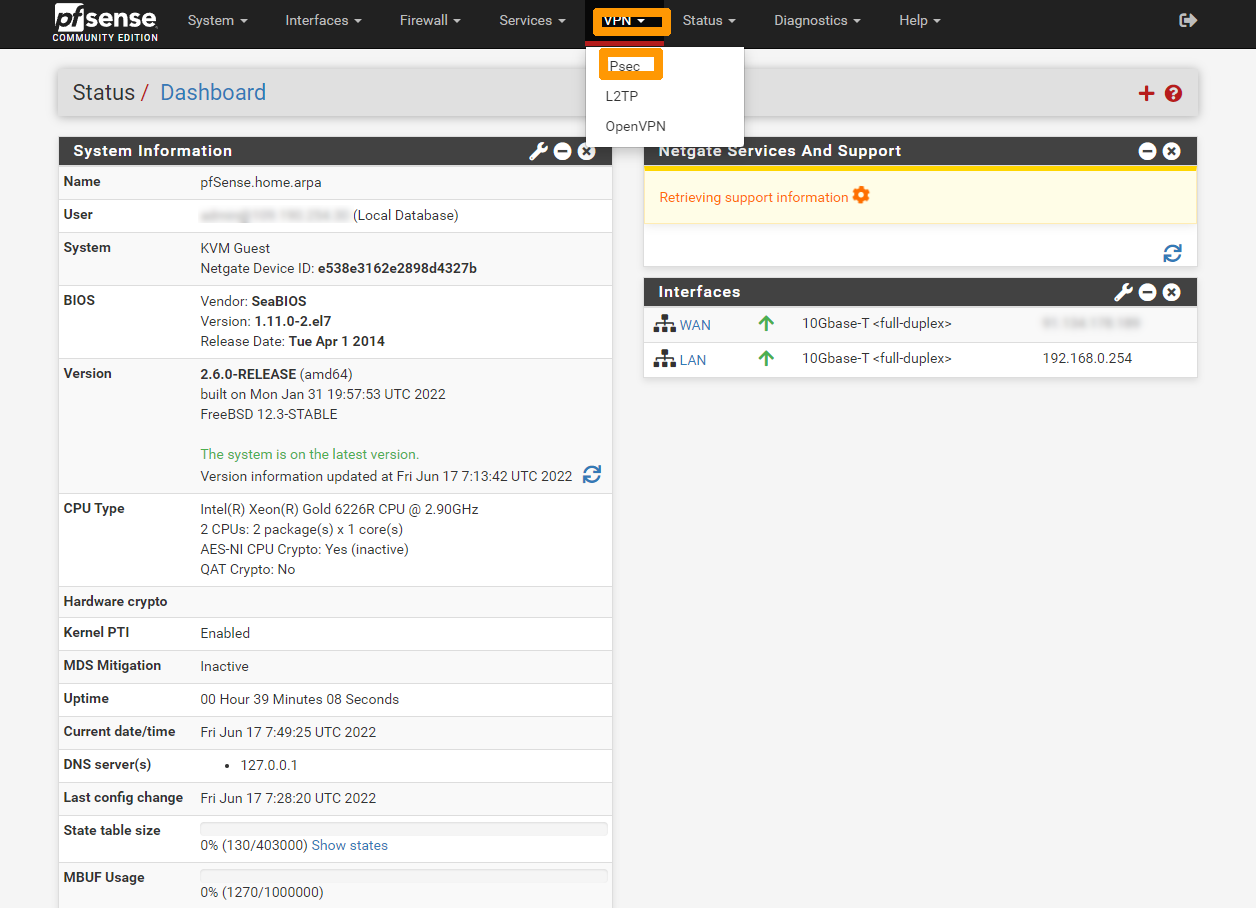
Connect from an authorised network to Canada's public address in HTTPS with this URL https://publicaddress-pfsense-canada.
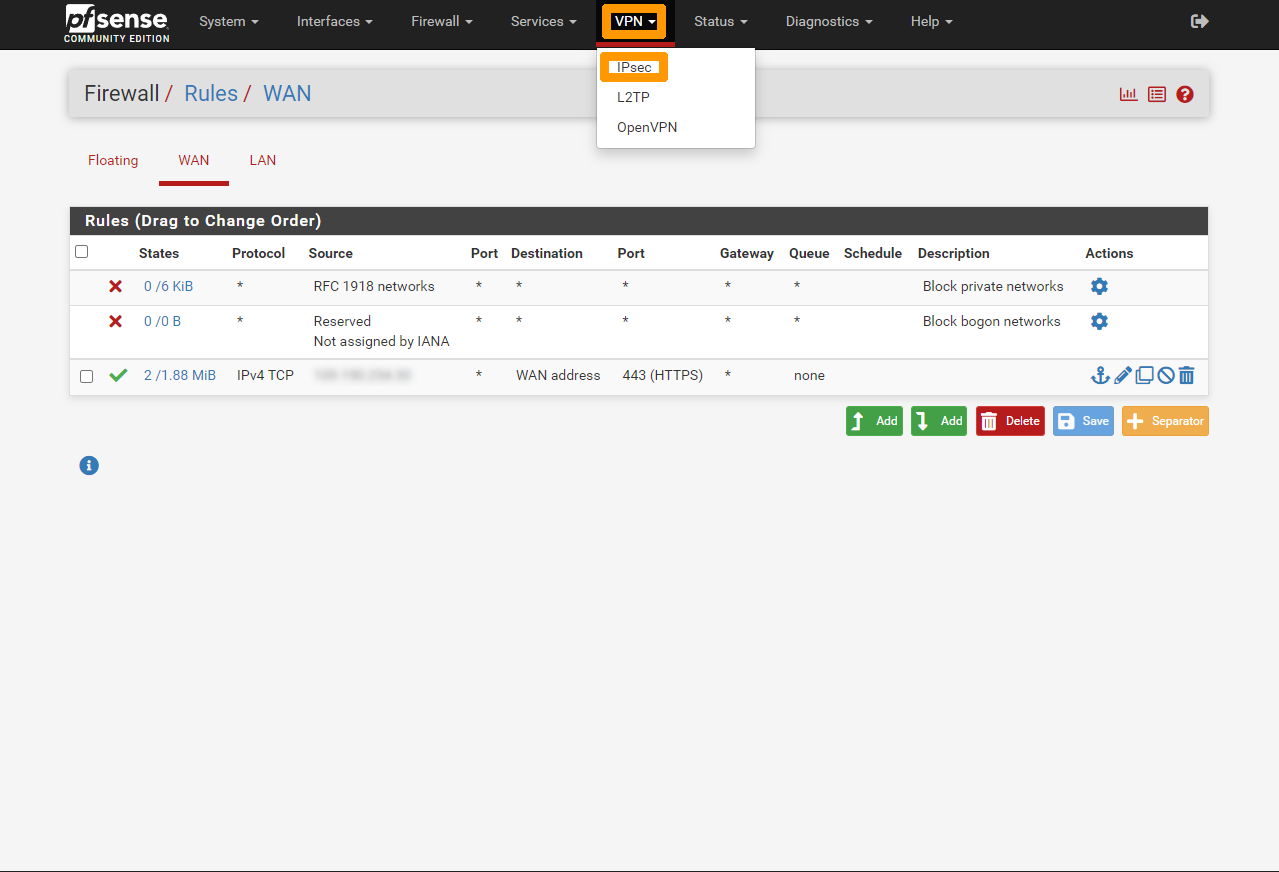
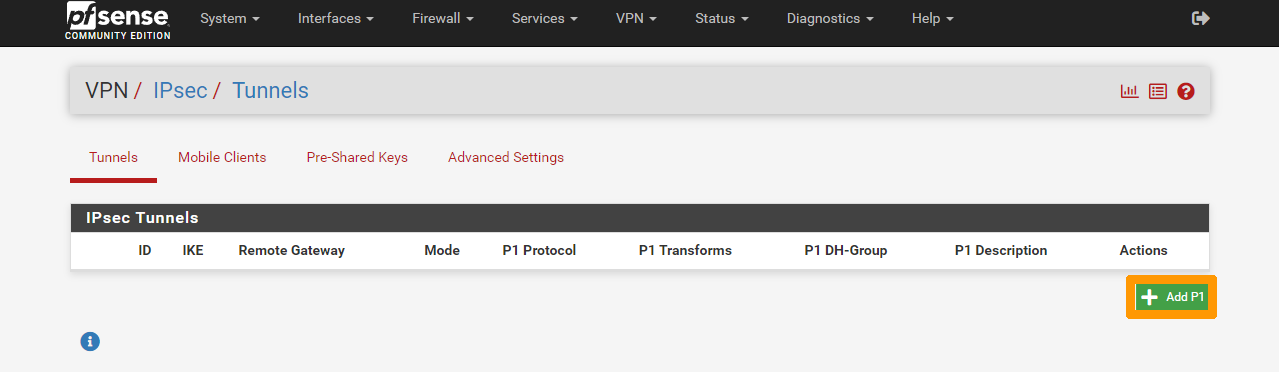
Go to the VPN menu and choose IPsec.
Click Add P1 to create IPsec VPN Phase 1.
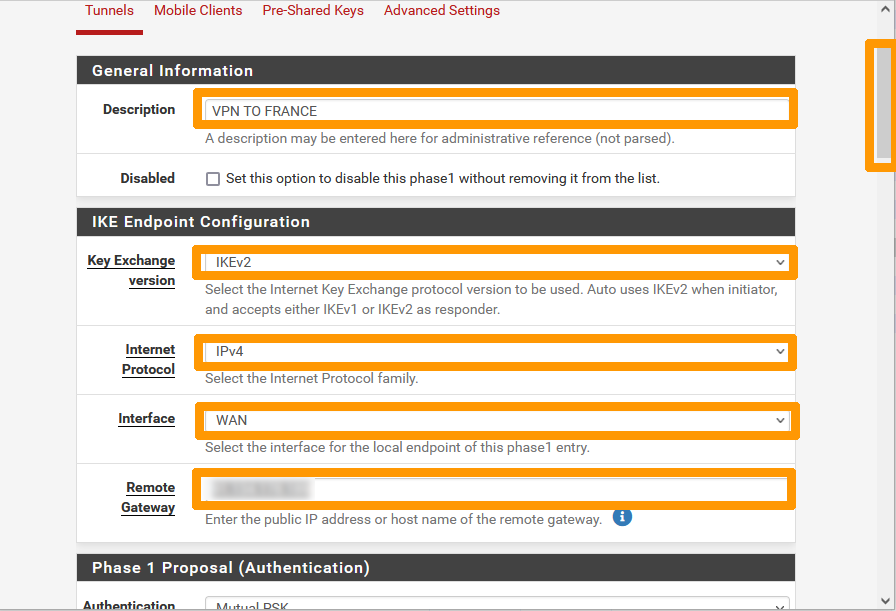
Enter this information:
- Description:
VPN TO FRANCE - Key Exchange version:
IKEv2 - Internet Protocol:
IPv4 - Interface:
WAN - Remote Gateway:
Public address of the pfSense virtual machine in France
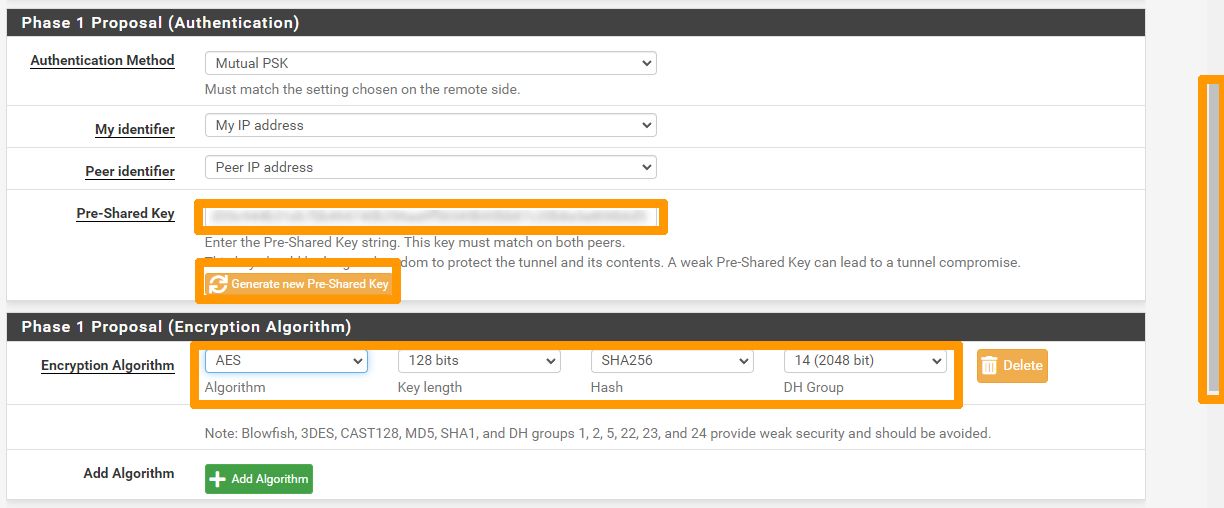
Click Generate new Pre-Shared Key to generate a pre-shared key in the Pre-Share Key field.
Write down or copy the key, it will be used for the VPN configuration on the gateway in France.
Keep the information in Encryption Algorithm.
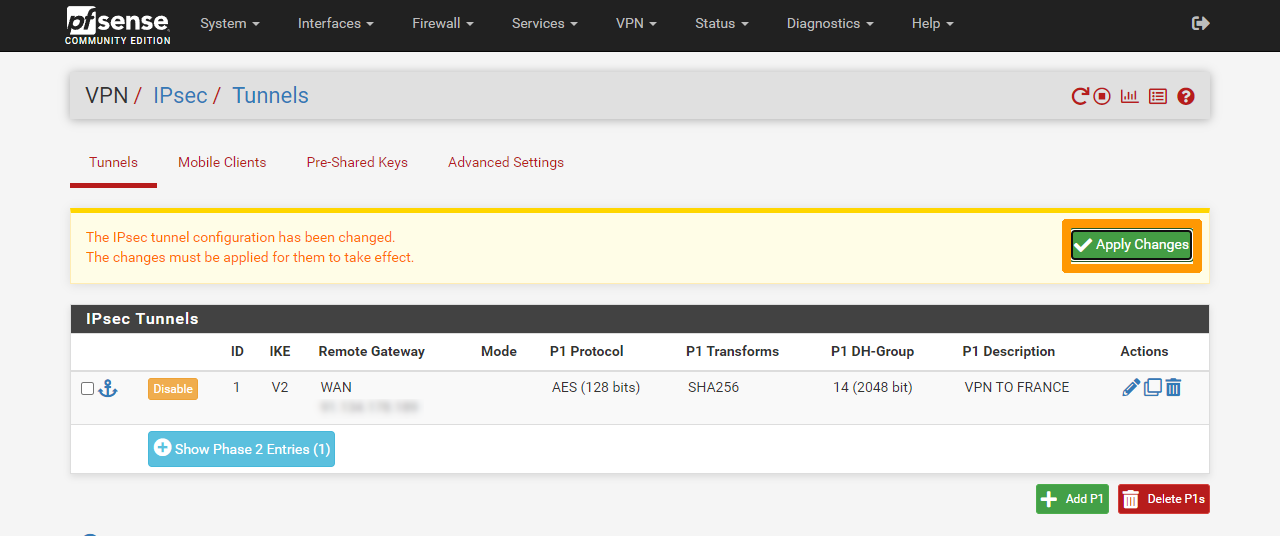
Click Save at the bottom of the menu.
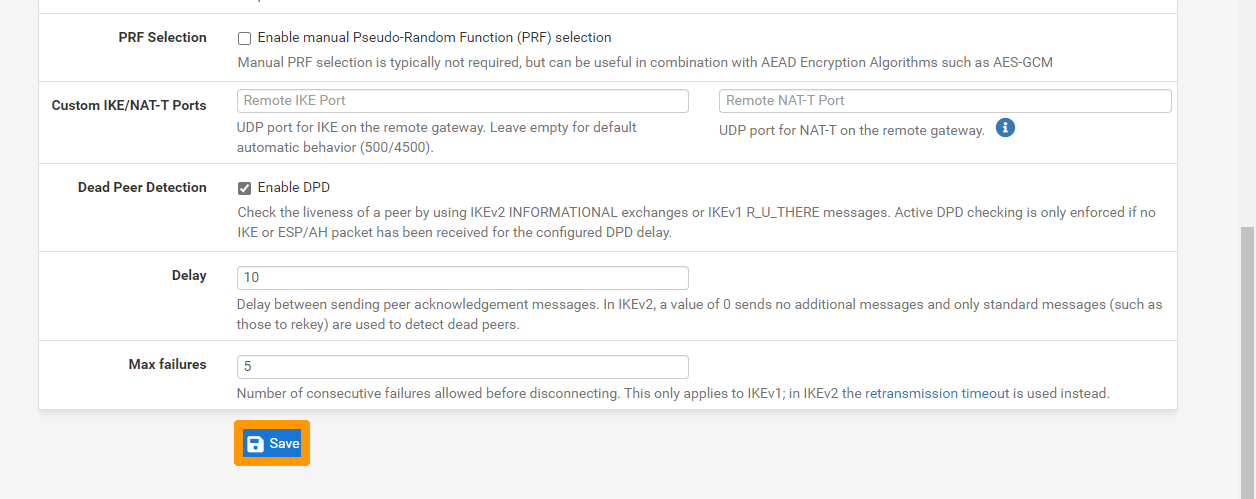
Click Apply Changes.
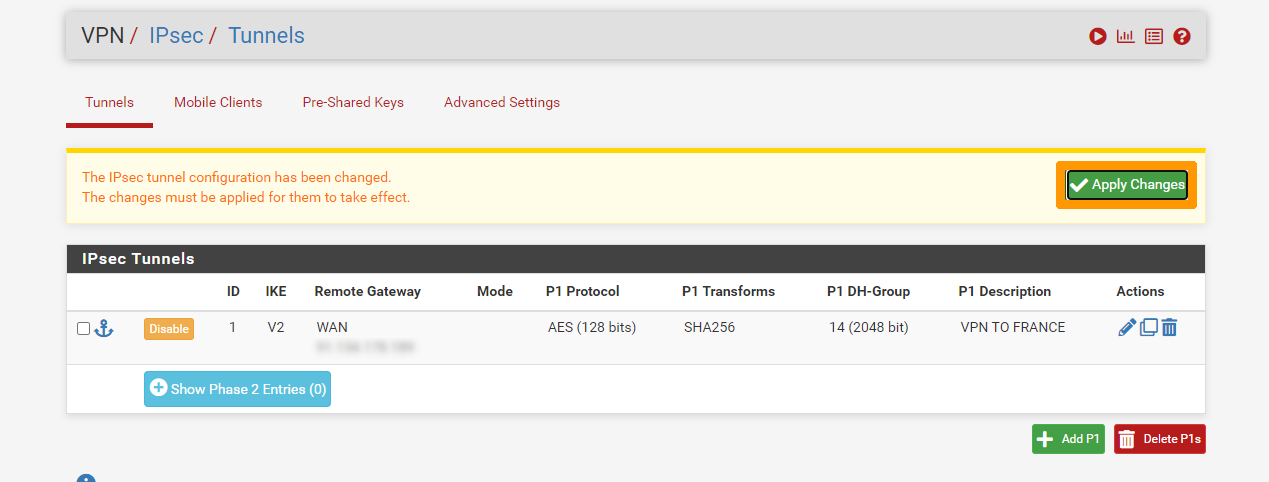
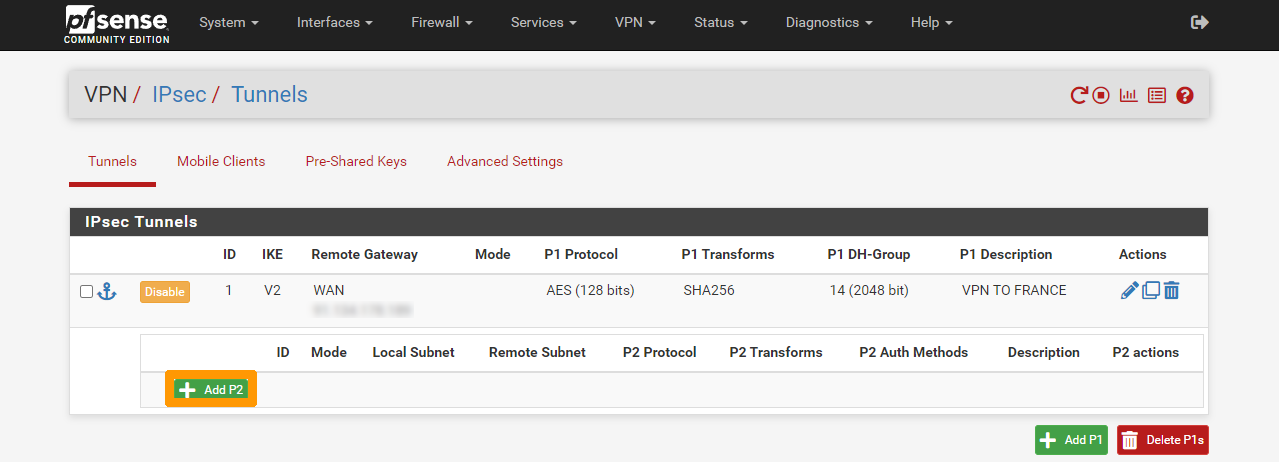
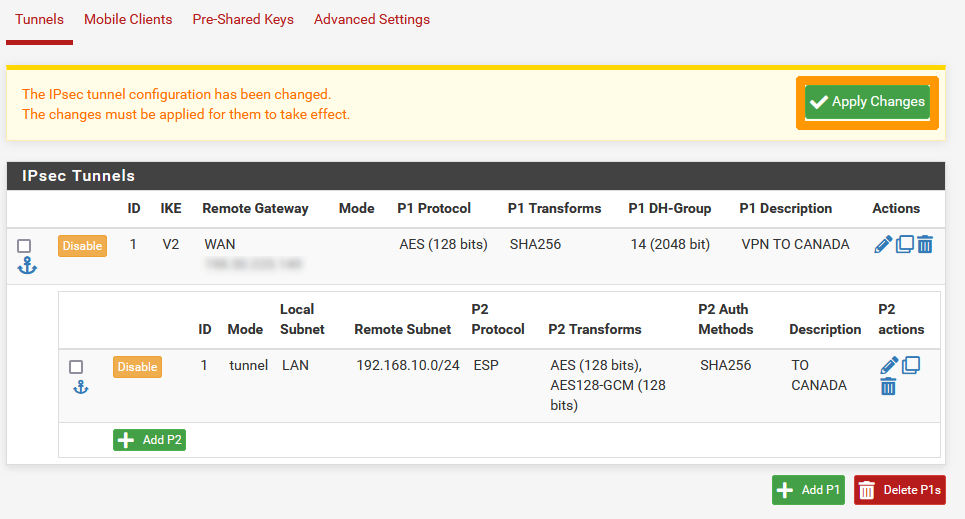
Click Show Phase 2 Entries.

Click Add P2 to add IPsec VPN Phase 2.
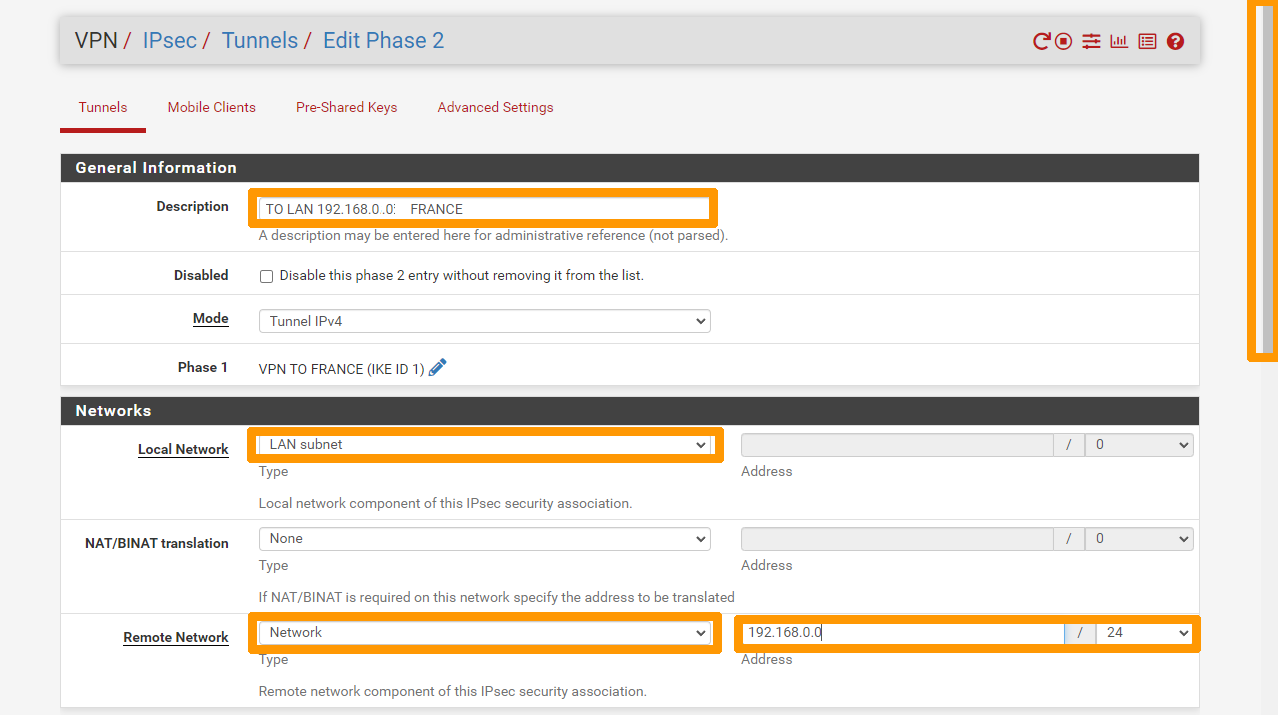
Enter this information:
- Description:
TO LAN 192.168.0.0/24 France - Local Network:
Subnet LAN - Remote Network: Type
Network, Address192.168.0.0/24
Take note of the encryption settings.
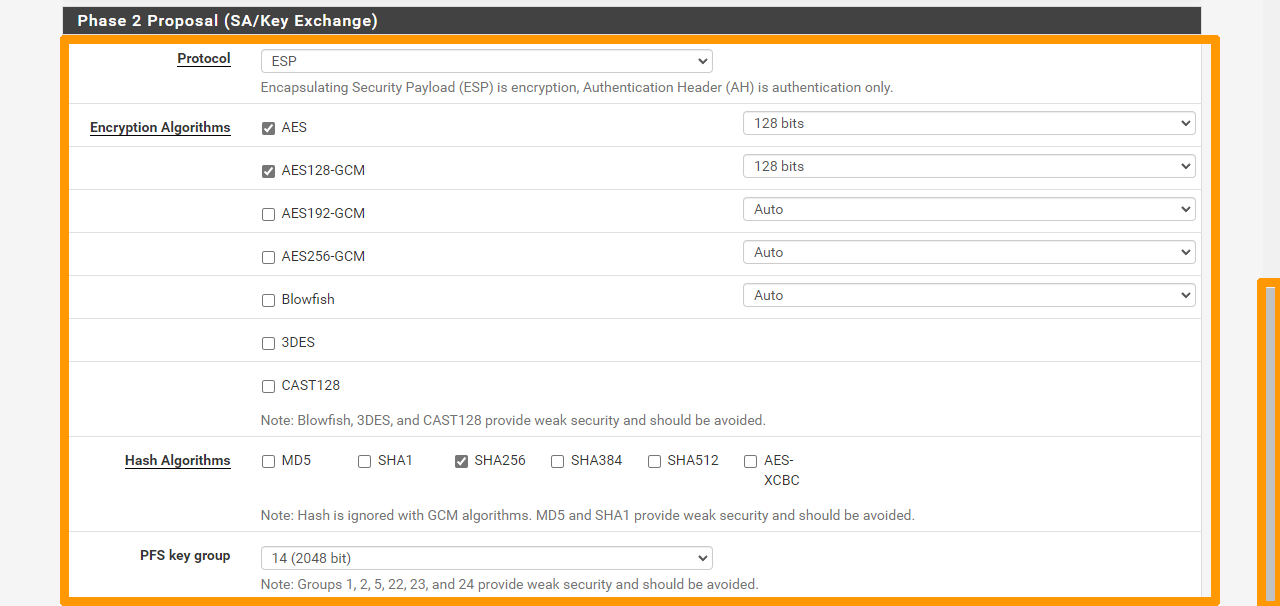
Click Save.

Click Apply Changes to complete the creation of the IPsec VPN on Canada's pfSense virtual machine.
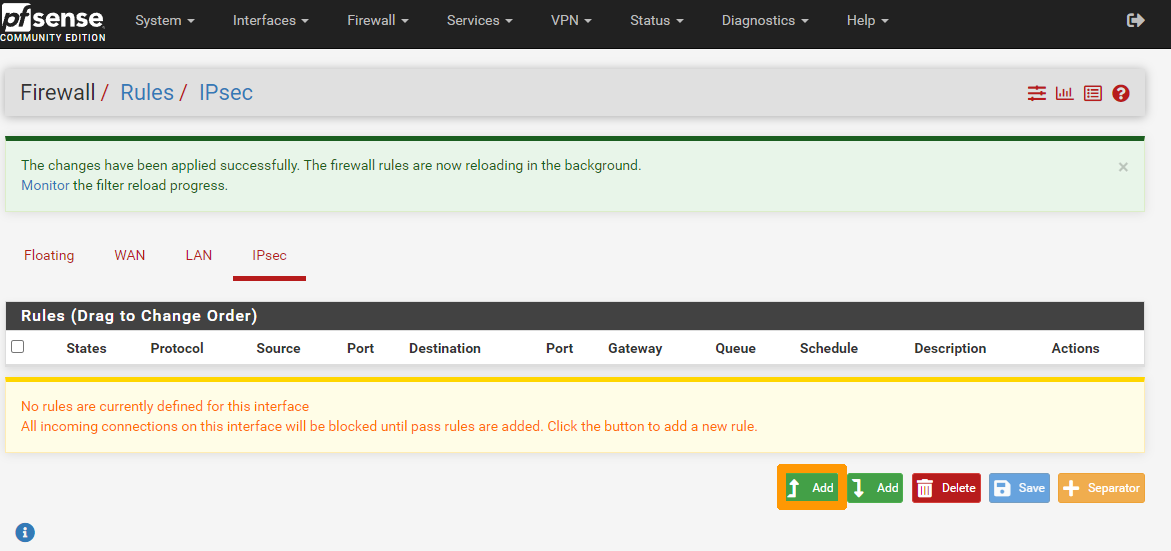
Step 4.1.2 Adding a firewall rule to allow network flow through the IPsec VPN between Canada and France
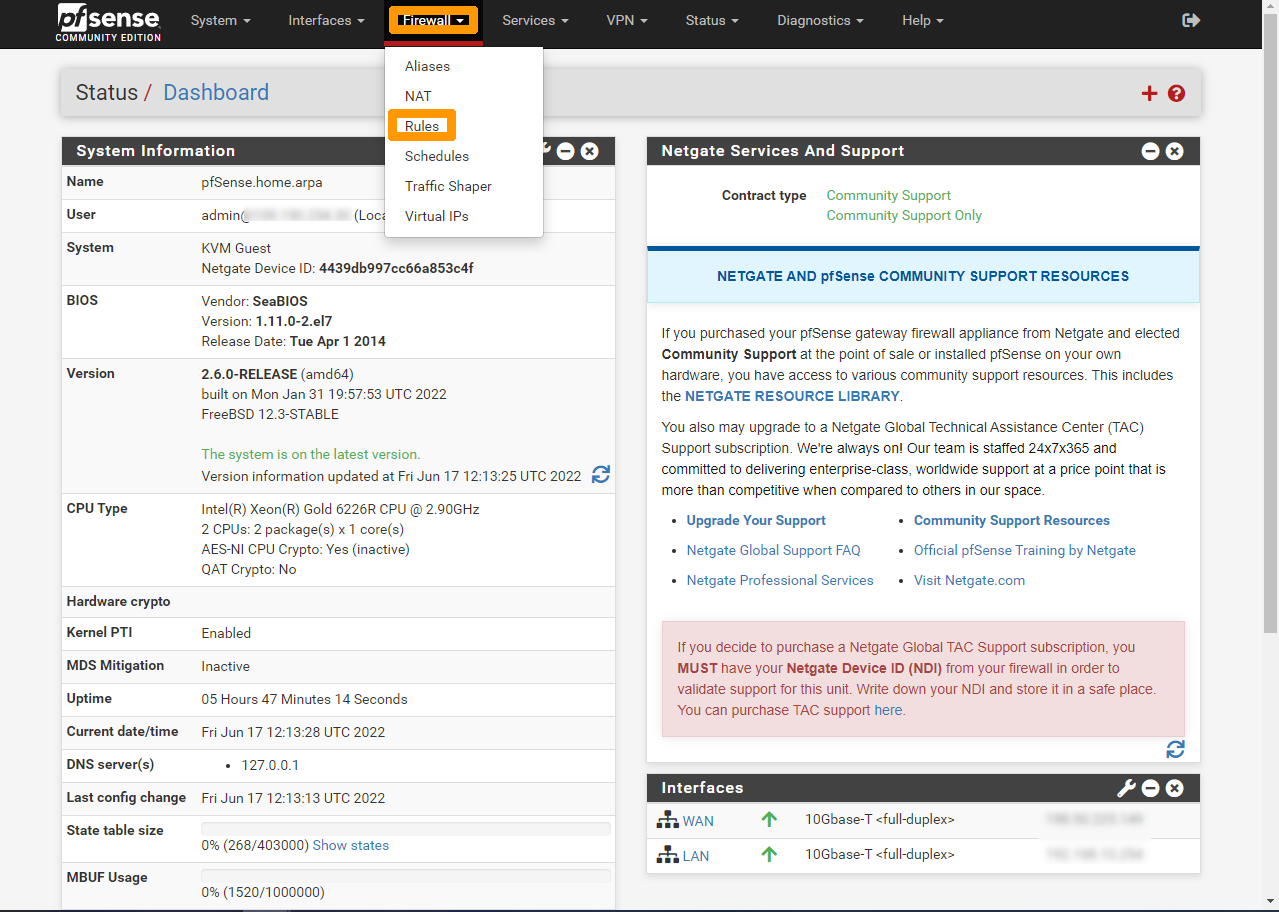
Click Rules in the Firewall menu.
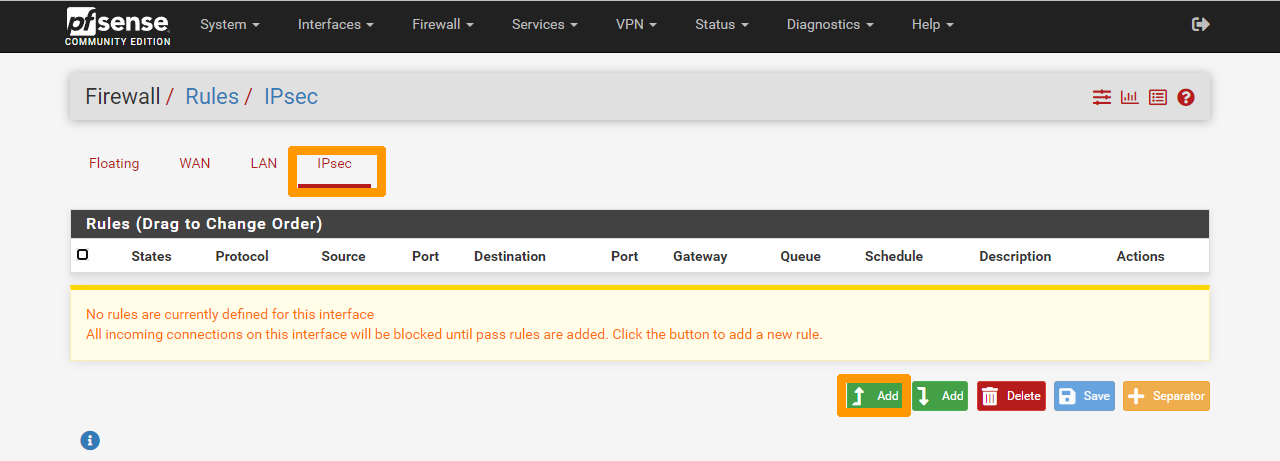
Go to the IPsec tab and click the Add button (at the bottom with the up arrow).
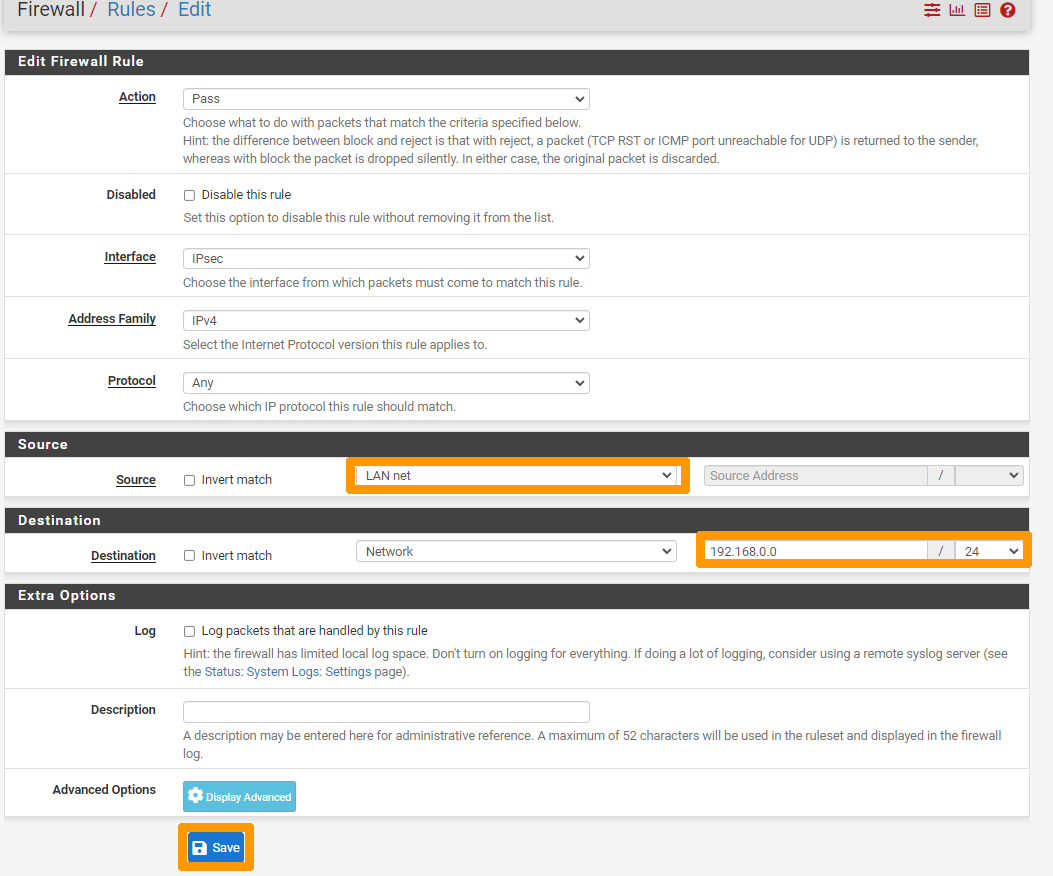
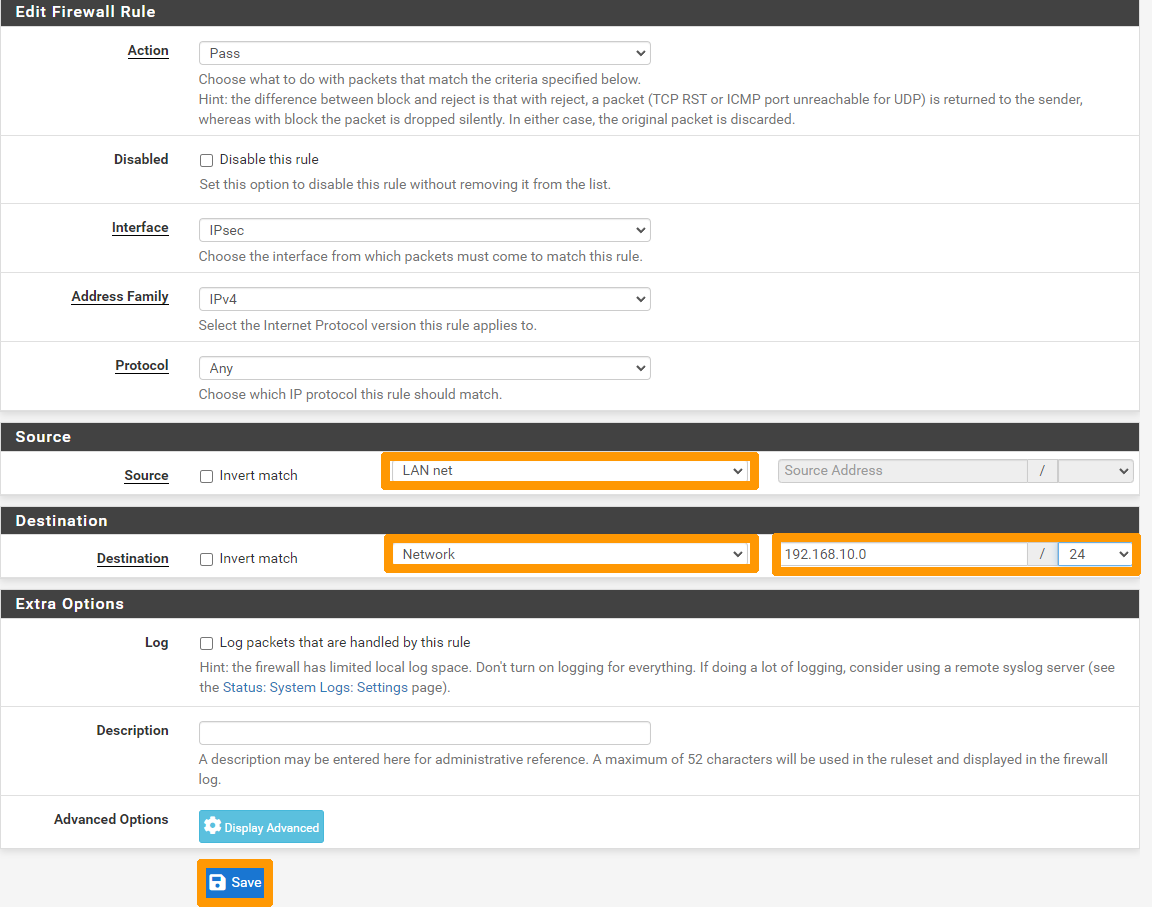
Modify these options:
- Source:
Net LAN - Destination:
Networkand192.168.0.0/24
Then click Save.
Click the same Add button again (at the bottom with the up arrow) to add a second rule.
Modify these options:
- Source:
Networket192.168.0.0/24 - Destination:
Net LAN
Click Save.
Click Apply Changes.
The setting on the bridge in Canada is then completed.
Step 4.2 Website configuration in France
Step 4.2.1 Set up IPsec VPN to Canada
Log in to the public address of the France gateway in HTTPS via: https://publicaddress-pfsense-france
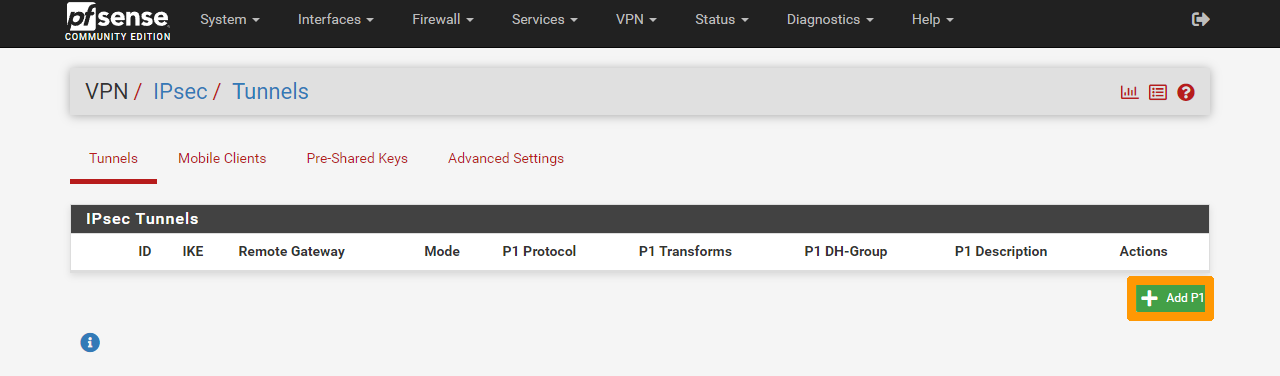
Go to the VPN menu and choose IPsec.
Click Add P1 to create IPsec VPN Phase 1.
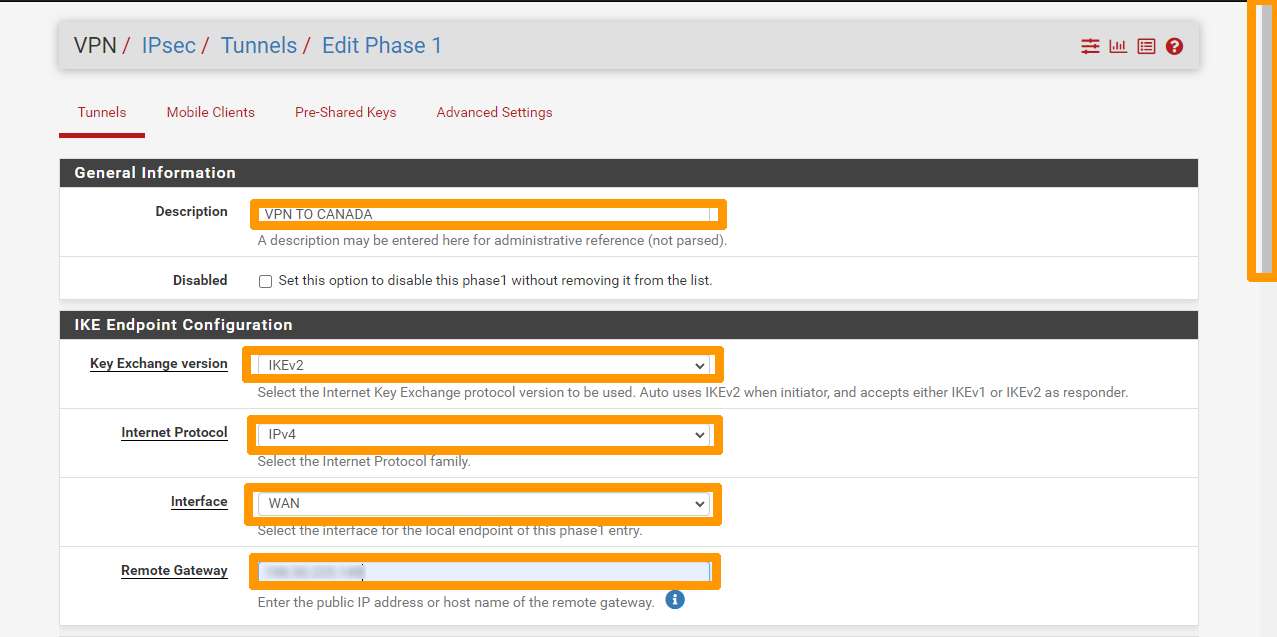
Choose this information:
- Description:
VPN TO CANADA - Key Exchange version:
IKEv2 - Internet Protocol:
IPv4 - Interface:
WAN - Remote Gateway:
Public address of the pfSense virtual machine in Canada
Paste the pre-shared key that was generated on the gateway in Canada into Pre-shared Key.
Compare and match the parameters in Encryption Algorithm with the gateway of Canada.
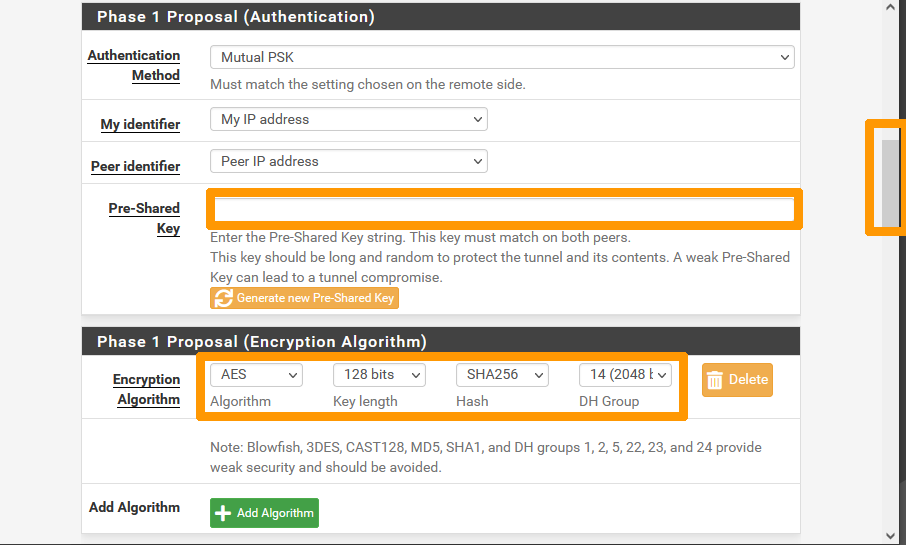
Click Save.
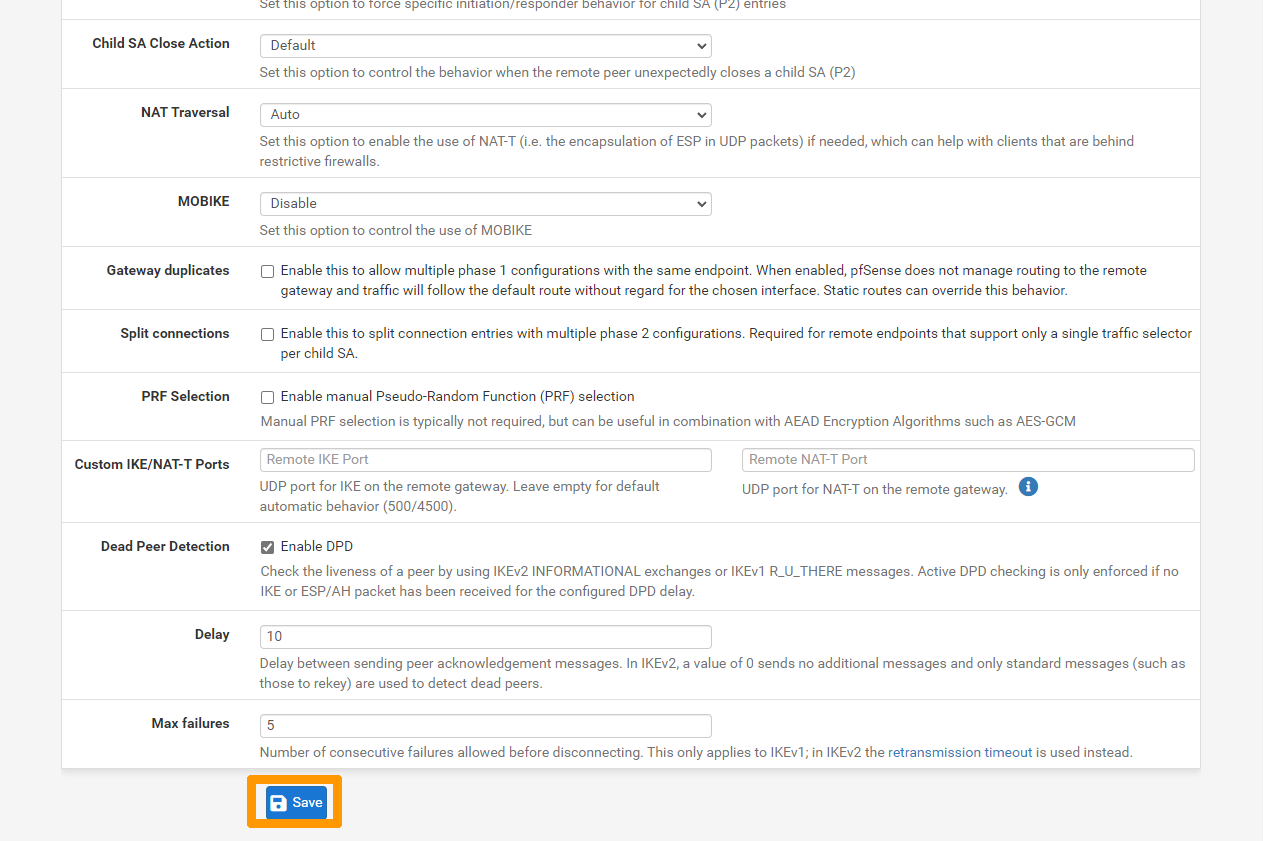
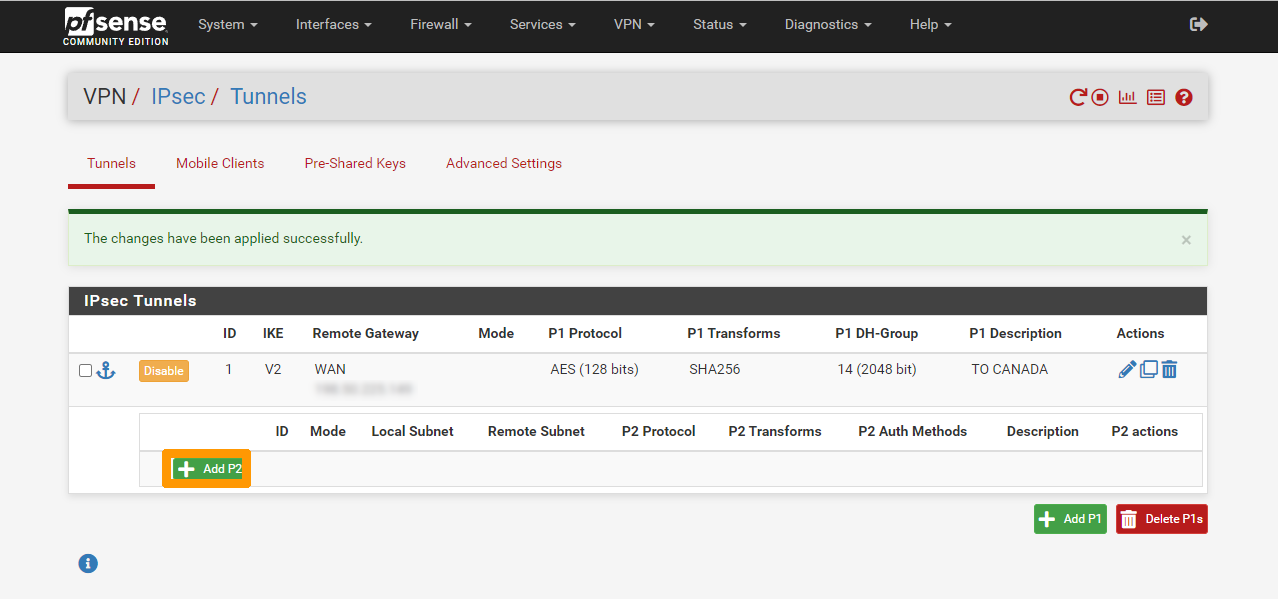
Click Apply Changes.
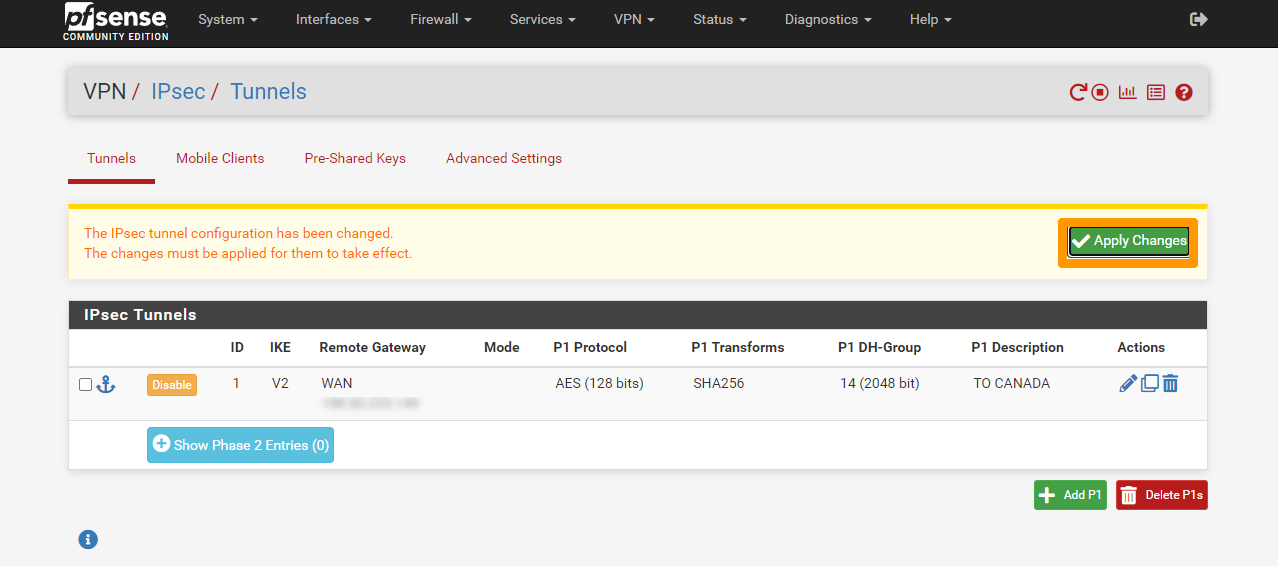
Click Show Phase 2 Entries.

Click Add P2 to add IPsec VPN Phase 2.
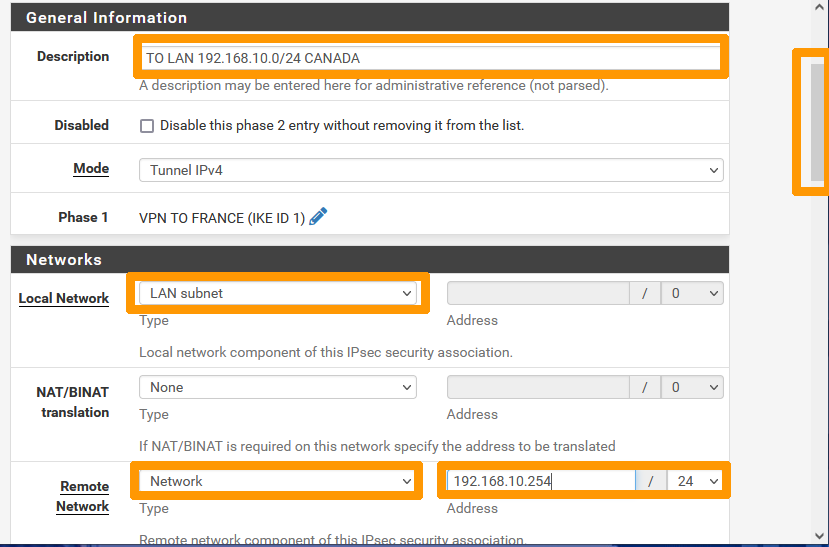
Enter the following information:
- Description:
TO LAN 192.168.10.0/24 CANADA - Local Network:
Subnet LAN - Remote Network: Type
Network, Address192.168.10.0/24
Check the encryption settings and make them identical with the ones set on the Canada gateway.
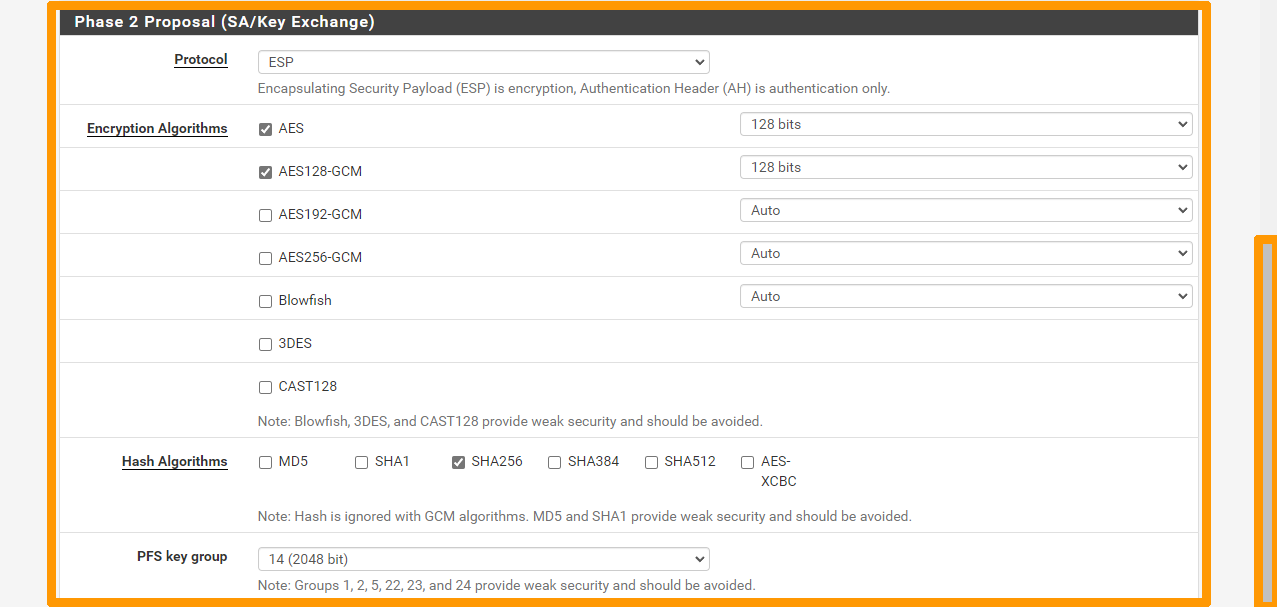
Click Save.
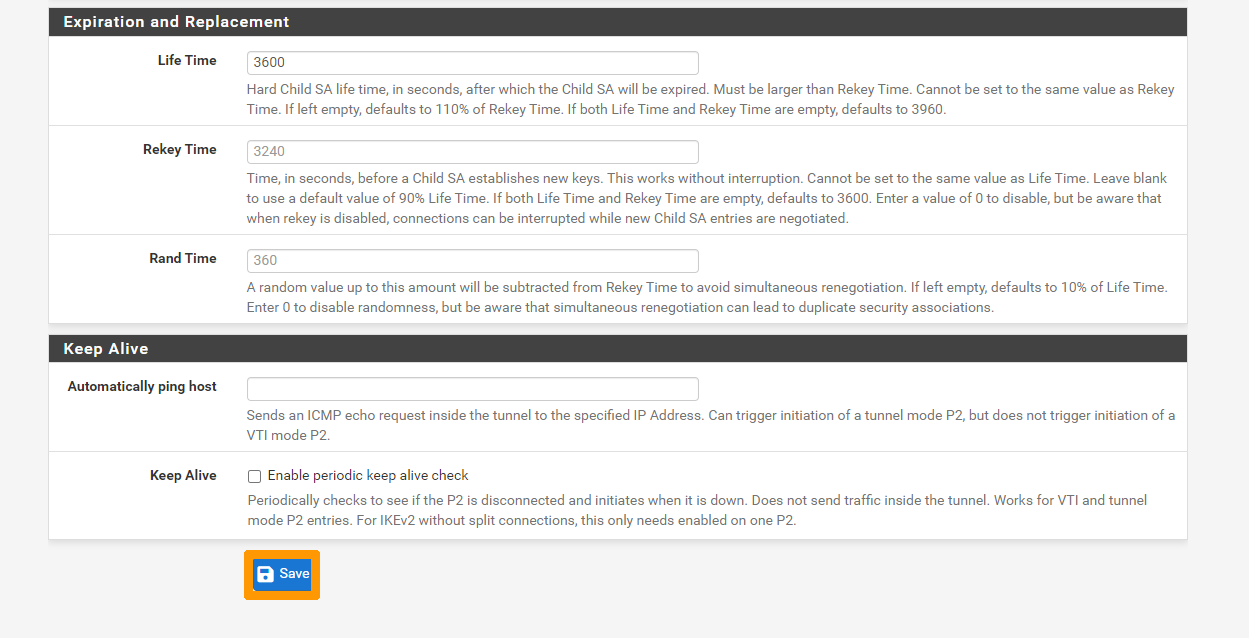
Click Apply Changes to finish creating the IPsec VPN.
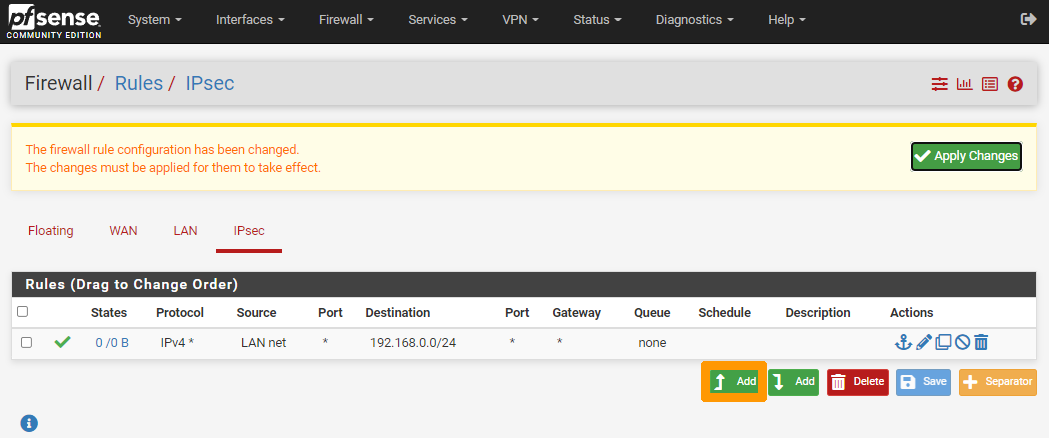
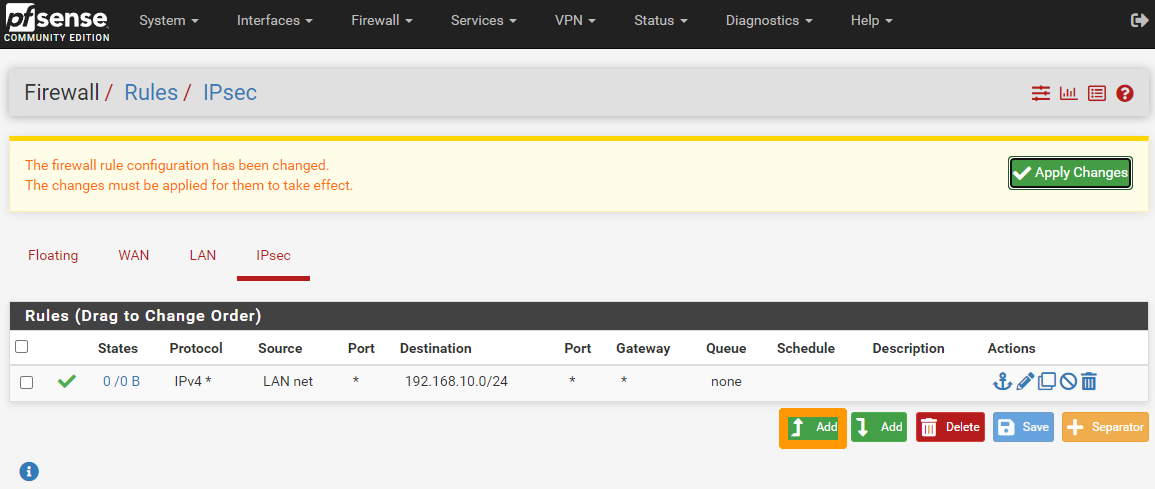
Step 4.2.2 Adding a firewall rule to allow network flow through IPsec VPN between Canada and France
Click Rules in the Firewall menu.

Go to the IPsec tab and click the Add button (at the bottom with the up arrow).
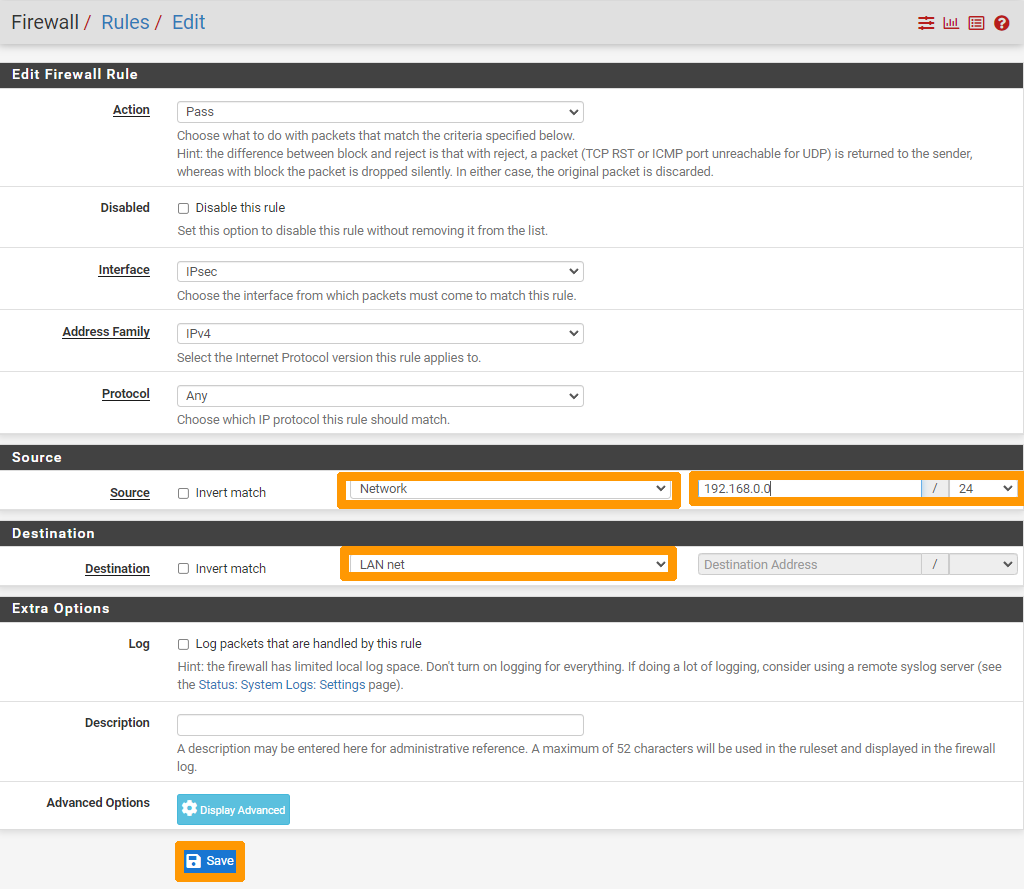
Modify these options:
- Source:
Net LAN - Destination:
Networkand192.168.10.0/24
Then click Save.
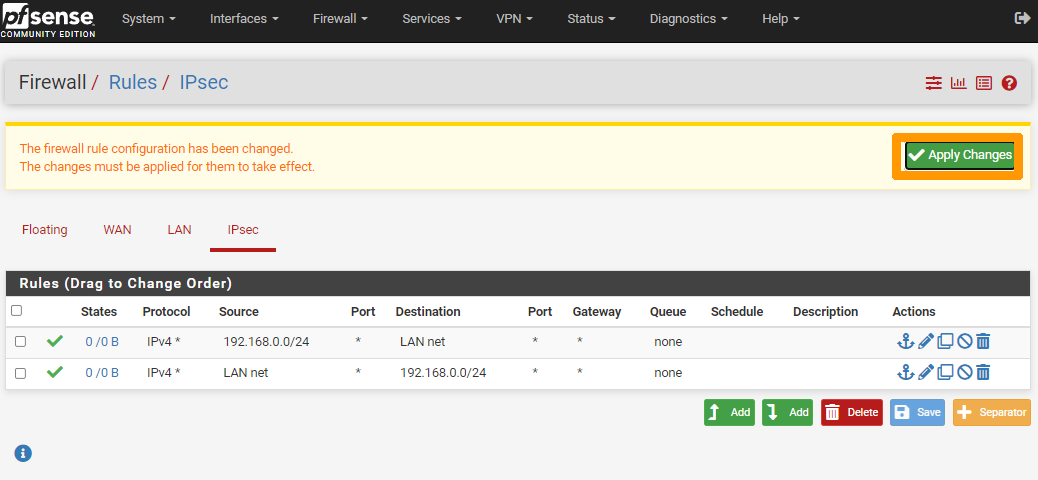
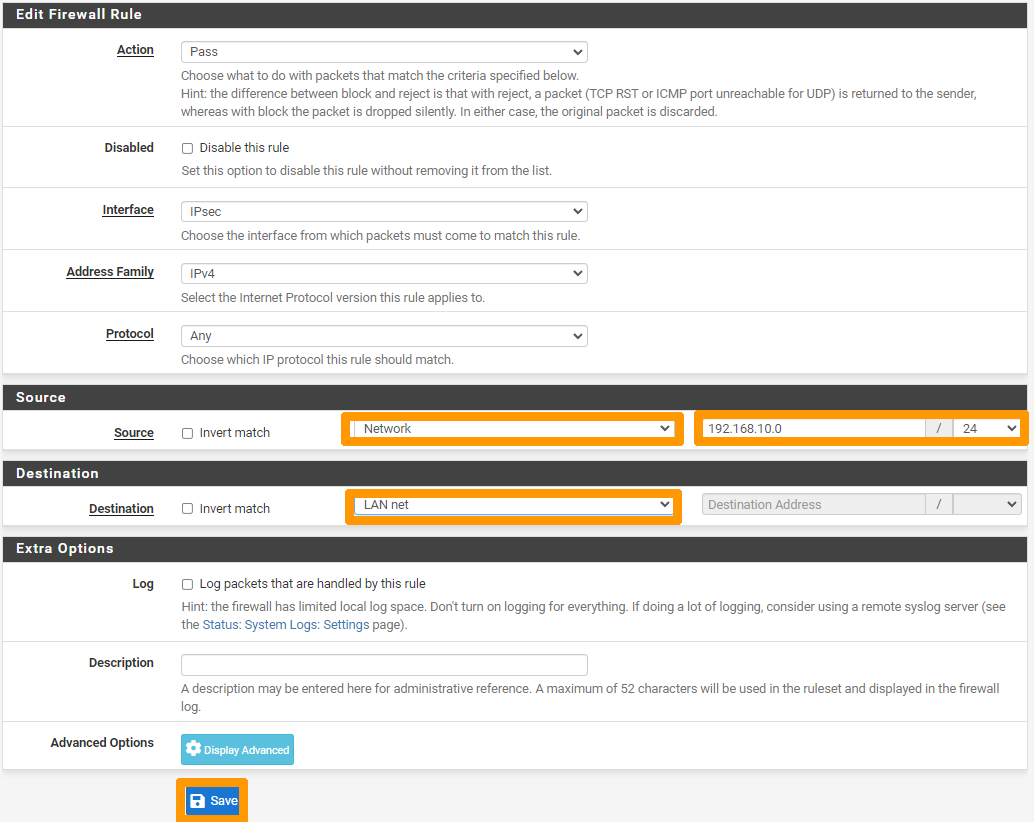
Click Add again (at the bottom with the up arrow) to add a second rule.
Modify these options:
- Source:
Networkwith this network192.168.10.0/24which corresponds to the private network of Canada - Destination:
Net LAN
Click Save.
Click Apply Changes.
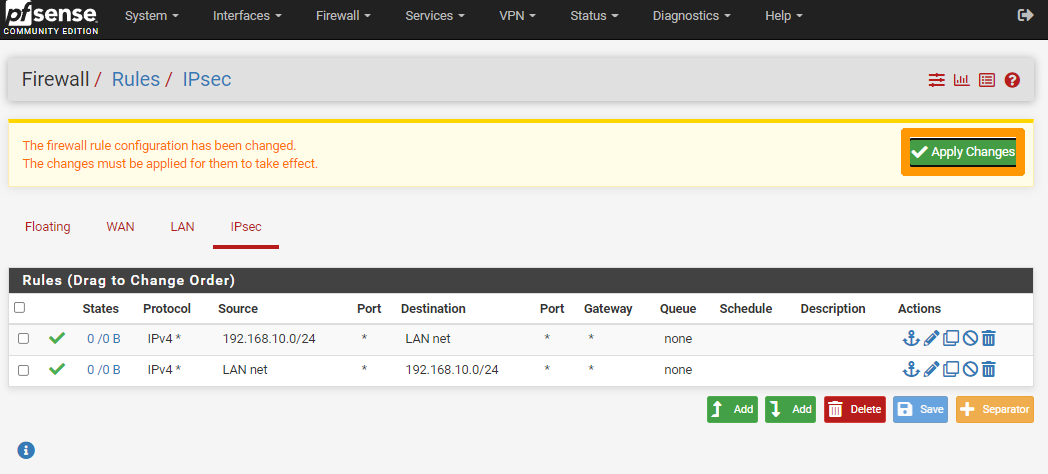
VPN setup is complete on both clusters. It is now possible to set up replicas through the secure VPN tunnel.
Go further
Disaster Recovery Plan on Nutanix
Asynchronous or NearSync replication through Prism Element
If you need training or technical assistance to implement our solutions, contact your sales representative or click on this link to get a quote and ask our Professional Services experts for assisting you on your specific use case of your project.
Join our community of users on https://community.ovh.com/en/.

