Pierwsze kroki z klastrem Nutanix (EN)
195 wyśw.
Objective
This guide will outline the steps you need to take to get started with your Nutanix on OVHcloud cluster:
OVHcloud provides services for which you are responsible, responsible and responsible for their configuration. You are therefore responsible for ensuring that it works properly.
This guide is designed to help you with common tasks. Nevertheless, we recommend contacting the OVHcloud Professional Services team or a specialist provider if you experience any difficulties or doubts when it comes to administering, using or setting up a service on a server.
Find out how to get started with your Nutanix cluster.
Requirements
- A Nutanix cluster in your OVHcloud account
- You must be logged in to Prism Central on the cluster
OVHcloud Control Panel Access
- Direct link: Nutanix
- Navigation path:
Hosted Private Cloud>Nutanix> Select your cluster
Some software, such as Microsoft products, require a license. You must therefore ensure that all installed systems and software have these licenses.
Instructions
Deploy a rebound VM
The rebound VM will serve as an entry point for the operations you will need to carry out to secure your cluster. It can also be used as a relay to reach other VMs after being put into production.
Continue reading this guide, depending on your OS: Linux - Rebound via SSH or Windows - Rebound via RDP.
Rebound via SSH
Creating and configuring the Linux VM
In this example, the network configuration is as follows:
- Network: 172.16.0.0/22
- Mask: 255.255.252.0
- Gateway: 172.16.3.254
Adapt this configuration to your cluster. You can find this information by using this OVHcloud API call.
Import your Linux image into the cluster. For more details, please refer to our guide on importing images into Nutanix.
In the left-hand menu of Prism Central, expand Compute & Storage and click VMs.
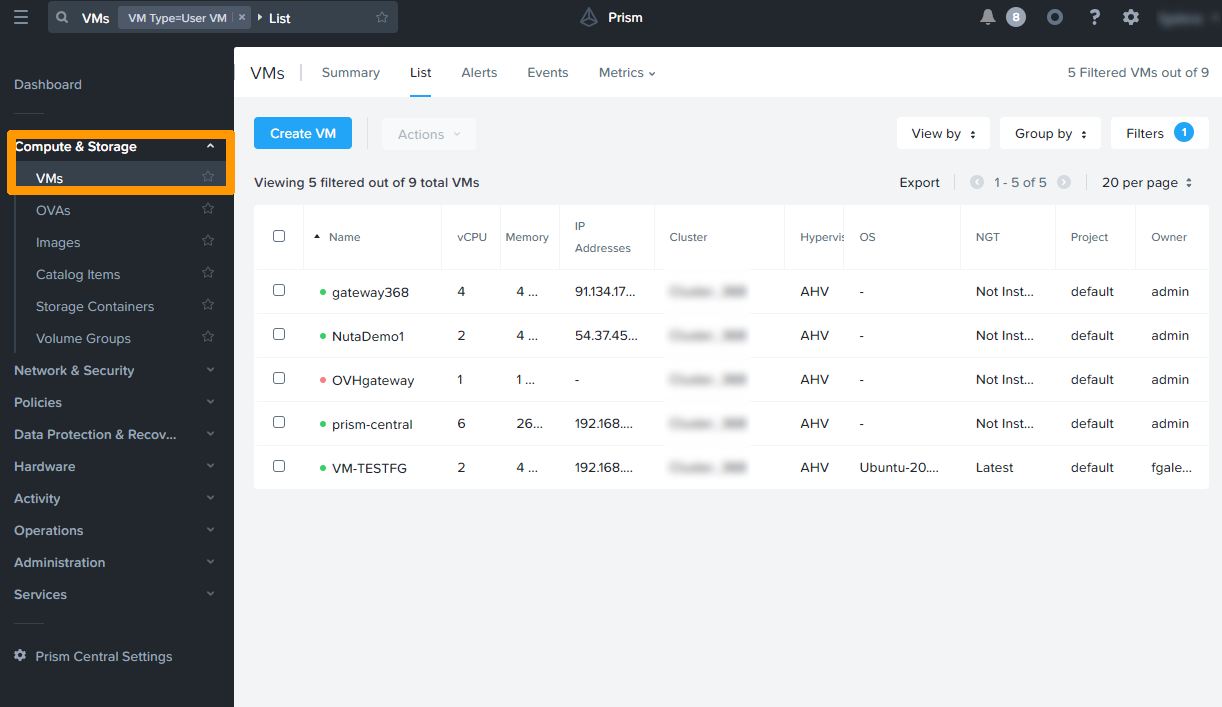
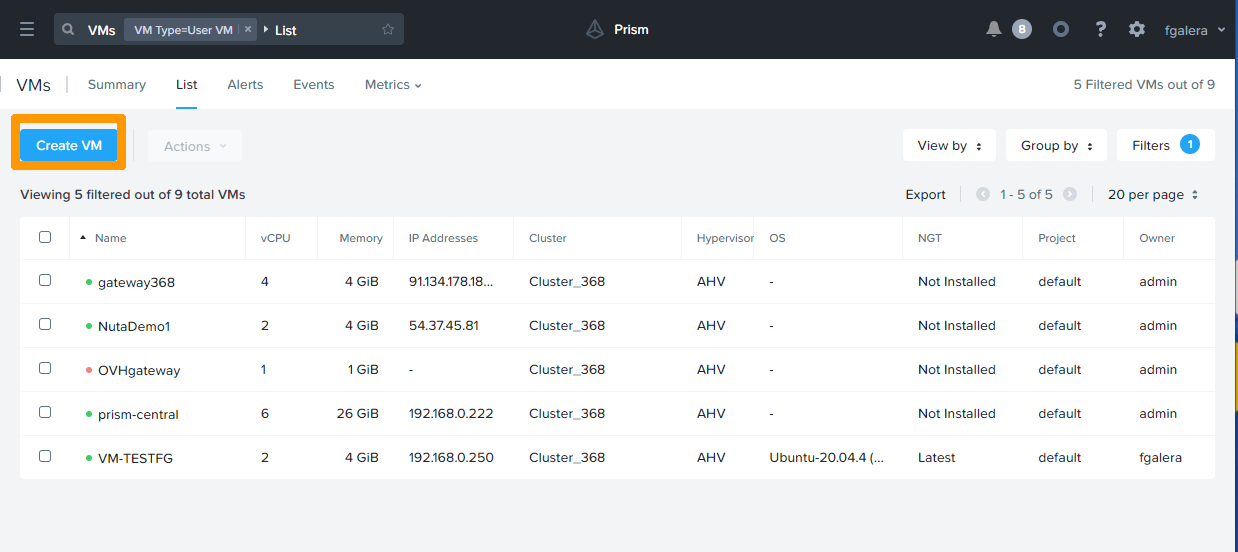
Click the Create VM button.
Customize the name and features of the VM.
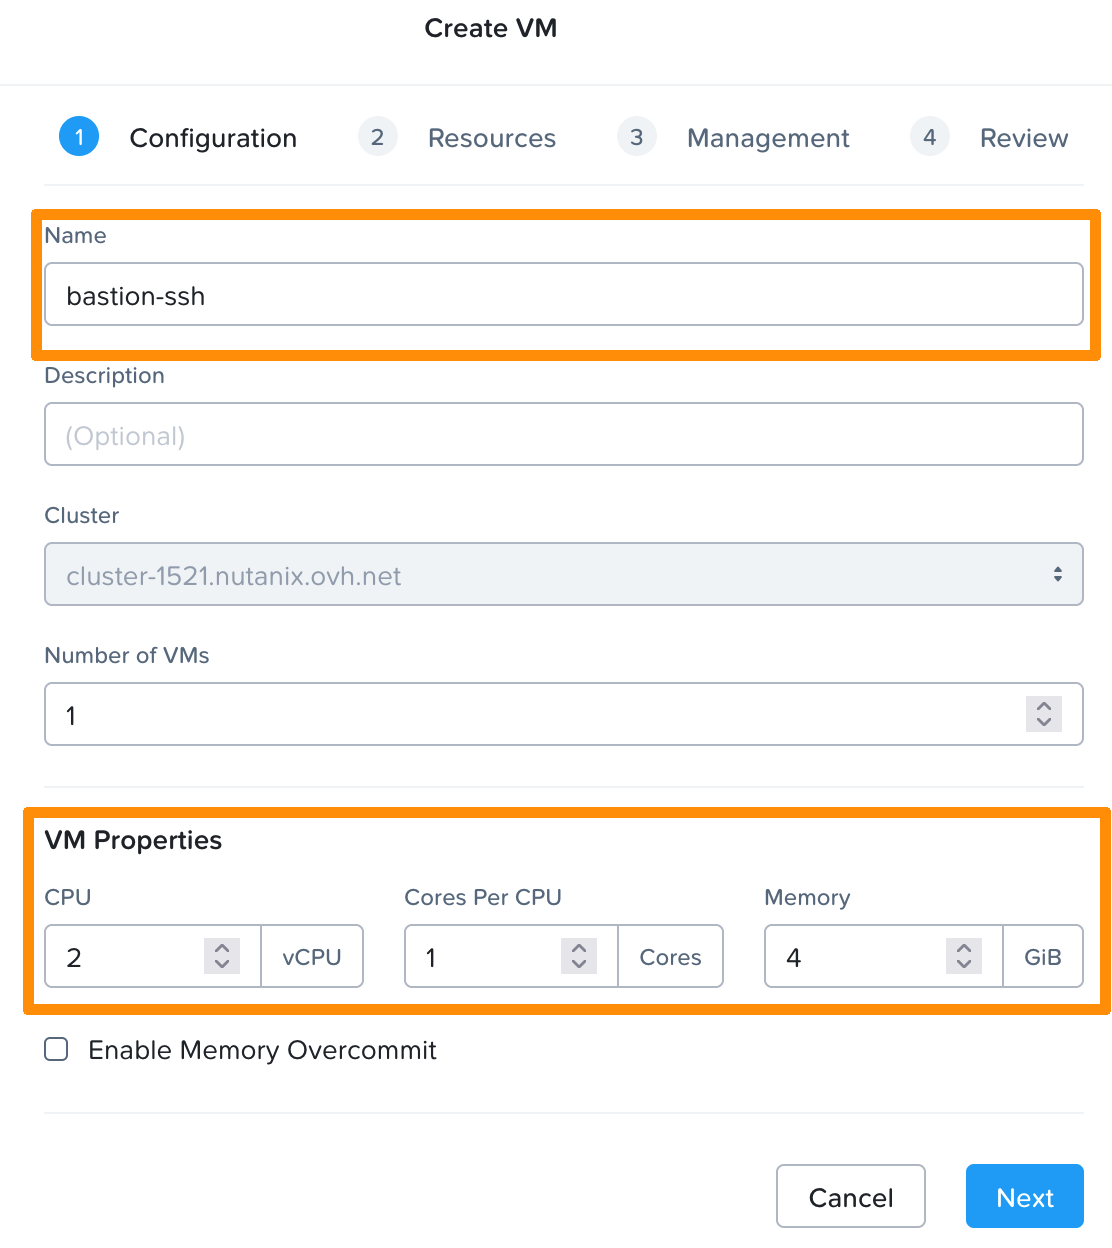
Click Next.
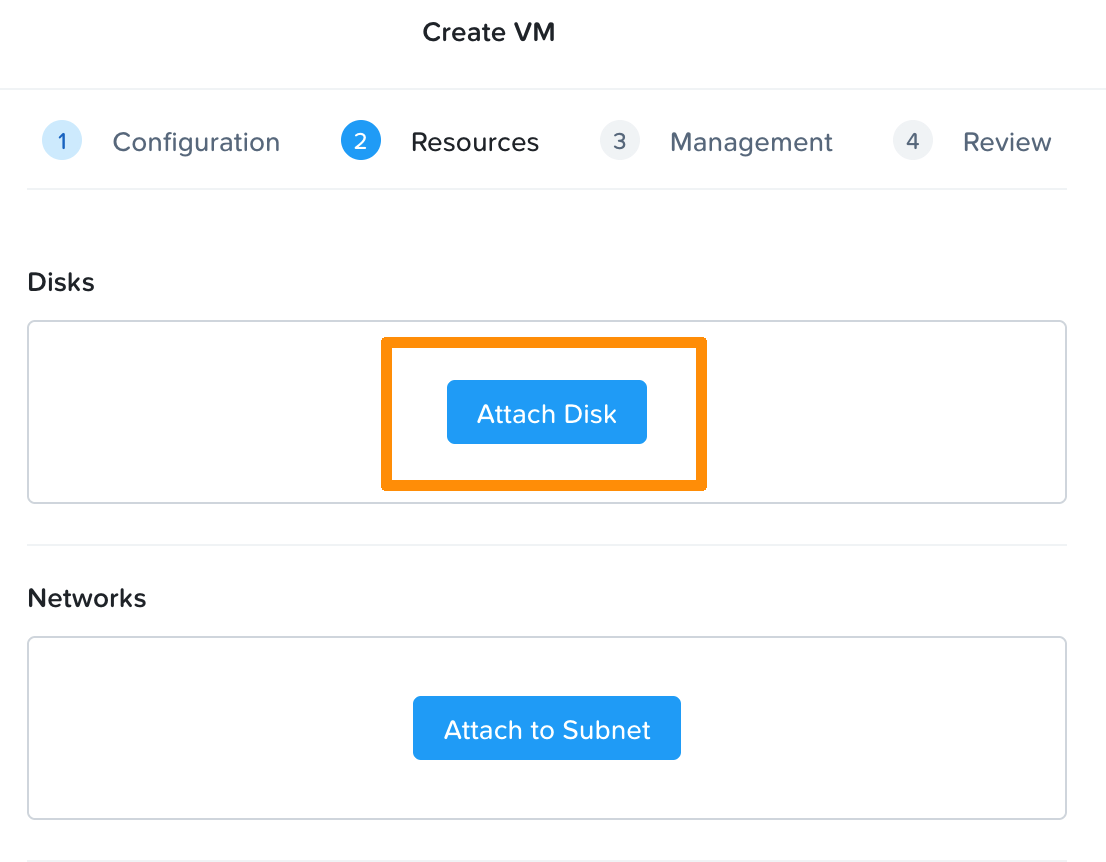
You then need to attach a disk. To do this, you can select the image already present on your cluster (Alpine Linux).
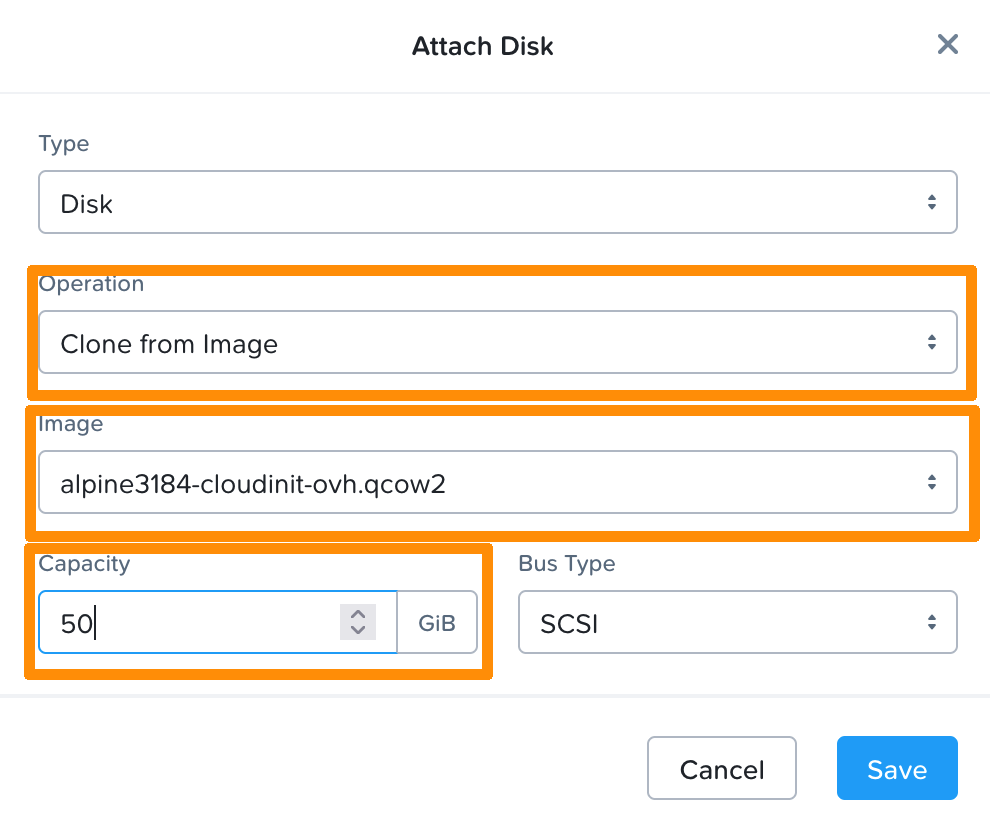
Click Save.
Then click Attach Subnet.
Select the "infra" network and click Save.
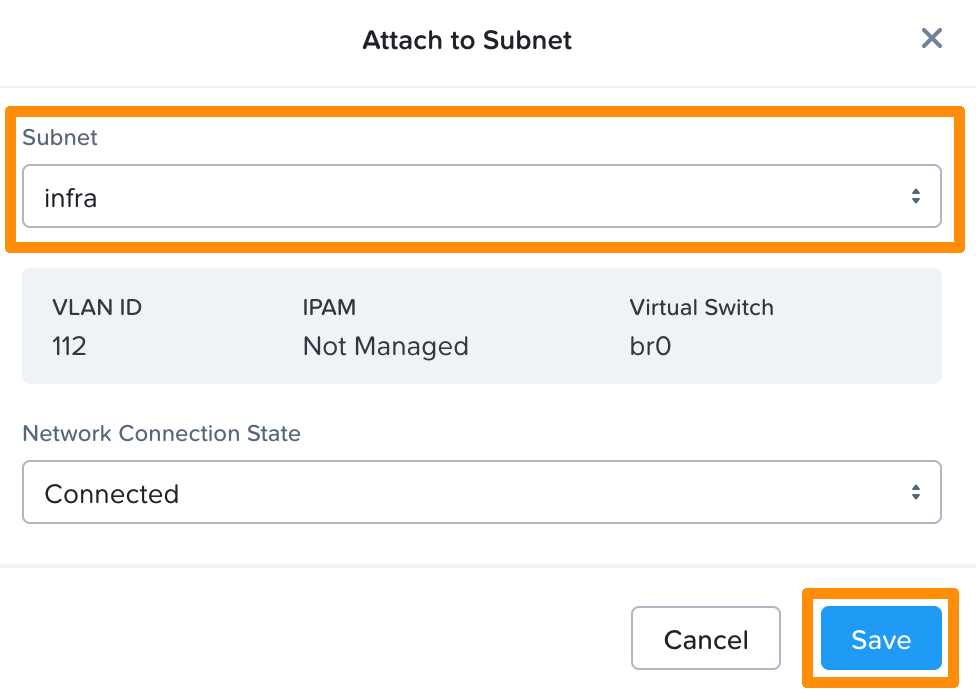
Click Next.
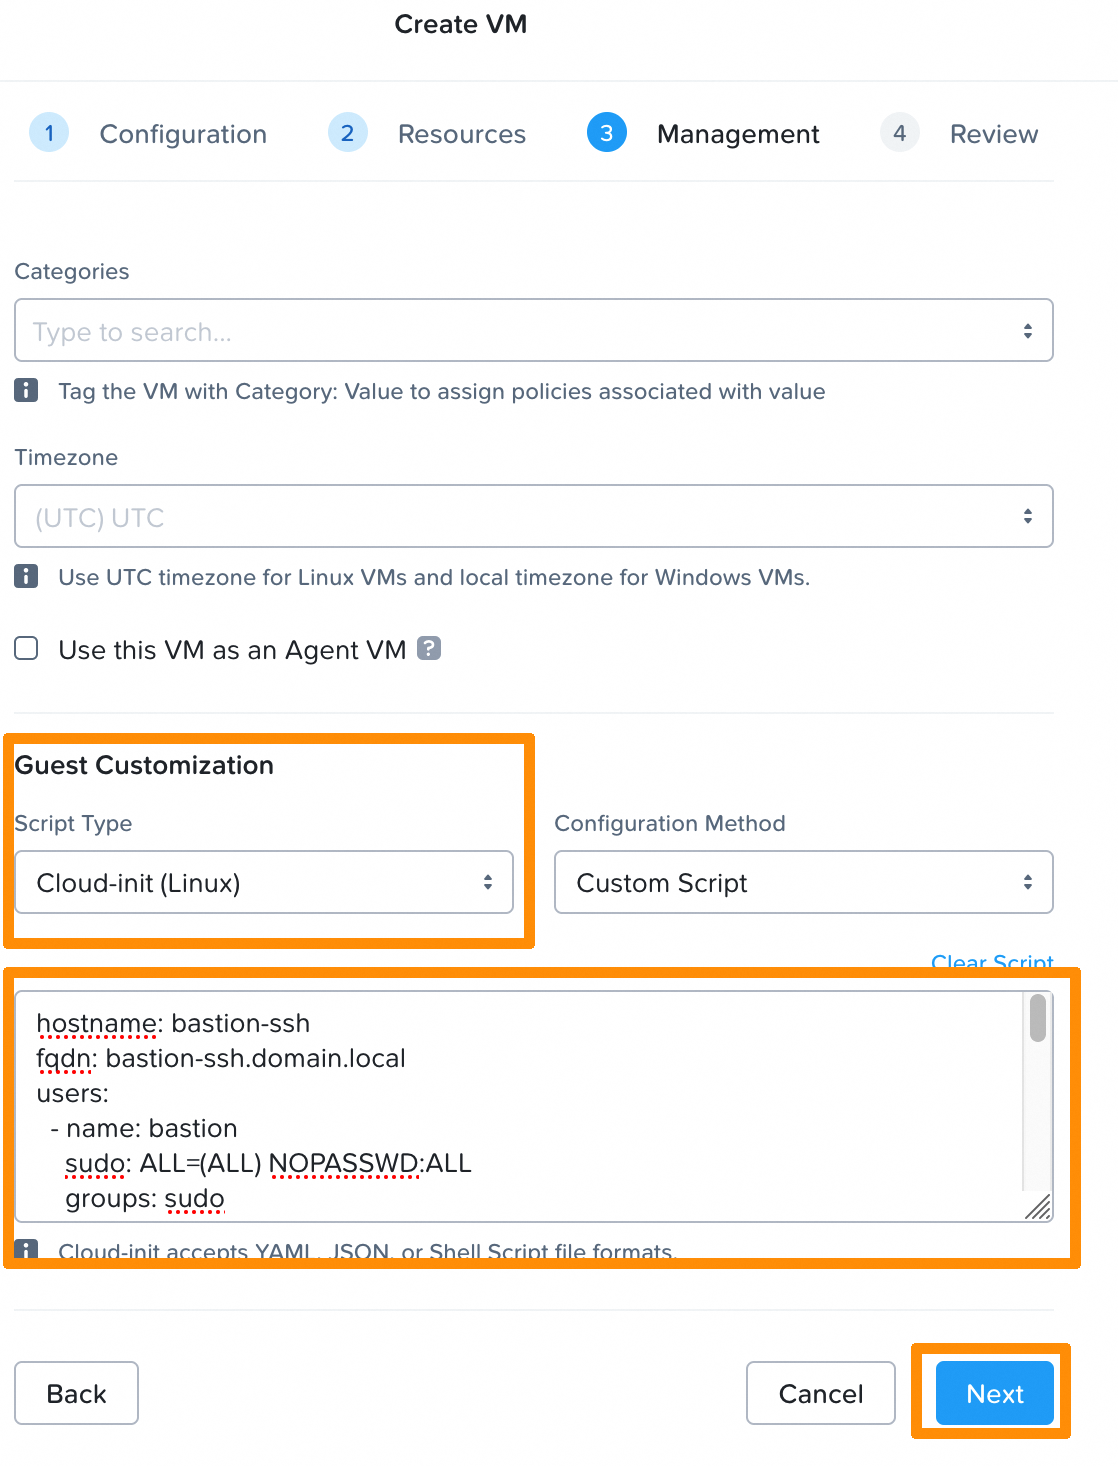
Select cloud-init, copy the "cloud-init" script, then click Next and finally Create VM.
Adapt this configuration to your cluster. You can find this information by using this OVHcloud API call. Make sure to adapt your password and IP configuration.
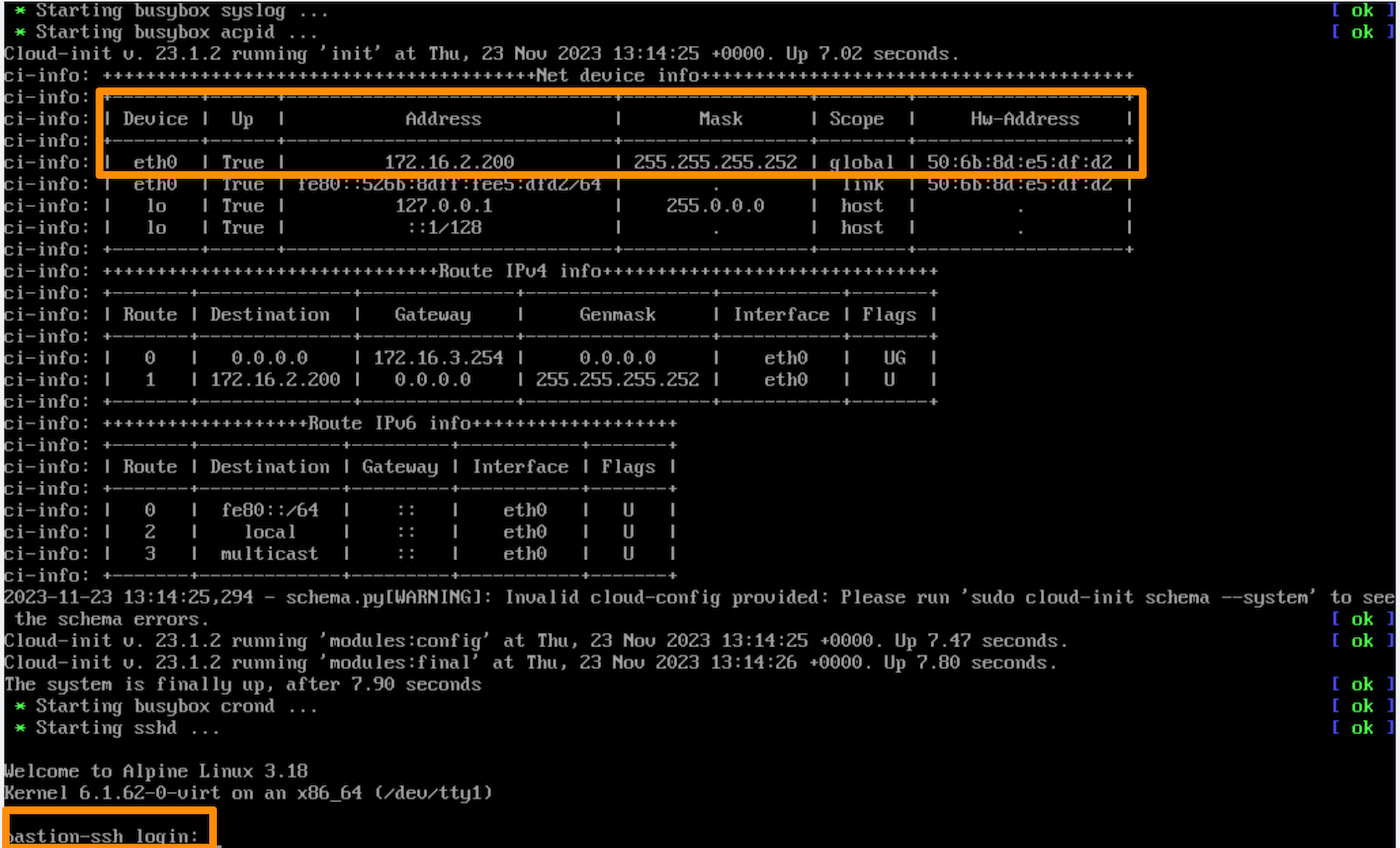
Open the console after restarting the VM. You can see that the VM has taken the settings from the cloud-init file.
Load Balancer configuration
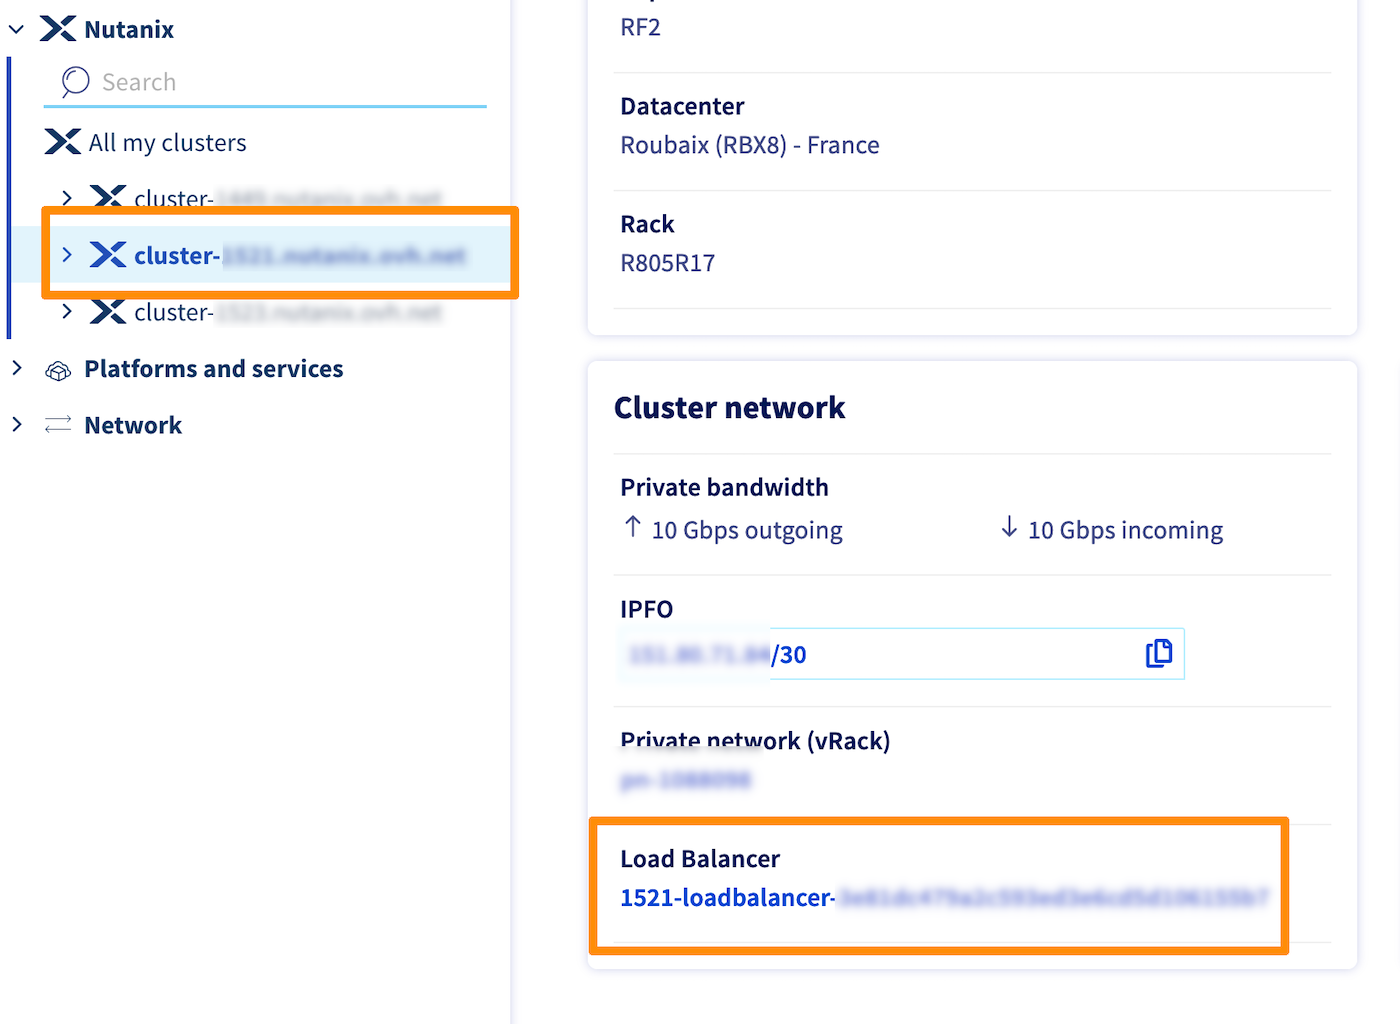
Open the Nutanix Cluster configuration page.
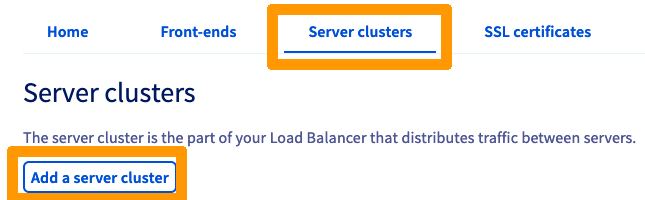
In the Cluster network box at the bottom of the page, click on the Load Balancer.

In the Server clusters tab, click Add a server cluster.
Name your server farm, then select TCP and enter this information:
- Port: 22
- Datacenter: ALL
- Private network: nutanix
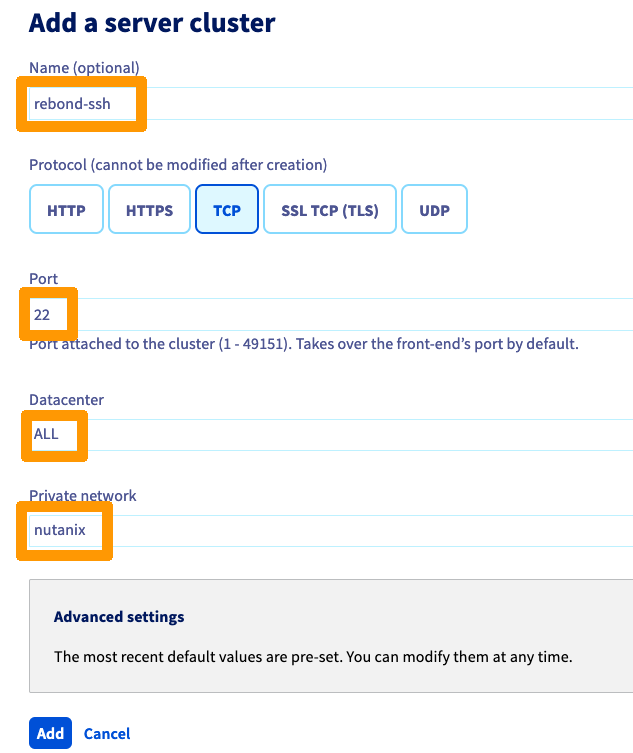
Click Add to confirm the creation of the server cluster.
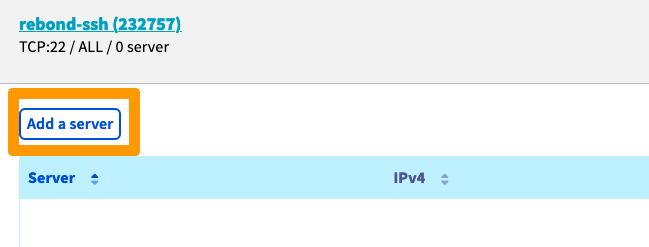
Then click Add a server.
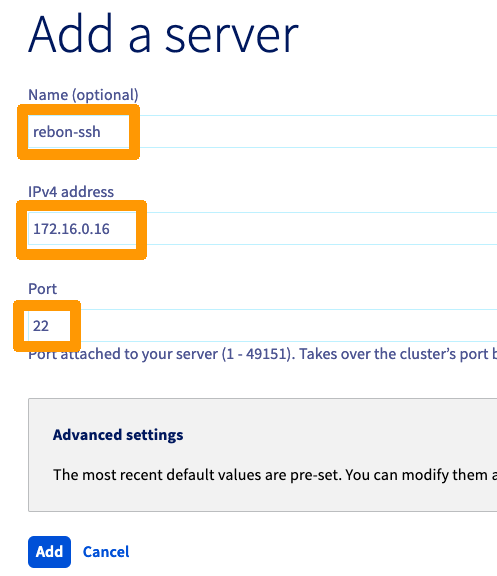
Enter these values:
- Name (optional):
SSH - IPv4 address:
IP address of your Windows VM - Port:
22
Click Add to confirm the server creation.
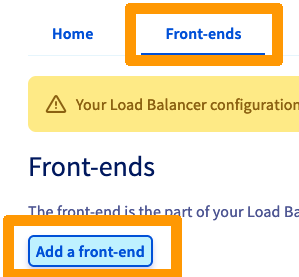
Then click on the Front-ends tab, and on Add a front-end.
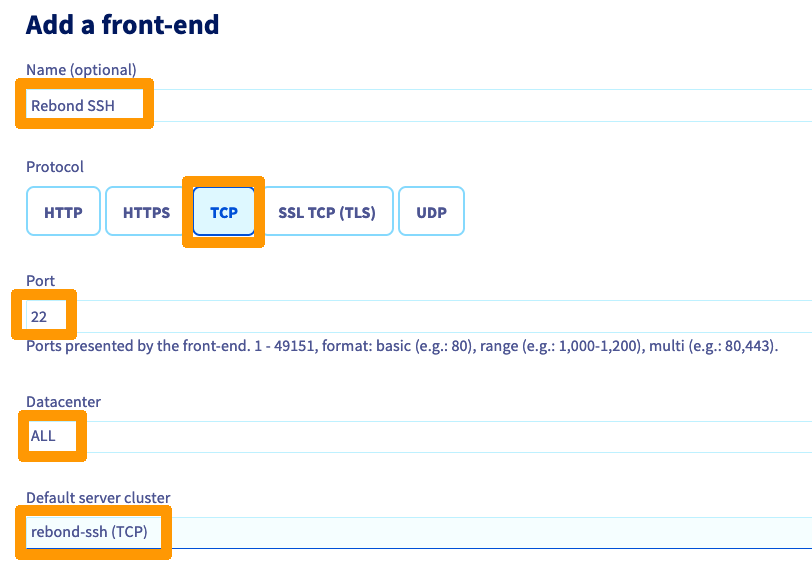
Name your front-end, choose the TCP protocol and modify these values:
- Port:
22 - Datacenter:
ALL - Default server cluster:
rebound-ssh (TCP)
Click Add.
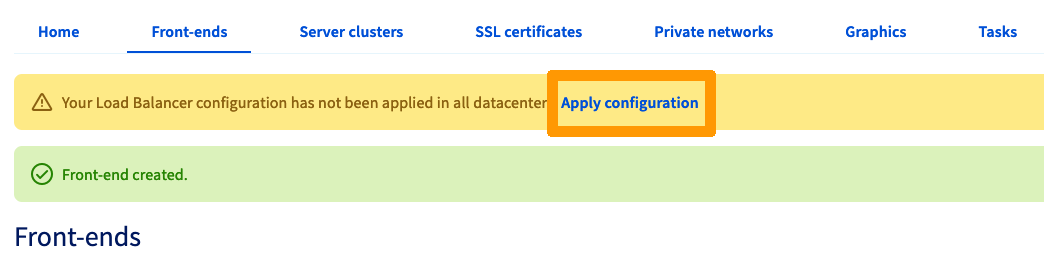
Click Apply configuration.
Select the Datacentre and click Apply configuration.
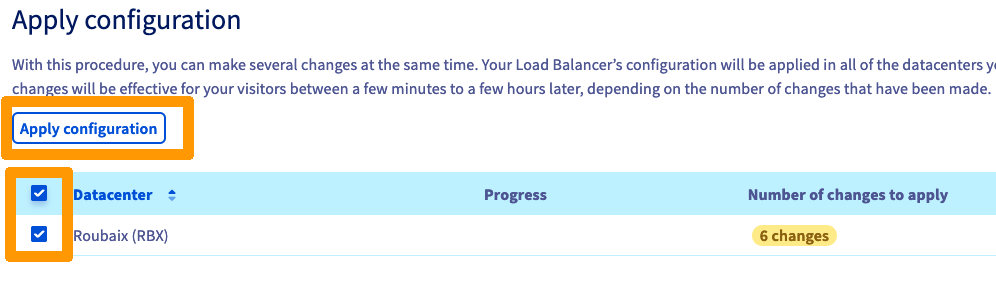
You can track the progress of the changes in the Tasks tab.
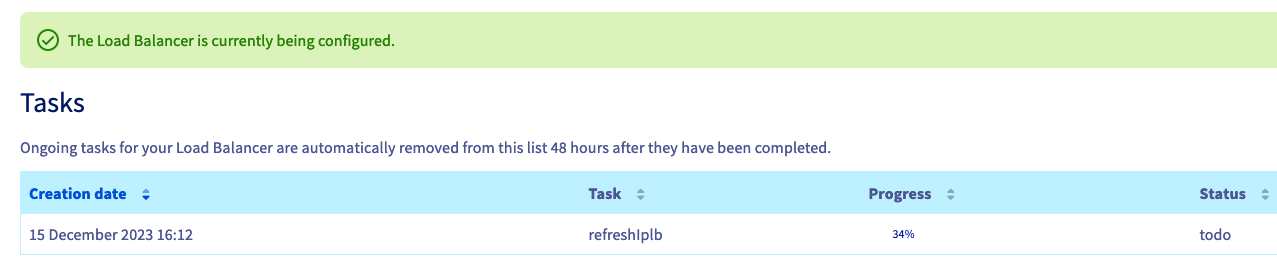
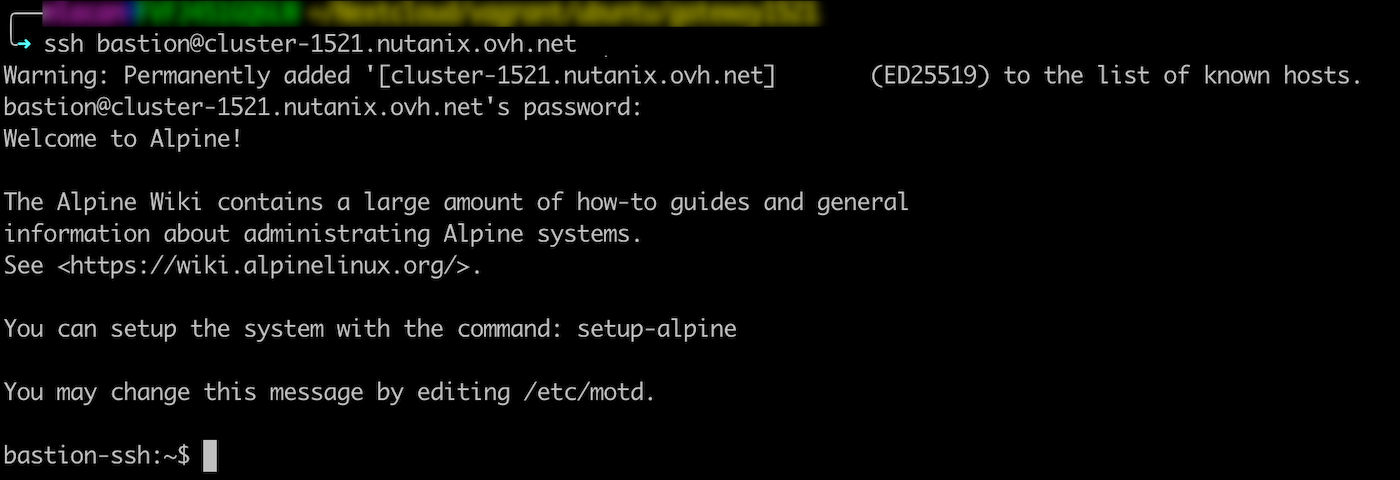
The Load Balancer is now configured. Use your preferred terminal to connect to your machine. You can enter your cluster’s DNS name or Load Balancer’s IP address:
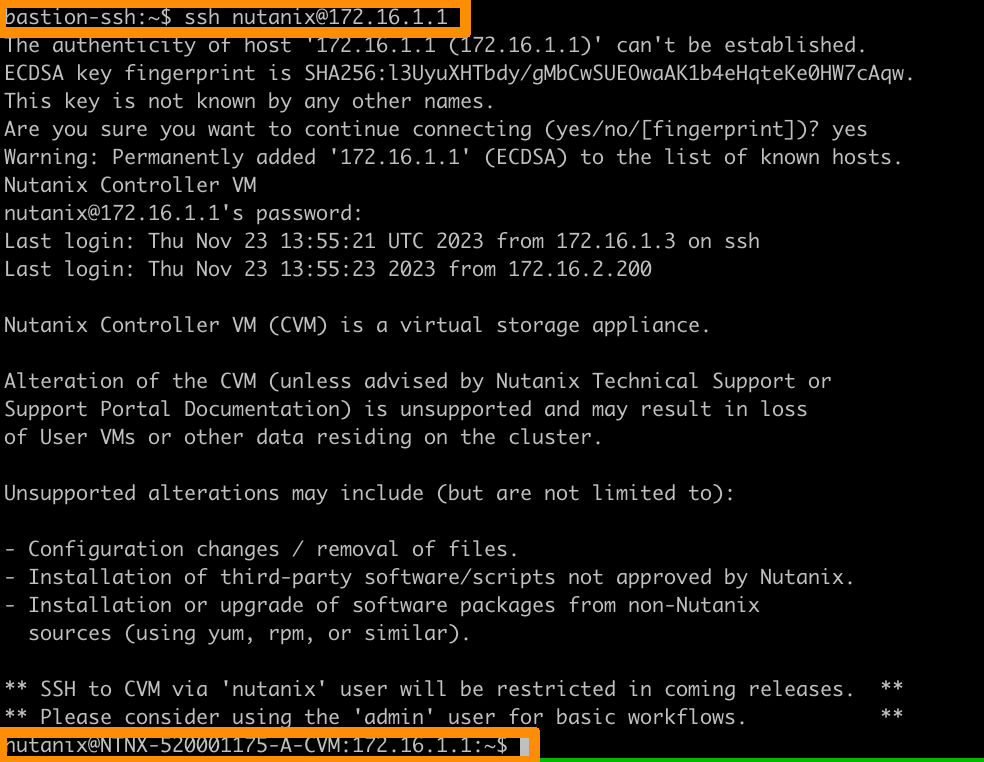
You can now rebound on the different elements of the cluster:
- CVMs
- Hosts
- Prism Element
For example, for a CVM, enter the following in the terminal:
Rebound via RDP
Creating and configuring the Windows VM
Import your Windows image into the cluster. Read our guide on importing images into Nutanix.
In the left-hand menu of Prism Central, expand Compute & Storage and click VMs.
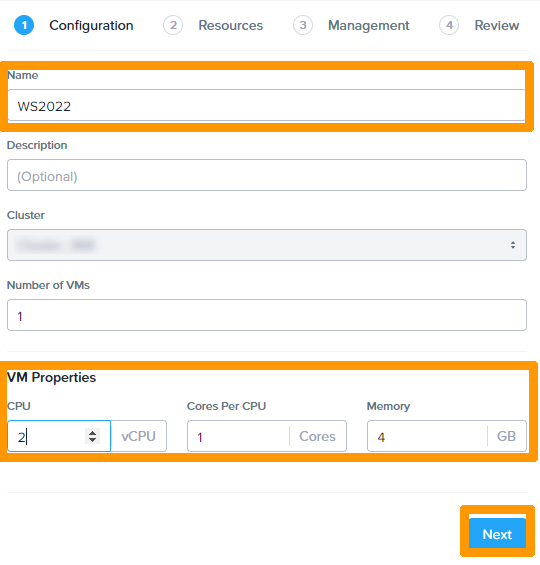
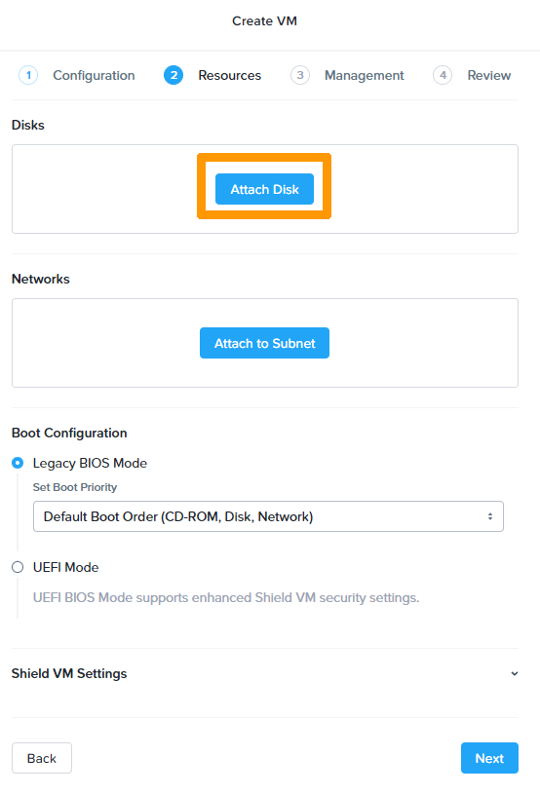
Click the Create VM button.
Enter a name in Name, choose the options in VM Properties and click Next.
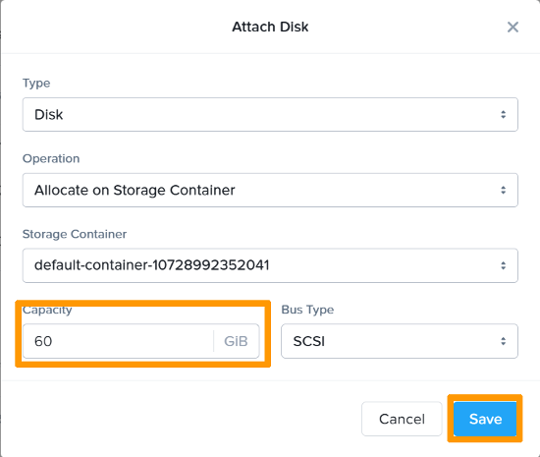
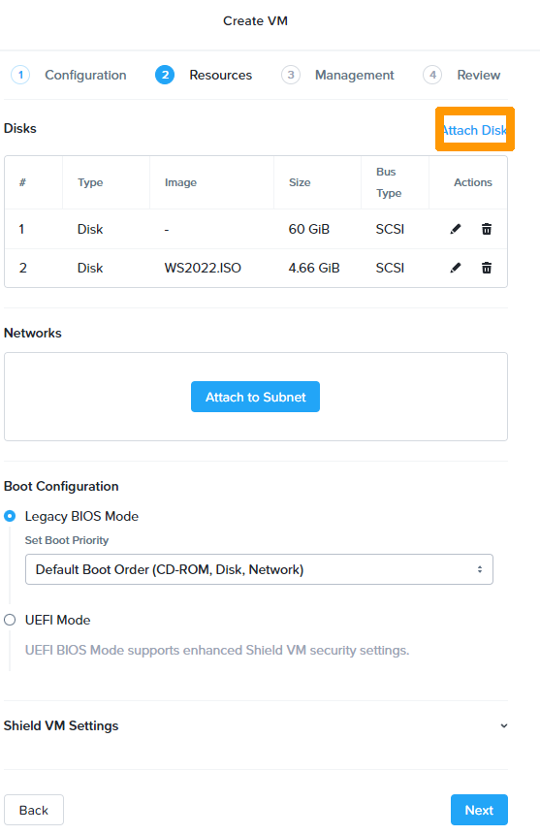
1. Adding a system disk
Click the buttonAttach Disk.
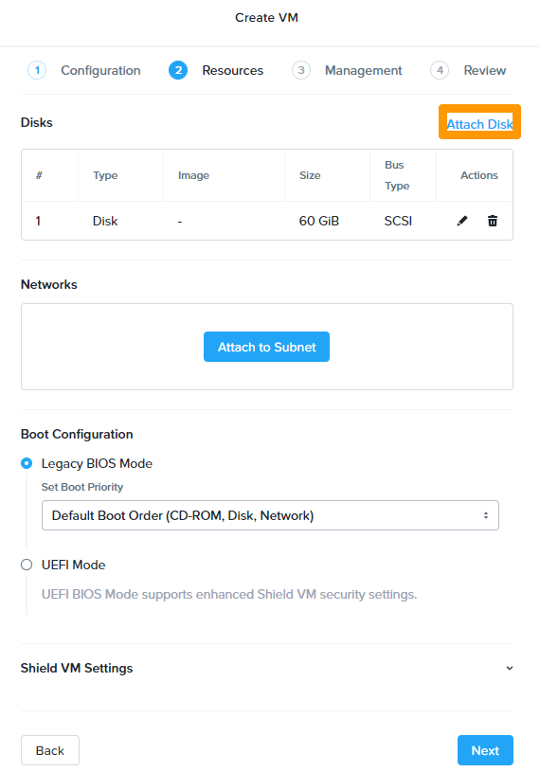
Enter 60 in the capacity field and click Save to create a 60 GB disk.
2. Adding the Windows Server 2022 installation ISO image
The image must be imported before it can be used in a new virtual machine.
For more details on importing images, please refer to our guide on importing images into Nutanix.
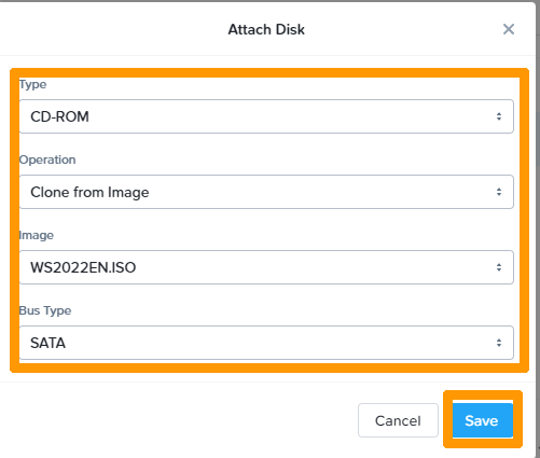
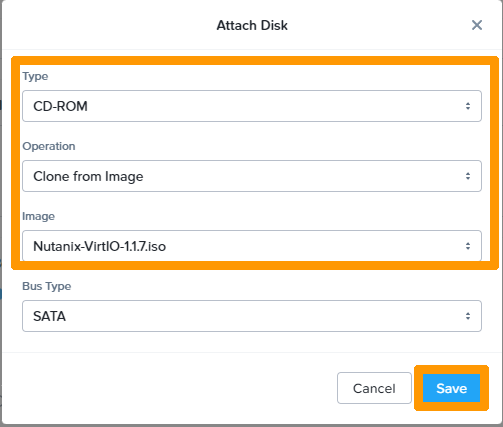
Click Attach Disk.
Change the Type parameters to CD-ROM, Operation to Clone from Image , Image to WS2022EN.ISO.
Click Save.
3. Adding ISO image containing AHV-specific drivers
This image contains the disk controller driver and must also be imported. It is available on the Nutanix website if you have a Nutanix customer account.
Click Attach Disk.
Change the Type parameters to CD-ROM, Operation to Clone from Image, Image to Nutanix-VirtIO-1.1.7.iso.
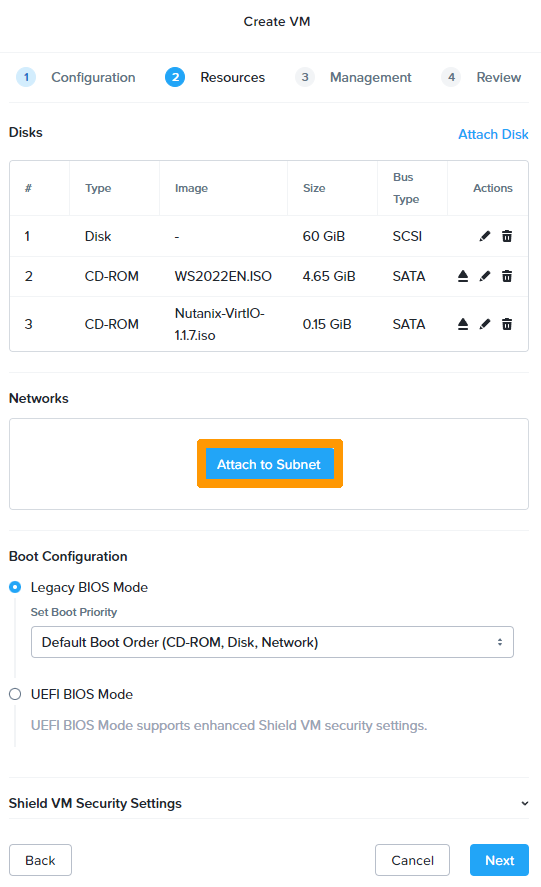
Click Save.
4. Network configuration
Click Attach Subnet.
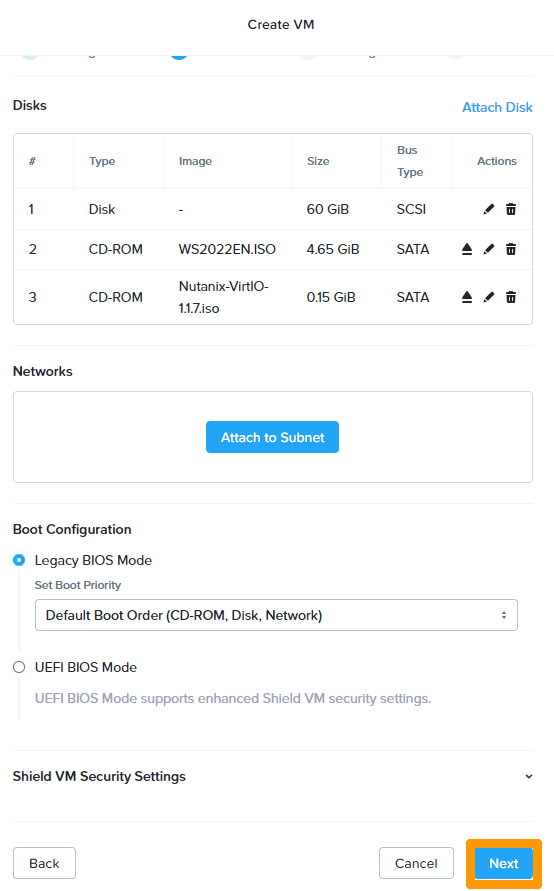
Select the "infra" network and click Save.
Click Next.
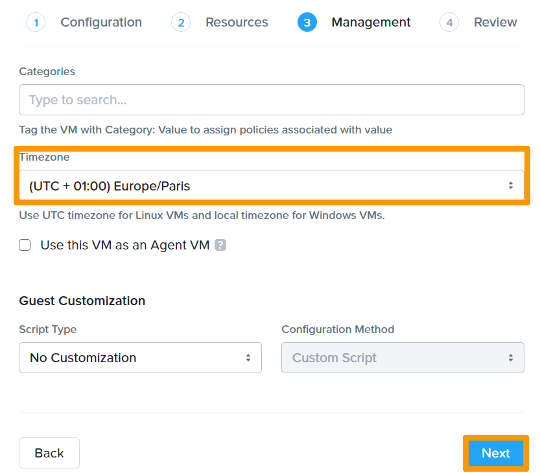
Select the time zone of your country in the Timezone field and click Next.
Click Create VM.
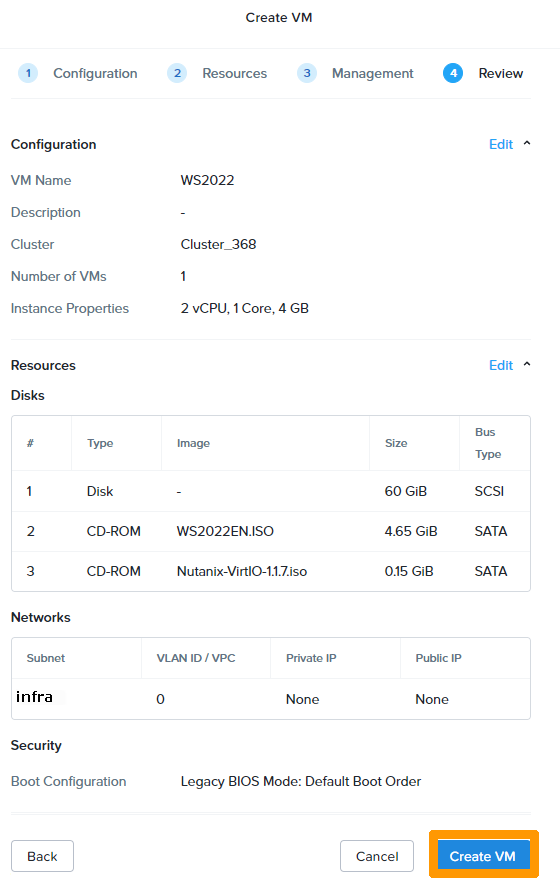
The newly created virtual machine will then appear in the dashboard.
 .
.
Installation of Windows Server 2022
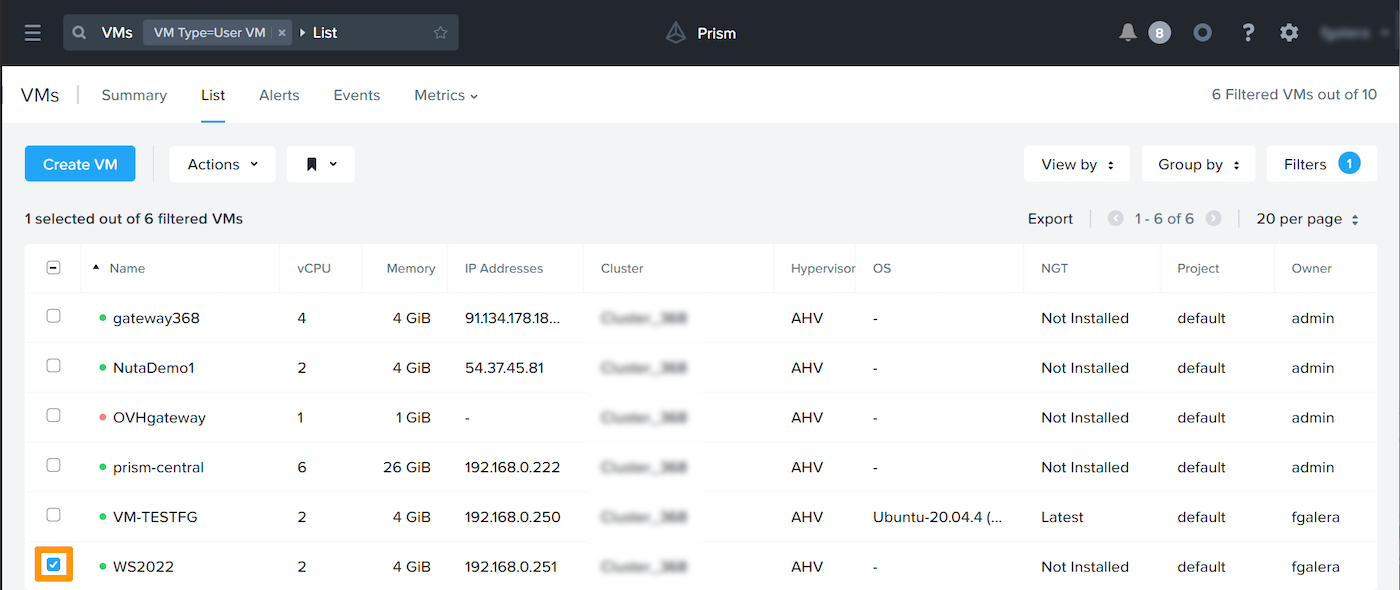
Select the virtual machine on which you want to install Windows Server 2022, by ticking the box on the left of the VM.
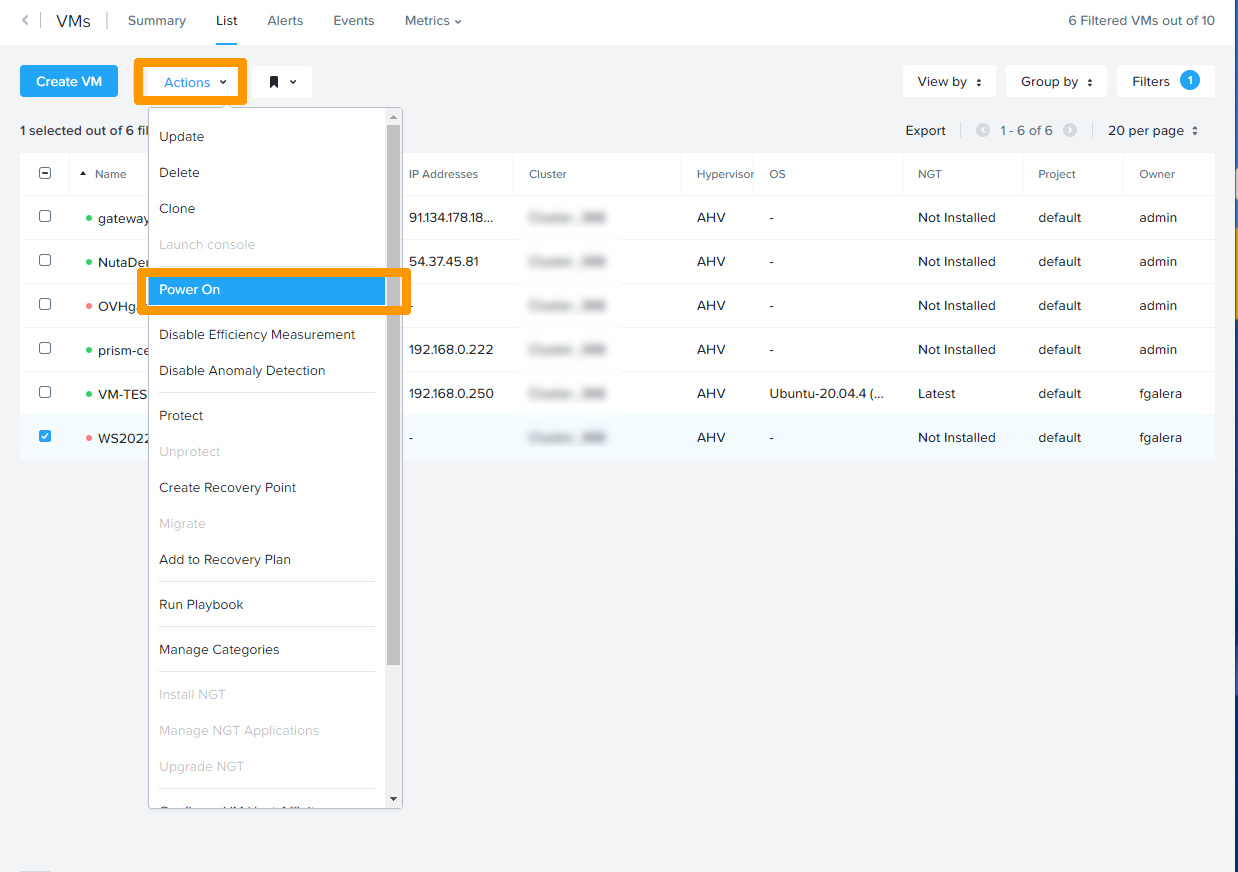
1. Boot the VM
Click the Actions menu, then Power ON.
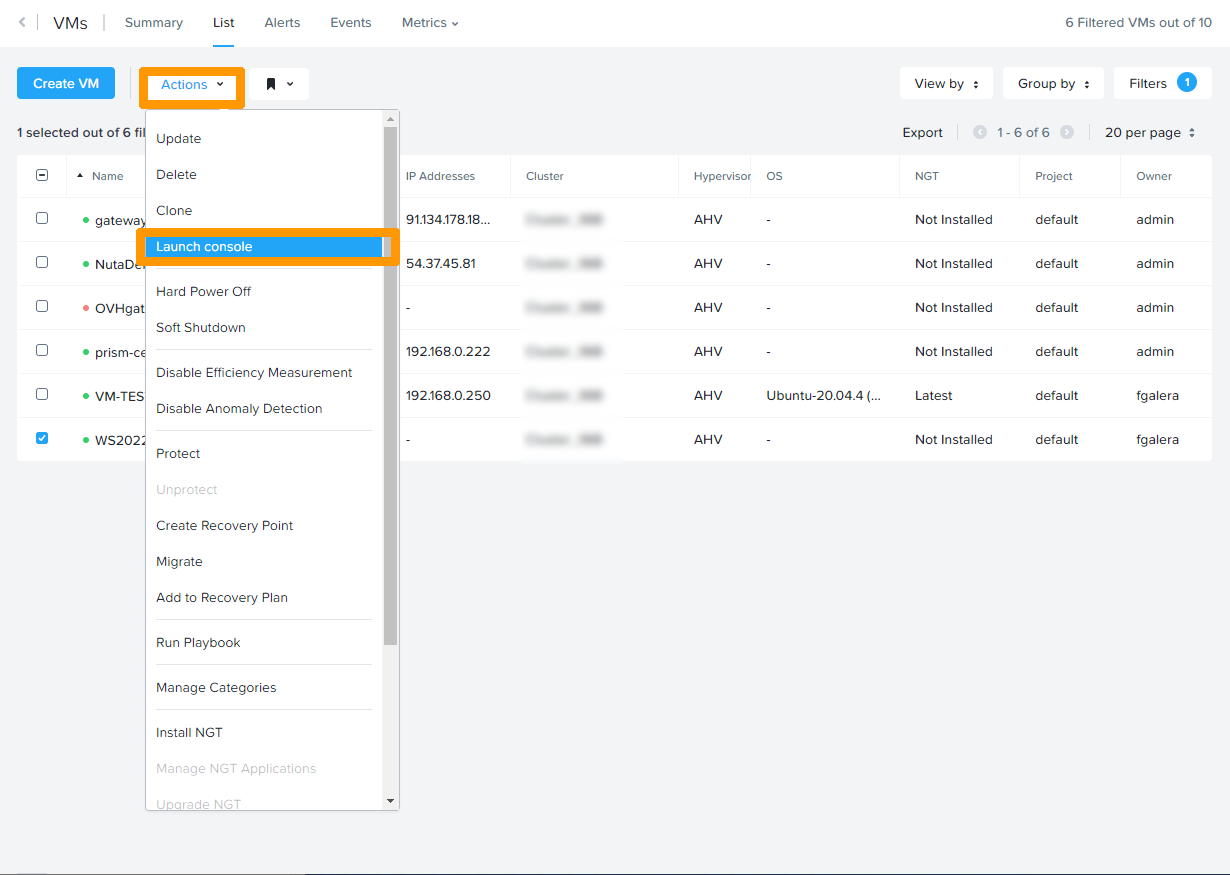
2. Launch the console
Click the Actions menu, then Launch Console.
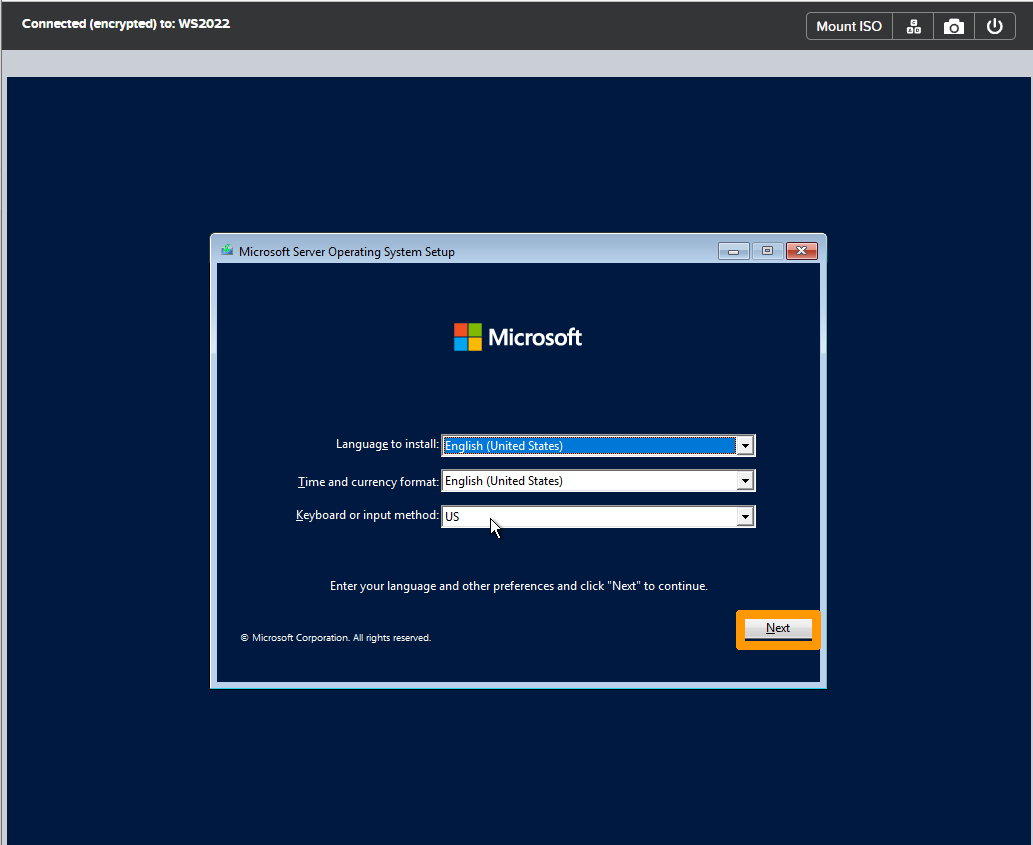
3. Start the installation
Choose your locale and click Next.
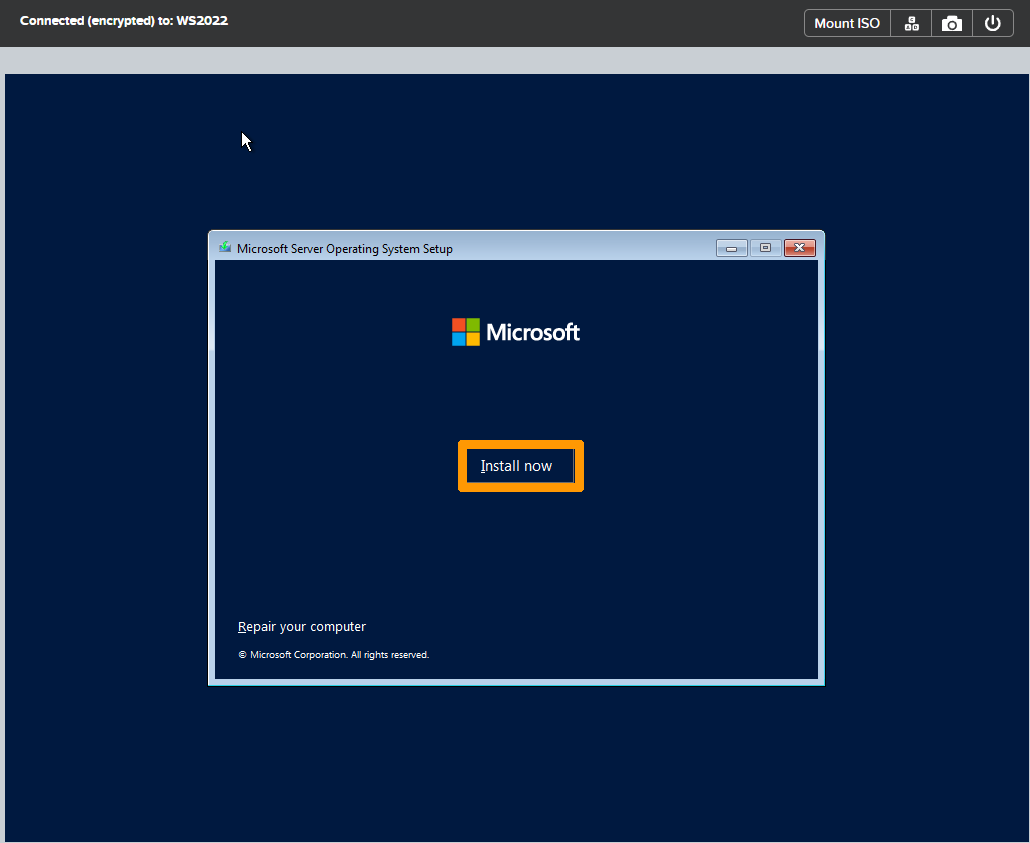
Click Install now.
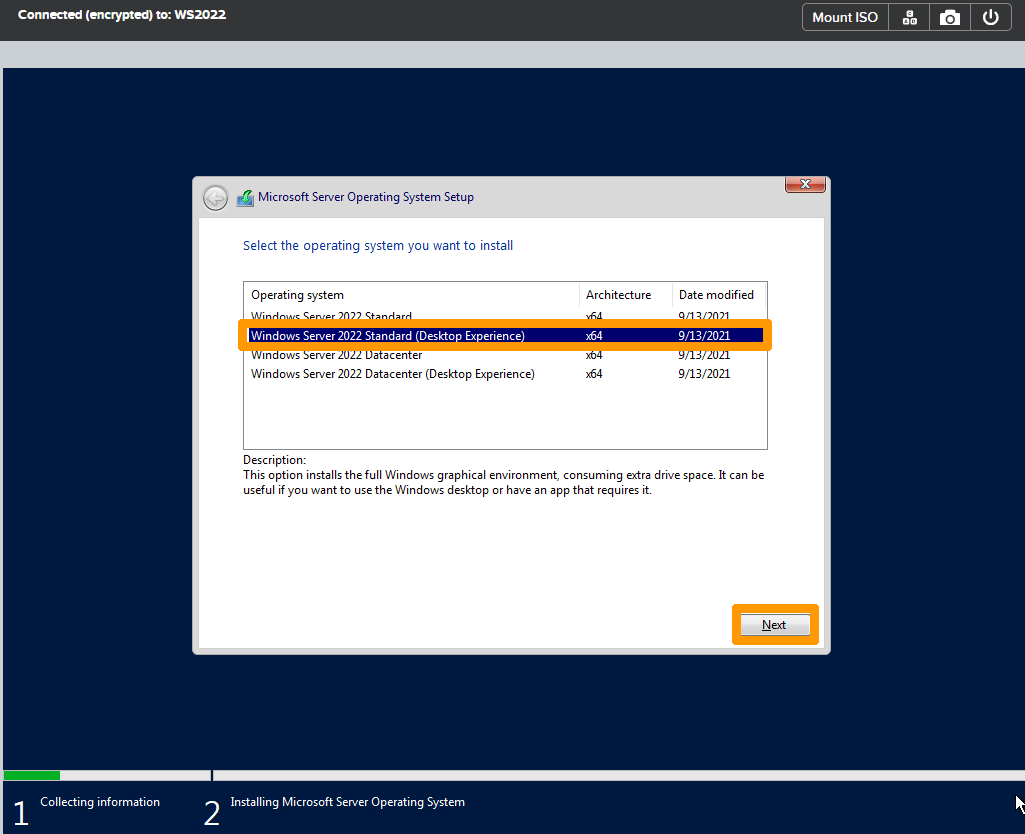
Select Windows Server 2022 Standard (Desktop Experience) and click Next.
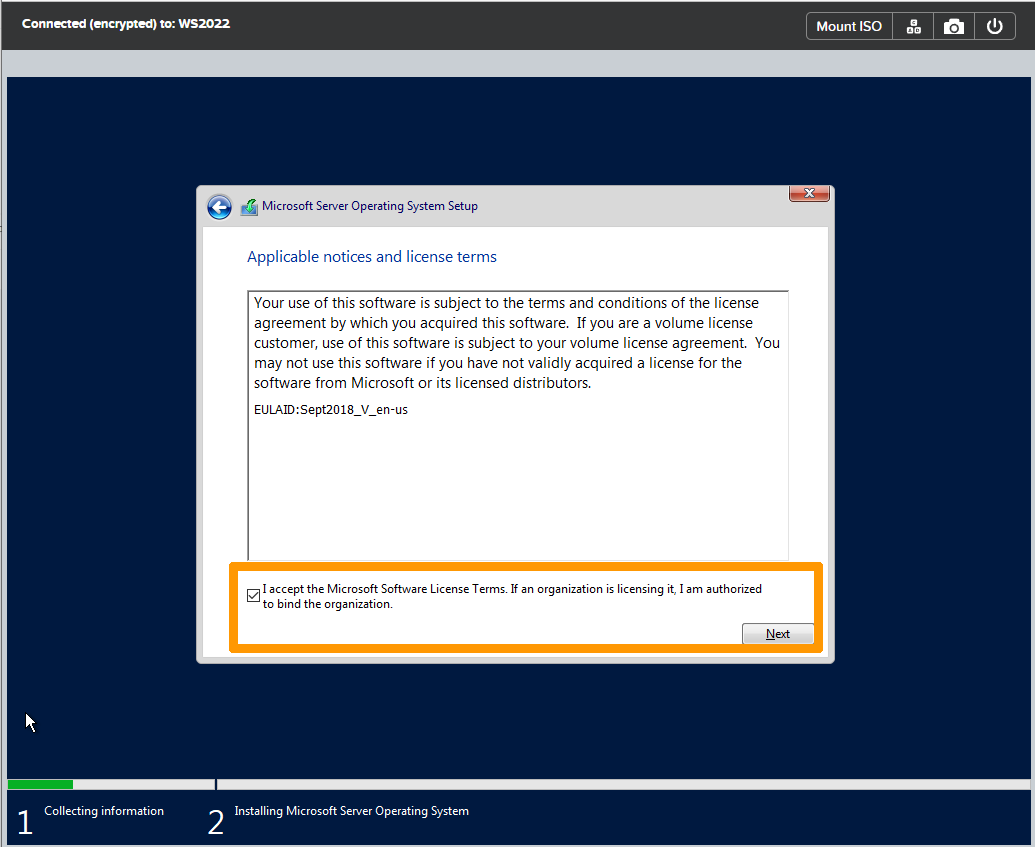
Read the Microsoft software license terms and conditions, confirm their acceptance, and click Next.
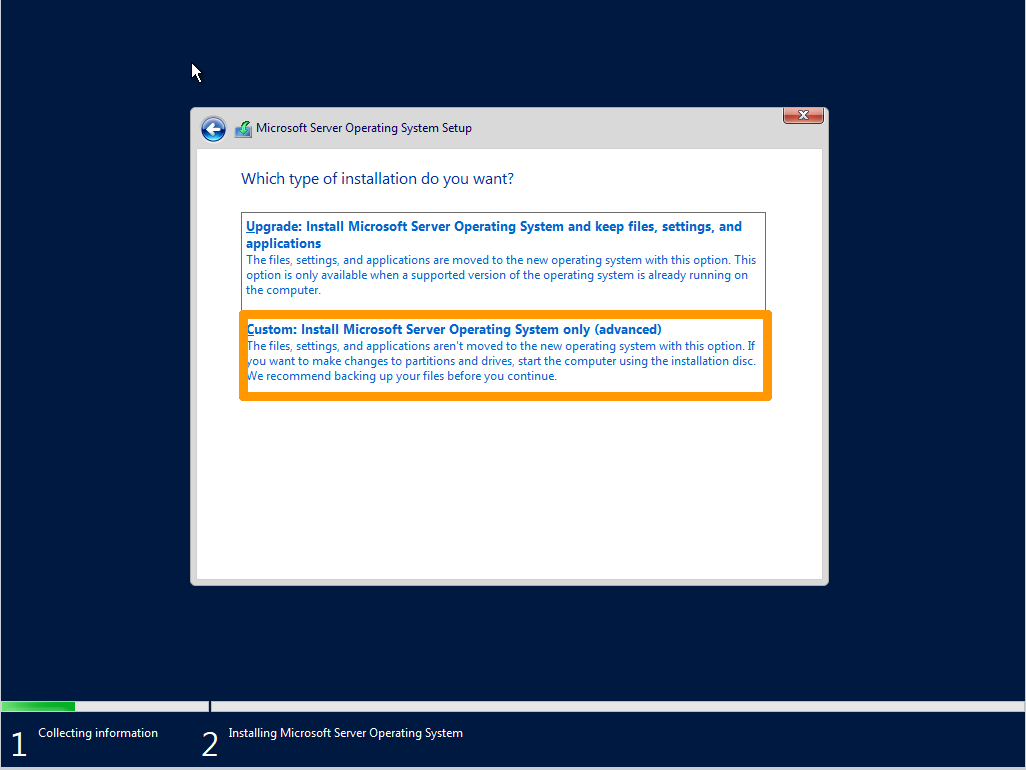
Click Custom: Install Microsoft Server Operating System only (advanced).
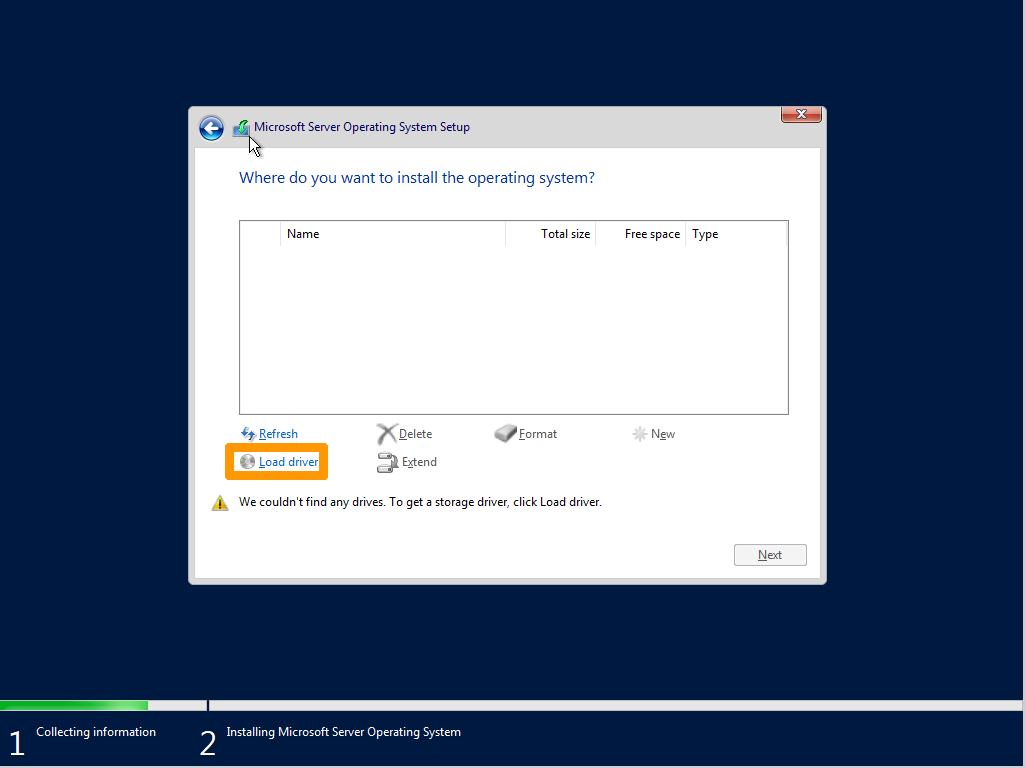
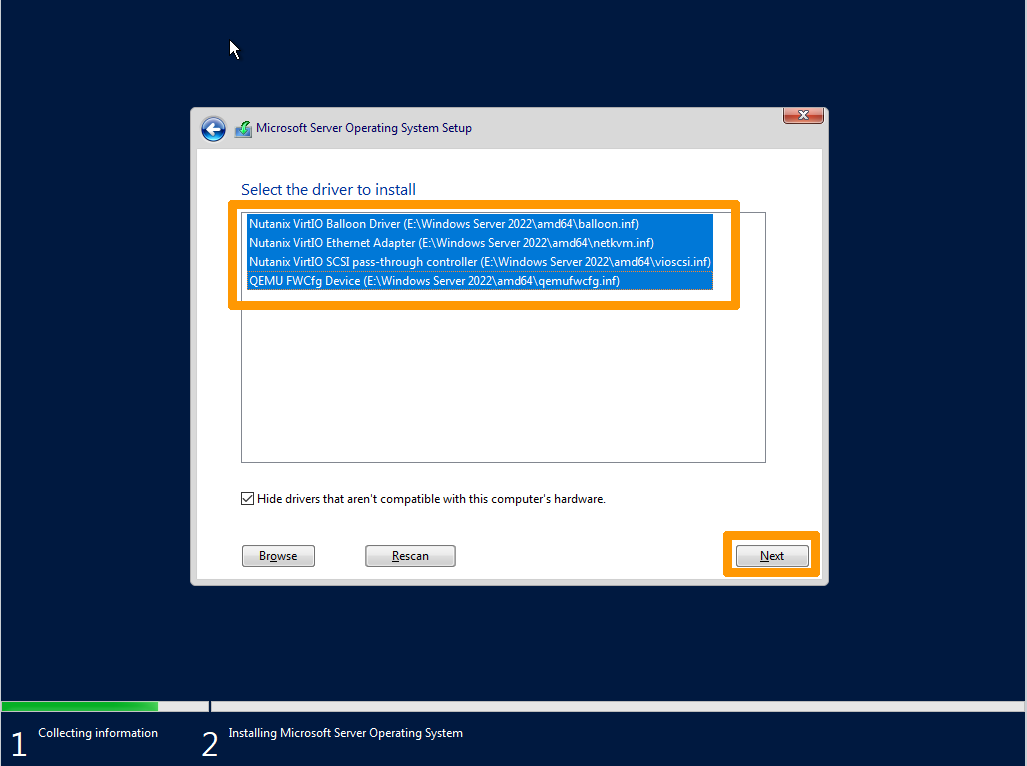
Click Load driver.
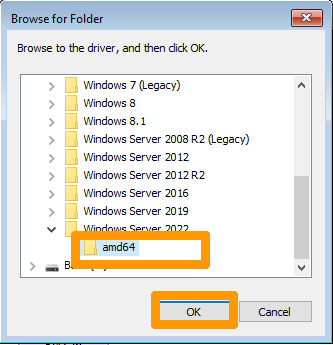
Click Browse.

Select the correct folder e:\Windows Server 2022\amd64 and click OK.
Select these drivers:
Nutanix VirtIO Balloon DriverNutanix VirtIO Ethernet AdapterNutanix VirtIO SCSI pass-through controllerQEMU FWCfg Device
Click Next.
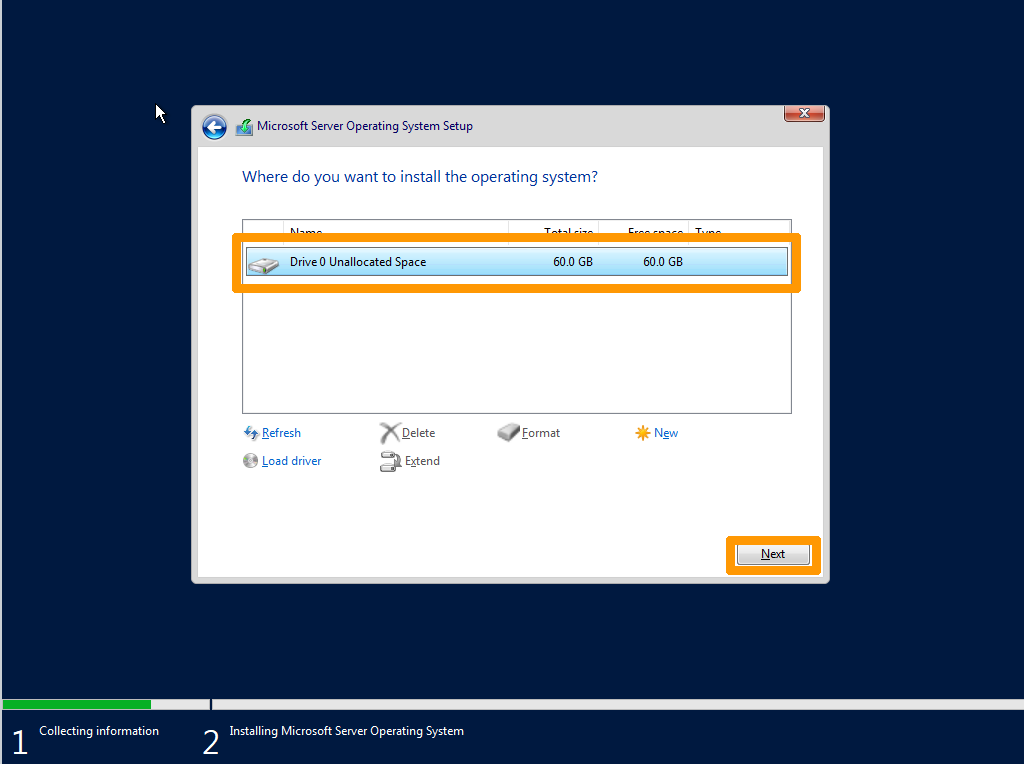
The 60 GB disk appears, click Next.
Enter and confirm the password in the two fields provided, and click Finish.

Windows Server 2022 and WS2022-specific drivers for the AHV hypervisor have been successfully installed.
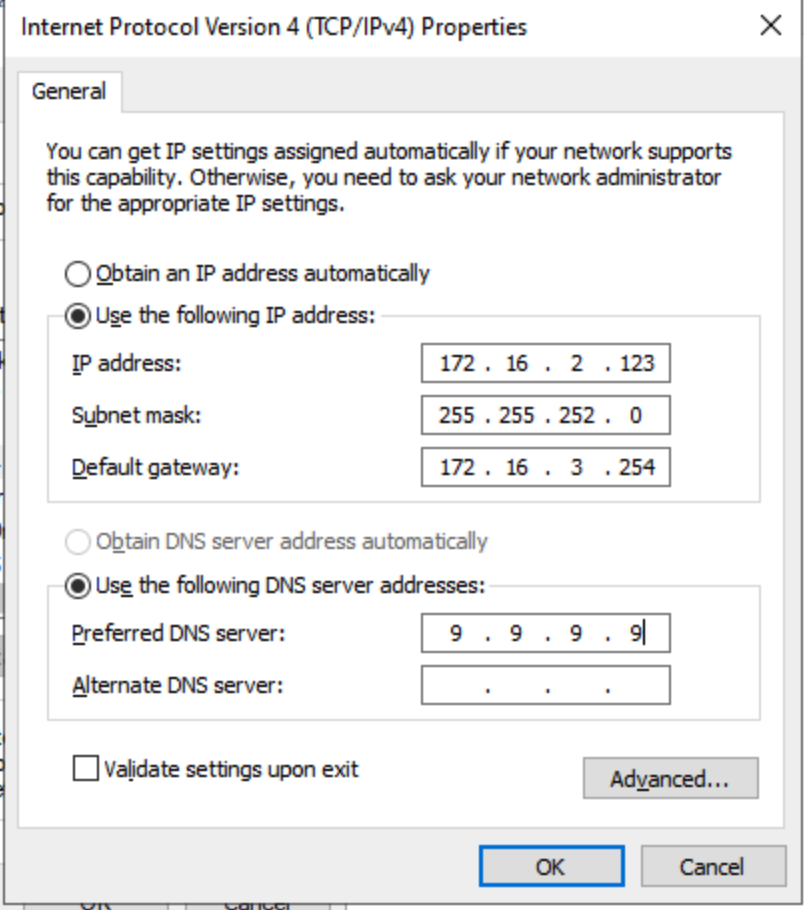
4. Windows Configuration
Log in and assign an IP address to the machine in the "infra" network. In this example, the network configuration is as follows:
- Network: 172.16.0.0/22
- Mask: 255.255.252.0
- Gateway: 172.16.3.254
Adapt this configuration to your cluster. You can find this information by using this OVHcloud API call.
In the system settings, enable "Remote Desktop".
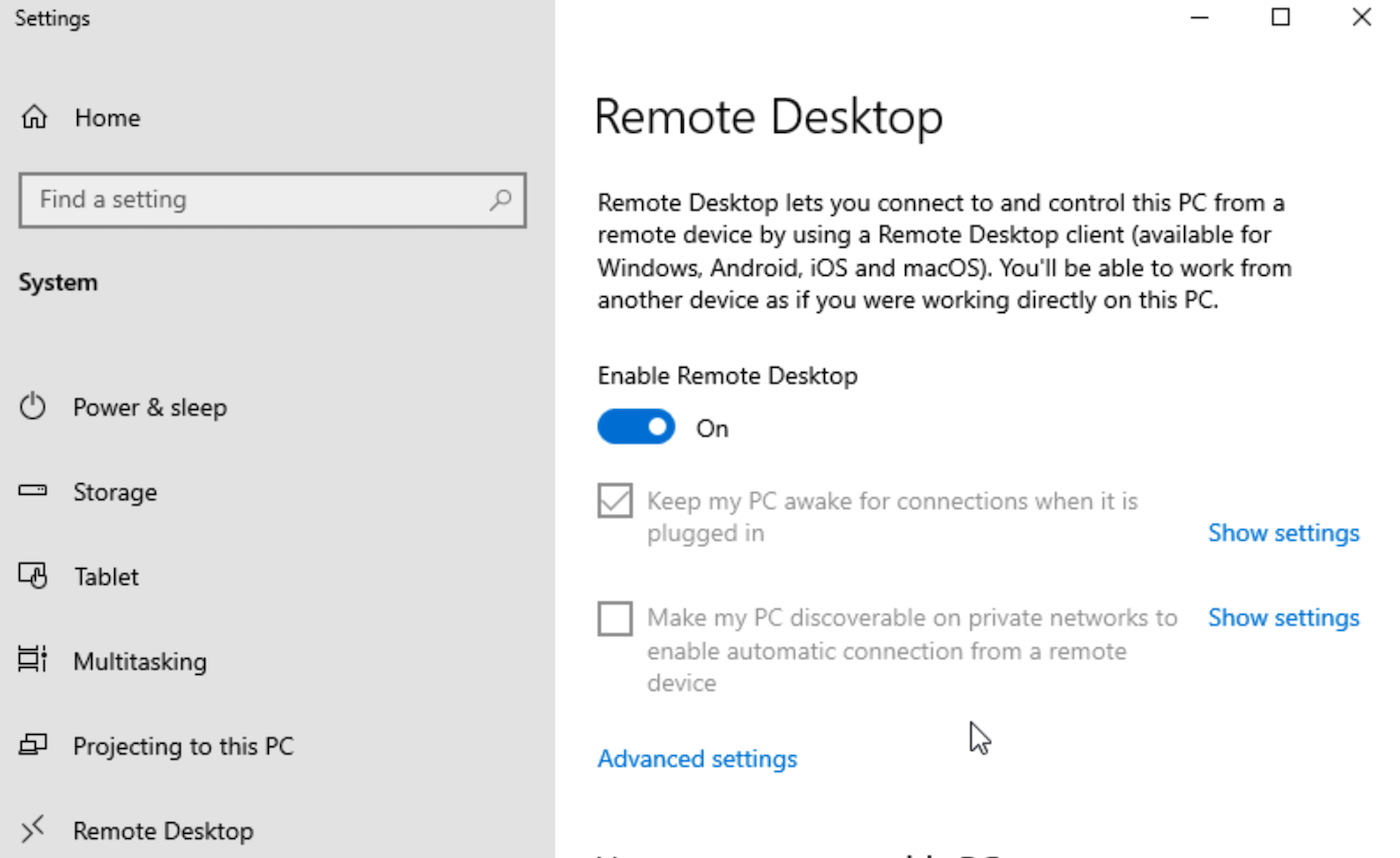
Check the firewall configuration if necessary.
Load Balancer configuration
In the Cluster network box at the bottom of the page, click on the Load Balancer.
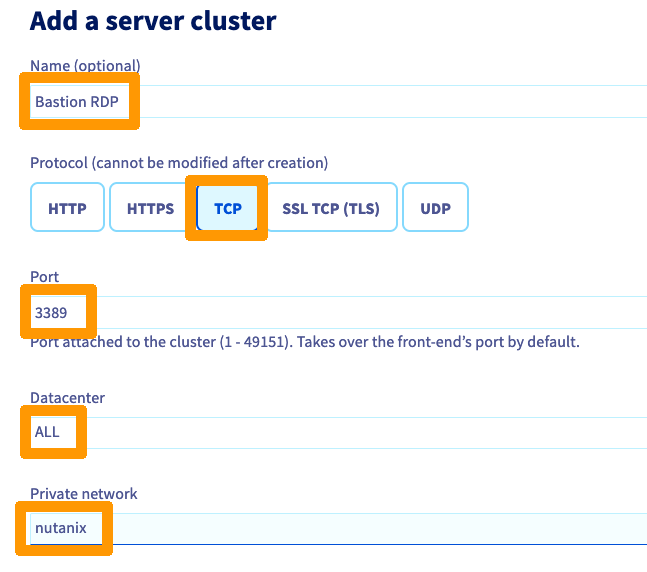
In the Server clusters tab, click Add a server cluster.

Name your server farm, then select TCP and enter this information:
- Port:
3389 - Datacenter:
ALL - Private network:
nutanix
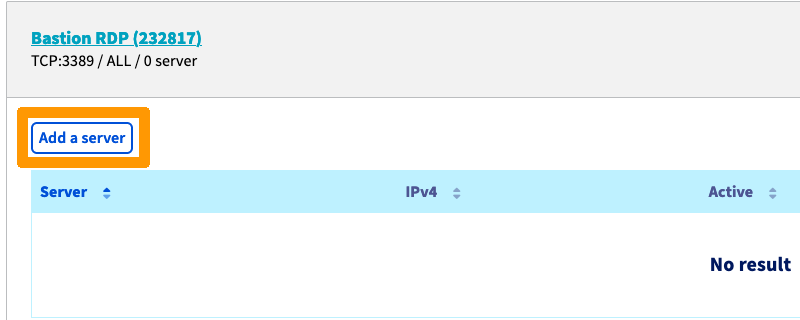
Click Add to confirm the creation of the server farm.
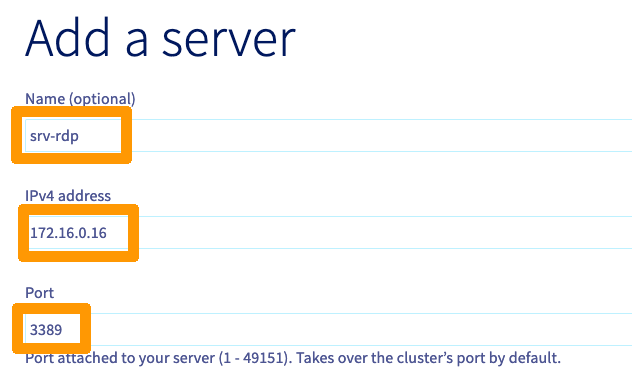
Click Add a server.
Enter these values:
- Name (optional):
RDP - IPv4 address:
IP address of your Windows VM - Port:
3389
Click Add to confirm the cluster creation.
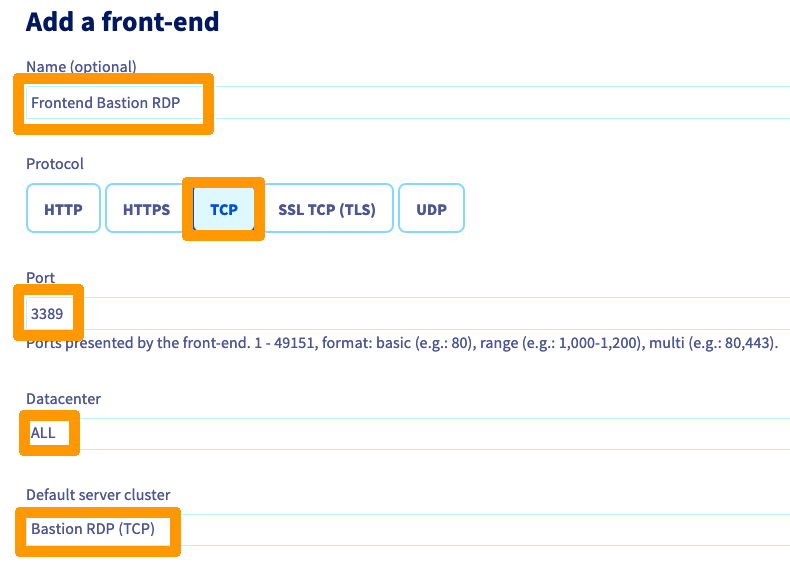
Then click on the Front-ends tab, and on Add a front-end.

Name your front-end, choose the protocol TCP and modify these values:
- Port:
3389 - Datacenter:
ALL - Default farm:
Bastion RDP (TCP)
Click Add.
Click Apply configuration.
Select the Datacentre and click Apply configuration.
You can track the progress of the changes in the Tasks tab.
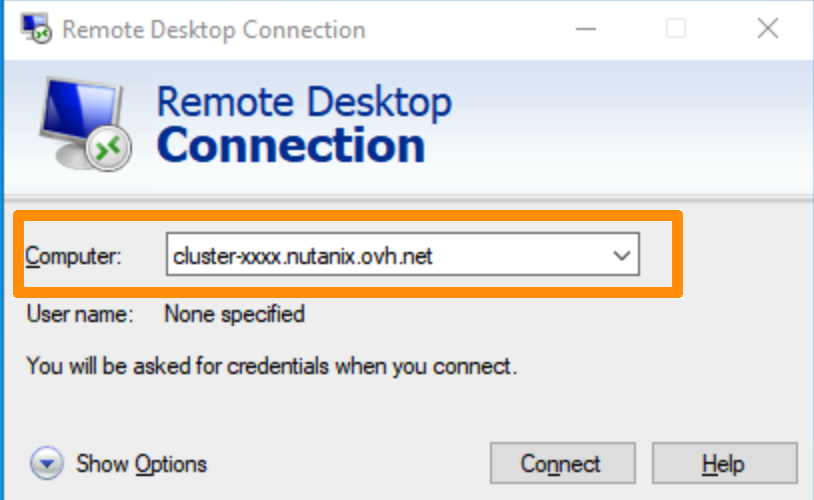
The Load Balancer is now configured. Use your favorite RDP client to connect to your machine. You can enter your cluster’s DNS name or Load Balancer’s IP address:
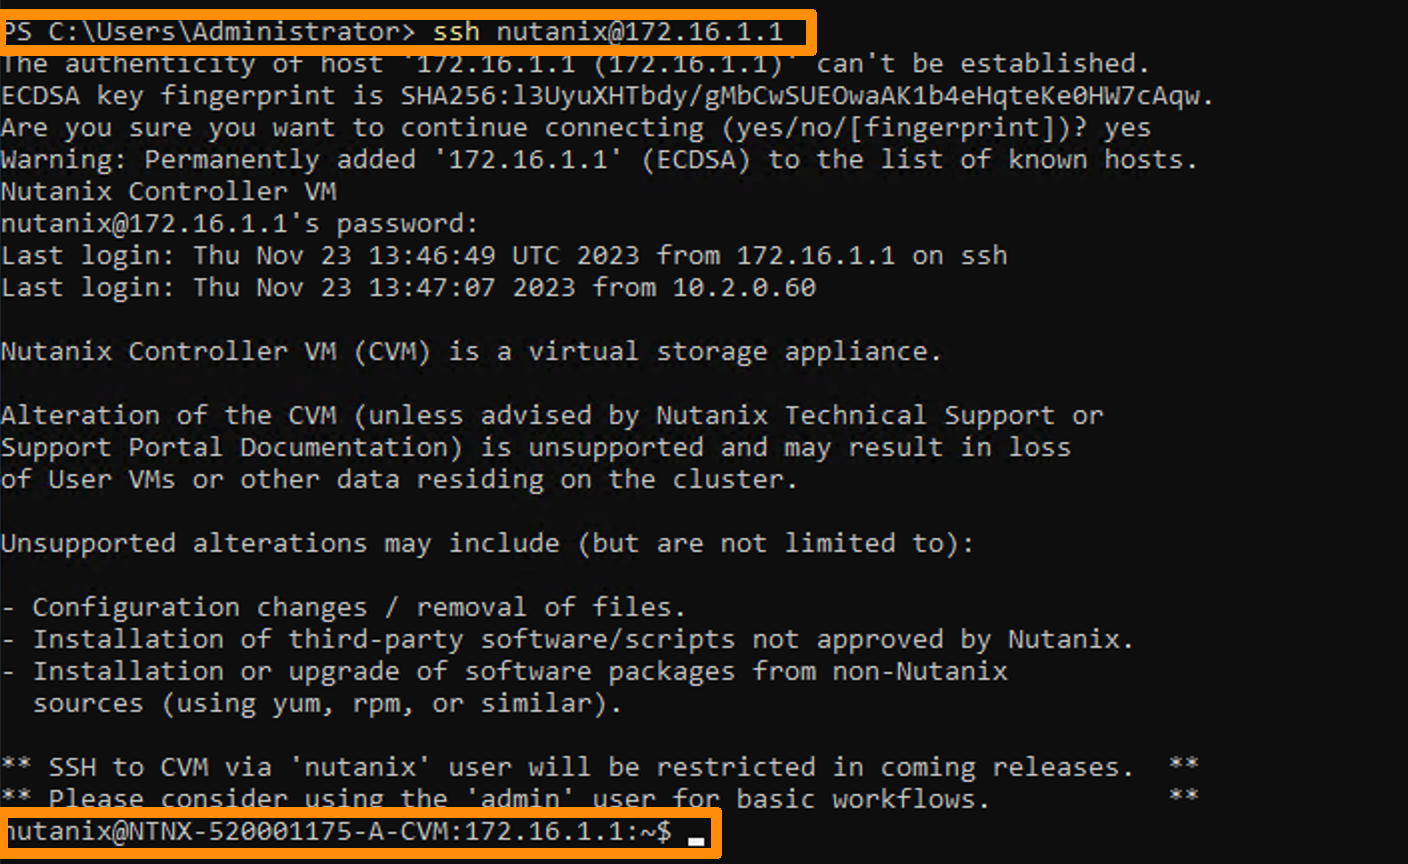
You can now rebound on the different elements of the cluster:
- CVMS
- HOSTS
- Prism Element
For example, for a CVM, open powershell and type:
Secure the cluster
To secure your cluster, we recommend changing your passwords. Use the Nutanix knowledge base to perform these operations: kb6153 - Secure your Nutanix cluster.
You can also secure access to Prism Central.
Go further
If you need training or technical assistance to implement our solutions, contact your sales representative or click on this link to get a quote and ask our Professional Services experts for assisting you on your specific use case of your project.
Join our community of users on https://community.ovh.com/en/.

