Gestione distribuita del firewall in NSX (EN)
247 viste
Objective
The distributed firewall feature in NSX allows filtering with all elements in your VMware cluster that are on Overlay or VLAN segments. It should be used normally on east-west connections (ovh-T1-gw), but it also works with elements of the VMware cluster that are connected on the north-south gateway (ovh-T0-gw). Filtering applies from the source (VM, segment, network, etc.).
To simplify the administration of NSX, it is possible to place tags on your elements (segments, virtual machines, roles, etc..) and create groups that contain the objects associated with the tags or IP address ranges (this solution should not be preferred).
Learn how to manage the distributed firewall by creating a rule that blocks traffic between a virtual machine and all virtual machines in another segment.
OVHcloud provides services for which you are responsible, with regard to their configuration and management. It is therefore your responsibility to ensure that they work properly.
This guide is designed to assist you as much as possible with common tasks. However, we recommend contacting a specialist provider if you experience any difficulties or doubts when it comes to managing, using or setting up a service on a server.
Requirements
- Being an administrative contact of your Hosted Private Cloud infrastructure to receive login credentials.
- A user account with access to the OVHcloud Control Panel.
- Having NSX deployed with two segments configured in your NSX configuration, you can use our guide on segment management in NSX for more information.
Instructions
We will isolate communication between a virtual machine and all virtual machines in a segment bi-directionally by performing these operations :
- Create two tags, one on a virtual machine and one on a segment.
- Create two associated groups, one containing the first tag and the other the second.
- Create a policy in the distributed firewall that will contain two rules:
- A rule that will forbid traffic from the first group to the second.
- Another rule that will forbid traffic from the second group to the first.
Creating tags
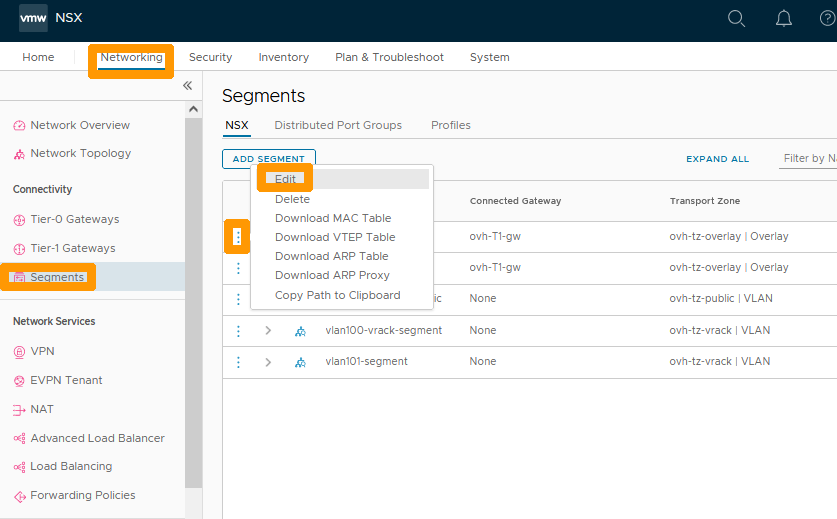
In the NSX interface, go to the Networking tab and click Segments to the left in Connectivity.
Then click on the three vertical dots to the left of the segment you want to tag and choose Edit from the menu.
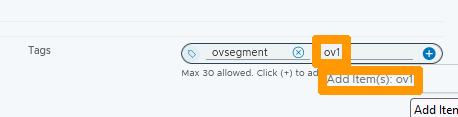
To the right of Tags, enter ovsegment instead of tag and click Add Item(s) ovsegment below the input box.

Enter ov1 instead of Scope and click Add Item(s) ov1 below the input box.
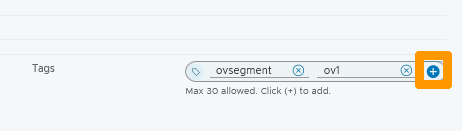
Click the + button to the left of your tag.
The created tag is displayed in the bottom right of Tags, you can create more tags depending on your needs.
Click SAVE.
Click CLOSE EDITING to complete the markup for your segment.
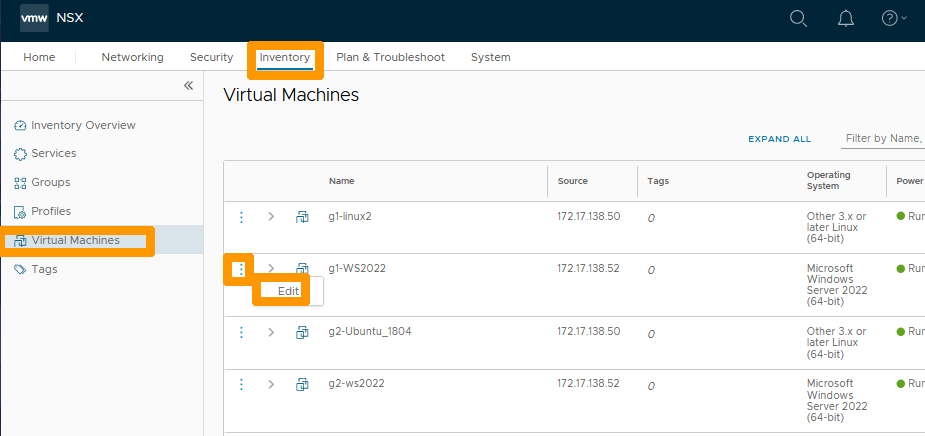
Go to the Inventory tab and click Virtual Machines on the left in the inventory to view the list of virtual machines.
Then click on the three vertical dots to the left of the virtual machine that you want to tag and choose Edit from the menu.
Enter vm instead of Tag and click Add Item(s) vm below the input box.
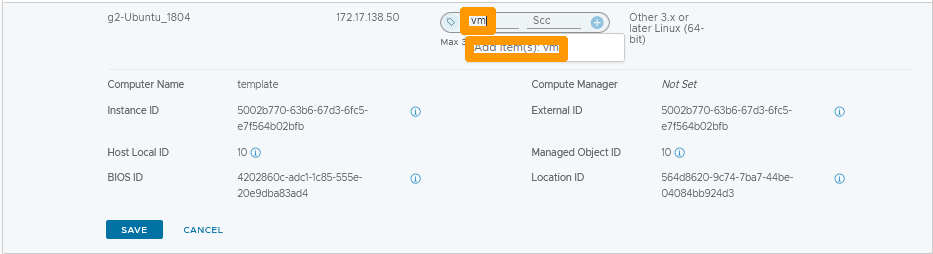
Enter ov2 instead of Scope and click Add Item(s) ov2 below the input box.

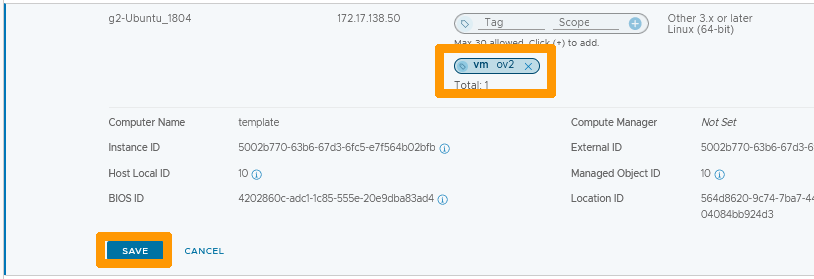
Click the + button to the left of your tag.

The tag is created, click SAVE to save your changes.
Stay in the inventory and click Tags on the left to see the list of tags.

Add groups that contain tags
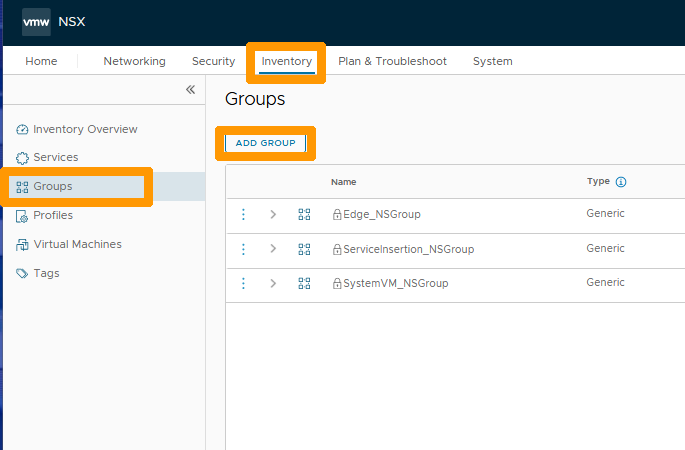
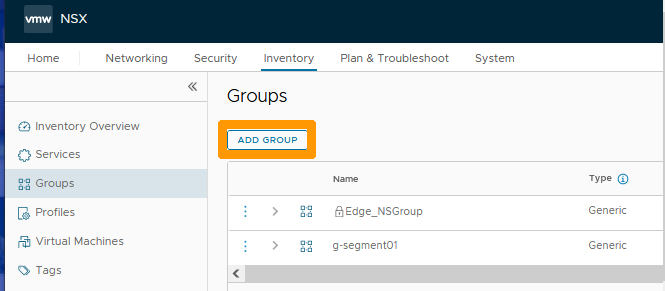
In the inventory, go to Groups on the left and click ADD GROUP to create a group.
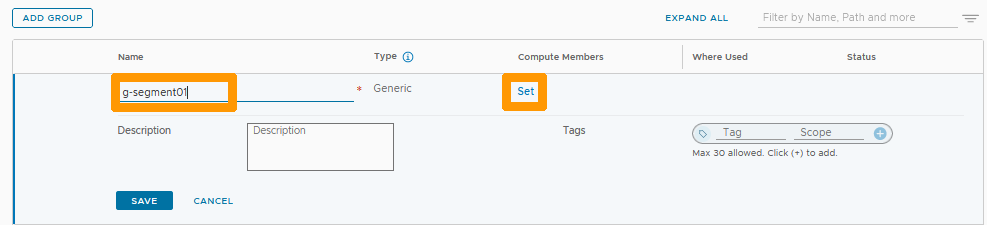
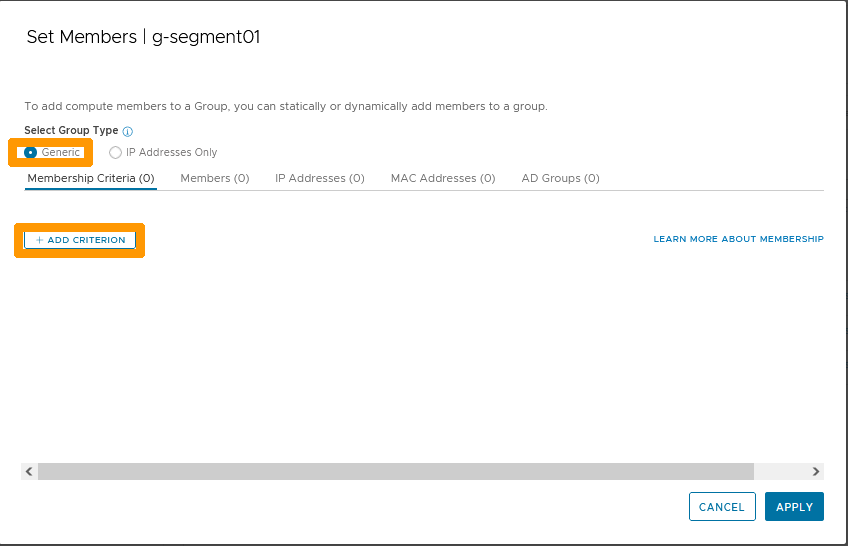
Type g-segment01 below the Name column and click Set under the Compute Members column.
Leave Generic selected and click + ADD CRITERION.
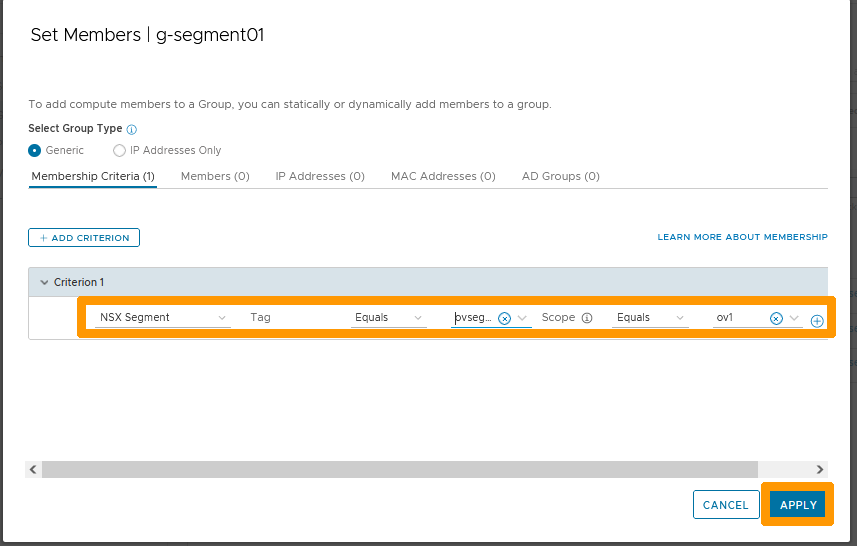
Choose these settings :
- Type :
NSX Segment. - Tags : Equals
ovsegment. - Scope: Equals
ov1.
Click APPLY.
Click SAVE.

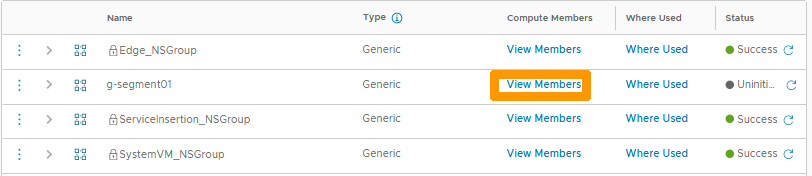
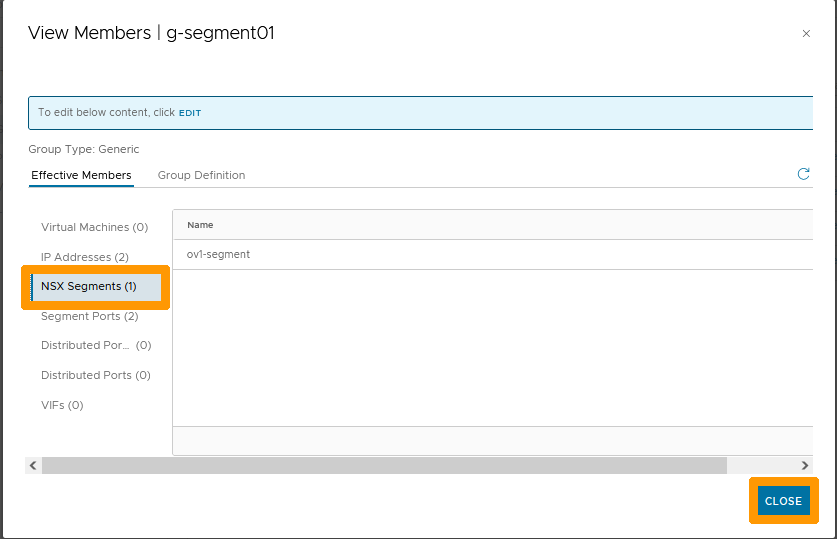
The group is created. Click View Members in the row of your group to display the members list.
Click IP Addresses to view the IP addresses that are used on your segment and which have been automatically added to your group.
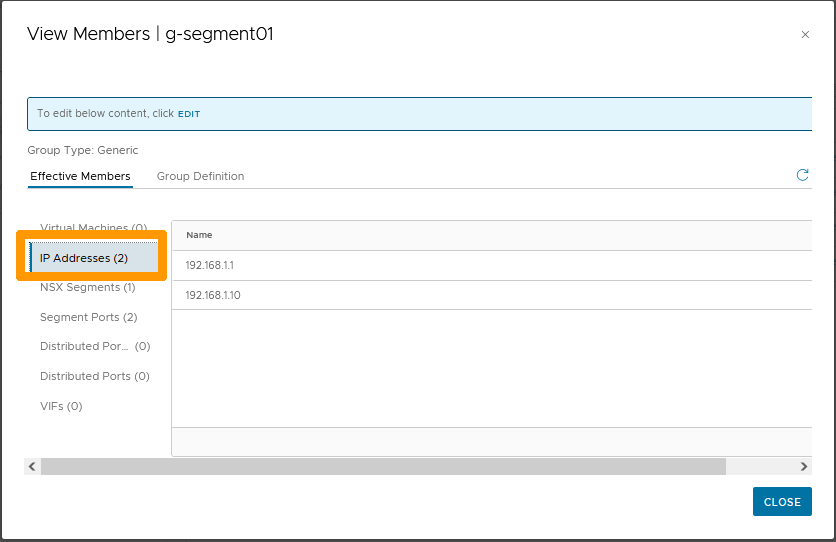
Click NSX Segments to display the member segment of this group which has been automatically added from the criteria. You can click on CLOSE to close this window.
Click ADD GROUP to create a second group.
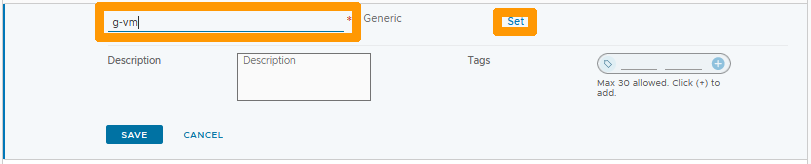
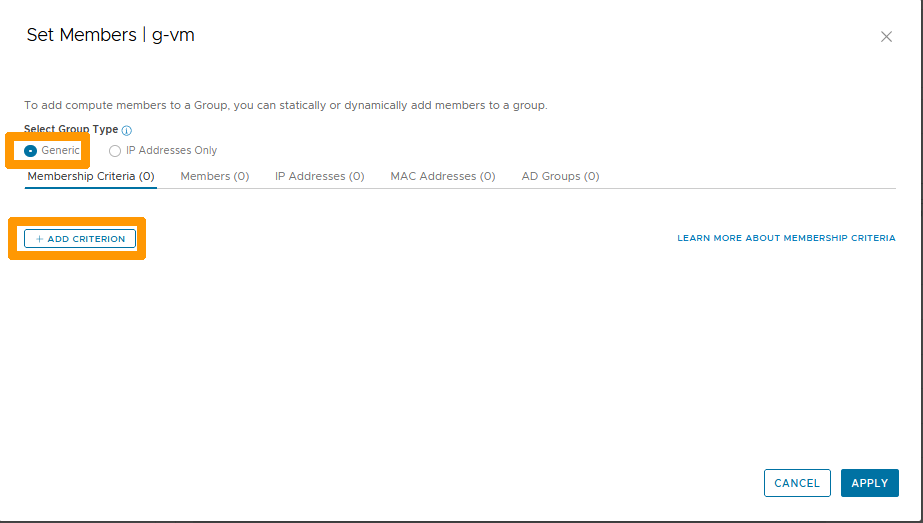
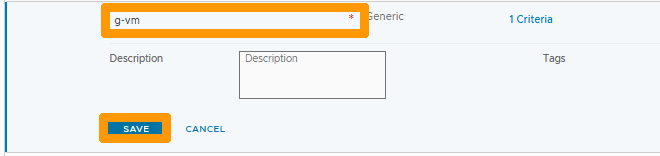
Type g-vm below the Name column and click Set under the Compute Members column.
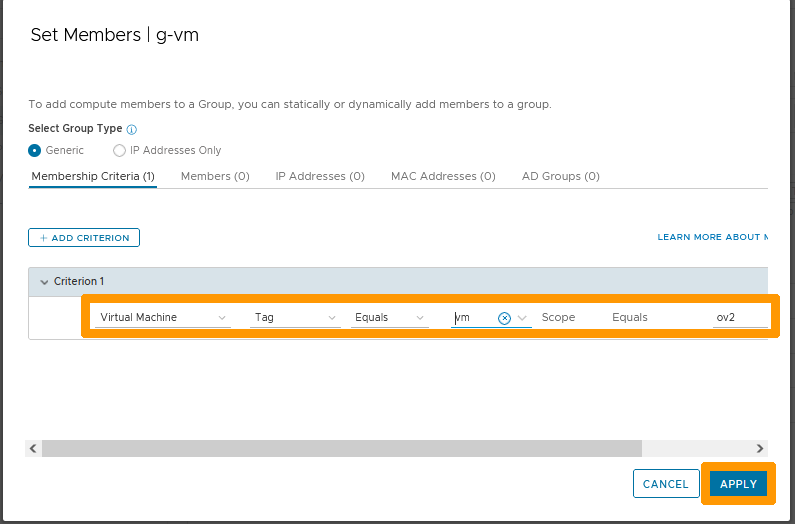
Leave Generic selected and click + ADD CRITERION.
Choose these settings :
- Type :
Virtual Machine. - Tags : Equals
vm. - Scope: Equals
ov2.
Click on APPLY.
Click SAVE.
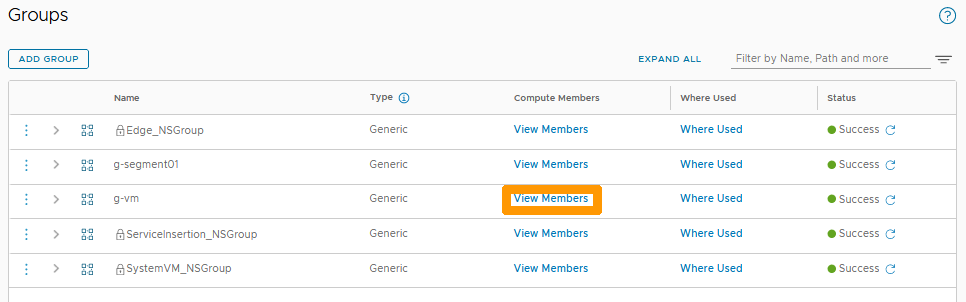
Click View Members in the row of your group to view the members.
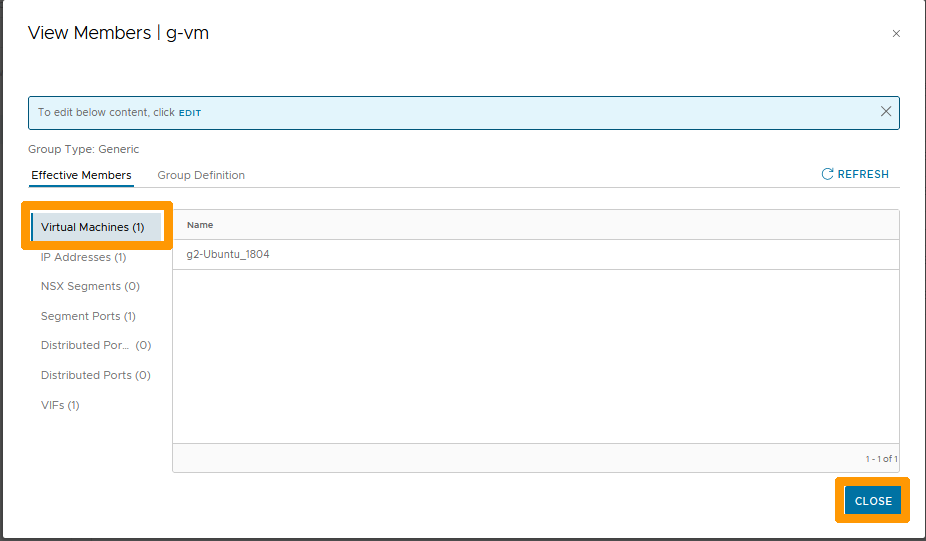
In the Virtual Machines section, you can see the tagged virtual machine that has been automatically added.
Click CLOSE to close this window.
Setting up a distributed firewall rule
We will now create a two-way blocking rule, on the distributed firewall, between the two created groups.
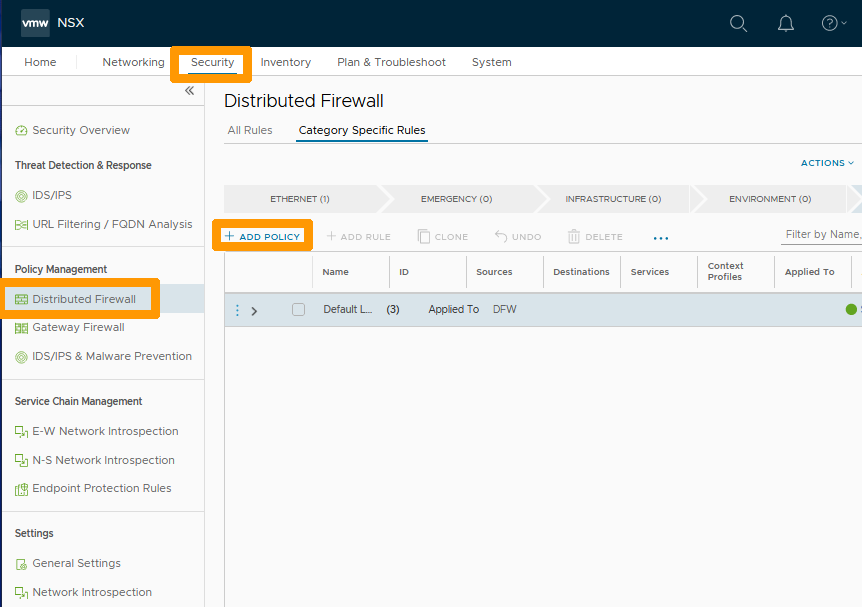
Go to the Security tab, select Distributed Firewall and click + ADD POLICY.
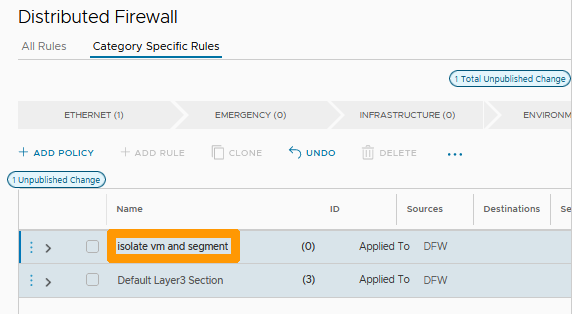
Name your strategy Isolate vm and segment.
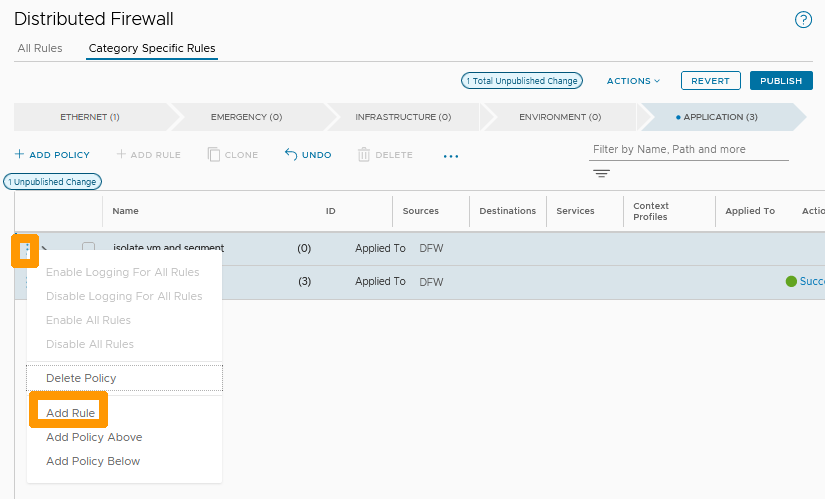
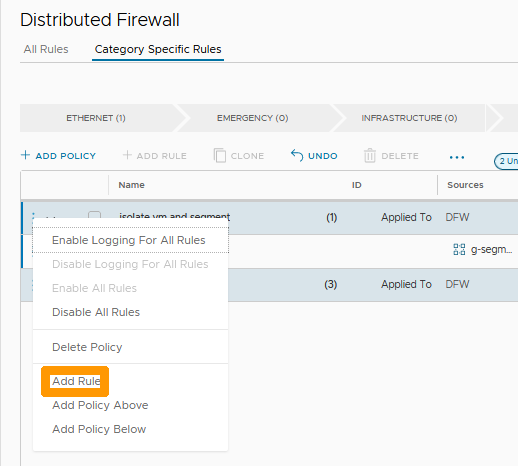
Click the three vertical dots to the left of your policy and choose Add Rule from the menu.
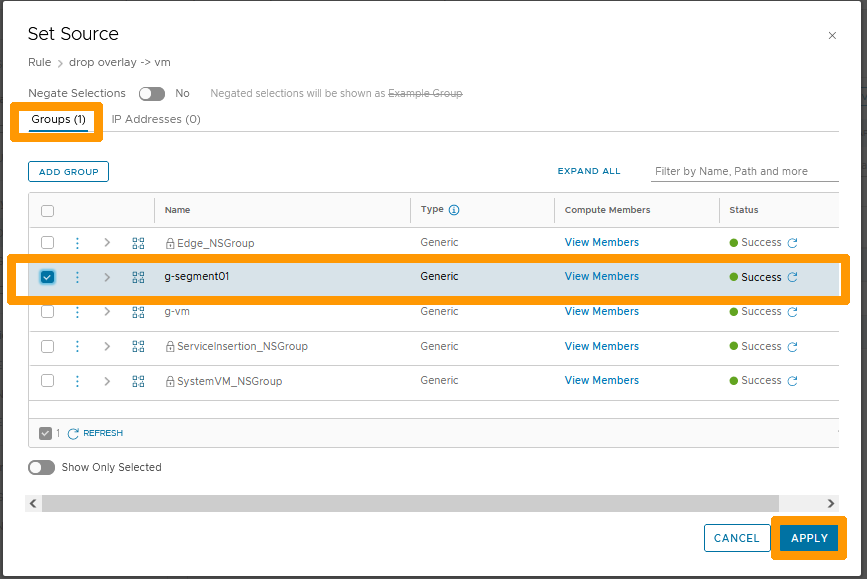
Click the Pen icon to the right of Any in the Sources column.

Stay on the groups tab, check the g-segment01 group and click APPLY.
Click the Pen icon to the right of Any in the Destinations column.
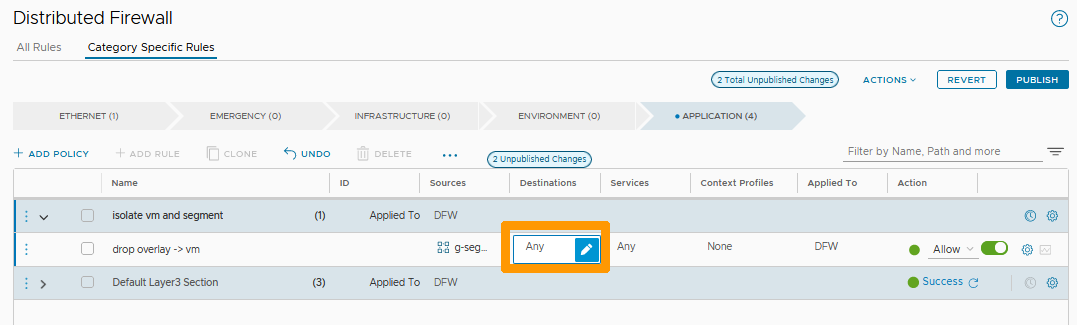
Select the g-vm group and click APPLY.

Choose Drop to remove packages on this rule and click the three vertical dots to the left of your policy.
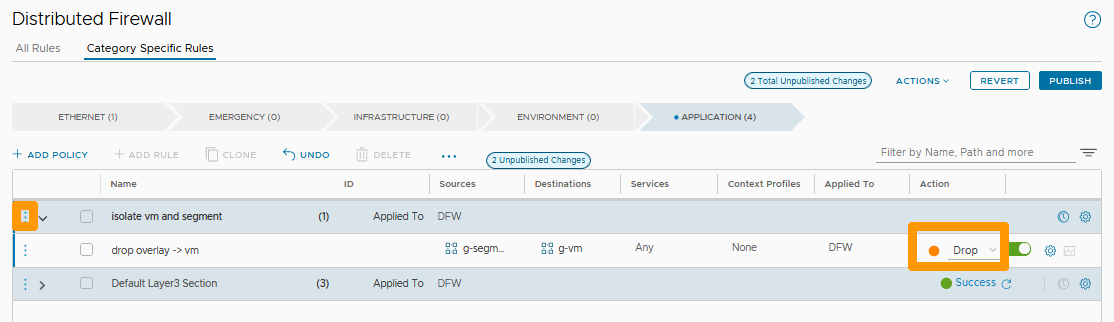
Click Add Rule in the menu.
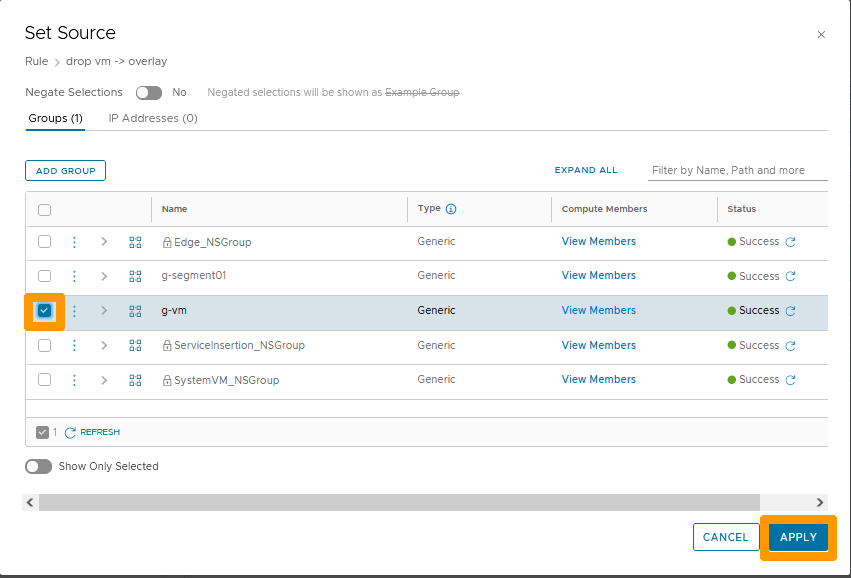
Click the Pen icon to the right of Any in the Sources column.
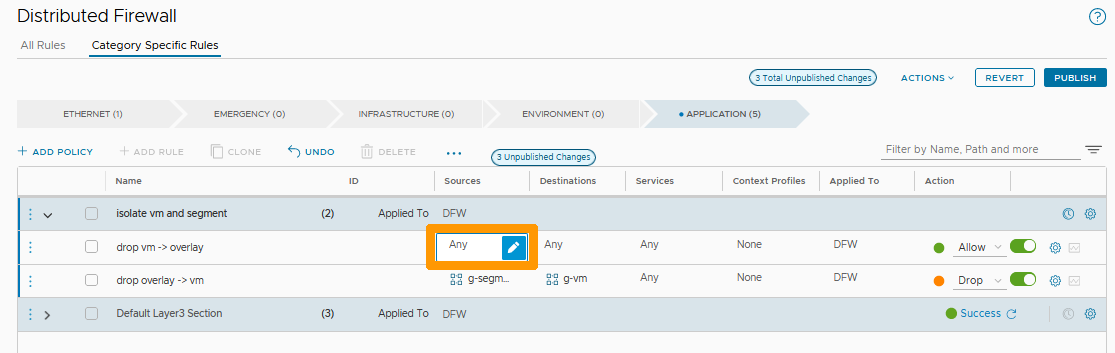
Select the g-vm group and click APPLY.
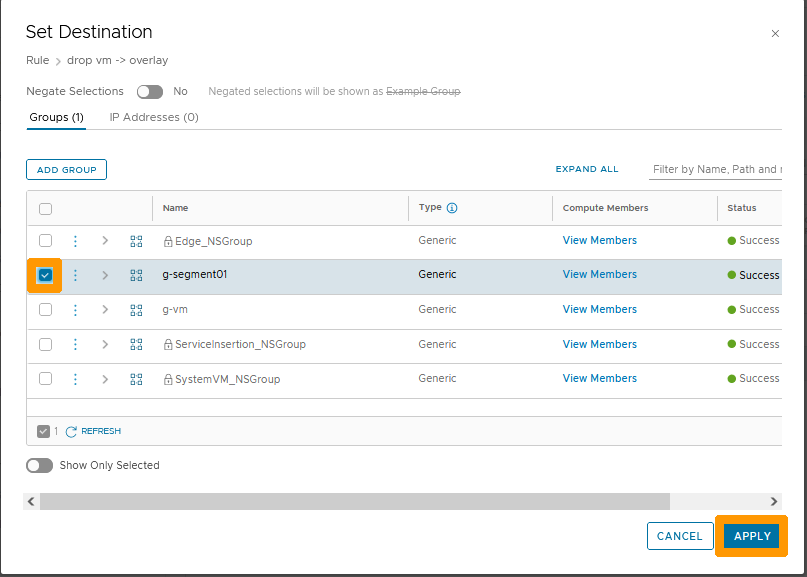
Click the Pen icon to the right of Any in the Destinations column.
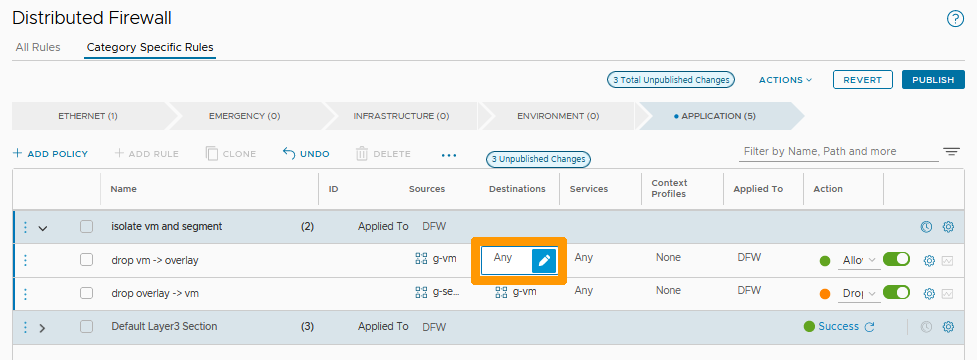
Select the g-segment01 group and click APPLY.
Choose Drop to remove packages from this rule and click publish to validate the creation of the policy and its two associated rules.
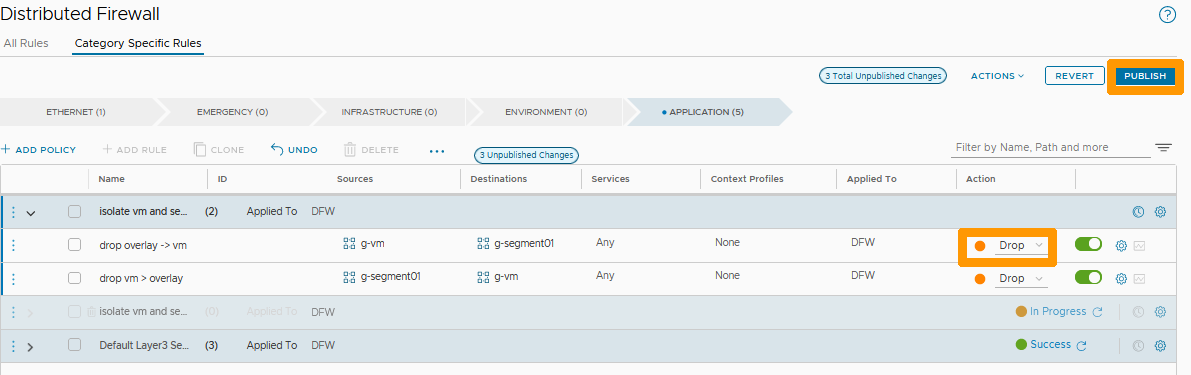
Your rule is active, the traffic between the virtual machine member of the g-vm group and the segment member of the g-segment group is no longer possible.
Go further
VMware Distributed Firewall in NSX documentation
If you need training or technical assistance to implement our solutions, contact your sales representative or click on this link to get a quote and ask our Professional Services experts for a custom analysis of your project.
Join our community of users on https://community.ovh.com/en/.

