Strumenti avanzati (EN)
276 viste
Objective
This guide will show you all the administration tools, other than the Prism Central and Prim Element web interfaces, which are:
- ncli which can be accessed locally, via SSH on Prism Central and Prism Element.
- acli which can be used via SSH on CVMs.
- Cmdlets for Powershell.
- The REST API from the Prism Central or Prism Element URL.
OVHcloud provides services for which you are responsible, with regard to their configuration and management. It is therefore your responsibility to ensure that they work properly.
This guide is designed to assist you as much as possible with common tasks. Nevertheless, we recommend contacting a specialist provider if you experience any difficulties or doubts when it comes to managing, using or setting up a service on a server.
Requirements
- a Nutanix cluster in your OVHcloud account
- For the REST API, you must have a virtual machine running Linux with a text editor to run the curl and jq commands.
Some commands can only be used if you have SSH access to Prism Central and Prism Element.
Tools overview
ncli command
ncli is located on Prism Central and all CVMs through an SSH connection. You can also install it locally on a Windows or Linux desktop from the Prism Central web interface.
ncli allows you to manage aspects of the Nutanix cluster such as storage, tasks and some actions on virtual machines within the cluster.
acli tool
The acli command is only available on CVMs. It is used for managing VMs, network and snapshot hosts.
Powershell extensions
Powershell is a scripting language developed by Microsoft and based on Net.Framework.
It works in Microsoft, Linux and MacOS environments but is mainly used in a Microsoft environment.
All of the examples below have been run only on this environment.
Nutanix has added extensions that allow cluster and VM administration using Powershell scripts.
API REST administration interface
Through the URL of Prism Central or Prism Element, you can use an API named REST API either in the command line with the curl tool, or through another programming language such as python or php or even with the standard commands of Powershell.
For more information on these commands, see the Go further section of this guide.
Instructions
Examples of ncli use
Connect via SSH with an SSH client on one of the CVMs:
The ncli command is used followed by options, as in this example ncli entity action option1=`value` option2=`value2 but it also can be used interactively by running only ncli.
Creating a Storage Container named newcontainer in interactive mode
Deleting the Storage Container
Run the following command to delete the Storage Container without confirmation:
Examples of using the acli command
Connect via SSH with an SSH client on one of the CVMs:
The acli command is used followed by options, such as acli entities.action for-which option1="value1" option2="value2", but it also can be used interactively by running only acli from a CVM
If acli is used followed by a sequence of orders, a confirmation request will always be offered if a choice is made.
To automate the task and make a default choice, use this syntax instead acli -y entities.action for-which option1="value" option2="value2"
Creating a snapshot in interactive mode
Run these commands from one of the CVMs:
View and delete a snapshot without going through interactive mode
Run these commands to view and delete a snapshot with a confirmation request:
Use this syntax without prompting when deleting the snapshot:
How to configure and use Powershell on Windows
Installing Powershell 7 and Nutanix modules
You need to install the latest version of Powershell from this Powershell installation website.
Download and install the installer that corresponds to your version of Windows, in 32 bits or more generally in 64 bits.
Launch the Powershell 7 command prompt in administrator mode.
Command examples with Powershell for Nutanix
Import modules for Powershell from the PowerShell 7 console:
Log in to Prism Central by executing the command below and edit these items:
< PRISM CENTRAL IP >replace this item with the IP address or FQDN of Prism Central< PRISM CENTRAL USERNAME >replace this item with the Prism Central user name
Run the command below to see a list of all virtual machines:
Reuse the previous command followed by | and the ft command to display only the virtual machine name:
Use this command sequence to find and remove a virtual machine named VW-WS2022:
Using REST API commands
All of the examples shown below must be run on a virtual machine running Linux with the curl tool.
Some commands need other tools that are available in most Linux distributions.
Display all API options from Central Prism
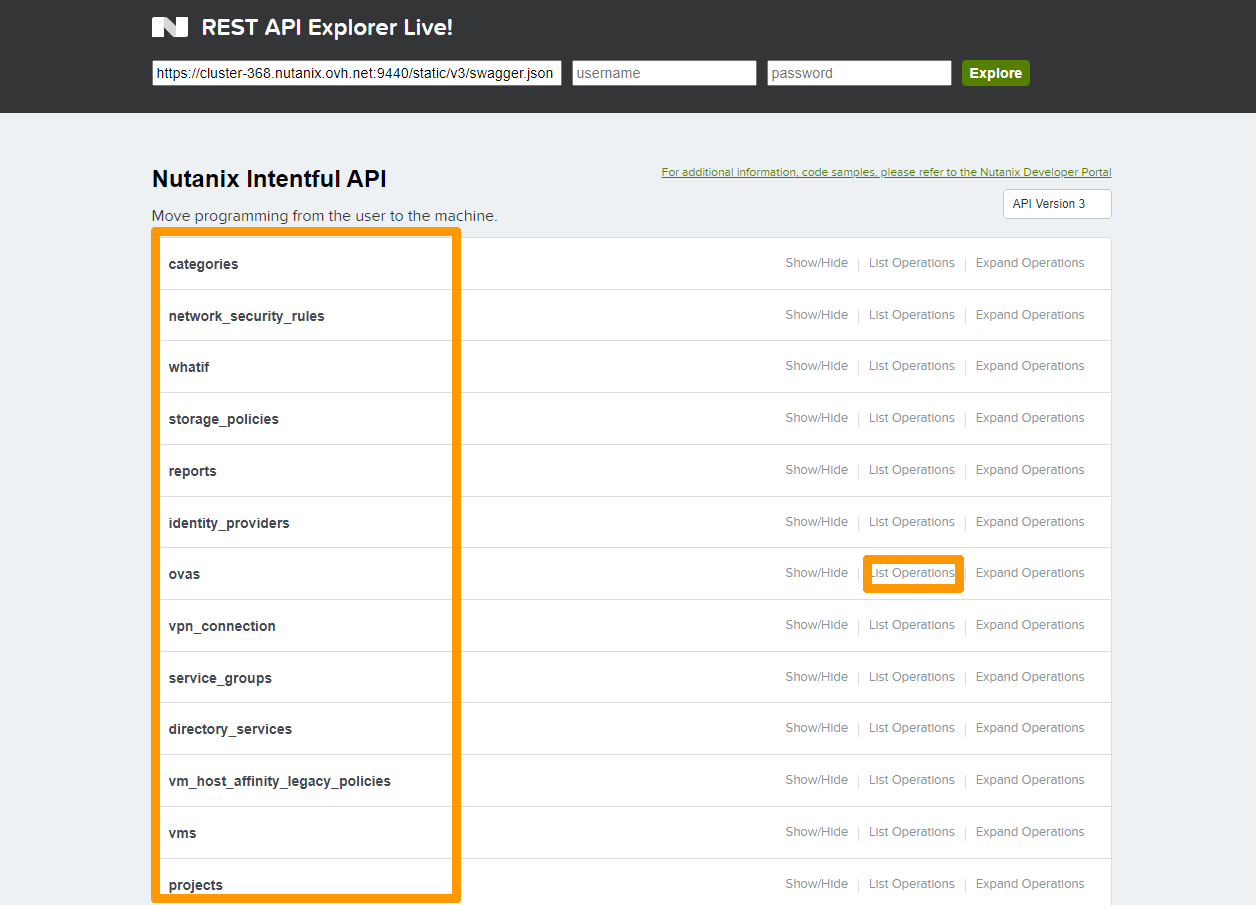
You can get the list of REST API options from Prism Central.
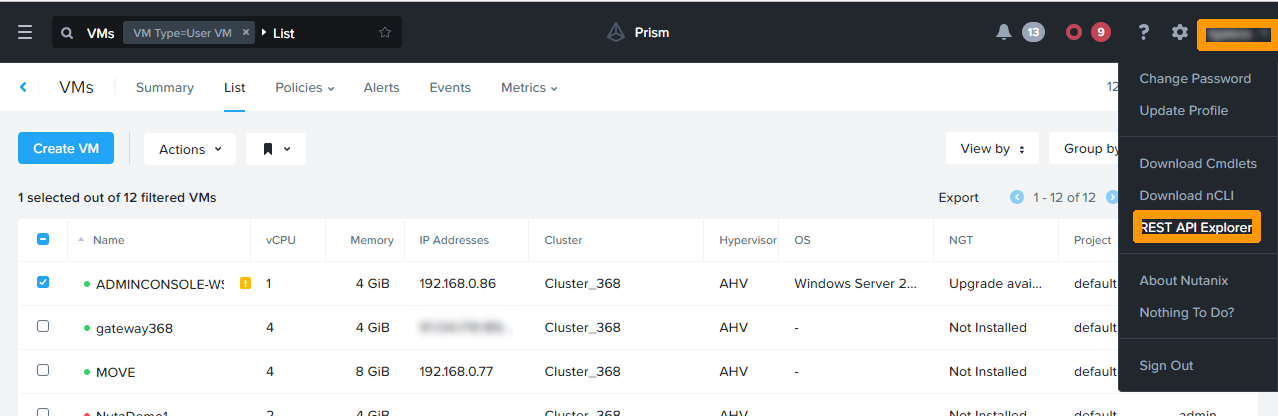
In the top right-hand corner of the Prism Central interface, click Username, then REST API Explorer.
The list of command groups is displayed on the left.
Click List operations to the right of one of the command groups to display all possible commands in that group.
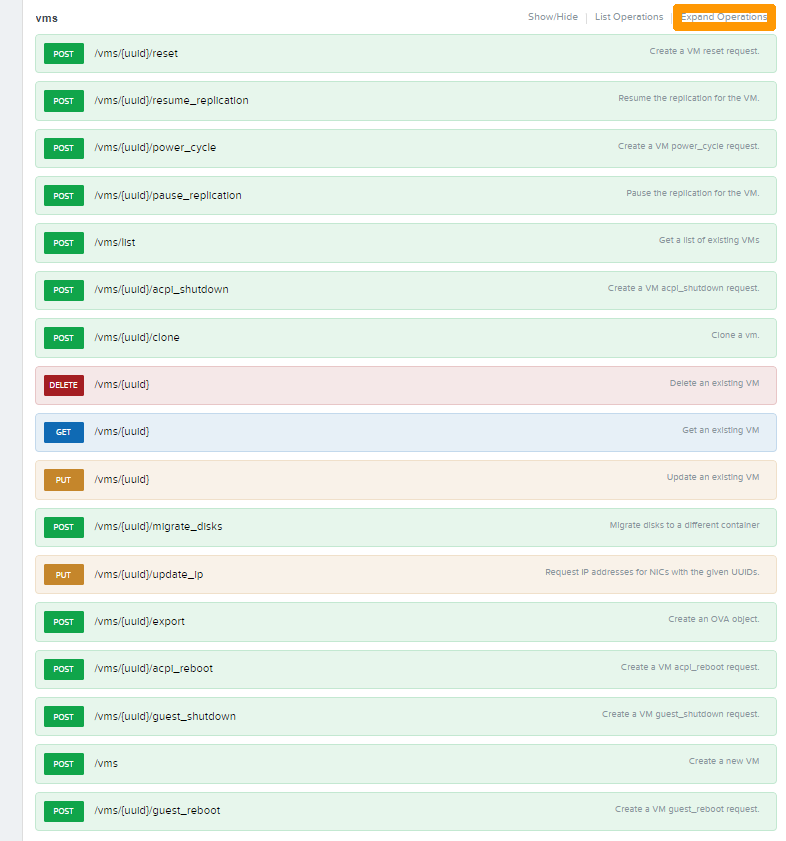
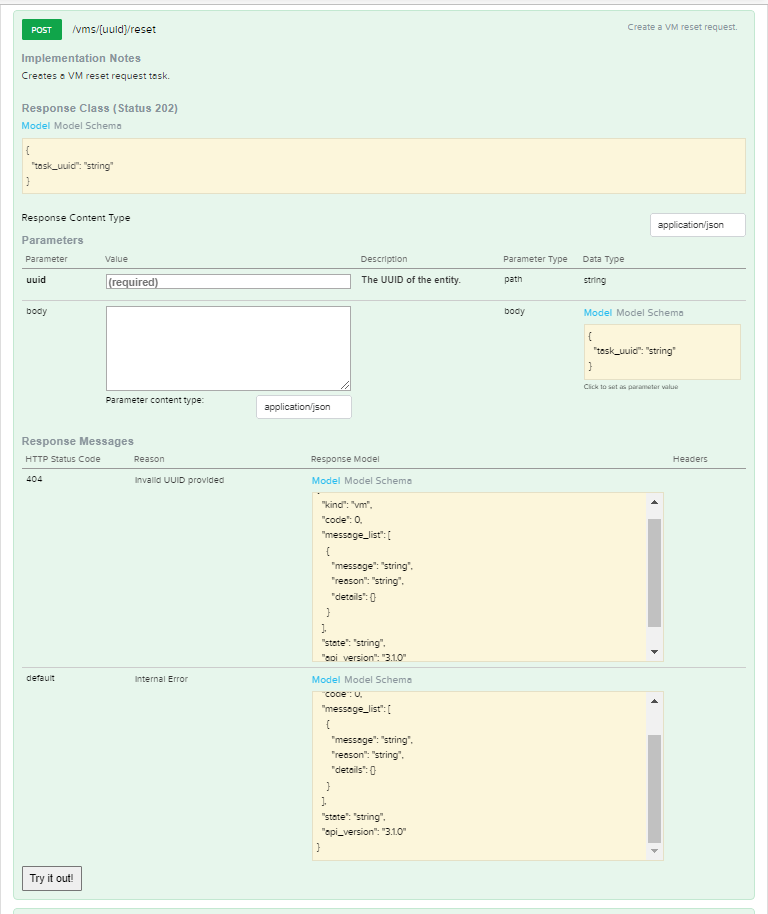
Click Expand operations to list the syntax for a particular command.
Various simple examples
Connect via SSH to a Linux VM in the cluster that has the curl and jq commands installed.
For these examples to work, replace:
< PRISMCENTRAL IP >by the IP address or FQDN of Prism Central.< PRISM CENTRAL USER >by the Prism Central user.< PRISM CENTRAL PASSWORD >by the Prism Central user password.
View the list of ISO and QCOW2 images installed on Prism Central
This command generated a file in a readable json format using the jq command, which contains the list of images and the information needed for other REST API commands.
Viewing the list of virtual machines
Run this command to display the list of virtual machines:
The result is always in json format.
Below is a part of the generated file, containing the virtual machine UUID.
There is a UUID for each element of the Nutanix clusters (VM, Vdisks, images, etc..). This number is unique.
"kind:" "vm" corresponds to the type of the object.
Viewing VM Information from its uuid
Run the following command by replacing < VM UID > with the UUID of a previously listed virtual machine:
Viewing the Network List
Run this command to display the list of networks in Nutanix:
Viewing Information about Administered Clusters in the Prism Central Console
Run the following command to display information about the clusters administered by Prism Central:
Advanced examples
In addition to displaying information, you can act on the Nutanix cluster to create or modify elements of a cluster.
We will see how to create two virtual machines in an automated way, one in a Linux environment, the other on Windows.
Creating a virtual machine on Linux
You can install Linux from pre-installed images, and you can customise the configuration with cloud-init, which uses the yaml file format. To import images into a Nutanix cluster, you can refer to our guide on importing ISO images.
Follow these instructions to create a virtual machine from a Ubuntu cloud-init customisable image.
On Linux, create a password in SHA-512 format with the command mkpasswd:
Edit the cloud-config.yaml file. Replace:
< RSAKEYFORLOGIN >by an RSA key that will connect via the SSH userlinux account.< PASSWORDGENERATEDBYMKPASSWORD >by the password created in SHA-512 format.
The file in yaml format is created with the possibility to install a virtual machine under LINUX with the NGINX WEB server.
Transform the yaml file into mime64 format and store it in a variable so that it can be integrated into the virtual machine configuration file.
Edit the vmlinux.json file below by editing these elements to fit your environment:
< VMNAME >must be replaced with the name of the virtual machine you want to give in the Nutanix console.< UUID-IMAGE-LINUX-CLOUD-INIT >must be replaced with the UUID of the cloud-init-compatible Linux image.< UID-NETWORK >must be replaced with the UUID of the network on which the virtual machine will operate.< MIME64FORMATEDYAMLFILE >must be replaced with the contents of the$USERDATAvariable.< CLUSTER-NAME >must be replaced with the cluster name.< CLUSTER-UUID >must be replaced with the cluster UUID.
All the necessary information is either accessible from the Prism central web interface or through the REST API access seen above.
Run this command to install the virtual machine:
The new virtual machine will then appear in Prism Central with NGINX installed and updates performed.
Creating a virtual machine on Windows
You can install virtual machines on Windows from a prepared image using the Windows-integrated sysprep command and apply a customisation file to it.
The image can be imported directly from a virtual machine in the cluster.
The configuration file is an XML file. You can create this file using the Windows ADK tools that you can download from the Microsoft site via this link and use Windows system image manager to create a suitable XML file.
Below is an example XML file for Windows 2019 that creates an admin user and changes the password for the admin and Administrator account to P@ssw0rd:
Copy the XML file to a Linux VM in the cluster and transform it into MIME64 format, as below, to integrate it into the VM configuration file in json format:
Edit the vmwindows.json file below by editing these items to fit your environment:
< VMNAME >must be replaced with the name of the VM you want to give in the Nutanix console.< UID-IMAGE-WINDOWS2022SYSPREPED >must be replaced with the UUID of the Windows SYSPREPED image that can be used with an XML file.< UID-NETWORK >must be replaced with the name of the network on which the virtual machine will operate.< MIME64FORMATEDYAMLFILE >must be replaced with the contents of the$USERDATAvariable.< CLUSTER-NAME >must be replaced with the cluster name.< CLUSTER-UUID >must be replaced with the cluster UUID.
All necessary information is either accessible from the Prism Central web interface or through REST API commands.
The new virtual machine will appear in Prism Central, it is then started with the response file options.
Go further
References to Nutanix development tools
If you need training or technical assistance to implement our solutions, contact your sales representative or click on this link to get a quote and ask our Professional Services experts for assisting you on your specific use case of your project.
Join our community of users on https://community.ovh.com/en/.

