Configuring the storage on a HGR-STOR-2 server (EN)
284 viste
Objective
Your HGR-STOR-2 server presents the same disks under different logical devices of the operating system.
Depending on the systems, without any specific post-configuration, this architecture can cause confusion (where is my data?) or even collisions (unintentional access to the same physical disk for different uses), which could cause the loss of your data.
Depending on your system, you may need to do a post-configuration to set up multipath features.
The Multipath allows you to aggregate different access possibilities to the same disk (path) as a single logical device.
This documentation details:
- compatible OVHcloud templates (tested by our teams)
- the OS post-configuration procedure
- This guide documents a configuration with 102 disks, but the information is also valid for other configurations.
- The configuration detailed in this guide is not equipped with NVMe disks (these are optional).
- You will only find the latest versions of the systems.
- All tested Debian versions detect only 2 paths and not 4, which would lead to LVM collisions.
Requirements
Instructions
In addition to its internal disks, the server supports up to 102 disks of 14TB type SAS.
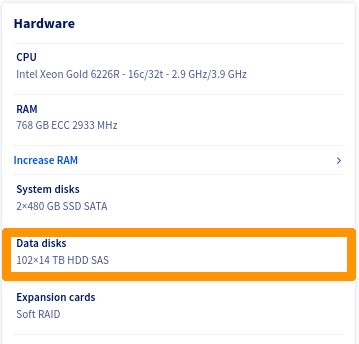
Storage disks have:
- Internet access
- 2 access via SAS controller.
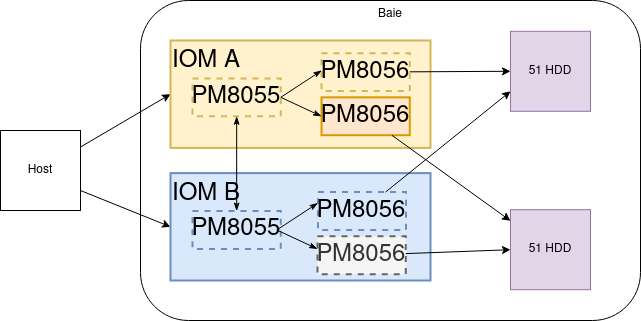
There are 4 ways to access a disk:
- SAS Controller 1 - Path 1-> Disk
- SAS Controller 1 - Path 2-> Disk
- SAS Controller 2 - Path 1-> Disk
- SAS Controller 2 - Path 2-> Disk
Here is a logical view:
List of OVHcloud templates
| Template | Procedure | Remarks |
|---|---|---|
| ESXi 7 | Procedure for ESXI-7 | |
| AlmaLinux 8 | Procedure for AlmaLinux 8, Rocky Linux 8, Fedora 34 Server | |
| Rocky Linux 8 | Procedure for AlmaLinux 8, Rocky Linux 8, Fedora 34 Server | |
| Fedora 34 Server | Procedure for AlmaLinux 8, Rocky Linux 8, Fedora 34 Server | |
| Proxmox VE 7 | Procedure for Proxmox VE 7 | |
| Ubuntu Server 22.04 LTS | Procedure for Ubuntu Server 22.04 LTS | |
| Debian all versions | Not supported | Detects only half of the paths |
| Windows Server 2019 | Procedure for Windows |
Linux LVM Warning
Create your PVs only on multipath devices of type /dev/mapper/mpathXX.
For example:
- Creation of PVs:
- Creation of a VG
- Creation of a LV
ZFS warning on Linux
Create your zfspool only on multipath devices of type /dev/mapper/mpathXX.
For example:
ESXi-7
ESXi does not need to install any additional components, the multipath is automatically managed.
If necessary, you can perform the checks described below.
Checks
Connect via SSH in shell on your ESXi.
Adapter List
Verify that ESXi has detected both SAS controllers of the following types:
Disk list
You should see 102 or 50 disks.
Multipath details
To avoid overloading this documentation, we only display one of the returned items.
We note that for each device, there are indeed 4 paths.
- System Viewed Disk:
Local WDC Disk (naa.5000cca259203a00) - Two controllers:
vmhba2andvmhba3 - Two terminal disks:
T72andT175
View via the web interface
Select Storage, then select the Devices tab.
Filter the results with the keyword WDC.
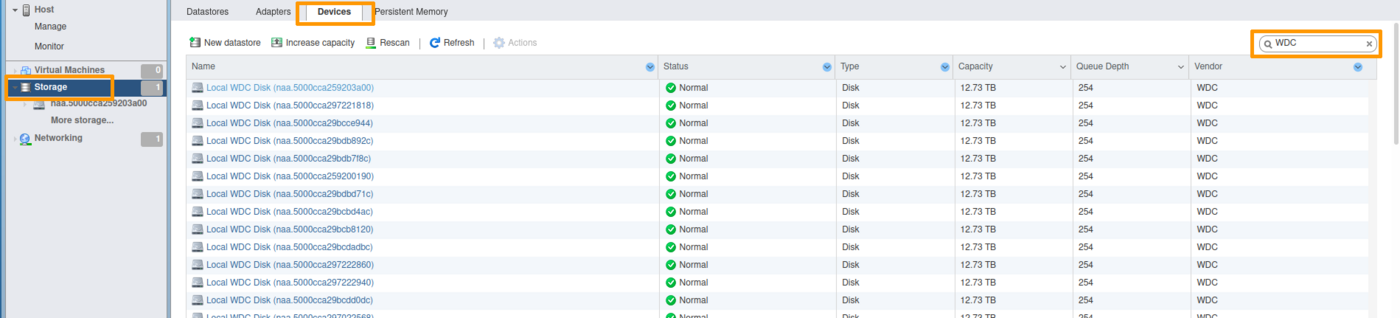
At the bottom of the list, you must have a count of 102 disks (or 50, depending on the configuration used).

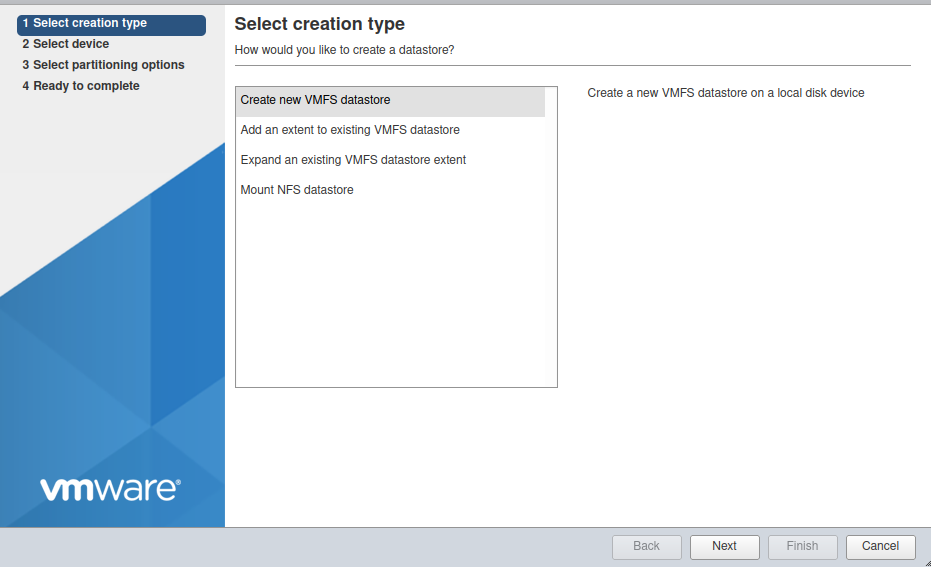
Add a datastore
Select Storage, then select the Datastores tab.

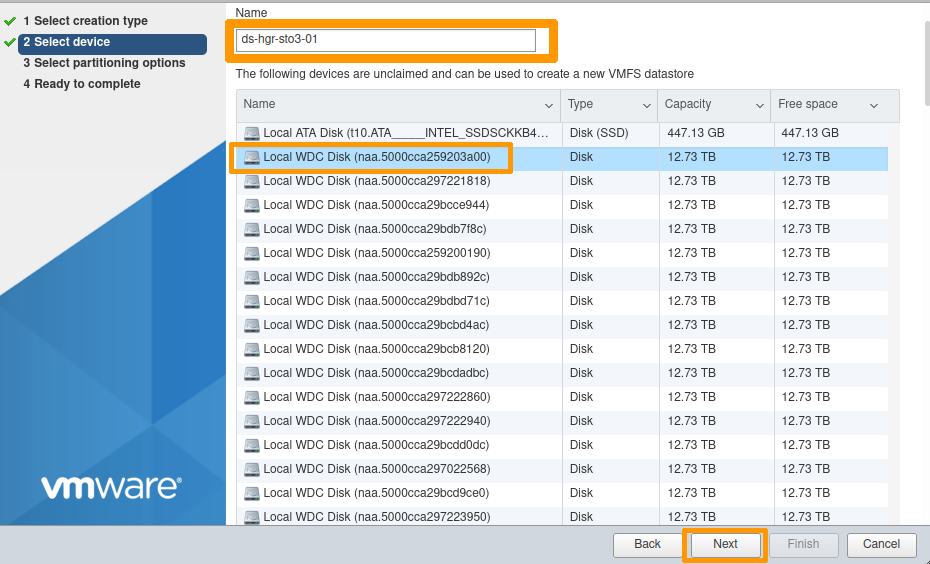
Click the New datastore icon.
Name your Datastore at your convenience (ds-hgr-sto3-01 in the example below).
Select one of the disks shown.
The disks presented by the HGR-STOR-2 are named Local WDC Disk (naa.xxxxxxxxxxxx).
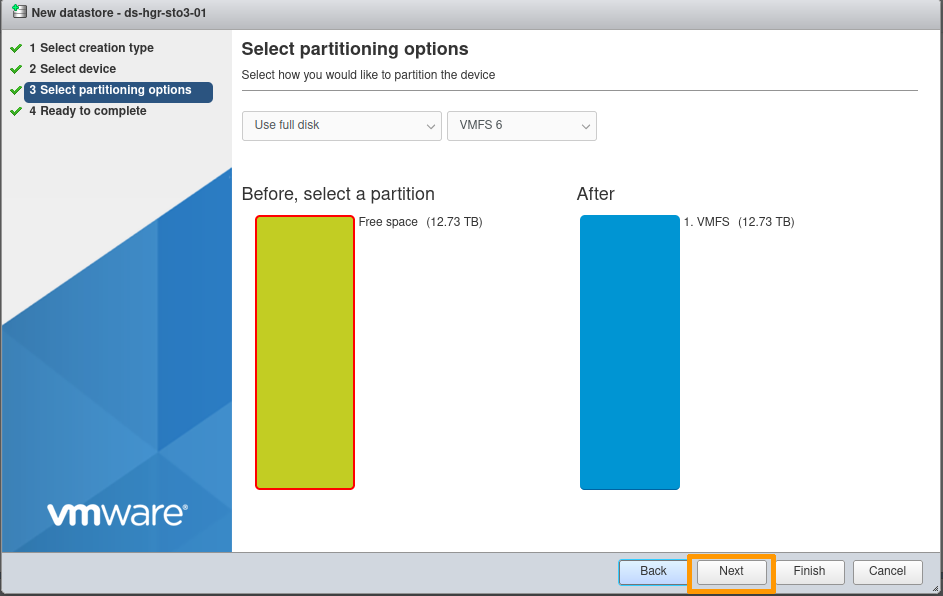
Partitioning options:
By default, the entire disk is allocated (no partitioning).
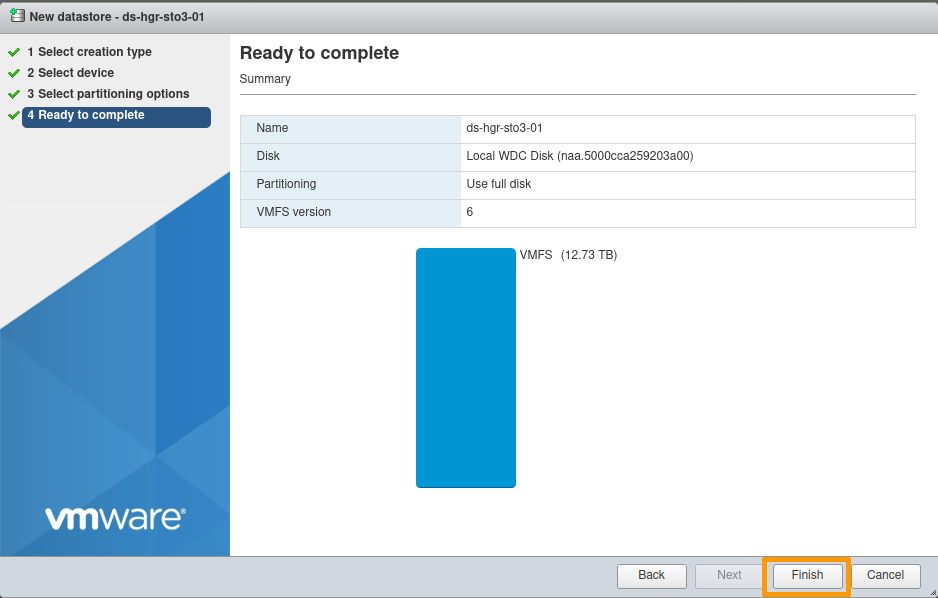
Final confirmation:
At this point, you can modify your choices or cancel the creation of the Datastore if necessary.
Otherwise, click Finish.
An information message reminds you that the selected disk will be completely erased.
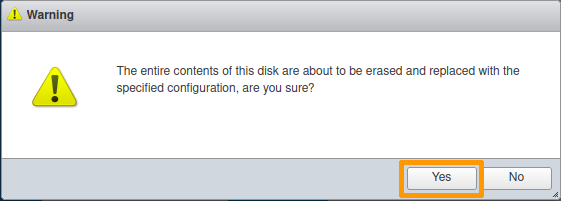
Your datastore is now available.

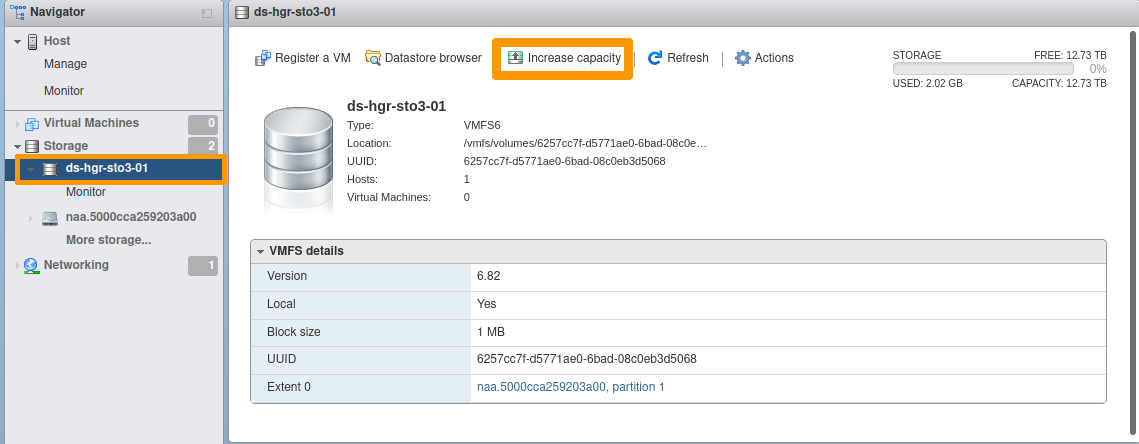
Datastore extension
Select the datastore to extend.
Click the Increase capacity icon.
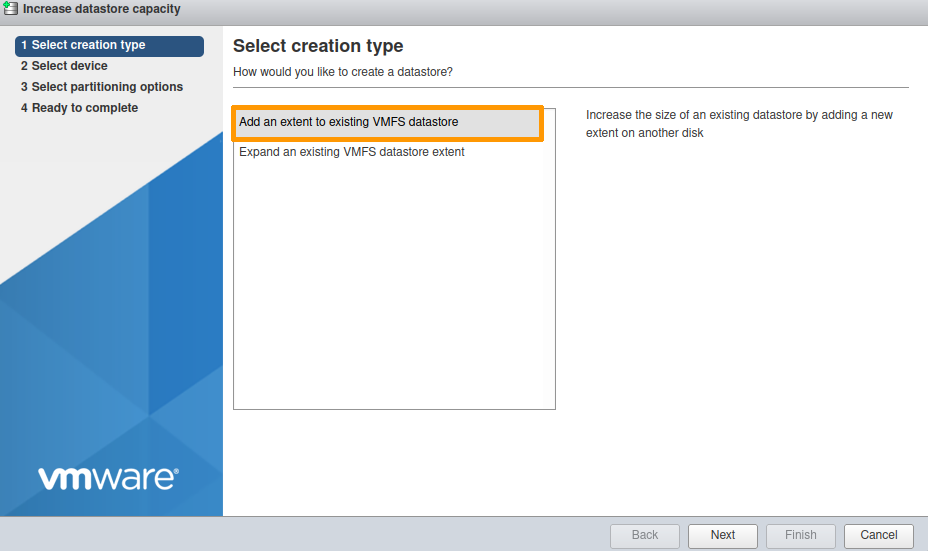
Select Add an extent to existing VMFS datastore.
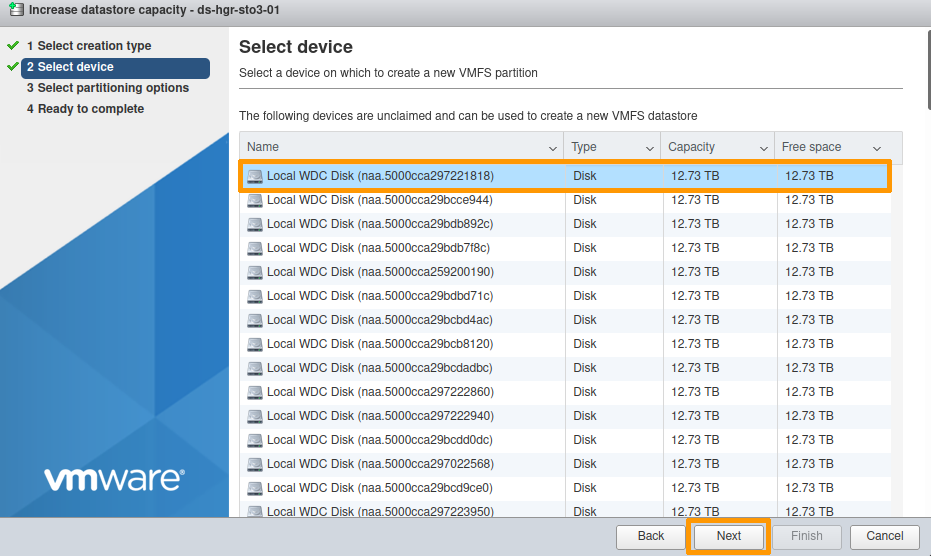
Select one of the devices shown.
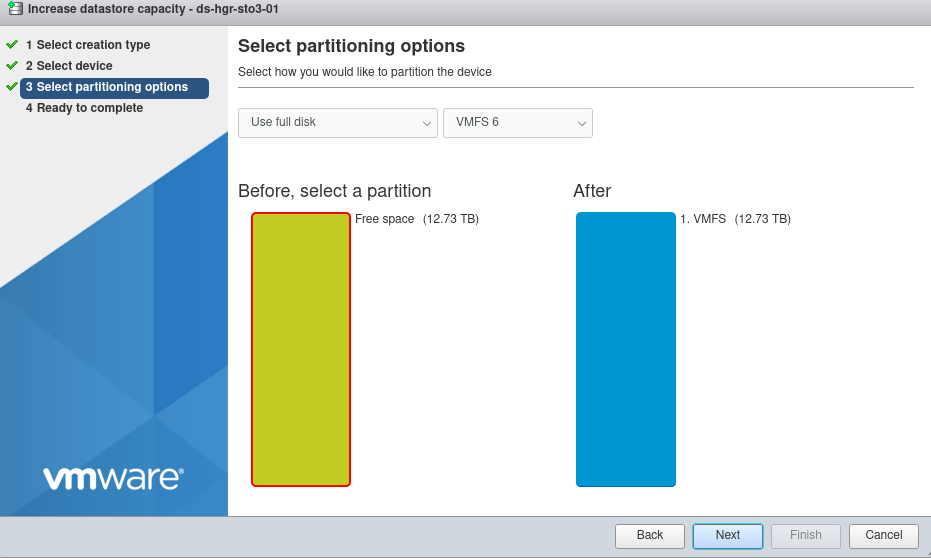
By default, the entire disk will be used.
An information message reminds you that the selected disk will be completely erased.
Your Datastore is now extended.
The example below documents an increase from 12.73 TB to 25.47 TB.

AlmaLinux 8, Rocky Linux 8, Fedora 34 Server
Post-configuration
The necessary packages are already installed.
Example for AlmaLinux:
However, the multipath configuration still needs to be done, as the file /etc/multipath.conf is not present.
Configuring the multipath service
Activate the service:
Enable the user_friendly_names and find_multipaths options.
Restart the multipathd service:
Check the status of the multipathd service:
List the multipath devices:
We can see that we have 4 paths for each mpathXX device listed.
Ubuntu Server 22.04 LTS
Post-configuration
There are no additional packages to install.
The configuration is done automatically.
Proxmox VE 7
Post-configuration
Install the multipath-tools package:
Generate the initial configuration:
Edit the /etc/multipath.conf file
- Change the
find_multipathsoption toon.

- Change the
use_friendly_namesoption toyes.

Save the /etc/multipath.conf file, then restart the multipathd service.
Check the status of the multipathd service:
Add an LVM storage node to Proxmox
It is necessary to create the Volume Groups (VG) manually so that Proxmox can use them.
Example: creating a VG on 3 PV multipath.
Add the storage node:
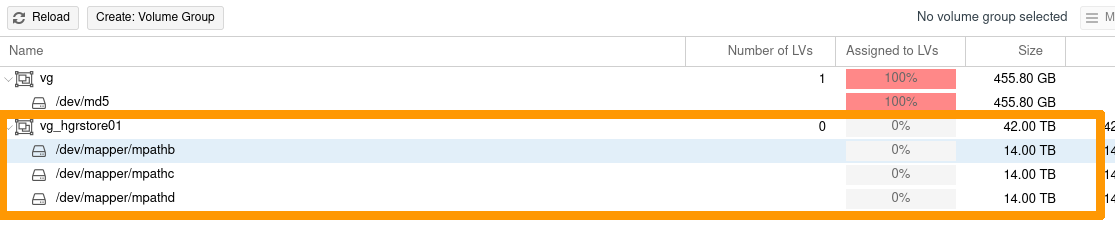
In the Proxmox interface, select your node, then LVM.
Click the Reload button.
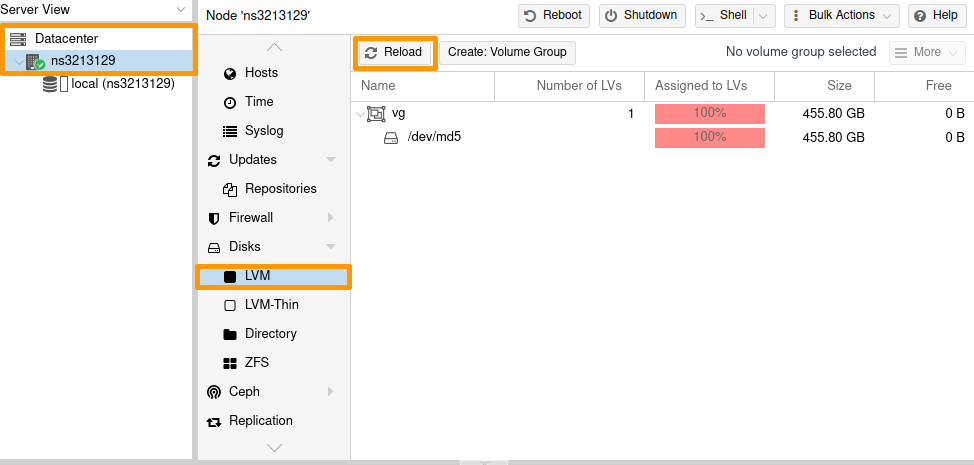
The new VG is now listed.
- Select
Datacenter->Storage; - then click on the
Addbutton ->LVM; - enter the ID with your storage name, and the target VG you have just created.
Once you have set your configuration, click the Add button.
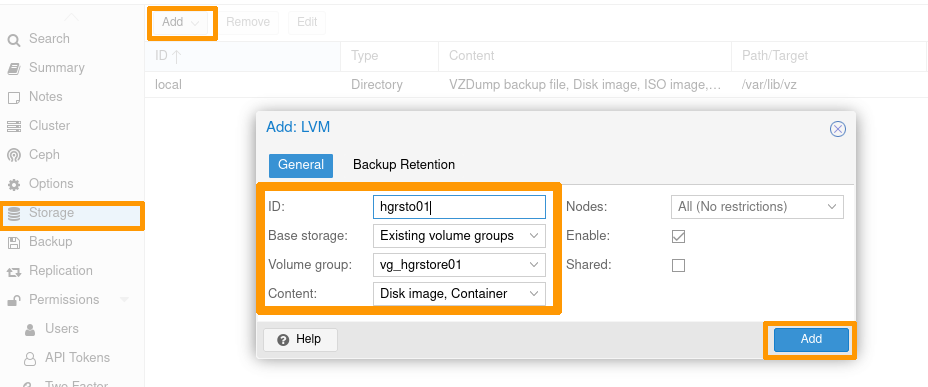
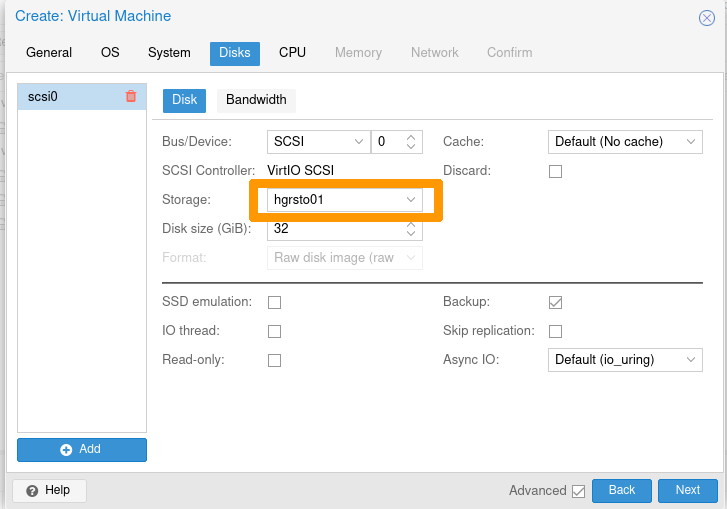
The storage is now available.

You can use it for deploying VMs or other devices.
Add a ZFS storage node to Proxmox
It is necessary to create the ZFS pools manually so Proxmox can use them.
Example: creating a pool on 2 multipath disks.
In the Proxmox interface:
- Select
Datacenter->Storage. - then click the
Addbutton ->ZFS.
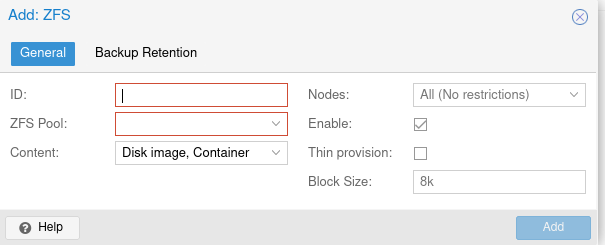
Enter the ID with your storage name, and select one of the ZFS Target Pools you have just created.
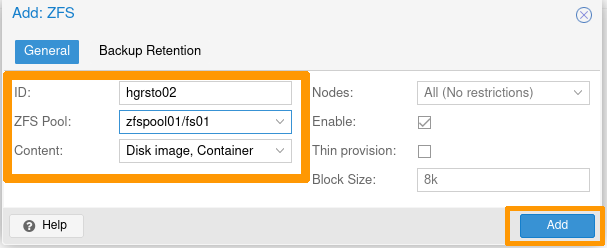
Your Proxmox storage is now usable.

Windows Server 2019
Post-configuration
Step 1 - Installing the MPIO feature
- Via Powershell
- Via Server Manager
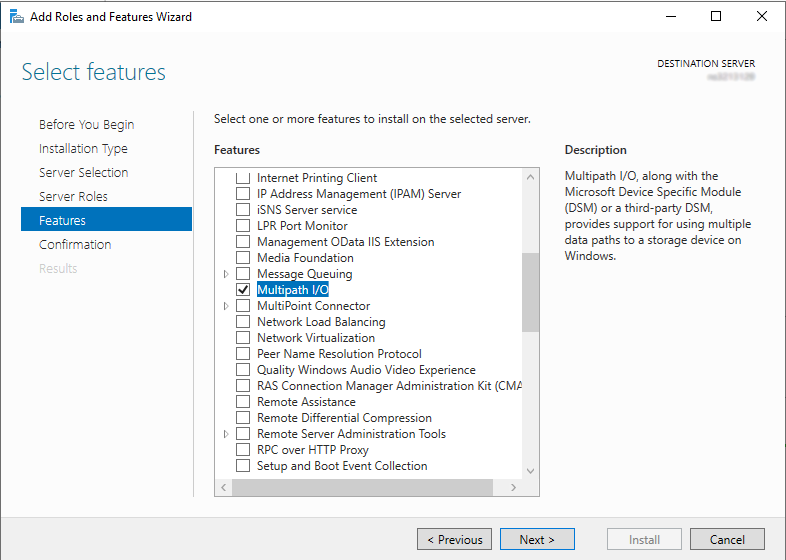
Whichever method you use, restart the server to finalize the component installation.
Step 2 - Add storage in MPIO
- Via Powershell
Retrieve the VendorId and HardwareId storage information:
Add the device using the previously retrieved VendorId and HardwareId information:
Check that the device is now properly registered:
The default storage Vendor 8 Product 16 is not used. You can leave it or remove it (in the latter case, use the Remove-MSDSMSupportedHw command).
- Via Server Manager
Launch the MPIO control panel. To do this, go to the Start menu and search for MPIO.
In the Discover Multi-Paths tab, select the device listed in the Others window and then add it by clicking the Add button:
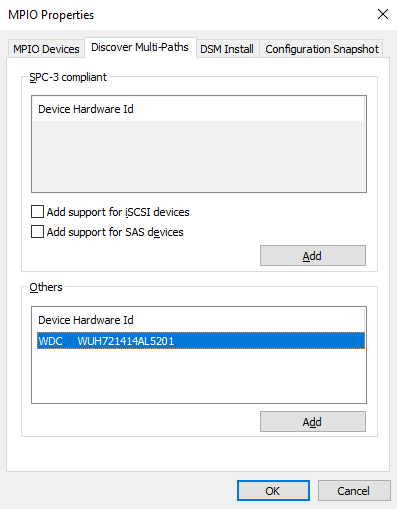
Whichever method you use, restart the server to apply the configuration change.
Step 3 - Configuring the Default Balancing Policy for MPIO
- Via Powershell
This is the recommended method because using Server Manager will require you to set policy for each disk.
Possible policies are:
| Policy | Description |
|---|---|
| None | Default workload balancing policy. |
| FDO | Fail Over Only: A policy that does not perform load balancing. This policy uses only one active path, other paths are fallback paths. |
| RR | Round Robin: Load balancing policy that allows all available paths for MPIO to be used in a balanced way. |
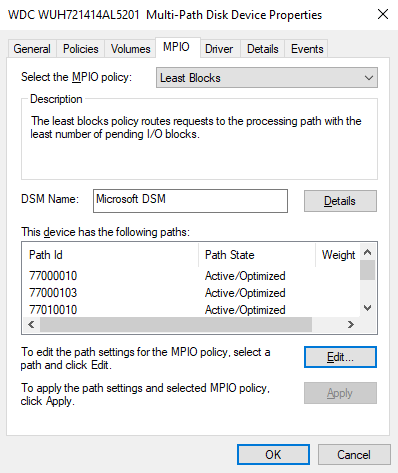
| LB | Least Blocks Load balancing policy that sends I/O to the path with the least data blocks currently being processed. |
- Via Server Manager
This method is not recommended because it requires setting the policy for each disk.
Since the MPIO is already installed, the MPIO tab is accessible in the disk properties.
Once you have completed these three steps, you can list the disks:
Go further
Join our community of users.

