Quantum computing - Getting started with Emulators Notebooks
174 vues
Some links on this documentation refer to the AI and Machine Learning solution. Quantum computing shares the same infrastructure as a service so you might be redirected to another section of this documentation.
Introduction
A Notebook is a document that integrates code, rich text elements, and multimedia, making it a convenient tool for quantum analysis and visualization.
OVHcloud Quantum Emulators is our managed solution for Jupyter and VS Code Notebooks. You can easily launch Notebooks with the required CPU and GPU resources while enjoying benefits like pre-installed dependencies and Quantum frameworks, secure user access, and simplified data management.
Objective
This guide demonstrates how to create, configure, access, stop, restart and delete a Quantum Emulators Notebook from the OVHcloud Control Panel (UI). This method is user-friendly and ideal for beginners.
Alternatively, you can use one of the following methods:
- The ovhai command-line interface (CLI)
- The Quantum API
- The ovhai Python SDK
Each method offers its distinct advantages, depending on your expertise and preferred workflow.
Requirements
- A Public Cloud project in your OVHcloud account.
- A Public Cloud user with the Administrator or Quantum Operator & Objectstore Operator roles.
OVHcloud Control Panel Access
- Direct link: Public Cloud Projects
- Navigation path:
Public Cloud> Select your project
Instructions
OVHcloud Quantum Solutions authorization process
If you're using the CLI, API, or SDK, you will need to complete an authorization process before creating a Quantum Emulators Notebook. To do so, follow these steps:
- Click the
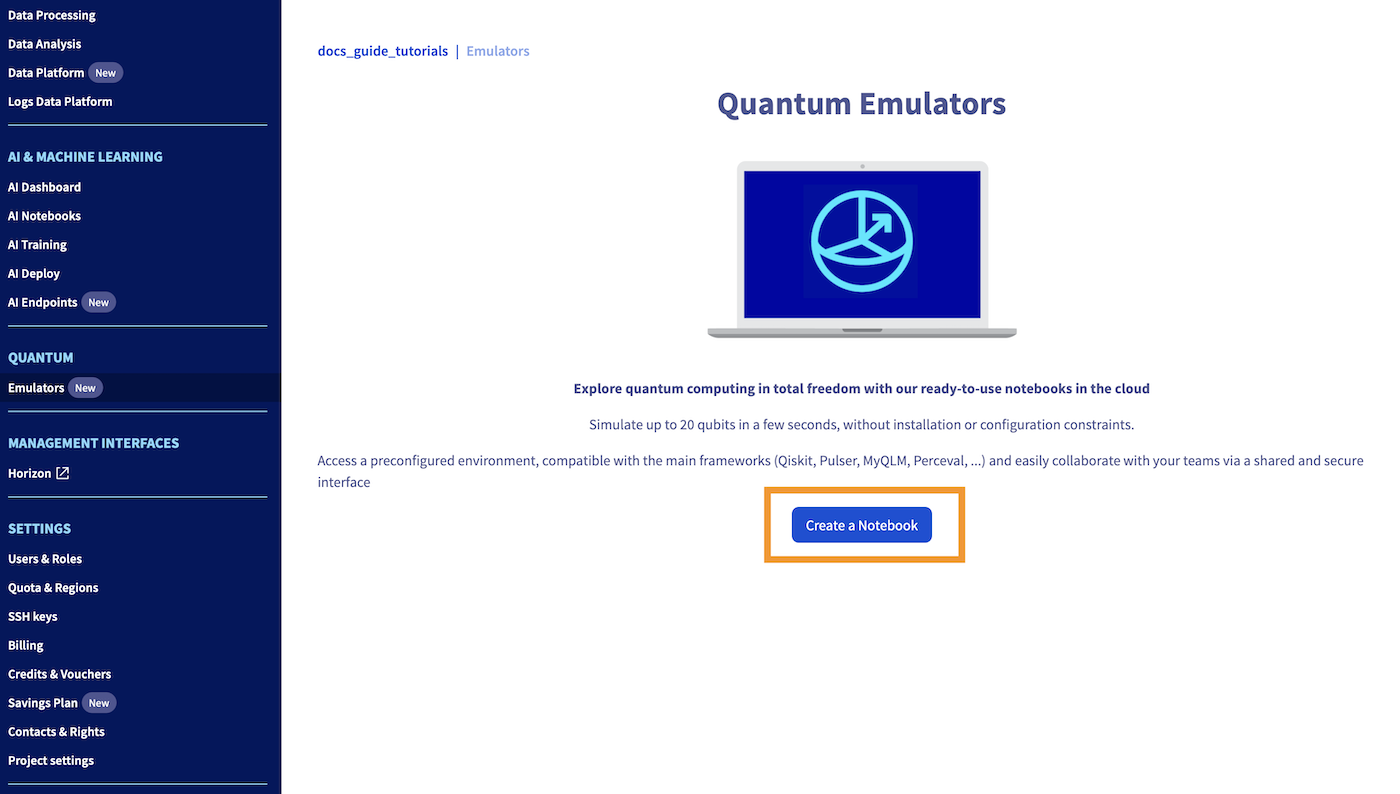
Quantum Emulatorscategory. - Click the
Create a Notebookbutton. The authorization process will take place silently in the background.
Launch your first Quantum Notebook
To create a Quantum Notebook, follow these steps:
Click the Quantum Emulators category.
Click the Create a Notebook button and follow the prompts to specify the configuration of your Quantum Notebook.
1. Notebook name
Give a name to your notebook. This will make it easier to manage when you have multiple Quantum Notebooks created.
2. Notebook location
Next, select a location.

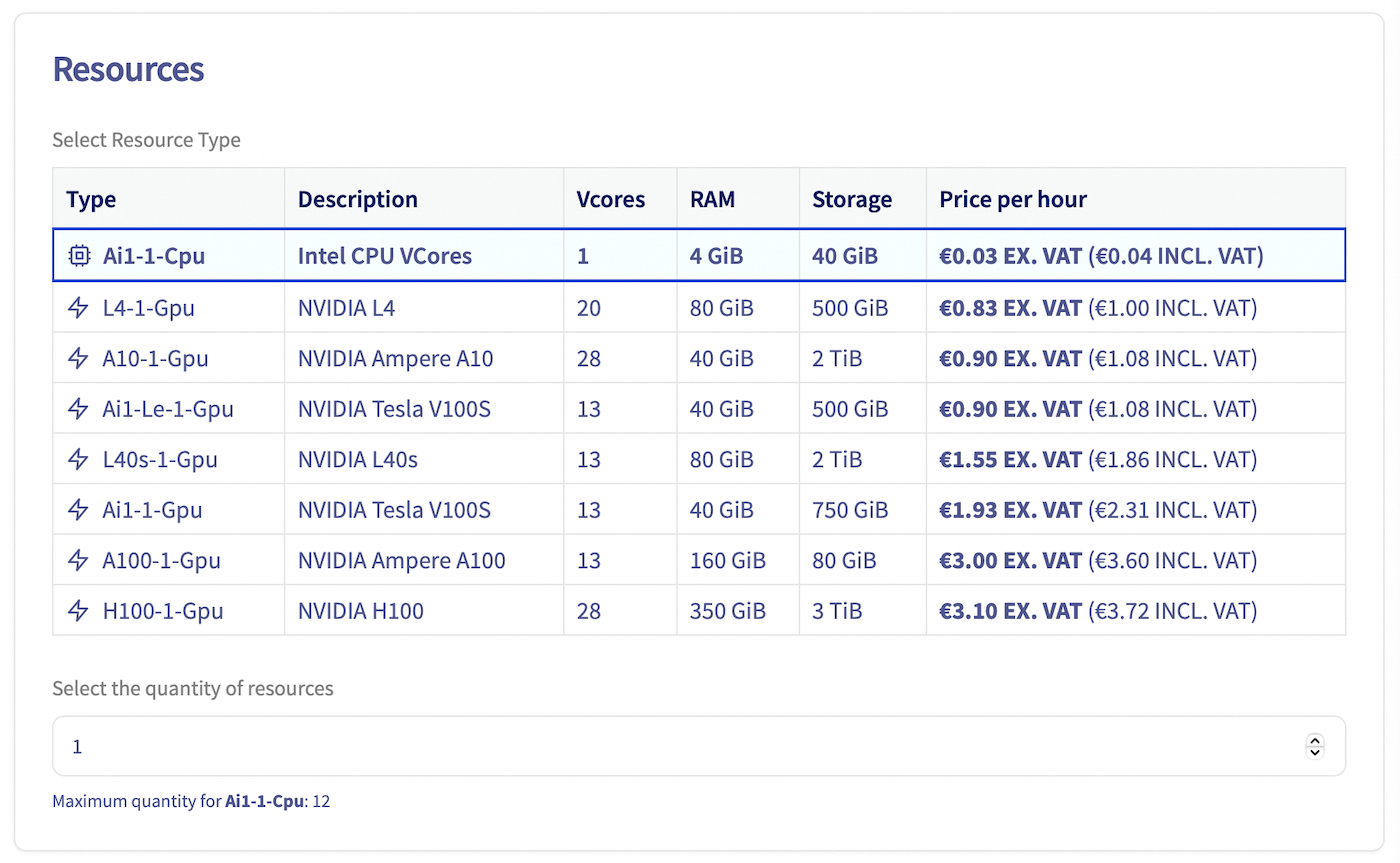
3. Compute resources
Specify and adjust the type and amount of computing resources (CPU / GPU) for your Quantum Notebook. Use the + and - buttons to increase or decrease the number of CPUs and GPUs, depending on your needs.
Click Next.
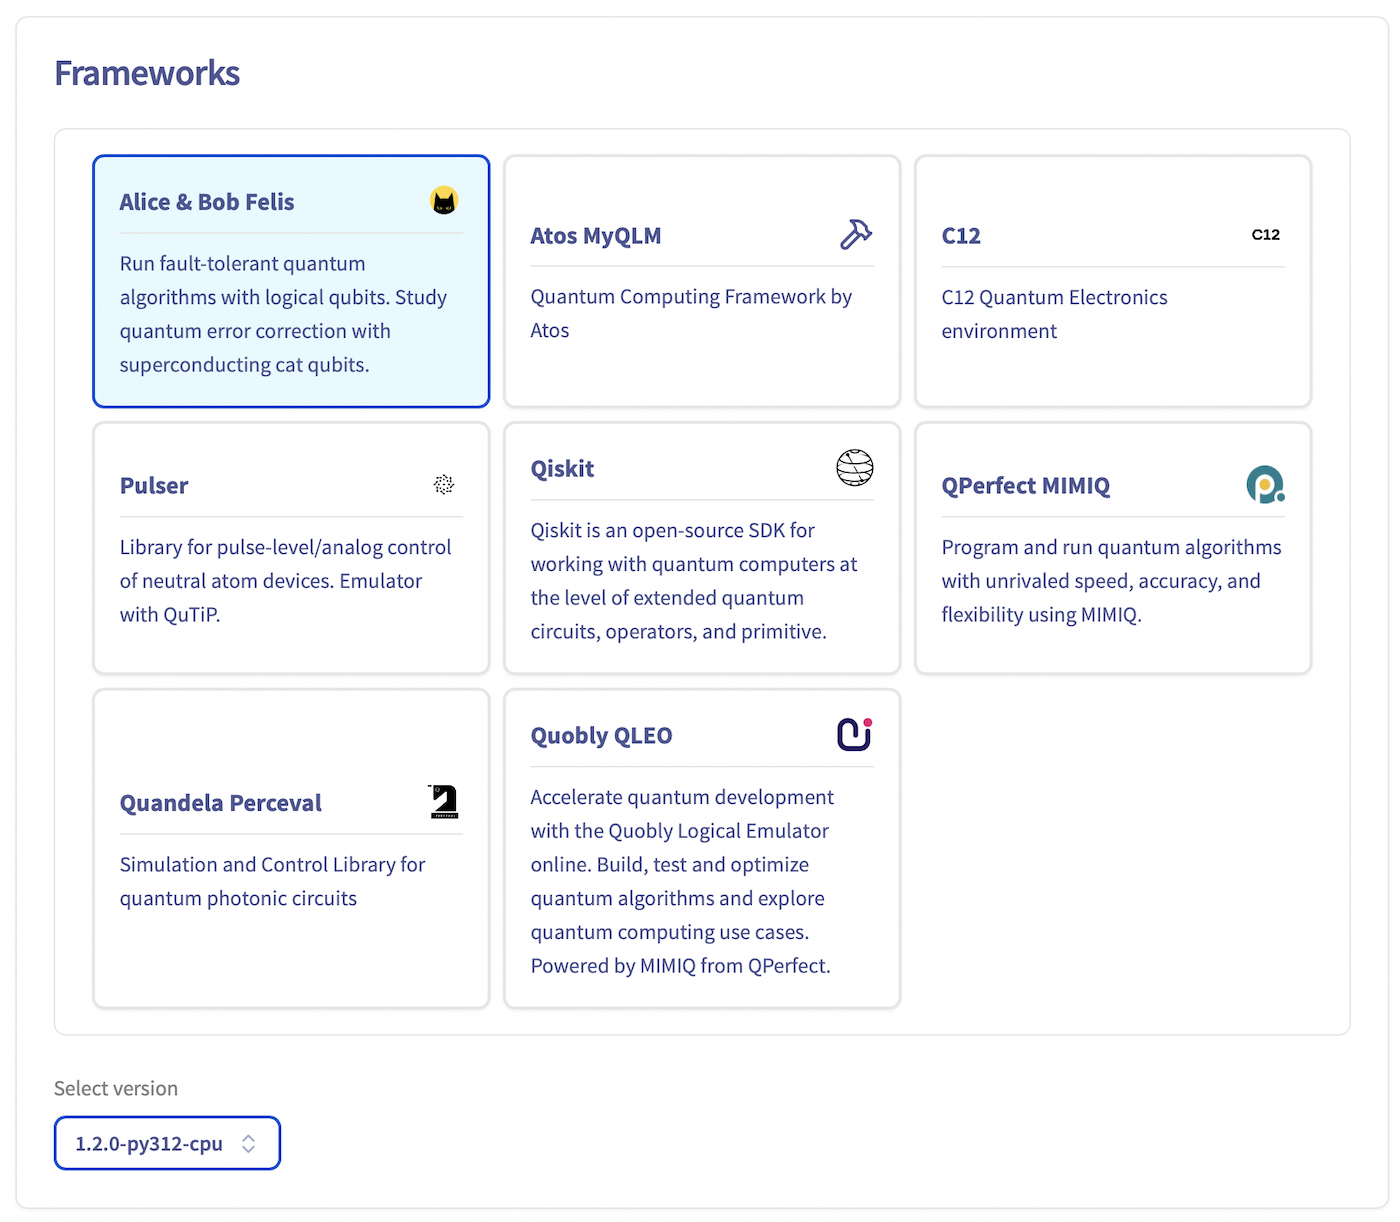
4. Pre-configured frameworks
Choose the Quantum Python framework you want to use, which will be pre-installed and ready to use when your notebook is launched. A wide range of Quantum frameworks are available in different versions. Select the version that suits your needs. Then, click Next to continue.
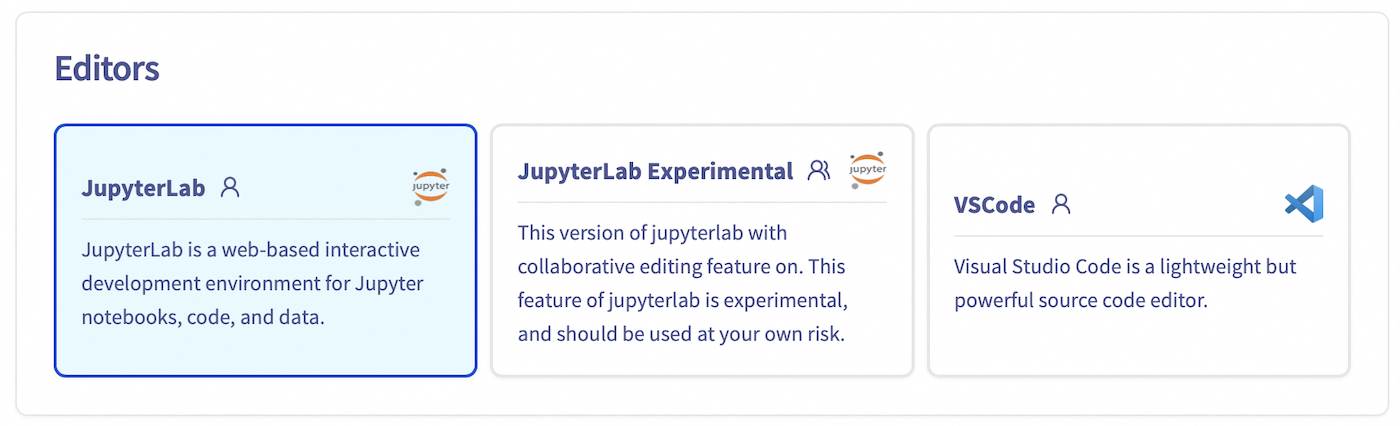
5. Live-code editor
Choose the code editor you want.
6. Privacy settings
Then, select your privacy settings and click Next.
Public access will expose your data and code to anyone getting the Quantum Notebook link. Be careful not to use it with sensitive data. On the other hand, Restricted access will require a user and password combination or a Quantum token to access the Notebook content to ensure a secure environment.

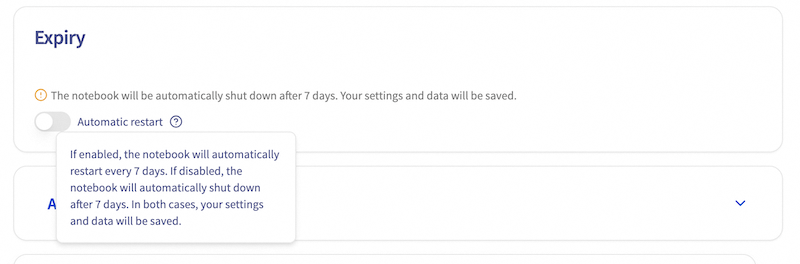
7. Notebook lifecycle
Our main motivation is to keep the platform up-to-date in terms of security patches and new feature alignment. To achieve this, we need to update and restart hosts from time to time, which requires them to be free from any customer workload.
By default, your AI notebook will automatically shut down after 7 consecutive days of running. Rest assured that all your settings and data will be preserved. You have the option to enable Automatic Restart, which will automatically restart your notebook every 7 days, ensuring minimal disruption to your workflow. Alternatively, you can also contact our support to extend this automatic restart period from 7 to 28 days.
8. Advanced configuration
By default, your Quantum Notebook comes with ephemeral storage (local storage). But in this step, you can also link Object Storage containers and Git repositories to your notebook to easily access your remote data.
If you want to learn more about configuring containers and Git repositories in the Notebook, you can refer to this AI & Machine learning documentation. For now, we will launch a classic Notebook without any external volumes added to it.
Click Next.
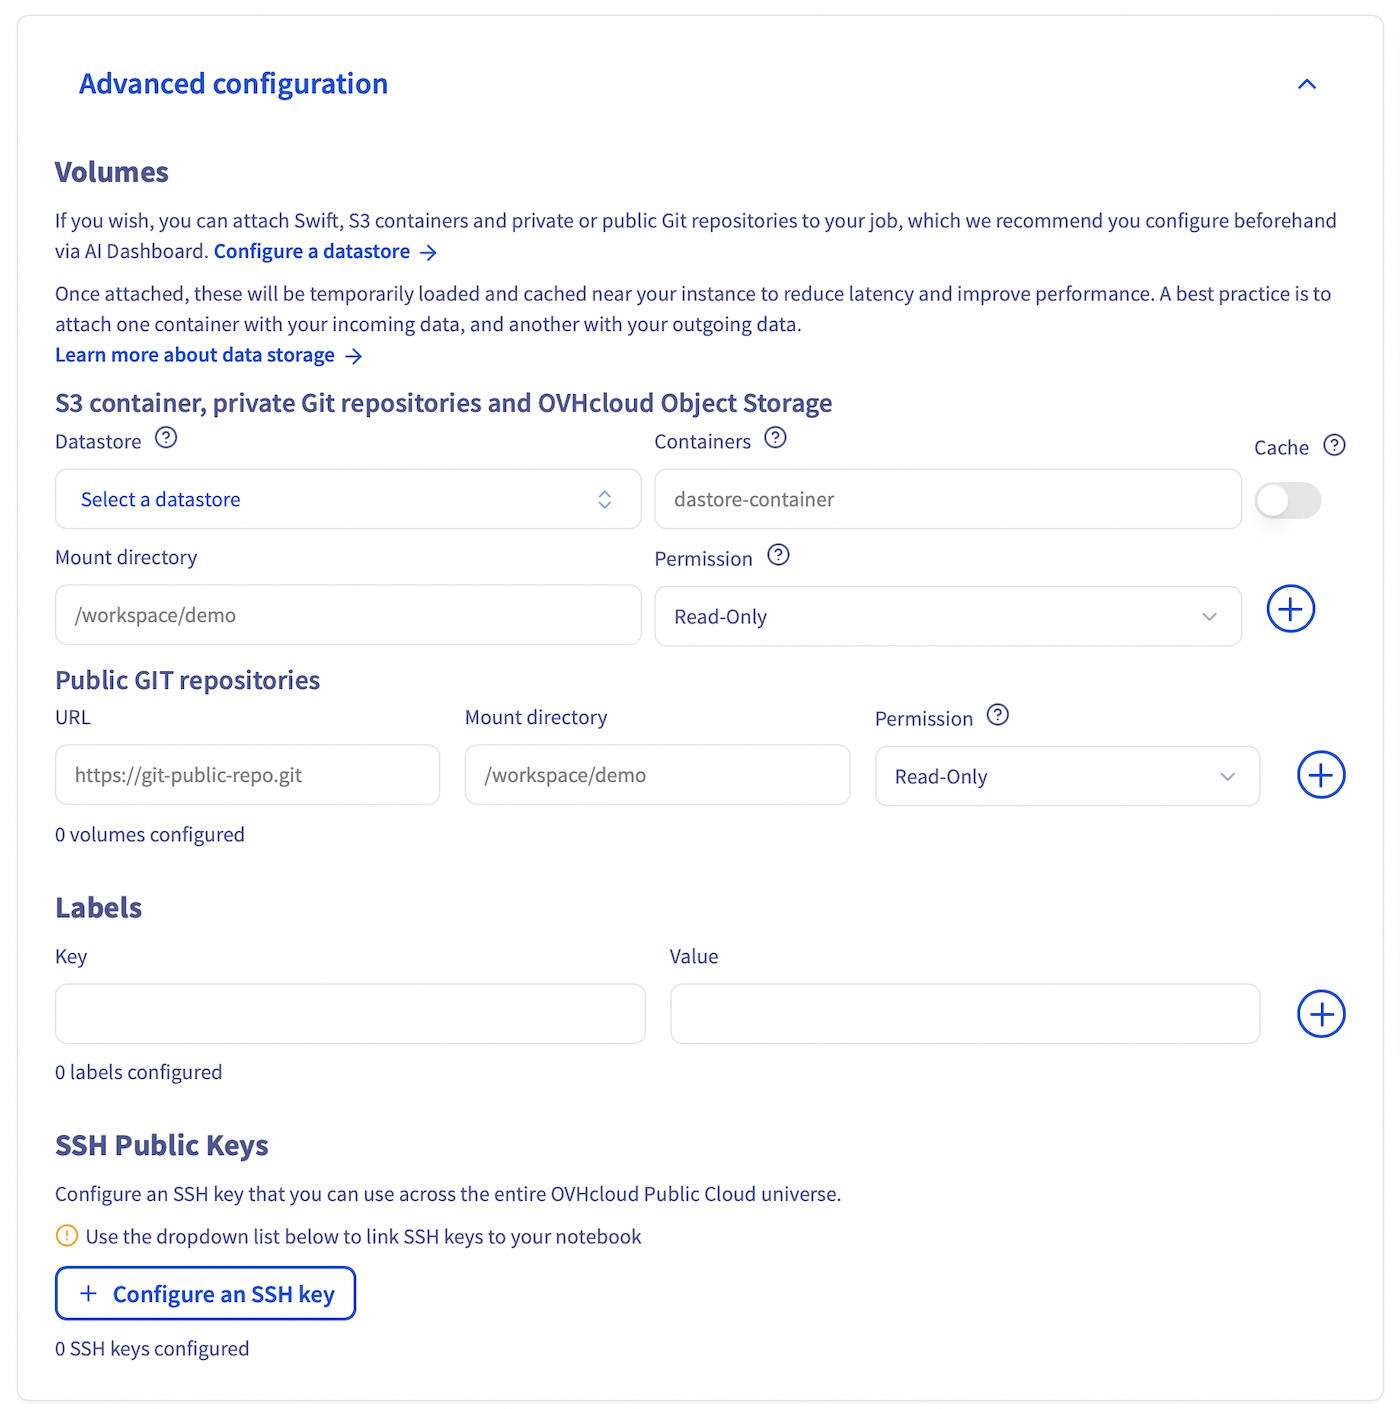
SSH public keys allow you to access your Notebook remotely. This section is optional, click Next.
9. Launch the Quantum Notebook
At the end of the process, review your settings and click the Order now button to confirm and launch the creation of your Notebook. You will be redirected to your notebook dashboard:
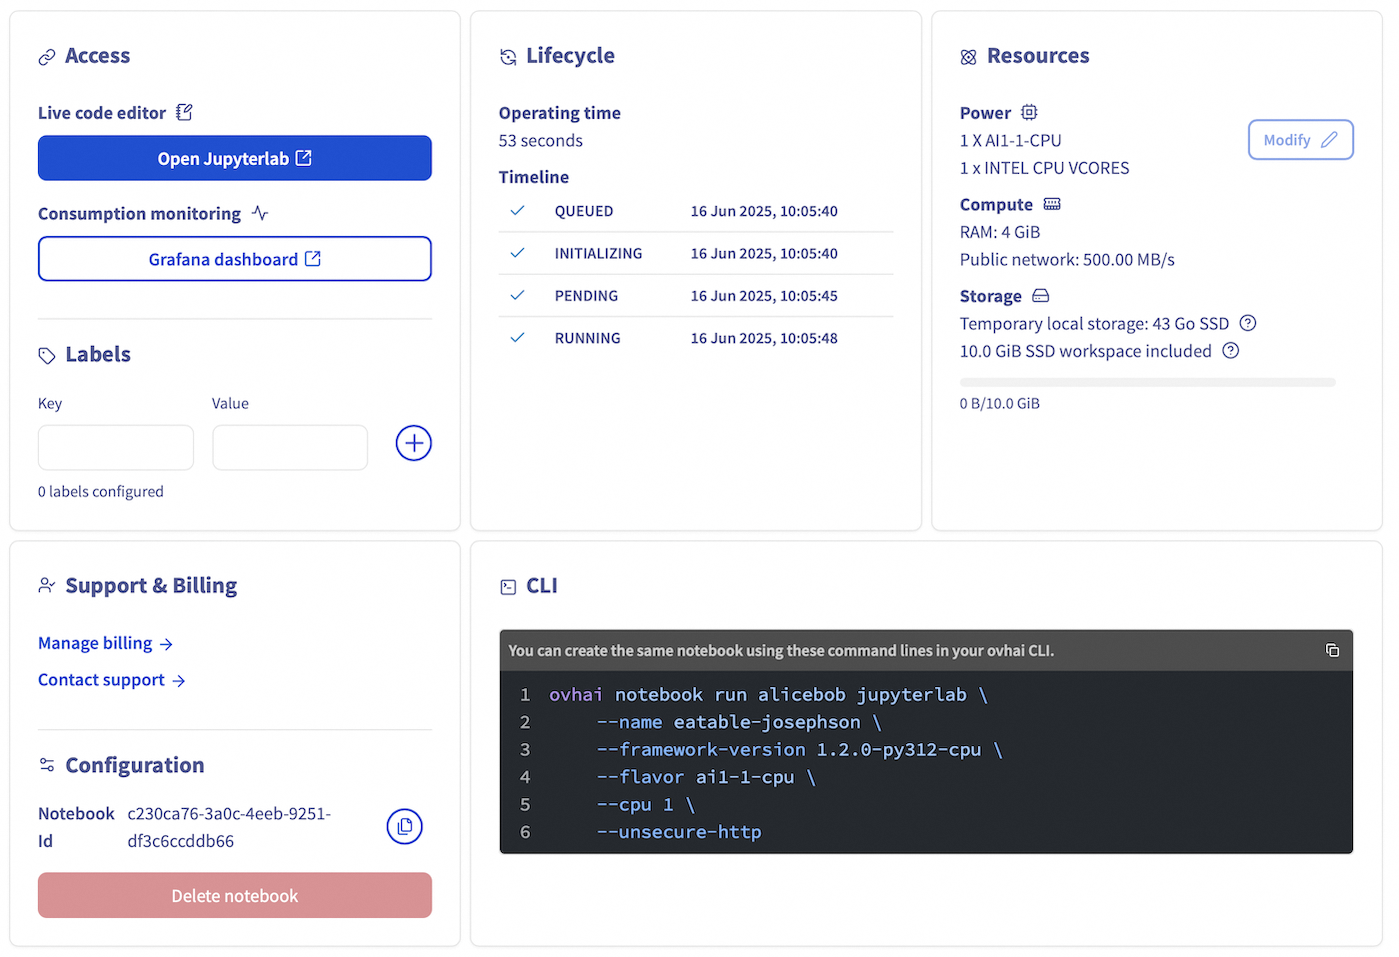
Note at the bottom of the screen the equivalent ovhai CLI command. This command allows you to run the exact same Notebook using the CLI.
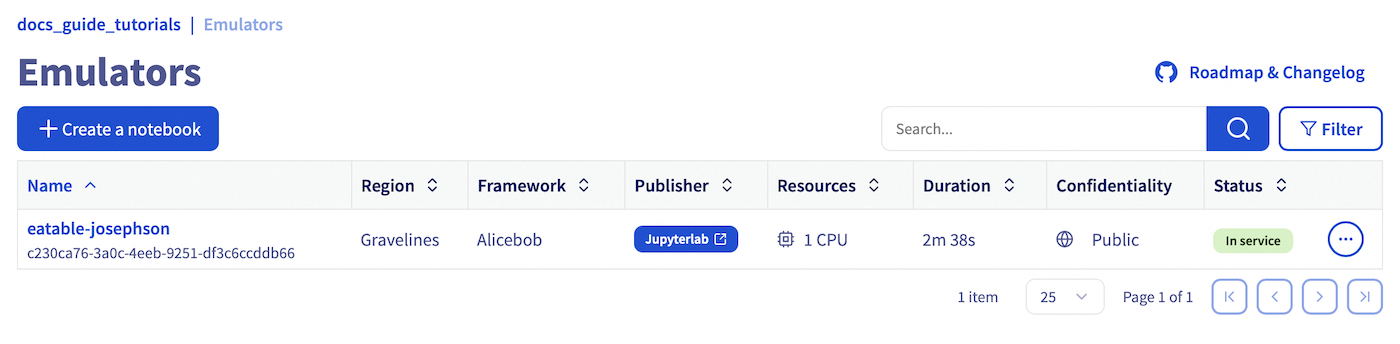
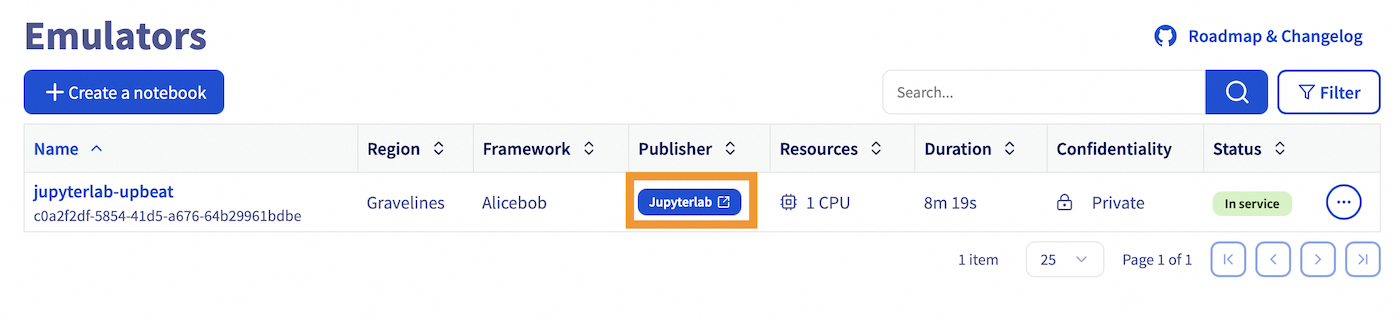
When your Notebook is created, it will appear on your Quantum Emulators tab:
If you prefer to use the command line interface to launch your Quantum Notebook, please follow these steps:
- Follow this AI & Machine learning documentation to install the
ovhaiCLI and log in. - Visit this second documentation to learn how to create your Quantum Notebook using commands.
- Create a bearer token from the ovhai CLI. For more detailed instructions on creating a token, check the manage access tokens documentation.
- Navigate to the desired region and follow the instructions to create a Quantum Notebook.
- GRA AI Solution API, for Gravelines, France.
- BHS AI Solution API, for Beauharnois, Canada.
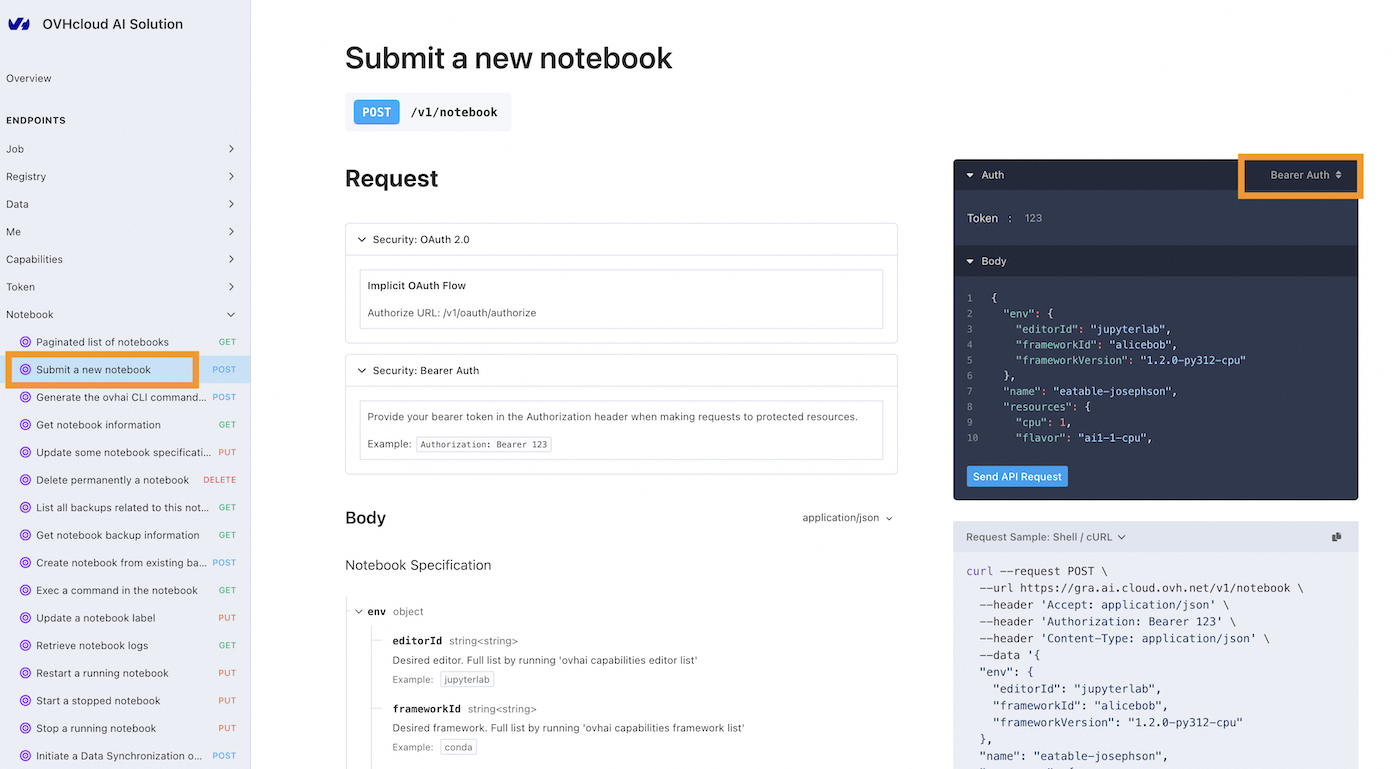
Submit a new notebookPOST method
Make sure to select Bearer Auth instead of OAuth 2.0, which is selected by default.
Alpha version warning: This package is currently in the alpha phase of development. The APIs and functionalities of the package may not be fully tested.
- Create a bearer token from the ovhai CLI. For more detailed instructions on creating a token, check the manage access tokens documentation.
- Install the
ovhaiPython SDK and follow the instructions in the ovhai PyPI page to create a Quantum Notebook. - Finally, open your terminal and run
pip install ovhai.
Here is a basic example of how to do it, making it easy for you to get started:
Accessing your Quantum Notebook
Once your Quantum Notebook is created and running, you can access it using the JupyterLab link in the Quantum Notebooks board or through the ovhai CLI, Quantum API, or Python SDK.
Click the JupyterLab link in the Publisher column:
You can also access the Notebook from its dedicated page:
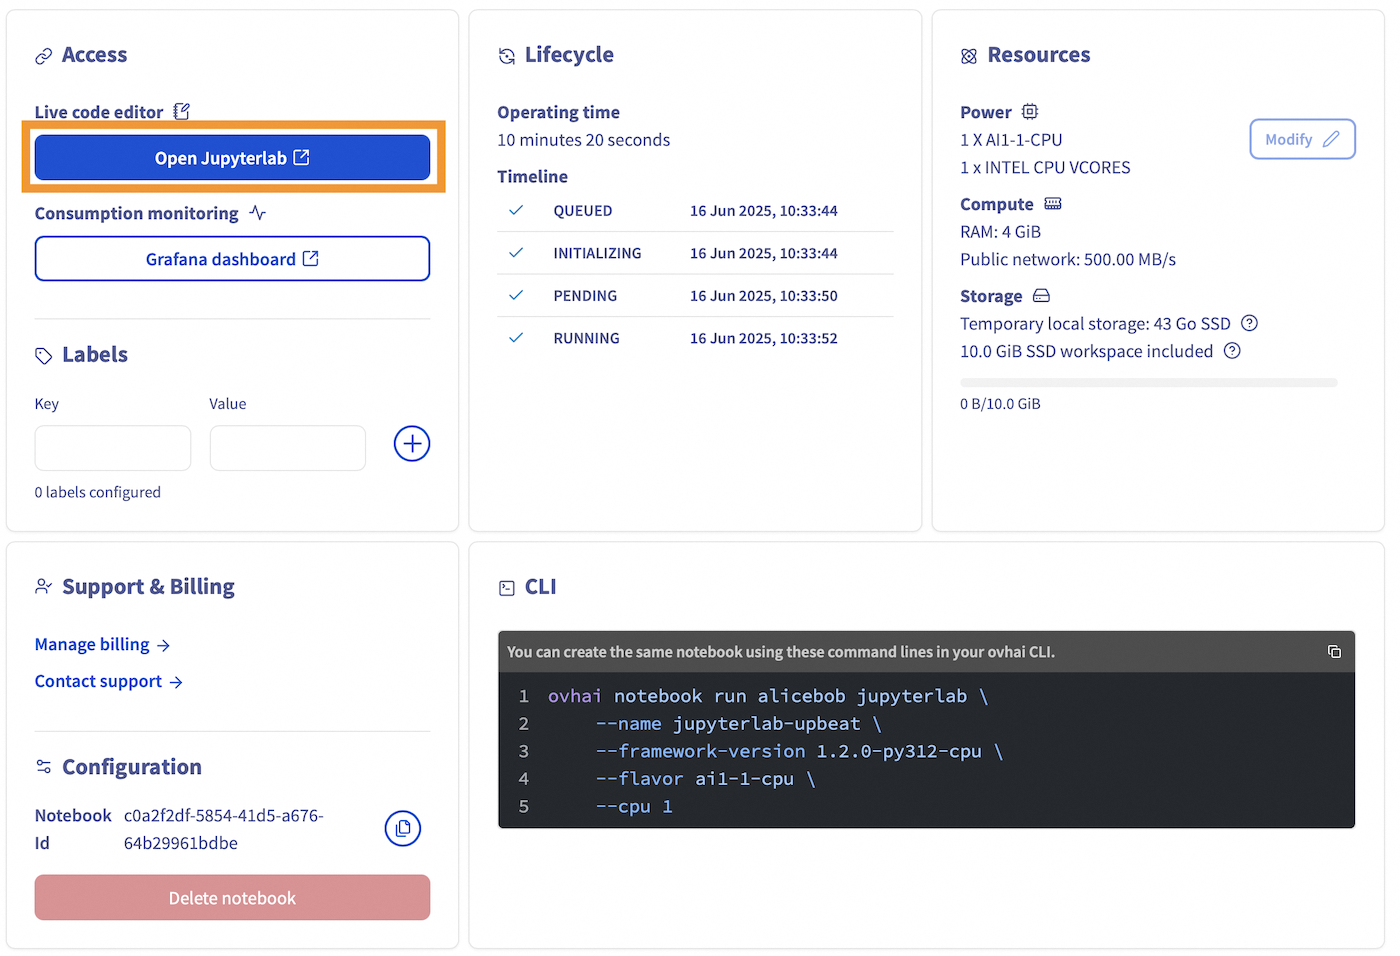
On the Notebook page, you will find information about the Notebook, including specifications, billing, and attached data, as well as a monitoring URL for real-time metrics.
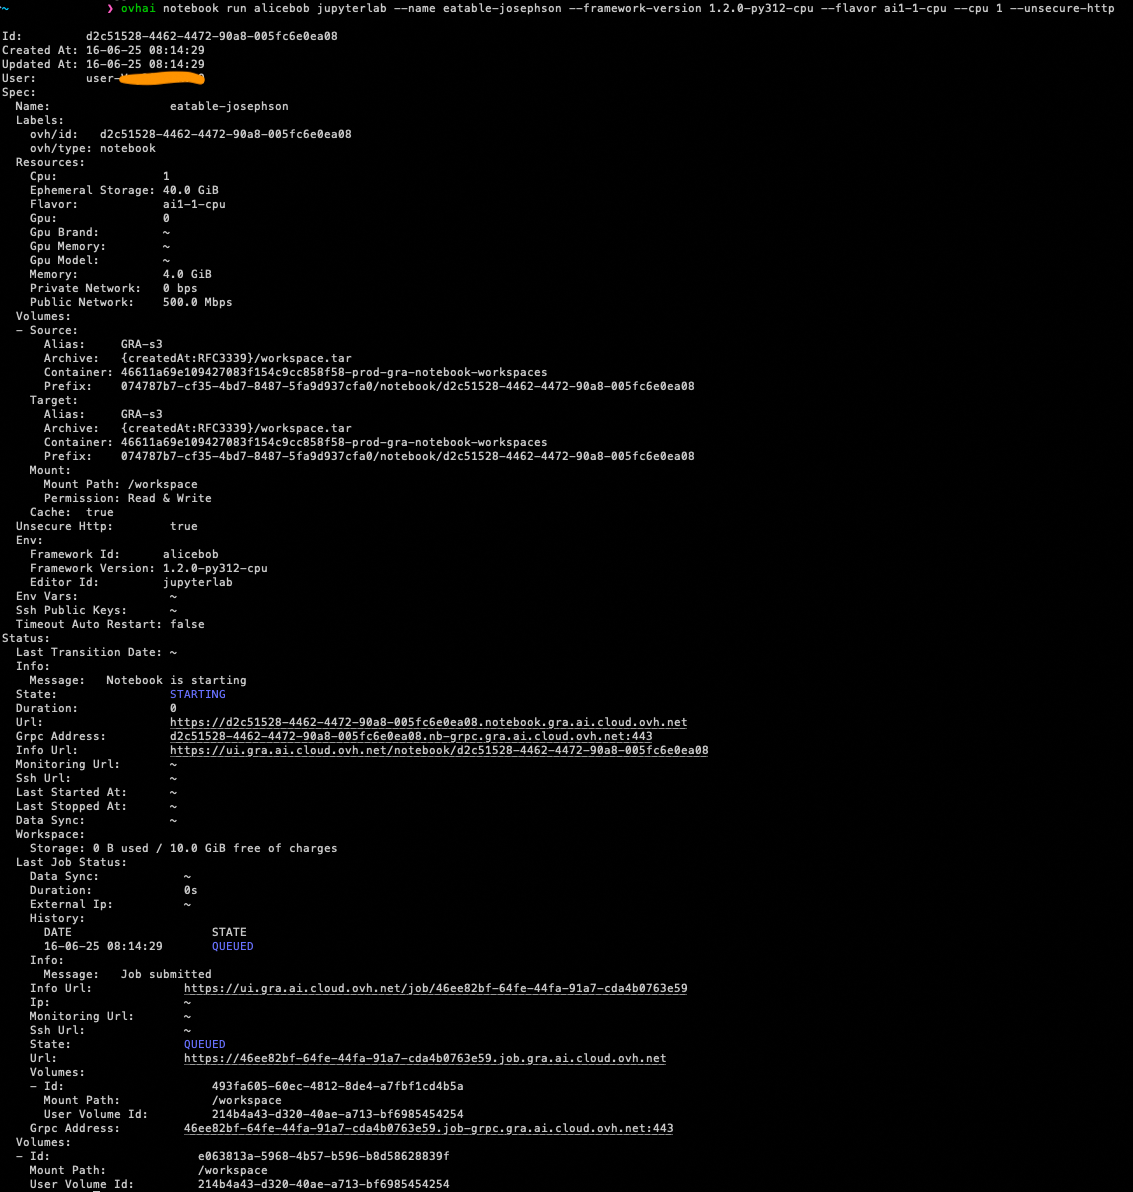
The URL of your Notebook should be displayed in your terminal and you can display it by running ovhai notebook list to retrieve the URL.

You can also get Notebook information using ovhai notebook get <NOTEBOOK_UUID>.
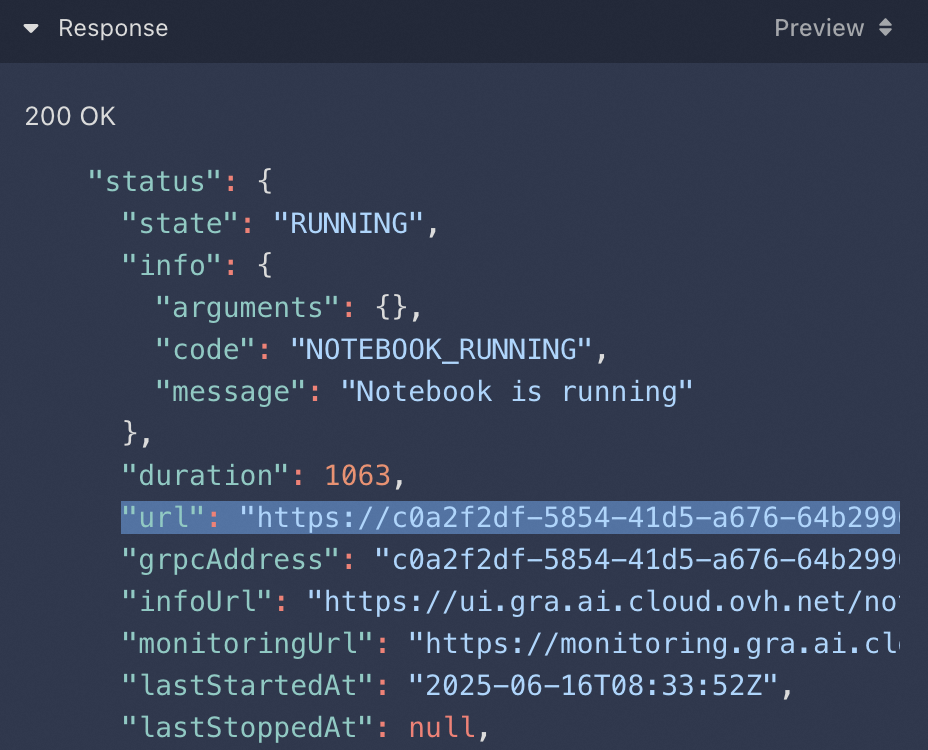
The URL of your Notebook should appear in the Response panel:
If not, use the Paginated list of notebooks GET endpoint method:
You can also get Notebook information using the Get notebook information GET endpoint method.
Run the following code to list all Quantum Notebooks:
You can also get Notebook information with this code sample:
Connecting to your Quantum Notebook
To connect to your Quantum Notebook, you'll need to authenticate using a username and password combination or an access token.
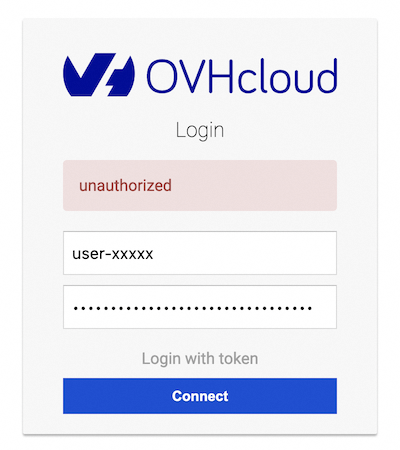
Using a Username and Password
Enter your Public Cloud project user's credentials to log in to your Quantum Notebook.
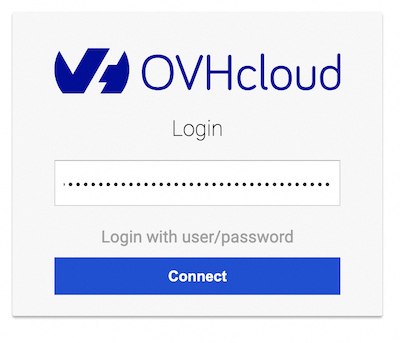
Using an Access Token
Click the Login with token button and enter your access token to log in to your Quantum Notebook.
Stopping a Quantum Notebook
You can stop your Quantum Notebook at any time to release its compute resources. This will release its compute resources but will keep your Notebook data and installed libraries. Therefore, you will not incur any further charges for compute unless you restart the Notebook. However, attached storage will be billed at the price of OVHcloud Object Storage (consult the Quantum Notebooks Billing documentation for more information). To do so, follow these steps:
Go to the Quantum Notebooks board and click on the ... button next to the Notebook you want to stop.
Click the Stop button to stop the Notebook. Or, on the notebook board, you can click on the red button at the top of the page.

Run the command ovhai notebook stop <NOTEBOOK_UUID> to stop the Notebook.
If you do not know its UUID, remember that you can easily list all your existing Quantum Notebooks by running ovhai notebook list.
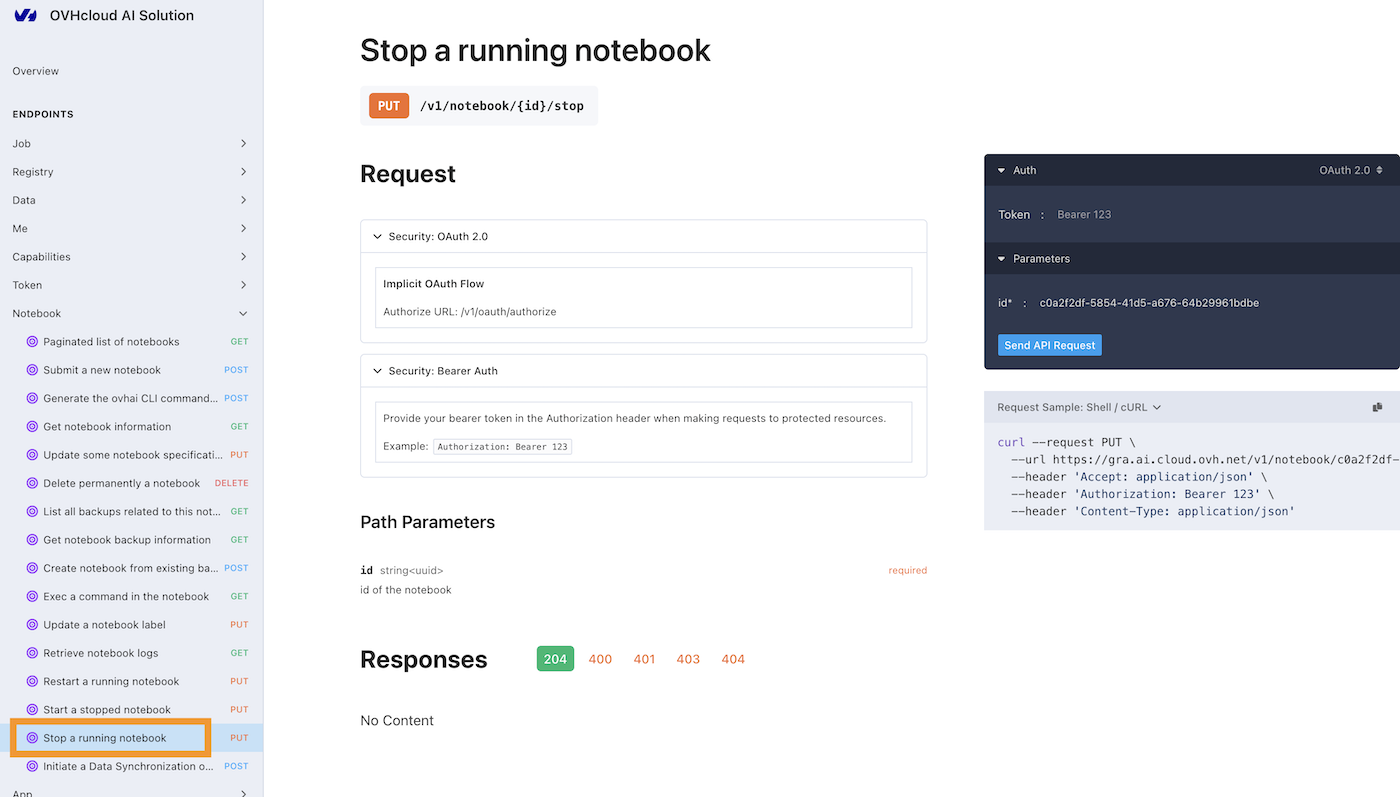
Select the Stop a running notebook endpoint and provide the UUID of the Notebook you want to stop.
Use the notebook_stop method to stop the Notebook.
Restarting a stopped Notebook
To restart a stopped Notebook, follow these steps:
Go to the Quantum Notebooks board and click on the ... button next to the Notebook you want to restart.
Click the Start button to restart the Notebook. Or, on the notebook board, you can click on the blue button at the top of the page.
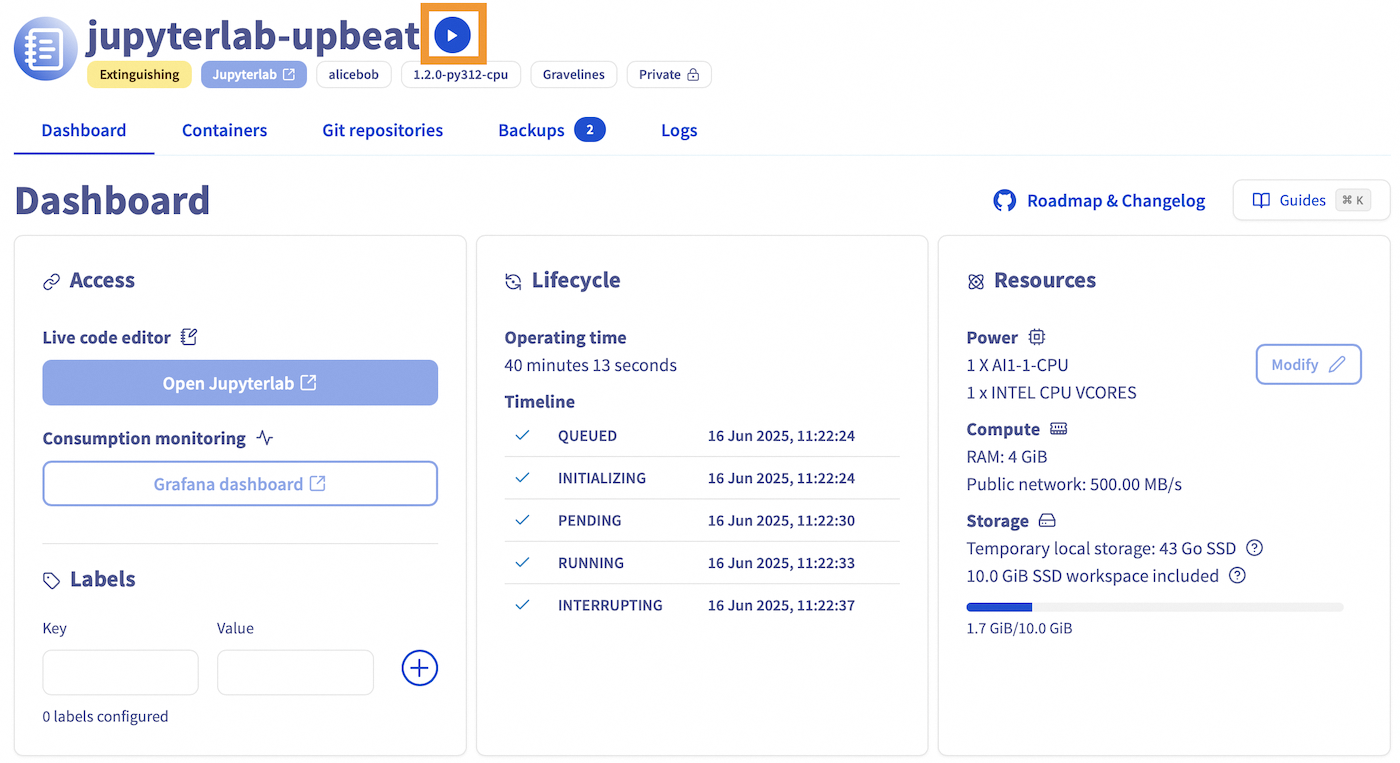
Run the command ovhai notebook start <NOTEBOOK_UUID> to restart the Notebook.
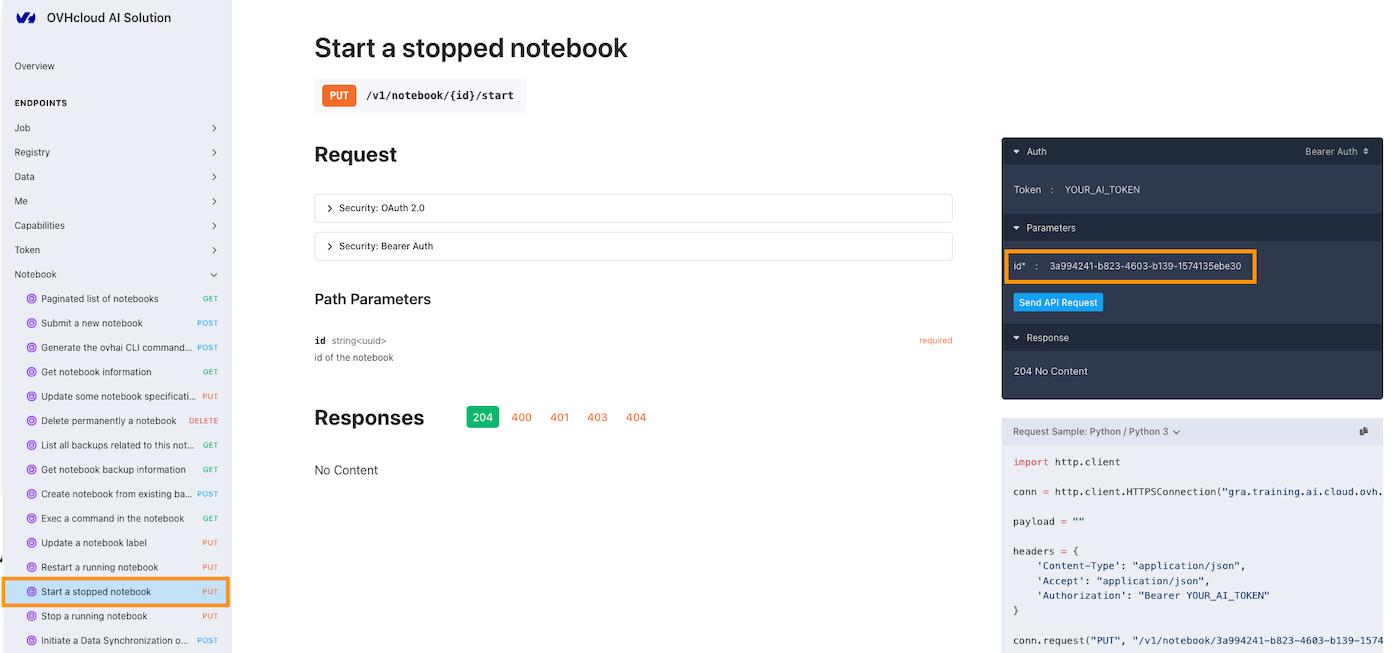
Select the Start a stopped notebook endpoint and provide the UUID of the Notebook you want to restart.
Use the notebook_start method to restart the Notebook.
Deleting a Notebook
The notebook must be stopped before deleting it. To delete a Notebook, follow these steps:
Go to the Quantum Notebooks board and click on the ... button next to the Notebook you want to delete.
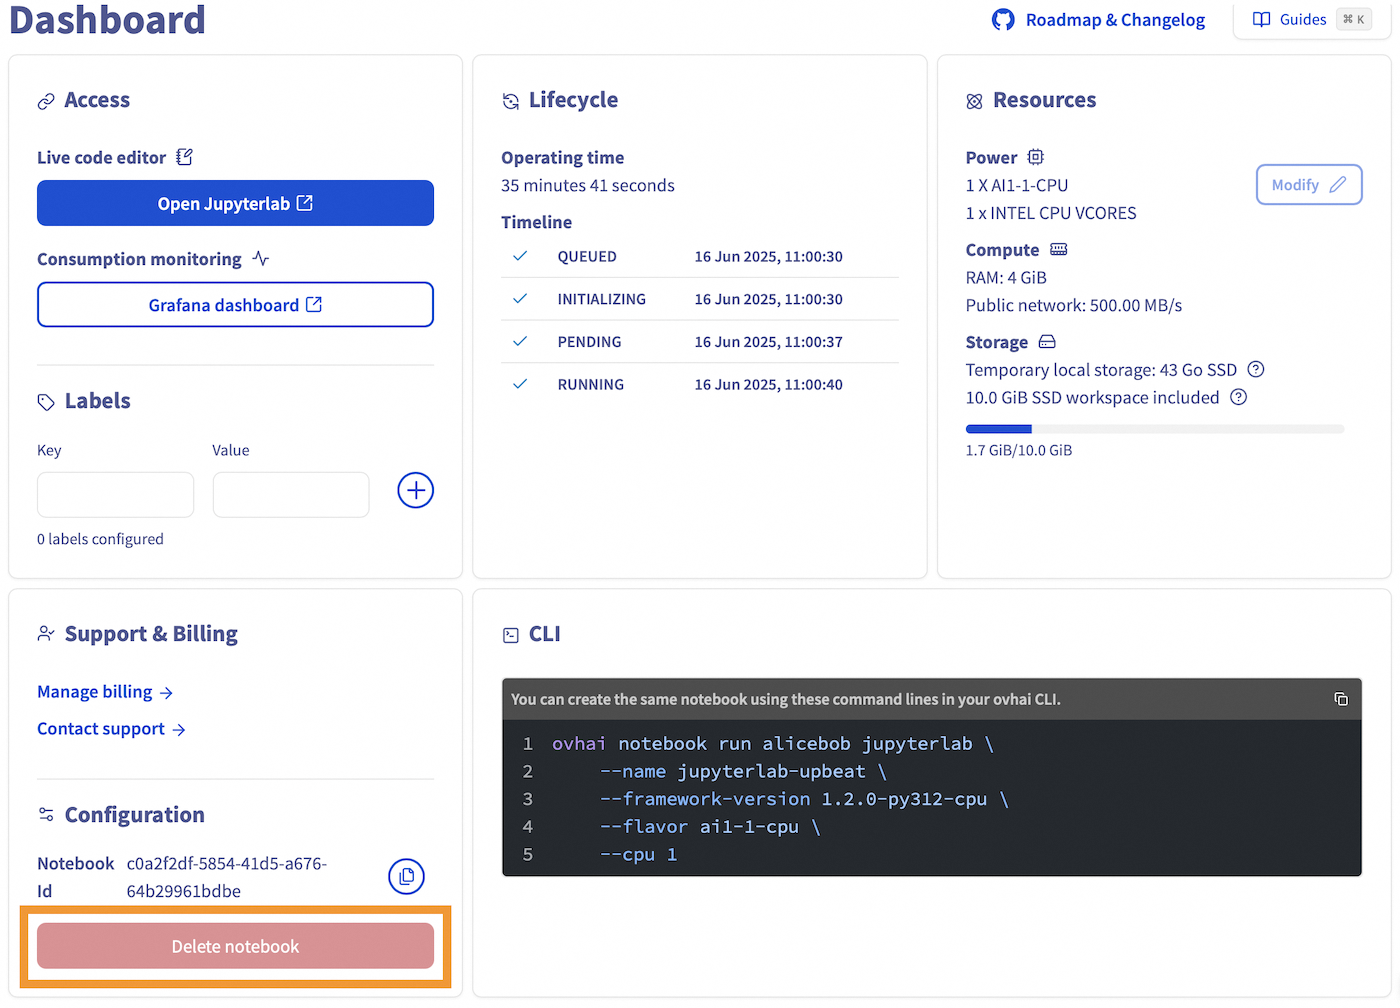
Click the Delete button to stop the Notebook. Or, on the notebook board, you can click on the Delete notebook button at the bottom of the page.
Run the command ovhai notebook delete <NOTEBOOK_UUID> to delete the Notebook.
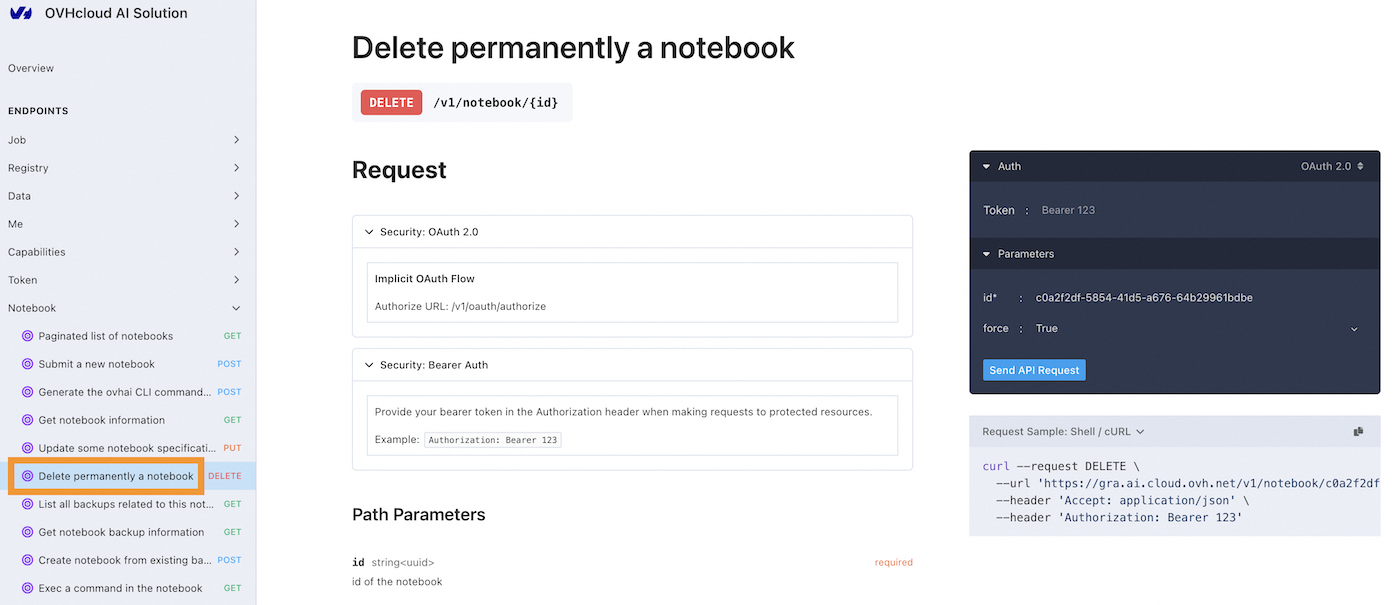
Select the Delete permanently a notebook endpoint and provide the UUID of the Notebook you want to delete.
Use the notebook_delete method to delete the Notebook.
Go further
- Discover how to access your Object Storage data and Git repositories from your Notebooks using the UI here.
- Learn about the technical features, capabilities, and limitations of the Public Cloud Quantum Notebooks offering here.
- Get some hints on how to debug your Notebooks if things go wrong here.
If you need training or technical assistance to implement our solutions, contact your sales representative or click on this link to get a quote and ask our Professional Services experts for a custom analysis of your project.
Feedback
We would love to help answer questions and appreciate any feedback you may have.
Please send us your questions, feedback, and suggestions regarding Quantum Notebooks:
- In the #quantum-computing channel of the OVHcloud Discord server.

