Working with vRack example - Managed Kubernetes and Public Cloud instances
1227 vues
Objective
OVHcloud vRack is a private network solution that enables our customers to route traffic between OVHcloud dedicated servers as well as other OVHcloud services. At the same time, it allows you to add Public Cloud instances and Managed Kubernetes clusters to your private network to create an infrastructure of physical and virtual resources.
In this tutorial, we are going to activate the vRack on a Public Cloud project. Then we will create a Managed Kubernetes cluster and a Public Cloud instance (PCI). Eventually, both of them will be added inside the vRack.
Concretely, we are going to install an OVHcloud Managed Kubernetes cluster and a Public Cloud instance, both of them in the same private network. We are going to deploy a WordPress on the Kubernetes cluster that will use the private network to connect to a MariaDB database installed on the Public Cloud instance.
In this tutorial we are going to give you an example of how to use the OVHcloud vRack to connect a Managed Kubernetes cluster with a Public Cloud instance inside the same private network.
The method described in this tutorial currently works if the Managed Kubernetes cluster and the external instance are in the same private network in the vRack. The process to connect them between different private networks will be described in a next tutorial.
Requirements
This tutorial presupposes that you already have a working OVHcloud Managed Kubernetes cluster, and some basic knowledge of how to operate it. If you want to know more on those topics, please look at the OVHcloud Managed Kubernetes Service Quickstart.
You also need to have Helm installed on your workstation and your cluster. Please refer to the How to install Helm on OVHcloud Managed Kubernetes Service tutorial.
It also supposes that you already have followed the Using vRack guide to activate the vRack on your Public Cloud project and put your OVHcloud Managed Kubernetes cluster inside the vRack.
Instructions
Setting up the vRack
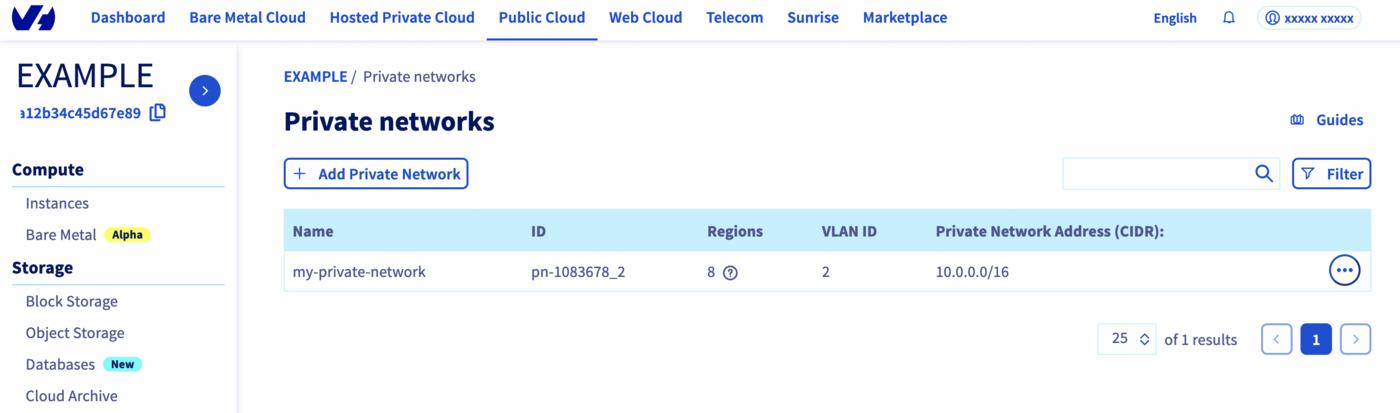
First of all, we will need to set up vRack Private Network for our Public Cloud. To do it, we follow the Configuring vRack for Public Cloud guide. Once you have created a vRack and added it into a Private Network, you can continue.
As explained in the Known limits guide, the following subnets are not compliant with the vRack feature and can generate some incoherent behaviours with our used overlay networks:
Setting up the Managed Kubernetes
Then we create a Kubernetes cluster, as explained in the Create a cluster guide. Integrating a cluster into a vRack Private Network must be done at the third step on cluster creation, when we can choose an existing private network for the cluster:
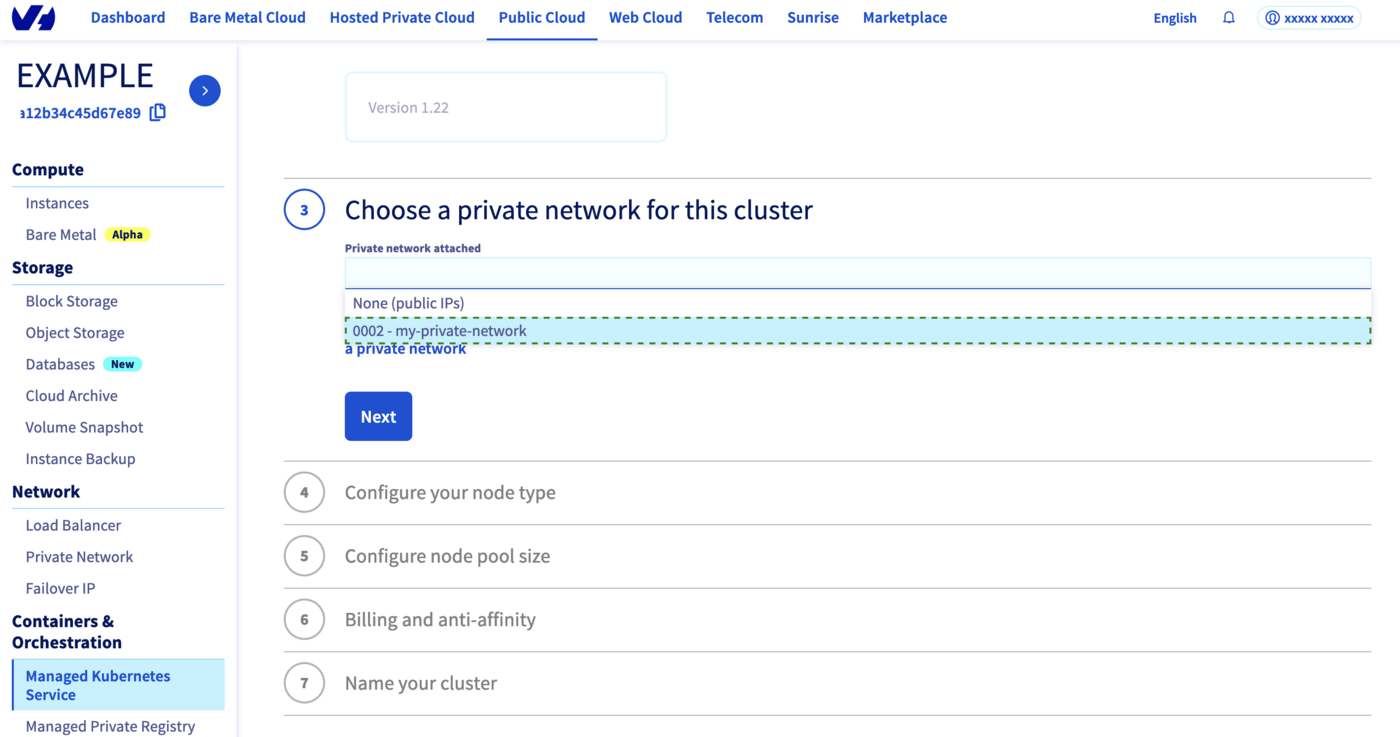
Our new cluster will be created inside the vRack Private Network we have chosen.
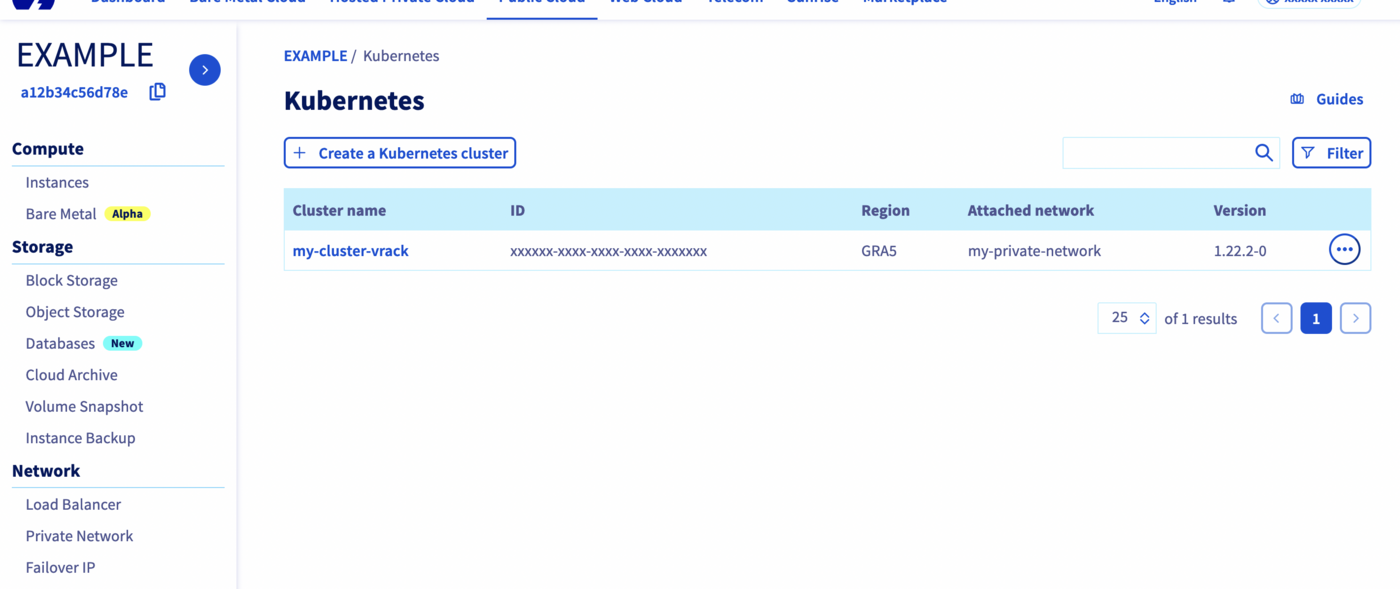
In the Managed Kubernetes Service Dashboard, we can see the cluster, with the chosen private network in the Attached network column:
Setting up the PCI
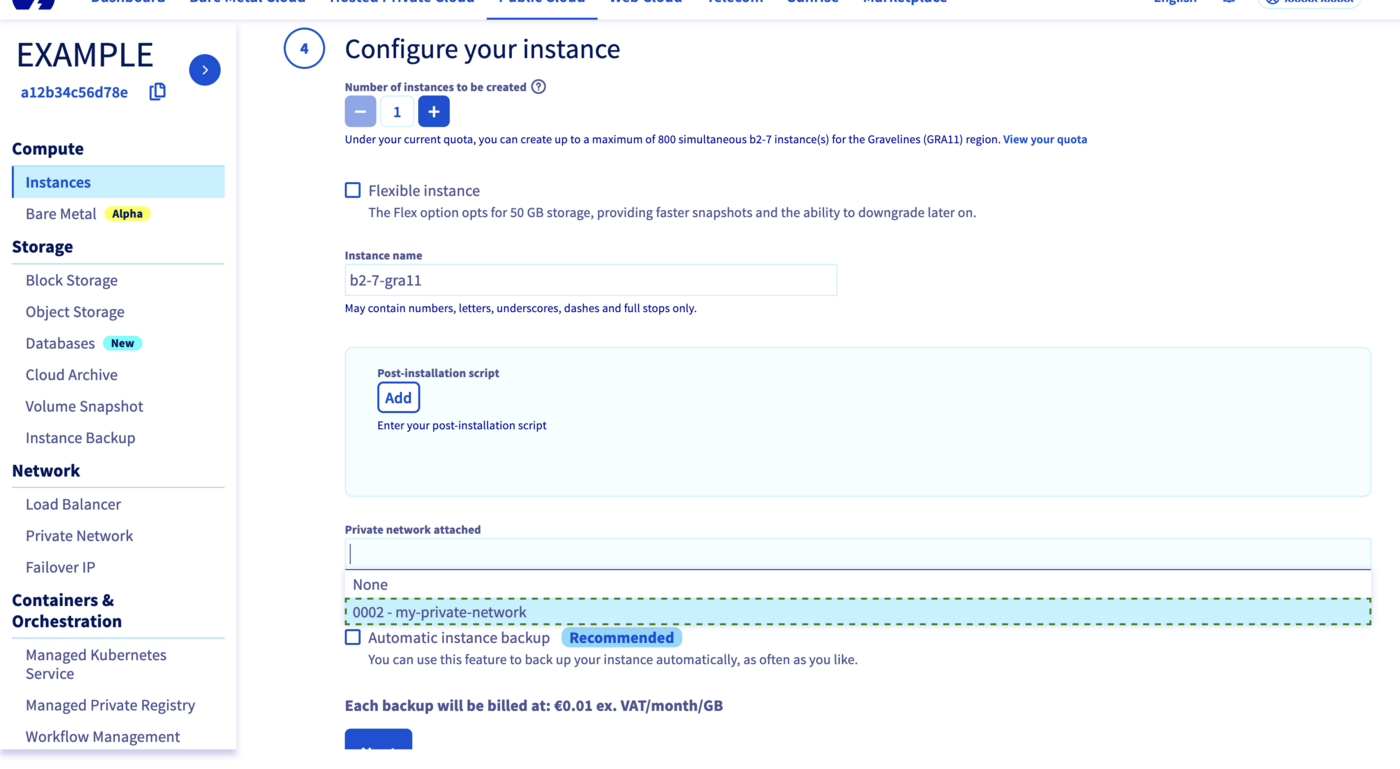
Now we can create a new Public Cloud instance inside the vRack, by following the Integrating an instance into vRack guide.
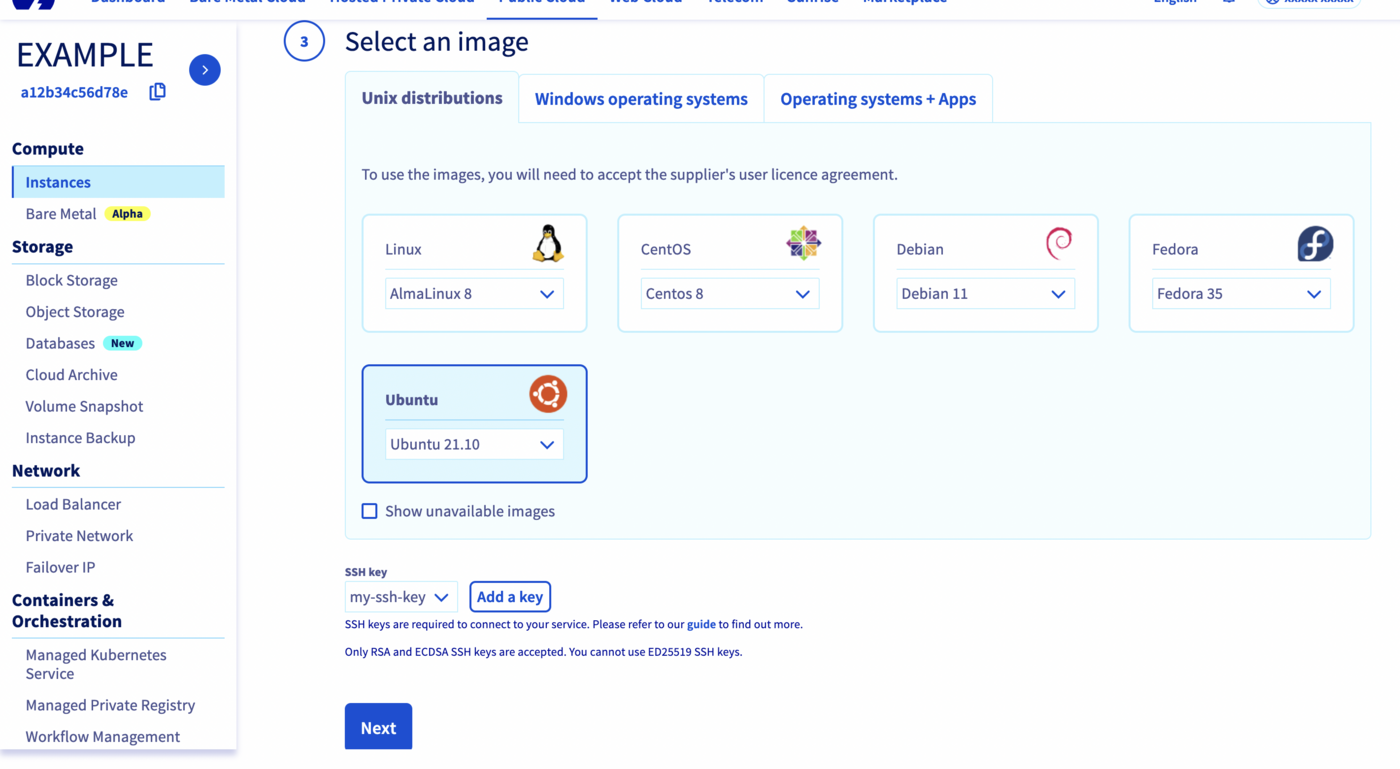
We are going to create an Ubuntu instance:
In the fourth step of creation, we attach it to the private network we created before:
After instance creation, click on the name of the newly created instance, and then scroll down a little in order to see the connection details in the OVHcloud Control Panel.
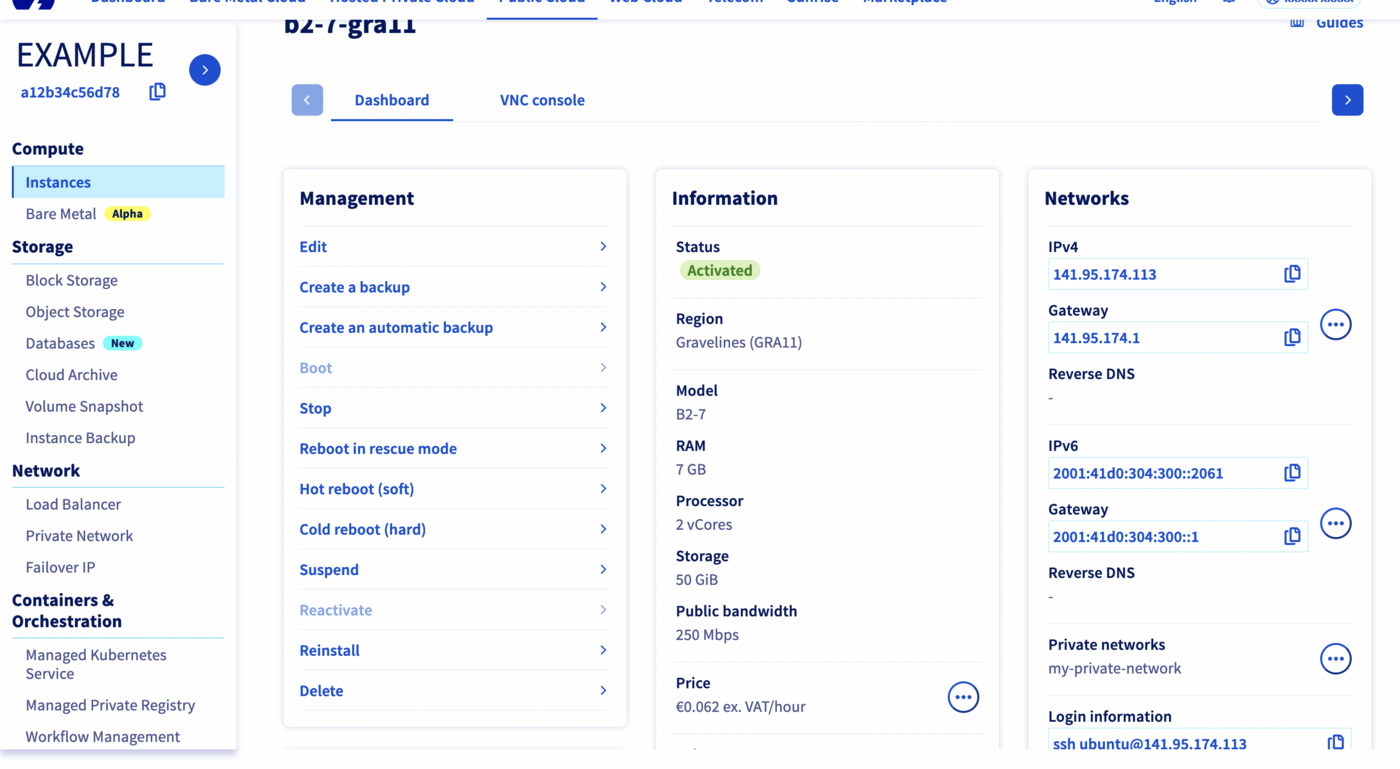
If we log in to the instance using SSH, we can see that it has two network interfaces, one attached to the public IP address we used to log in, the other attached to the private network:
Please take note of the private network IP address (in this case 10.0.64.51), as we will need to use it to configure WordPress.
Setting up MariaDB on the PCI
Installing MariaDB
The easiest way to install MariaDB in the PCI is to use the apt package manager:
That will install MariaDB and all its dependencies:
Creating a user and a database
Now we can connect to the database using the mysql client:
By default, the root account has no password when connected from the localhost, so we directly arrive to the MariaDB CLI.
Let's create a wordpress_db database and a wordpress_user user:
1. Create the database:
2. Create the user (with remote access) and grant privileges to this user on the new database:
3. Apply the changes to be sure that the modifications on the MariaDB grant tables take effect immediately:
The MariaDB instance is now ready.
Making MariaDB listen on the private network interface
By default, MariaDB only listens on localhost. In order to accept requests coming from the private network, we need to make it also listen on that network interface.
The easiest way to do it is by changing the bind_address line setted by default to 127.0.0.1 and change it to your MariaDB IP in the /etc/mysql/mariadb.conf.d/50-server.cnf configuration file:
before:
after:
Where <MARIADB_ADDRESS> is the private network IP address of the MariaDB instance (in this case 10.0.64.51).
Then restart MariaDB:
And try to connect to MariaDB using that interface:
In this case:
Accessing the MariaDB instance from the Managed Kubernetes cluster
To verify that the vRack is working as intended, let's test if we can access the MariaDB instance from the Managed Kubernetes cluster via the vRack.
We are deploying a MySQL client in the Kubernetes cluster, that will connect to the MariaDB instance using the vRack. Don't forget to replace <MARIADB_ADDRESS> with the private network IP address of the MariaDB instance (in this case 10.0.64.51).
Go to your running Kubernetes cluster (you need to previously retrieve the kubeconfig file and set-up your KUBECONFIG environnement variable):
And then execute the following comand:
Setting up WordPress
Now we have set up the database, we can deploy WordPress on the Kubernetes cluster. We are following a similar process as in our Installing WordPress tutorial, but adapting it to use an external database.
Pre-requisites
We (the OVHcloud Managed Kubernetes Service team) are working on a patch to be released in early 2022. In the meantime, please remove the default storage class and install the new one.
- Delete the concerned
StorageClassthat you are using by default
It will delete the existing StorageClass:
- Create a new
StorageClasswith the required fix
It will apply the correct StorageClass YAML manifest:
Using the WordPress Helm chart
For this tutorial we are using the WordPress Helm chart found on Bitnami repository. The chart is fully configurable, but we will only need to tweak the external database parameters:
mariadb.enabled
externalDatabase.host
externalDatabase.user
externalDatabase.password
externalDatabase.database
externalDatabase.port
As externalDatabase.host we will need to use the MariaDB instance's private network IP address, that be written down after creating the PCI.
helm install my-first-k8s-wordpress bitnami/wordpress --set mariadb.enabled=false,externalDatabase.host=<MARIADB_ADDRESS>,externalDatabase.user=wordpress_user,externalDatabase.password=a_strong_password,externalDatabase.database=wordpress_db,externalDatabase.port=3306 Don't forget to replace <MARIADB_ADDRESS> with the private network IP address of the MariaDB instance (in this case 10.0.64.51).
Wait until you obtain an external IP:
Then we can follow the instructions to get the Admin URL:
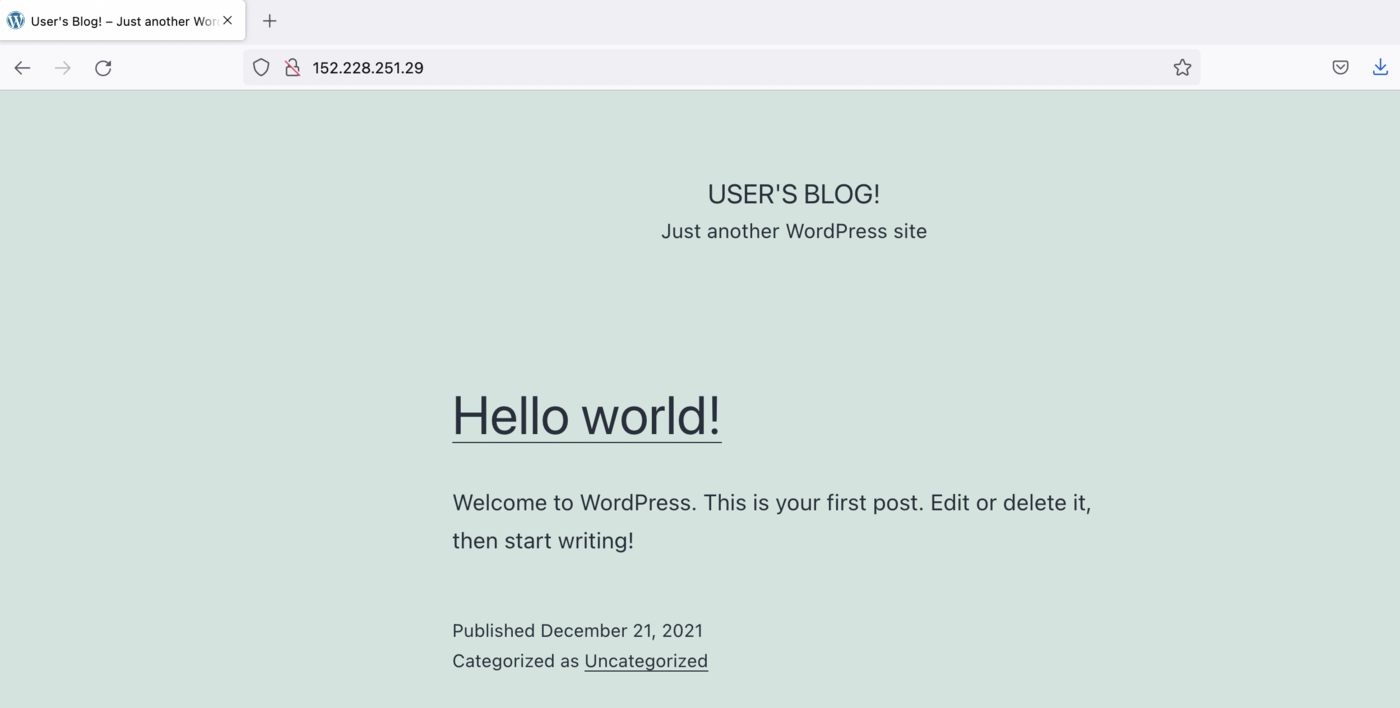
And putting the URL in the browser will take us to the new blog, accessing the MariaDB database from the PCI instance via the vRack.
Go further
-
If you need training or technical assistance to implement our solutions, contact your sales representative or click on this link to get a quote and ask our Professional Services experts for assisting you on your specific use case of your project.
-
Join our community of users.

