Deploying a Hello World application
1880 vues
Objective
Follow this quickstart guide to deploy a containerised Hello World application on your OVHcloud Managed Kubernetes Service cluster, using the OVHcloud Control Panel and the OVHcloud API.
In this guide, we’ll walk you through deploying a Hello World application on your OVHcloud Managed Kubernetes Service. You can manage your cluster either via the OVHcloud Control Panel or the OVHcloud API.
Requirements
- You should have already created a cluster on the OVHcloud Managed Kubernetes service.
- You will also need the kubectl command-line tool. You can find the detailed installation instructions for this tool on the Kubernetes official site.
OVHcloud Control Panel Access
- Direct link: Public Cloud Projects
- Navigation path:
Public Cloud> Select your project
For API users, this guide assumes you are familiar with the OVHcloud API. If you have never used it, you can find the basics here: First steps with the OVHcloud API.
Instructions
Getting your cluster information
Access the administration UI for your OVHcloud Managed Kubernetes clusters by clicking on Managed Kubernetes Service in the left-hand menu.
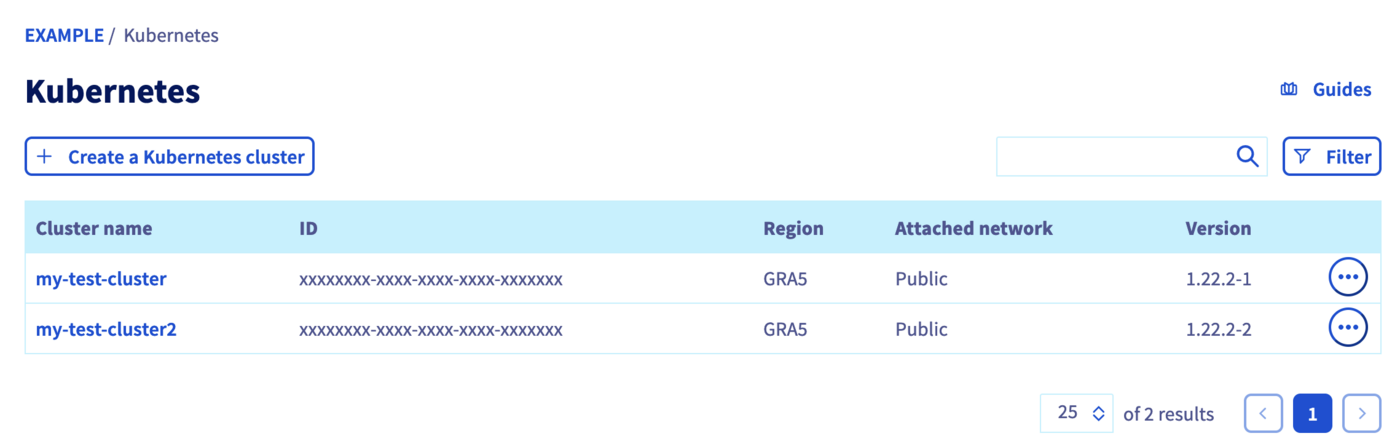
Click on your cluster to access its information.
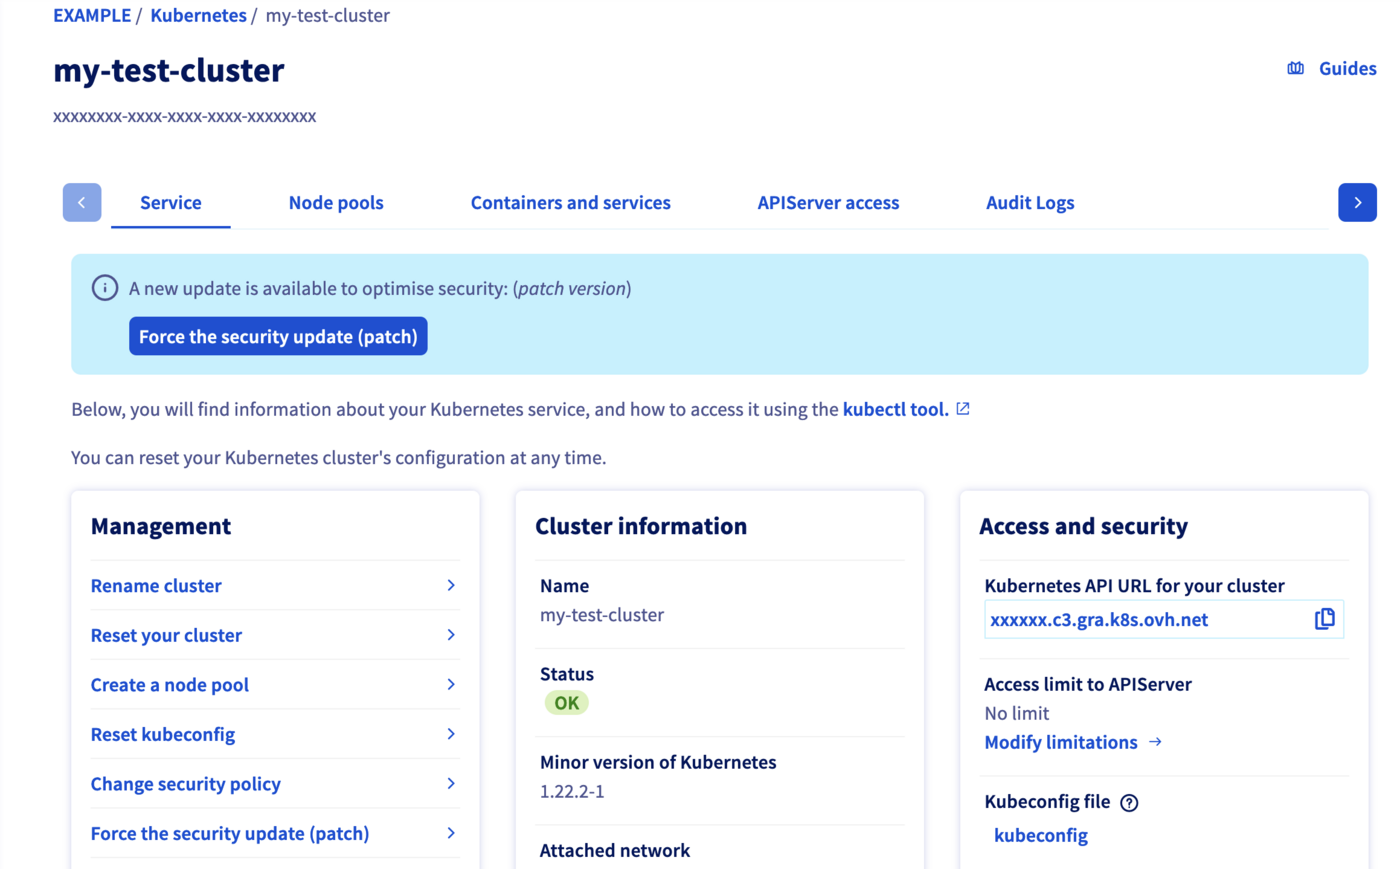
In this administration UI, you have several tabs included:
-
Service: A global view of your cluster, with important information like the status, API URL, and
kubectlconfiguration file. -
Node pools: The node pools of your cluster, with options for adding, configuring or removing them.
-
APIServer access: The possibility to configure the access to the API-server.
-
Audit Logs: Logs of your Kubernetes cluster’s control plane.
List your OVHcloud Managed Kubernetes clusters
The GET /cloud/project/{serviceName}/kube API endpoint lists all the available Kubernetes clusters:
Result:
By calling it, you can view a list of values. Note down the ID of the cluster you want to use. In this example, we will refer to it as kubeId.
Getting informations
The GET /cloud/project/{serviceName}/kube/{kubeId} API endpoint provides important information about your Managed Kubernetes cluster, including its region, status and URL.
Result:
Configuring the default settings for the kubectl CLI
Please refer to the Configuring kubectl on an OVHcloud Managed Kubernetes cluster documentation for this part of the process.
Add a node pool
In the Node pools tab of the administration UI, click the Add a node pool button.
Enter a node pool name:
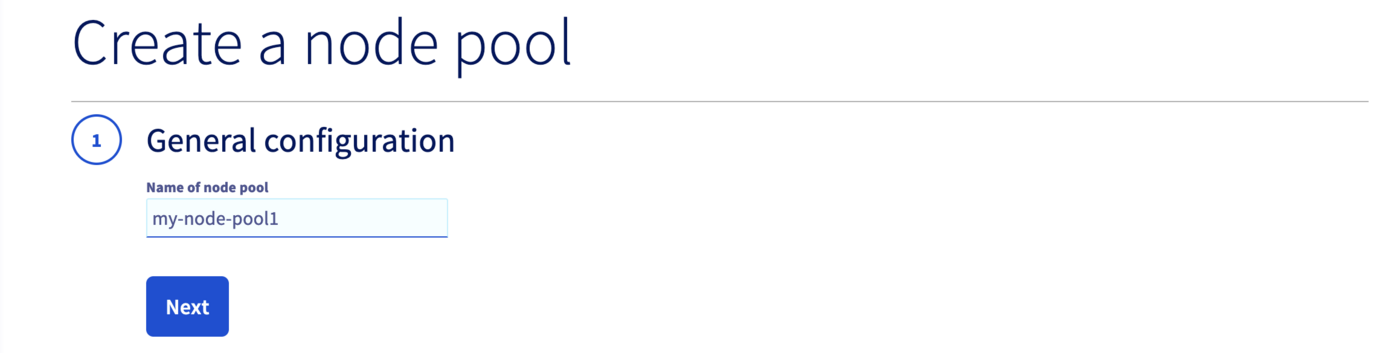
Only alphanumerical characters and "-" are allowed for the node pool name. You can’t use characters like “_”, “.” or "/" as a separator in a node pool name.
Choose a flavor (machine type) for your node pool, B2-7 for example:
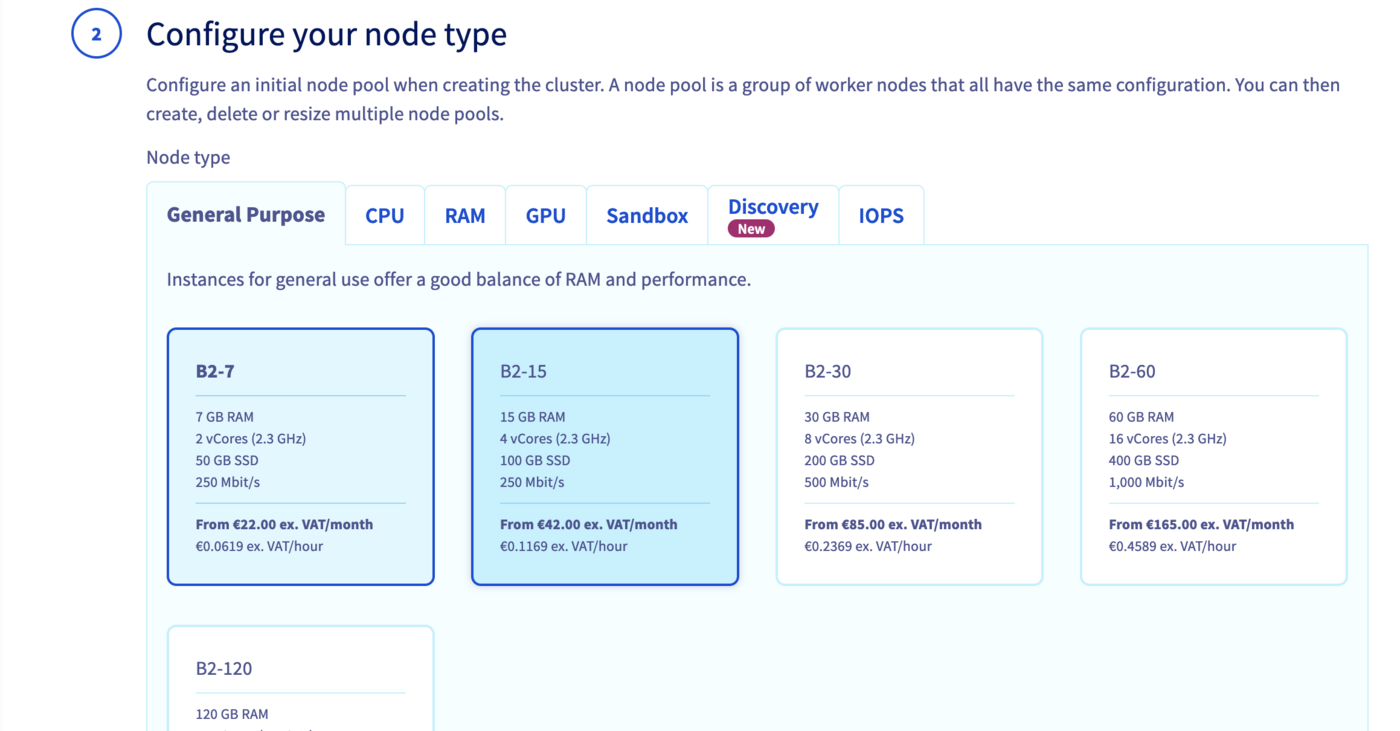
Configure the number of nodes you want to add to your node pool, 3 for example with Autoscaling disabled.
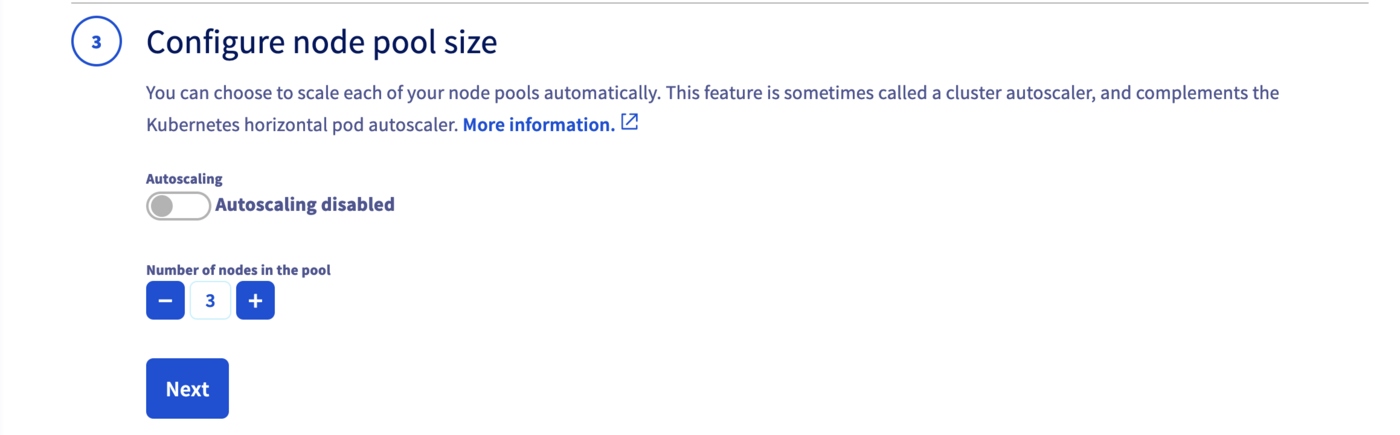
Define the billing method: monthly or hourly.

The first element needed to deploy the Hello World application is a node pool, a pool of machines, in your cluster. To create this node pool, you can use the POST /cloud/project/{serviceName}/kube/{kubeId}/nodepool endpoint, which will deploy a node pool for your cluster on the Public Cloud.
You will need to give it several information but only the flavorName parameter (the flavor of the instance you want to create) is a required parameter. If you don't fill a value for desiredNodes parameter, the default value will be 1, so you will create a new node pool with one node.
For this tutorial, we choose a general purpose node, such as the b2-7 flavor.
Result:
The API will return you the new node pool information.
Verify that your node pool is ready
In the Computer Nodes tab, you can inspect the state of your Node pools. The node pool you have just created should now be in an Installing state. The node pool installation can take a minute, so feel free to take a short break, then try again until it's ready.
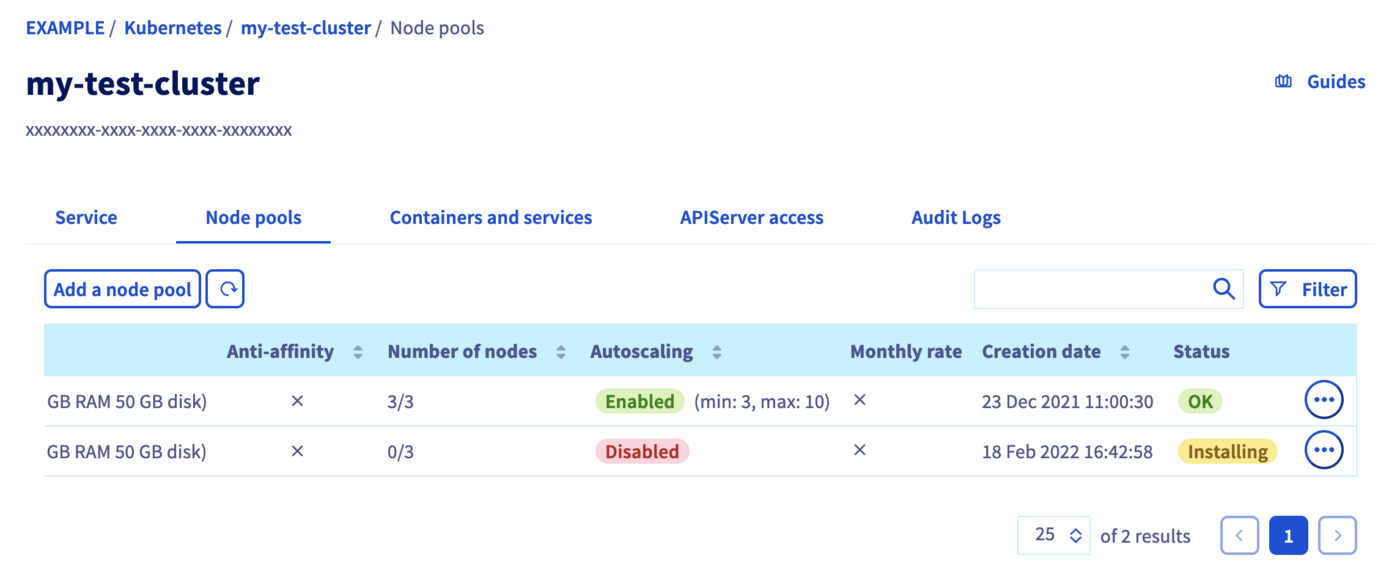
After its creation, click on the node pool in order to list its nodes details.
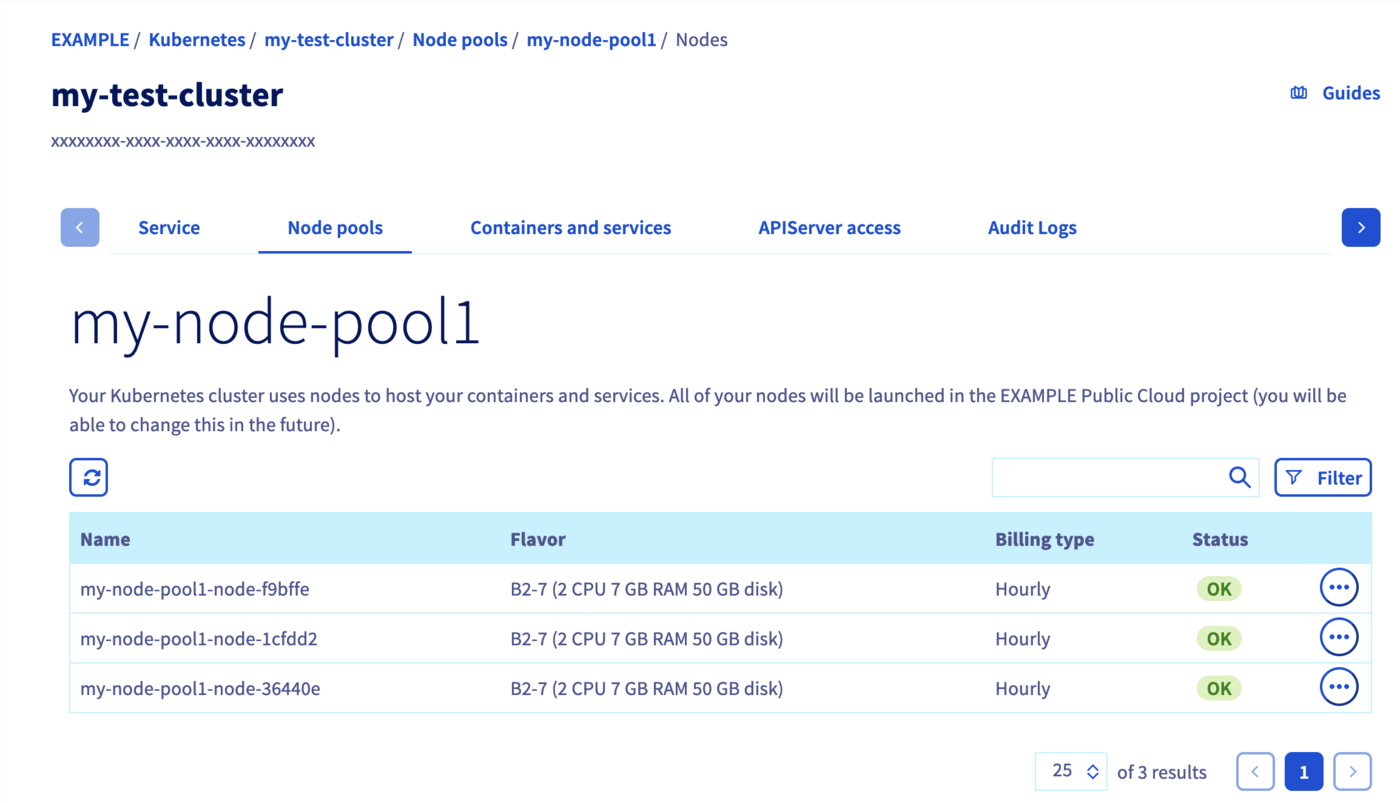
You can use the GET /cloud/project/{serviceName}/kube/{kubeId}/nodepool entrypoint to list all your node pools. Look for the node pool you've just created, and verify the status is READY.
The node pool installation can take a few minutes.
Result:
Deploy your first application
You're now ready to deploy your first application in your OVHcloud Managed Kubernetes cluster.
For more details about this process, you can refer to the deploying an application documentation.
Go further
As you can see in the Kubernetes section of the API Explorer, a lot of useful API endpoints exist to manage your Kubernetes clusters. Feel free to use the API endpoints depending on your use cases.
If you need training or technical assistance to implement our solutions, contact your sales representative or click on this link to get a quote and ask our Professional Services experts for a custom analysis of your project.
Join our community of users.

