Working with vRack example - Communicating between different private networks
278 vues
Objective
OVHcloud vRack is a private networking solution that enables our customers to route traffic between most OVHcloud services (dedicated servers, Public Cloud instances...). You can for example add Public Cloud instances, a baremetal servers and Managed Kubernetes clusters to your private network to create an private infrastructure of physical, virtual and containerized workloads.
Connecting a Managed Kubernetes cluster to another service in the same private network in the vRack is an easier process, as no network configuration is needed. Please have a look at our Working with vRack example - Managed Kubernetes and Public Cloud instances tutorial to see an example in action.
In this tutorial, we are going to activate the vRack on a Public Cloud project. Then we will create a Managed Kubernetes cluster and a Public Cloud instance (PCI). Eventually, both of them will be added inside the vRack but in different private networks.
In this tutorial we are going to give you an example of how to use the OVHcloud vRack to connect a Managed Kubernetes cluster with a Public Cloud instance inside different private network.
The method described in this tutorial is a temporary one, only required if you want to route traffic between different private networks in a single vRack. Our Managed Kubernetes team is working on a more streamlined solution for this advanced use case, as explained in this issue in our Public Cloud roadmap.
Requirements
This tutorial presupposes that you already have a working OVHcloud Managed Kubernetes cluster, and some basic knowledge of how to operate it. If you want to know more on those topics, please look at the OVHcloud Managed Kubernetes Service Quickstart.
You also need to have Helm installed on your workstation and your cluster. Please refer to the How to install Helm on OVHcloud Managed Kubernetes Service tutorial.
It also supposes that you already have followed the Using vRack guide to activate the vRack on your Public Cloud project and put your OVHcloud Managed Kubernetes cluster inside the vRack. It will also be useful to have followed our Working with vRack example - Managed Kubernetes and Public Cloud instances tutorial to understand the easier use case when both services are in the same private network.
And to understand why this configuration is needed, please have a look at the Using vRack - Communicating between different private networks technical document.
This guide assumes you are familiar with the OVHcloud API. If you have never used it, you can find the basics here: First steps with the OVHcloud API.
Instructions
Setting-up the vRack
First of all, we will need to set up vRack Private Network for our Public Cloud. To do it, we follow the Configuring vRack for Public Cloud guide.
As explained in the known limits guide, the default subnet ranges for our private networks won't work with OVHcloud Managed Kubernetes, as the ranges 10.2.0.0/16 and 10.3.0.0/16 are reserved to internal Managed Kubernetes use.
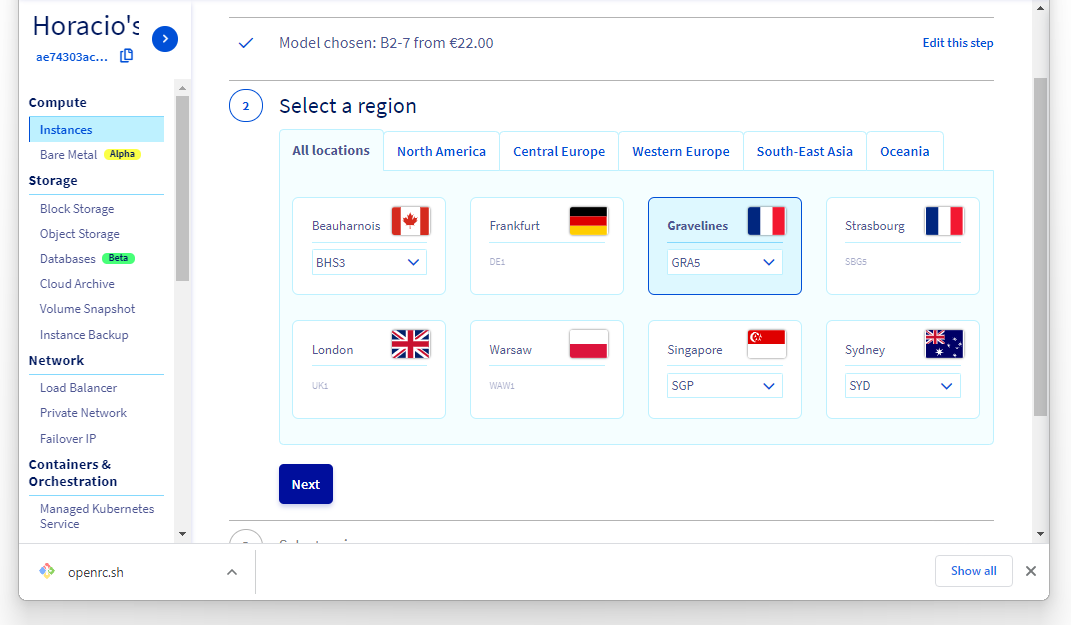
Once we have created a vRack, we need to create two different Private Networks enabled at least on the region of our cluster (GRA5 in our example). The private networks created via the OVHcloud Manager have by-default ranges, that can't be easily modified. We are thus creating the private networks using the OVHcloud API.
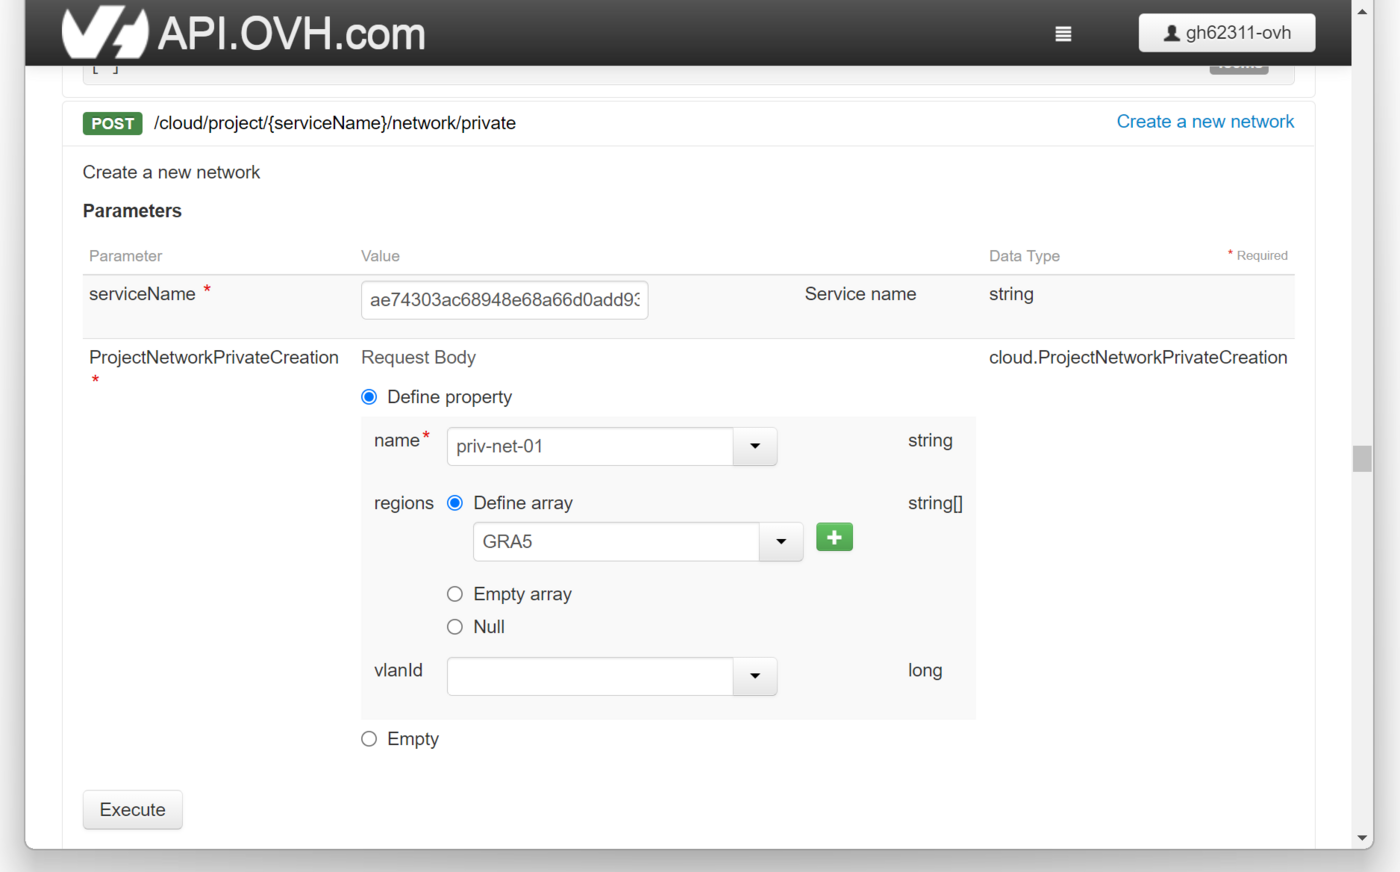
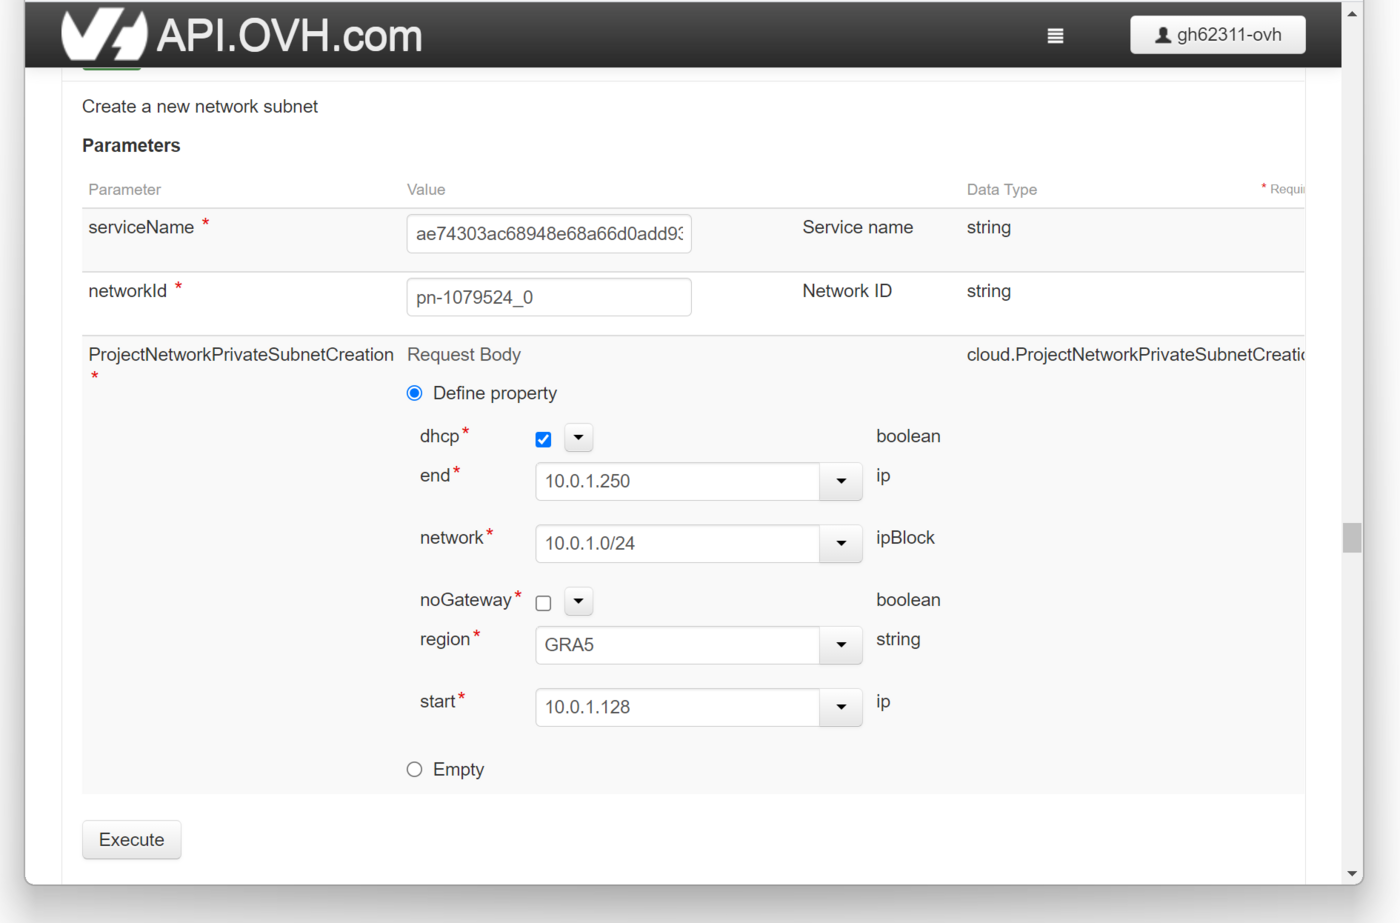
For this example we are creating two private networks, priv-net-01 & priv-net-02, with DHCP subnets with ranges of 10.0.1.0/24 et 10.0.2.0/24.
We will use the POST /cloud/project/{serviceName}/network/private endpoint to create the private networks:
And then we assign them the subnets using the POST /cloud/project/{serviceName}/network/private/{networkId}/subnet endpoint:
Retrieving the Openstack configuration file
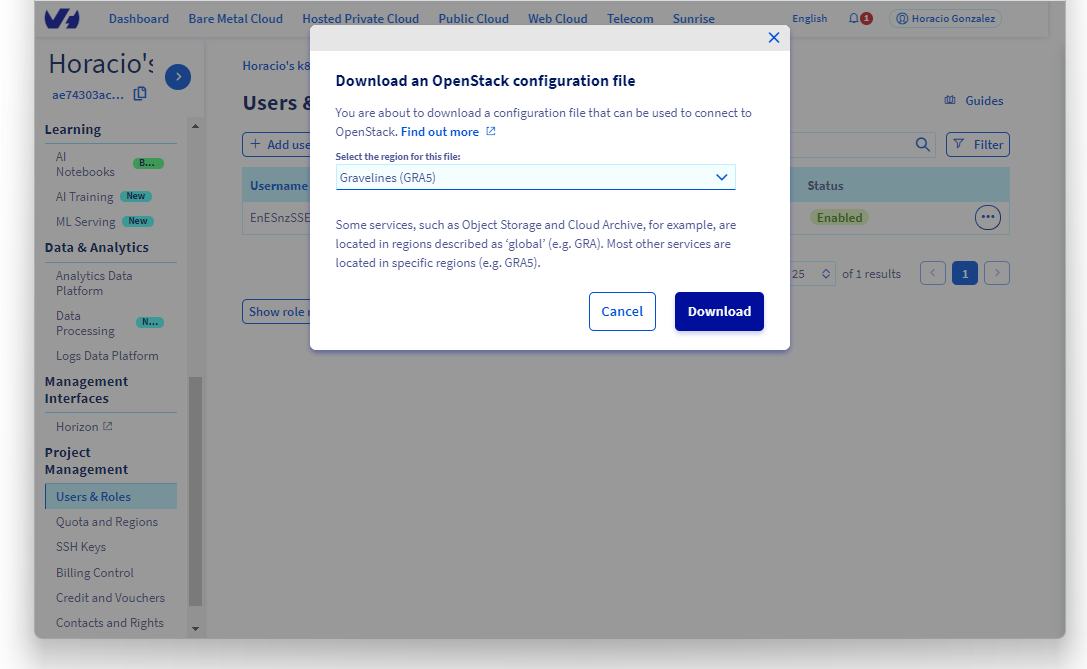
Now we need to download the openrc.sh configuration file, as explained in the Setting OpenStack environment variables guide.
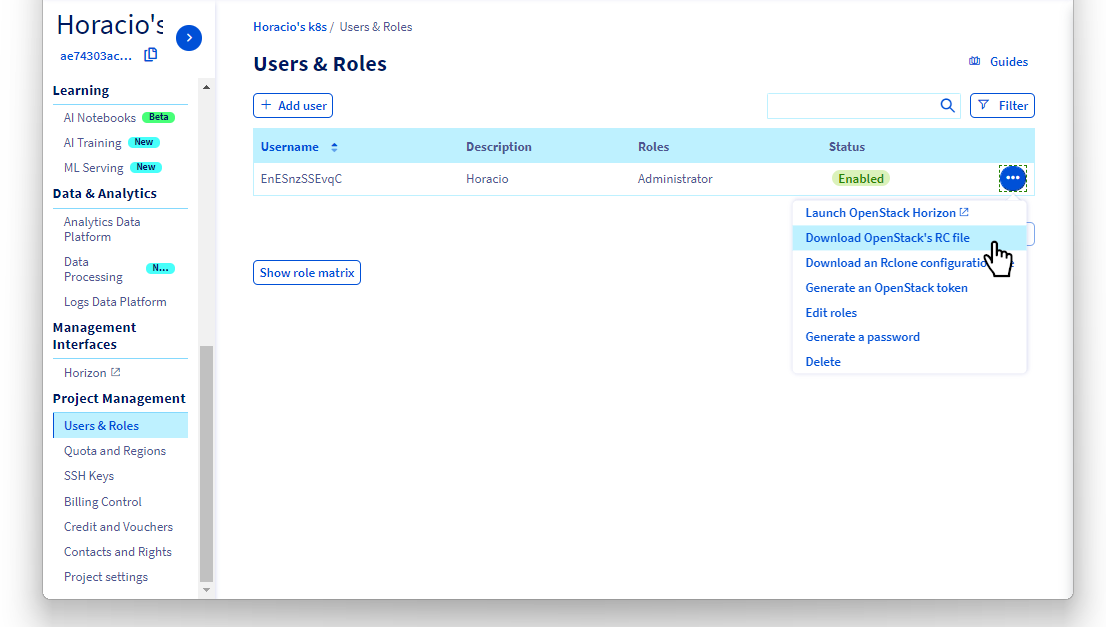
We will be working on GRA5 region, so we download the Gravelines (GRA5) file.
Following the steps on the Setting OpenStack environment variables guide to be sure that the Openstack CLI is working on our workstation.
Configuring the private networks
Let's begin by getting the private networks openstack IDs using the openstack CLI:
In this case, priv-net-01 has a subnet range of 10.0.1.0/24, and priv-net-02 has a subnet range of 10.0.2.0/24, don't forget to adapt the commands to your specific subnet ranges.
Now we can configure priv_net_01 with a static route to priv_net_02, and priv_net_02 with a static route to priv_net_01:
In my case:
Setting up a PCI gateway
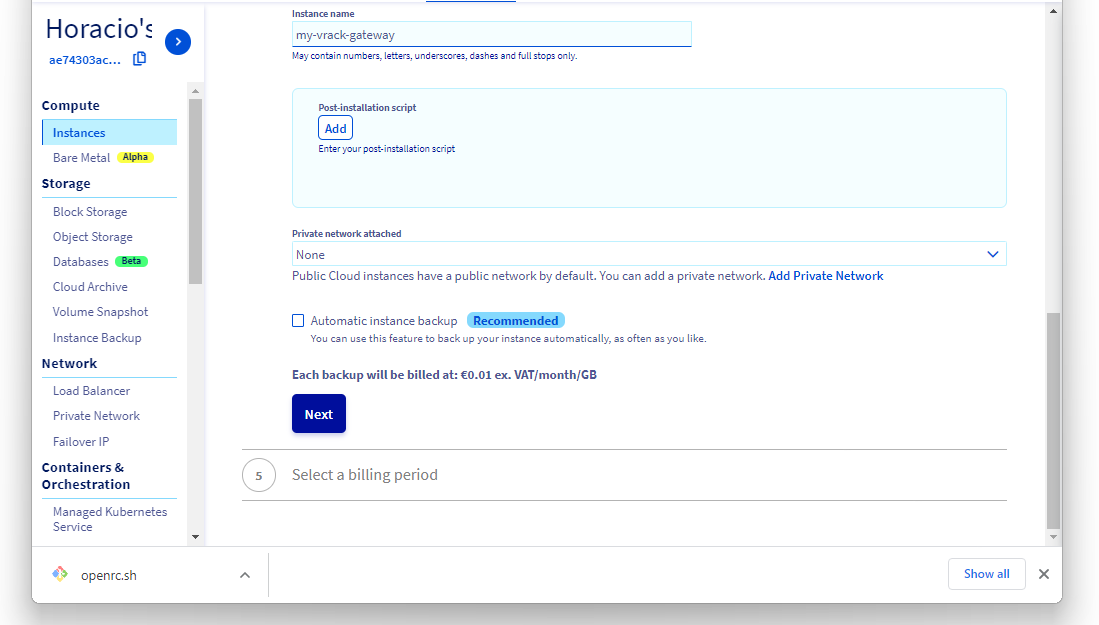
Now we are going to create a Public Cloud instance in GRA5, to act as a gateway for our vRack.
We are going to create an Ubuntu instance:
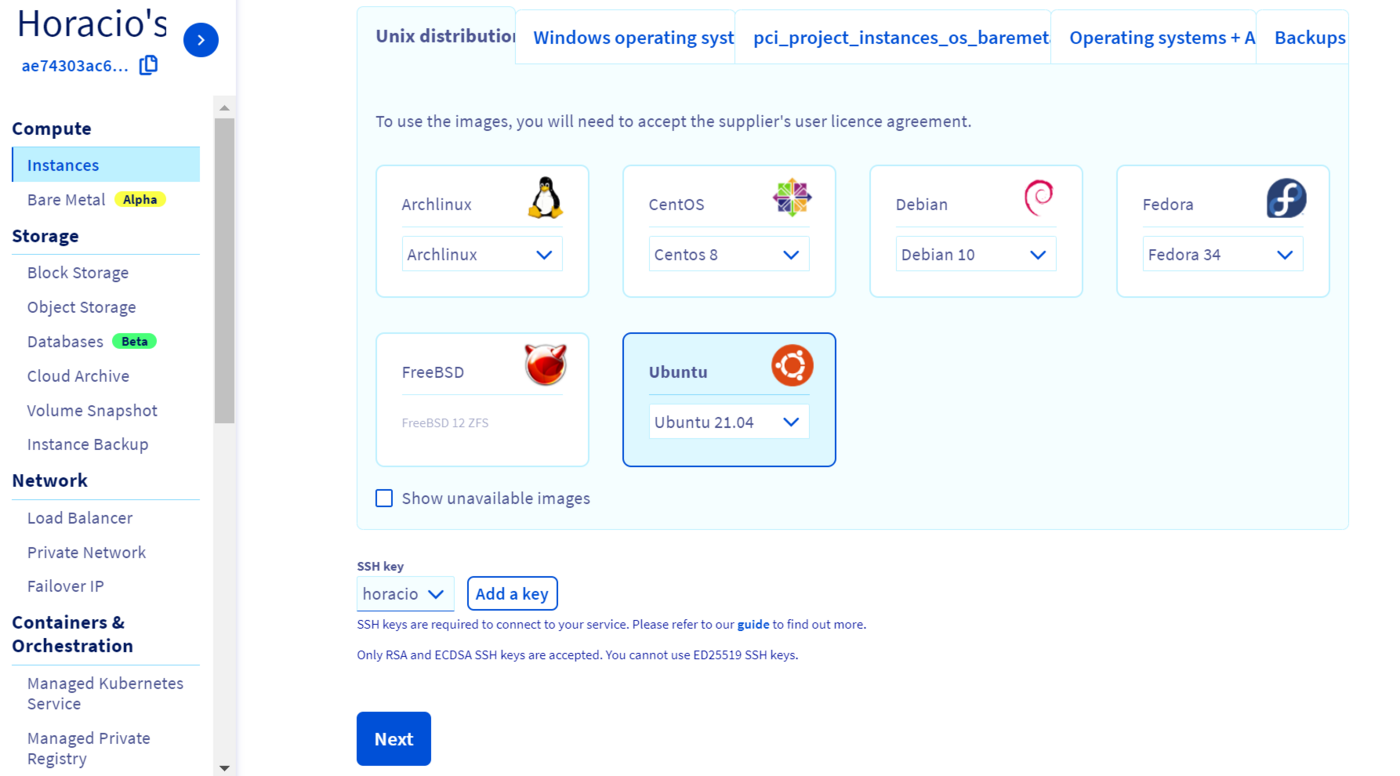
We do NOT attach the instance to a private network yet, as you can unfortunately configure only one private network at the creation stage in the OVHcloud Manager.
Adding the two private networks
Once the gateway instance is created, we need to add the two private networks to its configuration.
Let's get the private networks and the PCI gateway Openstack IDs:
And add two private network interfaces, for the two private networks, with the addresses 10.0.1.1 and 10.0.1.1:
Now we can verify that the gateway instance have two new private IPs:
As the last command also gave us the gateway instance public IP (in my example 54.38.255.196), let's add it as shell variable:
In my case:
Adding and configuring the private network NICs to the gateway instance
Let's SSH into the gateway instance using its public IP:
And get the MAC addresses of the two private network interfaces (NICs):
Let's modify the network configuration to configure the two new NICs. Edit /etc/netplan/50-cloud-init.yaml (with a sudo vim /etc/netplan/50-cloud-init.yaml) and add the information for ens7 and ens8:
/etc/netplan/50-cloud-init.yaml
And restart the network:
In this case:
Configuring the gateway instance to route the traffic between the two private networks
Now we can configure the gateway instance to route the traffic between the two private networks:
In this case:
Setting up the Managed Kubernetes attached to priv_net_01
Then we create a Kubernetes cluster in GRA5 region, attached topriv_net_01, as explained in the Create a cluster guide.
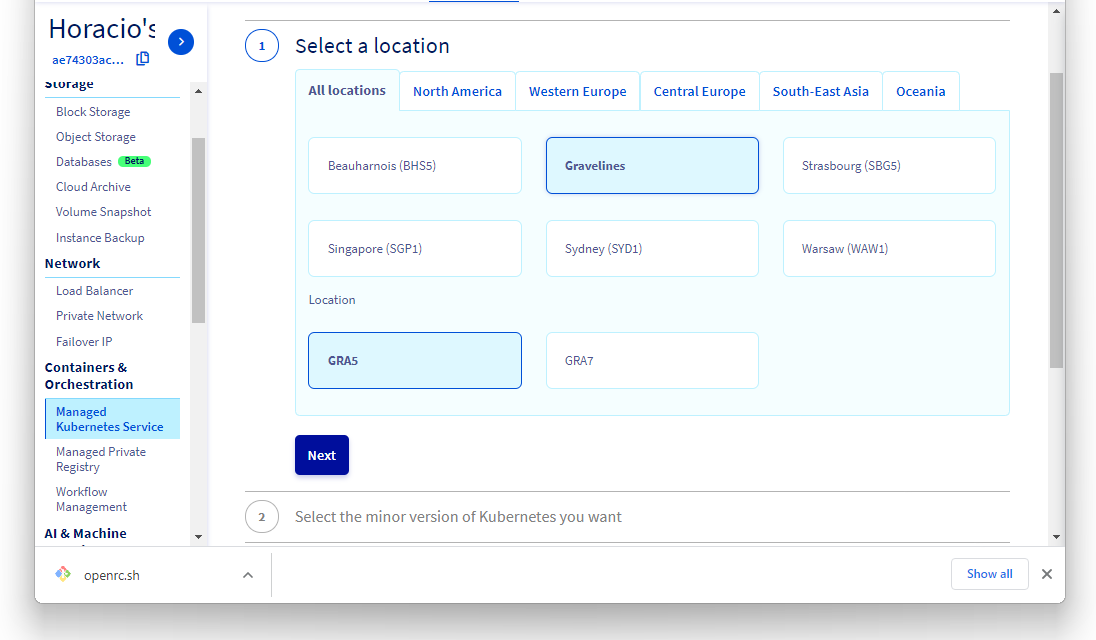
Integrating a cluster into a vRack Private Network must be done at the third step on cluster creation, when we can choose an existing private network for the cluster:
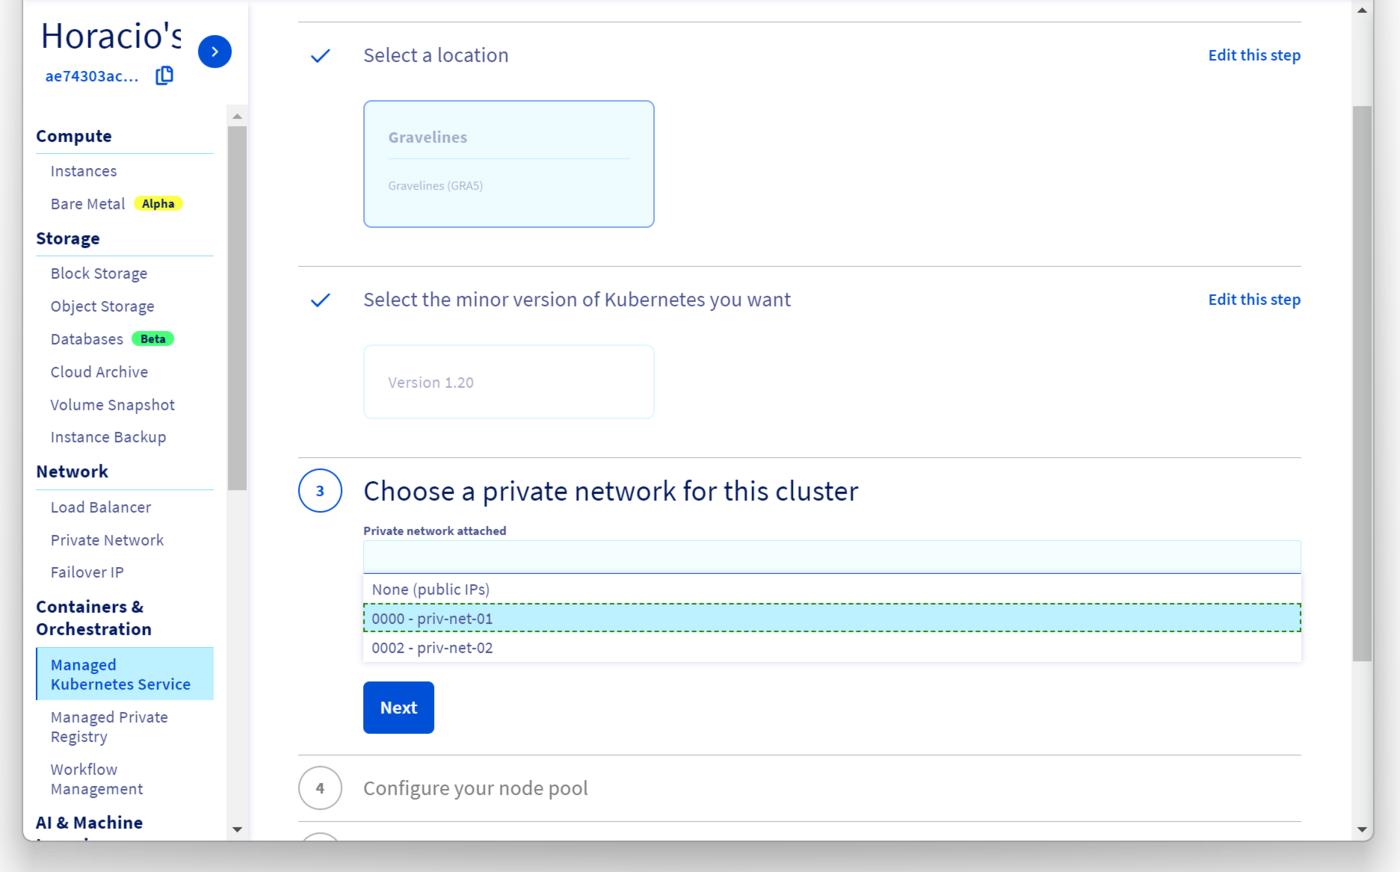
Our new cluster will be created inside priv_net_01.
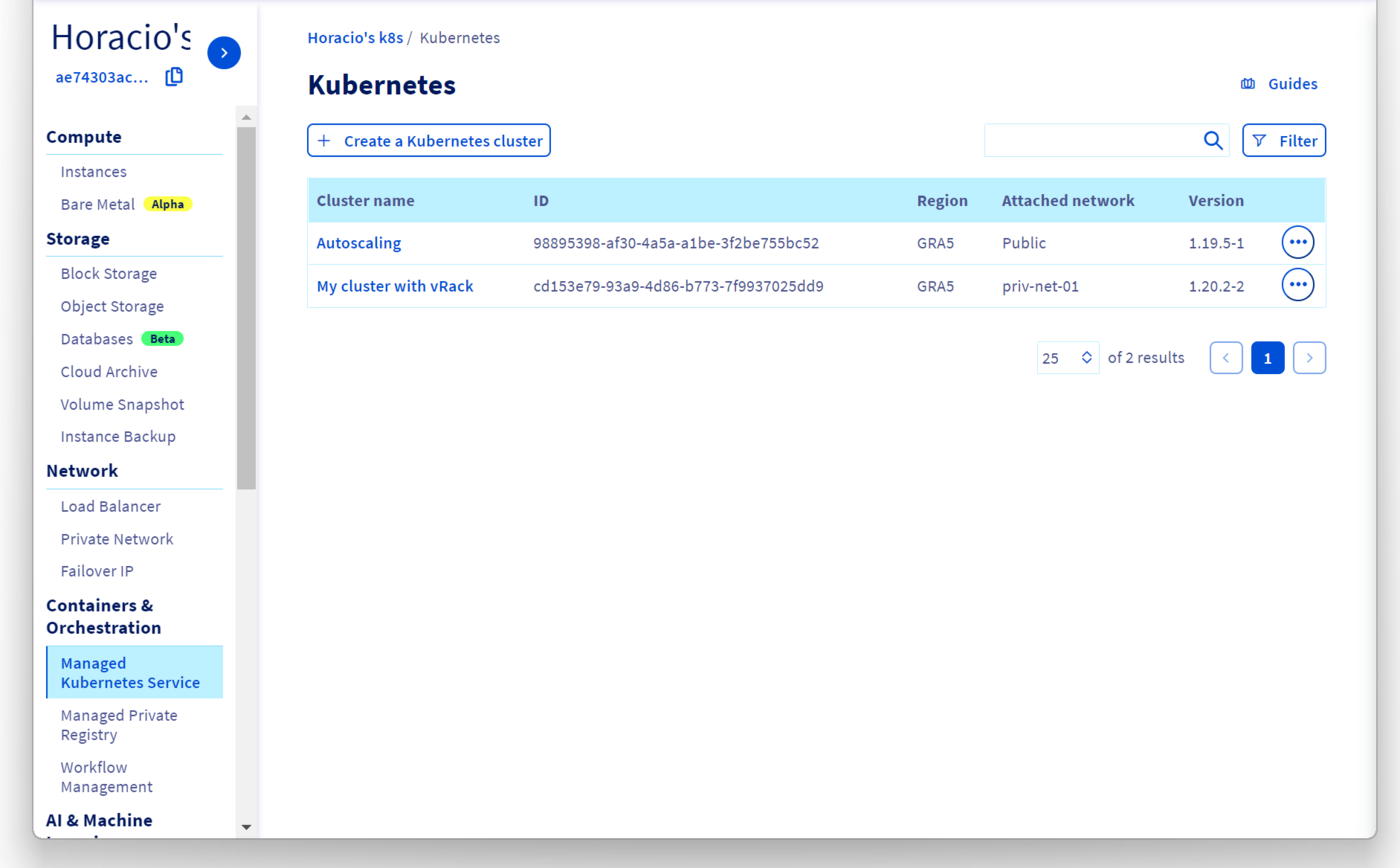
In the Managed Kubernetes Service Dashboard, we can see the cluster, with the chosen private network in the Attached network column:
Don't forget to grab your kubeconfig and configure kubectl to use it, as explained in the Configuring kubectl on an OVHcloud Managed Kubernetes cluster guide.
Setting up a PCI attached to priv_net_02
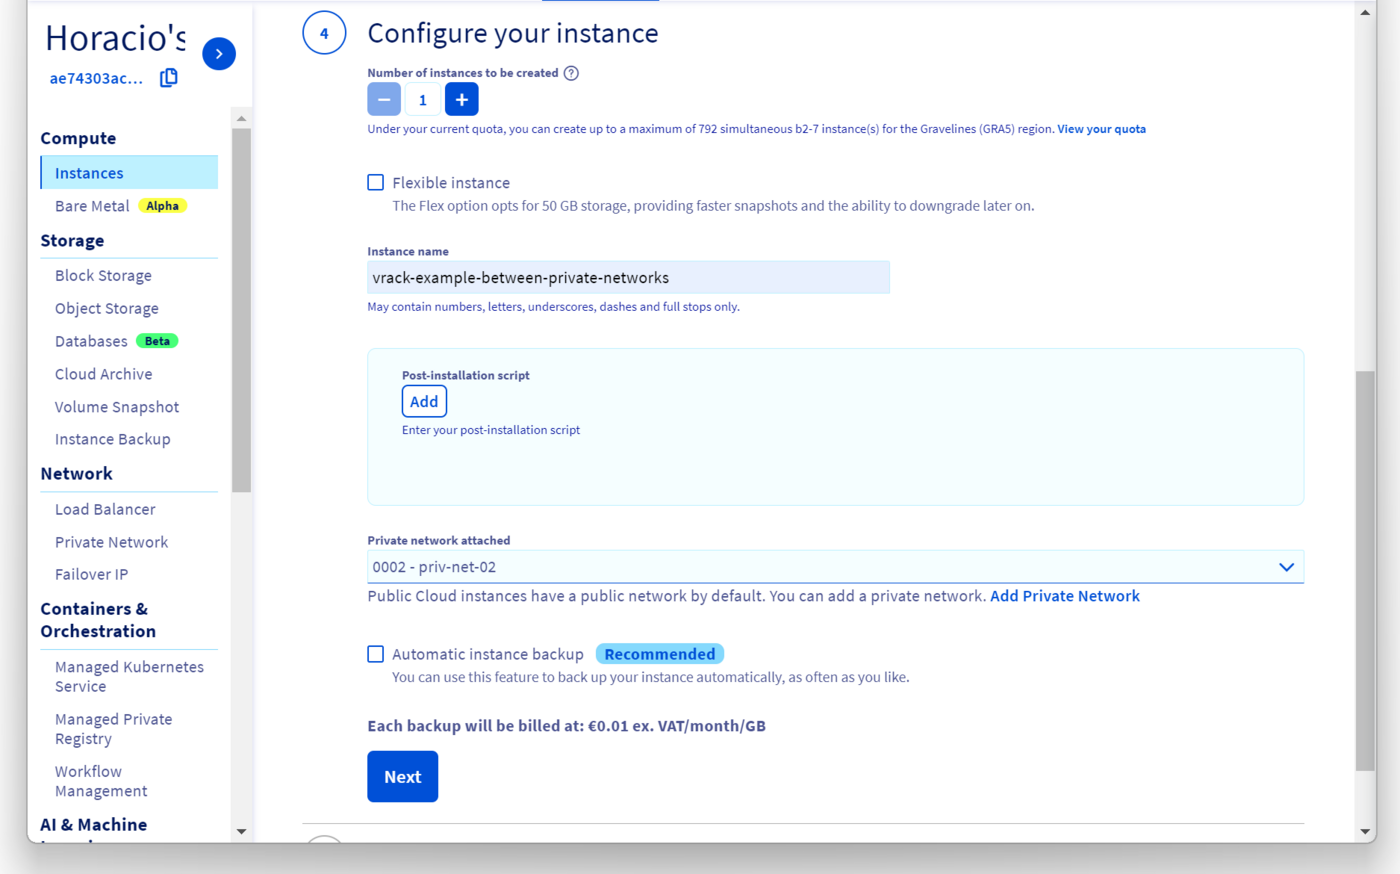
Now we can create a new Public Cloud instance, also in GRA5 region, and attach it to priv_net_02 by following the Integrating an instance into vRack guide.
We are going to create an Ubuntu instance:
In the fourth step of the creation, we call it vrack-example-between-private-networks and we attach it to priv_net_02:
After the instance creation, we can see the connection details in the OVHcloud Control Panel.
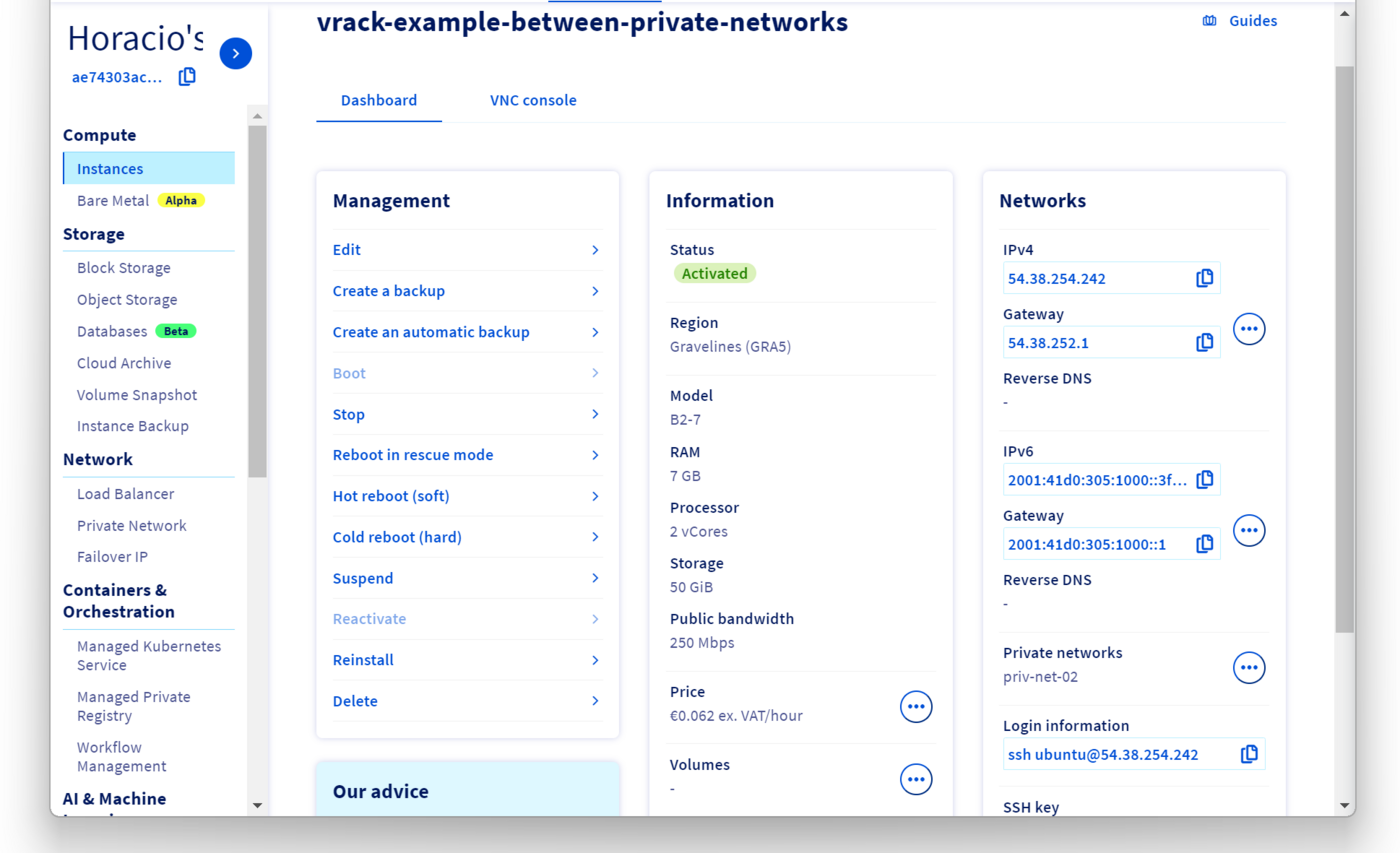
If we log in to the instance using SSH, we can see that it has two network interfaces, one attached to the public IP address we use to log in, the other attached to the private network:
Please take note of the private network IP address (in my case 10.0.2.142), as we will need to use it later.
Verifying that we can access the PCI from the Kubernetes cluster
Let's create a modified nginx pod to test our setup. Create a shell-demo.yaml manifest:
shell-demo.yaml
And deploy it in the cluster:
Now we can log in to the shell-demo pod and add some packages to allows us to verify if we can reach the instance on priv_net_02 (in my example with the 10.0.2.142 IP address):
If everything happens as intended, we can reach the PCI instance in priv_net_02 via the gateway:
Verifying that we can access the Kubernetes cluster from the PCI
Let's create another nginx pod and expose it with a NodePort service:
We get the NodePort port and we store it in a variable:
And the priv_net_01 IP address of one of our Kubernetes nodes:
We can SSH again into the PCI instance, and do a traceroute to see if we can reach the node, and then a curl to the NodePort:
Go further
-
If you need training or technical assistance to implement our solutions, contact your sales representative or click on this link to get a quote and ask our Professional Services experts for assisting you on your specific use case of your project.
-
Join our community of users.

