Sanitize your OVHcloud Managed Kubernetes with Popeye
232 vues
Objective
Popeye is a tool that scans Kubernetes clusters and reports potential issues with deployed resources and configurations.

It sanitizes your cluster based on what is deployed. By scanning your cluster, it detects misconfigurations and helps you to ensure that best practices are in place, thus preventing future headaches. It aims at reducing the cognitive overload one faces when operating a Kubernetes cluster in the wild.
Popeye also reports potential resources over/under allocations and attempts to warn you about your cluster running out of capacity.
Popeye scans your cluster for best practices and potential issues. Currently, Popeye looks at nodes, namespaces, pods and services.
For your information, Popeye is a read-only tool, it only retrieves informations in order to help you to securize and sanitize your cluster, it does not modify or delete resources on a Kubernetes cluster.
Read more about Popeye.
At OVHcloud, we like to provide you with the best products and services. For us, security is important, that's why we want to help you discover Popeye which will help you secure your OVHcloud Managed Kubernetes with helpful reports.
In this guide you will:
- Install Popeye (locally)
- Generate and export reports
- Fix common issues
- Store report on OVHcloud Object Storage
You can use the Reset cluster function in the Public Cloud section of the OVHcloud Control Panel to reinitialize your cluster before following this tutorial.
Requirements
This tutorial presupposes that you already have a working OVHcloud Managed Kubernetes cluster, and some basic knowledge of how to operate it.
Moreover, follow the deploying a Hello World application documentation in order to have an example application running on your cluster.
OVHcloud Control Panel Access
- Direct link: Public Cloud Projects
- Navigation path:
Public Cloud> Select your project
At this time you should have a running Kubernetes cluster with hello-world deployment and pod like below:
Instructions
Installing Popeye CLI
You can install Popeye on your computer from the binaries, the source, HomeBrew and even use it directly from a Docker image.
For this tutorial you will install it via HomeBrew:
The output should be like this:
After the installation, check that the popeye CLI is working correctly:
You should have a behavior like this:
Popeye is correctly installed on your computer, you can now use it to see if your cluster matches with Kubernetes security best practices.
Generate Popeye reports
The popeye CLI works like kubectl command. So when you execute the CLI, it searches your cluster configuration.
To generate a report, simply execute the CLI:
This command run tests on all nodes and namespaces by default:
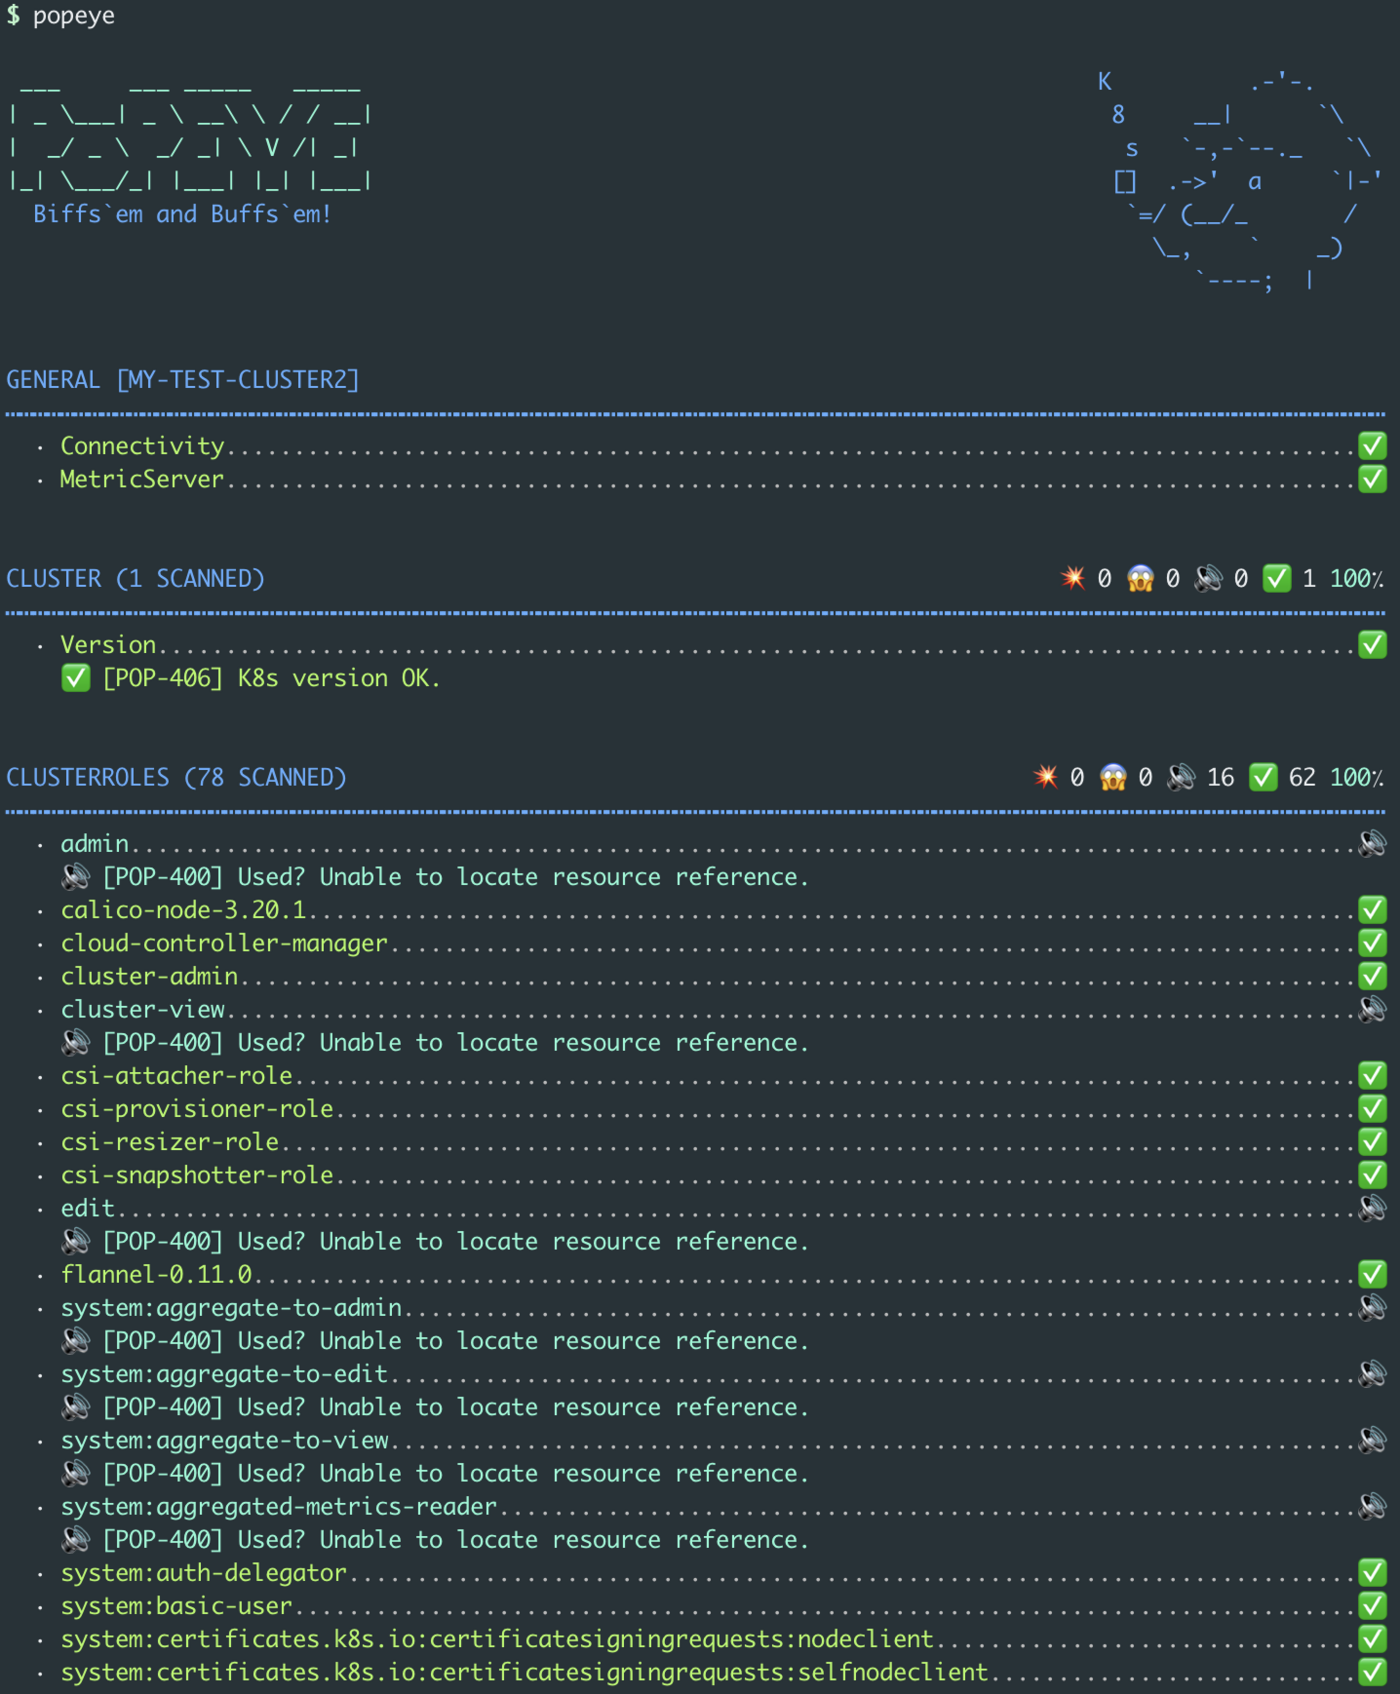
As you can see, by default, our OVHcloud Managed Kubernetes cluster (and with an hello world application deployed) has a 83 score.
Though it's a good score, let's take a look on what should be improved or fixed.
The report can be very big. So, in order to take a look at what you should improve or fix, a good practice is to run the popeye command only on a specified namespace.
This way, you can better improve and fix your cluster resources step by step.
As we deployed an hello world app in the default namespace, you can run popeye on the default namespace and generate a report only for deployments:
In this report, you can see that the best practices to follow are:
- use a tagged Docker image
- set resources requests and limits
- define containers port name
There are 3 simple best practices to follow. Let's fix them.
Copy the original hello.yml file (that you can find in the deploying a Hello World application guide) into a new one:
Then edit the new file hello-fixed.yml with the following content:
In the deployment section of this YAML file, you will:
- set the image tag to 1.0 (the specified version of the image you want to run on a container in the cluster)
- set resources requests and limits
- set the port name to "http"
Apply the new Kubernetes manifest:
kubectl apply -f hello-fixed.yml -n defaultYou should have the following results on your machine:
You can generate a new report and check if the warning messages disapear and if the score increases with the popeye command:
The report should be better now:
Export reports locally
You can generate and save a report with the --save command
This will save the report in your working directory:
Export reports on an OVHcloud Object Storage container
You can also export the generated report to an OVHcloud Object Storage container, as they are compatible with the S3 * API. It's like a AWS S3 bucket but on the OVHcloud infrastructure.
First, you need to have an Object Storage container, if you don't already had one, you can follow the Creating an Object Storage container guide.
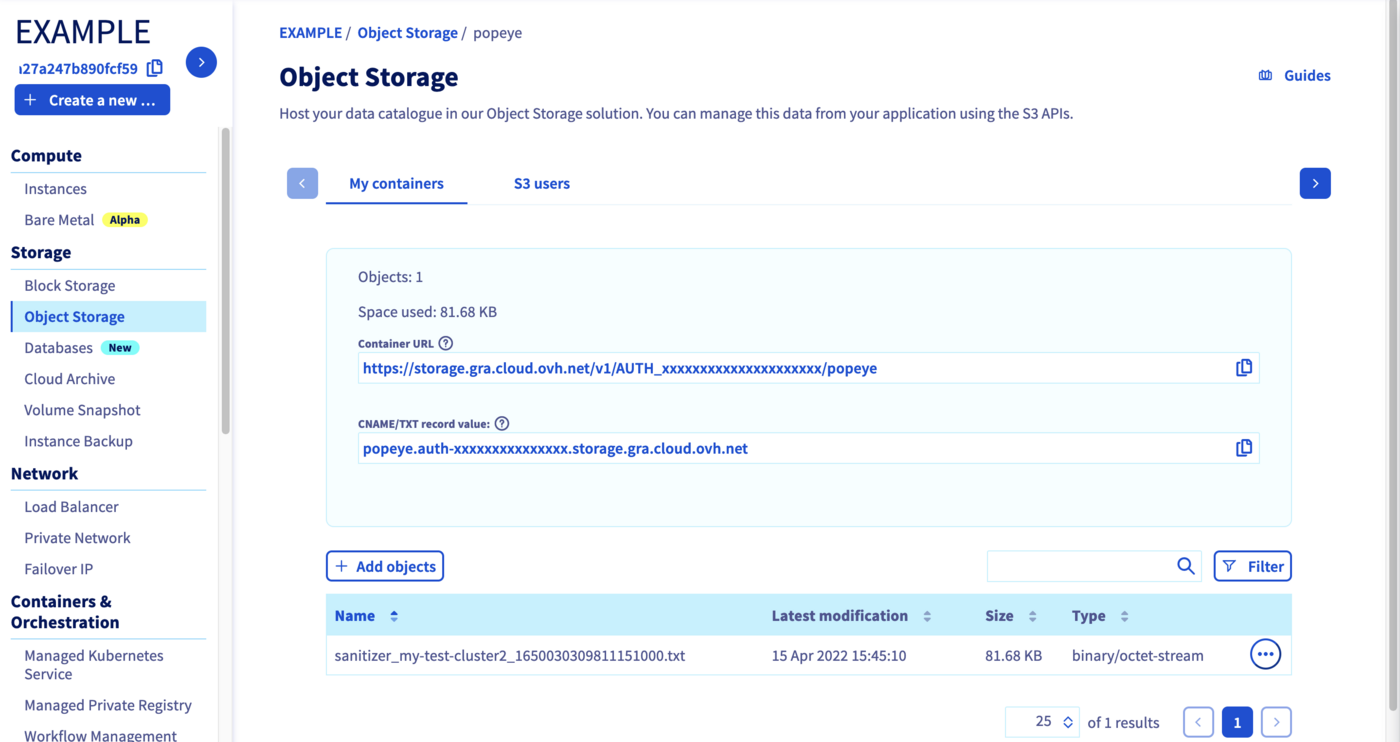
For this guide, our Object Storage container is named popeye and its region is GRA.

Creating an OpenStack user with Object Storage rights
In order to store your Popeye reports on an OVHcloud Object Storage, and generally if you want to interact with the Object Storage, you need to have the rights to manage an Object Storage.
In order to do that you will create an OpenStack user.
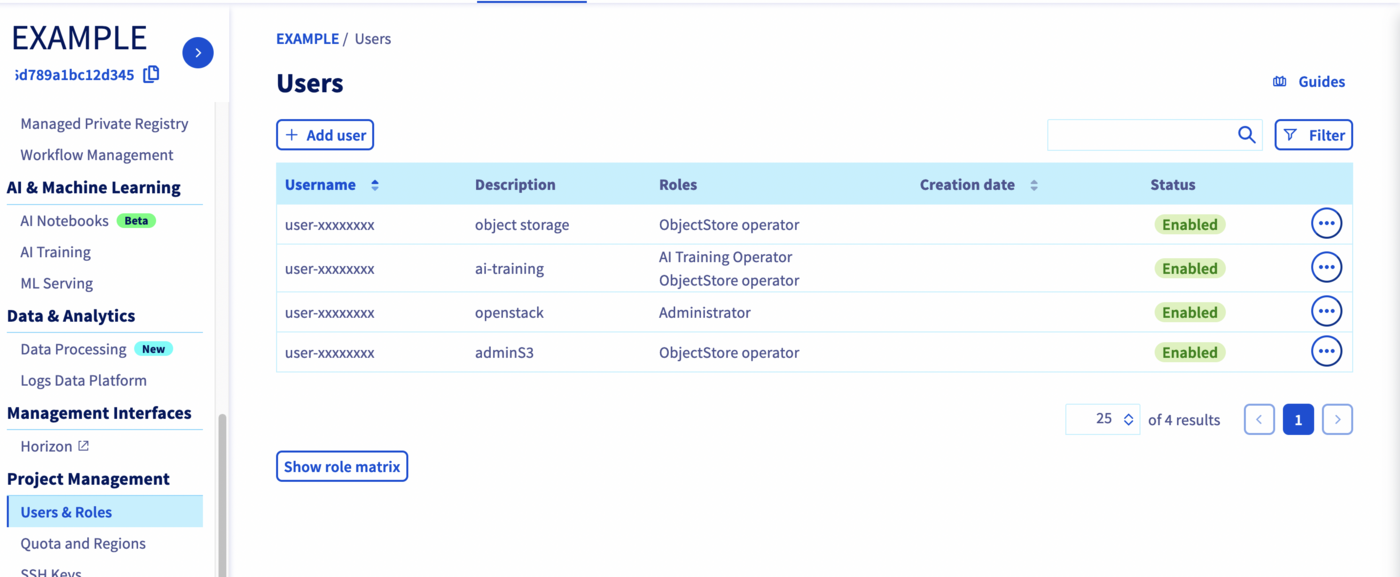
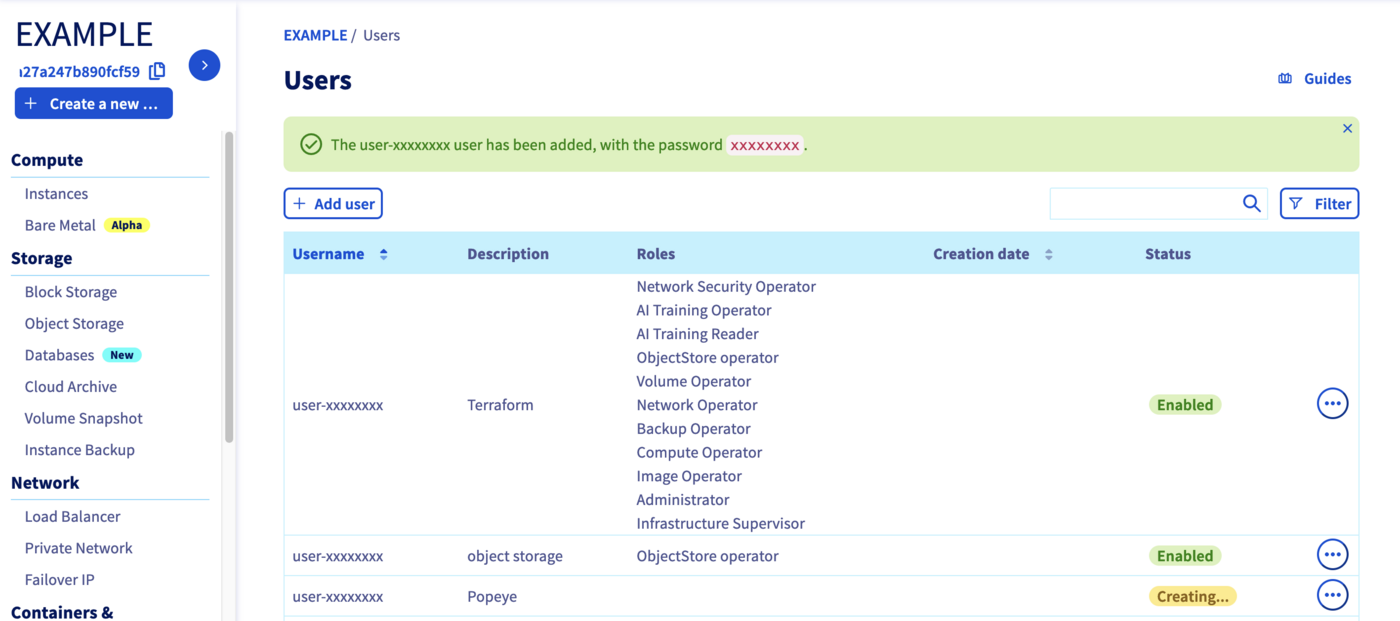
From your Public Cloud project, click on Users & Roles in the left-hand menu, then click on + Add user.
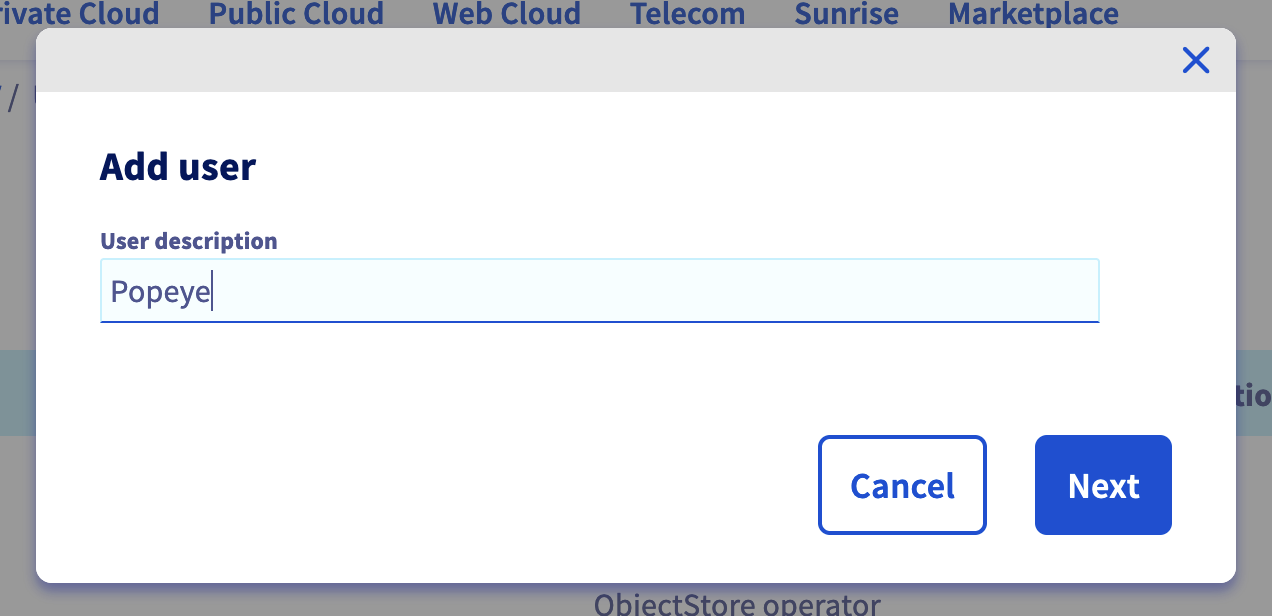
Enter a description for the user you want to create, for example Popeye and click on Next.
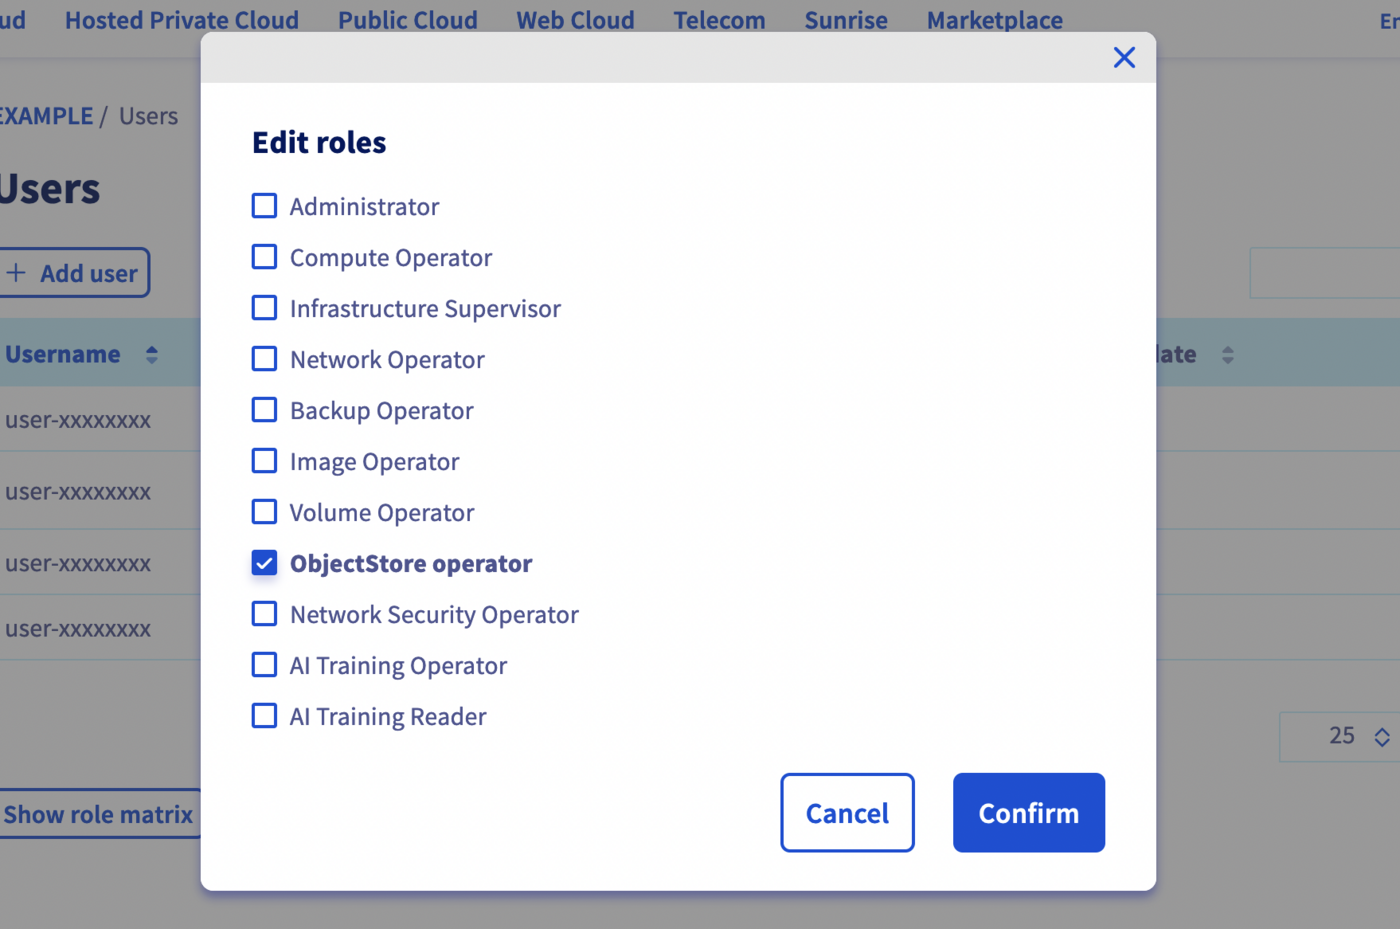
Check the ObjectStore operator role and click on Confirm.
Your user is being created. Username and password will be automatically generated and displayed in your Control Panel.
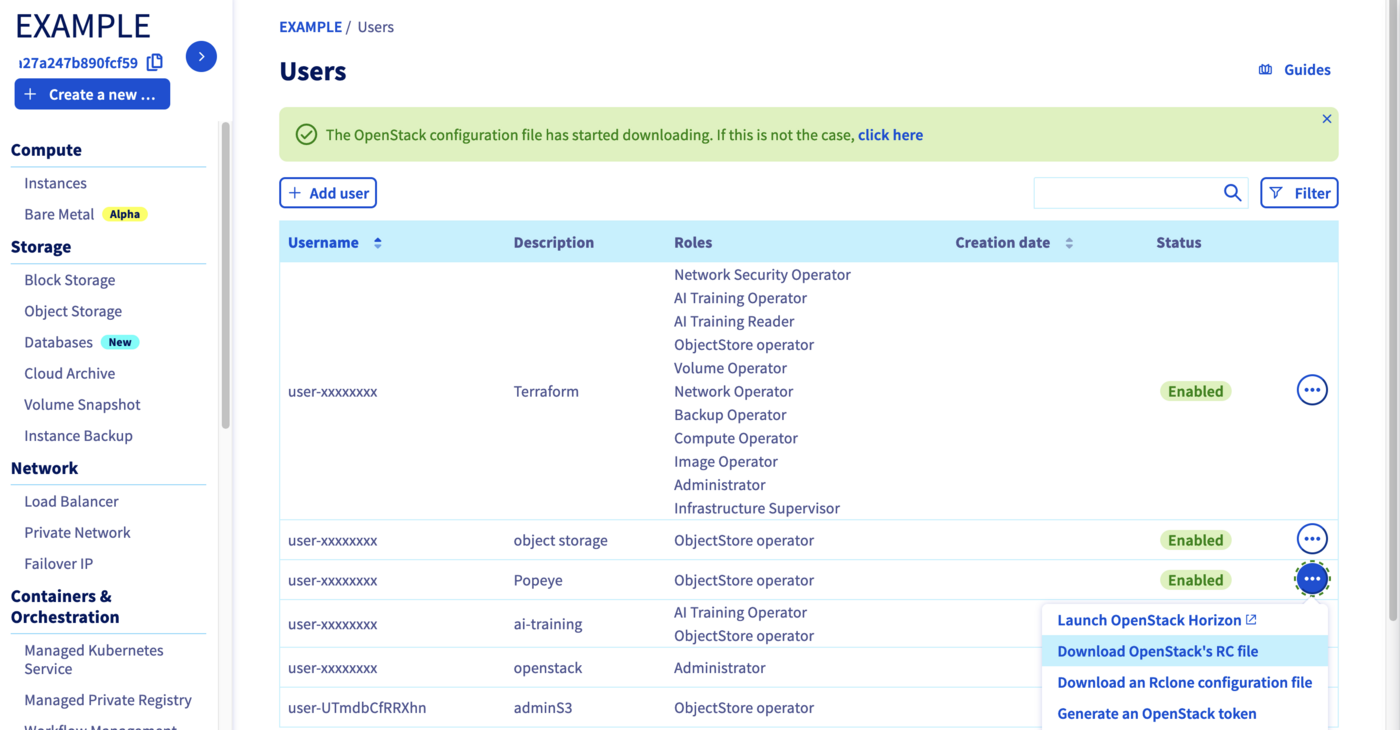
Get OpenStack RC file
In order to interact with the Object Storage through the Amazon S3 API, you need to generate your OpenStack credentials.
Click on Download OpenStack's RC file to retrieve the OpenStack RC file.
Then select the region of your Object Storage container (GRA for this guide) and click on the Download button.
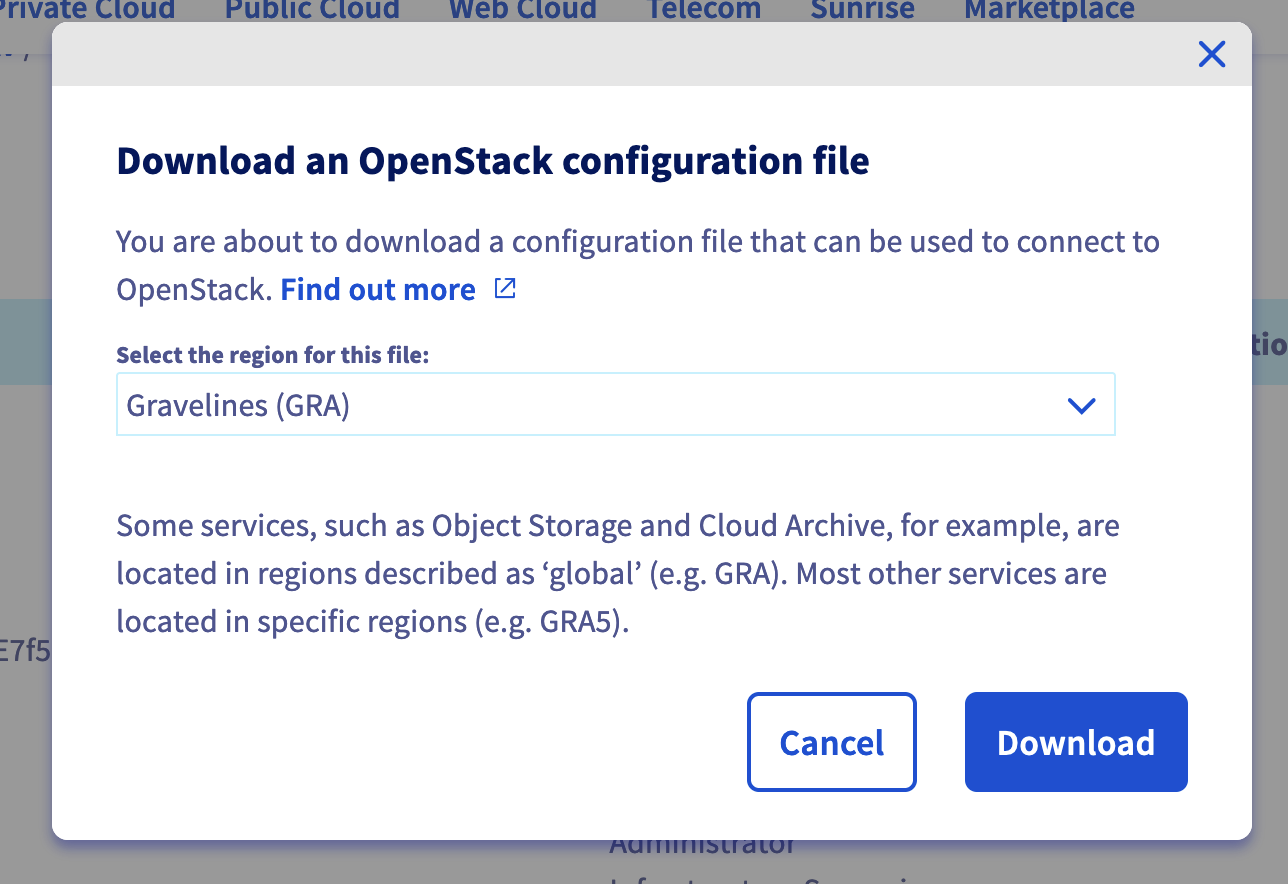
At this step, you should have an openrc.sh file like this:
cat openrc.shSource the openrc.sh file to set the OpenStack environment variables:
source openrc.shYou should execute this command and enter your password:
Install CLI tools
Now, you need to install the CLI tools:
pip install python-openstackclient awscliThe command installs openstack client to generate your credentials and aws CLI:
mkdir ~/.awsCreate the AWS CLI config file and set up the good endpoint to our Object Storage stored in the GRA region:
vi ~/.aws/config

[plugins]
endpoint = awscli_plugin_endpoint

[profile default]
region = GRA
s3 =
  endpoint_url = https://s3.gra.cloud.ovh.net
  signature_version = s3v4
s3api =
  endpoint_url = https://s3.gra.cloud.ovh.net
Generate AWS credentials:
Thanks to these credentials, you can now set them up in your .aws/credentials file:
vi ~/.aws/credentials

[default]
aws_access_key_id = <access_key>
aws_secret_access_key = <secret_key>
You should have a content like this:
Now you can test to list your existing Object Storage containers through the aws s3 CLI:
You should have popeye container/bucket in minimum in the following list:
Store Popeye report in your Object Storage
Now you can generate a Popeye report and save it in your Object Storage container thanks to the --s3-bucket, --s3-region and --s3-endpoint options:
You can check on your OVHcloud Object Storage popeye container that the report has been correctly stored:
Go further
- If you need training or technical assistance to implement our solutions, contact your sales representative or click on this link to get a quote and ask our Professional Services experts for assisting you on your specific use case of your project.
Join our community of users.
*: S3 is a trademark of Amazon Technologies, Inc. OVHcloud’s service is not sponsored by, endorsed by, or otherwise affiliated with Amazon Technologies, Inc.

