Adding Labels & Taint on Node Pool (Node Pool template)
241 vues
Objective
We previously showed you how to taint, cordon and drain specific Nodes and Nodes Pools. It's useful but it's not super efficient in the case of Kubernetes cluster AutoScaling, when your Nodes are created and deleted automatically.
In this new tutorial we will show you how to do some operations (add labels, annotations, taints...) propagated to your Nodes thanks to Node Pools template, on your OVHcloud Managed Kubernetes Service.
This enables multiple scheduling scenarii, like optimizing the cost of a cluster hosting your application by distributing Pods accross two labelled Node Pools (one is in monthly billing and the other autoscaled).
Thanks to the Node Pool's template, you will:
- add labels on Nodes
- add annotations on Nodes
- taint Nodes
- mark Nodes as unschedulable
- ...
Requirements
- a Public Cloud project in your OVHcloud account
Instructions
Create a Kubernetes cluster
You can follow the Kubernetes cluster creation step by step guide if you want to create it through the Control Panel or through Terraform.
Create a Node Pool Template with Terraform
Since the version 0.19+ of our OVH Terraform provider you can add IP restrictions also through Terraform.
Getting your cluster/API tokens information
The "OVH provider" needs to be configured with a set of credentials:
- an
application_key - an
application_secret - a
consumer_key
Why?
Because, behind the scenes, the "OVH Terraform provider" is doing requests to OVHcloud APIs.
In order to retrieve this necessary information, please follow our First steps with the OVHcloud APIs tutorial.
Specifically, you have to generate these credentials via the OVHcloud token generation page with the following rights:
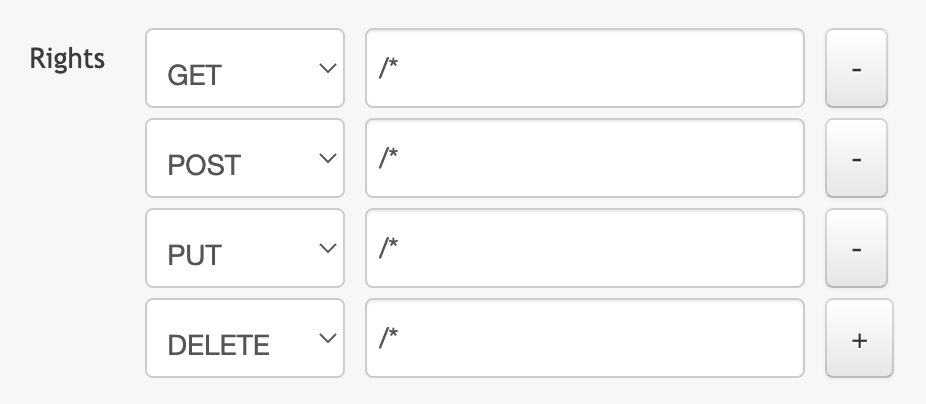
When you have successfully generated your OVHcloud tokens, please save them as you will have to use them very soon.
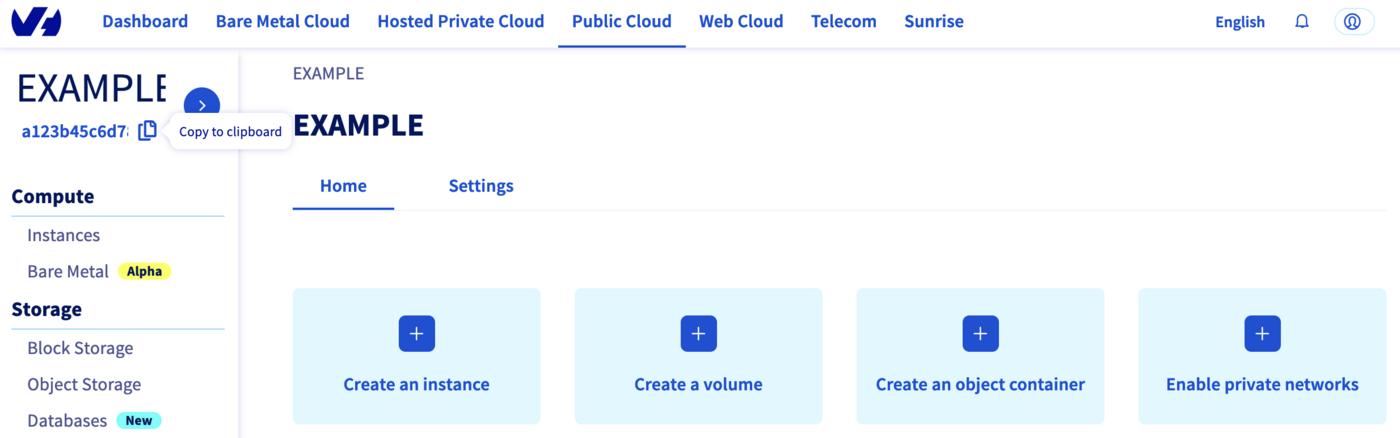
The last needed information is the service_name: it is the ID of your Public Cloud project.
How to get it?
In the Public Cloud section, you can retrieve your service name ID thanks to the Copy to clipboard button.
You will also use this information in Terraform resources definition files.
Terraform instructions
First, create a provider.tf file with the minimum version, european endpoint ("ovh-eu") and the keys previously retrieved in this guide.
Terraform 0.13 and later:
Terraform 0.12 and earlier:
Alternatively the secret keys can be retrieved from your environment.
OVH_ENDPOINTOVH_APPLICATION_KEYOVH_APPLICATION_SECRETOVH_CONSUMER_KEY
This later method (or a similar alternative) is recommended to avoid storing secret data in a source repository.
Here, we defined the ovh-eu endpoint because we want to call the OVHcloud Europe API, but other endpoints exist, depending on your needs:
ovh-eufor OVHcloud Europe APIovh-usfor OVHcloud US APIovh-cafor OVHcloud North-America API
Then, define the resources you want to create in a new file called ovh_kube_cluster_nodepool.tf:
Don't forget to replace <service_name> and <cluster_id> by the real data.
In this resources configuration, we ask Terraform to add a Node Pool with a template to your Kubernetes cluster.
Go to the ovh terraform provider documentation in order to see the ovh_cloud_project_kube_nodepool resource definition.
Now we need to initialise Terraform, generate a plan, and apply it.
The init command will initialize your working directory which contains .tf configuration files.
It’s the first command to execute for a new configuration, or after doing a checkout of an existing configuration in a given git repository for example.
The init command will:
- Download and install Terraform providers/plugins
- Initialise backend (if defined)
- Download and install modules (if defined)
Now, we can generate our plan:
Thanks to the plan command, we can check what Terraform wants to create, modify or remove.
The plan is OK for us, so let's apply it:
Check everything is correctly configured
To do some operations on your Nodes, through kubectl CLI, we invite you to follow our guide to configuring default settings.
When you can access the cluster through kubectl command, let's display our node pool:
Our node pool exists and we can see its configuration.
Now let's see the node pool template:
The template you defined will ask Kubernetes to propagate this configuration to all the Nodes of this Node Pool.
Let's display our node. We should have 1 node running:
Check that the label, annotation and taint you defined are well propageted to the node:
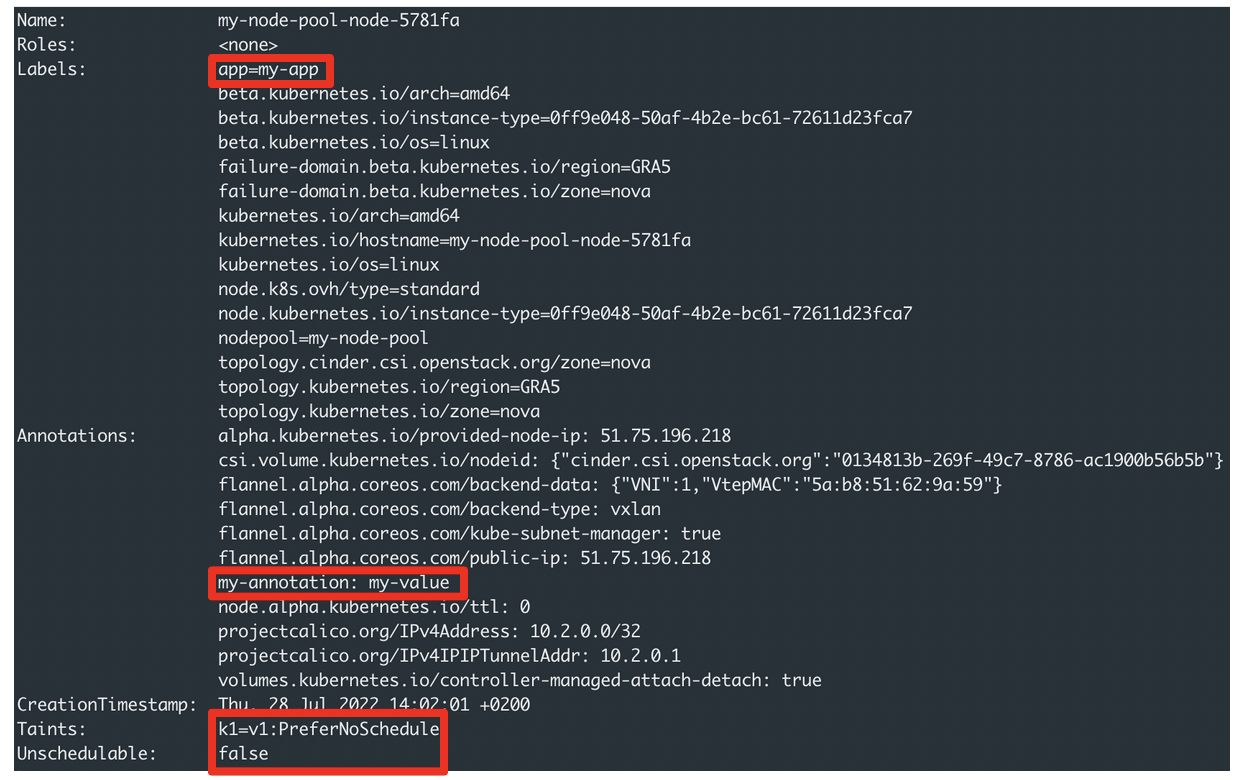
And if you edit the Node Pool configuration to activate the AutoScaling and scale to 3 nodes for example, all the information you defined will be propagated to new Nodes.
Create a Node Pool Template through API
You can also create a Node Pool template through the API. You can use the API Explorer for example to interact with our API.
To create a Node Pool with a template (labels, annotations, taints...), you have to make a call on:
with the following information:
Destroy
Destroy the Node Pool through Terraform
If you want to delete the Node Pool you added through Terraform, execute the terraform destroy command:
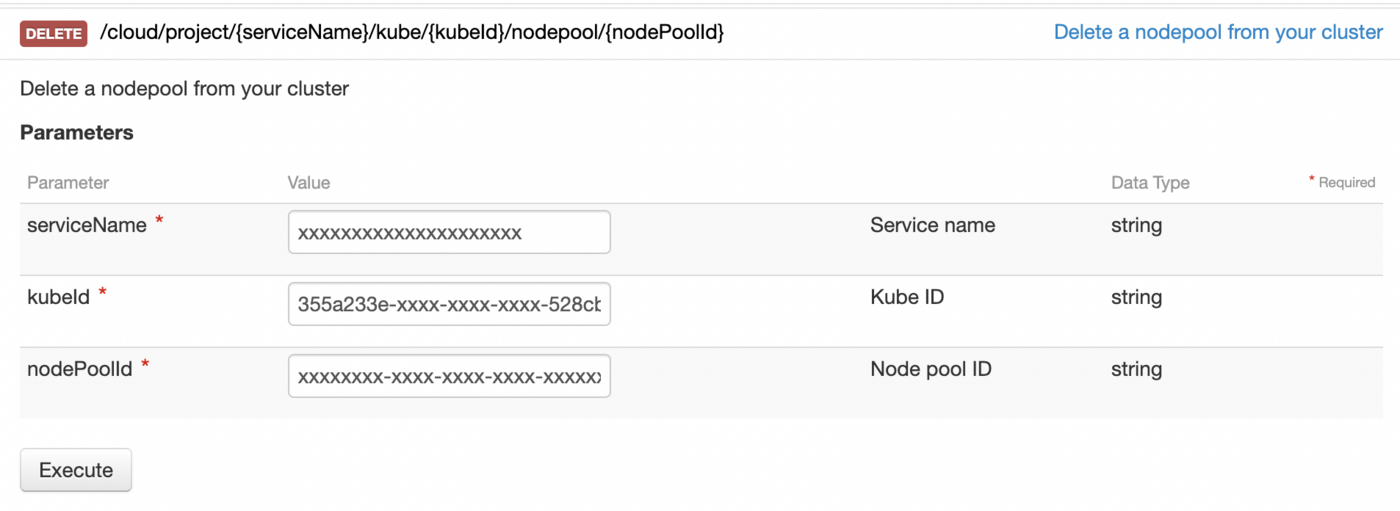
Destroy the Node Pool through API
To delete a Node Pool with the API, you have to make a call on:
with the following information:
Go further
To have an overview of OVHcloud Managed Kubernetes service, you can go to the OVHcloud Managed Kubernetes page.
-
If you need training or technical assistance to implement our solutions, contact your sales representative or click on this link to get a quote and ask our Professional Services experts for assisting you on your specific use case of your project.
-
Join our community of users.

