Dashboards - Tutoriel - Exposez votre instance Dashboards dans votre réseau privé via un reverse proxy NGINX (EN)
311 vues
Objective
Public Cloud Databases can be deployed over public network (internet) or private network. When using private network, you don't have access by default to monitoring tools we provide as a service, like Public Cloud Databases for Dashboards (metrics) or Opensearch (logs).
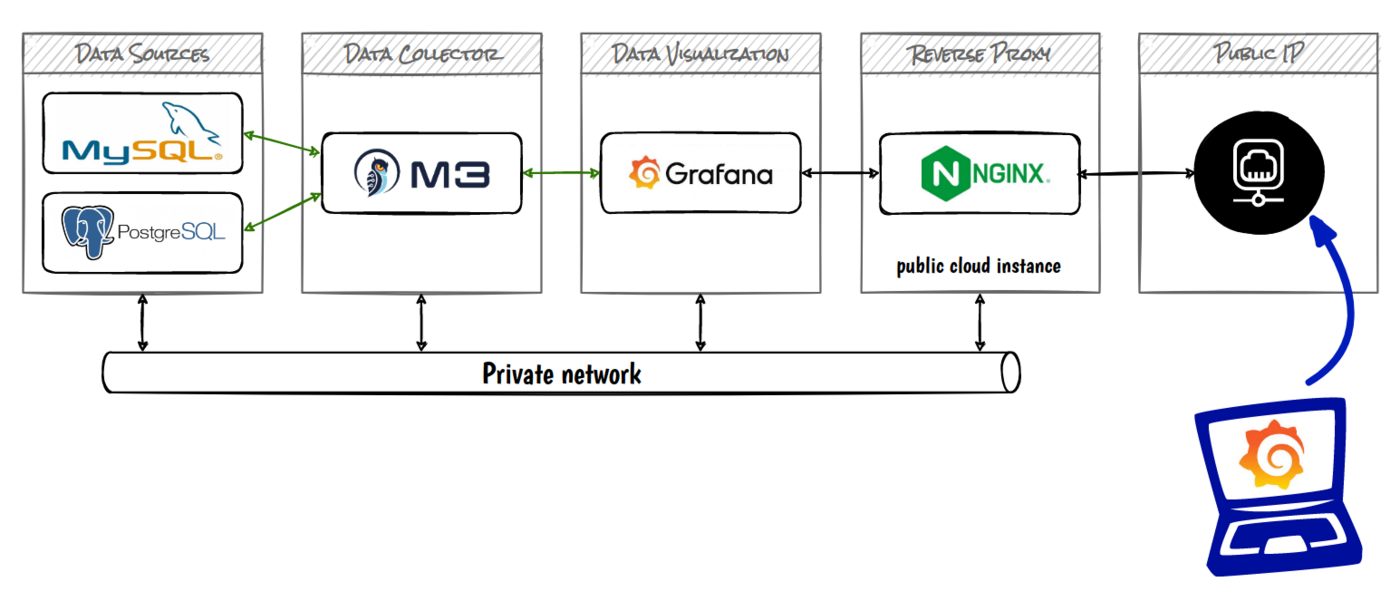
This guide explains how to expose your managed Dashboards to internet through the configuration of a NGINX instance in reverse proxy mode.
Schema concept:
OVHcloud provides services for which you are responsible, with regard to their configuration and management. It is therefore your responsibility to ensure that they function correctly.
This guide is designed to assist you in common tasks as much as possible. Nevertheless, we recommend contacting a specialist service provider or reaching out to our community if you experience any issues.
Requirements
- A Public Cloud project in your OVHcloud account
- A Dashboards running on your OVHcloud Public Cloud project. (This guide can help you to create a managed Dashboards. If you need more details on the private network configuration use this guide)
Instructions
Create a new instance in your vRack
This guide can help you to create a new instance in your vRack.
For this tutorial, we will use an Ubuntu 22.10 image to install NGINX.
Create a new compute instance in your vRack. If you need to expose your Reverse Proxy to a public network, please select the IP Floating address option.
Install NGINX
Once you have access to your new instance, update your system and install NGINX:
Check if your NGINX service is installed and running correctly:
Configure NGINX
Regarding the NGINX configuration we are going to follow the official Grafana documentation.
Create a configuration file in the /etc/nginx/sites-enabled/ file:
Be careful, replace the hostname of the Dashboards server your-grafana-12345abc-12345abc.database.cloud.ovh.net:443 by your own.
Also update the certificates and SSL key. If necessary, you can create them for testing purposes or in a non-productive environment using the following command:
Now the NGNIX is configured in reverse proxy mode
IP Packet forwarding
To redirect traffic from your Public IP to your Private IP, uncomment the following line in /etc/sysctl.conf to enable packet forwarding for IPv4:
Then force the system to reload the kernel variables:
Connect to your managed Dashboards
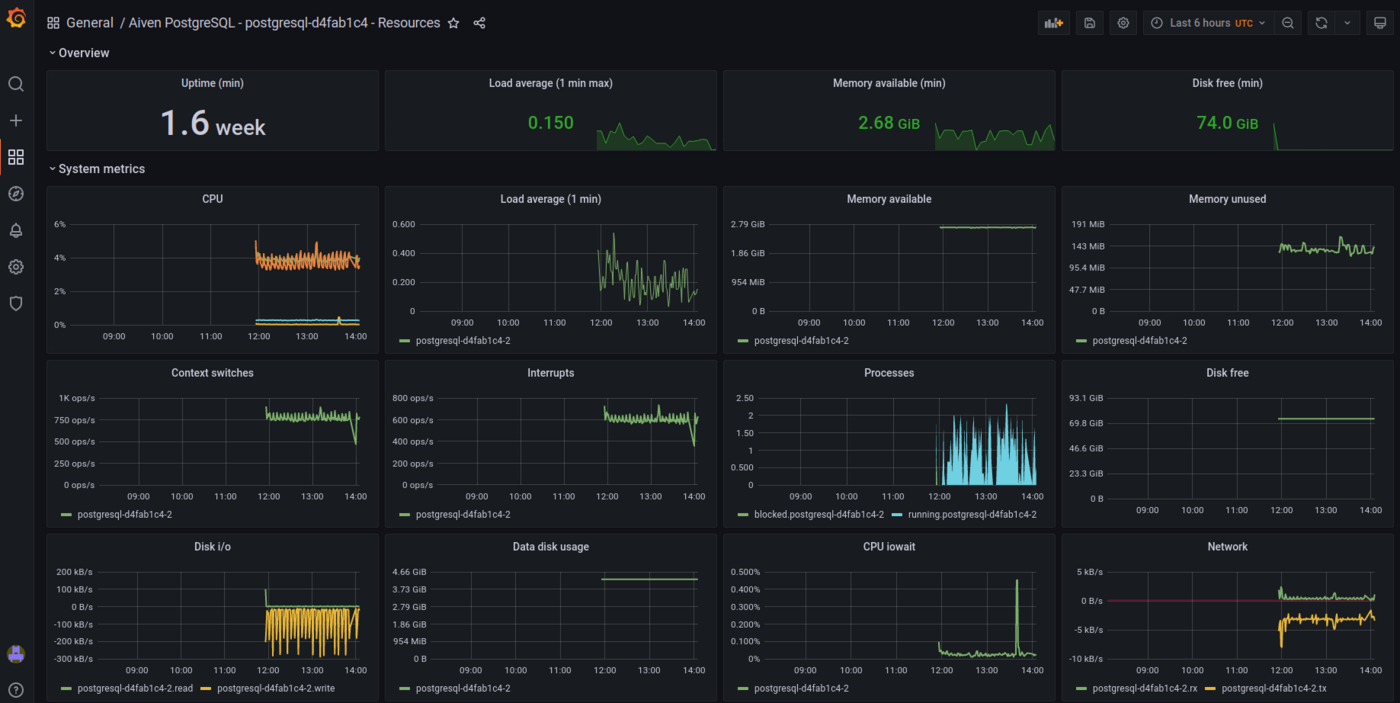
Connect to your https reverse proxy server with your browser (accept the SSL certificate if needed). You do have now access to your predefined or customized dashboards.
We want your feedback!
We would love to help answer questions and appreciate any feedback you may have.
If you need training or technical assistance to implement our solutions, contact your sales representative or click on this link to get a quote and ask our Professional Services experts for a custom analysis of your project.
Are you on Discord? Connect to our channel at https://discord.gg/ovhcloud and interact directly with the team that builds our databases service!

