Public VCF as-a-Service - Creating a new virtual machine (EN)
154 visualizaciones
Objective
This guide details how to create your first virtual machine using two methods:
- Creating a virtual machine from an ISO
- Creating a virtual machine with a template
Requirements
- A Public VCF as-a-Service
- An ISO of an operating system
Instructions
Creating a virtual machine
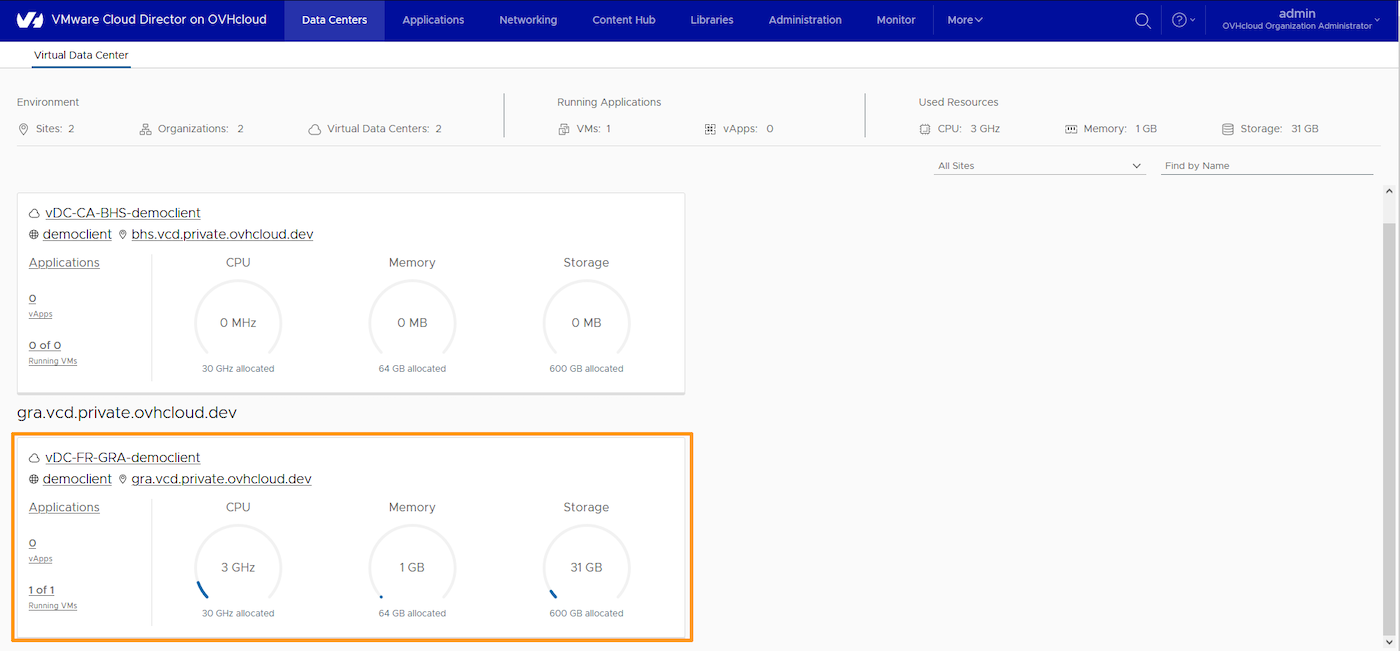
To create your virtual machine, first go to the datacentre where you plan to deploy it. Next, navigate to the Compute > Virtual Machine > NEW VM section.

Click on the tabs below.
What is a template? A template is a preconfigured virtual machine that is used to create new ones. The amount of memory, vCPU, network cards (NICs) and storage space are already defined and cannot be changed during deployment. Don't worry, you can change it once the deployment process is complete. This is a basic OVA deployment.
Back to creating your virtual machine. Fill in the required fields, then make sure to select the Type option as From Template. You will then see a dropdown menu of the different models available.
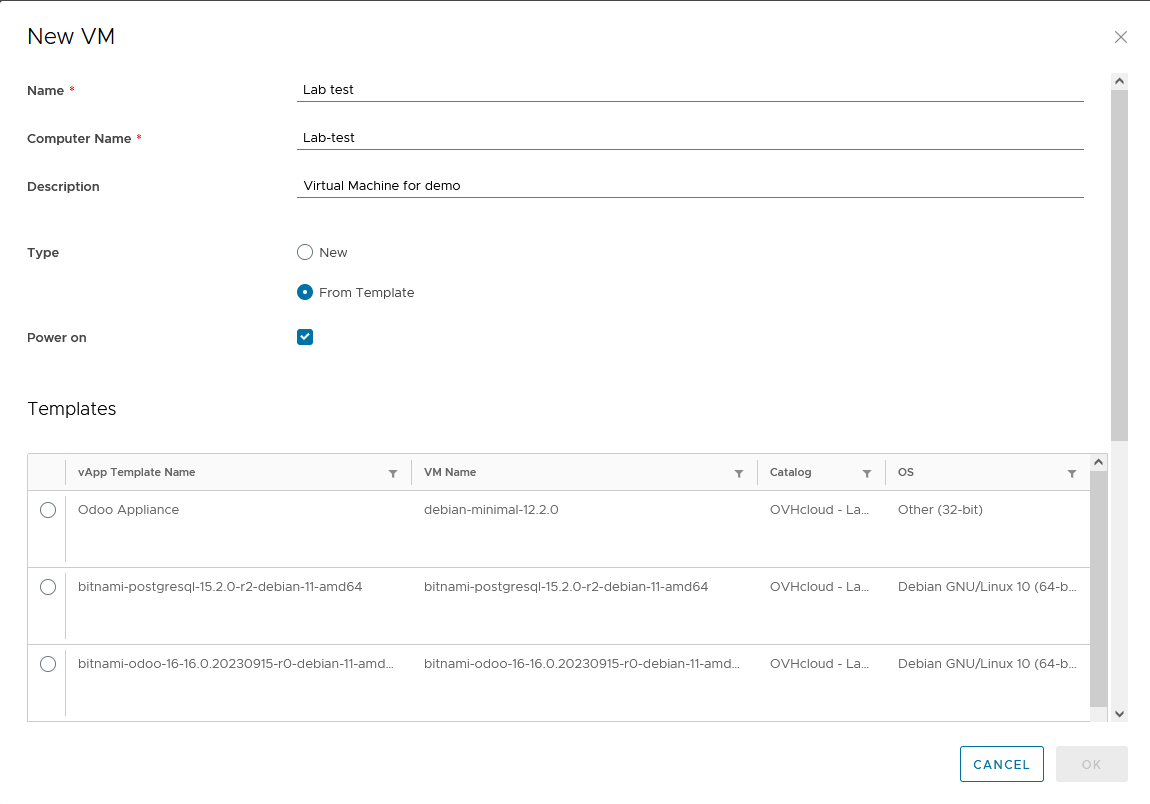
The templates available below are part of the pre-provisioned OVHcloud catalog, and can be used in a way that suits your needs. We provide a bunch of different Linux distributions with and without applications already installed, we also imported some models from the Bitnami catalog.
In the Custom Properties section, you can customize various properties of your virtual machine, such as a specific user, the domain name, its IP address and many others.
As for creating from a template, fill in the required fields, however for the option Type please select New.
In the Boot image section, you will find preconfigured ISOs provided to you.
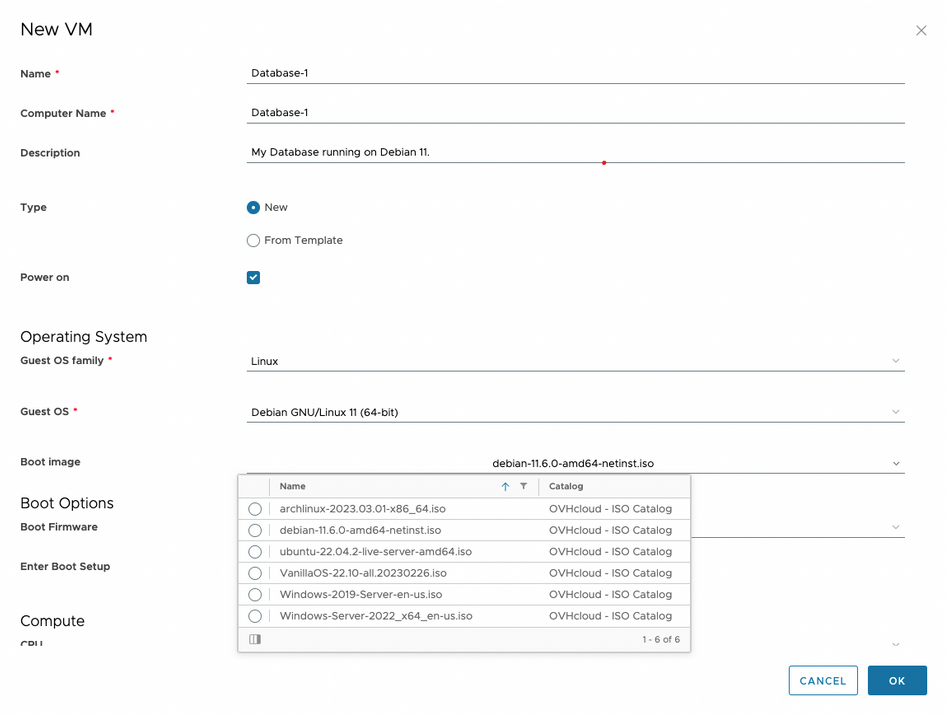
The Compute section allows you to configure the desired amount of vCPU and memory for this virtual machine.
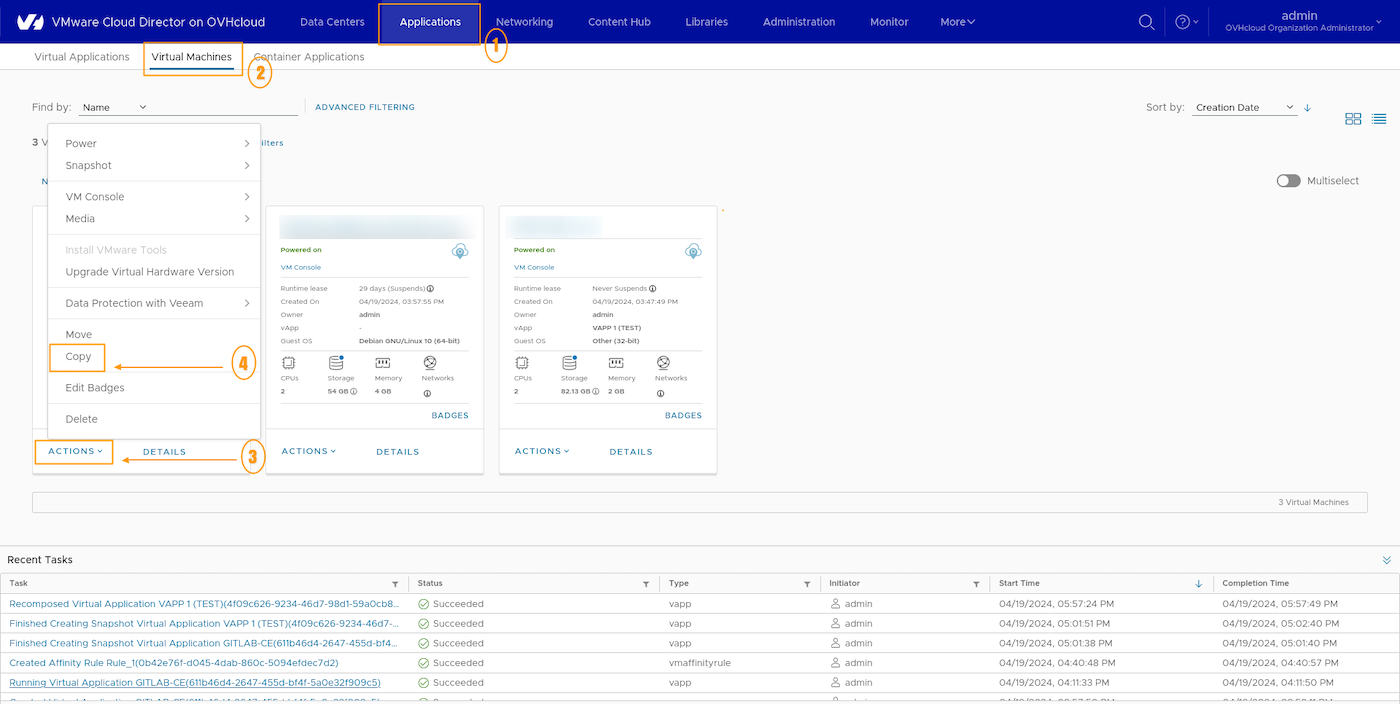
What is a Clone? A Clone is a copy of a virtual machine. In the case of a VM, the disk settings correspond with the machine used. You need to launch the copy from the VM: Click on Applications > VM > Actions > Copy, in the "Applications" section.
Warning: A vApp must always be added on VDC. Follow the dropdown menu for the various settings available, just like creating a VM.
For the NIC section, you have the option to choose the type of NIC you want. The default type (VMXNET3) is often a good choice if you don't have any special requirements.
Regarding network selection, you will find all available networks in your organization. In our example, we will use ovh-net-priv, a network we have created for you beforehand. We have enabled a DHCP service on this network and configured it with subnet 192.168.0.0/24.
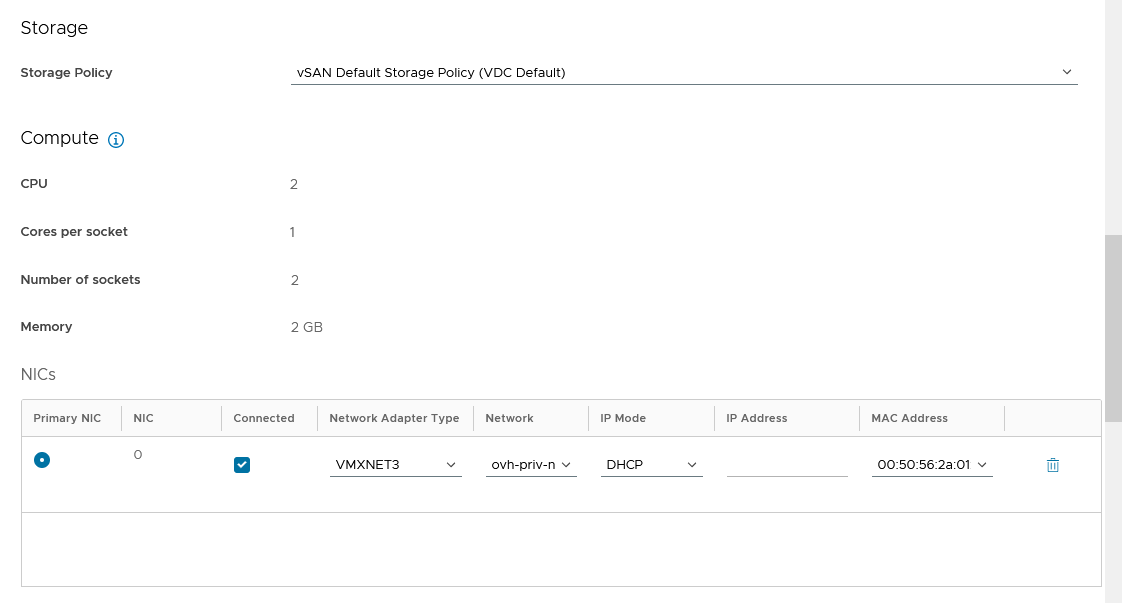
The IP Mode drop-down list provides different IP assignment modes:
- DHCP - Use the DHCP server (your VM must manage the DHCP even if you select it).
- IP Pool — Selects an IP from the network IP pool.
- Manual IP - You must set the IP manually.
Warning: This IP mode only allows you to organize your Public VCF as-a-Service inventory, but you will still need to configure the IP (or DHCP) inside the VM.
As for the Storage Policies section, you will only find one possibility: the vSAN default storage policy.
You can also add virtual disks in this section if you need more than one.

To conclude, please review all information provided to ensure accuracy. Next, click Ok to launch the virtual machine deployment. Once the deployment is complete, you will see the new VM listed in the selected virtual datacenter.
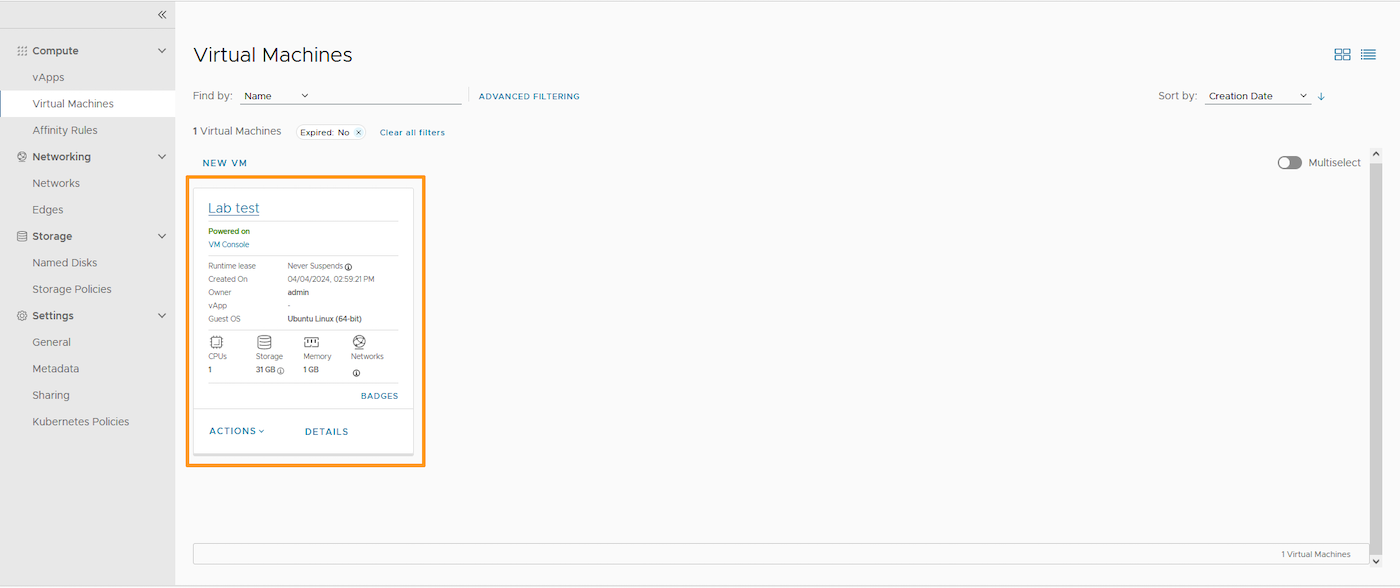
If you have used the From scratch method, you just need to turn on your server and launch the installation of your OS.
Creating a virtual machine, in pictures:
Go further
If you need training or technical assistance to implement our solutions, contact your sales representative or click on this link to get a quote and ask our Professional Services experts for a custom analysis of your project.
Join our community of users on https://community.ovh.com/en/.

