Crear un snapshot (EN)
246 visualizaciones
Objective
VMware offers the ability to take snapshots so you can save and possibly go back to a VM's previous state.
This guide explains how to execute these tasks
Requirements
- Being an administrative contact of your Hosted Private Cloud infrastructure to receive login credentials
- A user account with access to vSphere (created in the OVHcloud Control Panel)
Instructions
Take a Snapshot
A snapshot allows you to capture a VM state.
It offers a layer of protection for your VM prior to executing changes as it offers the ability to come back to that state if needed.
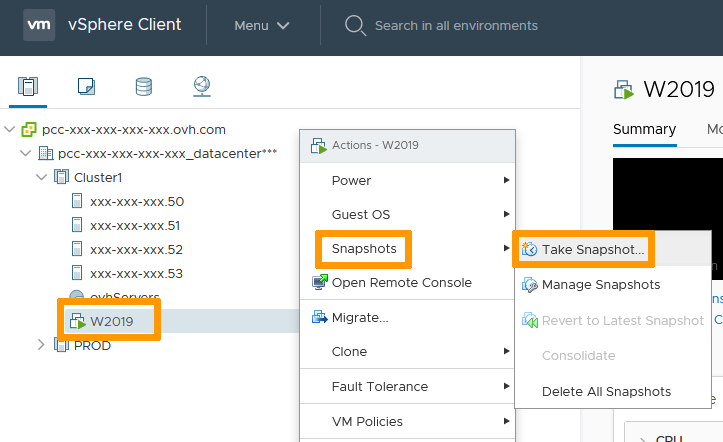
In the vSphere interface menu, go to the Hosts and Clusters dashboard.
Navigate to your VM, right-click it and, in the Snapshot menu, select Take Snapshot.
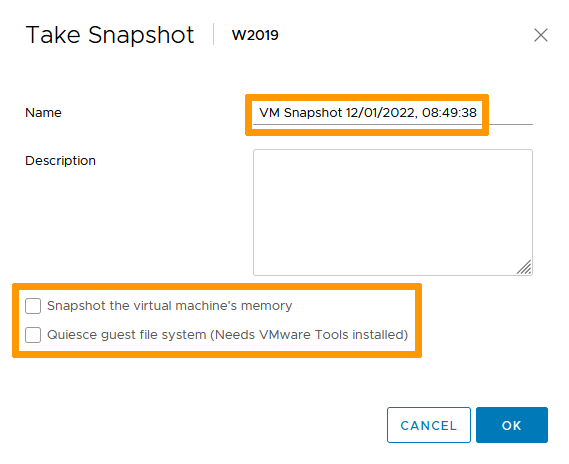
By default, the snapshot will be named after the current date and time. You may edit it to your preference.
A description may also be added for reference.
If your VM is running, the snapshot process offers two options:
- Snapshot the virtual machine's memory. This will save the VM Ram state, helping with certain applications that may not have commited changes to disk. It should also make your snapshot crash-resistant, meaning it can be reverted to without powering off the VM.
- Quiesce guest file system (Needs VMware Tools installed). This will bring your VM to a state that is backup suitable: clearing buffers, committing changes to disks...
If your VM is not running, those options are greyed out.
We recommend taking snapshots of a turned off VM and if it is not possible, preferably use the Quiesce option over the memory snapshot for added security.
Click OK when ready.
Your snapshot is done.
Manage Snapshots
You can take multiple snapshots of a single VM repeating the process explained above.
With time, snapshots will consume resources, especially storage, to be maintained and possibly will affect VM performance.
Below is how to revert, clear or consolidate snapshots.
Revert to Snapshot
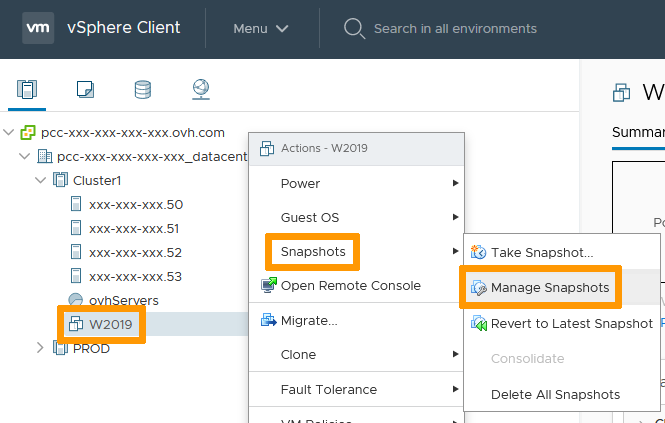
In the vSphere interface menu, go to the Hosts and Clusters dashboard.
Navigate to your VM, right click on it and in the Snapshots menu, select Manage Snapshots.
Check the snapshot tree and select the one you wish to go back to.
Click on Revert To.
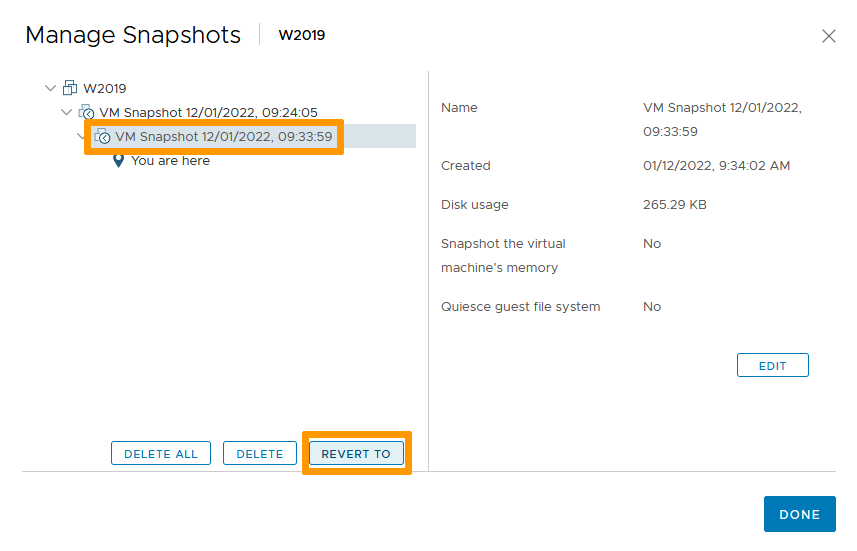
Confirm by clicking OK.
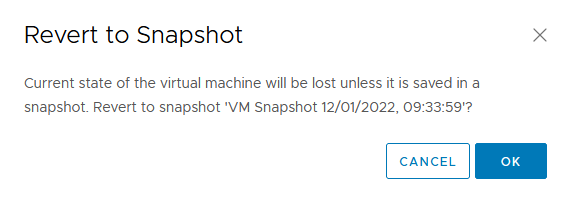
You can click Done as your VM has been reverted to the point chosen.
If you only have a single snapshot or wish to revert to the last taken snapshot, you can speed up the process by choosing Revert to Latest Snapshot in the Snapshots menu.
Clear Snapshot
In the vSphere interface menu, go to the Hosts and Clusters dashboard.
Navigate to your VM, right click on it and in the Snapshots menu, select Manage Snapshots.
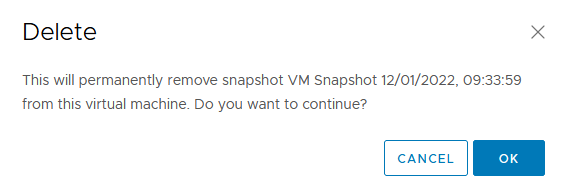
Check the snapshot tree and select the one you wish to delete.
Click on Delete.
You can also clear all snapshots by clicking Delete All.
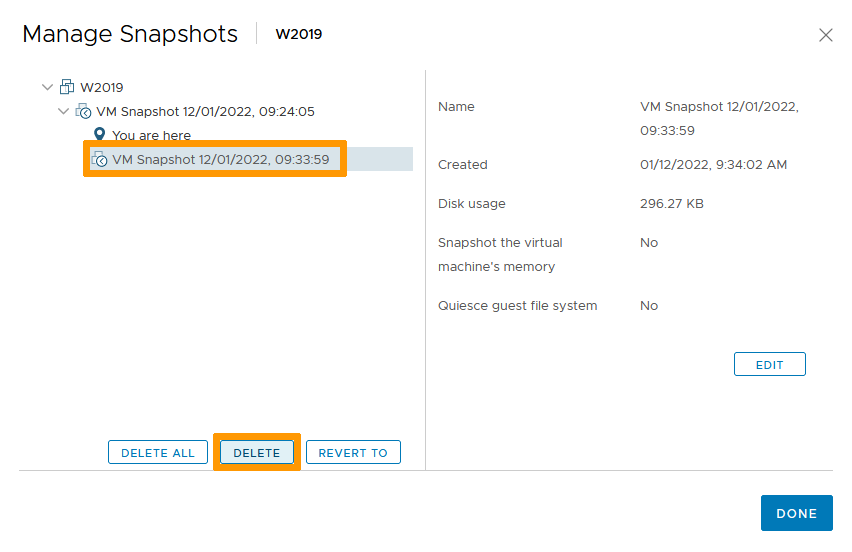
Confirm by clicking OK.
You can click Done as your snapshot was cleared.
If you wish to clear all snapshots, you can speed up the process by choosing Delete All Snapshots in the Snapshots menu.
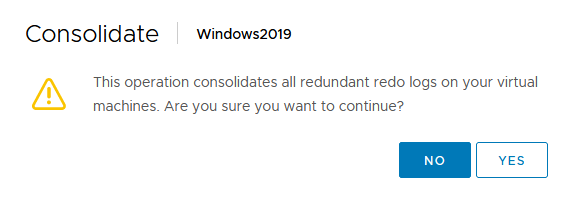
Consolidate snapshots
Snapshot consolidation is useful when snapshot disks fail to compress after a delete operation. After consolidation, redundant disks are removed, improving virtual machine performance and saving storage space.
In the vSphere interface menu, go to the Hosts and Clusters dashboard.
Navigate to your VM, right click on it and in the Snapshots menu, select Consolidate.
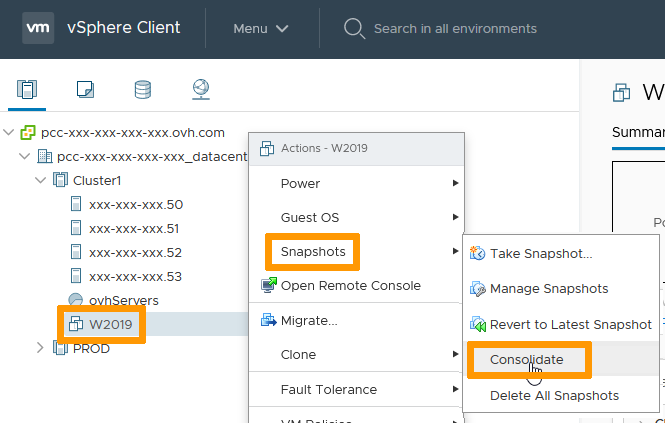
Confirm by clicking YES.
You can find more information about consolidation on the VMware documentation.
Go further
Join our community of users on https://community.ovh.com/en/.

