Enterprise File Storage - Private network configuration
214 visualizaciones
Objective
Enterprise File Storage services can be managed via OVHcloud API or from your OVHcloud Control Panel.
This guide explains how to connect your Enterprise File Storage service to a vRack private network using vRack Services and Service Endpoint technology.
For more information on vRack Services, please refer to this page.
Requirements
- An Enterprise File Storage service in your OVHcloud account
- Access to the OVHcloud Control Panel
Overview
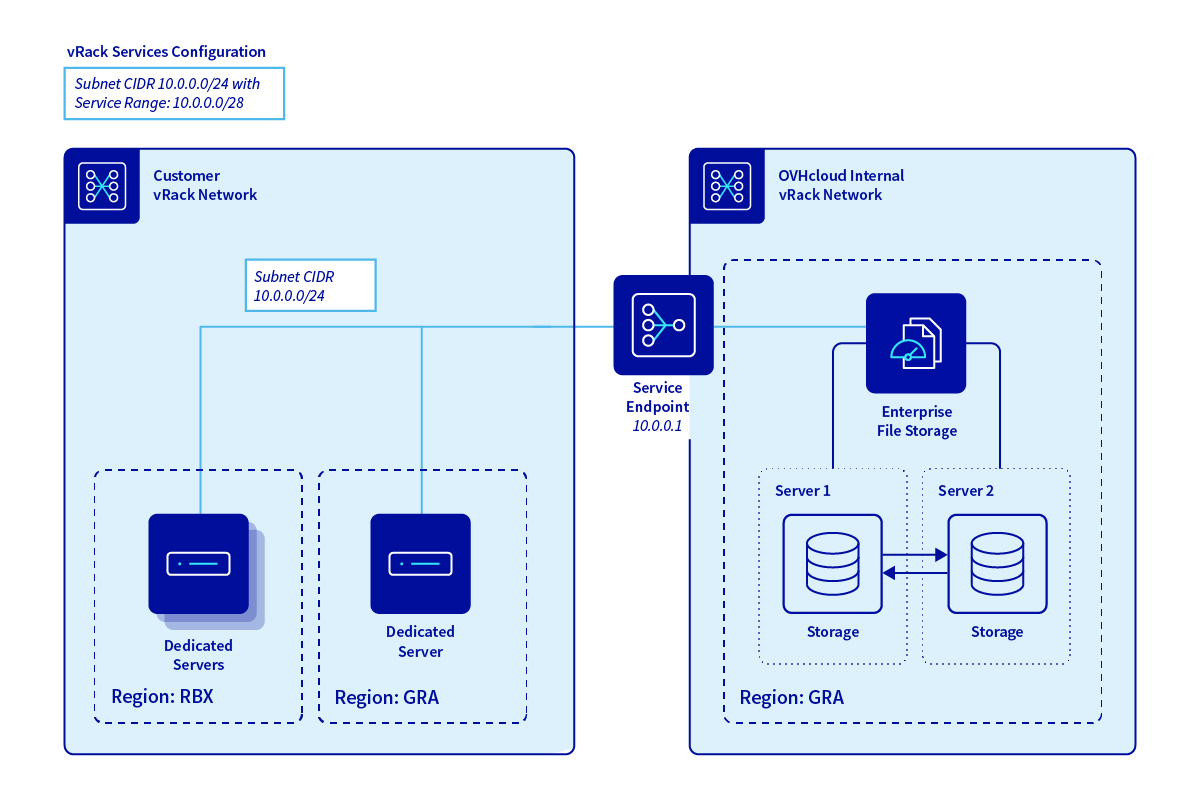
Enterprise File Storage is a service that is exposed to the vRack via an IP address. There are three steps to assigning an IP address to your service:
- Selecting or creating a vRack
- Selecting or activating a vRack Services
- Selecting or creating of a subnet
Instructions
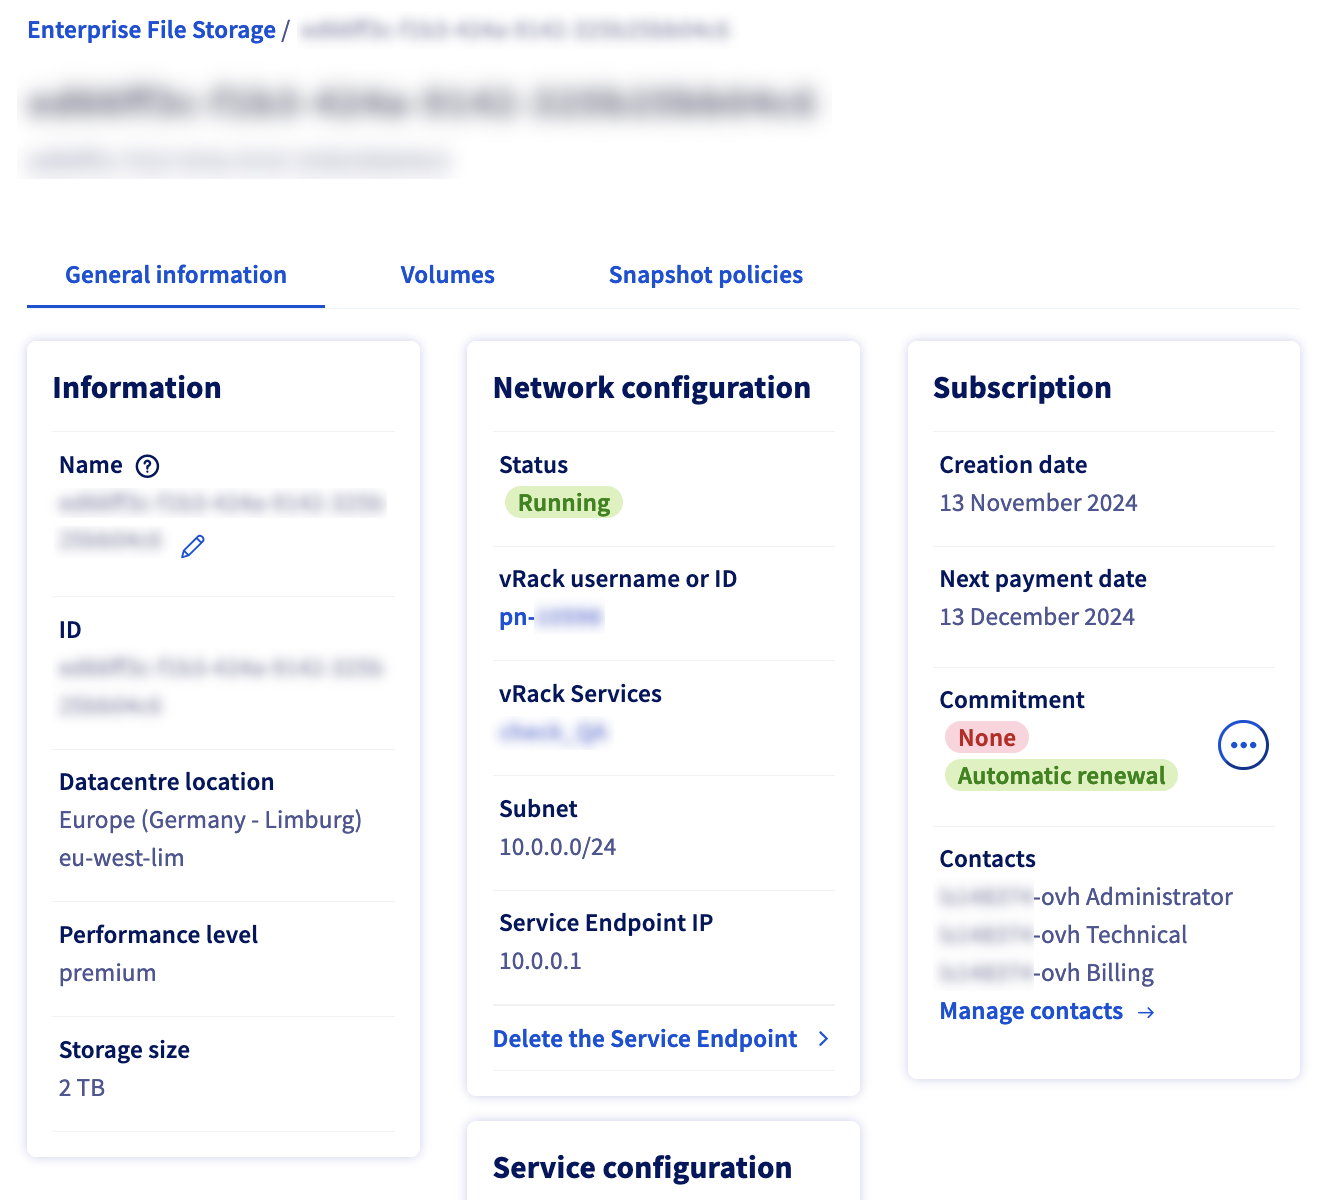
Log in to your OVHcloud Control Panel and select Bare Metal Cloud from the top navigation bar. Go to Storage and Backup then Enterprise File Storage and select your service from the list.
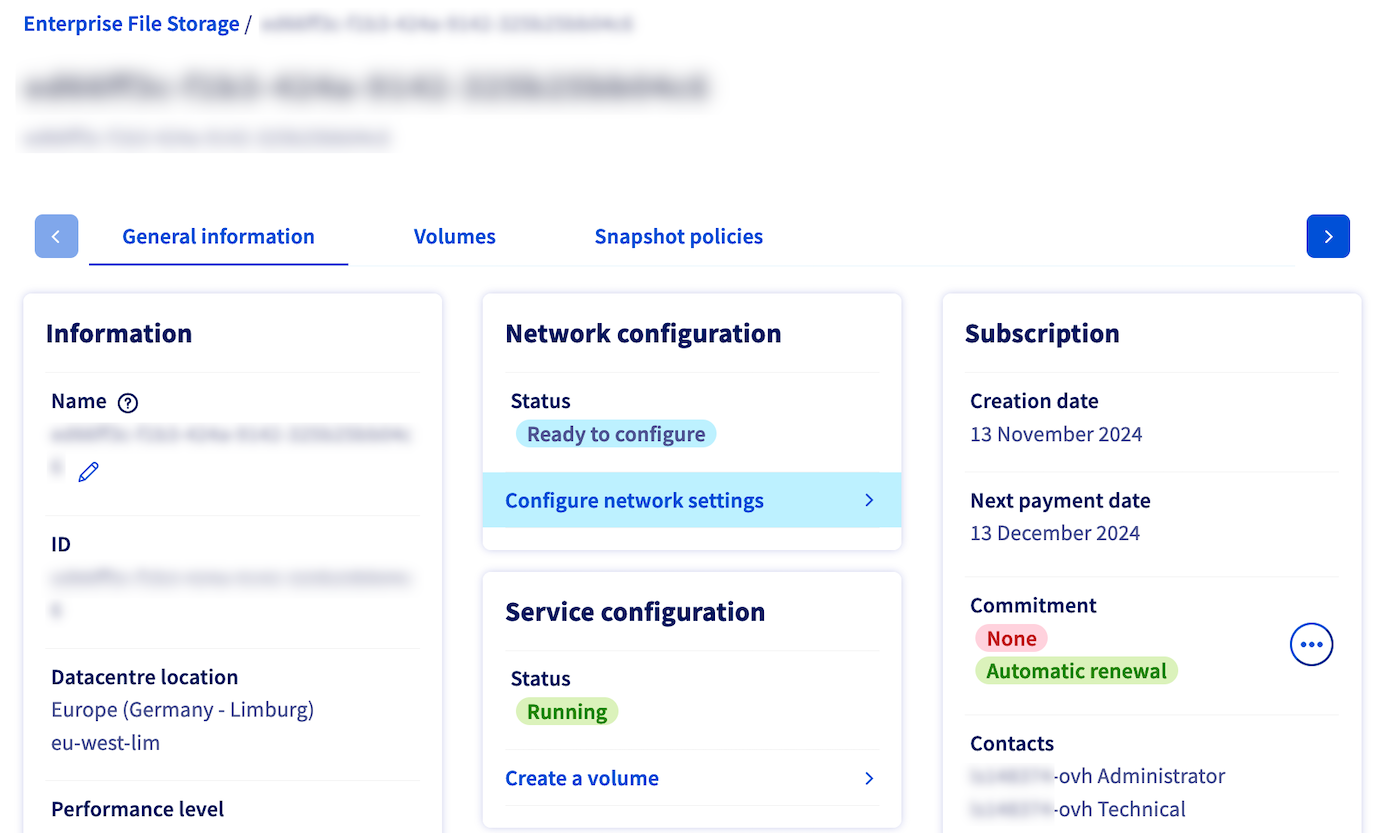
By default, the service is not connected to a private network, it is in Ready to configure state. This step is required before you can create your volumes and/or set your ACLs.
Click the Configure Network Parameters link to configure your Service Endpoint to enable your volumes to be consumed from your private network.
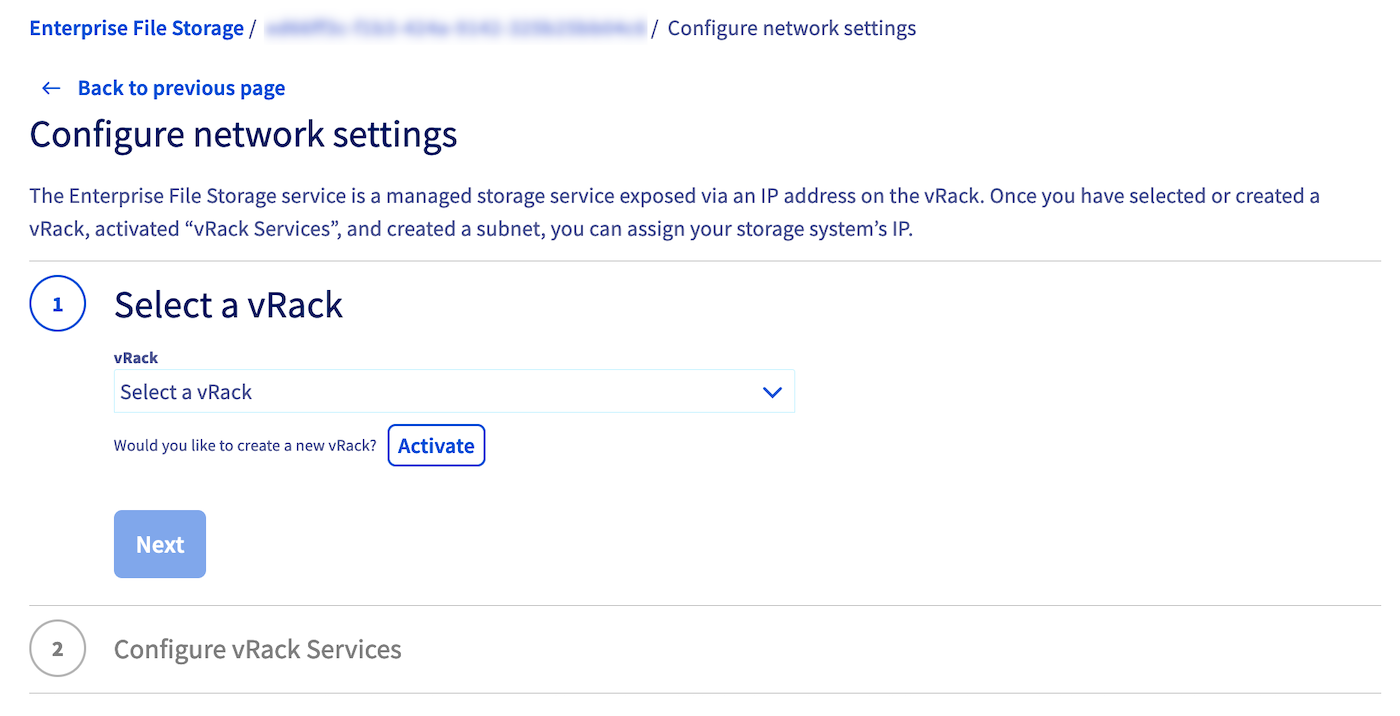
Step 1 - Selecting or creating a vRack
You must have a vRack to activate your vRack services. OVHcloud vRack is a free service. If you don't have one at this stage, you can order one using the Order button in the Control Panel. Otherwise, select your vRack from the drop down menu.
Please note that creating vRack Services, Subnets, or Service Endpoints on a production vRack does not cause any service interruption. Therefore, you can safely follow steps 2 and 3 of this guide in a production environment.
Step 2 - Selecting or activating a vRack Services
In this second step you will create a vRack Service. If you don't already have a vRack Services activated, you can do it at this step. Click on Activate to be be redirected to the vRack Services configuration page. For more information on vRack Services configuration, please refer to this page.
Once your new vRack Services is activated, you will need to go back to the Configure Network Parameters page to perform the rest of the configuration (i.e. Step 1 above).

Step 3 - Selecting or creating a subnet
Select the subnet on which you want to expose your Enterprise File Storage service. If your subnet does not yet exist, it is necessary to create it. To do this, go to the vRack Services configuration page then to the Subnet tab. For more information on how to create a subnet, refer to this page.
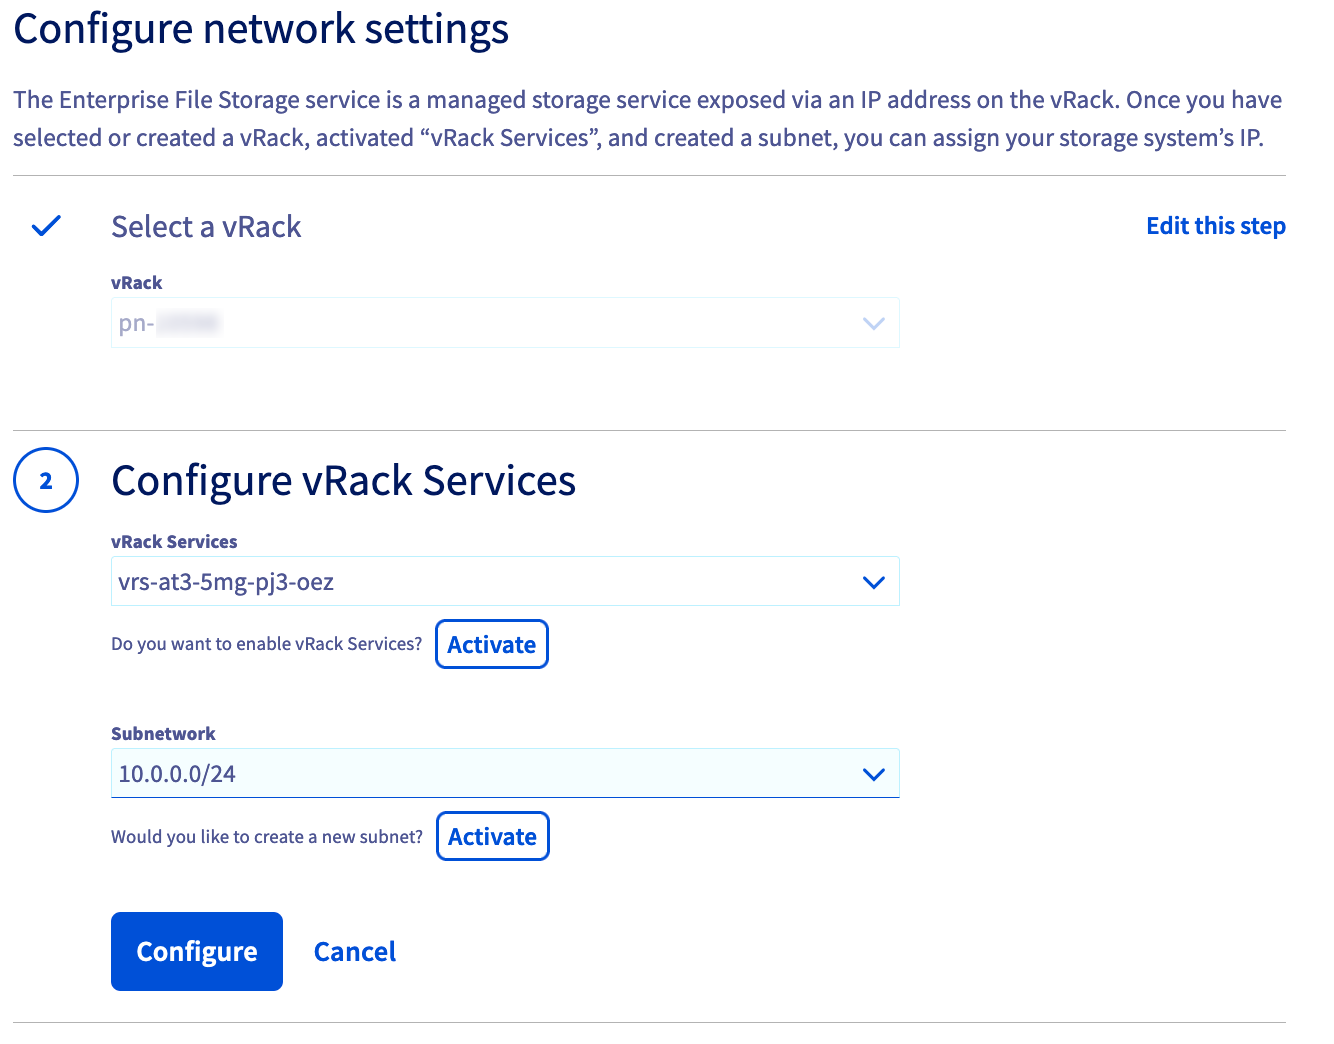
Once you've completed these 3 steps, click the Configure button. You will be redirected to your Enterprise File Storage information page and will be able to follow the deployment of your Service Endpoint.
After a few moments, your new Service Endpoint will be configured and available.
You can now follow the guides below to create and manage your volumes, snapshots and ACLs.
Testing network connectivity from an NFS client to your Service Endpoint
Prerequisites:
- Your NFS client must have a network interface configured in the same subnet as your vRack Services and must be in the same VLAN as well. The vRack Services subnet is not routable and requires a CIDR 24 subnet (x.x.x.x/24 or x.x.x.x/255.255.255.0).
- If this is not possible, you can use a gateway that will translate the address and port to it but you will have to contact OVHcloud support, otherwise you will not be able to mount your NFS shares.
- The IP address of your Service Endpoint is in a subset of CIDR 27, 28 or 29 of your vRack Services subnet.
- The IP address of your Service Endpoint must be unique in your subnet and must be excluded from your DHCP server if you use one.
- Example: vRack Services 10.0.0.0/24 subnet - Service Endpoint 10.0.0.16/29 - Your service will therefore be accessible at IP address 10.0.0.16 in subnet 10.0.0.0/24.
- The arping IP_Endpoint command must return only one MAC address.
- The traceroute -T IP_Endpoint -p 2049 command must not return an error.
- The nmap -sV -T4 -p111,635,2049,4045,4046 IP_Endpoint command must return ports in the OPEN state (essential for the proper functioning of NFSv3).
Go further
Managing Enterprise File Storage from the OVHcloud Control Panel
Enterprise File Storage - API Quickstart
Enterprise File Storage - Managing volumes
Enterprise File Storage - Managing volume ACLs
Enterprise File Storage - Managing volume snapshots
If you need training or technical assistance to implement our solutions, contact your sales representative or click on this link to get a quote and ask our Professional Services experts for assisting you on your specific use case of your project.
Join our community of users.

