Deploy applications to specific Nodes and Nodes Pools
257 visualizaciones
Objective
In this tutorial we are going to show you how to deploy your applications to specific Nodes andNodes Pools, with labels and NodeAffinity Kubernetes concepts, on your OVHcloud Managed Kubernetes Service.
The example chosen here will take advantage of an OVHcloud billing specificity: using monthly billing for nodes that you also plan to keep for the long term can decrease your Kubernetes costs by up to 50%. We are seeing customers with varying workloads creating a first node pool with monthly billing to cover their long-term compute needs, and adding elasticity to the cluster with a second node pool using autoscaling and hourly billing.
We will:
- create a Managed Kubernetes cluster
- create a node pool with 3 nodes and "monthly" billing mode
- create another node pool with autoscaling activated (0 nodes minimum and maximum 10), with "hourly" billing mode
- deploy an application to a specific node pool (and nodes)
Requirements
- a Public Cloud project in your OVHcloud account
OVHcloud Control Panel Access
- Direct link: Public Cloud Projects
- Navigation path:
Public Cloud> Select your project
Instructions
Cluster creation
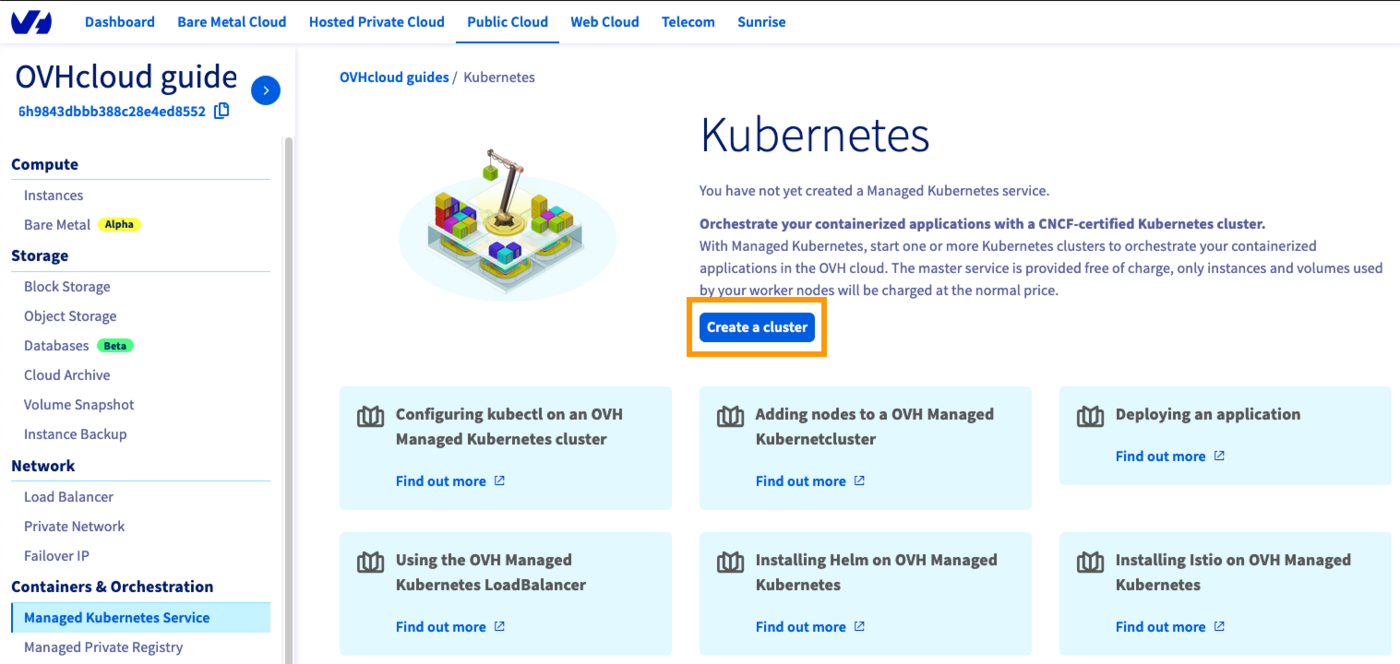
Access the administration UI for your OVHcloud Managed Kubernetes clusters by clicking on Managed Kubernetes Service in the left-hand menu and click on Create a cluster.
Or if you already have a cluster, the UI is a little bit different, you need ton click on Create a Kubernetes cluster button:

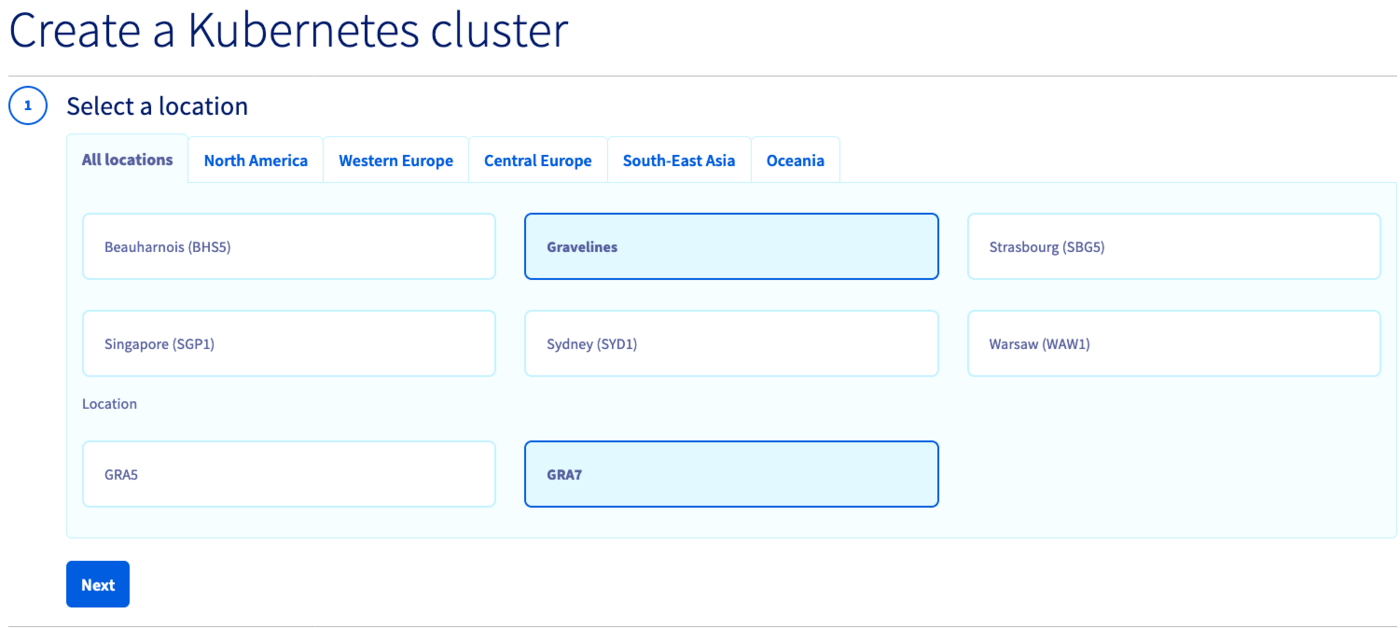
Select a location for your new cluster.
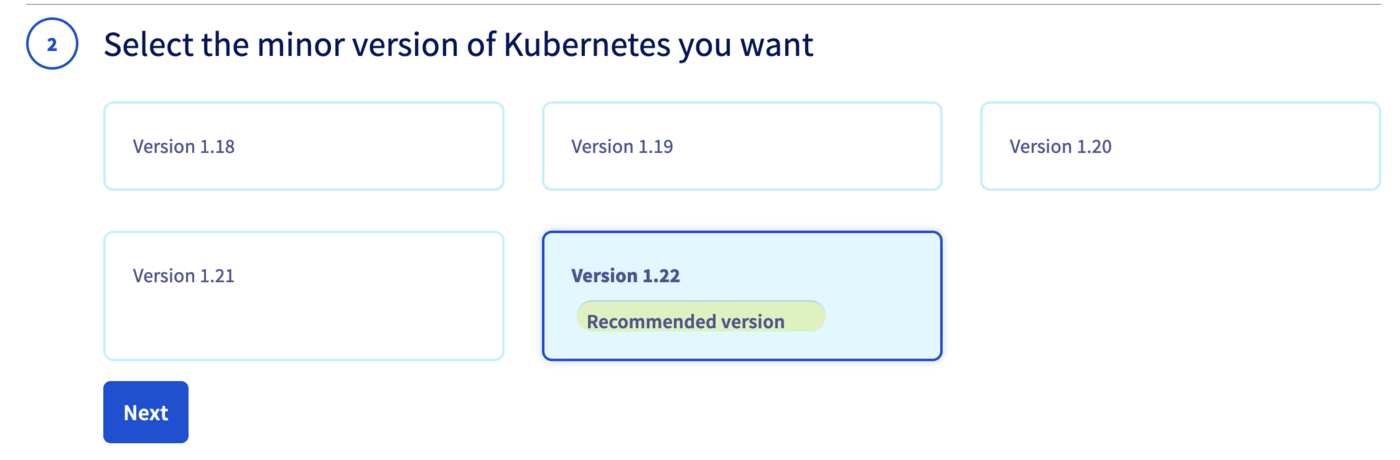
Choose the minor version of Kubernetes.
We recommend to always use the last stable version. Please read our End of life / end of support page to understand our version policy.
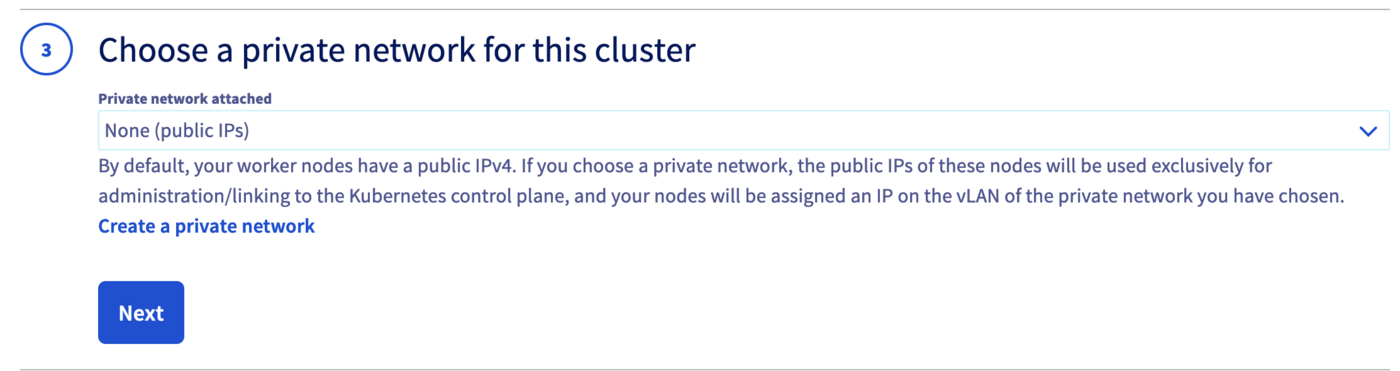
You can now choose to integrate your Kubernetes cluster into a private network using OVHcloud vRack. For more information about this option, please read our guide Using the vRack.
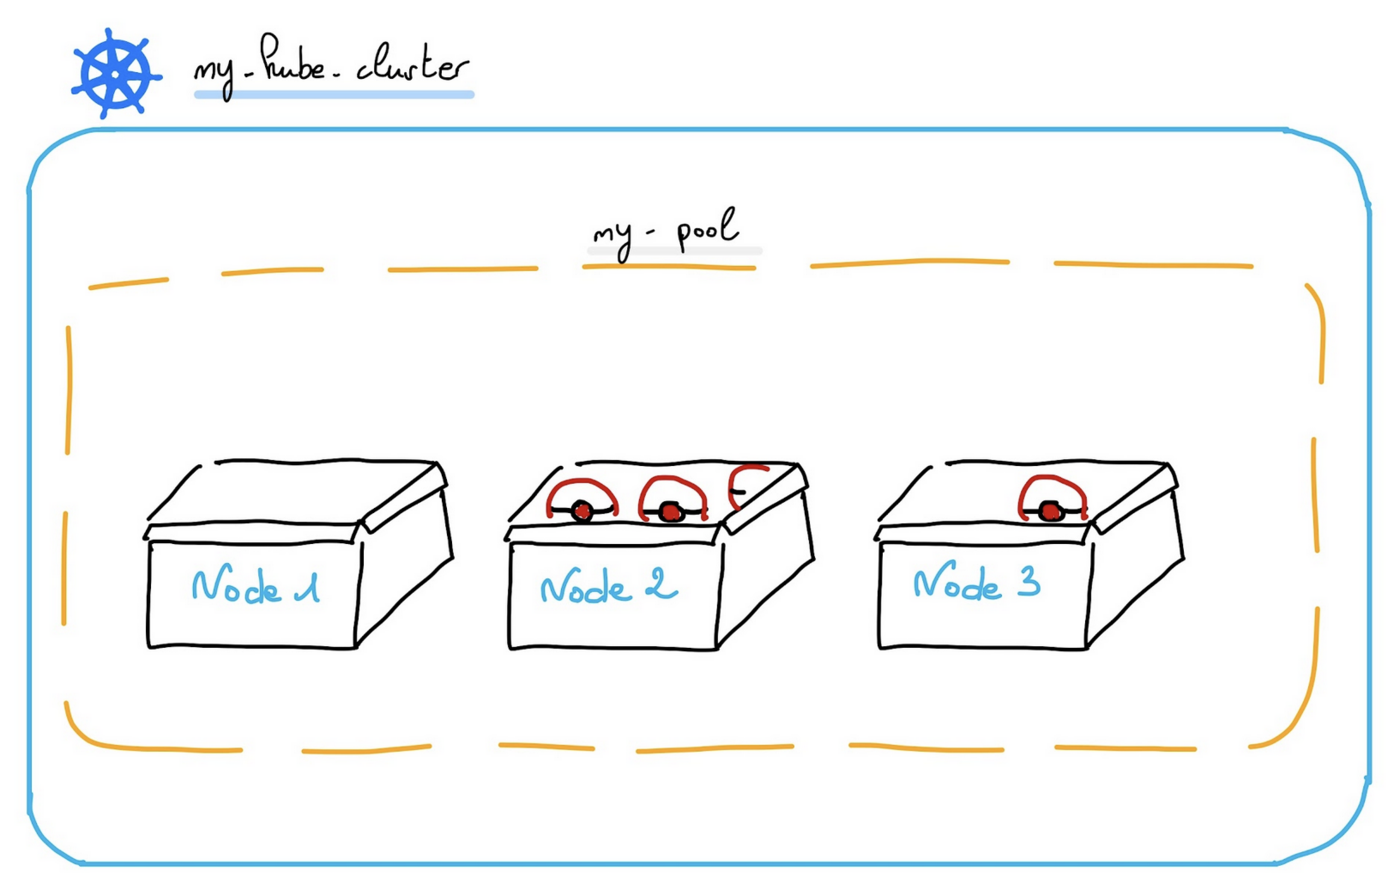
For this tutorial, we will configure two different node pools.
Reminder: A node pool is a group of nodes sharing the same configuration, allowing you a lot of flexibility in your cluster management.
You can read the Managing node pools guide for more information on node pools.
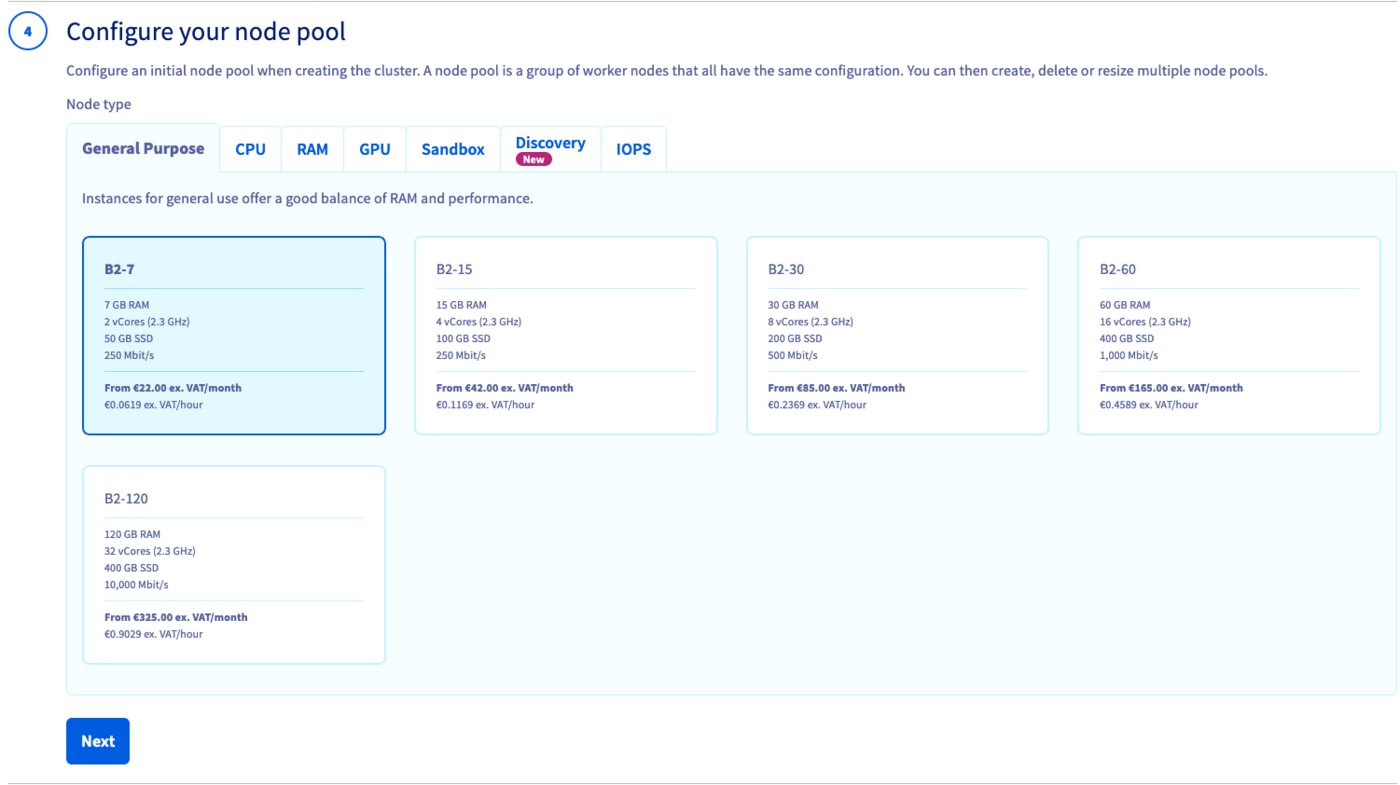
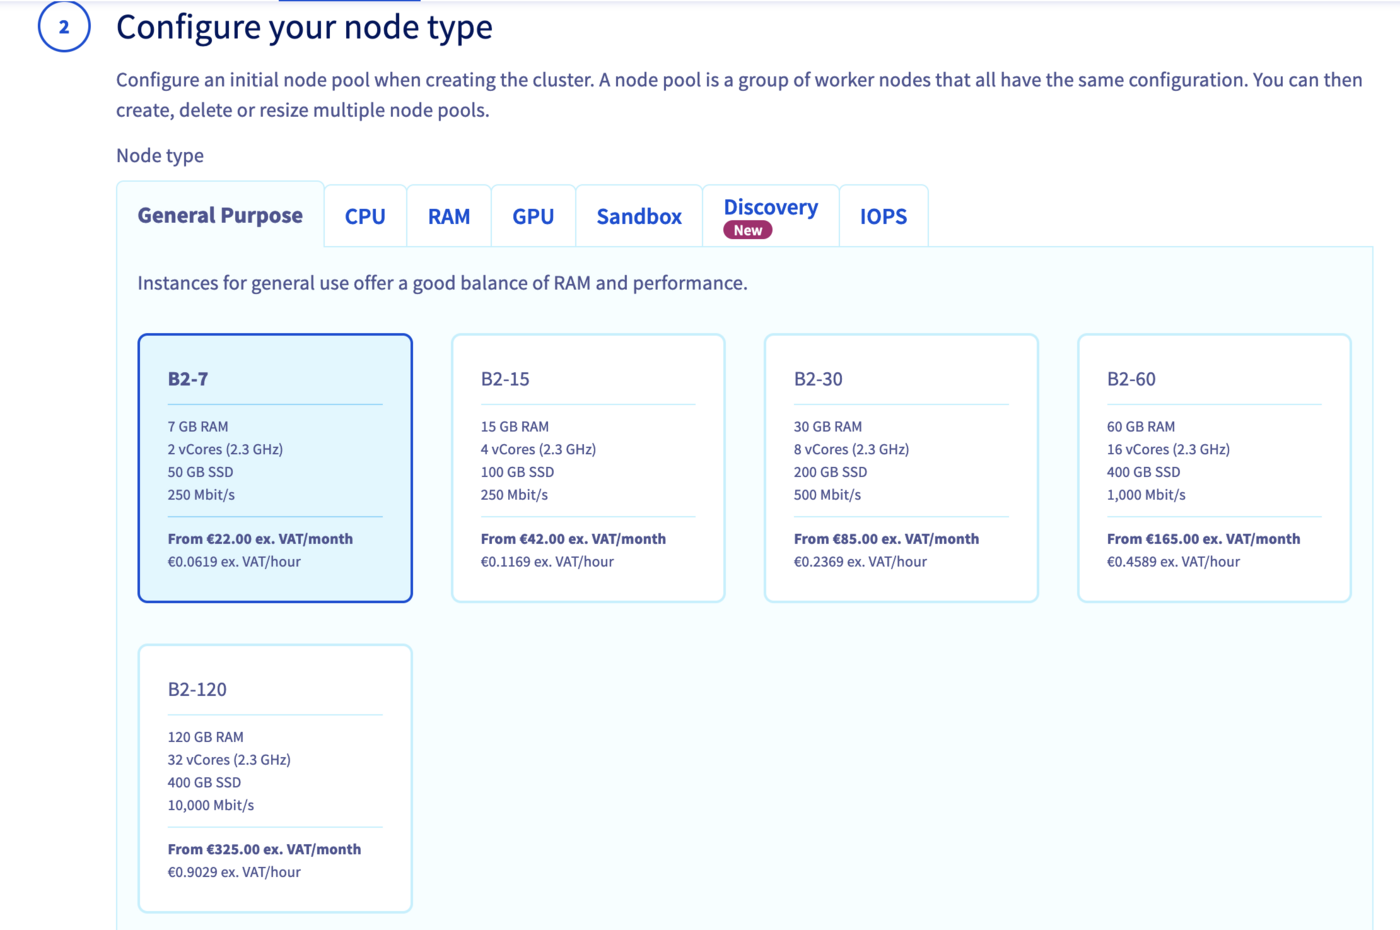
For our first node pool, choose a flavor, "B2-7" for example.
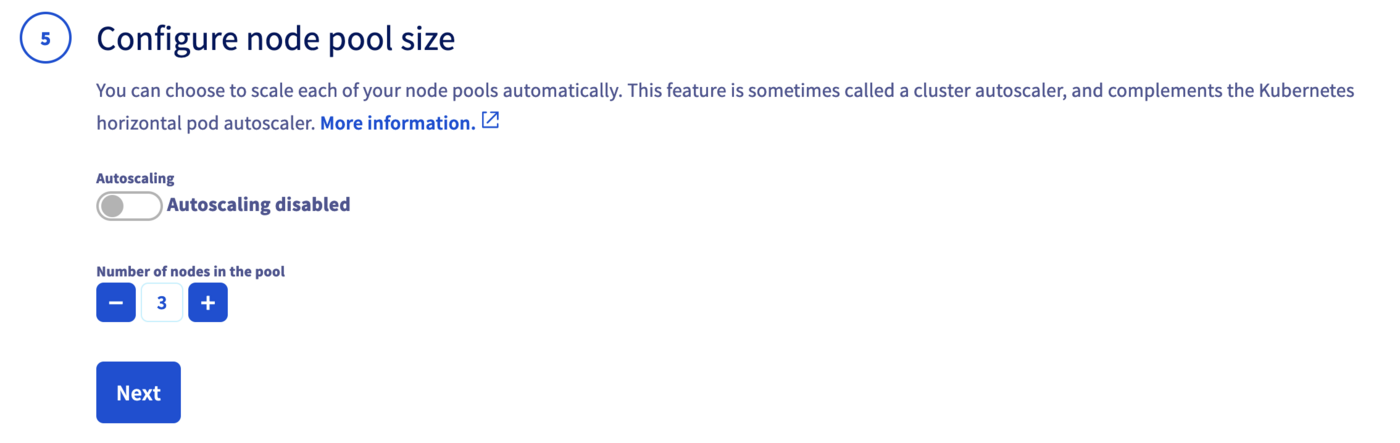
In the next step, define the size of the default node pool.
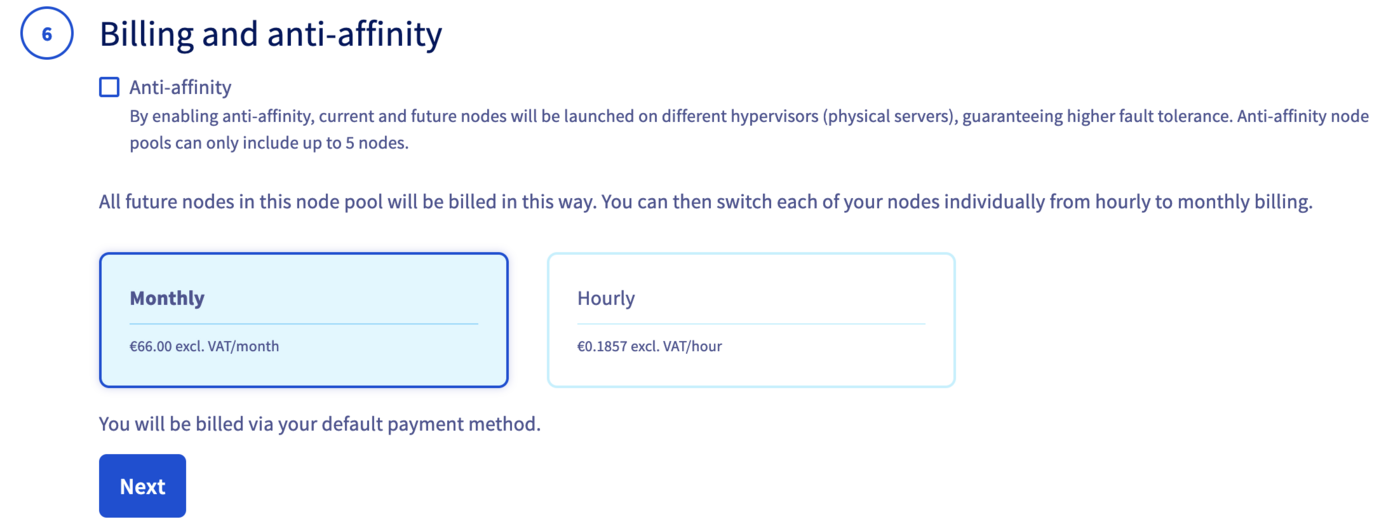
In the next step, choose Monthly billing mode.
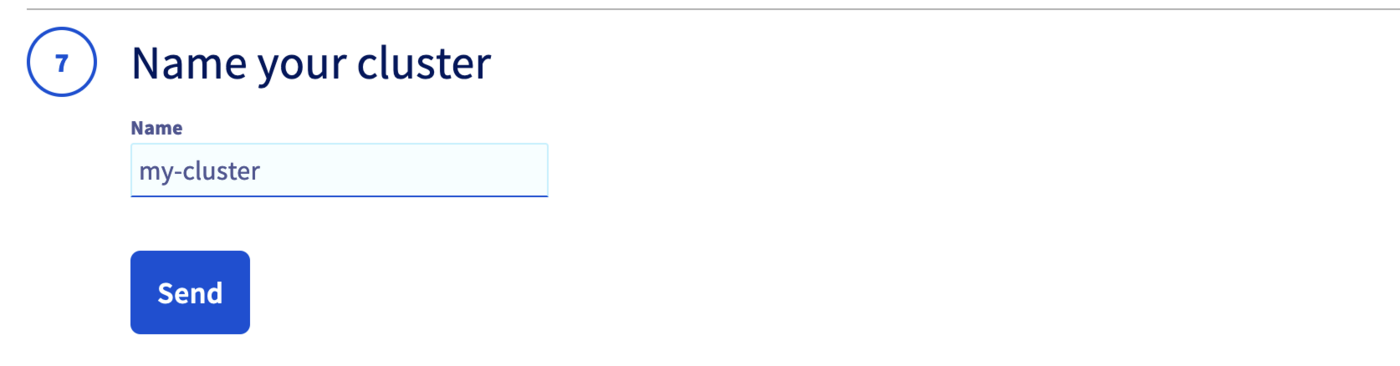
Finally, enter a name for your cluster and click on the Send button.
The cluster creation is now in progress. It should be available within a few minutes in your OVHcloud Control Panel.
Second node pool creation
Now, your Kubernetes cluster is up and running. You can see it in your OVHcloud Control Panel.
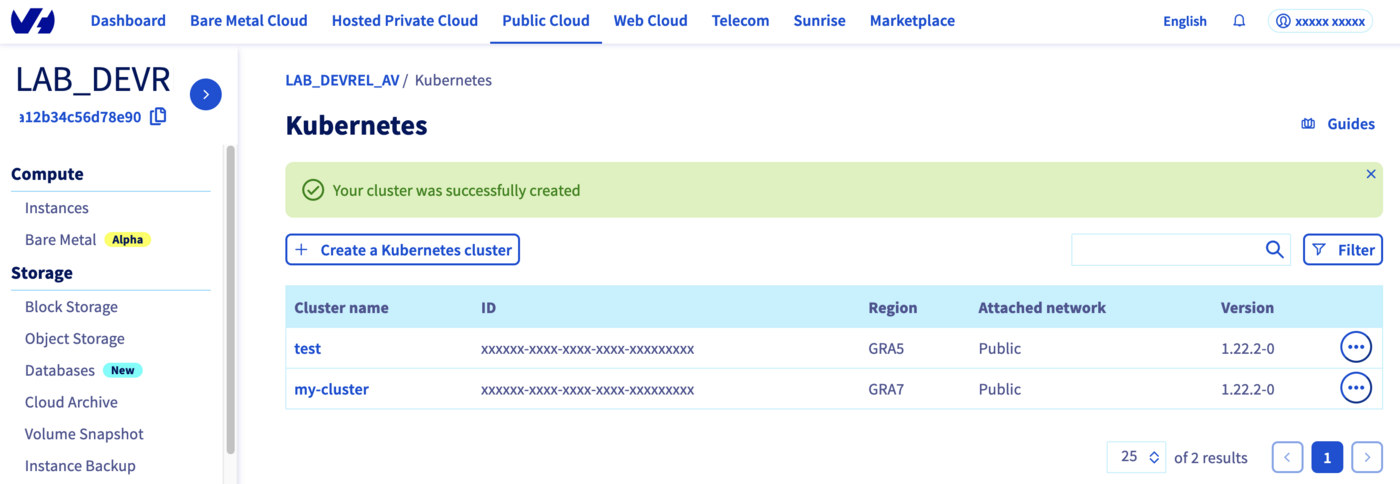
Click on your cluster, then on Node pools tab.
We will create our second Node pool.
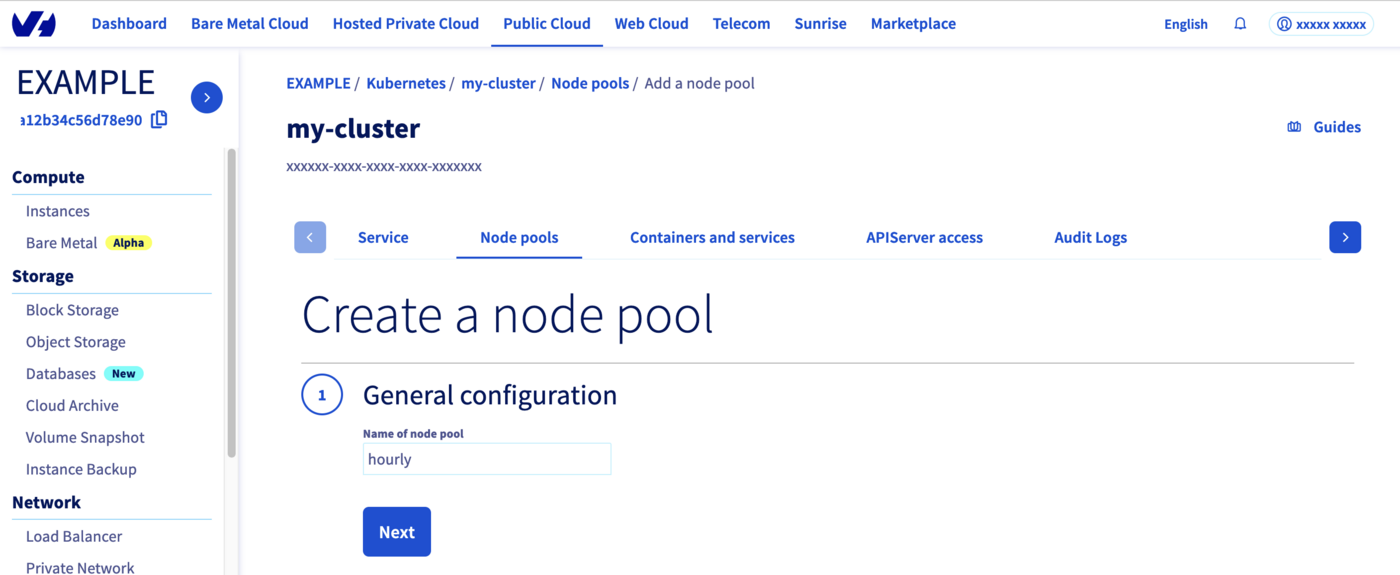
Click on Add a node pool button.
Then enter a name for your second node pool, hourly for example.
Select a flavor for your new node pool, we can choose "B2-7" like our other node pool.
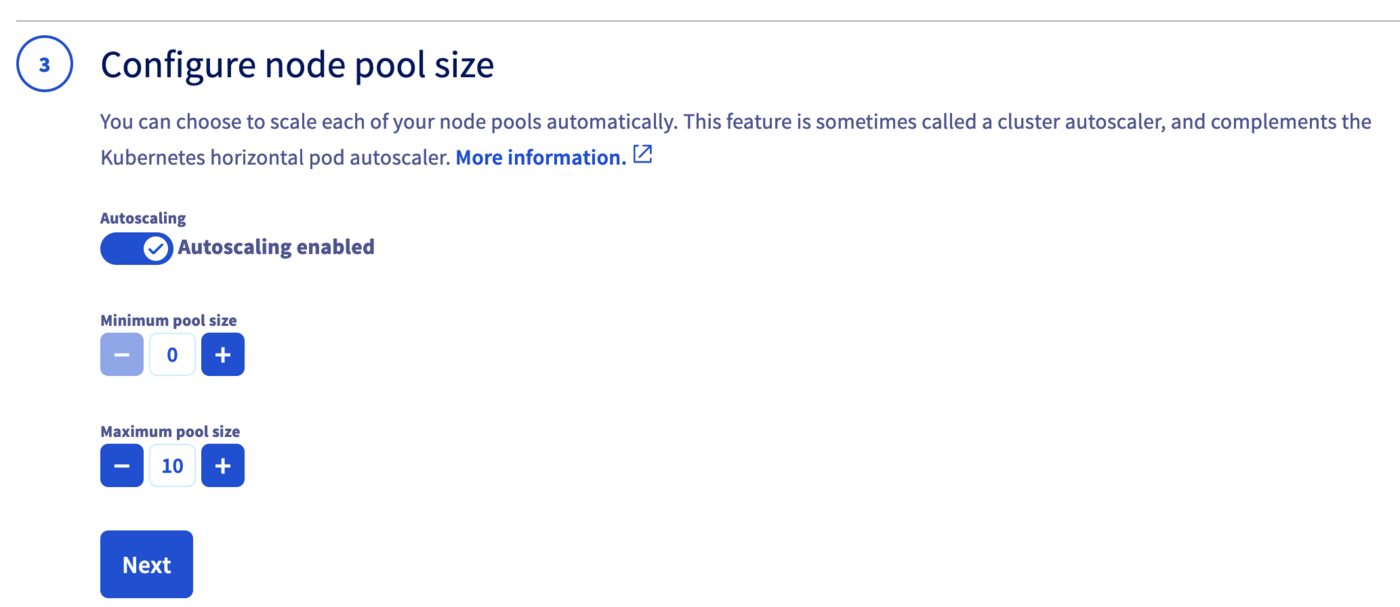
In the next step, define the size of our second node pool.
This time, we can enable the Autoscaling feature.
Define the minimum and maximum pool size in that case, 0 in minimum and 10 in maximum, for example.
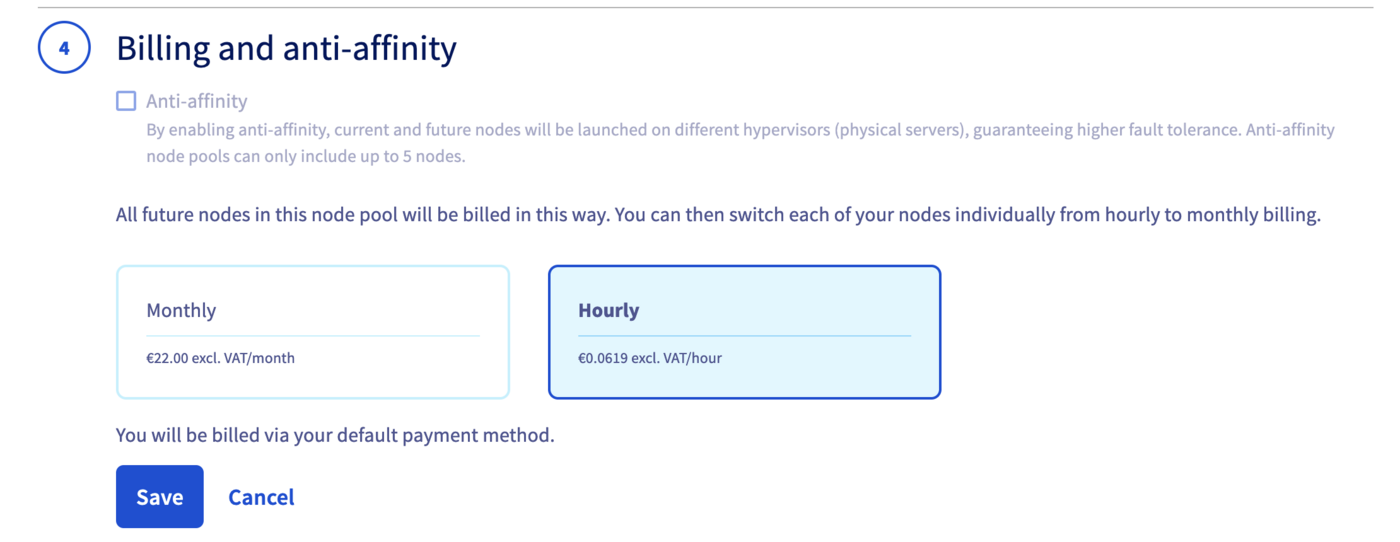
By enabling anti-affinity, current and future nodes will be launched on different hypervisors (physical servers), guaranteeing higher fault tolerance.
And then, choose Hourly billing mode for this second node pool.
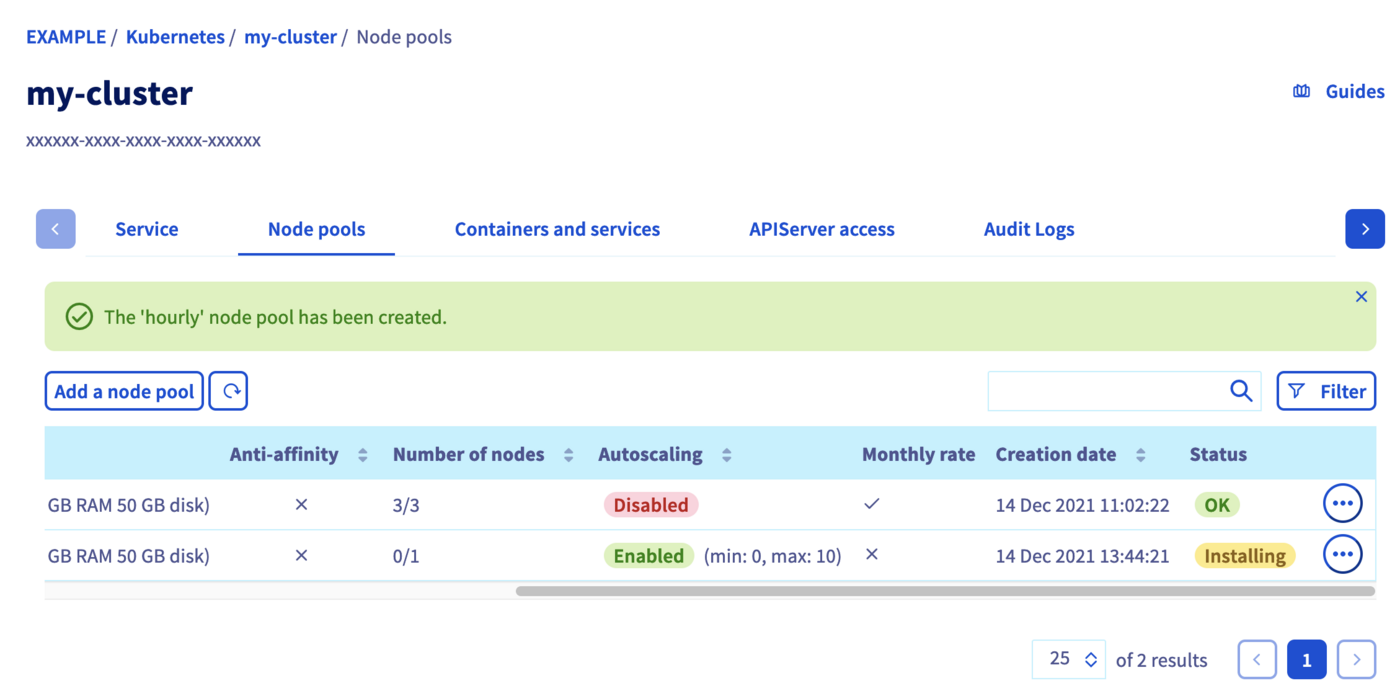
The node pool creation is now in progress. It should be available within a few minutes in your OVHcloud Control Panel.
The second node pool will be first in Installing status.
Wait until its status changes to OK.
Check and prepare our Node pools
To deploy your application on your Kubernetes cluster, we invite you to follow our guide to configuring default settings for kubectl.
When you can access to the cluster through kubectl command, let's display our node pools:
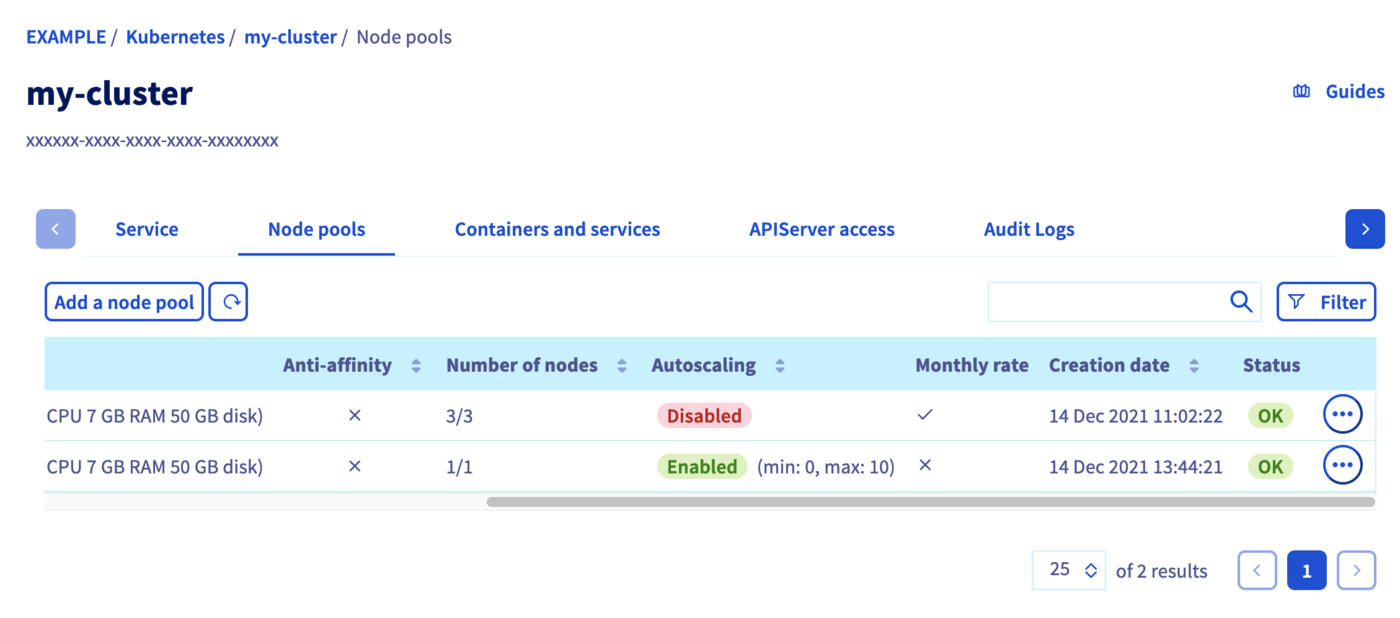
Our two node pools exist and we can see the different configuration and autoscaling mode.
Let's display our nodes. You should have 3 nodes running in our first node pool and 1 node in our "hourly" node pool:
If you don't do anything during several minutes, the AutoScaling in "hourly" node pool will terminate the node because of inactivity:
Deploying our application
It's time to discover the power of labels and NodeAffinity Kubernetes concepts.
We have one node pool with "monthly" billing and another one with "hourly" billing. The goal to have these two node pools is to have the possibility to separate our needs depending on our applications types.
In order to deploy our application in specific nodes, we need to know what is the label of the target node pool.
The thing to know is that the nodes created by Kubernetes have in their label the name of the Node Pool. Thanks to that you can ask Kubernetes to deploy applications in the wanted node pool.
Let's show the labels of our running nodes:
As you can maybe see, our running Nodes got the label nodepool=nodepool-cc40f90c-effb-4945-b7b9-05073725d62d.
The format of the label is: nodepool=<name of the nodepool>.
It's time to deploy an application, only on our hourly node pool and let's see the behavior of the AutoScaling.
Create a deployment.yaml file with this content:
When you apply this YAML manifest, a Pod will be first in Pending state. A new Node will be created. When the new Node will be successfully created, the Pod will be started in this Node.
You have to wait several minutes in order to have a new Node that matches your criteria.
And you can check in which node our application is running:
With this feature you can choose and control where you want to deploy your applications.
Note that a given label can be applied to multiple node pools and / or specific nodes only if it makes sense to you.
Where do we go from here?
In this tutorial you saw how to create, in your OVHcloud Managed Kubernetes cluster, several kinds of node pools and how to deploy your applications easily where you want to.
But do you know that you can do several others Node operations like taint, drain and cordon thanks to Node pool labels propagation to the Nodes?
To learn more about using your Kubernetes cluster the practical way, we invite you to look at our OVHcloud Managed Kubernetes documentation site.
-
If you need training or technical assistance to implement our solutions, contact your sales representative or click on this link to get a quote and ask our Professional Services experts for assisting you on your specific use case of your project.
-
Join our community of users.

