Deploying a Kubernetes Operator based on Helm on OVHcloud Managed Kubernetes
245 visualizaciones
Objective
Operators are one way to extend Kubernetes to automate some actions in the cluster.
In a few words, an operator offers OPS actions programmatically and avoids repetitive human activities that are devoid of added value. The tasks that an operator can do are various and can be on resources deployed in Kubernetes (like a Pod) or outside (like a database for example). In this guide, we are focusing on resources inside a Kubernetes cluster.
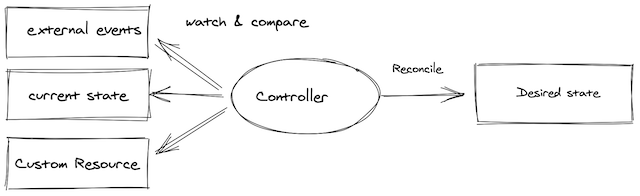
An operator is based on a Custom Resources that allow to extend Kubernetes API.
Thanks to the control loop of Kubernetes, the operator maintains the right state of the resources.
Then the operator's job is to monitor the state of the internal or external objects that it manages.
An operator can have various capabilities:
- basic application setup and configuration
- upgrade the application (with rollback if needed)
- backup and recovery if the operator handles a state
- auto-remediation of the application if a problem occurs
- monitoring and observability for its own metrics
- auto scaling, auto tuning...
A good summary of the capabilities of an operator can be found on the operator framework website.
As an operator is a custom API in Kubernetes, you need to develop it. Thankfully there are frameworks to help you to develop your own operator. The most important framework allows you to develop an operator with Ansible, Helm and Go. Another kind of frameworks exists to use other languages, like Java for instance with the Java operator SDK.
As we can see in the tutorial below, the capability of the developed operator depends on the language. For example, developing an operator with Helm offers less capabilities (but it's simpler).
Requirements
This tutorial assumes that you already have a Kubernetes cluster managed by OVHcloud, and some basic knowledge of how to operate it. If you want to know more on those topics, please look at the deploying a Hello World application documentation.
Instructions
In this tutorial, you will create a simple operator that manages the installation of an Nginx server and monitors it.
The operator allows you to:
- install a Ngnix server with the required number of Pods
- upgrade the number of Pods
- change the HTTP port
- recreate the service if it is deleted
You'll develop this operator with the operator SDK.
The operator SDK provides several tools:
- a CLI to develop and run locally the developed operator
- several helpers in different languages (Helm, Ansible and Go) to easily develop an operator
In this article, you will use the Helm helper.
Install the CLI
The SDK includes a CLI (Command Line Interface).
In order to install the CLI, follow the instructions applicable to your OS.
You can, for example, install it through Homebrew:
Then test if the CLI is correctly installed on your computer:
Output should be like this:
Develop an operator with Helm
In this guide, you will use Helm to create your first operator.
Helm is a package manager and provides templates to deploy applications in Kubernetes.
The CLI offers to scaffold an entire project, but it generates a lot of files that are not necessary for a non prod-ready application.
More information on the project layout generated by the CLI can be found in the official documentation.
The Helm chart
An operator based on Helm is like a classic Helm chart, it will follow the same structure and organization. Your first Helm operator will follow the following code organization:
First, create a helm-charts folder and then an ovh-nginx folder inside it.
Go inside the helm-charts/ovh-nginx folder.
Then, create a templates folder.
In this templates folder, create a file named deployment.yaml with the following content:
Then, in the templates folder, you can create the Service in a service.yaml file with the following content:
Then, still in the templates folder, create a helper to simplify the templates. To do that, create a _helper.tpl file with the content:
Your values need to be defined in a values.yaml file in the ovh-nginx folder with the content:
The operator can only manage fields declared in the values.yaml file and in the custom resource (see the custom resource definition chapter below).
Finally, in the ovh-nginx folder, create the Chart.yaml file with the following content:
At this point, you have a standard Helm chart.
It can be used with the Helm client (helm upgrade for instance) to deploy the Nginx server.
In the following sections you'll see how to delegate this to an operator.
Custom resources definition
The custom resources definition (CRDs) is the main point of the operator.
It allows you to extend the default API of Kubernetes. This means you can work with them the same way you would with its core resources.
In other words, once you have created a CRD, you'll be able to create new resources, called Custom Resources (CRs) to distinguish them from the core Kubernetes resources.
The CRD is some kind of schema for the CR based on it.
It is important to note that CRDs by themselves are just data. They do not have any logic attached to them, nor any special behavior. To add logic you need a controller or an operator.
You need to update your code organisation and add the following folders:
First, create a manifests folder. Go inside it and create a crd folder.
In the crd folder, create a tutorials.ovhcloud.com_ovhnginxoperators.yaml file with the following content:
Then create the watches.yaml file with the following content:
Test it locally (almost)
Before packaging and deploying your operator in a real Kubernetes cluster, you can test it locally.
You still need your Managed Kubernetes cluster to deploy your CRD and the Nginx server managed by the operator.
First, create the CRD in your Kubernetes cluster:
Output should be like this:
At this point there is no need to deploy the operator in the Kubernetes cluster, you can run it locally on your computer:
Output should be like this:
Do not stop the operator execution. It's mandatory that it continues to run for the next steps.
You'll be able to stop it later in this tutorial when you deploy it in the Kubernetes cluster.
Now it's time to create your first CR.
You need to update your code organisation and add the samples folder in the manifests folder:
In the samples folder, create the tutorials_v1_ovhnginxoperator.yaml file with the following content:
Before creating the CR, don't forget to create a namespace. This will be the namespace where the CR will be created and the Nginx server deployed:
Output should be like this:
Then create the CR:
Output should be like this:
At the time, the operator which is currently running detects the new CR and does a few things:
Let's take a look at the resources in your Kubernetes cluster:
Output should be like this:
Get the service external IP:
Output should be like this:
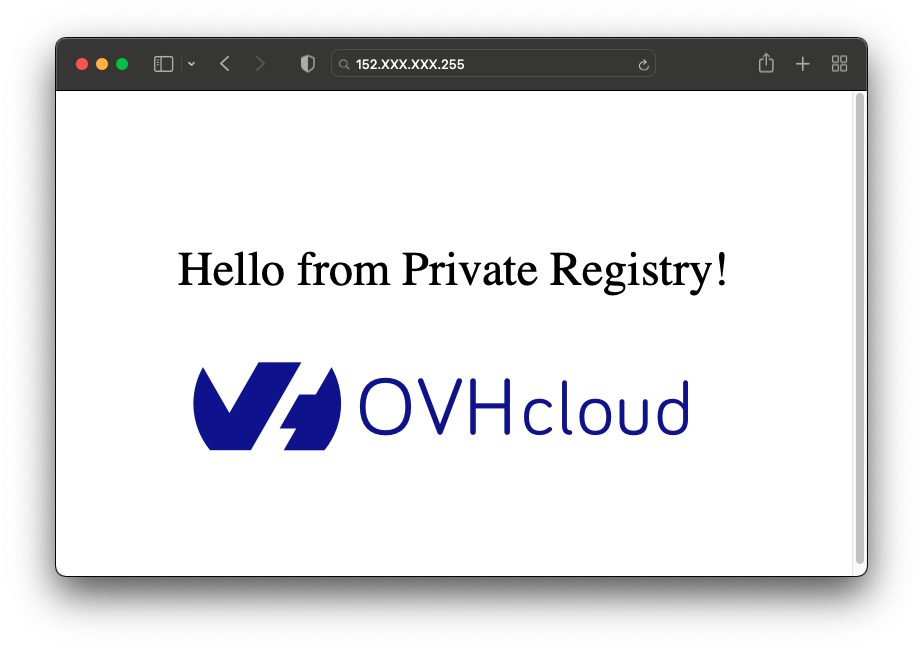
You can now visit the URL http://152.XXX.XXX.255/:
At this step, the operator should be triggered and will delete created pods and services.
Output should be like this:
Deploy the operator on the OVHcloud Managed Kubernetes cluster
Now we will show you how to deploy your operator on a Kubernetes cluster. You can now safely stop the local operator running in your terminal.
To be more readable, the following resources are simpler than the one you will have to create in the real world, especially the security configuration.
The packaging of an operator is like a classic application.
First, create a Dockerfile file in the root folder with the following content:
Then, build the image and push it to your favorite registry. In order to create a private registry, you can follow the how to create an OVHcloud private registry tutorial.
Output should be like this:
The last step is to deploy your operator in the Kubernetes cluster.
First, create the namespace for the operator:
Output should be like this:
Now you need to create a Kubernetes secret in order to tell Kubernetes what are the credentials to login and pull images to your Docker private registry:
Output should be like this:
Then, create the ovh-nginx-operator.yaml file in the manifests folder with the following content:
The path to the operator's image must be the same value as the [YOUR_PRIVATE_REGISTRY_URL] field in the previous examples.
Apply the file to the Kubernetes cluster:
Output should be like this:
It's time to test the operator.
Once again, you can apply the CR of the samples folder:
Output should be like this:
Now you can change the operator behaviour and tell it to create two replicas instead of one.
To do that, in the samples folder, edit the tutorials_v1_ovhnginxoperator.yaml file with the following content:
Then, display the pods and service:
Output should be like this:
Cleanup
If you want, you can uninstall the Nginx server and the operator.
First, delete your CR to delete the deployed Nginx server:
Then, delete the namespace:
Then, delete all resources and the operator itself:
Finally, delete the CRD:
What’s next
To go deeper on the Kubernetes operators topic, follow the other Kubernetes tutorials in the Operators section.
Go further
The operator pattern in Kubernetes.
The operator SDK.
-
If you need training or technical assistance to implement our solutions, contact your sales representative or click on this link to get a quote and ask our Professional Services experts for assisting you on your specific use case of your project.
-
Join our community of users on https://community.ovh.com/en/.

