Creating and using a Server Group in Horizon and CLI
35 visualizaciones
Objective
This documentation explains how to use the Server Groups feature to control the scheduling of a group of instances.
Using Server Groups to provide a mechanism to group instances according to a certain policy.
Prerequisites
- A Public Cloud project in your OVHcloud account
- Access to the Horizon interface
To use the OpenStack CLI, make sure you consult the following guides:
- Prepare the environment to use the OpenStack API by installing python-swiftclient.
- Load the OpenStack environment variables.
Definition
Policies
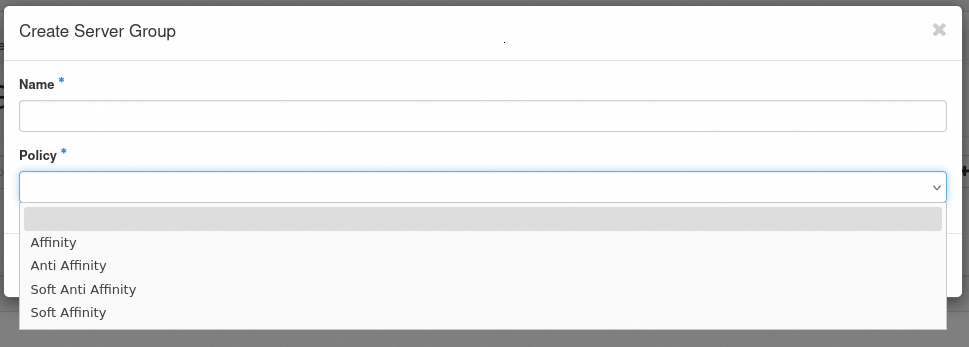
A Server Group can have one of four different policies: Affinity, Soft Affinity, Anti Affinity or Soft Anti Affinity.
Affinity
A Server Group with the policy of affinity will make sure that all the instances in that group are always placed on the same physical compute node.
Soft Affinity
A Server Group with the policy of soft affinity will try to make sure that all the instances in that group are placed on the same physical compute node, but ultimately will allow it if otherwise not possible.
Anti Affinity
A Server Group with the policy of anti affinity will make sure that the instances in that group are never placed on the same physical compute node.
Soft Anti Affinity
A Server Group with the policy of soft anti affinity will try to make sure that all the instances in that group are not placed on the same physical compute node, but ultimately will allow it if otherwise not possible.
Step 1: Creating Server Groups
- Log in to the Horizon interface.
- Select the appropriate region from the drop down menu at the top left.
- Click on
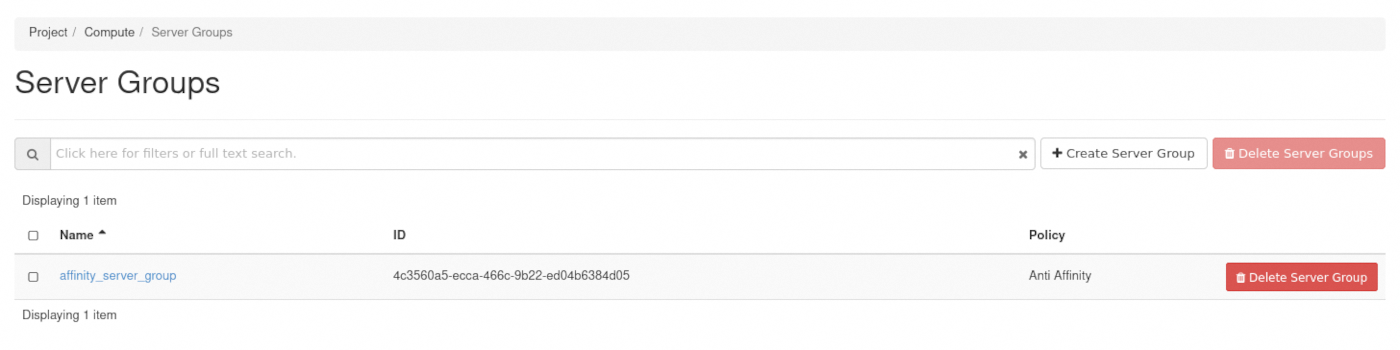
Computein left tab, then onServer Groups. - Next, cick on
+ Create Server Group. - In the popup window that appears, select a
NameandPolicyfor your server group. - Click on
Submit.
To create a Server Group, use the following command:
Step 2: Creating an Instance with a Server Group
Horizon can create, read, update, and delete, as well as obtain a list of Server Groups for a tenant to enable the specification of a group when starting a virtual machine.
- Log in to the Horizon interface.
- Select the appropriate region from the drop down menu at the top left.
- Click on
Computein left tab, then onInstances. - Click on
Launch Instance. - In the pop-up window, fill in the required fields to create your instance. In the
Server Groupfield, click on the drop-down arrow next toAvailableto display the list of available Server Groups. Select a Server Group and it will be moved toAllocated.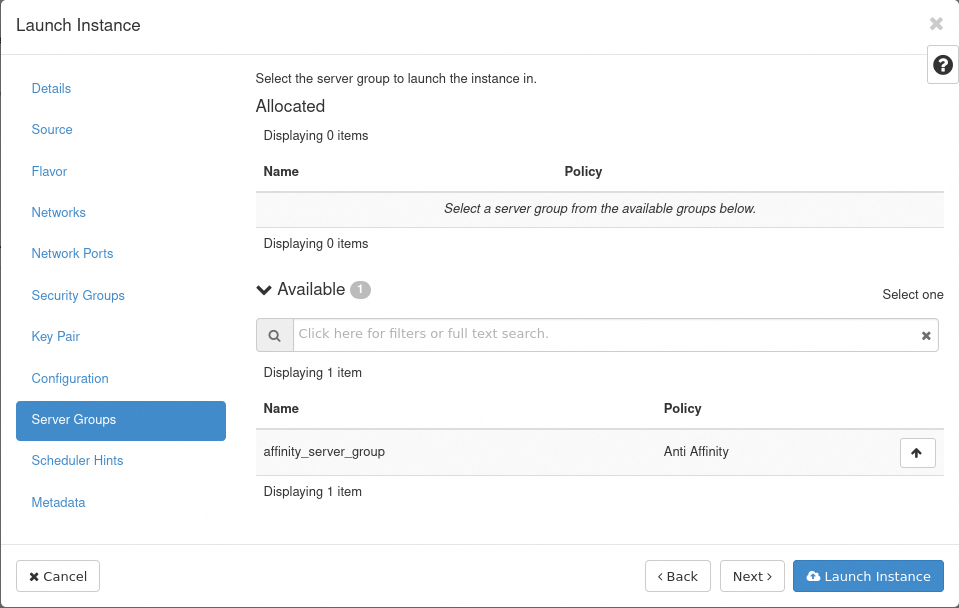
- Once done, click on
Launch Instance.
To apply a Server Group policy, you must specify the group when creating an instance, as a scheduling hint.
To do that, use the --hint parameter in the following command:
If you subsequently launch more instances referencing the same Server Group, the scheduler concentrates or distributes them according to the Server Group's policy.
Modifiying a Server Group
Once created, a Server Group cannot be modified.
In addition, an instance cannot be moved between Server Groups.
In both cases, this is because it would potentially require moving the instance to comply with the Server's Group policy.
Troubleshooting common issues
If you keep creating instances within a Server Group with a policy of anti affinity, you will eventually exceed the total amount of physical compute nodes in the region.
The command will still succeed, but the instance will subsequently fail to be scheduled to a compute node.
Instead, it will assume the ERROR status with the following fault message: _No valid host was found. There are not enough hosts available.
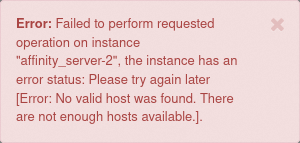
Another reason is that OpenStack cannot schedule the instance on a different physical compute node because there is already a server in the Server Group on every node.
The same scheduling error and "fault" message will occur when using a Server Group with a policy of affinity as well, when you create more instances than a physical compute node can host.
However when using a Soft Affinity policy, such as soft affinity or soft anti affinity, the scheduler is allowed to break the Server Group's policy if it is unable to uphold it.
Checking an instance in a Server Group
This means you may want to verify that your instances are on the same or on different physical compute nodes by looking at their hostId value.
We deployed four instances, two named anti_affinity_server with an anti affinity Server Group and two named affinity_server with an affinity Server Group:
You can confirm the scheduler was done following the policy of the Server Group with the following command:
With the 4 instances created, we obtain the following output example:
hostId is a unique identifier for each physical compute node. By comparing this value across your various instances, you can ensure that your Server Group policy is being followed or not.
It's not possible to compare hostId between different projects because the values are unique for each project.
Server Group quota
You have to use or specify --os-compute-api-version 2.50 or higher to see server-groups and server-group-members output for a given quota class.
Regarding quota, Server Groups and Server Groups Members are in the Compute Service Quotas.
| Quota | Description | Property name |
|---|---|---|
| Server Groups | Number of server groups per project. | server_groups |
| Server Group Members | Number of servers per server group. | server_group_members |
Here is an output example:
Go further
Join our community of users.

