Documentación de OVHgateway (EN)
308 visualizaciones
Objective
“OVHgateway” is the name of the outgoing point of your cluster to the internet.
This guide will explain how this gateway works, and how to redeploy it.
Requirements
OVHcloud Control Panel Access
- Direct link: vRack
- Navigation path:
Network>vRack private network
Instructions
Technical details
General information
The VM is based on Alpine Linux 3.18.2.
The gateway is built on an Alpine Linux base, on which we have added the necessary packages to cloud-init.
You must replace this gateway with one of your choice. The OVHgateway cannot be managed. You can't connect to it to make changes. There is no way to connect via SSH or any other protocol. It is also not possible to connect from the console via Prism Central. You can use this guide: OVHgateway replacement.
The OVHgateway has a lightweight design, with 2 NICs, 1 vCPU, 1 GB of memory and 1 GiB of disk space.
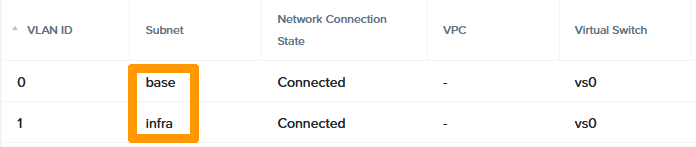
eth0is the interface for the external network and owns the Additional IP address in the subnet base with VLAN 0.eth1is the interface for the internal network in the subnet infra with VLAN 1.
OVHcloud teams have customised the VM with an IPTABLES script.
There is no way to connect with SSH or any other protocol. It is also not possible to log from the console via Prism Central.
The VM is used only to NAT traffic between hosts, CVM, VM and Internet.
ICMP requests are only allowed in the private network.
User data script
The VM is deployed with cloud-init, a tool that applies user data to your instances automatically.
How to redeploy the VM gateway with the central Prism interface
Step 1: Collect information
To redeploy the gateway VM you will need:
- Additional IP address
- LAN subnet (subnet of CVM, Prism Central, AHV hypervisors)
- Subnet name
Check the Additional IP address
In the management section of your vRack, verify the Additional IP address used by the Nutanix Cluster.

The following instructions will use the IP block 198.51.100.0/30 for example purposes.
For vRack purposes, the first, penultimate, and last addresses in any given IP block are always reserved for the network address, network gateway, and network broadcast respectively. This means that the first usable address is the second address in the block, as shown below:
Check the private subnet or gateway private IP address
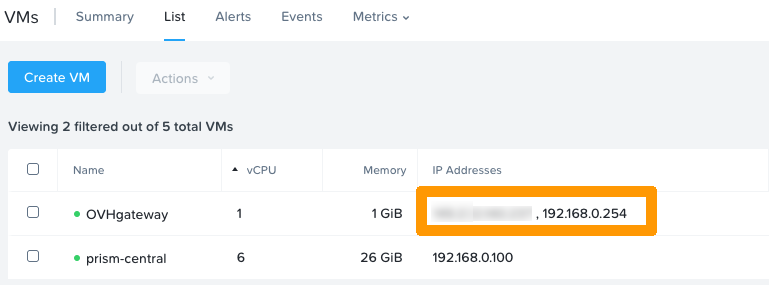
If the gateway still exists, go to the VM in the VM section of your Prism Central WebUI.
The gateway IP is displayed here.
However, if the gateway is not present, check the subnet by going to Hardware then Hosts in the Prism Central WebUI.
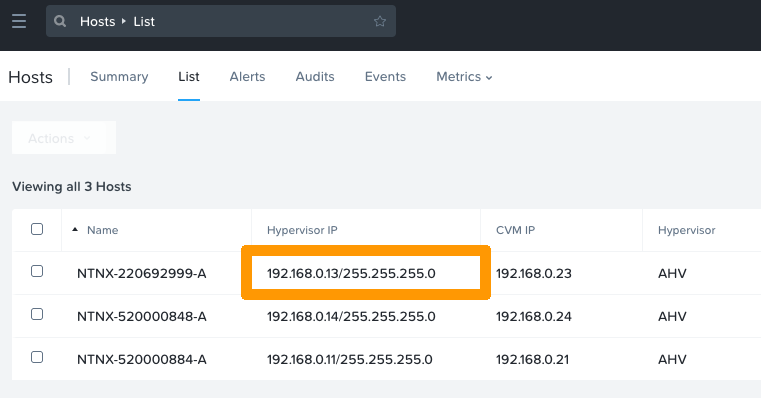
In this case the subnet is 192.168.0.0/24. In the default configuration, the gateway IP address is therefore 192.168.0.254.
Retrieve the subnet name
If the gateway still exists, go to the VM in the VM section of your Prism Central WebUI.
Click on the OVHgateway VM and open the NICs tab.
Step 2: create the VM
Log in to Prism Central and create a VM.
Customise the VM name and characteristics.
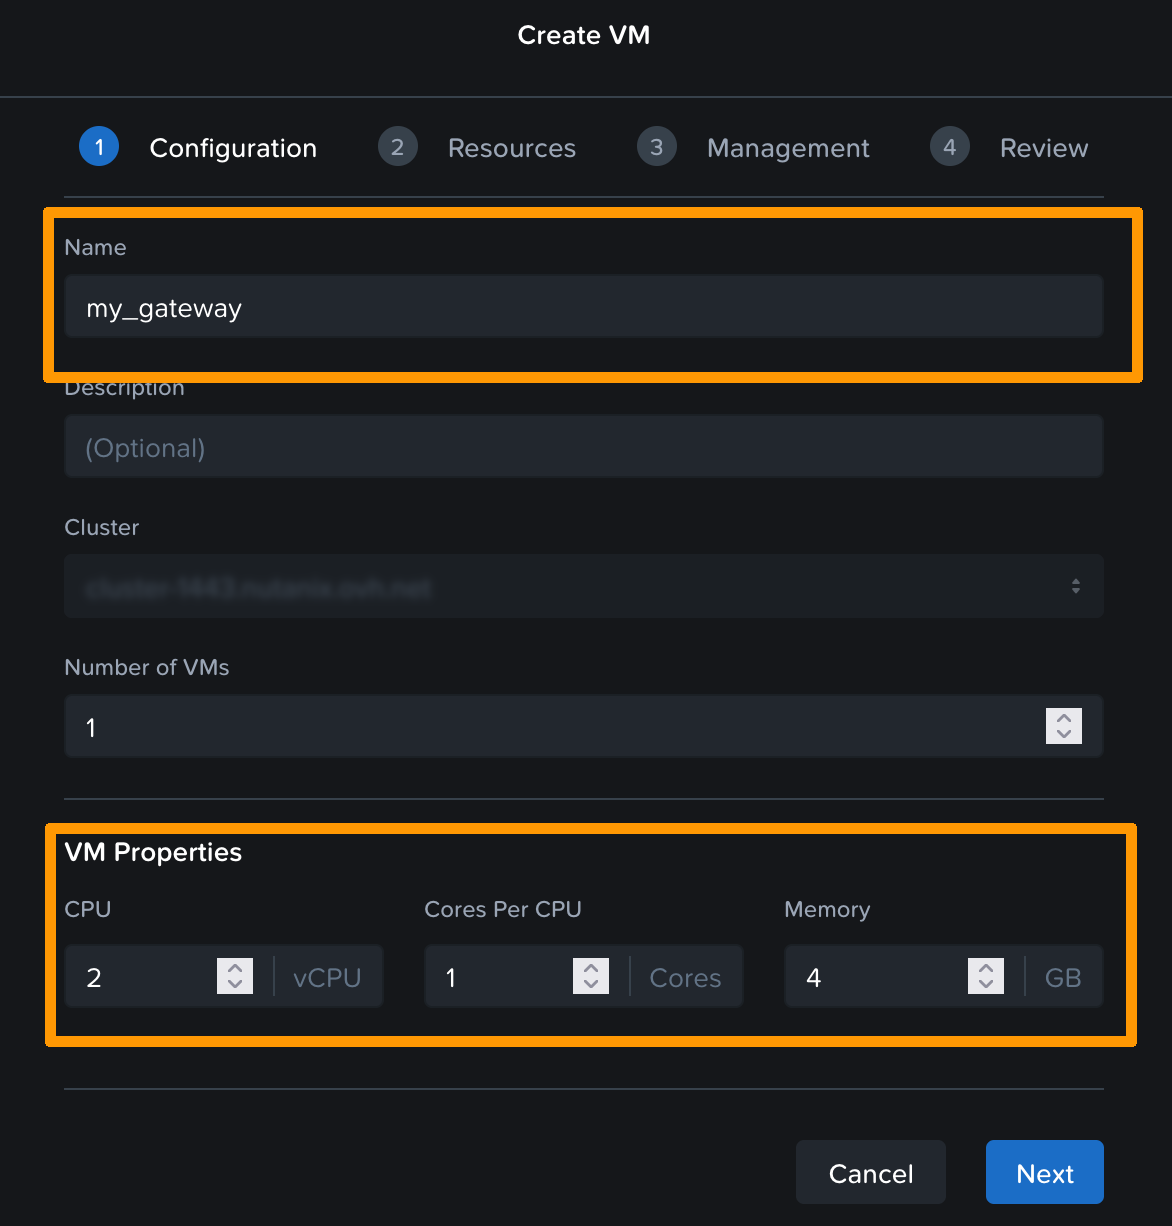
Click Next
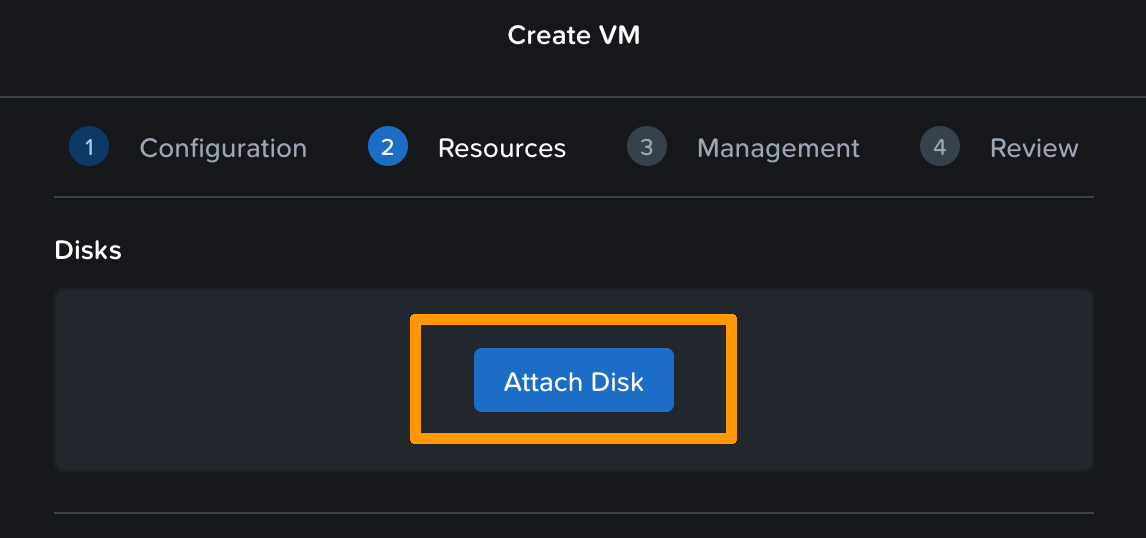
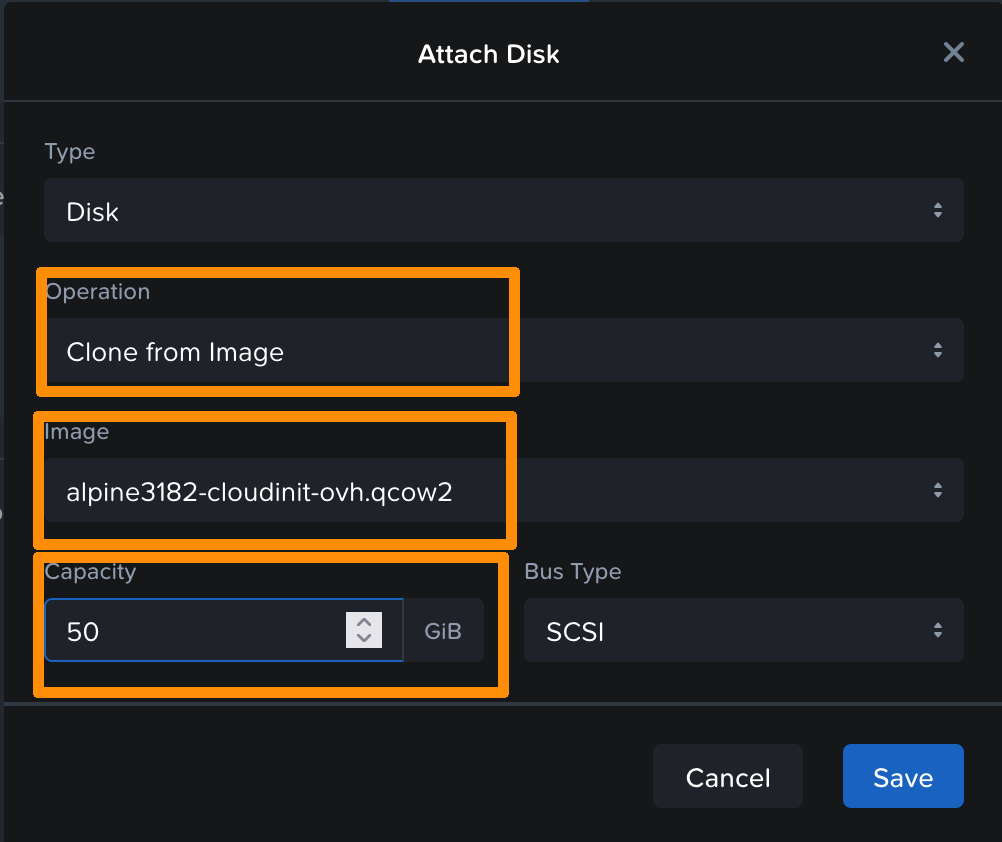
You then need to attach a disk. To do this, you can select the image used to create the original gateway.
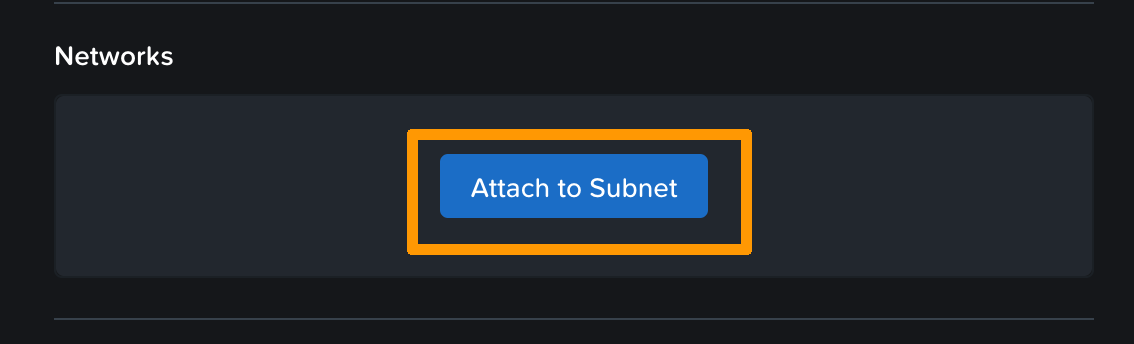
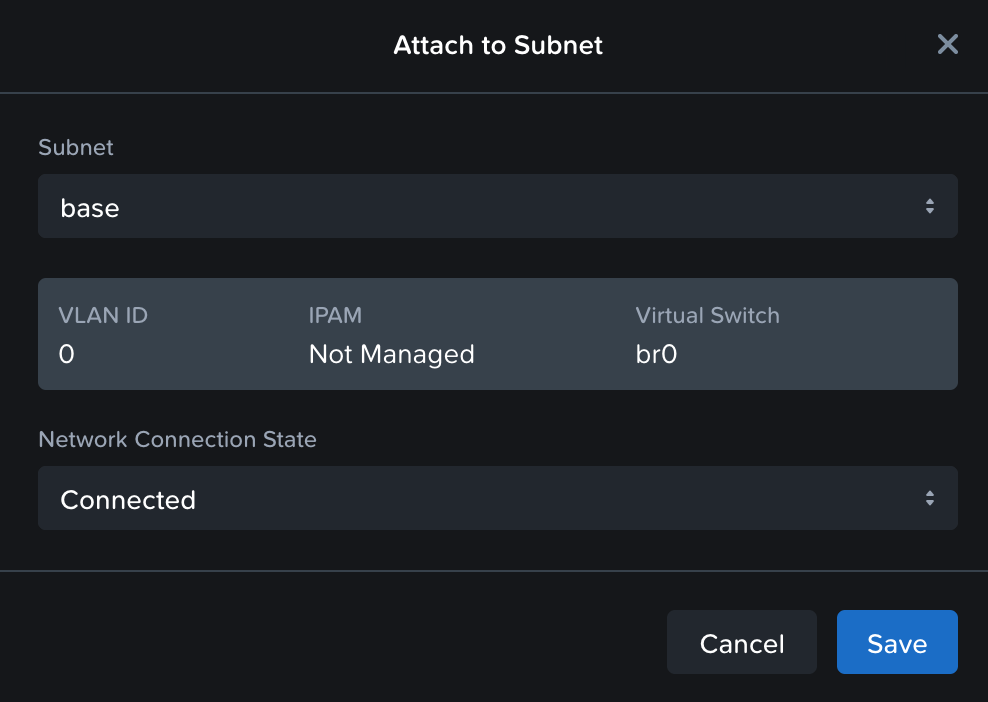
Then add two nics to the “base” network:
Click Next.
In the management interface, choose cloud-init in the “Guest customisation” section.
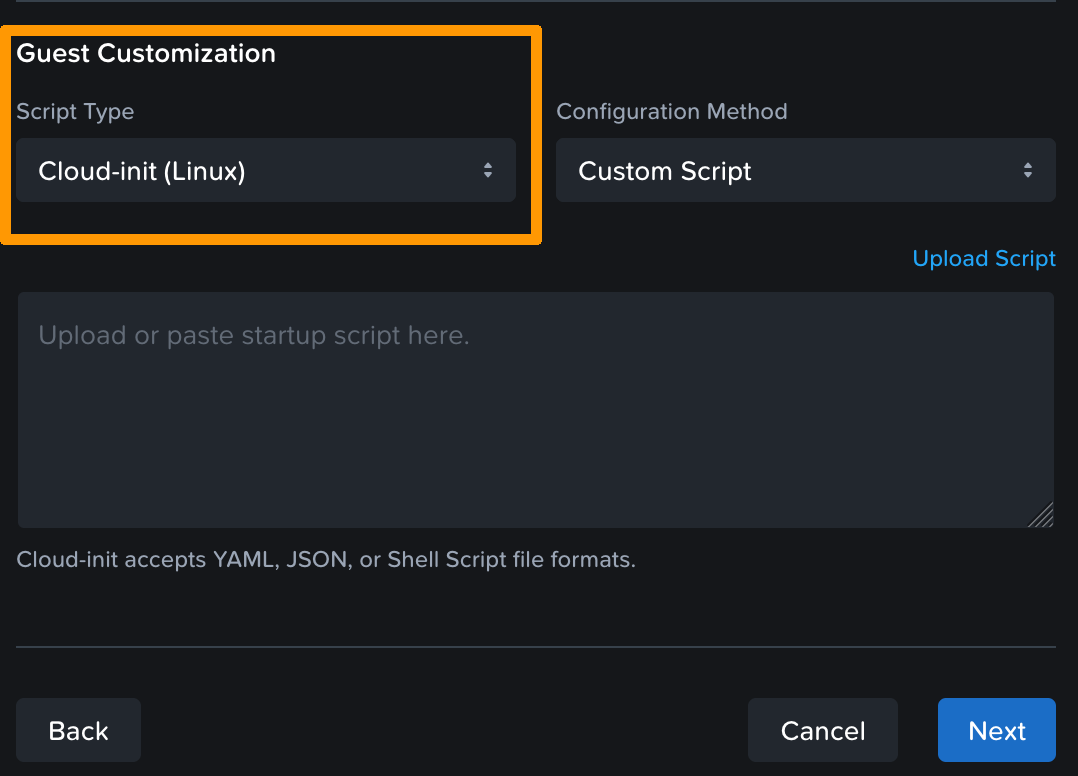
You now need to create a yaml script to define the parameters. This script contains the user data. When the system boots, these settings such as users, packets, files, etc. will be applied to the VM.
Below, you will find a template that you can modify with your values to create your VM.
You can use the original VM creation file or use a custom file to create your own gateway. This is what we will see in this example.
- Replace the
hostname,fqdn,name,passwd,ssh-autorized-keysand IP addresses with the values you want. - This file creates the network configuration, resizes the disk to occupy all the space, and then reboots.
- Warning: once created, your VM is exposed on the internet.
Paste this script into the box provided.
Click Next, then Create VM.
Wait a few minutes for the VM to take into account all settings.
Go further
If you need training or technical assistance to implement our solutions, contact your sales representative or click on this link to get a quote and ask our Professional Services experts for assisting you on your specific use case of your project.
Join our community of users on https://community.ovh.com/en/.

