Install SAP HANA on Bare Metal with SLES 15 for SAP
339 visualizaciones
Objective
This guide provides instructions for deploying the SLES 15 for SAP image on an OVHcloud dedicated server and preparing it for SAP HANA.
Requirements
OVHcloud Control Panel Access
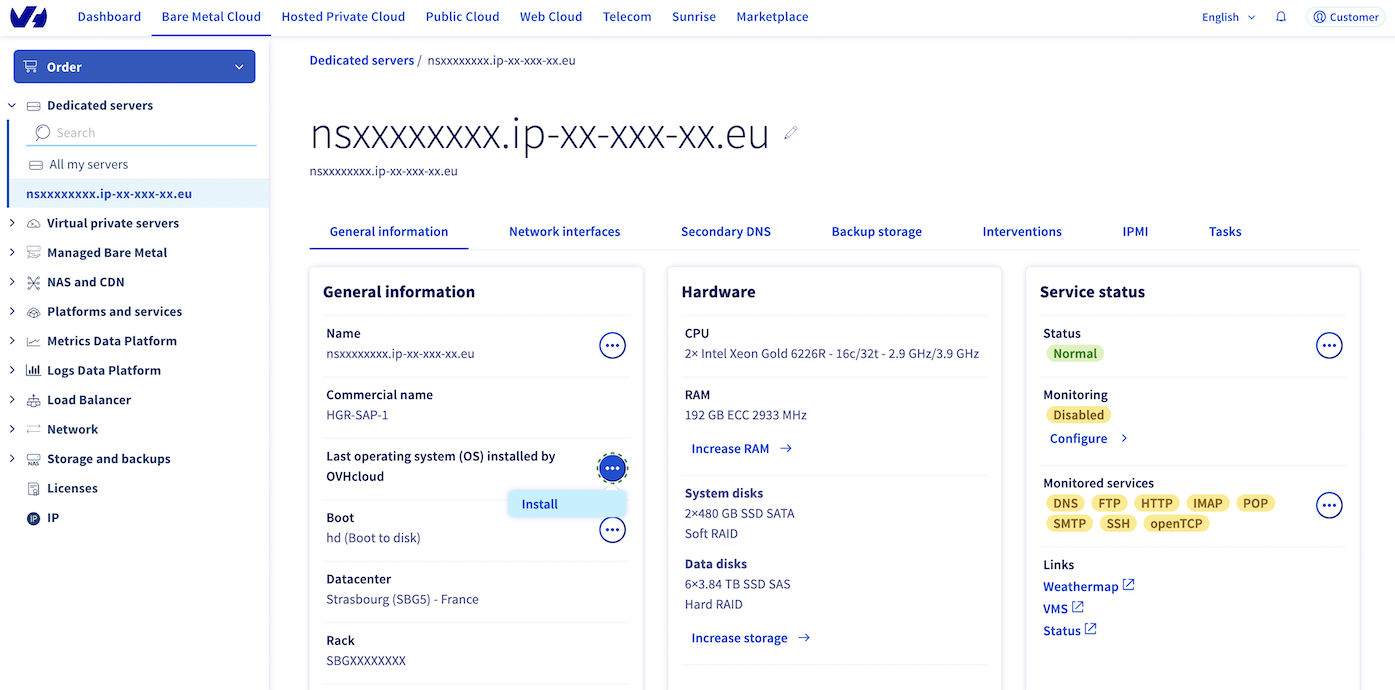
- Direct link: Dedicated Servers
- Navigation path:
Bare Metal Cloud>Dedicated servers> Select your server
Instructions
Deployment of the SLES 15 for SAP image
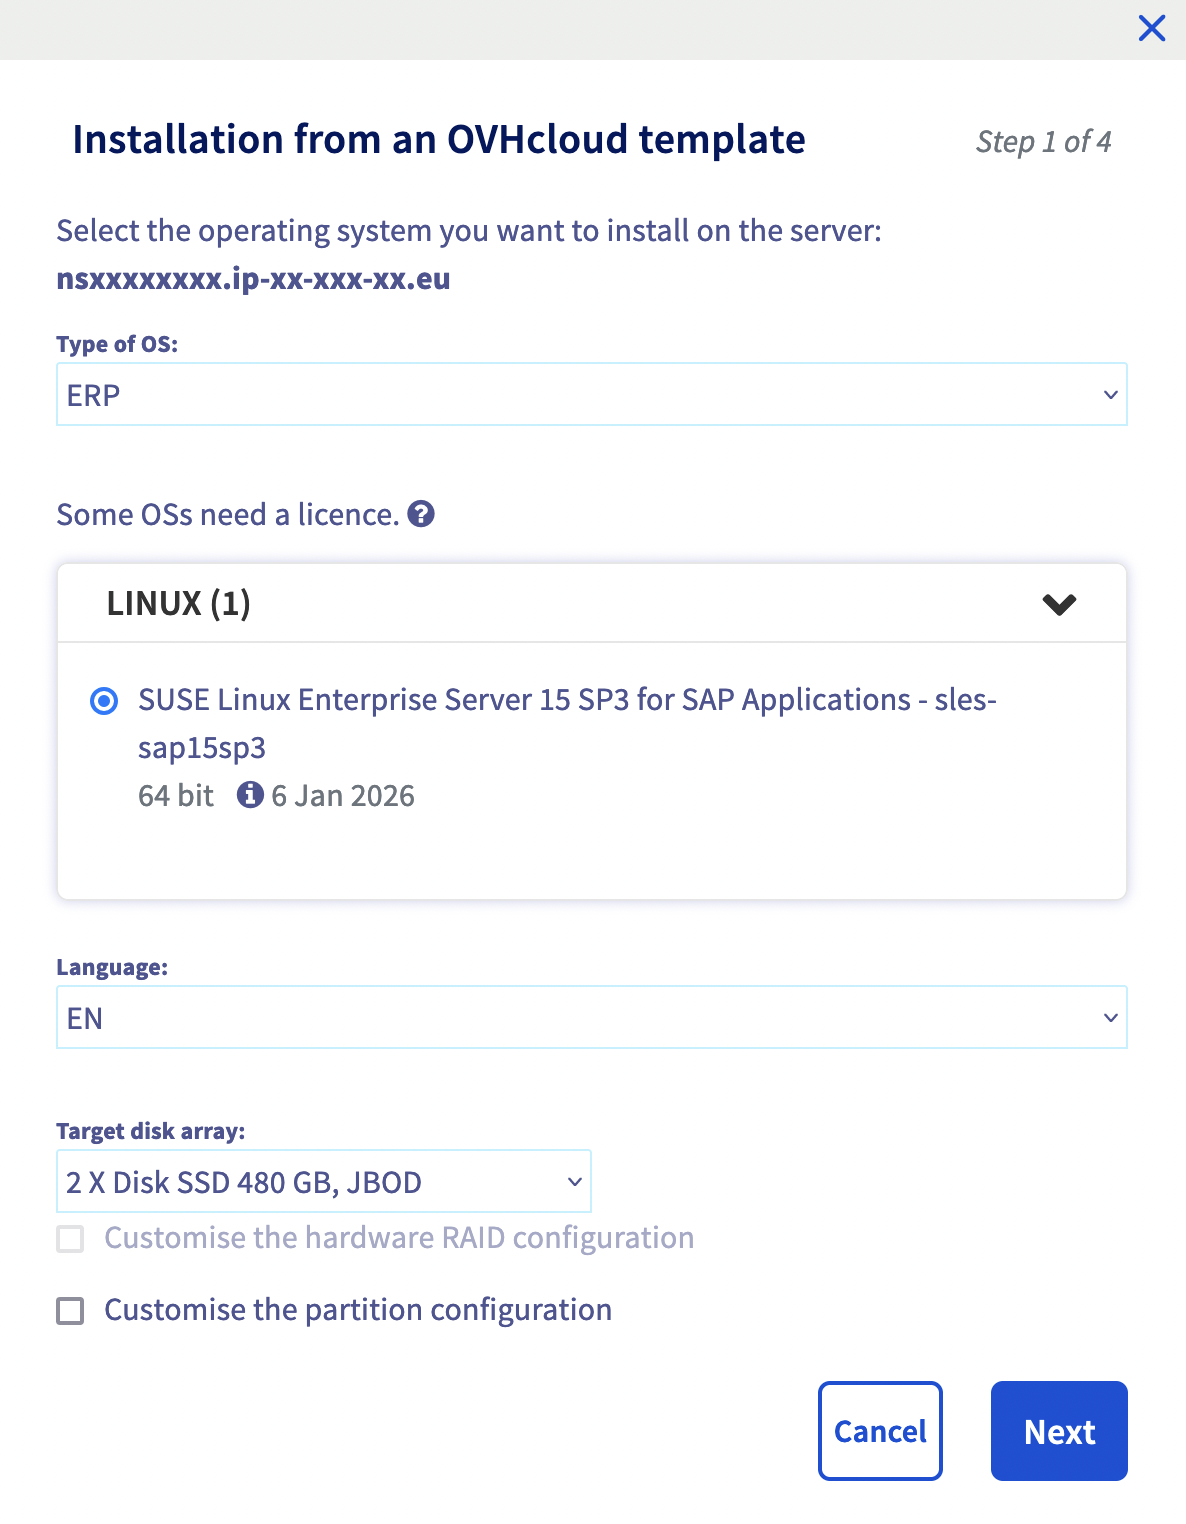
Click the Install button to launch the deployment of the SLES 15 for SAP image provided by OVHcloud.
The first step involves providing information about the operating system which you want to install.
a. In the drop-down menu Type of OS, select ERP.
b. In the drop-down menu LINUX, select SUSE Linux Enterprise Server 15 SP3 for SAP Applications - sles-sap15sp3.
We advise you to do this installation on the target disk array 2 X Disk SSD 480 GB, JBOD.
If you want, you can customise the partition configuration.
By default, partitions /boot and / are in RAID 1.
If you do not custom the configuration of partitions, you will go to the last step.
You can set a hostname which will be displayed with the command hostname. You have also the possibility to add your SSH key.
By default, a swap partition of 4 GB is created and follows the SAP recommendations which are explained in the SAP Note 1999997 - FAQ: SAP HANA Memory.
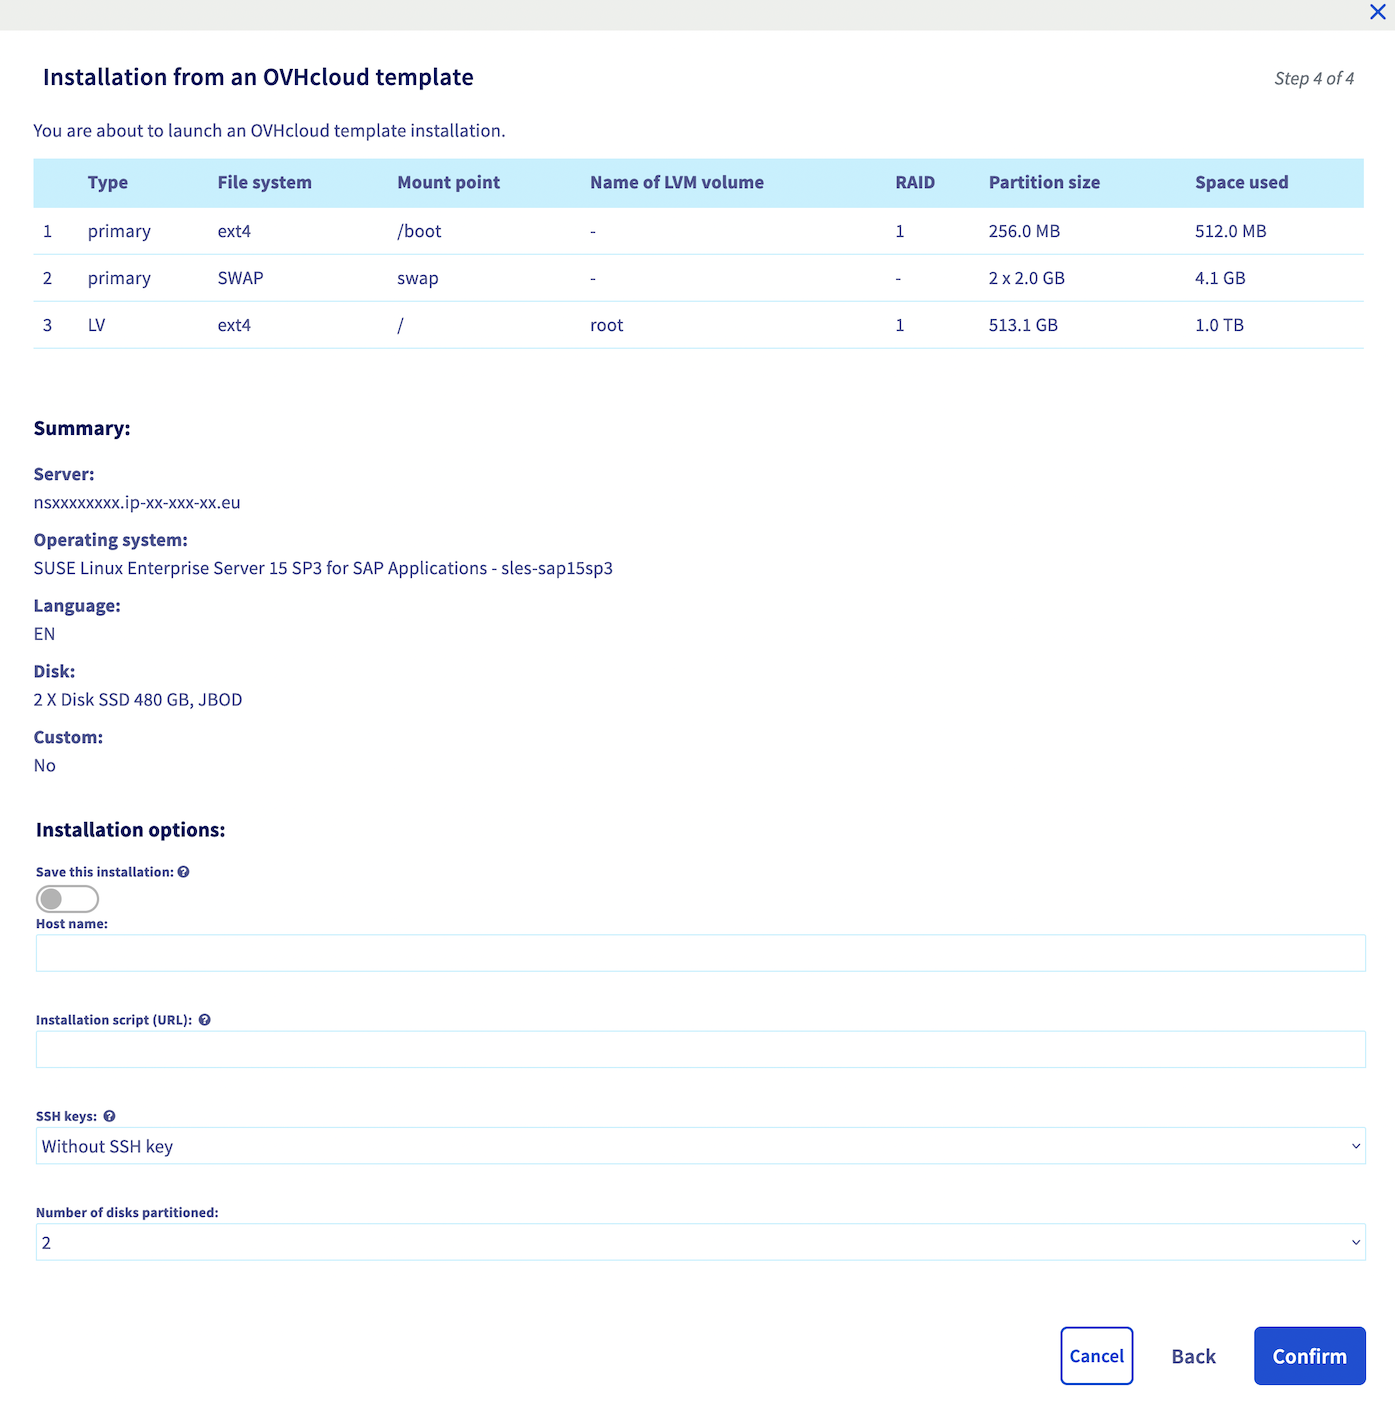
Once these last parameters are configured, click Confirm to launch the installation.
The SLES 15 for SAP image provided by OVHcloud is an image without license included. Following the deployment, you should install your SLES 15 for SAP license with the following command:
SUSEConnect -r <license>
Once the SLES 15 for SAP installation is done, you can connect to your dedicated server.
Preparation of file systems
We will use the Logical Volume concept which is offering a lot of advantages within configuration of partitions.
- Get the name of the disk where you will install your SAP HANA database. The name of the disk should be
sda.
To check it, you can launch the command below and you will get this result:
- Create a physical volume based on the data disks RAID with the following command:
- Create a virtual group named
vg_hanabased on the physical volume previously created.
- Create logical volumes which will be the partitions for the operating system.
Each logical volume will be shown as a directory for the SAP HANA installation.
We advise you to follow this table to size your logical volumes.
| Logical volume | Size |
|---|---|
| usrsap | MIN(32 GB) |
| hanadata | 1 x RAM |
| hanalog | [RAM ≤ 512 GB ] = 1/2 x RAM [RAM > 512 GB ] = 512GB |
| hanashared | MIN(1 x RAM; 1 TB) |
| hanabackup | hanadata + hanalog |
In each line, replace the character <X> by the size of your logical volume wanted in gigabytes, for example 32.
- Once these logical volumes are created, it is necessary to format them in a format supported by SAP HANA.
In this guide, we use the XFS format. We recommend taking into consideration the SAP Note 2972496 - SAP HANA Filesystem Types to discover all formats supported by SAP HANA.
- Create the directories on which are going to be based the logical volumes.
- To mount the file systems on the operation system, you have to get their UUID to fill the
/etc/fstabfile.
To get each UUID from logical volumes, you can use these commands:
- Add this content in the
/etc/fstabfile, replacing content with previously retrieved values.
- You can now execute the command
mount -a. This command will mount the logical volumes on your operation system. You have to see it in the output of the commanddf -hwith the size previously configured.
Application of parameters with SAPtune
The SAPtune package is available on the SUSE operating system, and allows applying system parameters depending on the SAP role hosted on the server. To discover more about this package, we invite you to read the SUSE page.
As a reminder, you must have activated your SLES 15 for SAP license on your dedicated server before following the next steps of this guide.
We advise you to do an update of your operating system with the command zypper update -y.
- Install the saptune package.
- Depending on your future SAP system, you have two possibilities.
a. The first choice is HANA for running a SAP HANA database of a SAP NetWeaver system.
b. The second choice is S4HANA-DBSERVER for running the SAP HANA database of a SAP S/4HANA system.
To set these parameters after choosing your solution, run this following command:
- We recommend enabling the SAPtune service during the startup. At each startup of your server, the SAPtune service will set up the recommended parameters for your operating system.
- You can check if parameters have been successfully applied with this following command:
If you want to learn more about the parameters for SLES 15 and SAP HANA, we recommend you to read these two SAP Notes:
Your dedicated server is now ready to host a SAP HANA database.
You can proceed to its installation following the official SAP guide.
Go further
How to Configure Your NIC for OVHcloud Link Aggregation in SLES 15
If you need training or technical assistance to implement our solutions, contact your sales representative or click on this link to get a quote and ask our Professional Services experts for assisting you on your specific use case of your project.
Join our community of users on https://community.ovh.com/en/.

