How to manage nodes and node pools on an OVHcloud Managed Kubernetes cluster
367 visualizaciones
Objective
The OVHcloud Managed Kubernetes service provides you with production-ready Kubernetes clusters without the hassle of installing or operating them.
This guide covers one of the first steps after ordering a cluster: managing nodes and node pools.
Depending on your preferred workflow, you can manage them through:
- The OVHcloud Control Panel.
- The OVHcloud API.
- The
NodePoolsCustom Resource Definition (CRD) viakubectl.
We will walk you through each method to help you efficiently scale and manage your Kubernetes infrastructure.
Requirements
- You have an OVHcloud Managed Kubernetes cluster.
- If you plan to manage node pools using the
NodePoolsCRD, make sure you have the kubectl command-line tool installed. You can find detailed installation instructions on the official Kubernetes website.
OVHcloud Control Panel Access
- Direct link: Public Cloud Projects
- Navigation path:
Public Cloud> Select your project
On nodes and node pools
In your OVHcloud Managed Kubernetes cluster, nodes are grouped in node pools (group of nodes sharing the same configuration).
When you order a new cluster, it is created with a default node pool. Refer to our guide on creating a cluster for more information.
In this guide we explain how to do some basic operations with nodes and node pools using the Public Cloud section of the OVHcloud Control Panel.
In your OVHcloud Managed Kubernetes cluster, nodes are grouped in node pools (group of nodes sharing the same configuration).
In the cluster creation call, you can specify the specs of a first node pool that will be created with it. Then, you can update this node pool, or add additional node pools of different sizes and types.
Upon creation, a node pool is defined by its name (name), the type of instance within our available catalog (flavorName), the number of identical nodes that you want in that node pool (desiredNodes), and potentially self-defined boundaries to limit the value of desired nodes (minNodes and maxNodes).
You can also enable the autoscale feature, and the desiredNodes will be automatically updated at runtime within the minNodes and maxNodes boundaries, depending on the resource reservations of your workload (see Using the cluster autoscaler).
Setting the antiAffinity boolean ensures that nodes in that node pool will be created on different hypervisors (baremetal machines) and therefore ensure the best availability for your workload. The maximum number of nodes is set to 5 if this feature is activated on a nodepool (you can of course create multiple node pools with each 5 anti-affinity nodes max).
Setting the template property will allow you to define some specs (annotations, finalizers, labels, taints, schedulability) that will be applied to each node under this node pool.
If your cluster have been created in a 3AZ Region, you also must specify an AZ with the availabilityZones parameter.
You can enable the creation of Floating IPS with the attachFloatingIps parameter. If enabled boolean is true, a Floating IP will be attached to each node.
Finally the boolean monthlyBilled ensures that all nodes in a node pool will be spawned in monthly billing mode and therefore benefit from the monthly discount.
After creation, the desiredNodes, minNodes, maxNodes, autoscale and template properties can also be edited at any time.
In this guide we explain how to do some basic operations with nodes and node pools using the OVHcloud API: adding nodes to an existing node pool, creating a new node pool, etc.
In your OVHcloud Managed Kubernetes cluster, nodes are grouped in node pools (group of nodes sharing the same configuration).
When you create your cluster, it's created with a default node pool. Then, you can modify the size of this node pool, or add additional node pools of different sizes and types.
In this guide we explain how to do some basic operations with nodes and node pools using the NodePools CRD: adding nodes to an existing node pool, creating a new node pool, etc.
Instructions
Access the administration UI for your OVHcloud Managed Kubernetes clusters by clicking on Managed Kubernetes Service in the left-hand menu. In the table, select a cluster by clicking on the cluster name.
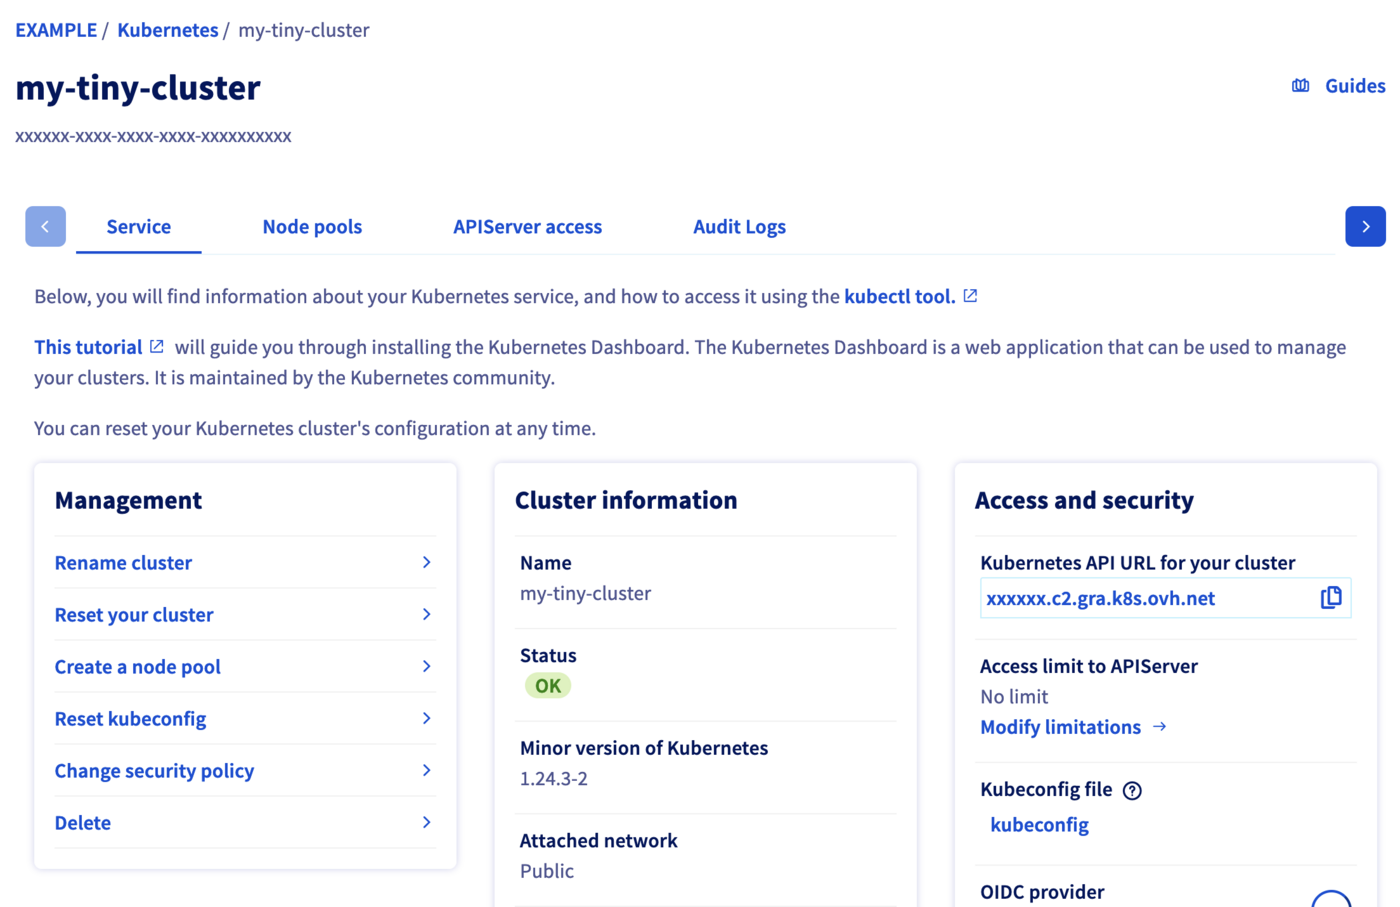
In this administration UI you have several tabs:
-
Service: Here you will have a global view of your cluster, with important information like the status, the API URL or the
kubectlconfiguration file. -
Node pools: You will find here the active node pools of your cluster. You will be able to add, resize or remove node pools.
-
APIServer access: You can add IPv4 ranges in order to restrict access to your cluster’s APIServer.
-
Audit Logs: Here, you will find the logs for your Kubernetes cluster’s control plane.
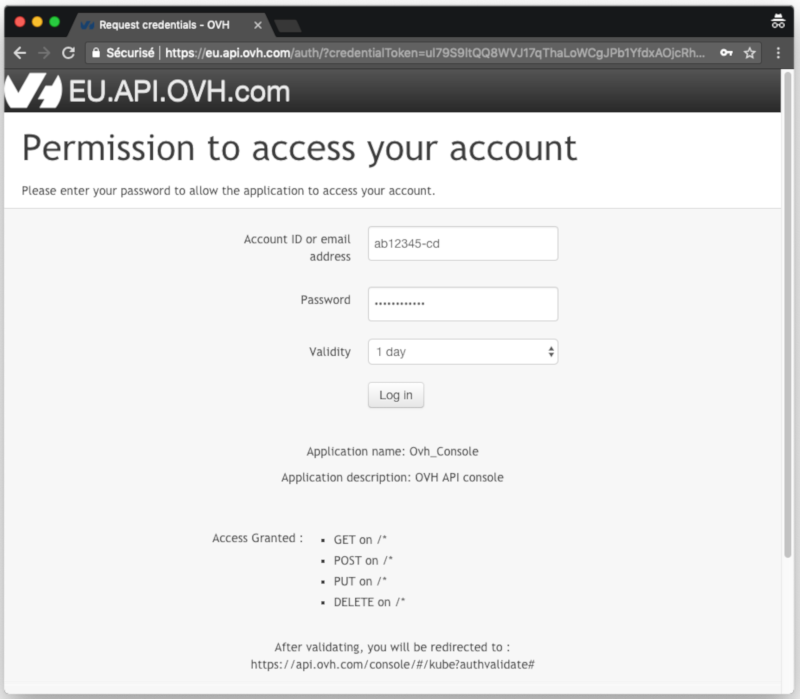
To simplify things, we are using the API Explorer, which allows to explore, learn and interact with the API in an interactive way.
Log in to the API Explorer using your OVH NIC.
If you go to the Cloud section of the API Explorer, you will see the available /cloud/project/{serviceName}/kube endpoint.
Kubernetes Custom Resources are extensions of the Kubernetes API. Like the default Kubernetes resources, the Custom Resources are endpoints in the Kubernetes API that store collections of API objects of a certain kind. Custom Resources allows to easily extend Kubernetes by adding new features and behaviors.
The simplest way to add a Custom Resource to Kubernetes is to define a CustomResourceDefinition (CRD) with the resource schema.
One of our targets in developing the node pools for OVHcloud Managed Kubernetes was to give our users the capability to fully manage node pools (and by extension nodes themselves) from within Kubernetes, so the logical way to do it was to propose them as Custom Resources in your Kubernetes cluster, by developing the NodePools CRD.
To verify that the NodePools CRD in available in your cluster, do:
You get the list of installed CRDs and inside it the nodepools.kube.cloud.ovh.com
You can get the details of the NodePools CRD by doing:
The most interesting part is the spec of the CRD, describing the NodePool object and its properties:
After creation:
- The
desiredNodescan be edited and the node pool will automatically be resized to accommodate this new value. minNodes,maxNodes,autoscaleandautoscalingcan also be edited at any time.- /!\
flavor,nameandantiAffinityare not editable.
Be aware that maxNodes is set by default to 5 when antiAffinity is enabled.
To configure cluster autoscaling based on node pools, follow the documentation Configuring the cluster autoscaler and Cluster autoscaler example.
To customers developing they own autoscaling scripts, we strongly encourage you to define minNodes and maxNodes.
Getting your cluster information
Click on Managed Kubernetes Service, then click on the name of the relevant cluster.
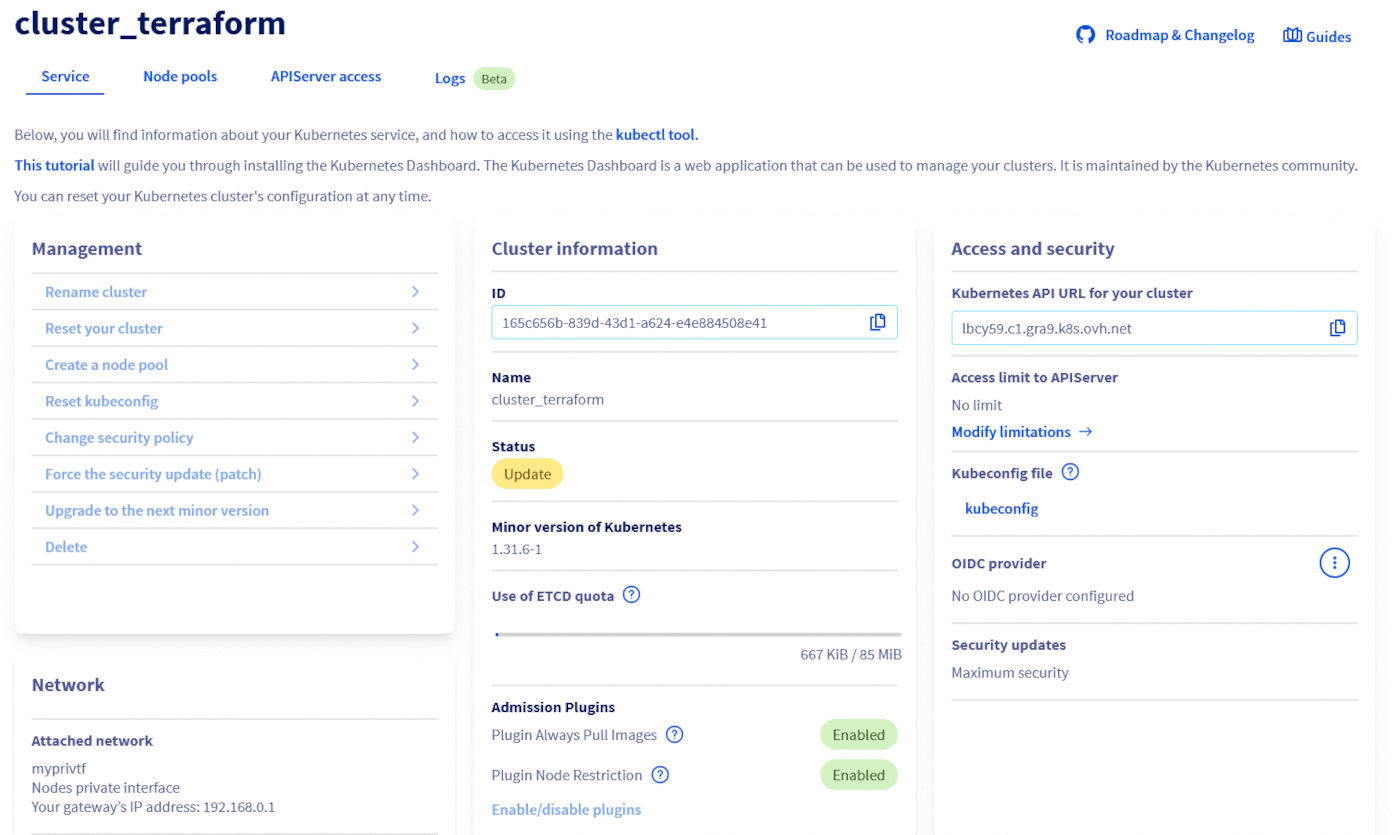
The GET /cloud/project/{serviceName}/kube/{kubeId} API endpoint provides important information about your OVHcloud Managed Kubernetes cluster, including its status and URL.
Result:
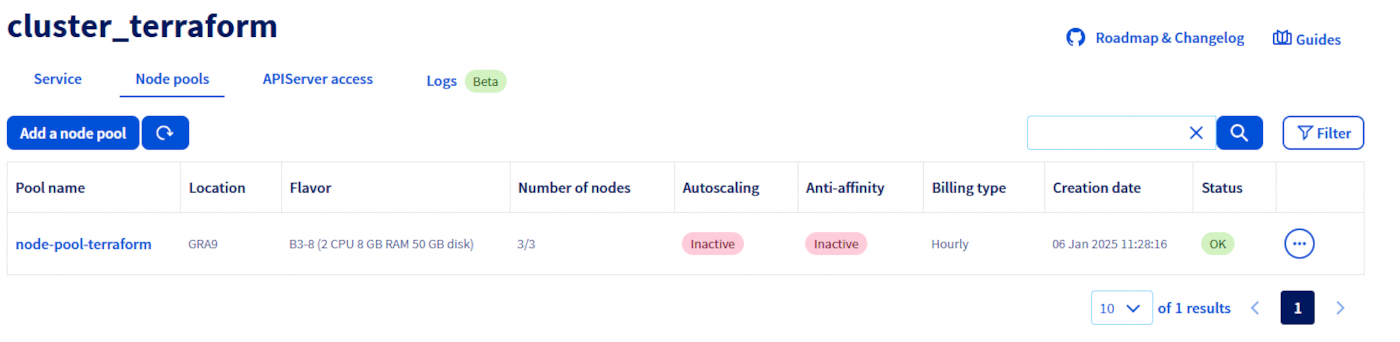
Listing node pools
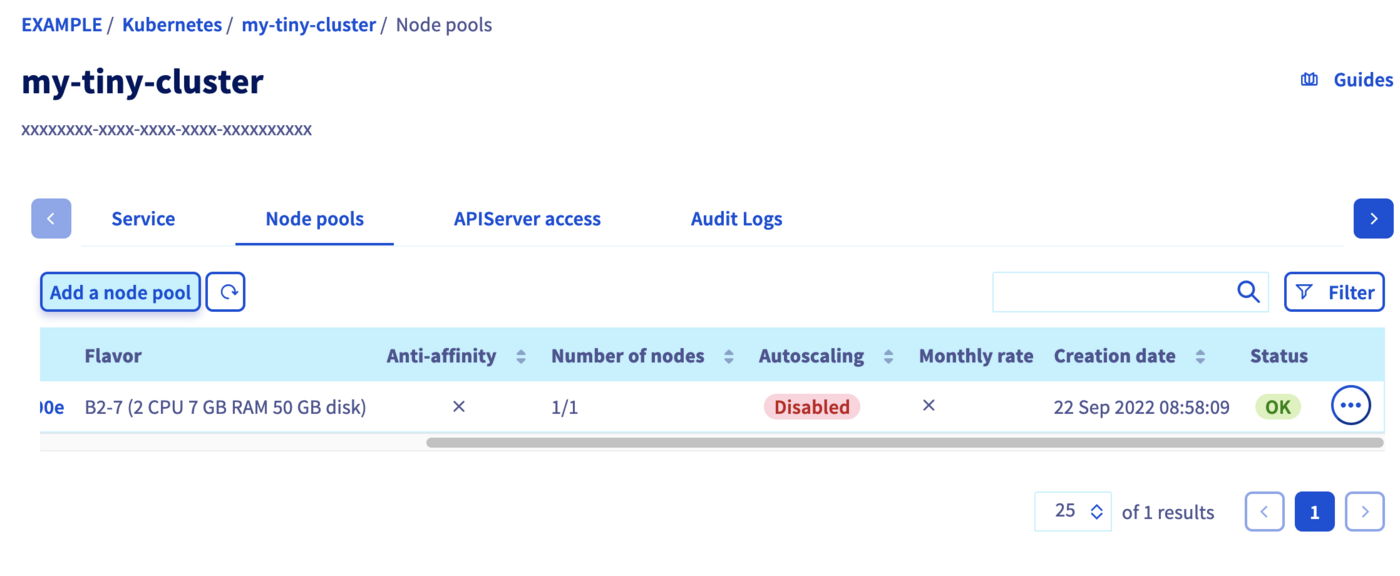
Click on Managed Kubernetes Service, then click on the name of the relevant cluster and open the Node pools tab.
The GET /cloud/project API endpoint lists all the available Public Cloud Services associated to your OVHcloud account:
Result:
Choose the Public Cloud Service corresponding to your OVHcloud Managed Kubernetes. In this example, we will refer to it as serviceName.
The GET /cloud/project/{serviceName}/kube API endpoint lists all the available clusters in your chosen project:
Result:
By calling it, you can view a list of your Kubernetes clusters ID. Note down the ID of the cluster you want to use. In this example, we will refer to it as kubeId.
To list node pools, you can use:
In my case I have one node pool in my cluster, called my-node-pool, with 2 B2-7 nodes:
You can see the state of the node pool, how many nodes you want in the pool (DESIRED), how many actually are (CURRENT), how many of them are up-to-date (UP-TO-DATE) and how many are available to be used (AVAILABLE).
Getting information on a node pool
Click on Managed Kubernetes Service, then click on the name of the relevant cluster and open the Node pools tab.
You can also view the nodes that make up a node pool, by clicking on the name of one of them.
Use the GET /cloud/project/{serviceName}/kube/{kubeId}/nodepool/{nodePoolId} API endpoint to get information on a specific node pool:
Result:
Use this command:
Create a node pool
In the Node pools tab, click on the button Add a node pool.
Fill the fields to create a new node pool.
The name of node pool should be in lowercase. The “_” and “.” characters are not allowed. The node pool name cannot begin with a number.
The subsequent node pool configuration steps are described in Creating a cluster.
To learn more about the flavors of the current OVHcloud range, refer to this page.
Use the POST /cloud/project/{serviceName}/kube/{kubeId}/nodepool API endpoint to create a new node pool:
Request:
You will need to give it a flavorName parameter, with the flavor of the instance you want to create. For this tutorial choose a general purpose node, like the b2-7 flavor.
If you want your node pool to have at least one node, set the desiredNodes to a value above 0.
On a 3AZ Region, the availabilityZones is also mandatory.
To get the availibilityZones available for a region, you can use the GET /cloud/project/{serviceName}/capabilities/productAvailability API endpoint.
The API will return you the new node pool information.
Result:
json { "id": "xxxxxx-xxxx-xxxx-xxxx-xxxxxxxxxx", "projectId": "", "name": "my-node-pool", "flavor": "b2-7", "status": "INSTALLING", "sizeStatus": "UNDER_CAPACITY", "autoscale": false, "monthlyBilled": false, "antiAffinity": false, "desiredNodes": 1, "minNodes": 0, "maxNodes": 100, "currentNodes": 1, "availableNodes": 0, "upToDateNodes": 1, "createdAt": "2023-02-14T09:39:47Z", "updatedAt": "2023-02-14T09:39:47Z", "autoscaling": { "scaleDownUtilizationThreshold": 0.5, "scaleDownUnneededTimeSeconds": 600, "scaleDownUnreadyTimeSeconds": 1200 }, "template": { "metadata": { "labels": {}, "annotations": {}, "finalizers": [] }, "spec": { "unschedulable": false, "taints": [] } } }Via the NodePools CRD To create a new node pool, you simply need to create a new node pool manifest.
Copy the next YAML manifest in a
new-nodepool.yamlfile:
yaml apiVersion: kube.cloud.ovh.com/v1alpha1 kind: NodePool metadata: name: my-new-node-pool spec: antiAffinity: false autoscale: false autoscaling: scaleDownUnneededTimeSeconds: 600 scaleDownUnreadyTimeSeconds: 1200 scaleDownUtilizationThreshold: "0.5" desiredNodes: 3 flavor: b2-7 maxNodes: 100 minNodes: 0 monthlyBilled: false
antiAffinity,flavorandnamefields will not be editable after creation.
You cannot change themonthlyBilledfield from true to false.Then apply it to your cluster:
bash kubectl apply -f new-nodepool.yamlYour new node pool will be created:
```console $ kubectl apply -f new-nodepool.yaml nodepool.kube.cloud.ovh.com/my-new-node-pool created
$ kubectl get nodepools NAME FLAVOR AUTOSCALED MONTHLY BILLED ANTIAFFINITY DESIRED CURRENT UP-TO-DATE AVAILABLE MIN MAX AGE my-new-node-pool b2-7 false false false 3 0 100 3s nodepool-b2-7 b2-7 false true true 2 2 2 2 0 5 14d ```
At the beginning the new node pool is empty, but if you wait a few seconds, you will see how the nodes are progressively created and made available (one after another)...
console $ kubectl get nodepools NAME FLAVOR AUTOSCALED MONTHLY BILLED ANTIAFFINITY DESIRED CURRENT UP-TO-DATE AVAILABLE MIN MAX AGE my-new-node-pool b2-7 false false false 3 3 3 0 100 3s nodepool-b2-7 b2-7 false true true 2 2 2 2 0 5 14d
Updating the node pool
Configuring a node pool
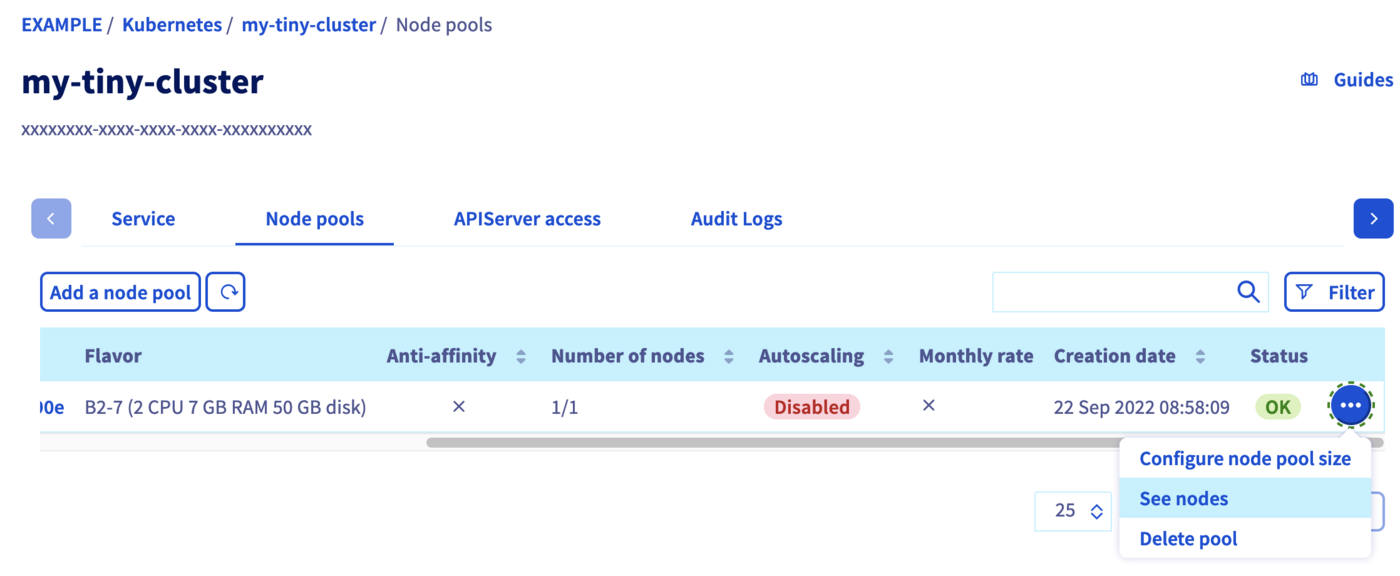
To access the nodes configuration, switch to the Node pools tab. Click on the ... button in the row of the node pool concerned, then select See nodes.
Here you can change the billing method for a node or delete a node by clicking on the respective ... button of a node.
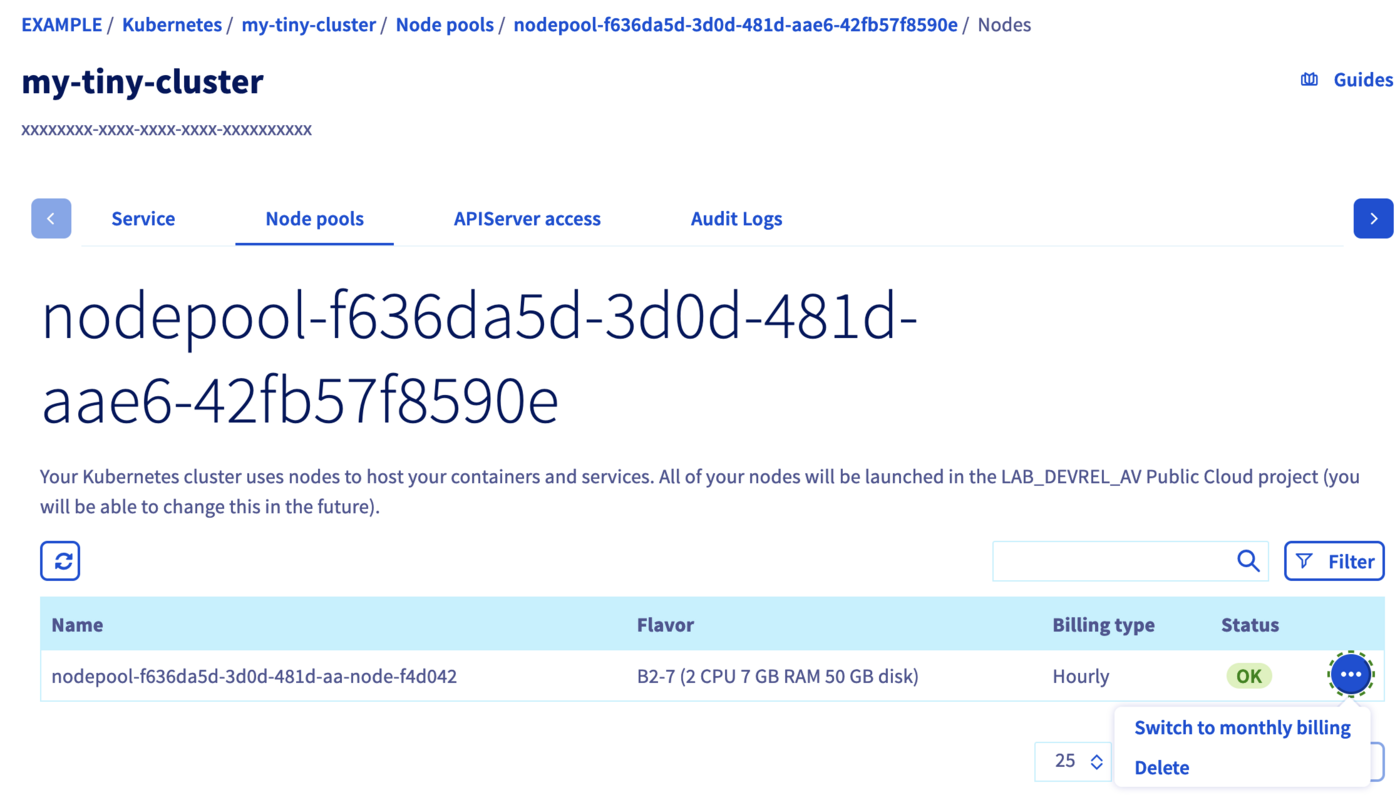
You can only switch from an hourly billing method to a monthly billing method, not vice versa.
Adding nodes to an existing node pool
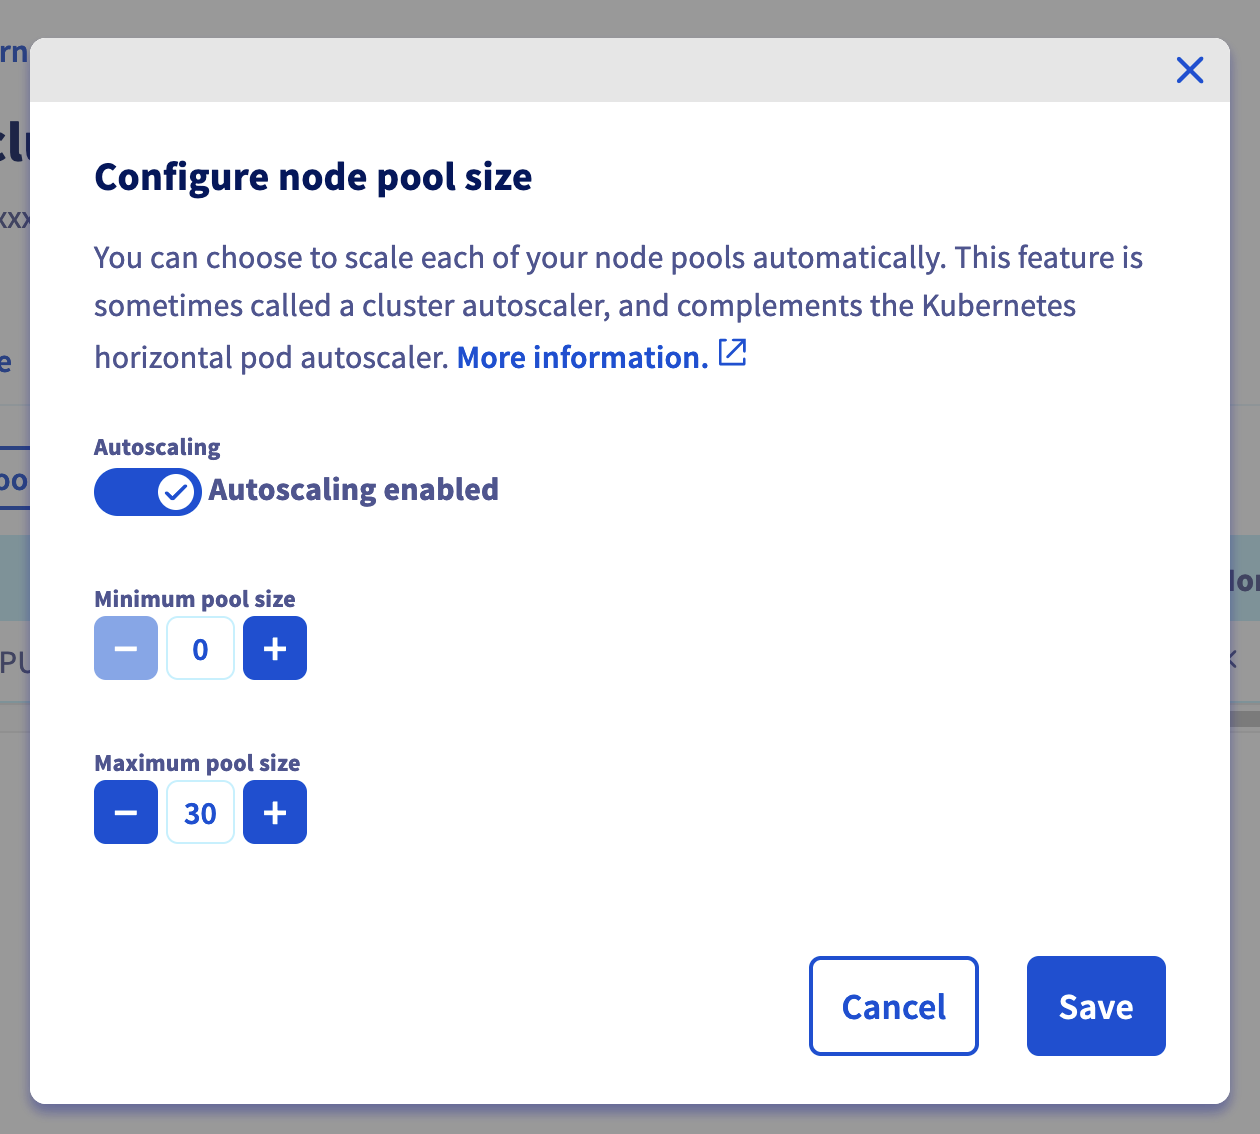
In the Node pools tab, click on the ... button in the row of the node pool concerned, then select Configure node pool size.

In the popup window, you can re-size your node pool by adding nodes. You can alternatively enable the autoscaling feature which allows you to set the minimum and maximum pool size instead.
To upsize or downsize your node pool, you can use the PUT /cloud/project/{serviceName}/kube/{kubeId}/nodepool/{nodePoolId} API endpoint, and set the desiredNodes to the new pool size. You can also modify some other properties:
It is not possible to update/change the following parameters: antiAffinity, flavorName and name.
To upsize or downsize your node pool, you can simply edit the YAML file and re-apply it.
For example, raise the desiredNodes to 5 in new-nodepool.yaml and apply the file:
antiaffinity, flavor and name fields can't be edited.
The DESIRED number of nodes has changed, and the two additional nodes will be created.
Then, after some minutes:
You can also use kubectl scale —replicas=X to change the number of desired nodes. For example, let's resize it back to 2 nodes:
Then, after some minutes:
Deleting a node pool
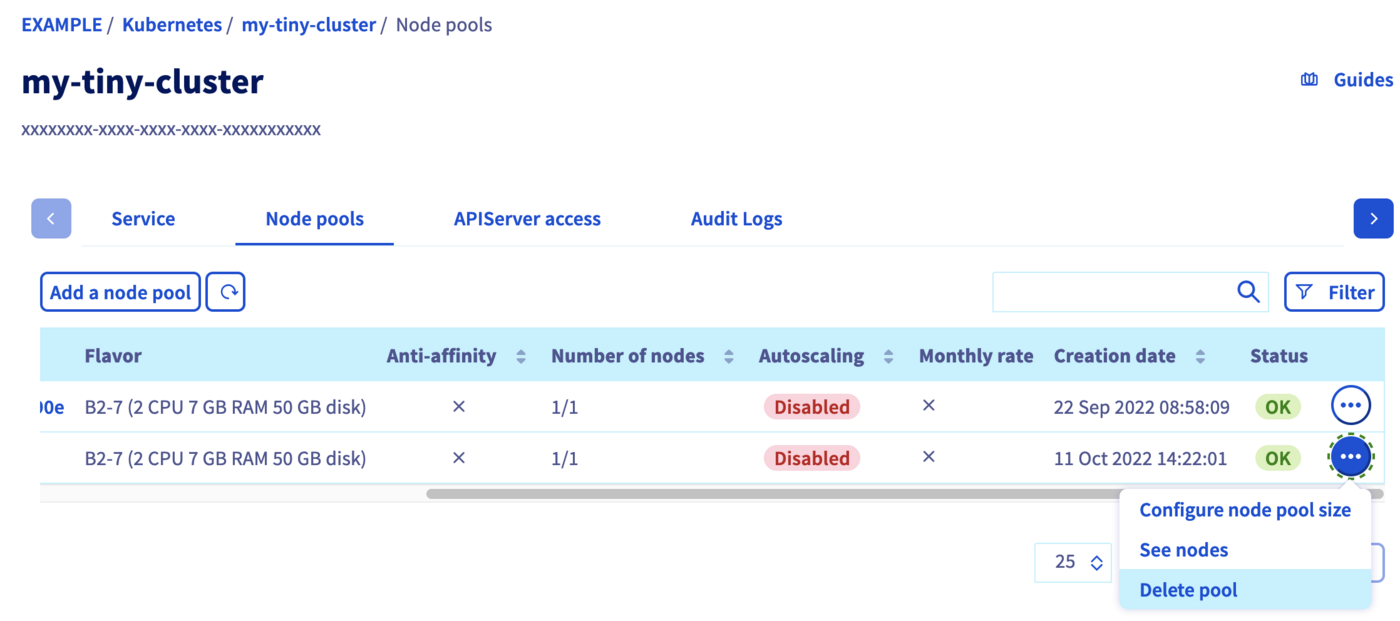
In the Node pools tab, click on the ... button in the row of the node pool concerned, then select Delete pool.
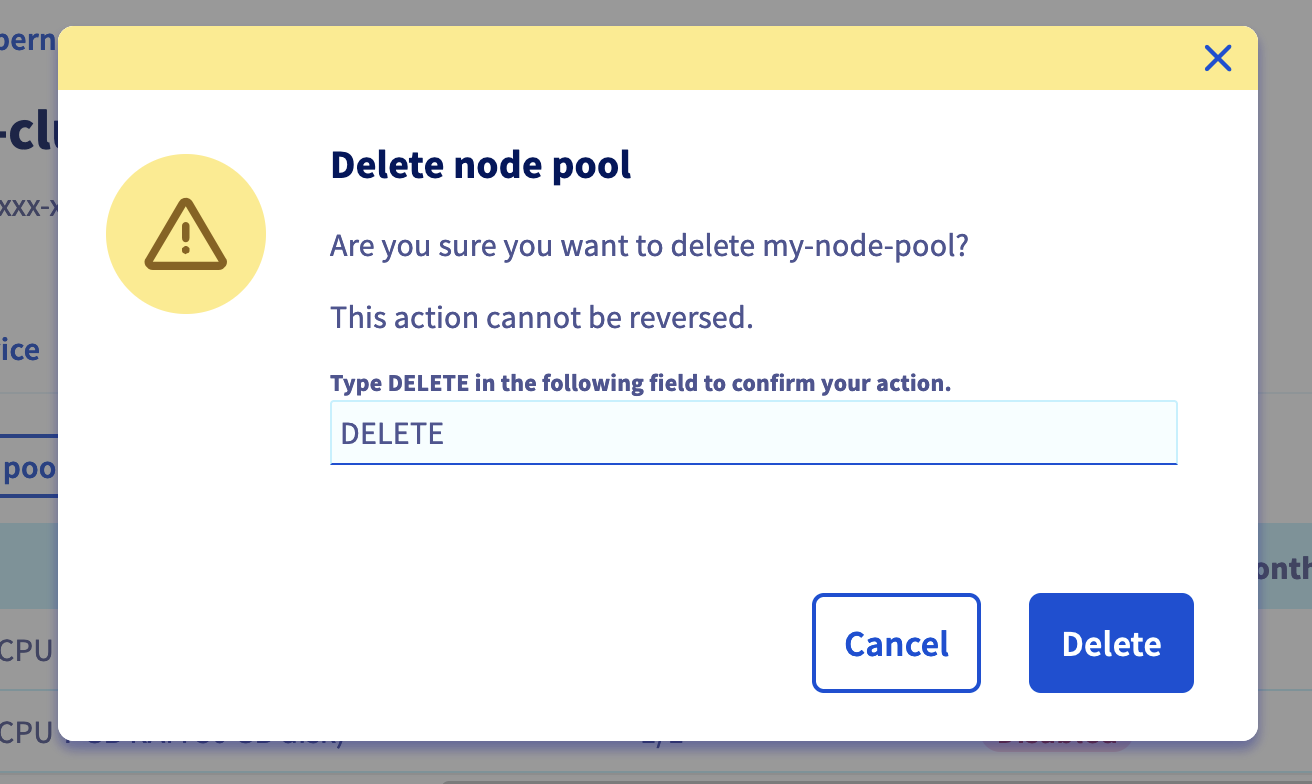
Confirm the decision by typing DELETE into the field, then click on the Delete button.
To delete a node pool, use the DELETE /cloud/project/{serviceName}/kube/{kubeId}/nodepool/{nodePoolId} API endpoint:
You can simply use kubectl to delete a node pool, as any other Kubernetes resource:
After executing this command, Kubernetes will change the state of the nodes to Ready,SchedulingDisabled. After a little time, Nodes will be deleted.
Go further
To have an overview of the OVHcloud Managed Kubernetes service, visit the OVHcloud Managed Kubernetes page.
To deploy your first application on your Kubernetes cluster, we invite you to follow our guides to configure default settings for kubectl and to deploy a Hello World application.
If you need training or technical assistance to implement our solutions, contact your sales representative or click on this link to get a quote and ask our Professional Services experts for a custom analysis of your project.
Join our community of users.

