Web Hosting - Activating email addresses included
5511 Views
Objective
If you have ordered a Web Hosting plan without directly linking it to a domain name, the email solution included with your Web Hosting plan must be enabled manually. You can link it to the domain name of your choice.
Find out how to activate the email addresses included in your Web Hosting plan.
Requirements
- A domain name in your OVHcloud Control Panel.
- An OVHcloud Web Hosting plan (excluding "100 MB free hosting" and "Start10m" offers).
The "email address(es) included with your web hosting plan" option is unavailable for an external domain name (not registered with OVHcloud or registered on a different OVHcloud account from yours).
To transfer an external domain to OVHcloud, follow this guide. If your domain name is already registered with OVHcloud or if a DNS zone already exists for it in another OVHcloud account than your own, refer to our documentation "Managing contacts for your services" to find out how to manage it.
Finally, if your domain name is already linked to the "email address(es) included" option of another web hosting plan, you will not be able to associate it directly with your own web hosting plan. Use this guide to check with the current web hosting manager.
OVHcloud Control Panel Access
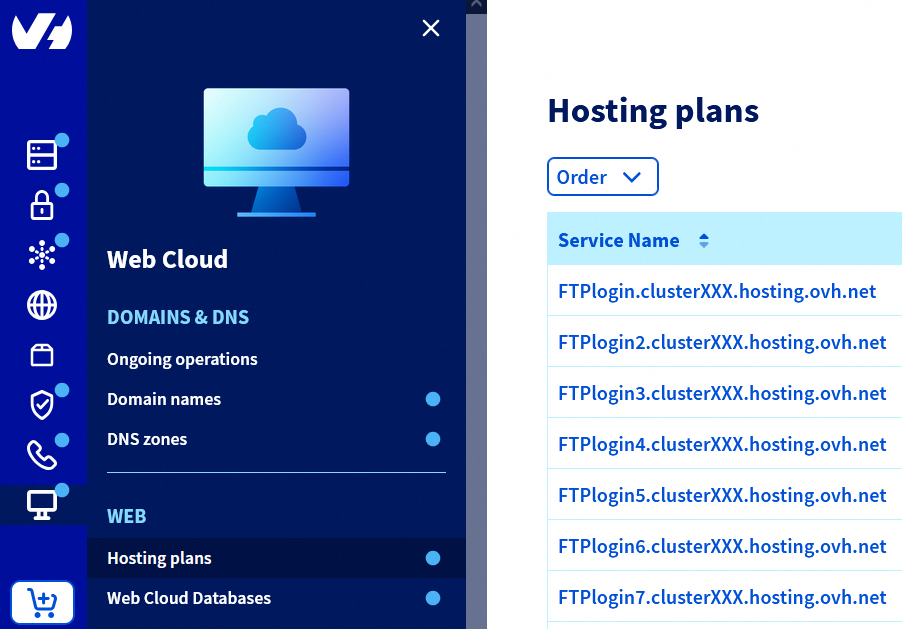
- Direct link: Hosting plans
- Navigation path:
Web Cloud>Hosting plans> Select your web hosting plan
Instructions
Activate your email addresses included with your web hosting plan
Click on the tabs below to view each of the 3 steps.
Go to the Hosting plans page, then select the web hosting plan concerned.
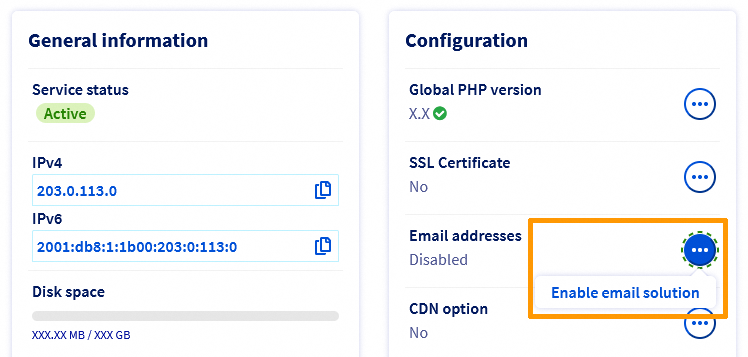
In the Configuration box, you will see Email addresses.
Click the ... button on the right, then Enable email solution.
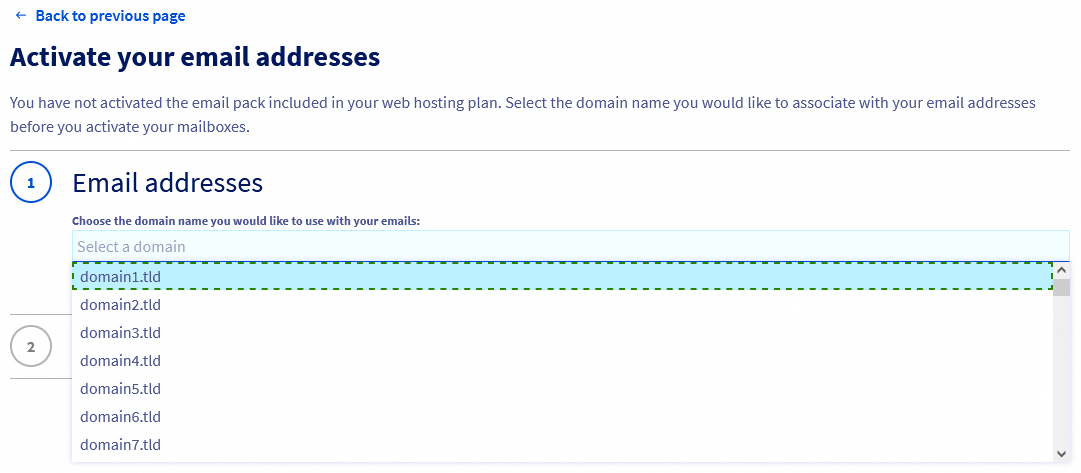
The activation window appears. Choose the domain name you would like to link your email addresses to, then confirm your choice.
If you would like to have more included email accounts, please order a higher web hosting plan from our webpage.
Please note: it may take a few minutes for the email option to be enabled. You will receive an email confirming that you have installed and enabled the MX Plan solution. This includes managing and configuring your email accounts.
Deleting the email solution linked to your Web Hosting plan
You can permanently delete the email solution linked to your Web Hosting plan.
This action cannot be undone. You will not be able to reactivate the email solution after it has been cancelled.
Click on the tabs below to view each of the 2 steps.
Go to the Hosting plans page, then select the web hosting plan concerned.
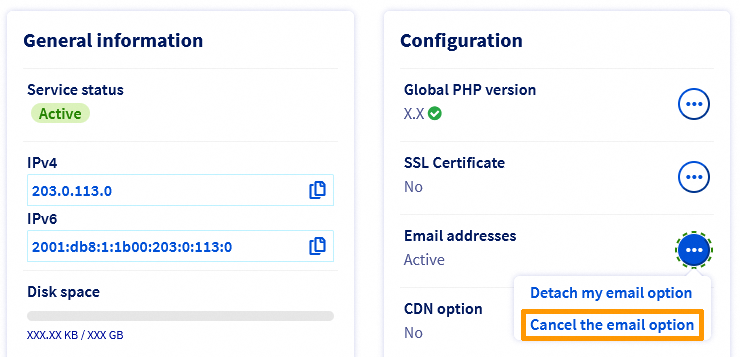
In the Configuration box, you will see Email addresses.
Click the ... button on the right, then Cancel the email option.
To confirm the deletion of the email solution linked to your web hosting plan, you will be sent a validation link via email. You must click this link for the delete operation to be launched.
Special case - Deletion of the email solution linked to your web hosting plan (in order to link it to another domain name)
For security reasons, it may take several days to permanently delete an email solution after you click on the deletion validation link.
If you would like to delete the email solution linked to your web hosting plan in order to link it to another domain name — and only in this specific case — you will need to confirm in writing your request to delete the solution as soon as possible. To do this, contact support by creating a support ticket from your OVHcloud Help Center. The support ticket must obligatorily be created from the customer account (and the corresponding NIC handle) that administers the service to be deleted.
Once the request has been processed, you can then link the email solution linked to your web hosting plan to another domain name.
Go further
For specialised services (SEO, development, etc.), contact OVHcloud partners.
If you would like assistance using and configuring your OVHcloud solutions, please refer to our support offers.
Join our community of users.

