Changing the password for a Web Hosting plan’s database
335 Views
Objective
Most websites use a database to store their articles, comments, or users' email addresses.
You can connect to this database using a configuration file contained in the file storage space on your Web Hosting plan. It contains credentials that allows your website to access its database server.
The password change for a database must therefore always be carried out in two places:
-
In your website’s configuration file via the FTP space on your Web Hosting plan.
-
And on the server that contains their database, via the OVHcloud Control Panel.
Until this change is made in both locations, your site will display a "database connection error".
For this reason, if you would like to change your database password, you will need to carry out all of the operations listed in this guide. If you have any doubts about how to proceed, contact your webmaster or contact a specialised service provider.
Changing your website’s database password involves four parts:
- 1: Identify your website configuration file
- 2: Identify your website database
- 3: Change the password for your website database in its configuration file
- 4: Change the password for your website database on the database server This guide explains how to change a database password securely.
OVHcloud is providing you with services for which you are responsible, with regard to their configuration and management. You are therefore responsible for ensuring they function correctly.
This guide is designed to assist you in common tasks as much as possible. Nevertheless, we recommend that you contact a specialist service provider and/or discuss the issue with our community on if you have difficulties or doubts. You can find more information in the Go further section of this guide.
Requirements
- An OVHcloud Web Hosting plan
- A database associated with your hosting
- FTP login details to log in to your hosting’s storage space
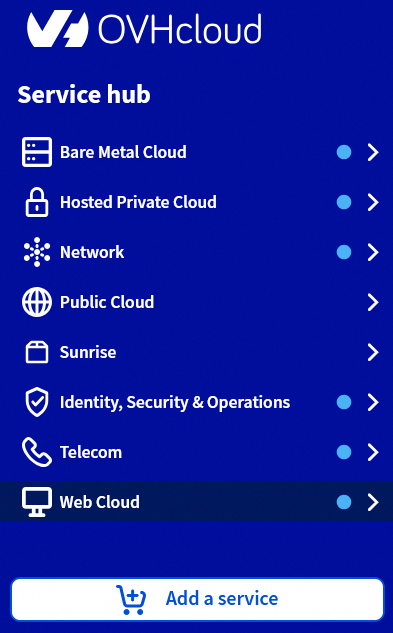
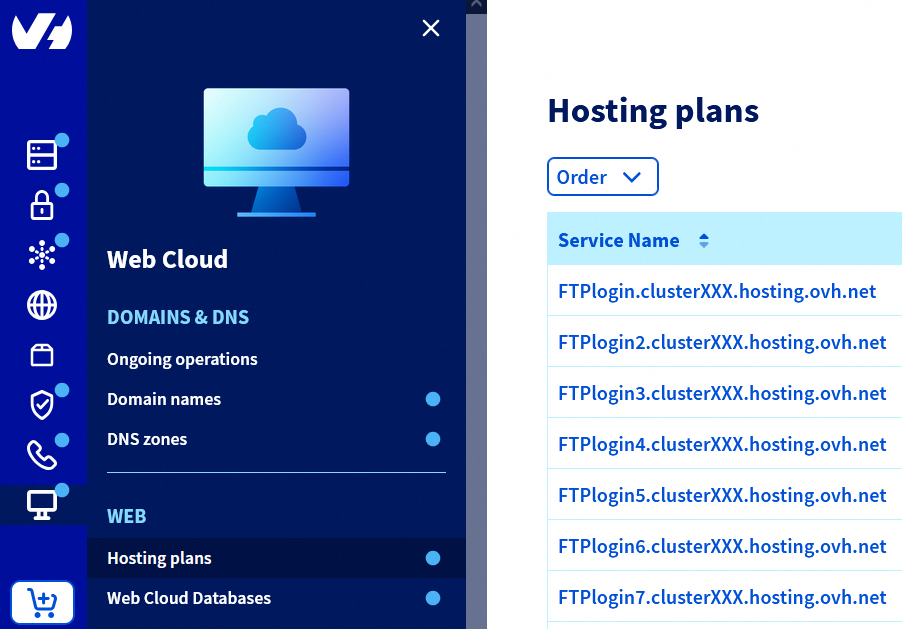
OVHcloud Control Panel Access
- Direct link: Web hosting
- Navigation path:
Web Cloud>Hosting plans> Select your web hosting plan
Instructions
1: Identify your website’s configuration file
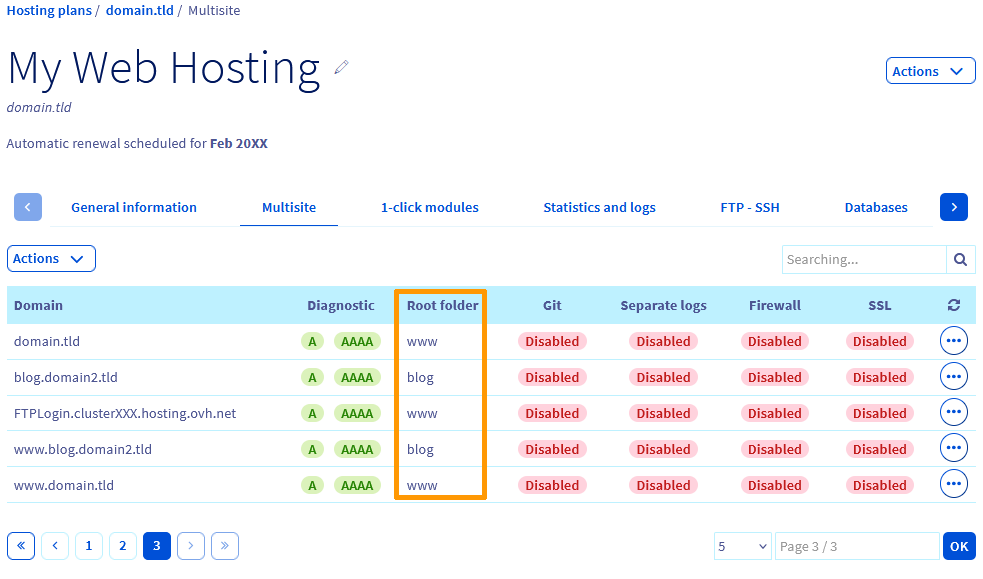
In the OVHcloud Control Panel, click on Web Cloud, then on Hosting plans and finally the hosting plan concerned. Then go to the Multisite tab. Identify the name of your site's Root folder (the directory in which its files and folders are located).
Next, go to the space containing your website’s files and folders (FTP space) by following this guide.
If you would like to change the password on your FTP space, please refer to this guide.
Open the Root folder identified previously.
Locate and open your site's configuration file:
- For a WORDPRESS site, open "wp-config.php".
- For a JOOMLA site, open "configuration.php".
- For a DRUPAL site, click on the "sites" folder, then "default". The configuration file is "settings.php".
- For a PRESTASHOP website, click on the "app" folder, then "config". The configuration file is "parameters.php".
2: Identify your website’s database
In the configuration file identified in step 1, start by noting down the name of its database:
- For WORDPRESS: The name appears under "DB_NAME".
- For JOOMLA: The name appears under "public $db".
- For DRUPAL: The name appears under "database".
- For PRESTASHOP: The name appears under "database_name".
Then go back to the OVHcloud Control Panel and open the Web Cloud section:
- Go to the
Hosting planssection, then to the Web Hosting plan concerned. - Click on
Databasestab on the right-hand side of your screen. - Locate the database name previously found in the
Database Namecolumn.
3: Change the password for your website’s database in its configuration file
For more information on password management best practices, follow the instructions in this guide.
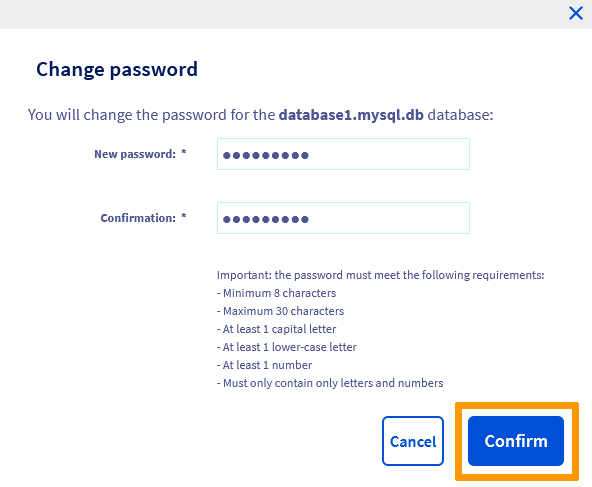
Choose the new password for your database and save it. It must meet the following conditions:
- Minimum 8 characters
- Maximum 30 characters
- At least one capital letter
- At least one lower-case letter
- At least one number
- Only numbers and letters
As described in step 1, go back to your Web Hosting plan’s file storage space, then open your website’s configuration file for editing.
Before you make any changes, save the content of this file locally in a text document, so that you keep a copy if you make any mistakes.
Manually replace your database password while avoiding changing or deleting any other elements of the configuration file (in the extracts below, only the sample password *0VhCloudPa55w0rdDB123* should be replaced):
- In the configuration file of a WORDPRESS website, modify "DB_PASSWORD":
- In the configuration file of a JOOMLA website, modify "public $password" (at the end of the configuration file):
- In the configuration file of a DRUPAL website, modify "password":
- In the configuration file of a PRESTASHOP website, modify "database_password":
Save this change.
4: Change the password for your website’s database on the database server
This operation will take a few minutes to take effect. Once you have launched it, check its status in the Ongoing tasks tab.
Log in to your OVHcloud Control Panel, then go to the Web Cloud section.
Click the Hosting plans menu, then select the Web Hosting plan concerned.
On the page that pops up, click on the Databases tab.

Next, click on the three dots to the right of your website’s database, then on Change password.
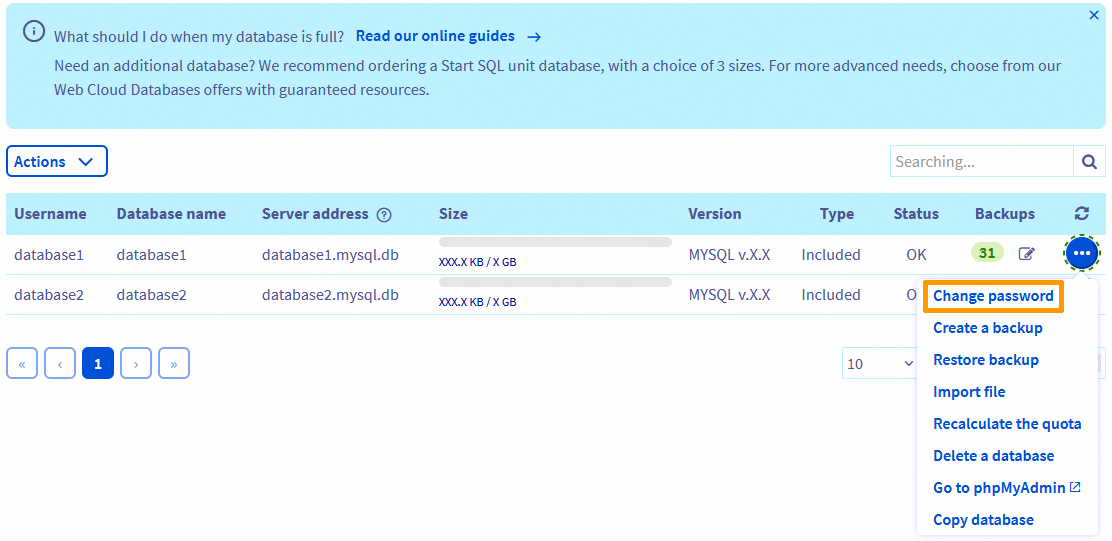
In the window that pops up, enter your database’s new password (defined at part 3), confirm it, then click on Confirm.
Go further
FileZilla software usage with your hosting
Troubleshoot common database errors
For specialised services (SEO, development, etc.), contact your OVHcloud partners.
Join our community of users.

