How to configure reverse DNS for a Public Cloud instance
338 Views
Objective
Reverse DNS (rDNS) is the complement to "forward" DNS resolution which resolves domain names into IP addresses. With reverse DNS resolution, an IP address can resolve into the domain name (or host name) it is mapped to. This means that DNS queries of the associated IP address will return this domain name.
Configuring the reverse DNS resolution for an instance is especially useful when sending emails. A mail server's validation by spam protection systems will improve if a DNS lookup of the IP address resolves properly.
This guide explains how to configure the reverse DNS path for the IP address(es) of your Public Cloud instance.
Requirements
- A Public Cloud instance in your OVHcloud account
- A domain name with its
Arecord mapped to the instance
OVHcloud Control Panel Access
- Direct link: Public Cloud Projects
- Navigation path:
Public Cloud> Select your project
Instructions
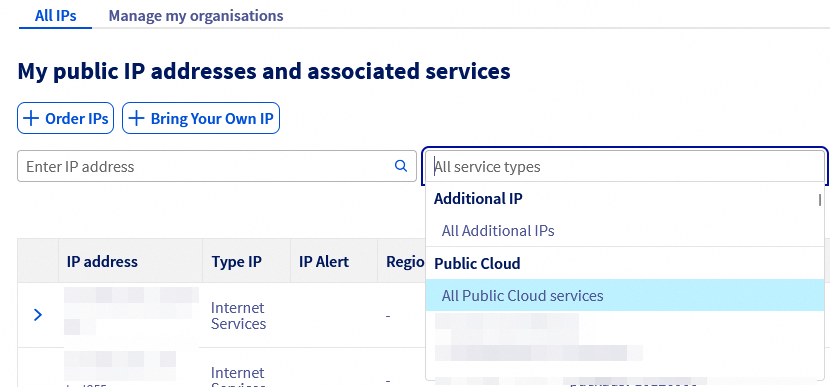
Go to the Network section and click on Public IP Addresses.
The drop-down menu underneath My public IP addresses and associated services allows you to filter your services according to category. You can also search for a specific IP in the search bar to the left of the drop-down menu.
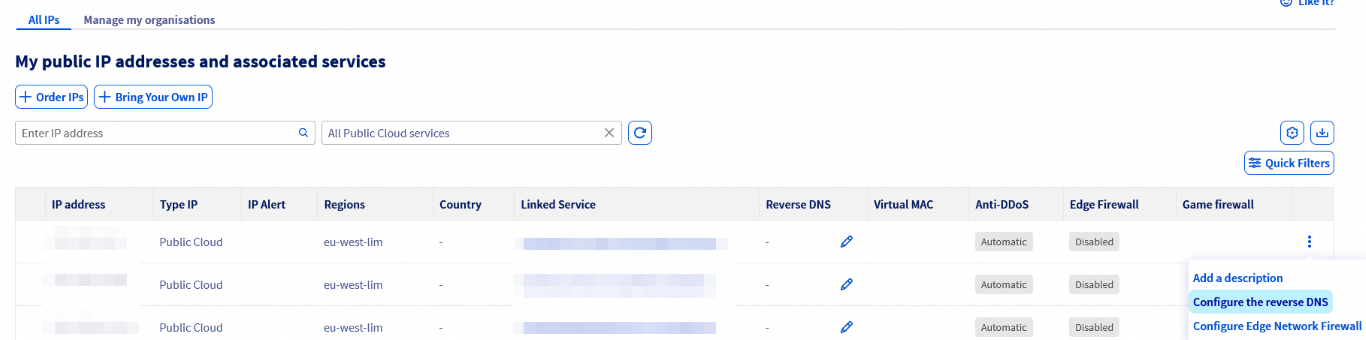
Click the ⁝ button in the row of the IP address concerned and select Configure the reverse DNS.
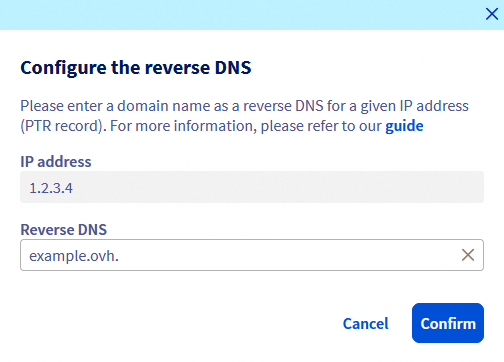
In the new window, enter your reverse path and click on Confirm.
You can also edit the reverse path directly via the pencil icon in the Reverse DNS column of the table.
If the modification does not work as expected, verify that the A record is correctly configured in the DNS zone of your domain name. Bear in mind that it might take up to 24 hours for DNS zone changes to be effective, in case you have only recently edited the A record.
If the domain name is managed by OVHcloud as its registrar and it uses OVHcloud DNS servers, you can refer to this guide.
Go further
First steps with Public Cloud instances
How to edit an OVHcloud DNS zone
Join our community of users.

