Installation of OVHcloud Connect Provider from the OVHcloud Control Panel
292 Views
Objective
With OVHcloud Connect, you can link your company network to your private OVHcloud vRack network, without creating a VPN tunnel through the internet. This will give you a quicker, more stable connection with guaranteed bandwidth.
This guide will show you how to set up the OVHcloud Connect Provider solution via the OVHcloud Control Panel
Requirements
To ensure correct operation of this service, you must be aware of the technical capabilities and limitations of the OVHcloud Connect solution and configure your network devices accordingly.
- An OVHcloud Connect Provider solution
- An OVHcloud vRack
OVHcloud Control Panel Access
- Direct link: OVHcloud Connect
- Navigation path:
Network>OVHcloud Connect
Instructions
Step 1: Ordering your solution
Once you have ordered your OVHcloud Connect Provider solution, you will receive an order confirmation via email, along with a service key.
Depending on the provider you have chosen, go to their portal to log in via the link provided in the order confirmation email. Then enter your service key and confirm the order presented to you.
Next, check the activation status of your solution. Click on it to confirm that its status has changed to "Active".
Step 2: Associating a vRack
Click on your OVHcloud Connect solution.
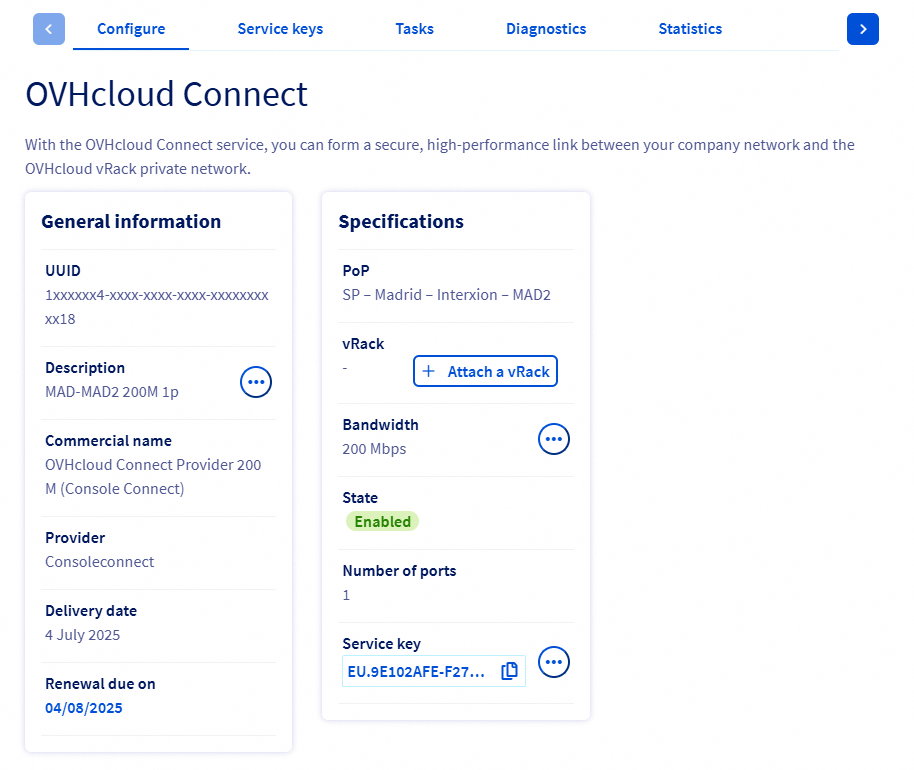
You will need to link a vRack to your solution first. Click the Attach a vRack button and select an existing vRack from the drop-down menu.
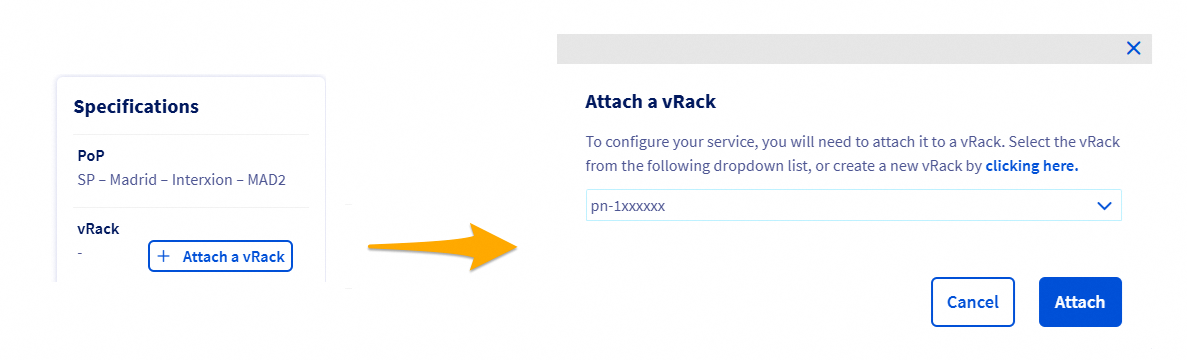
A message will confirm the vRack association.

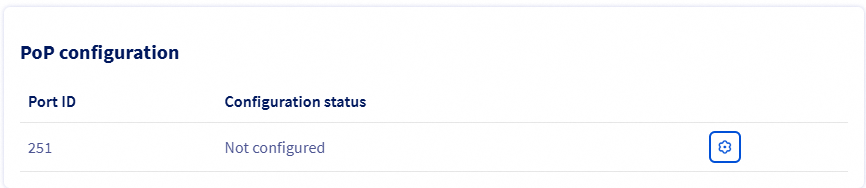
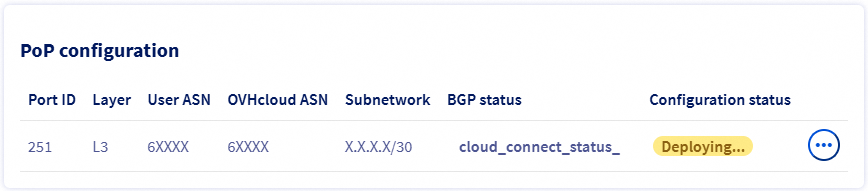
Step 3: Adding a PoP configuration
The OVHcloud Connect Provider solution requires an L3 level configuration.
Once you have connected your vRack, click the cogwheel button in the PoP configuration section and select the L3 configuration from the drop-down menu.
You will then need to enter the following:
| Information | Description |
|---|---|
| Customer ASN | Your AS BGP number, which is configured on your router located in the PoP |
| OVHcloud ASN | The OVHcloud AS number that will be configured on the OVHcloud Connect routers located in the PoP |
| Subnetwork in /30 | A size /30 IPv4 block, used for the link between your router and the OVHcloud Connect router located in the PoP |
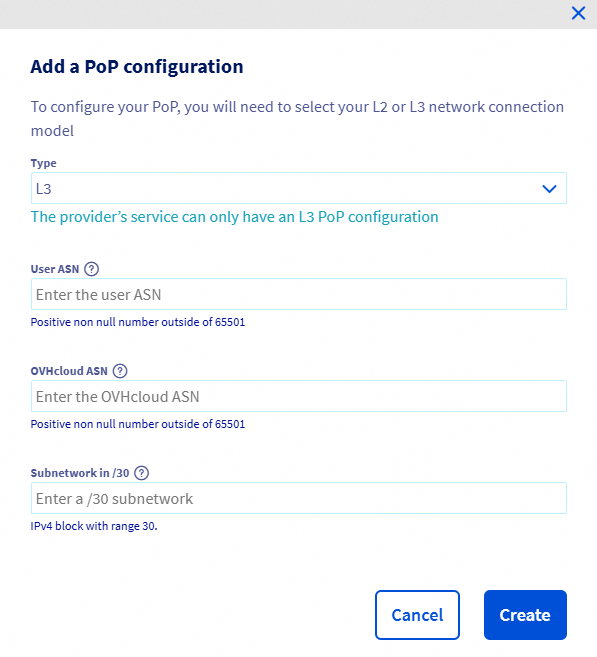
The PoP configuration menu will then appear.
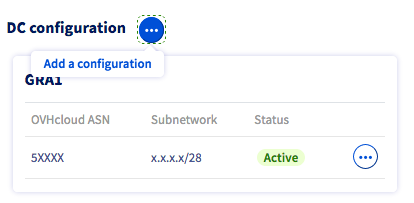
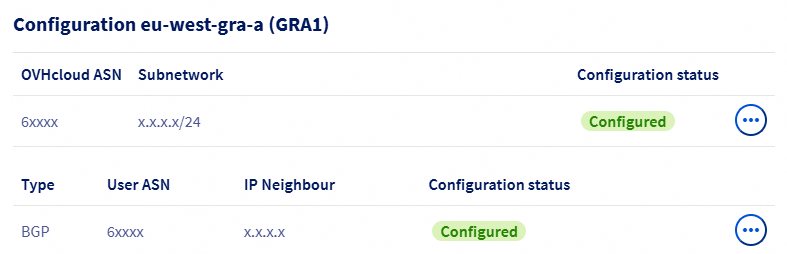
Step 4: Adding an availability zone configuration
When your PoP configuration has been set, click Add a configuration under the AZ configuration menu.

Select an availability zone from the dropdown menu, then enter the information required.
| Information | Description |
|---|---|
| OVHcloud ASN | The OVHcloud AS number that will be configured on the OVHcloud Connect routers located in the AZ. This number may be different from the ASN chosen for the PoP |
| A /28 subnetwork | A private subnetwork configured in your vRack in the selected AZ. This can be an IPv4 block of size /28 or higher |

You can add additional availability zone configurations by clicking on the + Add a configuration button.
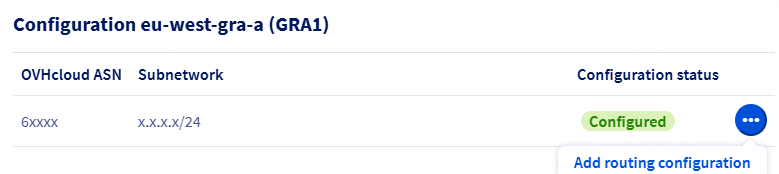
You must also add a routing configuration.
Adding a routing configuration
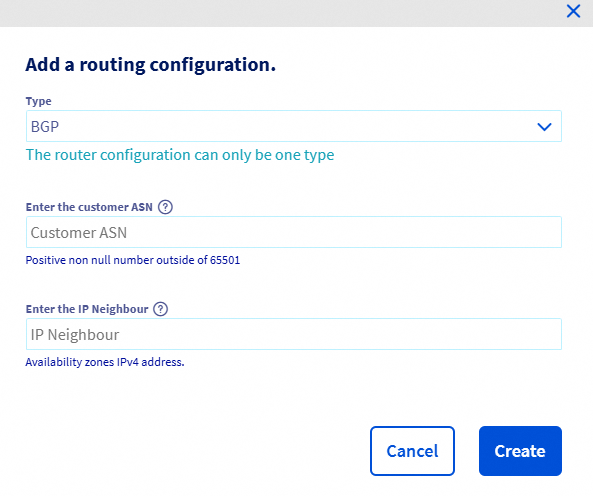
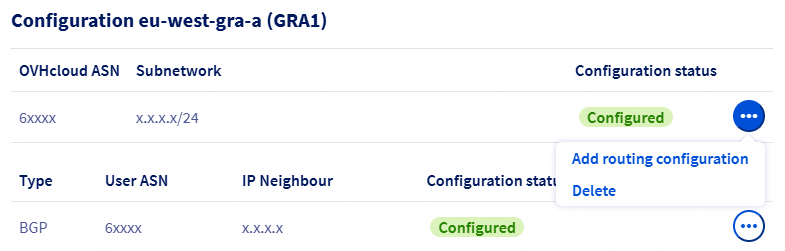
Click on the ... button on the desired availability zone then on Add routing configuration.
Then choose the routing type between Static and BGP.
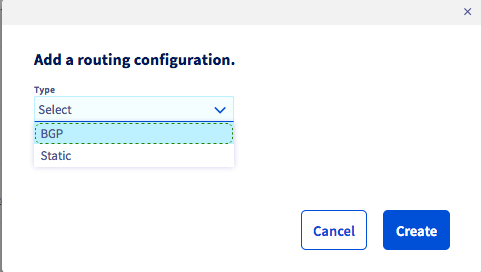
If you choose the BGP type, then enter the required information:
| Information | Description |
|---|---|
| Customer ASN | Your AS BGP number, which is configured on your router located in the AZ |
| IP Neighbour | IP address of the BGP neighbour of your router in the AZ. This address must be part of the subnet specified in the AZ Configuration menu |
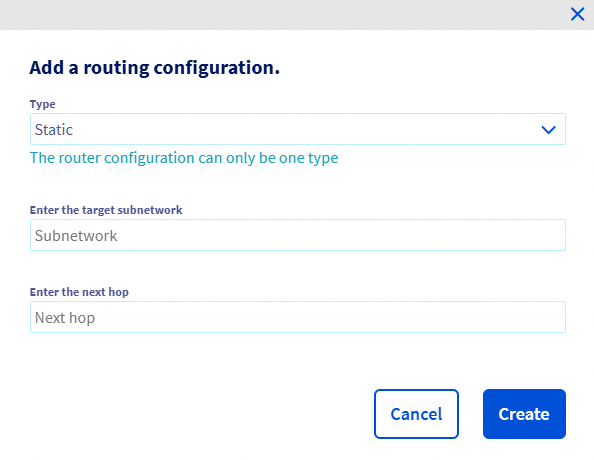
If you choose the Static type, enter the required information:
| Information | Description |
|---|---|
| Subnetwork | A prefix using CIDR notation |
| Next hop | IP address acting as gateway in the subnet range |
You can add multiple routing configurations within the same availability zone. The configuration type (BGP or Static) chosen for your first configuration will then apply to the next configuration in the same availability zone.
Deletion of vCenter resources
Each resource (PoP or AZ) can be deleted individually, but deleting a parent resource such as AZ or POP will automatically delete all the subresources.
Recursive removal is slower than sequential removal of each resource.
If a AZ configuration is shared between two or more OVHcloud Connect services, removing the PoP configuration from a single OVHcloud Connect service will not affect the AZ resource.
Deleting a Routing Configuration
To delete a routing configuration, click the ... button on the routing configuration to delete, then click Delete.

Deleting a AZ configuration
To delete a AZ configuration, click the ... button on the AZ configuration to delete, then click Delete.
Deleting an AZ configuration will delete the related routing configurations.
Deleting a PoP configuration
To delete a PoP configuration, click the ... button on the PoP configuration, then click Delete configuration.

Deleting a PoP configuration will delete the AZ and routing configurations.
Go further
If you need training or technical assistance to implement our solutions, contact your sales representative or click on this link to get a quote and ask our Professional Services experts for a custom analysis of your project.
Join our community of users.

