Creating a Kubernetes cluster based on OVHcloud Public Cloud Compute Instances in MRS
994 Ansichten
Usage of Managed Rancher Service is currently in Beta phase. This guide may be incomplete and will be extended during the beta phase. Our team remains available on our dedicated Discord Channel, do not hesitate to join and reach us: https://discord.gg/ovhcloud. Ask questions, provide feedback and interact directly with the team that builds our Container and Orchestration services.
Objective
Managed Rancher Service by OVHcloud provides a powerful platform for orchestrating Kubernetes clusters seamlessly. You can use Rancher to launch a Kubernetes cluster on any platform and location including:
- Hosted Kubernetes provider (e.g. OVHcloud Managed Kubernetes Service, AWS EKS, GCP GKE, etc).
- Infrastructure Provider - Public Cloud or Private Cloud (vSphere, Nutanix, etc).
- Bare-metal servers, cloud hosted or on premise.
- Virtual machines, cloud hosted or on premise
In this guide we will explore how to use OVHcloud as an Infrastructure Provider and create a Kubernetes cluster based on OVHcloud Compute Instances.
Requirements
- A Public Cloud project in your OVHcloud account
- An OVHcloud Managed Rancher Service (see the creating a Managed Rancher Service guide for more information)
- An access to the Rancher UI to operate it (see the connecting to the Rancher UI guide for more information)
- An OpenStack user
- A private network with a Gateway
Instructions
Creating OVHcloud Public Cloud credentials
To create OVHcloud Public Cloud credential, you need to have an existing OpenStack user with the Compute Operator role as a minimum. Read this guide on how to create an OpenStack user if you don't have one yet.
Log in to your Managed Rancher Service UI.
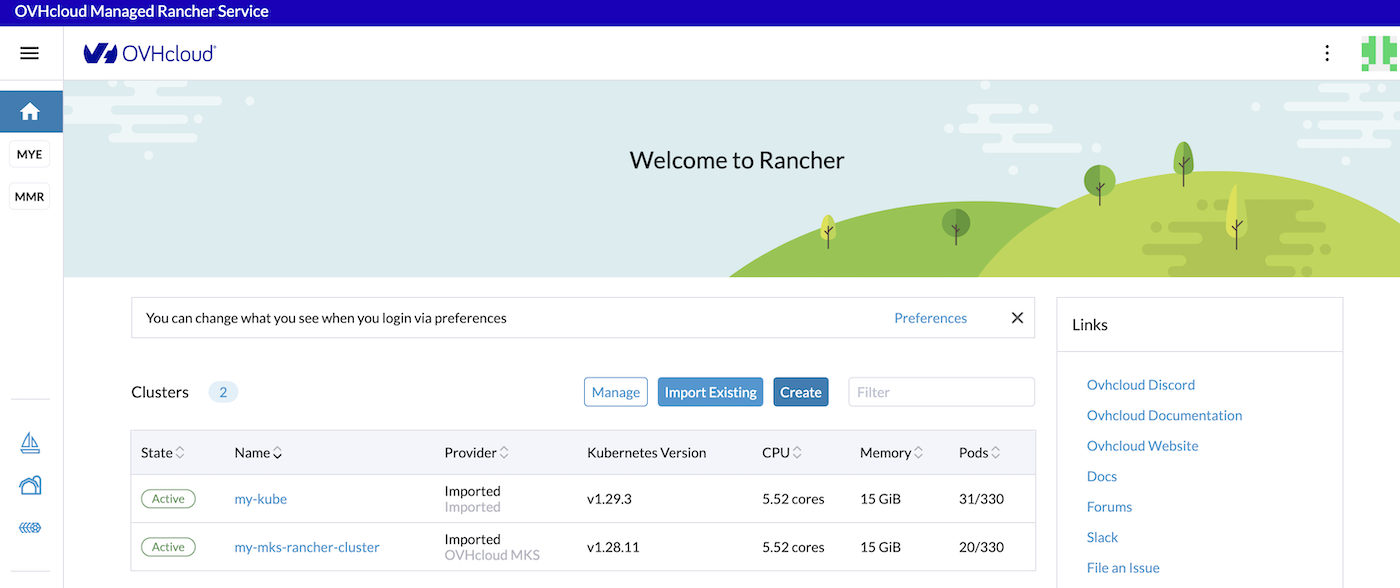
Click on Cluster Management in the menu.
Then click on Cloud Credentials.
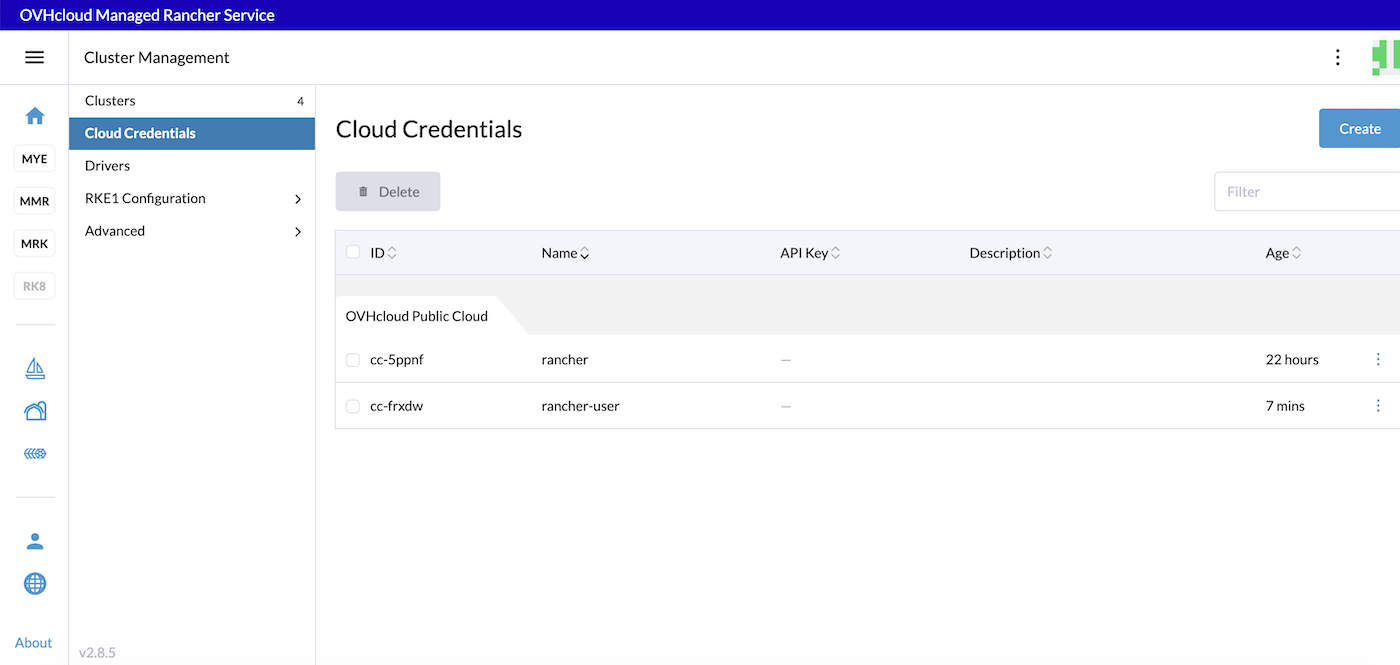
If you don't have any OVHcloud Public Cloud credentials yet, click the Create button.
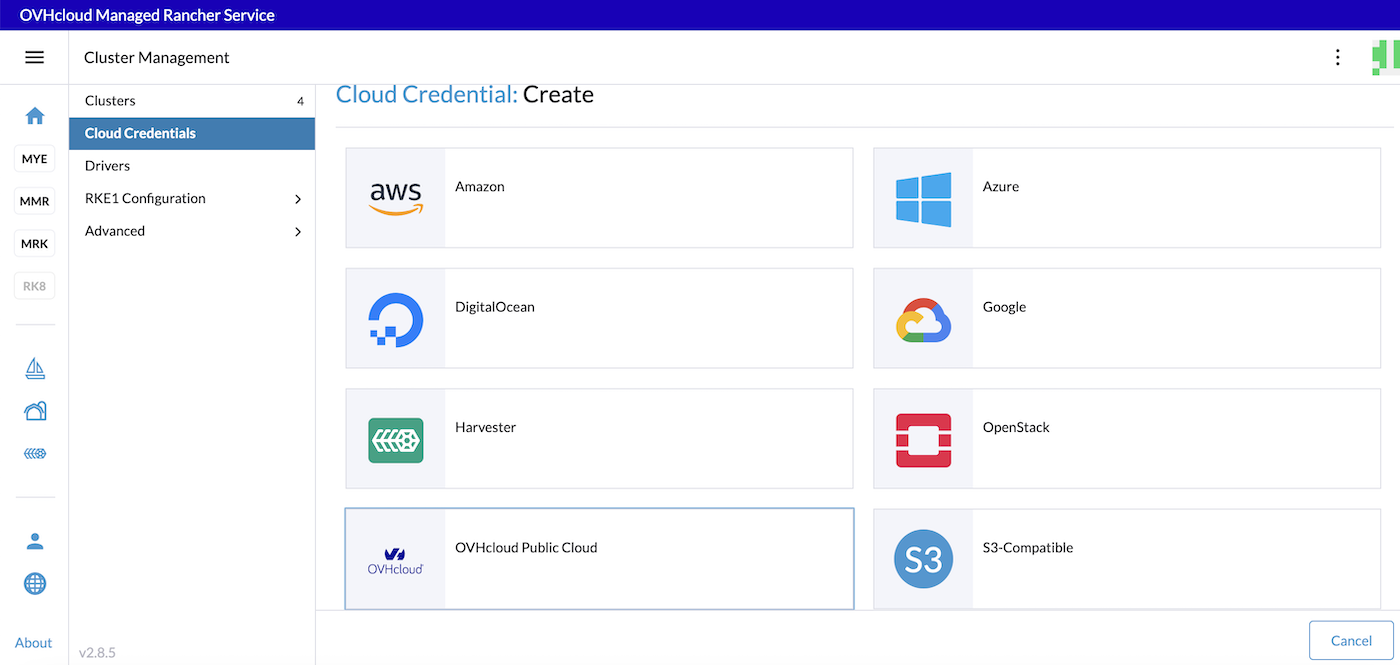
Click the OVHcloud Public Cloud button.
Define a name for the credentials, e.g. pci. Then fill in the OpenStack user's username and password.
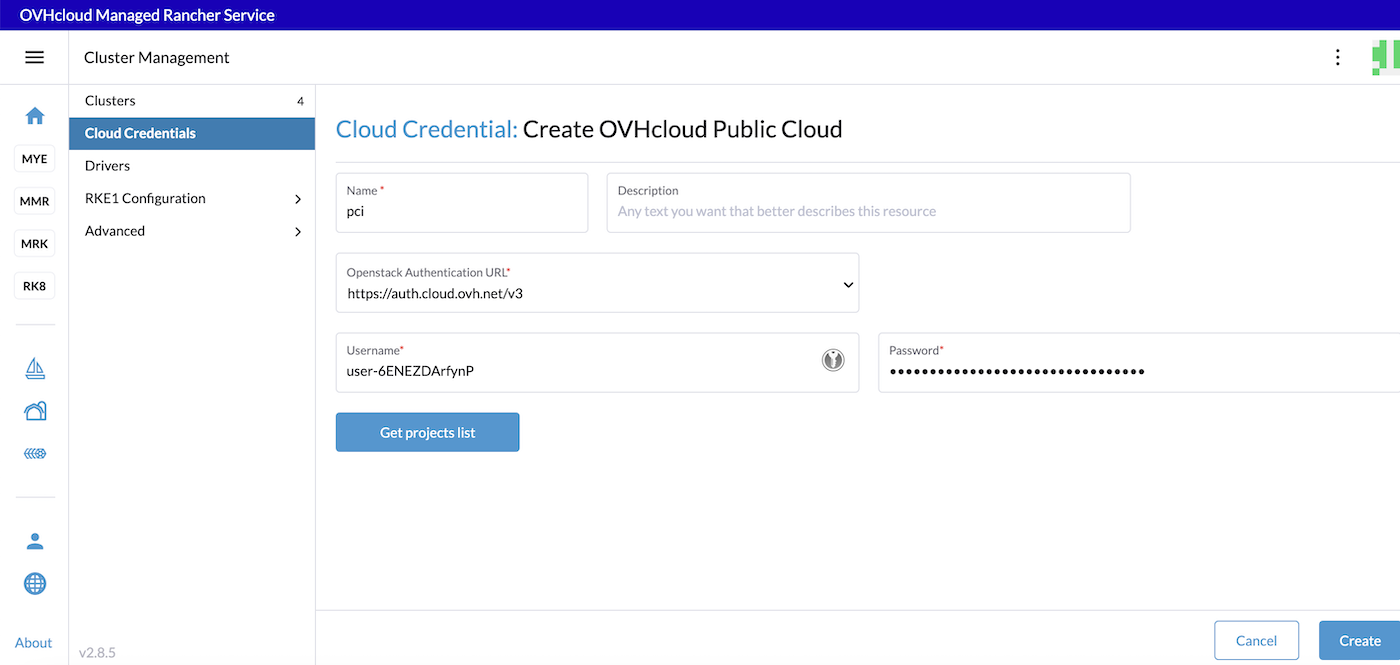
Click on Get projects list:
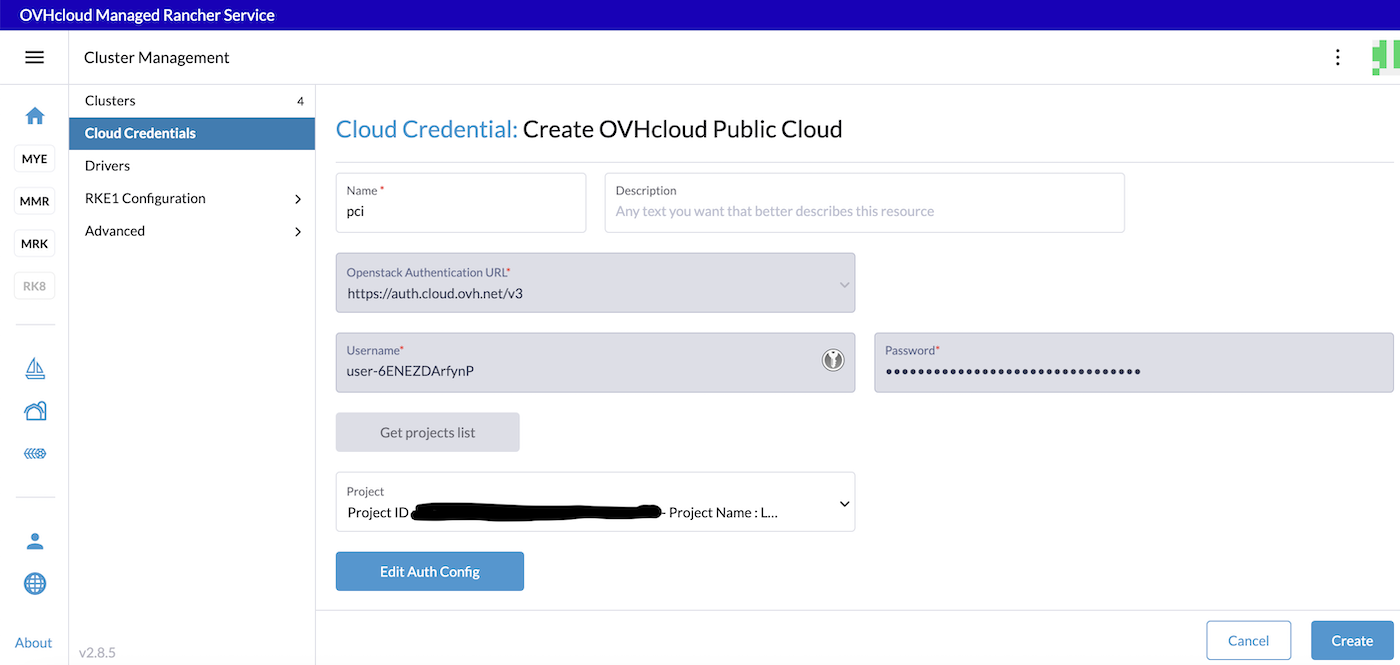
Select your Public Cloud Project in this list then click the Create button.
You don't have to click the Edit Auth Config button.
The OVHcloud Public Cloud credentials have been created. Now you can use them to create a Kubernetes cluster based on Public Cloud Instances (PCI). These credentials will be used to provision nodes in your clusters. You can use these credentials to create several Kubernetes clusters.
Creating a Kubernetes cluster on Compute Instances
Log in to your Managed Rancher Service UI.
Click the Create button.
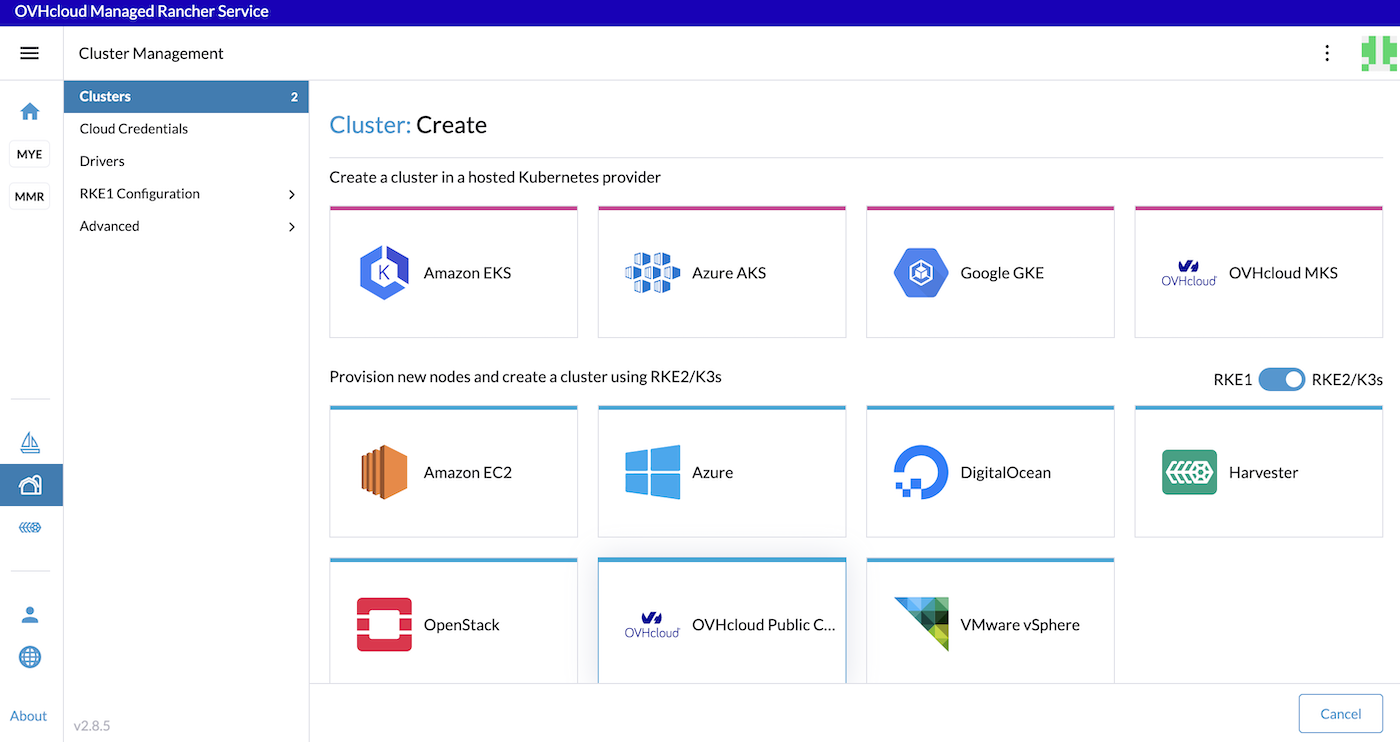
In Rancher you can create a Kubernetes cluster with different methods. To create a Kubernetes cluster running in Compute Instances, use the Provision new nodes and create a cluster using RKE2/K3s way and click the OVHcloud Public Cloud driver.
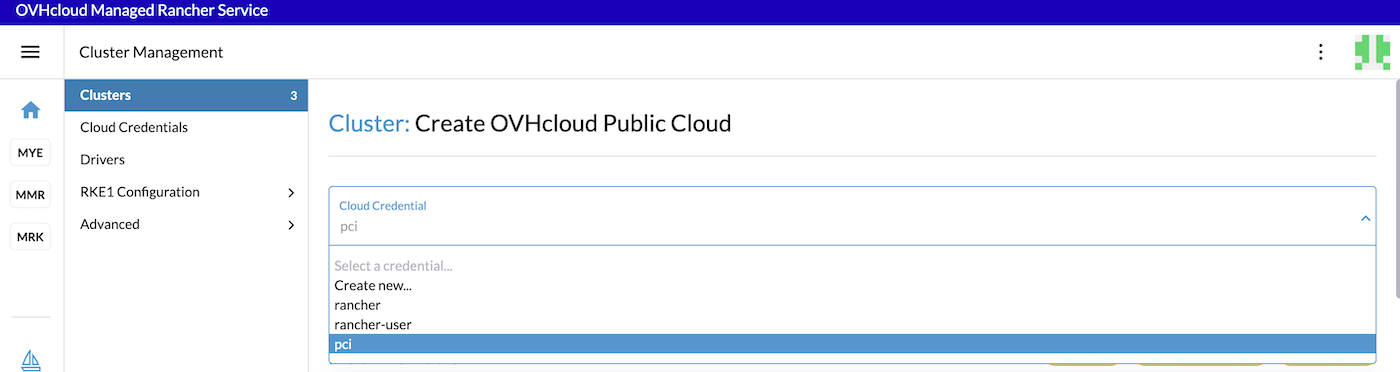
Select an OVHcloud Public Cloud credential:
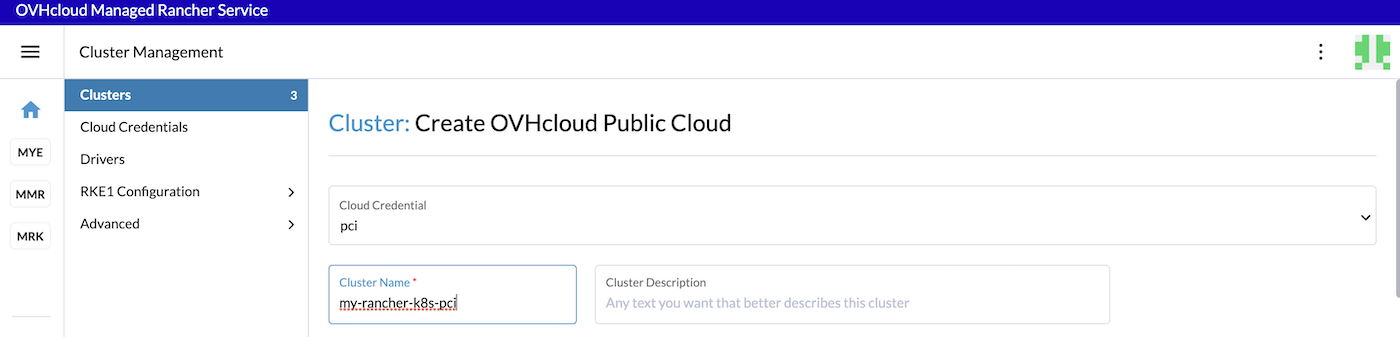
Then, define the cluster name.
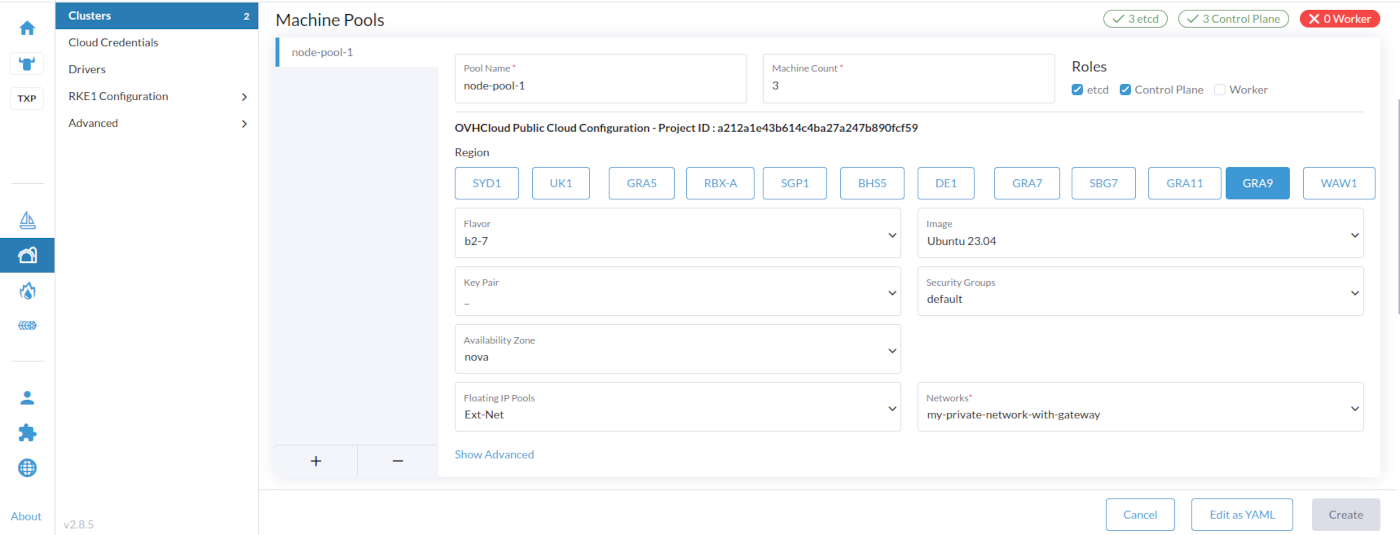
In the Machine Pools section you will configure your cluster.
When you configure a machine pool in Rancher, there are three roles that can be assigned to nodes: etcd, Control Plane and Worker.
Here are some good practices:
- At least 3 machines/nodes with the role
etcdare needed to survive a loss of 1 node and have a minimum high availability configuration for etcd. 3etcdnodes are generally sufficient for smaller and medium clusters, and 5etcdnodes for large clusters. - At least 2 machines/nodes with the role
Control Planefor master component high availability. - You can set both the
etcdandControl Planeroles for one instance. - The
Workerrole should not be used or added to nodes with theetcdorControl Planerole. - At least 2 machines/nodes with the
Workerrole for workload rescheduling upon node failure.
In this guide we will:
- Create a machine pool with 3 compute instances for
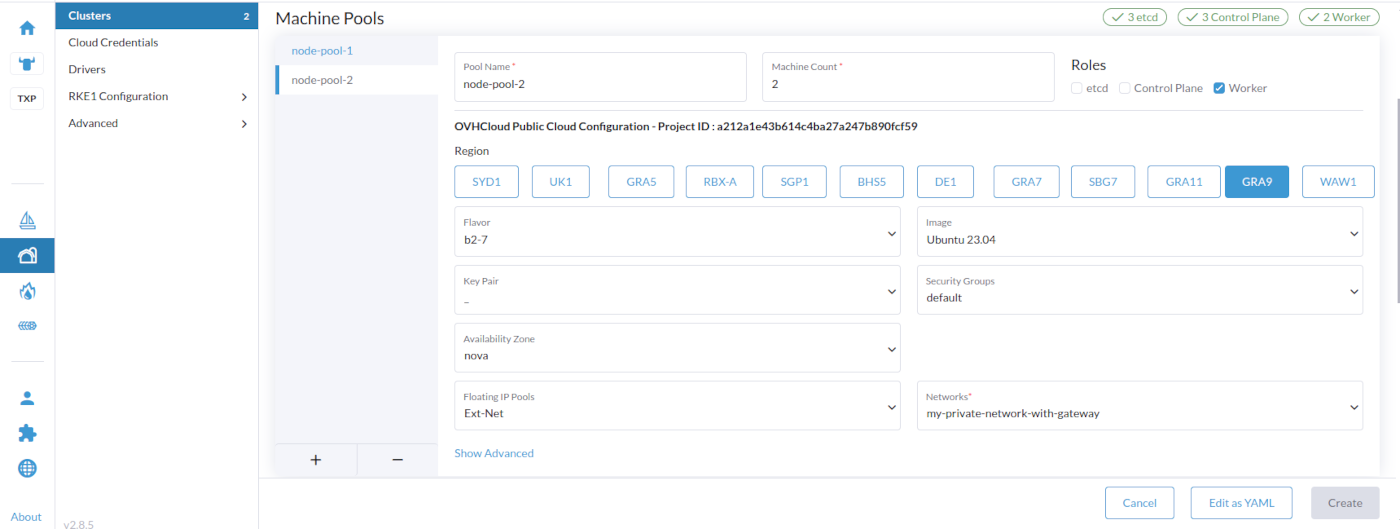
etcdandControl Plane. - Create a machine pool with 2 compute instances for
Worker.
For each of the machine pools, you have to:
- Define the pool name (
node-pool-1for example for the first machine pool). - Define machine count (3 for example for the first machine pool).
- Select roles (check
etcdandControl Planefor the first machine pool)/ - Choose the region (
GRA9for example for the first machine pool). If you want to check the availability of specific products that you plan to use alongside Kubernetes, you can refer to the Availability of Public Cloud Product page. - Choose the flavor (
b2-7for example). You can refer to the OVHcloud Flavor list. - Choose the image for the Operating System (OS) used for your machines/nodes. Please refer to Rancher Operating Systems and Container Runtime Requirements.
- Choose a Key Pair (optional). It's the SSH Key Pair that will be used to access your nodes. Please refer to this guide on how to create a SSH KeyPair and add it to your Public Cloud project. If you leave this field empty, a new keypair will be generated automatically.
- Choose the Security Group that will be applied to created instances. You can leave the field empty.
- Choose the Availability Zone (only
novais supported at the moment). - Choose the Floating IP Pools (only
Ext-Netis supported at the moment). - Choose the Networks. You need to choose a private network (with a gateway). The compute instances will be created in this private network.
At the bottom of the Machine Pools section, click on the + button to add the second machine pool with 2 workers machines/nodes and the same configuration.
In the Cluster Configuration section, choose the Kubernetes version. You need to choose between RKE2 and K3s Kubernetes Operating System (OS). For a production environment, we recommend choosing RKE2.
Select the Container Network, choose if you want to activate a Project Network isolation and the System Services tooling you want to install in your cluster.
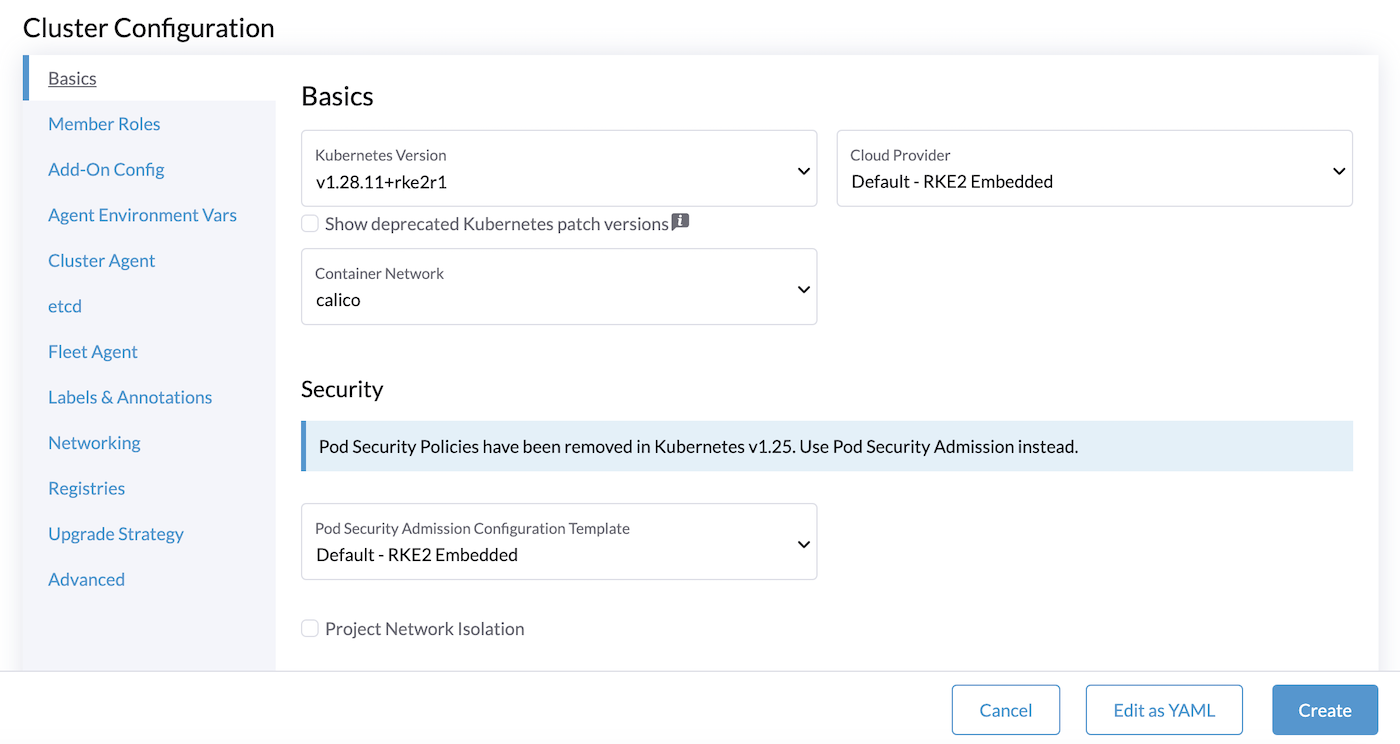
Follow the RKE2 cluster configuration reference for the Cluster Configuration.
In the Member Roles tab, you can add members for users that need to access the cluster. After creating the cluster, you can also add members.
Finally, click the Create button to create your Kubernetes cluster with OVHcloud PCI driver.
The cluster creation can take several minutes (depending on the OS and on the number of nodes you want).
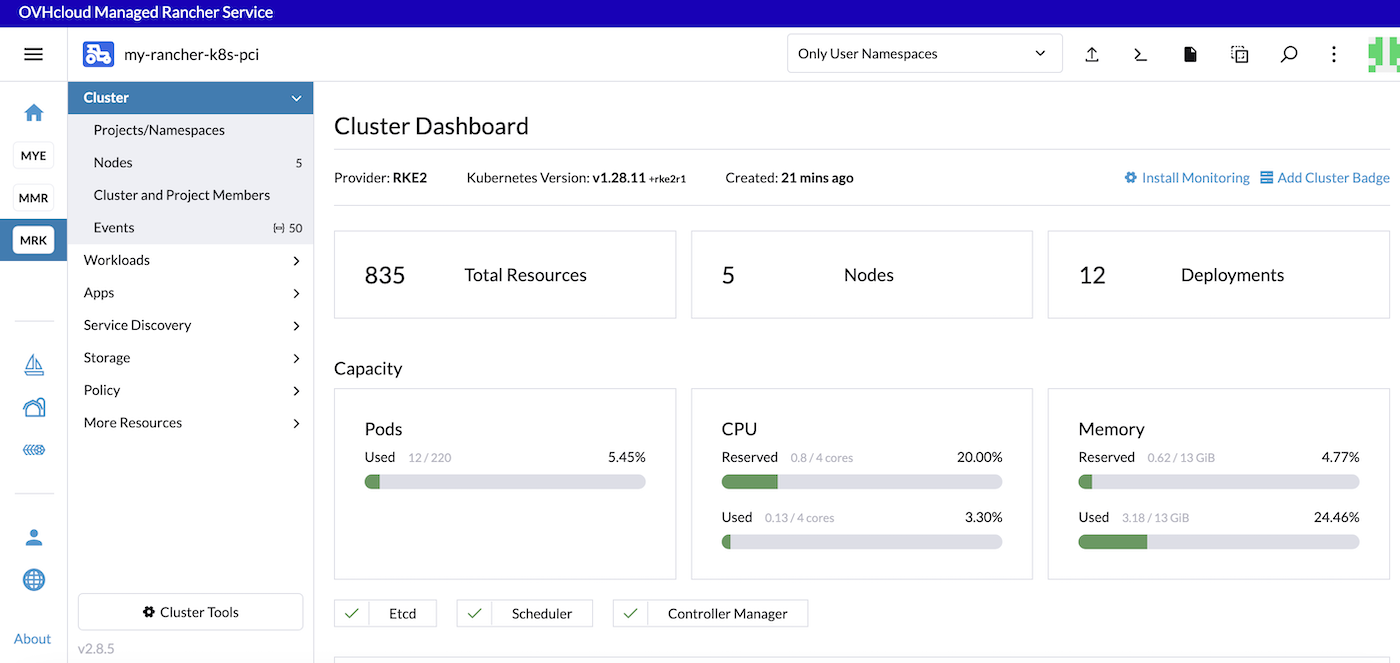
Testing the Kubernetes cluster
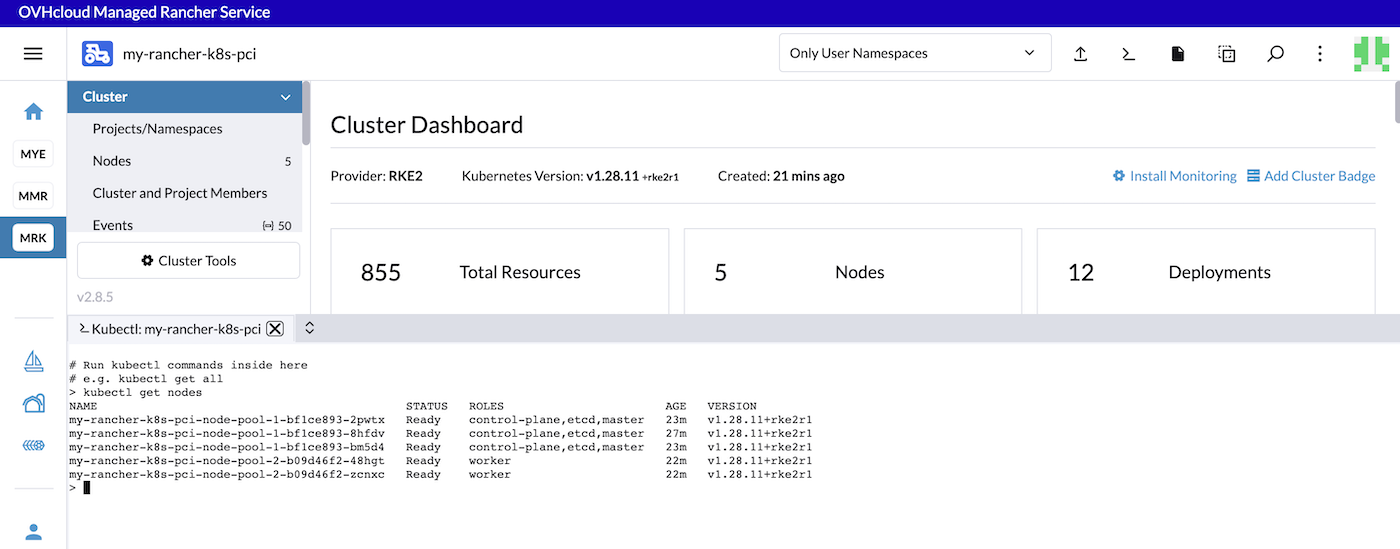
To test your cluster, on the Rancher UI, in the Cluster menu, after selecting your cluster, you can simply click on the Kubectl Shell icon to open a terminal.
List the nodes:
List the namespaces:
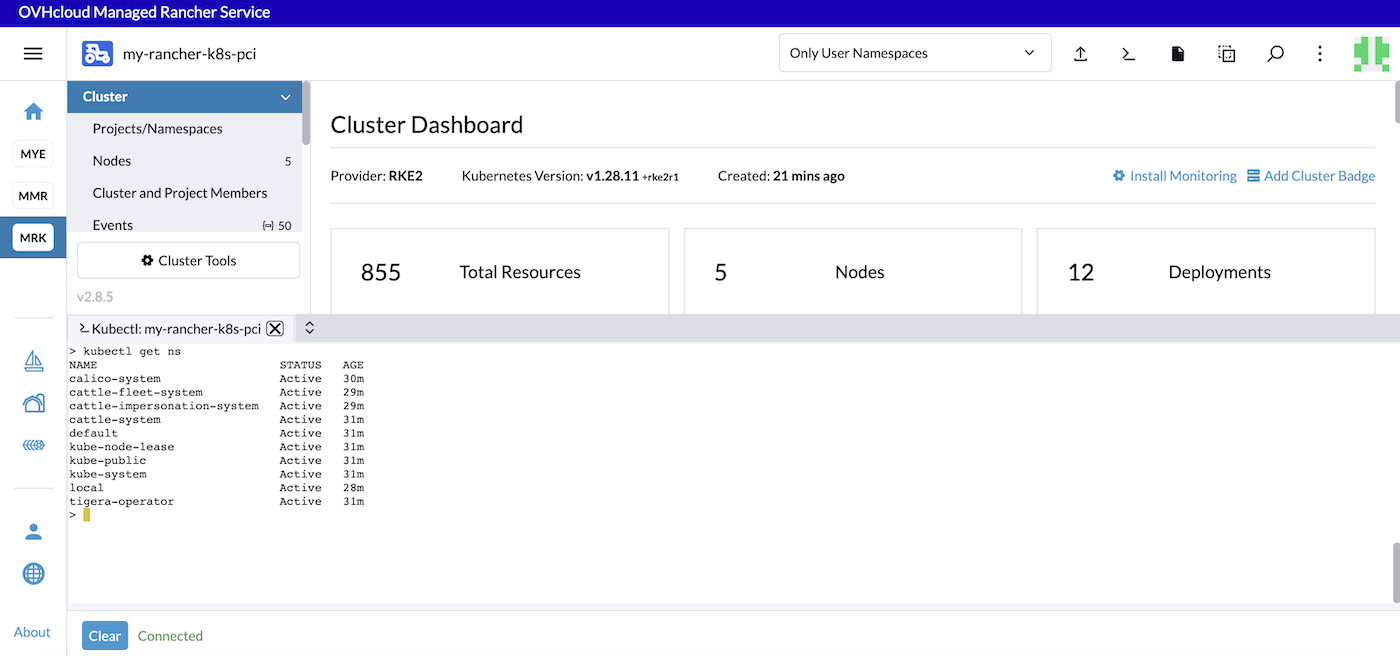
You can now install applications in your Kubernetes cluster though the kubectl CLI or the Rancher UI.
Go further
-
To have an overview of OVHcloud Managed Rancher Service, you can go to the OVHcloud Managed Rancher Service page.
-
If you need training or technical assistance to implement our solutions, contact your sales representative or click on this link to get a quote and ask our Professional Services experts for assisting you on your specific use case of your project.
-
Our team remains available on our dedicated Discord Channel, do not hesitate to join and reach us : https://discord.gg/ovhcloud. Ask questions, provide feedback and interact directly with the team that builds our Container and Orchestration services.
-
Join our community of users.

