Increasing the size of an additional disk
5782 Ansichten
Objective
If you have reached the maximum capacity on your additional disk, you can add more storage by increasing its size.
This guide explains how to increase the size of an additional disk and extend the main partition accordingly.
Requirements
- A Public Cloud instance in your Public Cloud project
- An additional disk created in your project
- Administrative (sudo) access to your instance via SSH (Linux) or RDP (Windows)
OVHcloud Control Panel Access
- Direct link: Public Cloud Projects
- Navigation path:
Public Cloud> Select your project
Instructions
The following steps presume that you have configured an additional disk according to our guide.
Monitoring disk usage before resizing
We recommend that you always maintain 20% free space on your storage volumes. This ensures optimum performance and avoids the risk of system degradation or failure when the volume reaches its maximum capacity.
To ensure that you resize your disk at the right moment, it is essential to monitor disk usage regularly. Below are quick tutorials for both Windows and Linux to help you track disk space and anticipate when an upgrade is needed.
Using Command Prompt
Open Command Prompt (Win + R → cmd → Enter).
Run the following command:
This will display the free space and total size of each disk.
Using PowerShell
Open PowerShell as Administrator.
Run the following command:
This will show the used and available disk space.
Using 'df' command
To check overall disk usage, run:
This will display disk usage in a human-readable format.
Using 'lsblk' command
To view disk partitions and their sizes:
Modifying the size of the disk
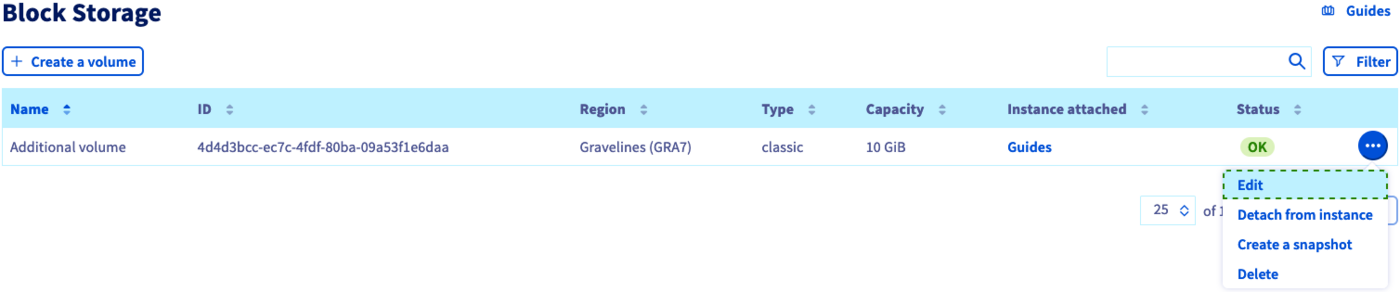
Log in to the OVHcloud Control Panel, go to the Public Cloud section and select the Public Cloud project concerned. Then click on Block Storage in the left-hand menu under Storage & backup
If the volume is attached to a Windows instance, click on ... in the row of the volume and select Detach from instance.
Click on ... in the row of the volume and select Edit.
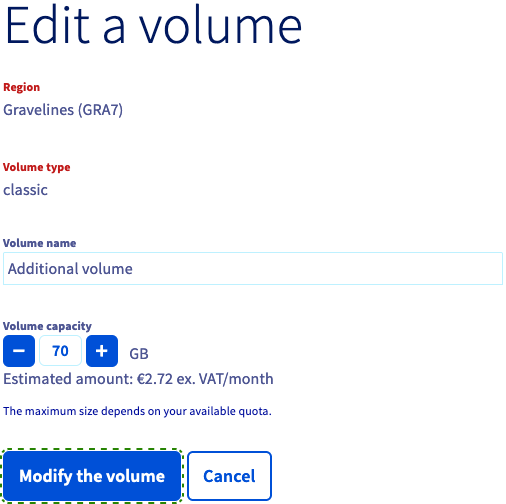
In the popup window, enter the new size for the volume and click on Modify the volume.
Extending the partition (Linux instance)
Establish an SSH connection to your instance in order to adjust the partition to the resized disk.
Unmount the disk first by using this command:
Recreate the partition:
Verify and check the partition:
Finally, re-mount and check the disk:
Once this is completed, detach the volume from the instance and reattach it to ensure the updated QoS settings (IOPS and bandwidth) are properly applied.
Extending the partition (Windows instance)
Before proceeding, reattach the volume to the instance. Click on ... in the row of the volume and select Attach to instance.
Establish a remote desktop (RDP) connection to your Windows instance.
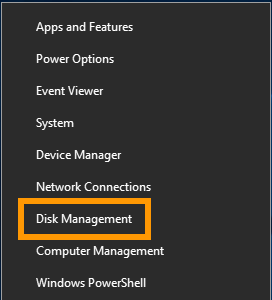
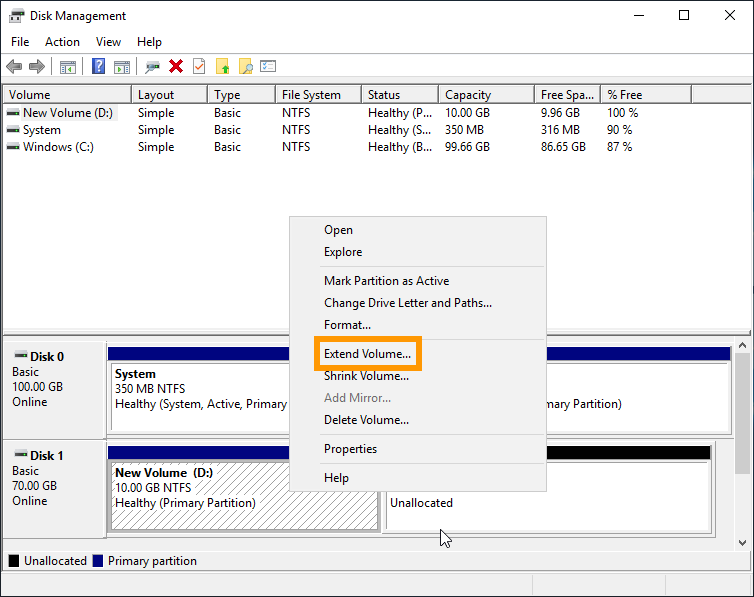
Once logged in, right-click on the Start Menu button and open Disk Management.
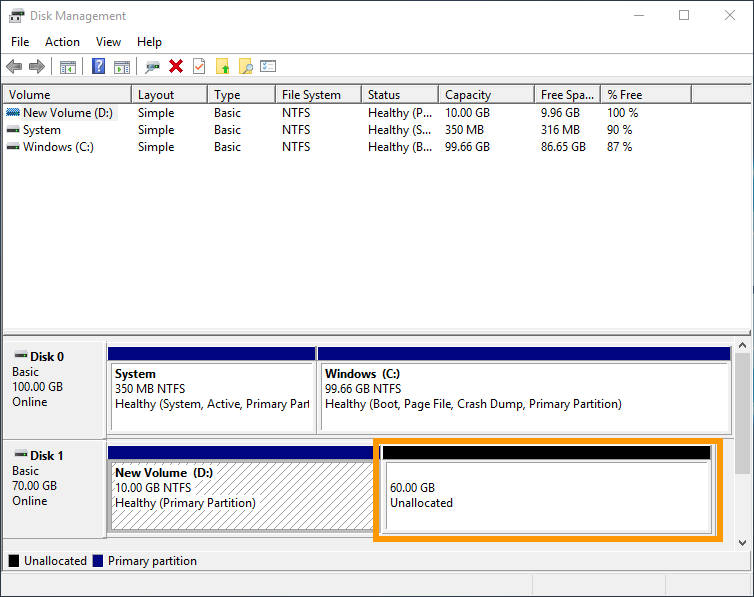
The extended disk now displays the additional capacity as unallocated space.
Right-click on the volume and select Extend Volume from the context menu.
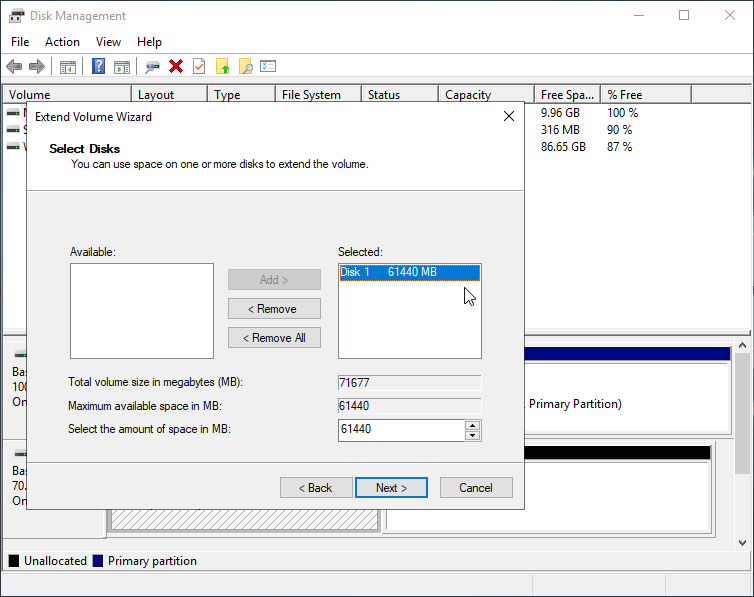
In the "Extend Volume Wizard", click on Next to proceed.
You can modify the disk space in this step if you want to add less than the entire amount to the partition. Click on Next.
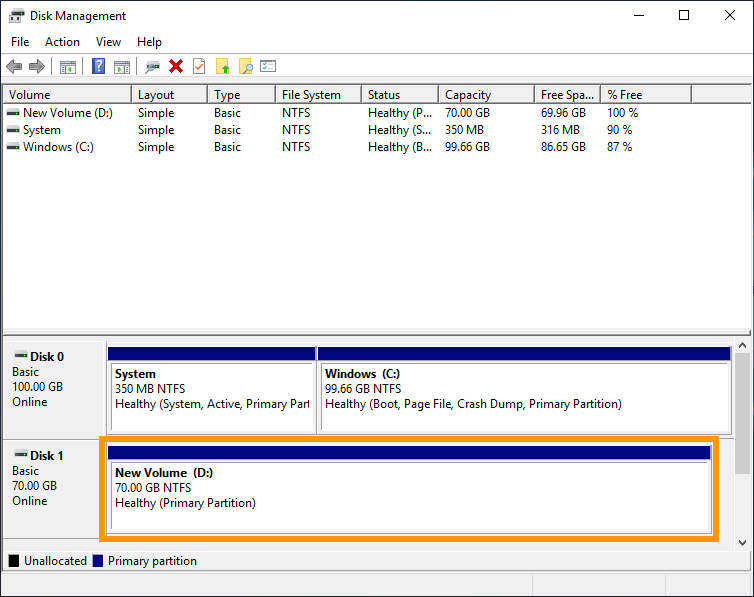
Click on Finish to complete the process.
The resized volume now includes the additional disk space.
Once this is completed, detach the volume from the instance and reattach it to ensure the updated QoS settings (IOPS and bandwidth) are properly applied.
Go further
Creating and configuring an additional disk on an instance
Change your Block Storage volume type
Join our community of users.

