Using instance backups to create or restore an instance
3037 Ansichten
Objective
The OVHcloud Control Panel enables you to create backups of your instances within a few clicks, as well as automating this process. You can make use of these instance backups for two basic purposes:
- Creating a new instance with the backup as a template in order to duplicate the original instance, for example if you are configuring a load balancing infrastructure.
- Restoring instances from a backup, for example if recent changes broke critical configurations on the instance.
This guide explains how to use backups to duplicate and restore your instances.
Requirements
- A backup of a Public Cloud instance
OVHcloud Control Panel Access
- Direct link: Public Cloud Projects
- Navigation path:
Public Cloud> Select your project
Instructions
Two types of backups are available:
- Local: Stored in the same region as your instance.
- Distant: Automatically replicated in another region of your choice.
The operations of creating and restoring an instance from a distant backup are fully supported via the OVHcloud API, offering greater flexibility and effortless integration into your automation processes.
Note : These operations are not yet available through the OVHcloud Control Panel.
Creating an instance from a backup
Then click Instance backup in the left-hand navigation bar under Compute.
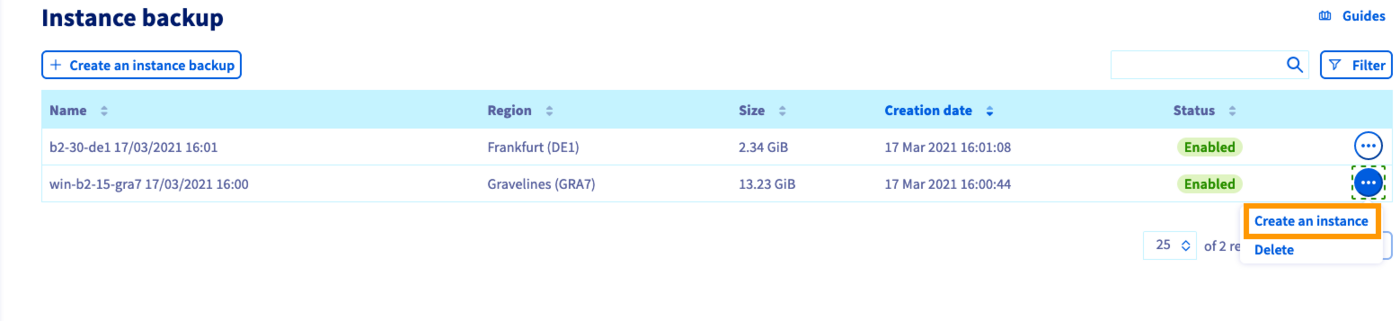
Click the ... button in the row of the relevant backup, then select Create an instance.
You will see a shortened version of the instance creation page where you can decide on some options.
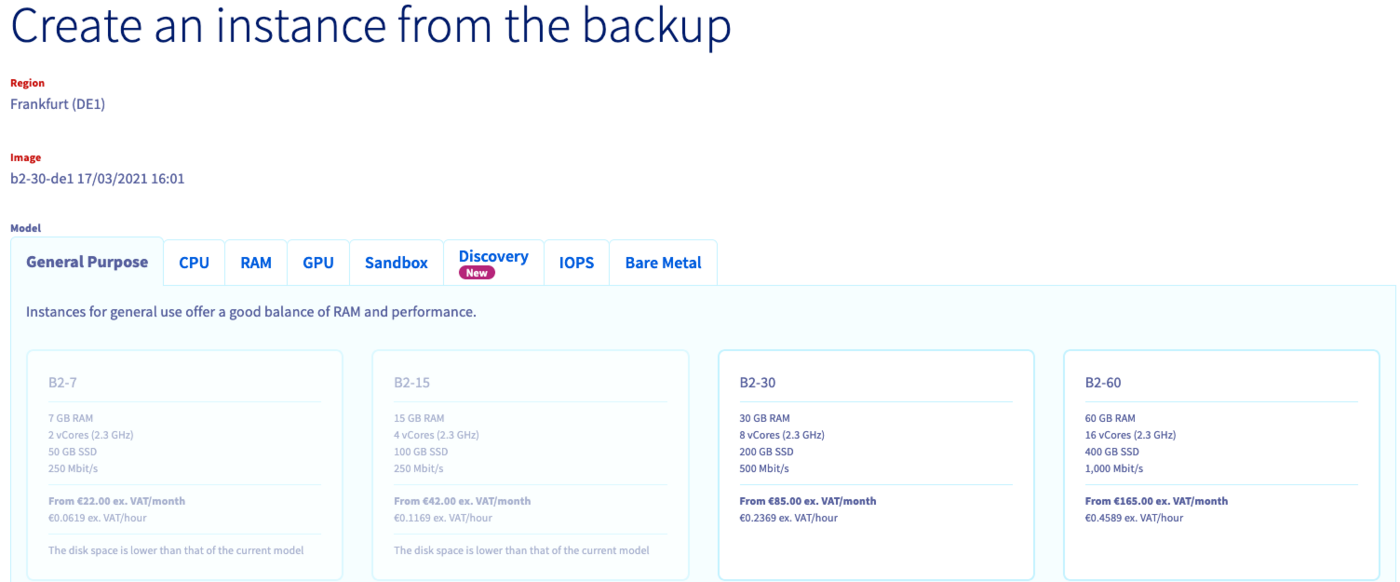
Some elements are pre-defined:
- Region: Your instance will be created in the same data centre as your backup.
- Image: The image will correspond to your backup.
- Model: Only the models that are compatible with your image are available, depending on your quota.
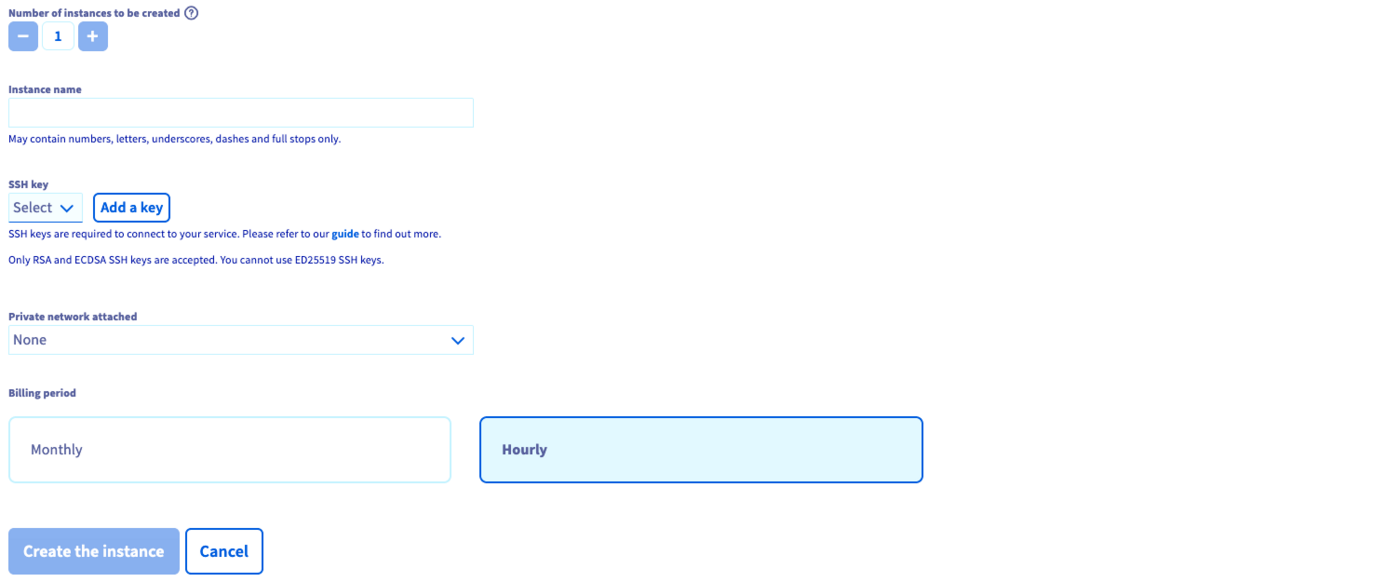
Choose the new instance's name, SSH key, vRack and billing period, then click the Create the instance button.
For further information on creating an instance, please refer to this guide.
In order to create the instance in a different data centre, you will first need to transfer the backup to the appropriate region. Please refer to our guide to transferring an instance backup.
To create an instance from your backup, use the backup ID as the image with this command:
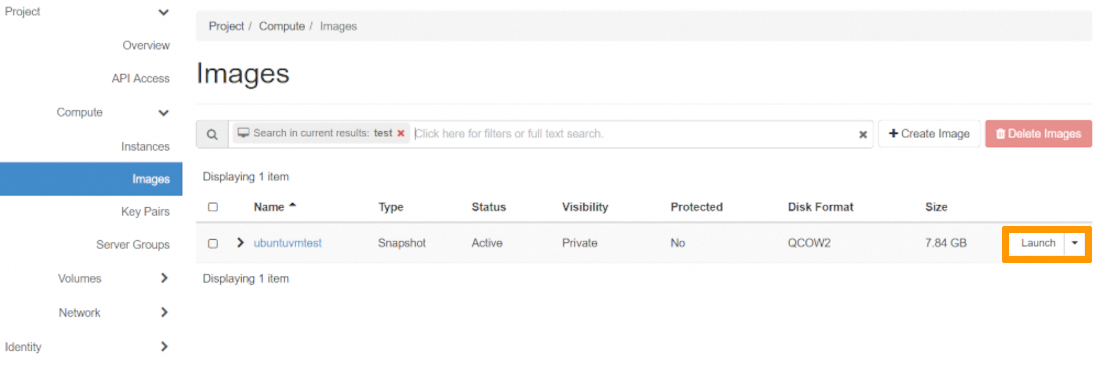
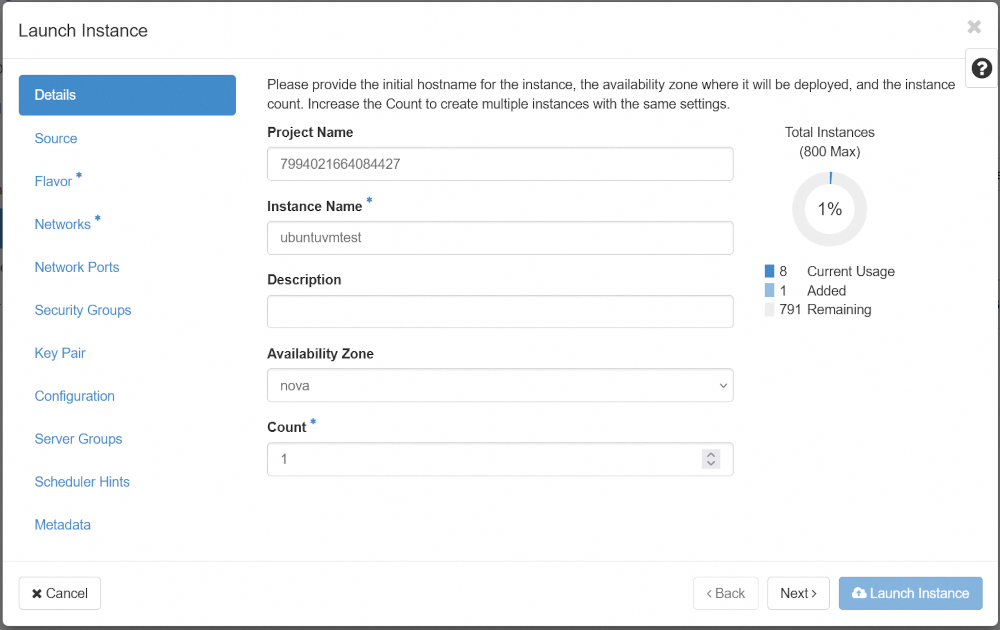
In the Horizon interface, click on Compute in the left-hand menu, then on Images. Find the desired image and click the Launch button to the right of your image line.
Name your instance in the dedicated field and determine the number of instances to create. Then click the Flavor tab.
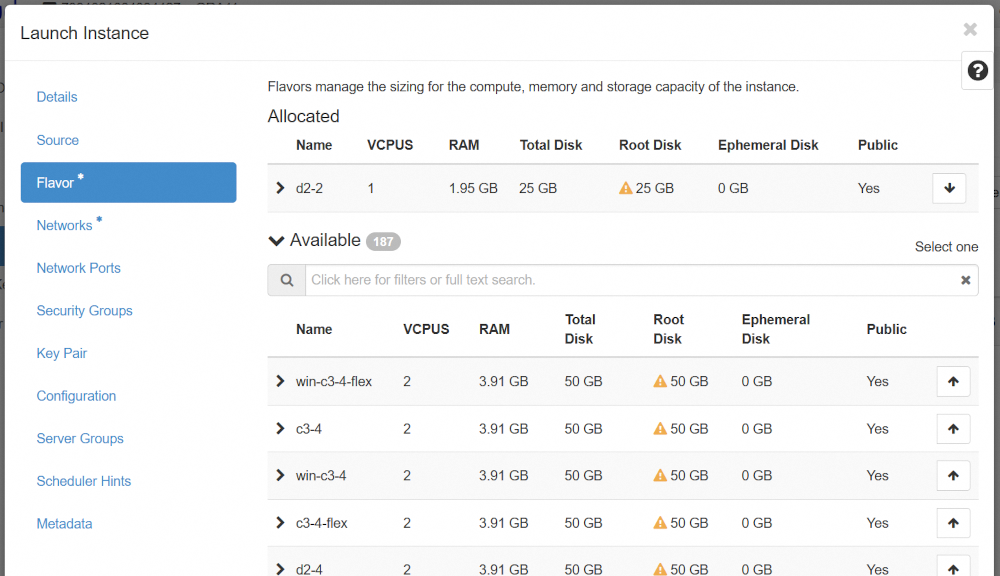
Choose the desired instance model, then click the Networks tab.
If your instance is a Windows server, you must select a flavor of type win-xx-xx (for example, win-b2-15) and have a public interface on the Ext-Net network. Without these conditions, authentication with the OVHcloud KMS will not be possible, and your server will remain with an unactivated licence. This could lead to limitations, including the absence of updates. Please note that it is not possible to resize a Linux instance (such as b2-15) to a Windows instance (such as win-b2-15). To make this transition, you need to recreate a new instance.
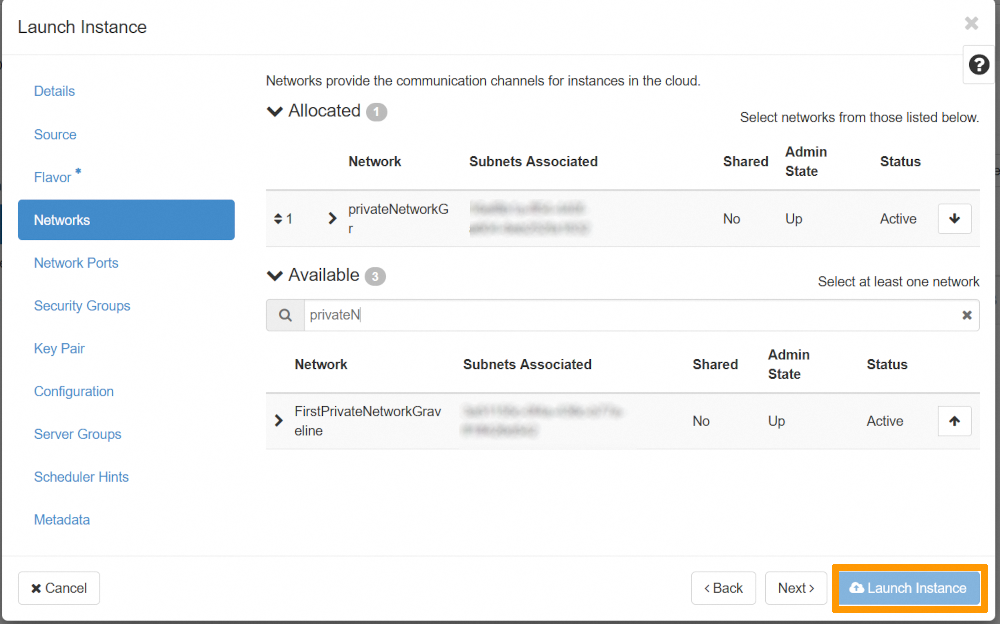
Choose the network you wish to assign to it, then click the Launch Instance button.
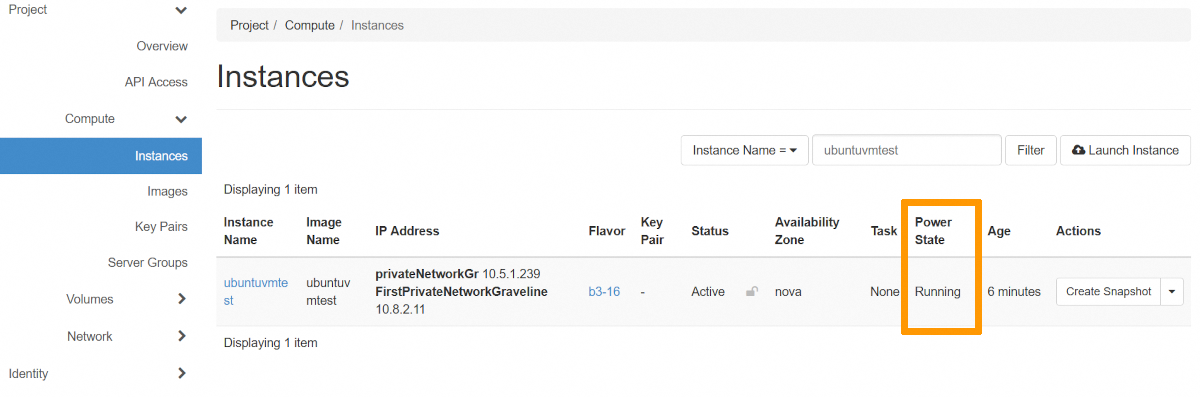
You can find the status of your new instance in Compute in the left-hand menu, then on Instances.
Fill in the variables:
- serviceName : The OVHcloud project ID.
- regionName : The region name where the instance will be located.
Example of the request body:
Restoring an instance from a backup
Then click Instances in the left-hand navigation bar under Compute.
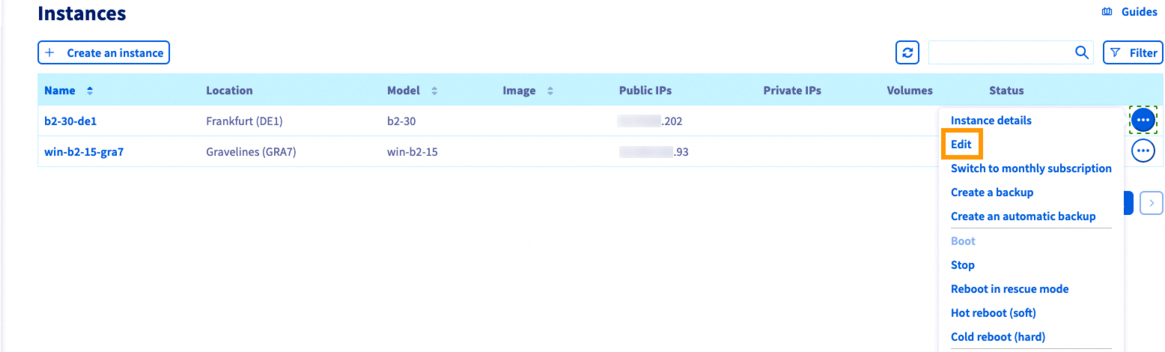
Click the ... button in the row of the relevant instance, then select Edit.
This opens the page for editing an instance where you can change:
- the instance's name;
- the instance's image;
- the instance's model;
- the instance's billing mode (from
hourlytomonthlyonly).
Make your changes if necessary and switch to the Backups tab of the Image section.
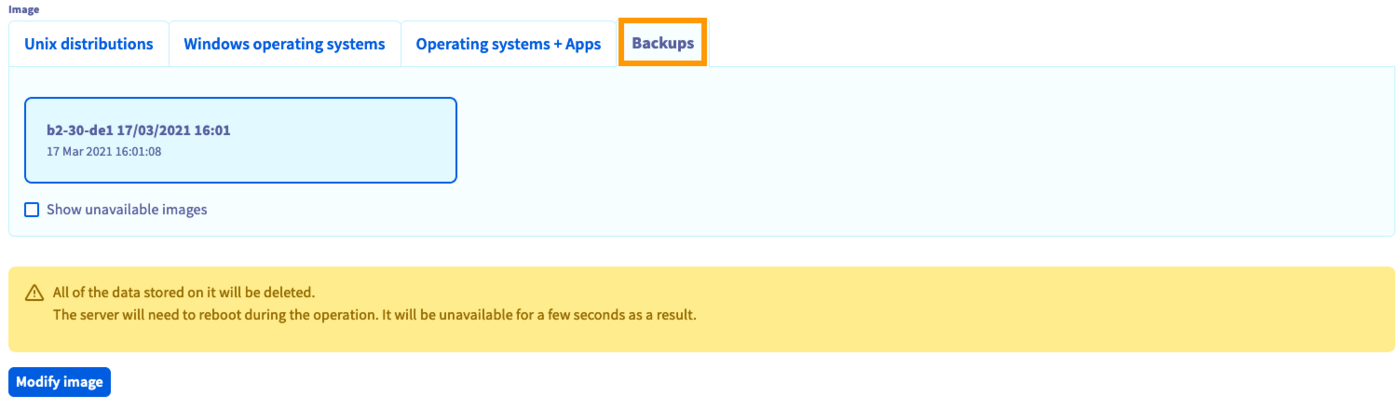
Select from the list of available backups. Click on Modify image if you are certain that you want to overwrite the current image with the backup.
The instance will have the status Re-installation until the process is completed. It might be necessary to refresh the page in the browser in order to see the current status.
As stated in the warning message, any data added after the backup creation will be lost.
Fill in the variables:
- serviceName : The OVHcloud project ID.
- regionName : The region name where the source instance is located.
- instanceId : The unique instance ID.
Example of the request body:
Go further
Join our community of users.

