Managing your Load Balancer service via the Control Panel
2007 Views
Objective
This guide is designed to help you get started using the Load Balancer, by introducing the main features of the solution.
Requirements
- An OVHcloud Load Balancer service
OVHcloud Control Panel Access
- Direct link: Load Balancer
- Navigation path:
Network>Load Balancer> Select your service
Instructions
Managing your Load Balancer via the Control Panel
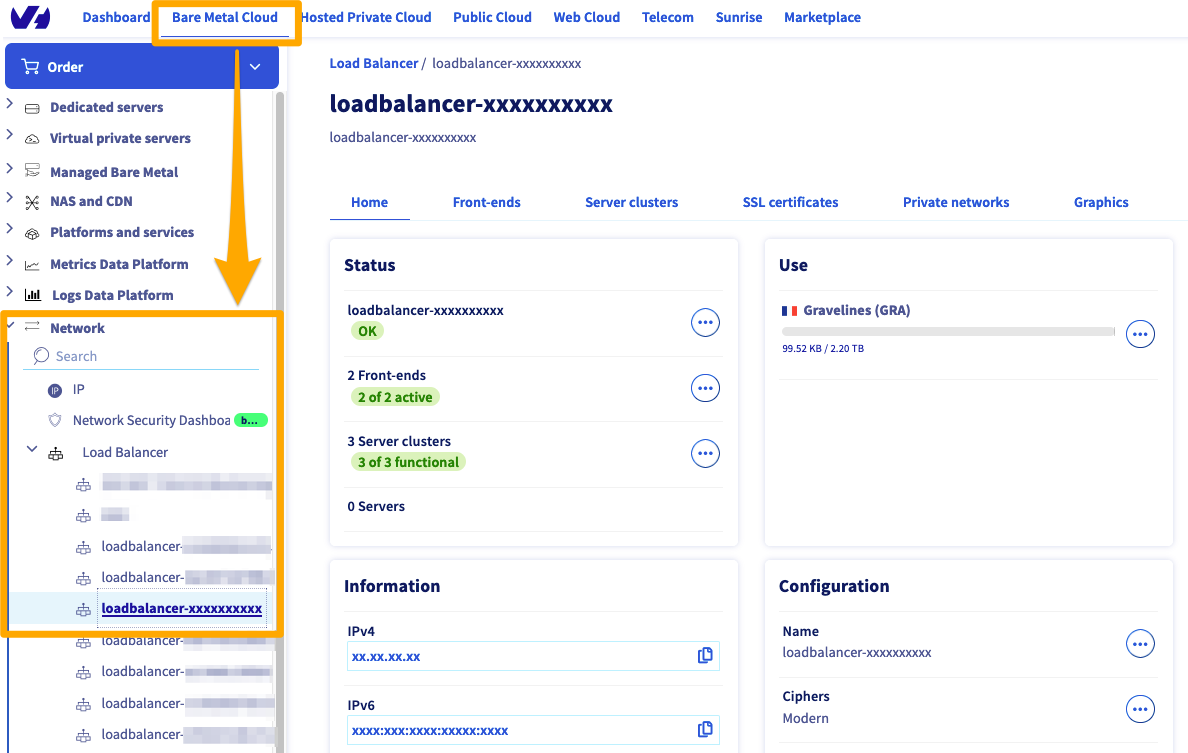
On this page, you will see the following information:
| Element | Purpose |
|---|---|
| Status | An overview of your Load Balancer with the IP, front-ends, functional clusters and servers added |
| Use | A summary of how to use your Load Balancer |
| Graphs | In this section, you will see the graphs linked to service, by concurrent connections or requests per minute |
| Information | Your IPv4 and IPv6 addresses and the Additional IPs linked to them, as well as the number of outgoing IPv4s (see more details by clicking on the ... button) |
| Configuration | Here, you can customise the name of your solution (which will appear at the top of the left-hand column) The cipher(s) are customisable, as well as the availability zone where your Load Balancer is based |
| Subscription | Here, you will see the admin details for your solution |
To add front-ends or Server clusters, simply click on their respective buttons. A form will then help you configure each part of your solution.
Managing front-ends
To add front-ends, simply go to the Front-ends section, and click Add a front-end. The following menu will then appear:
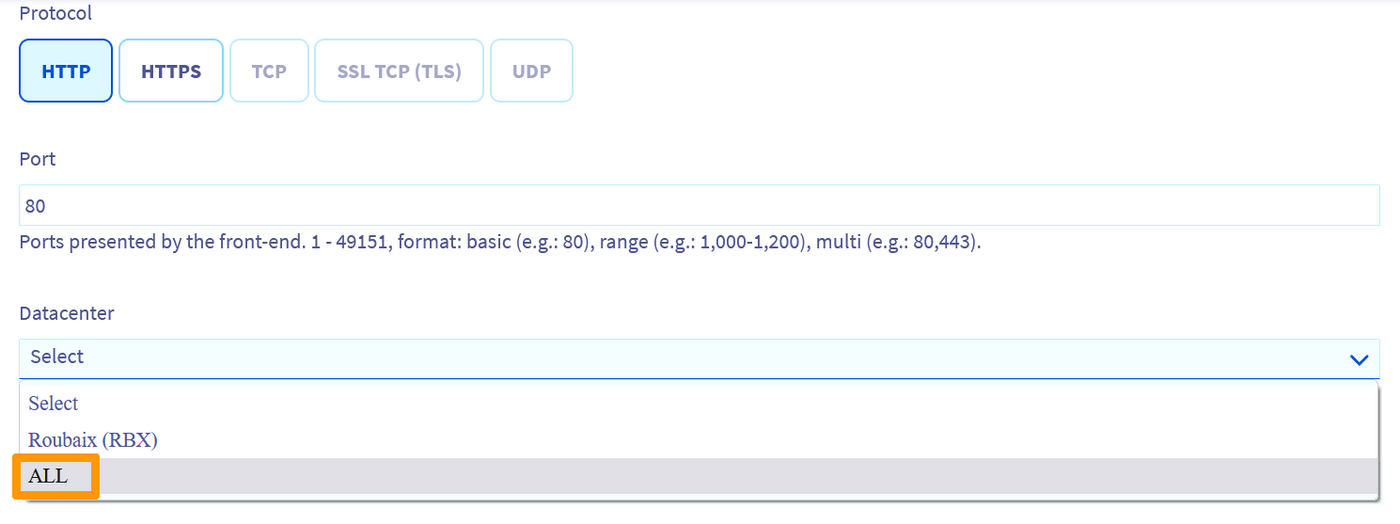
Details of front-end parts:
| Element | Purpose |
|---|---|
| Name | If you want, you can choose a name for your front-end. This is very useful when you have several front-ends, so you can tell them apart quickly |
| Protocol | You can choose between HTTP, HTTPS, TCP, SSL TCP (or TLS) and UDP |
| Port | Choose the listening port you wish to use |
| Datacentre | Choose between your availability zone or all availability zones to create your front-end |
| Default cluster | If you have several clusters configured, you can choose one of them as a default for each front-end |
You can also access advanced settings:
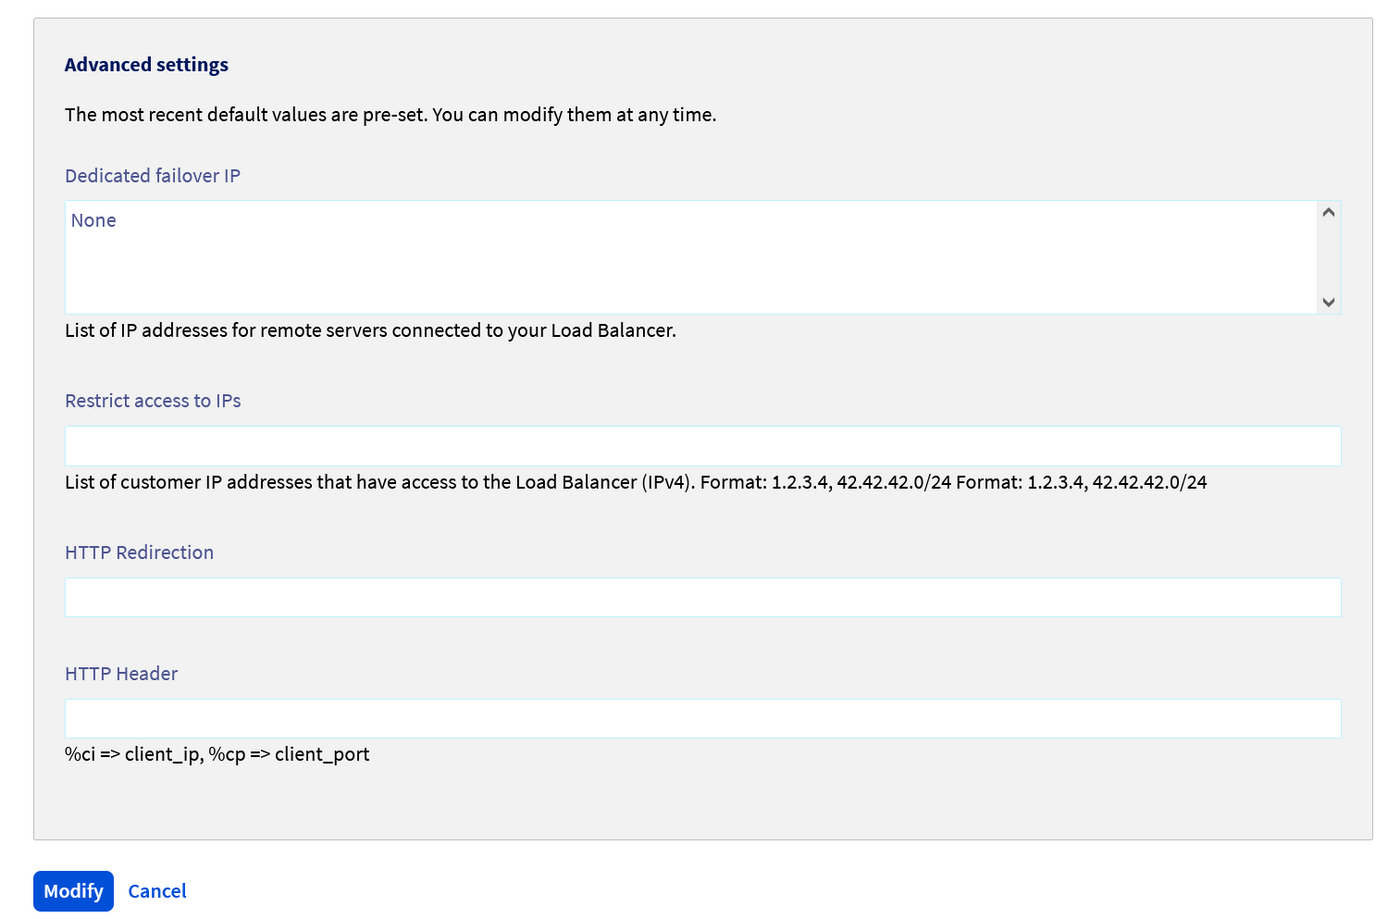
| Element | Purpose |
|---|---|
| Dedicated Additional IP | List of Additional IPs for remote servers |
| Restrict access to IPs | List for restricting remote access to the Load Balancer, for IPv4 only |
| HTTP redirection | Add a HTTP redirection URL |
| HTTP header | Add a HTTP header here |
Managing your clusters
To add a server cluster, simply go to the Server clusters section, and click Add a server cluster. You will get the same main options as for the front-end. However, the advanced options are different:
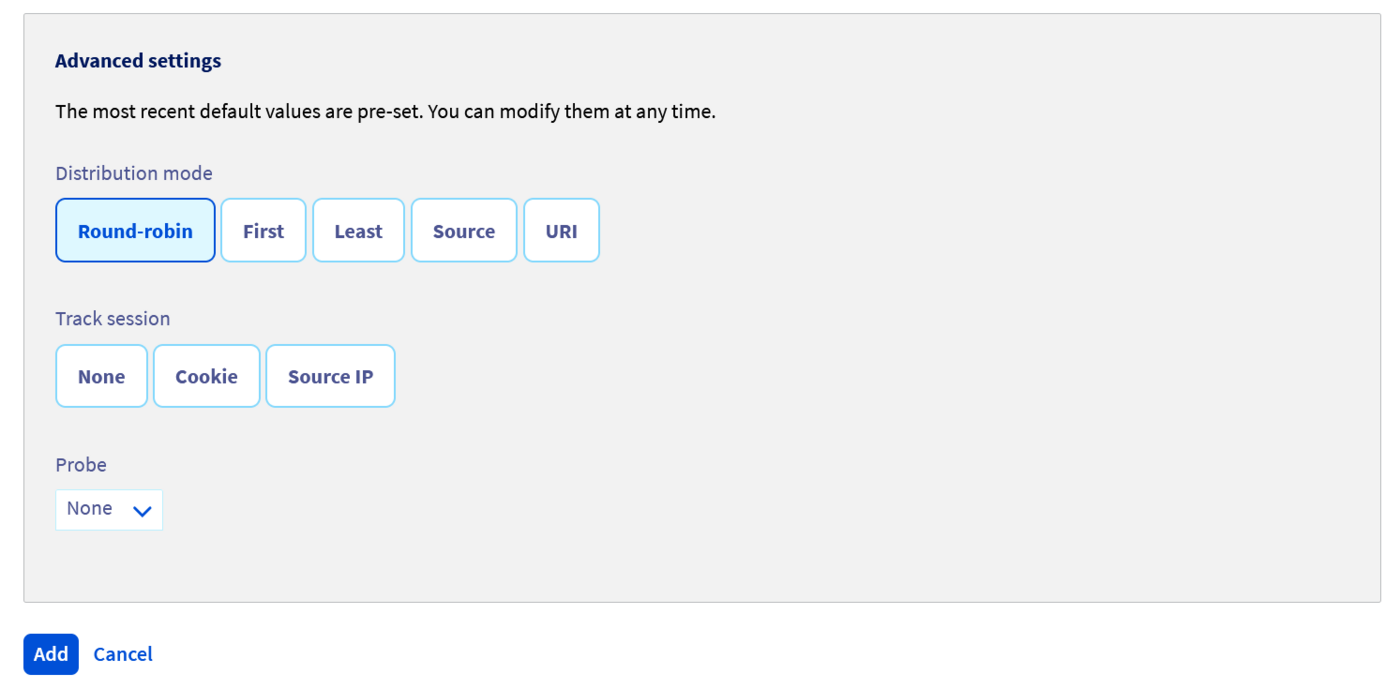
| Element | Purpose |
|---|---|
| Distribution method | Choosing between Round-robin, First, Last, Source or URI for your IP load balancing |
| Track session | You can track sessions via Cookie or source IP, this can be defined here |
| Probe | Choosing and activating a probe |
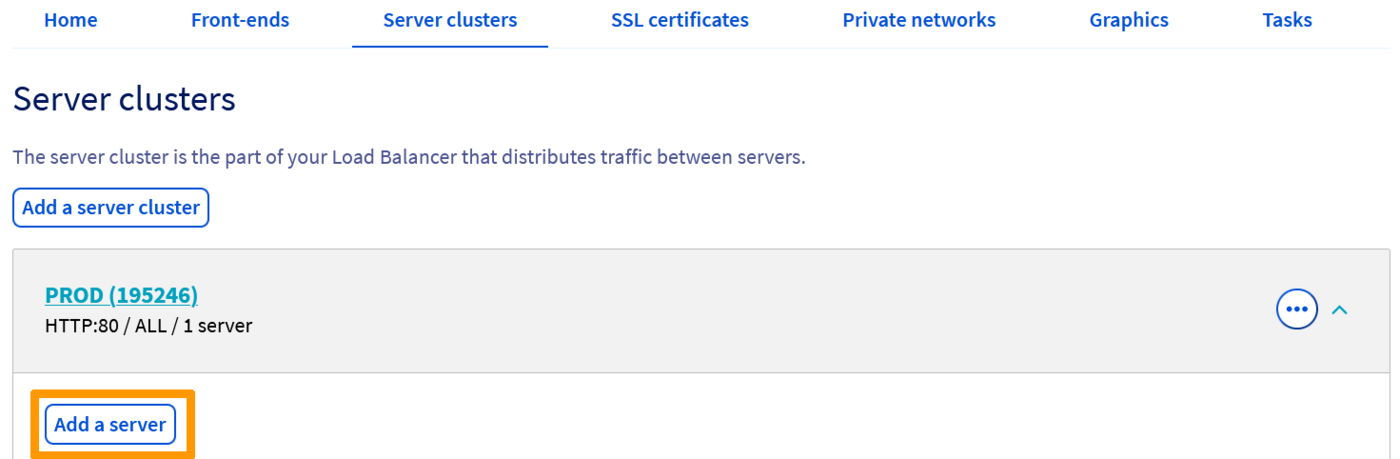
Managing your servers
Once you have created your server cluster, you just need to add servers to it. Details on these options are below, as well as advanced options:
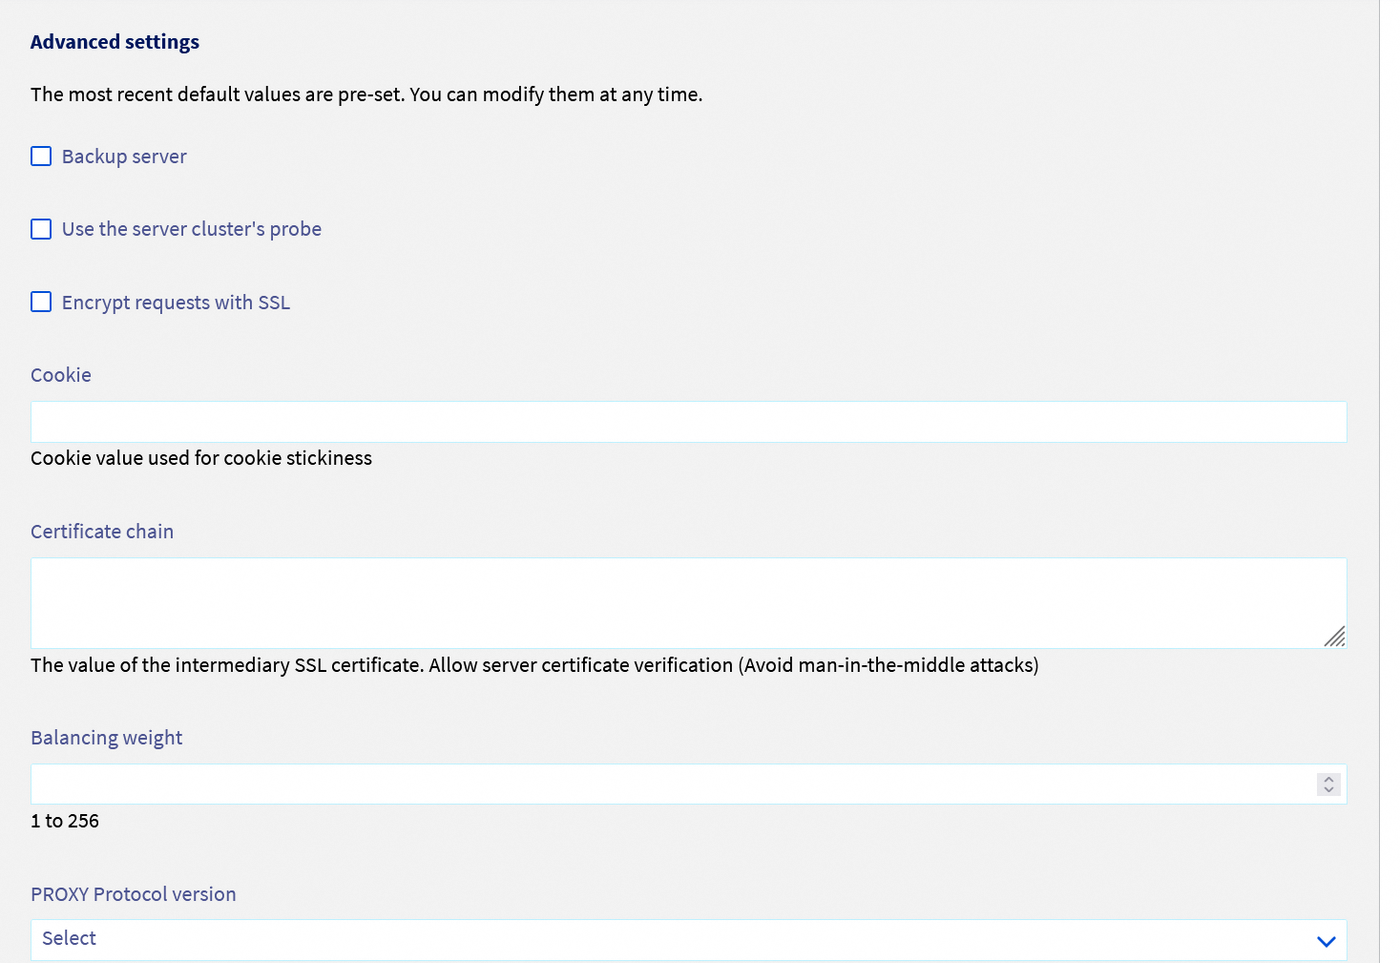
| Element | Purpose |
|---|---|
| Name | If you want, you can choose a name for your server. This is very useful when you have several servers, so you can tell them apart quickly |
| IPv4 address | Adding the IP address of the service that will act as a server |
| Port | Server port |
| Backup server | Selecting which server is a backup server |
| Use the server cluster’s probe | Choosing the probe that was validated when you created the cluster |
| Encrypt requests with SSL | Encrypting requests with an SSL certificate |
| Cookie | Add a customised session cookie |
| Certificate chain | Add a certificate chain |
| Balancing weight | Choose the balancing weight for the load balancer |
| PROXY Protocol version | Only if you have configured it, choose the version of the PROXY protocol you wish to use on the server. You can find more information on the PROXY protocol and how to use it with the OVHcloud Load Balancer in this guide. |
Managing SSL certificates
You can add an SSL certificate to the Load Balancer in the SSL Certificate section. You have two options: you can order an SSL certificate from OVH, or add an external certificate.
OVHcloud SSL certificate
To order an SSL certificate, simply go to the SSL Certificate section, then click Order an SSL certificate and browse the options available:
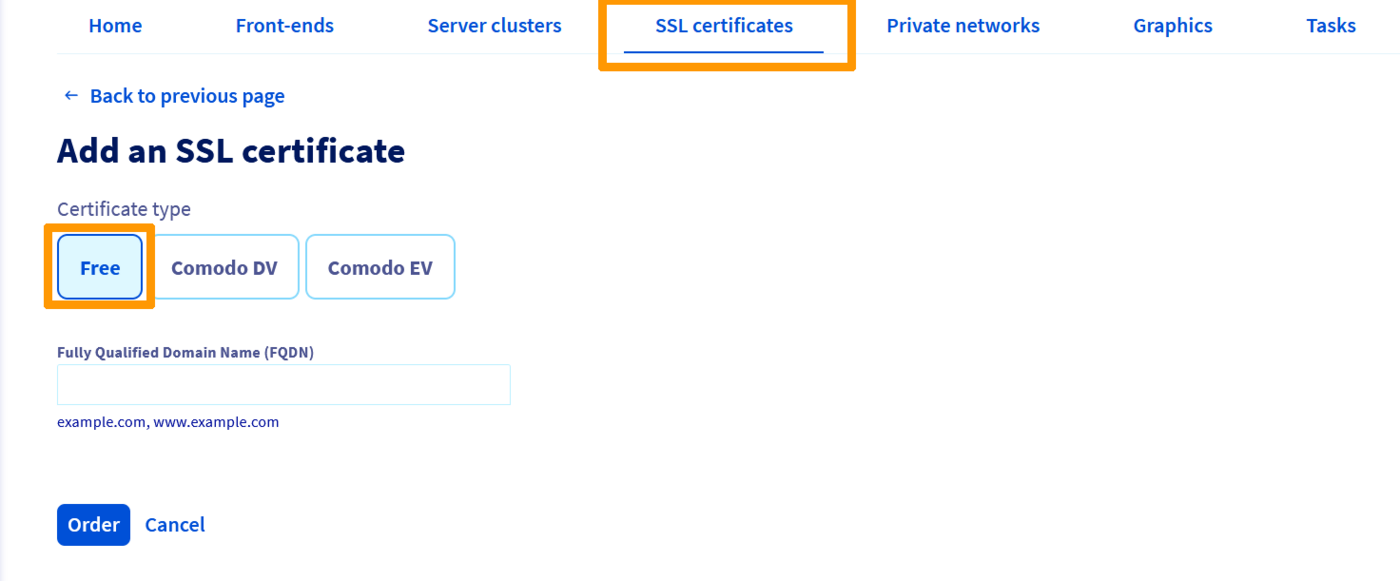
| Element | Purpose |
|---|---|
| Name | If you want, you can choose a name for your certificate. This is very useful when you have several certificates, so you can tell them apart quickly |
| Certificate type | Free (Let's Encrypt), Comodo DV or Comodo EV (For more details, see this page) |
| Fully Qualified Domain Name (FQDN) | Domain(s) concerned |
Adding an external SSL certificate
If you already have your own SSL certificate, you can add it directly:
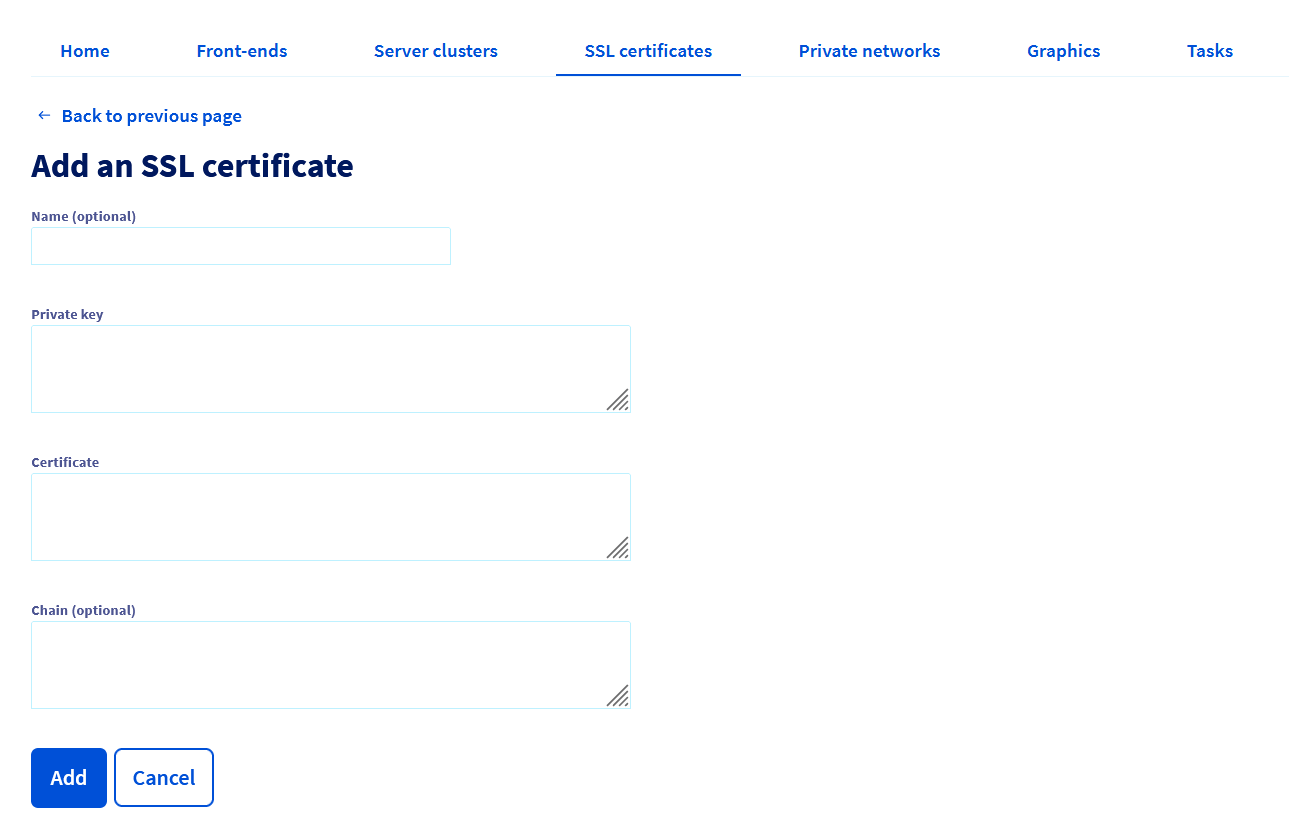
| Element | Purpose |
|---|---|
| Name | If you want, you can choose a name for your certificate. This is very useful when you have several certificates, so you can tell them apart quickly |
| Private key | Field for entering the private key to add to the service |
| Certificate | Field for adding the certificate |
| Chain | Field for adding the root certificate, if required |
Go further
Join our community of users.

