Configuration of an OVHcloud Load Balancer service with HTTP/HTTPS
7721 Ansichten
Objective
This guide aims to help you create your first HTTP/HTTPS service using the OVHcloud Load Balancer offer. We will configure a simple OVHcloud Load Balancer service to distribute HTTP traffic for a service, such as a website.
A frontend will be created to listen on port 80, while another will listen on port 443 with an SSL/TLS certificate. These frontends will be configured to direct their traffic to a common HTTP farm. This farm can have one or more servers, depending on the chosen / adapted configuration.
As a reminder, the OVHcloud Load Balancer service is composed of 4 elementary parts:
- the
frontends; - the
farmsof servers and theirservers; - the advanced
routesbetween Frontends and Server Farms; - the
SSL/TLScertificates allowing TCP and/or HTTP connections to be encrypted.
Requirements
- Have an OVHcloud Load balancer offer in your OVHcloud account
- Have a configured farm
- Have a configured frontend
- Have an SSL certificate
OVHcloud Control Panel Access
- Direct link: Load Balancer
- Navigation path:
Network>Load Balancer> Select your service
Instructions
Table of contents
We will guide you through the different steps. Depending on your architecture choices, some configurations may differ.
Before you start, it is recommended to consult the OVHcloud Load Balancer presentation.
The order of element creation is important. In particular, server farms must be configured before being able to attach an SSL/TLS certificate or servers to them. Similarly, frontends must be configured after the server farms in order to be able to configure the frontend's default farm.
The features detailed below are accessible from the OVHcloud Control Panel:
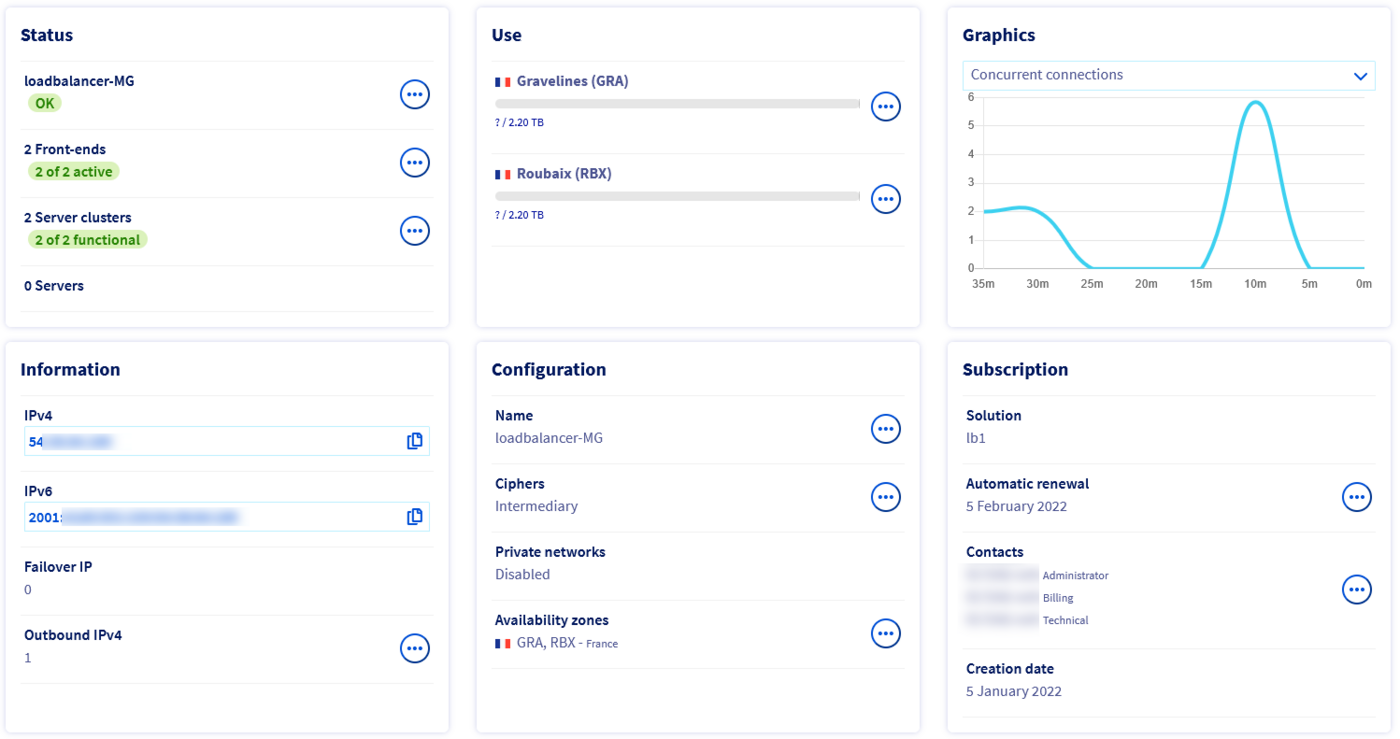
For more information about the features of the OVHcloud Control Panel, see the Managing the Load Balancer service via the OVHcloud Control Panel page.
Via the OVHcloud API, use the following call:
For more information on the API features, consult the page API function details
Add a server farm
We will add an HTTP server farm to our service. This part is responsible for distributing traffic to the servers.
From the OVHcloud Control Panel
In the Server Farms tab, click the Add a server farm button.
Fill in the fields. The only mandatory fields for a simple configuration are the Protocol and the Datacentre. It is recommended to explicitly define a Port, generally port 80 for a web service. If no port is specified, your OVHcloud Load Balancer will automatically use the same port as the corresponding frontend and the probes may not work as expected.
If you add several servers in your farm, it is recommended to configure an HTTP availability probe. When a probe is configured, the OVHcloud Load Balancer service can automatically disable a server that is down or under maintenance, in order not to affect visitors.
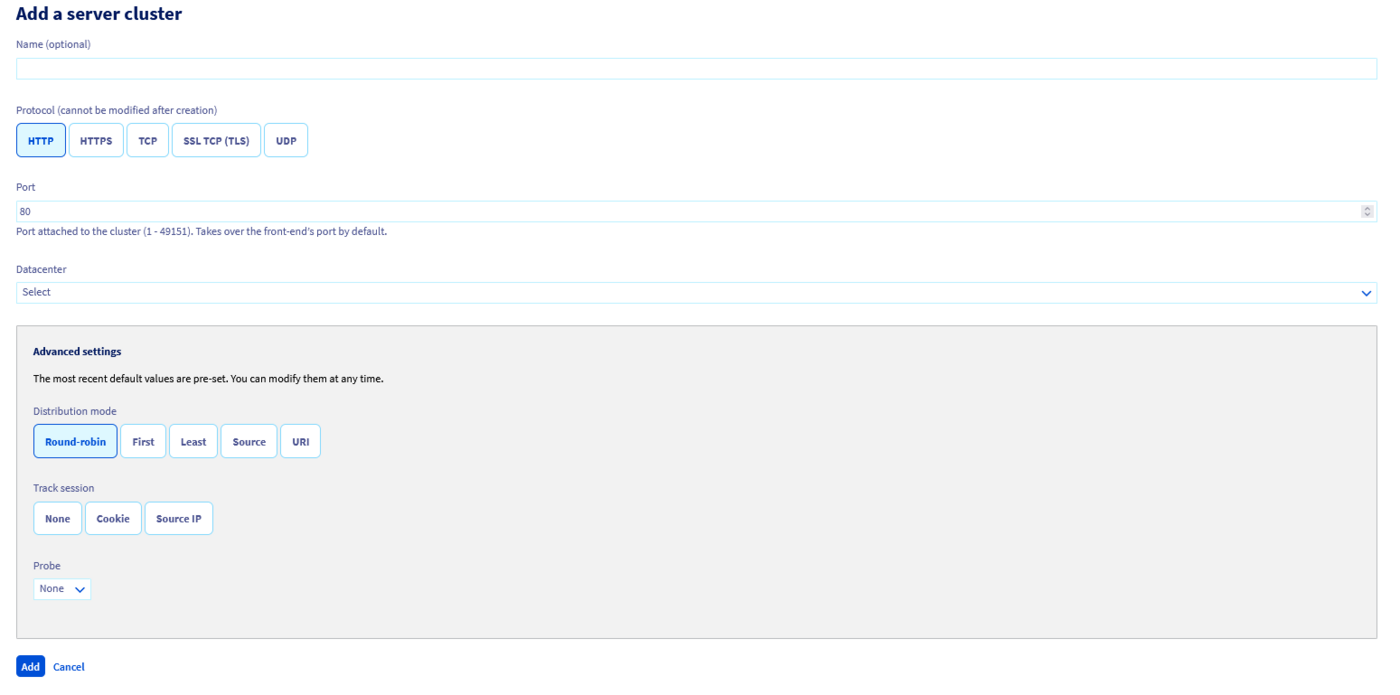
Click the Add button once you have filled in the fields.
Your server farm should appear in the list, under the Server Farms tab.

From the OVHcloud API
- List of HTTP server farms:
- Details of a specific HTTP server:
- Adding a new HTTP server farm:
- Modifying a specific server farm:
- Deleting a specific server farm:
Add a server
We will now add a server to our server farm.
From the OVHcloud Control Panel
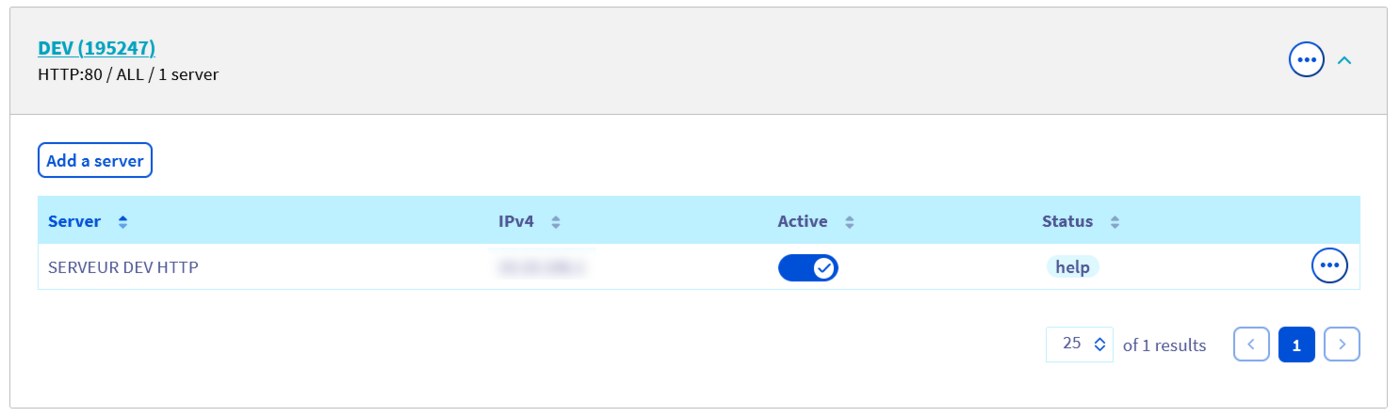
Still in the Server Farms tab, select the farm to which you want to add a server by clicking on the corresponding line. The list of servers already configured in the farm appears below the list of farms, as well as the Add a server button. Click on this button to add a new server.
Only the IPv4 Address field is mandatory. If a server does not use the same port as the one defined above in the farm, it is possible to override it in the server configuration. However, in order to maintain the most homogeneous and maintainable configuration possible, it is recommended to use this parameter only in advanced cases.
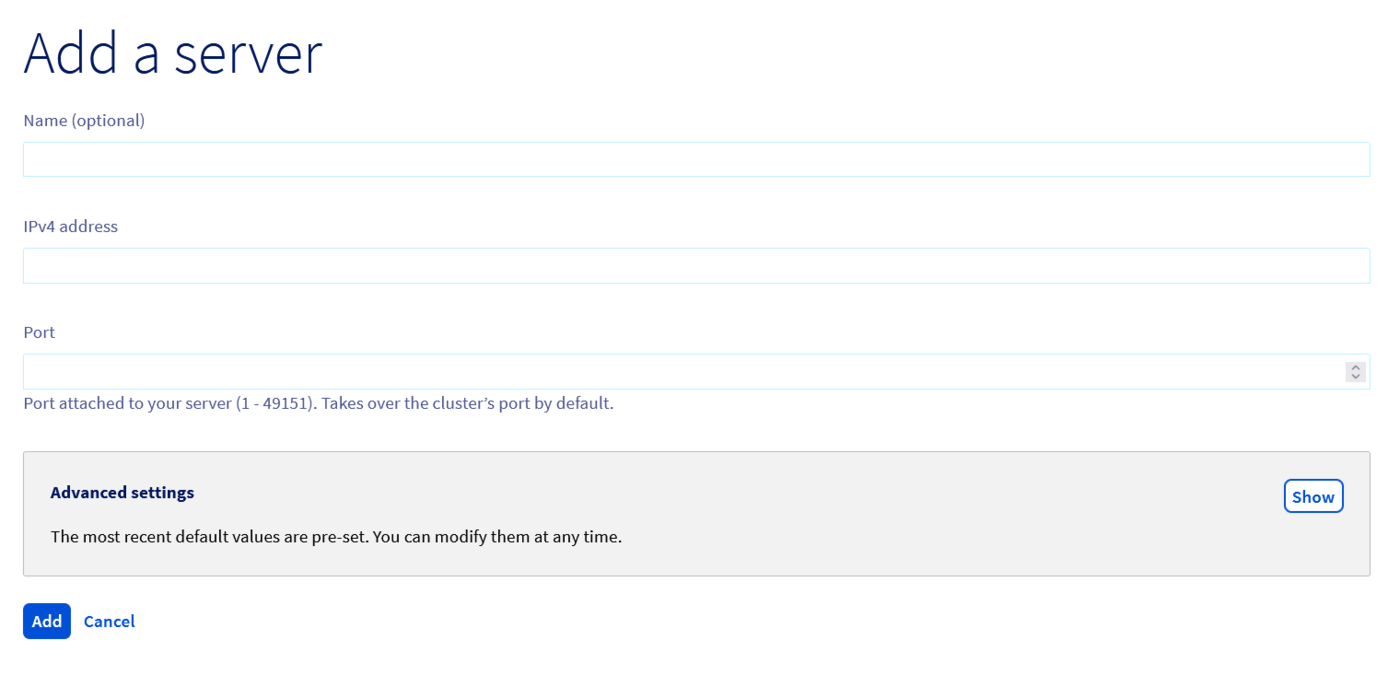
Click the Add button once you have filled in the fields.
Your server should appear in the list of servers, in the Server Farms tab, just below the list of farms.
From the OVHcloud API
- List of servers in the farm:
- Details of a specific server:
- Adding a new server:
- Modifying a specific server:
- Deleting a specific server:
Add a frontend
We will now add a frontend to our service and connect it to our server farm. The frontend is the part of your OVHcloud Load Balancer that is used to expose your service on the Internet. At first, we will configure it in HTTP only, without an SSL/TLS certificate.
From the OVHcloud Control Panel
In the Frontends tab, click the Add a frontend button.
Fill in the fields. The only mandatory fields for a simple configuration are the Protocol, the Port (80 for a standard HTTP web service) and the Datacentre. If you want your service to be available on several ports at the same time, you can specify a list of ports separated by commas or a range of ports in the form "START_PORT-END_PORT".
If you have routed Additional IPs to your OVHcloud Load Balancer service, you can also attach a frontend to one or more specific Additional IPs.
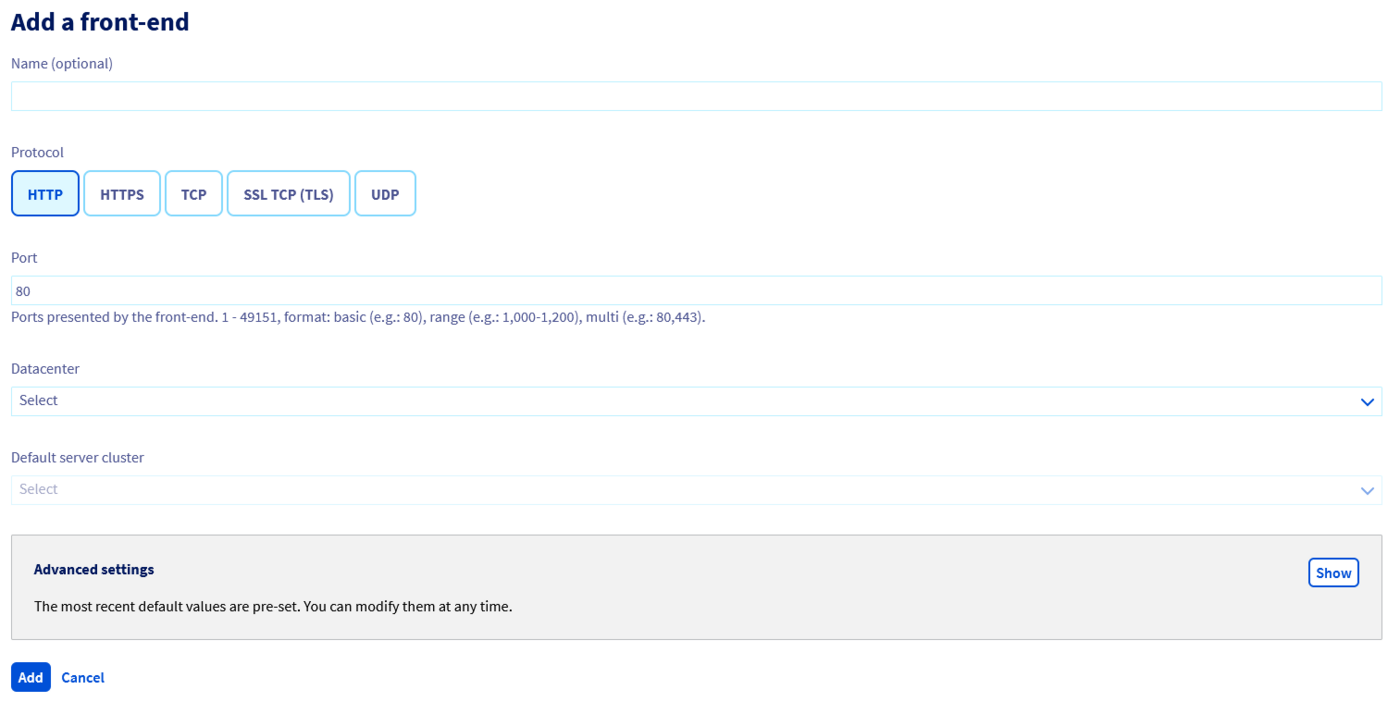
Click the Add button once you have filled in the fields.
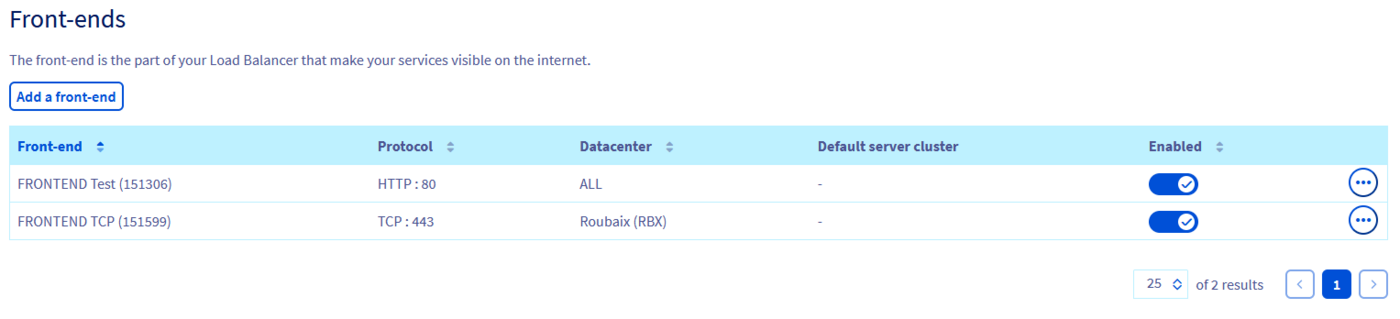
Your frontend should appear in the list, under the Frontends tab.
From the OVHcloud API
- List of HTTP frontends:
- Details of a specific frontend:
- Adding a new frontend:
- Modifying a specific frontend:
- Deleting a specific frontend:
Add an SSL/TLS certificate
The previous section described the general configuration for an HTTP frontend. This section describes the additional steps to enable support for the HTTPS protocol on an HTTP frontend. In particular, you will need to:
- switch the frontend to port 443, the standard port for the HTTPS protocol;
- configure an SSL/TLS certificate to authenticate and encrypt the connections.
Whether you choose a configuration via the API or via the OVHcloud Control Panel, you will have a choice between 2 strategies for your SSL/TLS certificates. This choice depends on your needs as well as the current solutions in place:
- Import an existing SSL/TLS certificate.
- Order an automatically managed SSL/TLS certificate. The ordering of DV and EV certificates will be available soon.
If you choose to import an SSL/TLS certificate that you have ordered and managed yourself, you will have to renew it periodically yourself and update it in your OVHcloud Load Balancer service. Most certificates are valid for 1 year. Some may be valid for longer. Let's Encrypt certificates are valid for 3 months. It is recommended to use the service managed automatically by your OVHcloud Load Balancer for Let's Encrypt certificates in order not to accidentally miss a deadline.
If you choose a certificate managed by your OVHcloud Load Balancer service, it will be automatically ordered, validated, installed and renewed periodically by your OVHcloud Load Balancer.
For the validation and renewal operations to work, the domain(s) you are ordering this certificate for must be routed to your OVHcloud Load Balancer service. This implies that the A and AAAA fields of your domain point respectively to the IPv4 and IPv6 of your OVHcloud Load Balancer or one of its Additional IPs. During the order, you will receive an email that will guide you through the validation steps.
To ensure service continuity when switching your domain to the IP of your OVHcloud Load Balancer service to validate your certificate, a good practice is to first configure and fully test the HTTP configuration on port 80. This way, your site remains accessible without interruption. If your site already has an HTTPS connection and you want to migrate to certificates managed by your OVHcloud Load Balancer service, you can import your existing certificates, configure and test your HTTPS Frontend and finally order a new certificate for the same domain. It will be automatically taken into account before your old certificate expires.
The certificates configured on your OVHcloud Load Balancer service are automatically available for all frontends of your OVHcloud Load Balancer service on which the SSL option is enabled.
TLS 1.3 support
With the constant evolution of security standards on the Internet, OVHcloud is committed to providing the most recent and secure technologies for your services. The OVHcloud Load Balancer now supports TLS 1.3.
What is TLS 1.3?
TLS 1.3 is the latest version of the TLS protocol, offering significant improvements in terms of security and performance compared to TLS 1.2. The key advantages include a faster handshake process, thus reducing the time needed to establish secure connections, and the use of safer encryption suites to strengthen the security of transmitted data.
Why use TLS 1.3 with OVHcloud Load Balancer?
By integrating TLS 1.3, your OVHcloud Load Balancer will benefit from enhanced security and improved performance, ensuring an optimal user experience for your visitors. The reduction in handshake time speeds up page loading, while the security improvements ensure that your data is protected with the most recent and secure standards.
From the OVHcloud Control Panel
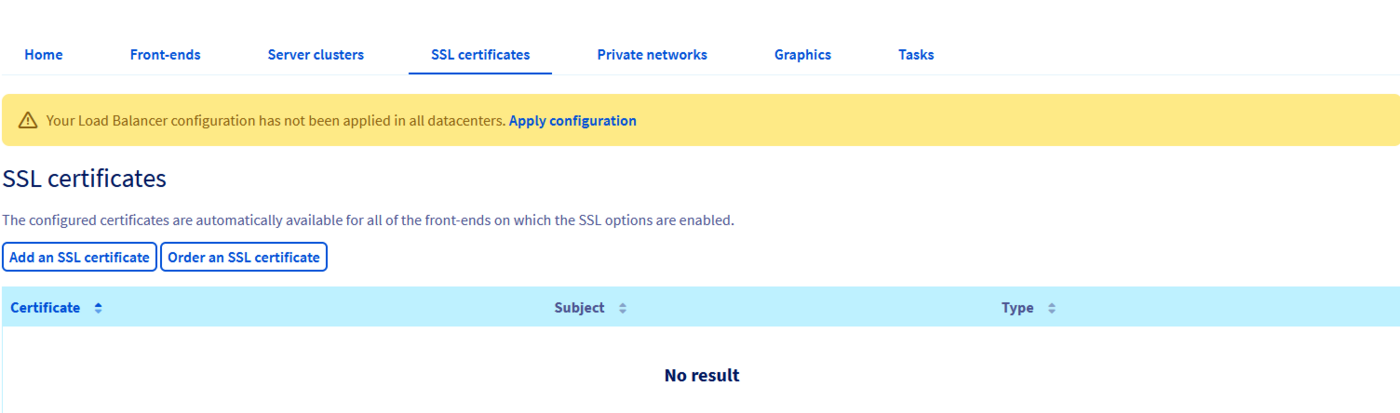
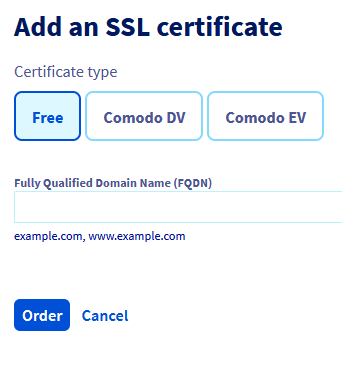
The list of SSL/TLS certificates configured on your OVHcloud Load Balancer service is in the SSL Certificates tab. This interface offers the 2 options mentioned above, namely importing an existing certificate (via the Add an SSL certificate button) and Order an SSL certificate managed automatically by your OVHcloud Load Balancer service.
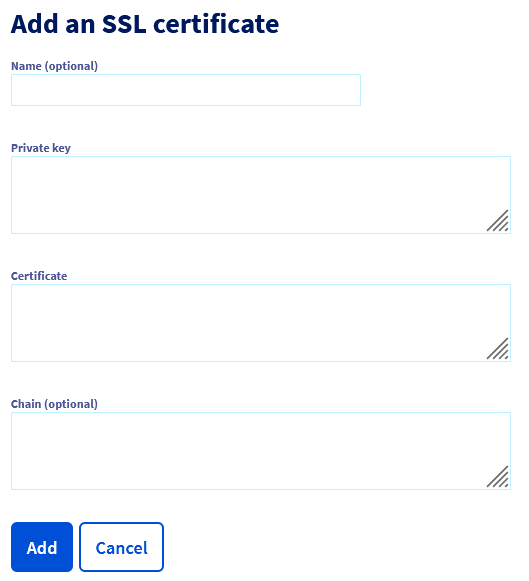
If you choose to import an existing SSL/TLS certificate, click on Add an SSL certificate. The Private Key and Certificate fields are mandatory.
Click the Add button once the fields are filled in. Your certificate will then appear in the certificate list.
To add a Let's Encrypt certificate, click on Order an SSL certificate, enter your domain, make sure it points to your OVHcloud Load Balancer service and follow the emails you receive. You will then see it appear in the list of available certificates.
Once your certificate(s) are configured, you can create an HTTPS frontend, on the same model as the HTTP frontend created above with port 443 and the SSL option enabled.
Optionally, you can also enable the HSTS option. If this option is enabled, browsers will record that this website should never again be visited without HTTPS after their first visit in HTTPS. This strengthens overall security by protecting against "Man-in-the-middle" attacks in which a malicious actor could make your website appear unavailable in HTTPS and force your visitors to switch to "HTTP".
Although the added security is significant, it is recommended to wait a while before enabling this option, to make sure there are no side effects in HTTPS. Indeed, once HSTS is enabled, there is no going back.
From the OVHcloud API
- List the existing SSL/TLS certificates:
- Get the details of an SSL/TLS certificate:
- Adding a new existing SSL/TLS certificate:
- Modifying a specific SSL/TLS certificate (only the displayed name can be modified) :
- Deleting a specific SSL/TLS certificate:
Apply the changes
The changes made to your OVHcloud Load Balancer service must be explicitly applied in each of the zones configured for your OVHcloud Load Balancer service. Only then will they be visible to your visitors. This allows a complex configuration change to be made in a single step.
If you have several zones, you will have to apply the same configuration for each of your zones.
From the OVHcloud Control Panel
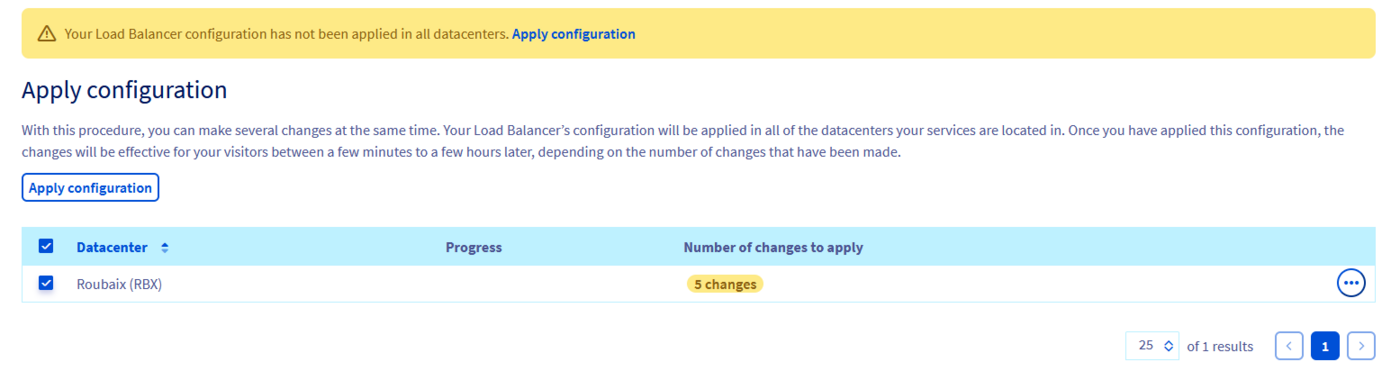
Go to the home page of your OVHcloud Load Balancer service, click on the ... dots next to the name of your service and click on Apply the configuration.
Then select the list of zones you want to deploy and click on the Apply the configuration button.
From the OVHcloud API
- Refresh a zone:
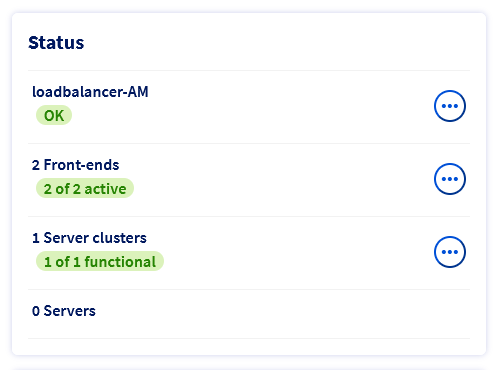
Validation
Once all these steps are completed, you should have a functional load balancing service. You can validate the status of the service by visiting your site.
Go further
Join our community of users.

