How to use automated backups on a VPS
111 Views
Objective
The Automated backup option for VPS offers a convenient way to have complete system backups available from your OVHcloud Control Panel without having to connect to the server to create and restore them manually. Another advantage is that you can also choose to mount a backup and then access its files remotely.
This guide explains the Automated backup option for your OVHcloud VPS.
Before applying a backup strategy, we recommend consulting the product pages and FAQ for pricing comparisons and further details.
Requirements
- An active Virtual Private Server in your OVHcloud account
- Administrative access (sudo) via SSH to your VPS (optional).
OVHcloud Control Panel Access
- Direct link: VPS management
- Navigation path:
Bare Metal Cloud>Virtual private servers> Select your VPS
This feature is currently unavailable for Virtual Private Servers in Local Zones.
Instructions
Content overview
- How to upgrade to Premium Automated Backup
- How to configure the backup time
- How to restore a backup from the OVHcloud Control Panel
- How to mount and access a backup
- Best practice for using Automated backups
When you order a VPS, a single daily Automated backup is included as a free service option. This standard backup option allows you to:
- Mount and restore the daily backup.
- Set the time of day this backup will be created.
For more flexibility with your backups, you can activate the Premium Automated Backup option.
How to subscribe to Premium Automated Backup
The Premium Automated Backup option creates a backup of your VPS every 24 hours at the specified time.
You will have access to all daily backups of the last 7 days. Once 7 backups are created, each new backup will replace the oldest one.
Click the Automated backup tab in the horizontal menu.
Click the link Order a premium backup (for services ordered from 7 AUG, 2025) or the button Enable Automated backup.


In the next step, note the pricing information, then click Order. You will be guided through the order process and receive a confirmation email.
How to configure the backup time
You can change the time of day at which the backup will take place.
After selecting your VPS, click on the Automated backup tab in the horizontal menu.
Click on ... above the table and then on Edit.
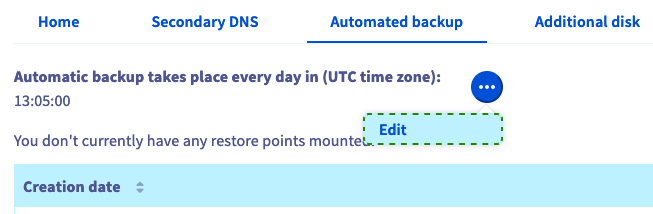
In the window that appears, edit the time of day (24-hour UTC time standard). Click on Confirm.
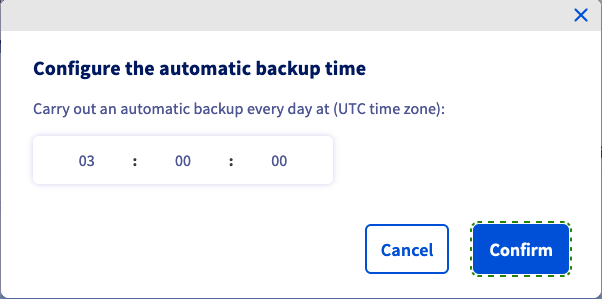
Once confirmed in the Control Panel, the change will come into effect after 24 to 48 hours.
How to restore a backup from the OVHcloud Control Panel
After selecting your VPS, click on the Automated backup tab in the horizontal menu.
Click the button ... next to the backup you would like to restore and select Restoration.

If you recently changed your root password, make sure to tick the option "Modify the root password on restoration" in the popup window to preserve your current root password and click on Confirm. You will receive an email as soon as the task is complete. The restoration might take a while, depending on the disk space used.
Please note that the automated backups will not include your additional disks.
How to mount and access a backup
It is not necessary to completely overwrite your existing service with a restoration. The "Mounting" option allows you to access the backup data to retrieve your files.
OVHcloud provides services for which you are responsible with regard to their configuration and management. It is therefore your responsibility to ensure that they function correctly.
This guide is designed to help you with common tasks. Nevertheless, we recommend contacting a specialist service provider or reaching out to the OVHcloud community if you encounter any difficulties. You can find more information in the Go further section of this guide.
After selecting your VPS, click on the Automated backup tab in the horizontal menu.
Click on ... next to the backup you need to access and select Mounting.

When you use this option, a read-write copy of the backup is created and mounted. The original backup will remain available unchanged for future restorations.
After the process is completed, you will receive an email. You can now connect to your VPS and access the partition where your backup is located.
Using Secure Shell
First, connect to your VPS via SSH.
You can use the following command to verify the name of the newly attached device:
Here is a sample output of this command:
In this example, the partition containing your backup filesystem is named "sdb1".
Next, create a directory for this partition and define it as the mountpoint:
You can now switch to this folder and access your backup data.
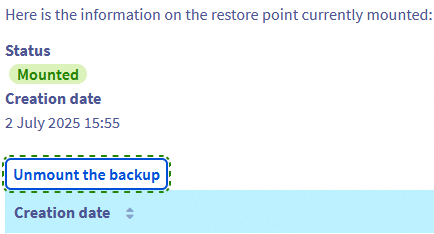
Remember to unmount the backup once you have finished using it. Click on the button Unmount the backup in the Automated backup tab, then confirm in the popup window.
Using Windows
Establish an RDP connection to your server.
Once logged in, right-click on the Start Menu button, and then click Disk Management.
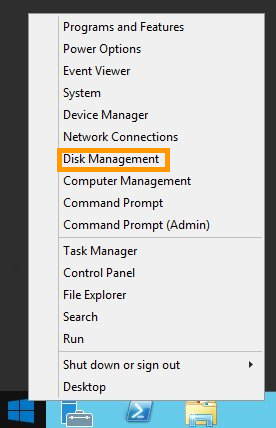
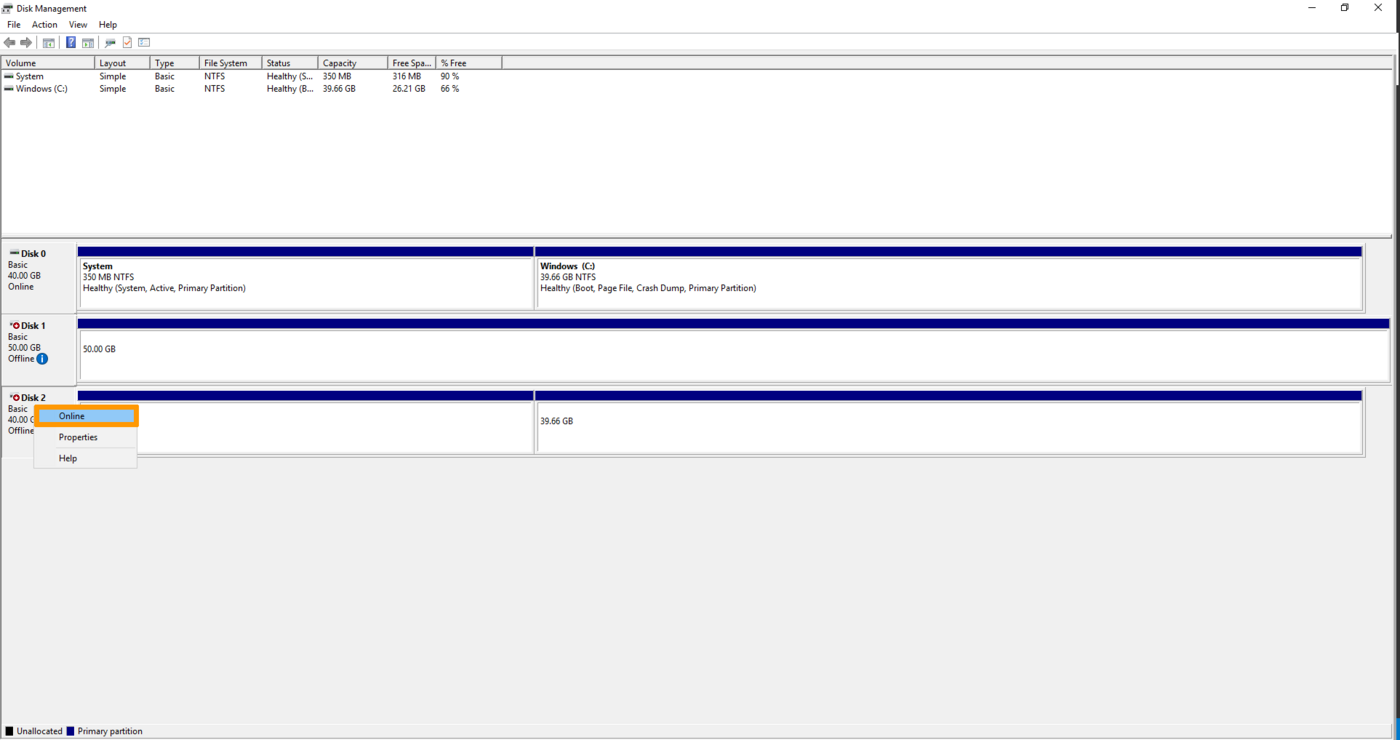
When the disk management tool opens, your mounted backup will appear as a basic disk with the same storage space as your main disk.

The disk will appear as Offline, right-click on the disk and select Online.
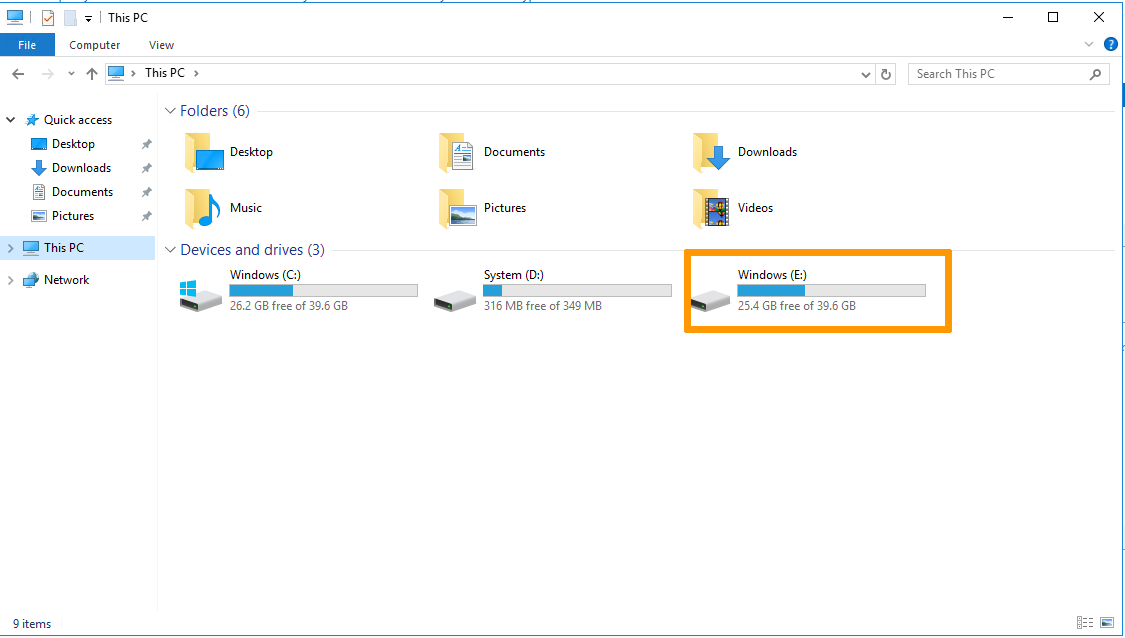
Once done, your mounted backup will be accessible in the File Explorer.
Remember to unmount the backup once you have finished using it. Click on the button Unmount the backup in the Automated backup tab, then confirm in the popup window.
Please note that a server reboot will occur when the backup is unmounted.
Best practice for using Automated backups
The Automated Backup functionality is based on VPS snapshots. We recommend following the steps below to prevent any issues before using this option.
Configuring the QEMU agent on a VPS
Snapshots are instantaneous images of your running system ("live snapshot"). To ensure the availability of your system when the snapshot is created, the QEMU agent is used to prepare the filesystem for the process.
The "qemu-guest-agent" agent is not installed by default on most distributions. Moreover, licensing restrictions may prevent OVHcloud from including it in the available OS images. Therefore, it is best practice to verify and install the agent if it is not activated on your VPS. Connect to your VPS via SSH and follow the instructions below, according to your operating system.
Debian-based distributions (Debian, Ubuntu)
Use the following command to check whether the system is properly set up for snapshots:
The expected output is:
If the output is different, for example "No such file or directory", install the latest version of the package:
Reboot the VPS:
Start the service to ensure it is running:
Redhat-based distributions (Centos, Fedora)
Use the following command to check whether the system is properly set up for snapshots:
The expected output is:
If the output is different, for example "No such file or directory", install and enable the agent:
Reboot the VPS:
Start the agent and verify that it is running:
Windows
You can install the agent via MSI file, available from the Fedora project website: https://fedorapeople.org/groups/virt/virtio-win/direct-downloads/latest-qemu-ga/.
Verify that the service is running by using this PowerShell command:
Go further
Join our community of users.

