VPS - Management from the OVHcloud Control Panel
48 Views
Objective
- Understand the VPS management interface.
- Identify essential information.
- Know where to perform the main actions.
Requirements
- An active VPS offer in your OVHcloud Control Panel
Some VPS features mentioned on this page are not available in OVHcloud Local Zones.
Please visit our Local Zones page for more information.
OVHcloud Control Panel Access
- Direct link: VPS management
- Navigation path:
Bare Metal Cloud>Virtual private servers> Select your VPS
Instructions
This guide helps you understand the VPS management interface in the OVHcloud Control Panel, identify essential information and use the main available actions (reinstallation, reboot, backup, configuration).
Content overview
Dashboard
The Home tab is the main dashboard of your VPS.
It centralises key information about the service and provides access to essential management actions.
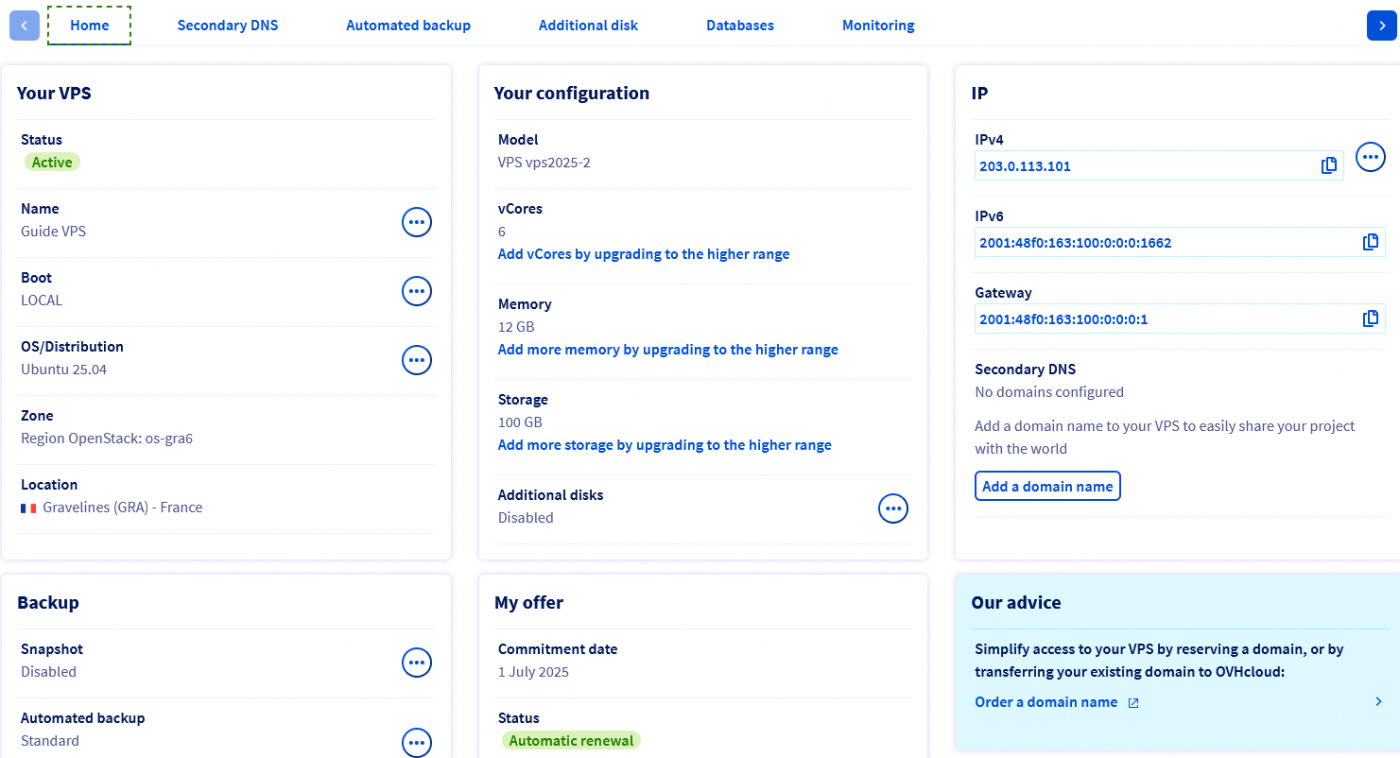
Your VPS
Find below the basic information about your VPS and the service status. Click on the tabs below to display the details.
To customise the name of your VPS, click on the ... button and select Change the name. This feature is useful for easier navigation in the Control Panel when managing multiple VPS services. However, the internal service name remains in the format VPS-XXXXXXX.VPS.ovh.net.
The boot mode indicated is either:
- In normal mode (LOCAL), where the server loads the installed operating system.
- In rescue mode, provided by OVHcloud for troubleshooting.
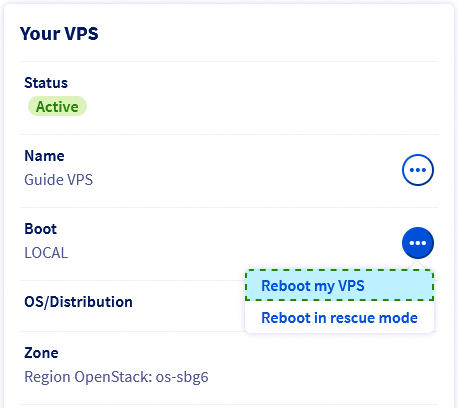
Use the ... button to reboot the VPS or boot it in rescue mode if necessary.
If needed, find more information in our guide on rescue mode.
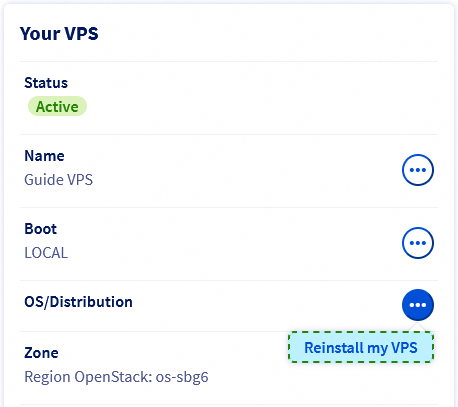
This is the currently installed operating system. Use the ... button to reinstall the same operating system or choose another one from the available options.
A reinstallation will delete all data currently hosted on the VPS (except for additional disks).
If you ordered a Windows VPS, you can only choose a Windows OS for reinstallation. Similarly, if Windows was not selected during the order, it cannot be installed after the VPS is delivered.
Once the system is installed, you are responsible for applying the operating system security updates. You can find more information in the section "Reinstall your VPS" as well as in our guide "Securing a VPS".
These sections provide information about the location of your VPS. This can be useful for identifying and assessing any potential impacts on your service, such as those mentioned in incident or maintenance reports.
Your configuration
Click on the tabs below to display the details of this section.
This item indicates the commercial reference identifying the VPS model, corresponding to the VPS offers on our website.
The current resources of your VPS are displayed here and can be updated separately by clicking on the corresponding link. Note that upgrades are limited by the chosen VPS model and may only be available by moving to a higher range.
Add additional disks to your VPS to increase the server's storage capacity beyond that included in the initial configuration. You can, for example, store backup data on them.
IP
Click on the tabs below to display the details of this section.
The main public IPv4 address of the VPS is automatically configured during installation. Find more information on IP management in our guide "Configuring an alias IP address".
Find the public IPv6 address and the associated gateway address here. These are automatically attached to the VPS during installation. Find more information in our guide "Configuring IPv6 on a VPS server".
This feature is useful for hosting DNS services. Consult our guide "Configuring an OVHcloud secondary DNS on a VPS" for more details on this subject.
Backup
These options refer to additional VPS services for backing up and restoring your system.
A snapshot on a VPS is an instant backup of the server's state, allowing you to quickly restore the system in case of a problem. The Snapshot option allows you to create a manual snapshot as a single restore point.
A daily system backup (excluding additional disks) is automatically performed and kept for 24 hours (applicable only to services ordered from August 7, 2025). By switching to the "Premium Automated Backup" option, you will have the last 7 daily backups of your VPS, which you can use for mounting and restoring.
Compared to manual snapshots, this feature increases data security by creating multiple restore points at regular intervals.
Find all information on the backup solutions available for your service on the VPS product page and in our respective guides.
My offer
This section presents the most important information regarding the billing of your service. Find all information on this subject in our respective guides.
VPS functions available in the "Home" tab
OVHcloud provides services whose configuration and management are your responsibility. It is therefore your responsibility to ensure their proper functioning.
This guide is intended to assist you with common tasks. However, we recommend that you contact a specialised service provider or our community if you encounter difficulties or doubts regarding the administration, use or implementation of services on a server.
Reboot your VPS
A reboot may be necessary to apply configuration updates or to resolve a malfunction. Where possible, perform a "software reboot" from the server's graphical interface (Windows, Plesk, etc.) or via the command line below:
However, you can perform a forced reboot at any time in your OVHcloud Control Panel. From the Home tab, click on the ... button next to Boot in the Your VPS section. Select Reboot my VPS and click Confirm in the window that appears.
Reinstall your VPS
The reinstallation of your VPS can be done from your Control Panel. This operation is generally used in case of system problems, environment change or to start with a clean installation.
Click on the ... button to the right of OS/Distribution, then on Reinstall my VPS.
In the window that appears, choose an operating system from the drop-down list. The options offered are images compatible with an OVHcloud VPS and are immediately functional after installation.
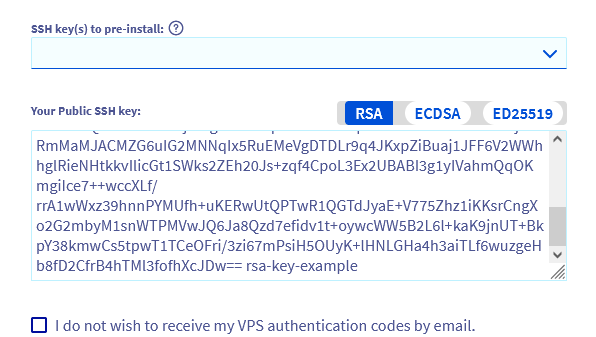
If you have selected a compatible operating system, you can provide a public key to be automatically installed. Two options are available:
- Manually copy the key string and paste it into the
Your SSH Public Keyfield. - If you have previously stored a public key in your OVHcloud Control Panel, select the desired key from the
SSH Key to pre-installdrop-down menu.
For more information on this topic, consult our guides:
- How to create and use authentication keys for SSH connections to OVHcloud servers
- Tutorial - How to use PuTTY for SSH connections and authentication
If you have selected an SSH key and do not need a password to connect, enable the option I do not wish to receive my VPS authentication codes by email.
Reinstallation will format all the server's disks. It is strongly recommended to create a snapshot of your VPS before proceeding, so that you can return to the previous state in case of a problem.
Licenses
Some operating systems or proprietary platforms, such as Plesk or cPanel, require licenses that generate additional costs. Licenses can be managed from your Control Panel: go to the Bare Metal Cloud section, then click on Licenses in the left-hand navigation bar.
To have a Windows operating system running on a VPS, you must have previously chosen it in the ordering process. A VPS with another OS installed cannot be reinstalled with Windows via the method described above.
The reinstallation process can take a few minutes.
Go further
How to recover access to the server in case of lost user password
Join our community of users.

