Repartitioning a VPS after a storage upgrade
75 Views
Objective
After upgrading the storage capacity of your VPS, you will need to repartition the disk space to take advantage of the full size. The following steps describe how to do this.
Repartitioning could permanently damage your data. OVHcloud cannot be held responsible for any loss or damage to your data. Before doing anything, make sure you back up all of your data.
This guide explains how to increase your storage space after a disk upgrade.
Requirements
- Administrative access to your VPS (Windows)
- Rescue mode activated on the VPS (Linux only)
Instructions
After a memory (RAM) or processor (vCores) upgrade, these resources of your VPS are automatically adjusted. The usable disk space however is not automatically increased when you upgrade the storage of your VPS.
Linux
Back up your data
Attempting to extend a partition can lead to data loss. It is therefore strongly recommended that you back up the data on your VPS.
Activate rescue mode and verify the partitions
If the VPS is not already in rescue mode, activate it by using our guide.
You can then verify the configuration of the disks:
The partition corresponding to rescue mode (sda1 in this example) is mounted in the directory / and the disk of the VPS is named sdb and should have no mount point.
Example:
If your result looks similar to the output above and the column MOUNTPOINT is empty in the corresponding line, you can proceed with the next step.
However, if your result shows that there is a mount point for the VPS partition, it needs to be unmounted first.
Example:
In the example output above, the partition sdb1 is mounted at /mnt/. In order to resize the partition, this partition must not be mounted.
To unmount your partition, use the following command:
In this example configuration, the command would be:
Check the filesystem
Before you proceed, it is recommended to check the filesystem to see if there are errors in the partition. The command is as follows:
If you see any errors, take note of them and resolve them as required. Below is a (non-exhaustive) list of the most common errors you might see:
-
bad magic number in superblock: Do not continue. Please read and follow our instructions on How to fix a bad magic number in superblock error. -
/dev/vdb1 has unsupported feature(s): metadata_csumfollowed bye2fsck: Get a newer version of e2fsck!: Update e2fsck. If the latest version is not available viaapt(or another package manager), you will need to compile it from source.
Launch the fdisk application
If the filesystem check is completed successfully, launch the fdisk application. In the settings, you need to enter the name of the disk and not the name of the partition. For example, if your partition is sdb1, the disk name will be /dev/sdb.
This application offers several commands, which you can view by entering m.
Delete the old partition
Before deleting the old partition, it is recommended that you write down the number corresponding to the first sector of the partition. You can find this information through the command p. The information is listed under the Start field. Save this data for later.
If you have not backed up your data, this is the point of no return.
Then delete the partition with the command d.
The single partition will automatically be deleted.
Create a new partition
You now need to create a new partition with the command n. It is recommended that you use the default values.
On the First sector line, check that the default value is the same as the one you have previously written down. If it is different, use the value you have written down.
If you see the following message:
Enter n and proceed.
Answering y would mean overwriting the existing ext4 file system on Partition 1 and agreeing to destroy the data on it.
Make the partition bootable
You now need to ensure that the partition is bootable. You can do this using the command a.
Save your changes and exit the application with the command w:
Extend the filesystem on the partition
The partition has been extended, but the filesystem still occupies the same space as before. To extend it, simply enter the following command:
Check the results
In order to check if the extension has been successful, you can mount the newly created partition and verify its size.
You will find the new partition size listed below the label size.
How to fix a bad magic number in superblock error
If the command e2fsck returns the error message bad magic number in superblock, you should check and repair the filesystem by using a backup of the superblock. To see which backups of the superblock are available, enter the following command:
Then use the first superblock backup to check and repair the filesystem:
Windows
Access File and Storage Services
You can find this in the Server Manager:
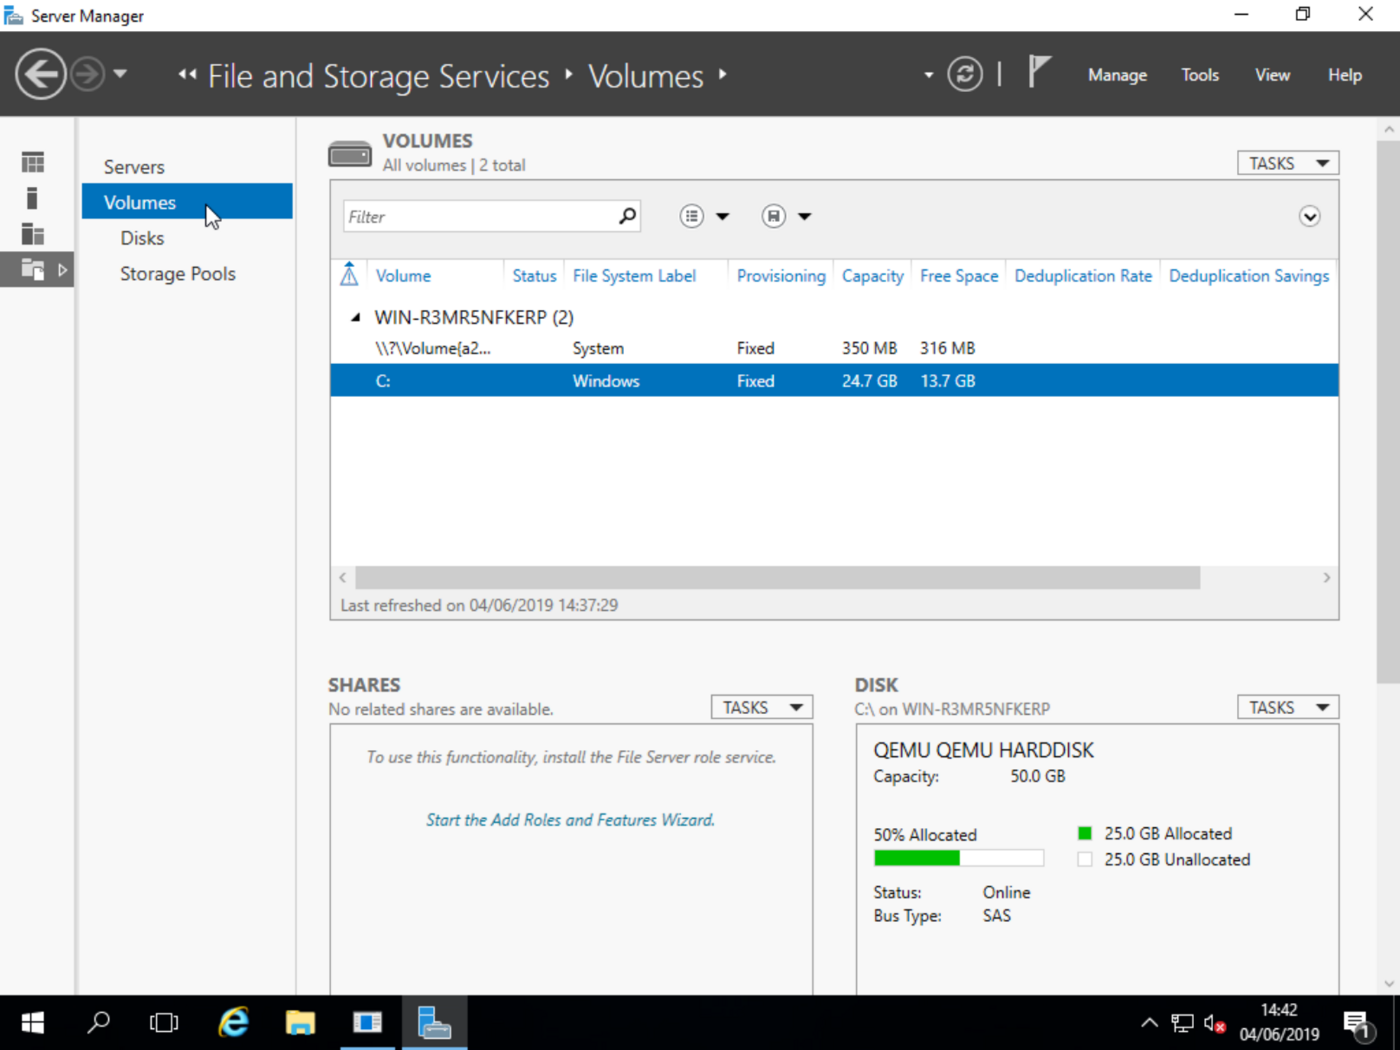
Resize the volume
Right click on the C: volume and select Extend Volume....
You will then be prompted to choose your new volume size:
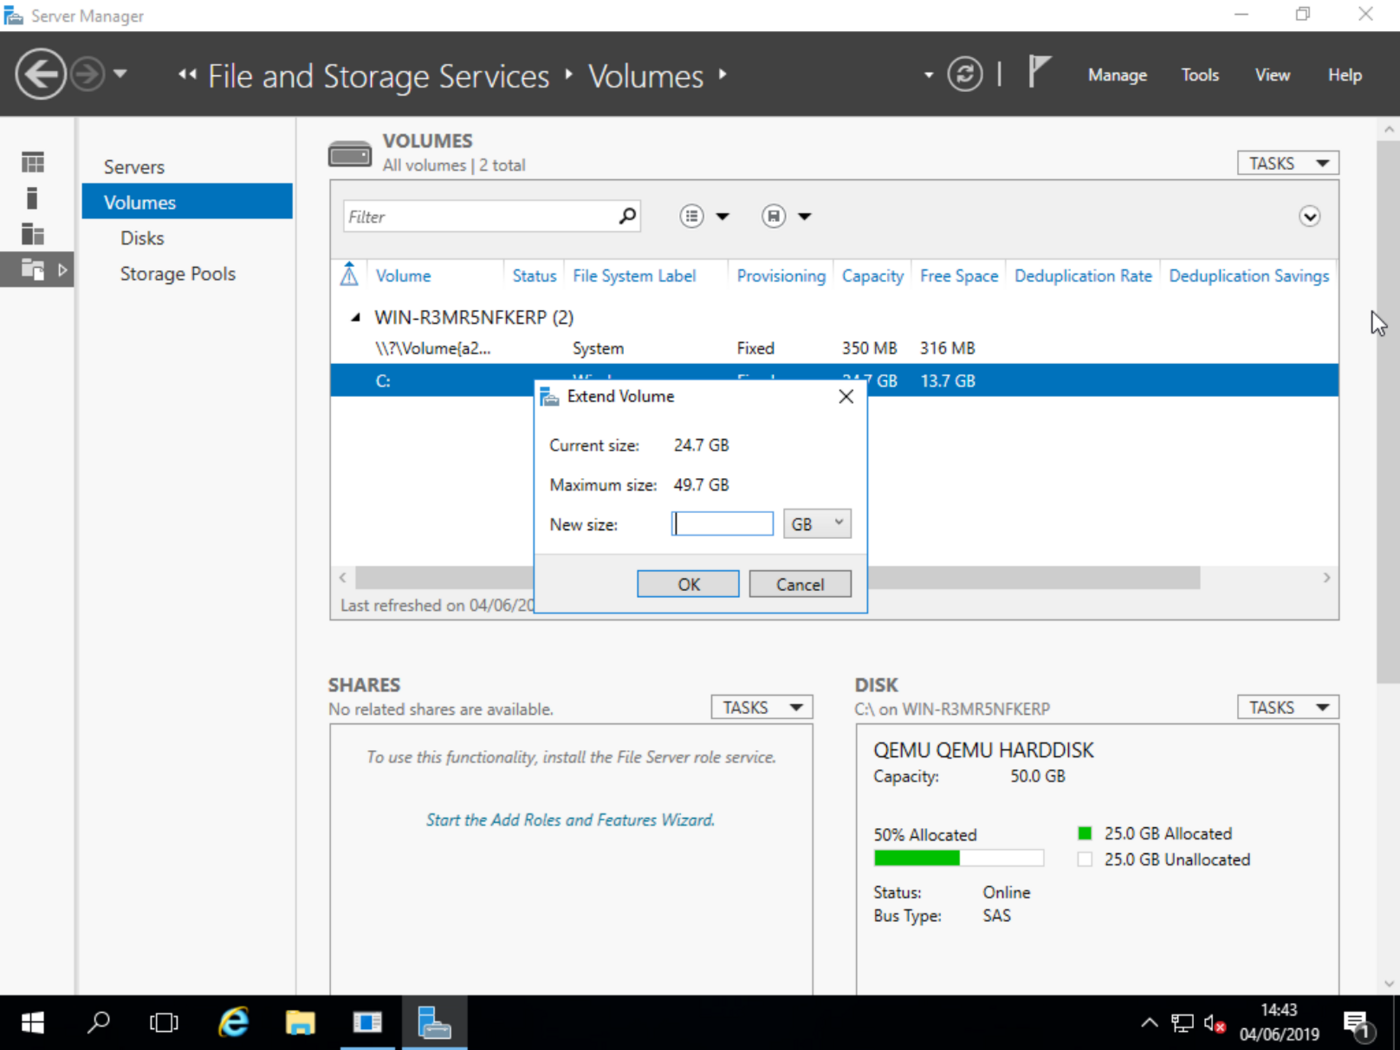
Enter your desired size and click OK. Your volume will now be extended.
Go further
Join our community of users.

