Segment management in NSX
100 Views
Objective
In an NSX solution a segment is a virtual level 2 domain, it can be of two types :
- VLAN-backed segments : Communication between hosts and virtual machines is done through VLANs and a Layer 2 switch of the OSI model. In order for these segments to communicate with the elements of NSX (Internet and other segments), an interface must be added to the Tier-1 Gateways or Tier-0 Gateways gateways.
- Overlay-backed segments: The connection is made using a software overlay that establishes tunnels between hosts. You must add an address to a subnet that will be used for routing outside this segment. They must be connected to a Tier-1 Gateways gateway such as ovh-T1-gw.
The segments are linked to transport zones that are predefined by OVHcloud.
- system-owned-vlan-transport-zone-for-rtep | VLAN : Area for extended RTEP networks.
- system-owned-vlan-transport-zone-for-evpn | VLAN : Zone for VPNs.
- ovh-tz-overlay | VLAN : Zone for Overlay segments behind the ovh-t1-gw gateway.
- ovh-tz-public | VLAN : Area connected to the public network on a single VLAN provided by OVHcloud.
- ovh-tz-vrack | VLAN : Area connected to the OVHcloud vRack where it is possible to create segments with a particular VLAN.
Discover the creation and use of segments in the NSX and vCenter interfaces.
OVHcloud provides services for which you are responsible, with regard to their configuration and management. It is therefore your responsibility to ensure that they work properly.
This guide is designed to assist you as much as possible with common tasks. However, we recommend contacting a specialist provider if you experience any difficulties or doubts when it comes to managing, using or setting up a service on a server.
Requirements
- Being an administrative contact of your Hosted Private Cloud infrastructure to receive login credentials.
- A user account with access to the OVHcloud Control Panel.
- NSX deployed.
Instructions
Please note that the designations (such as the VLAN number) and IP addresses of the network configurations are provided as examples, and can be modified if required.
Creating a segment in the NSX interface
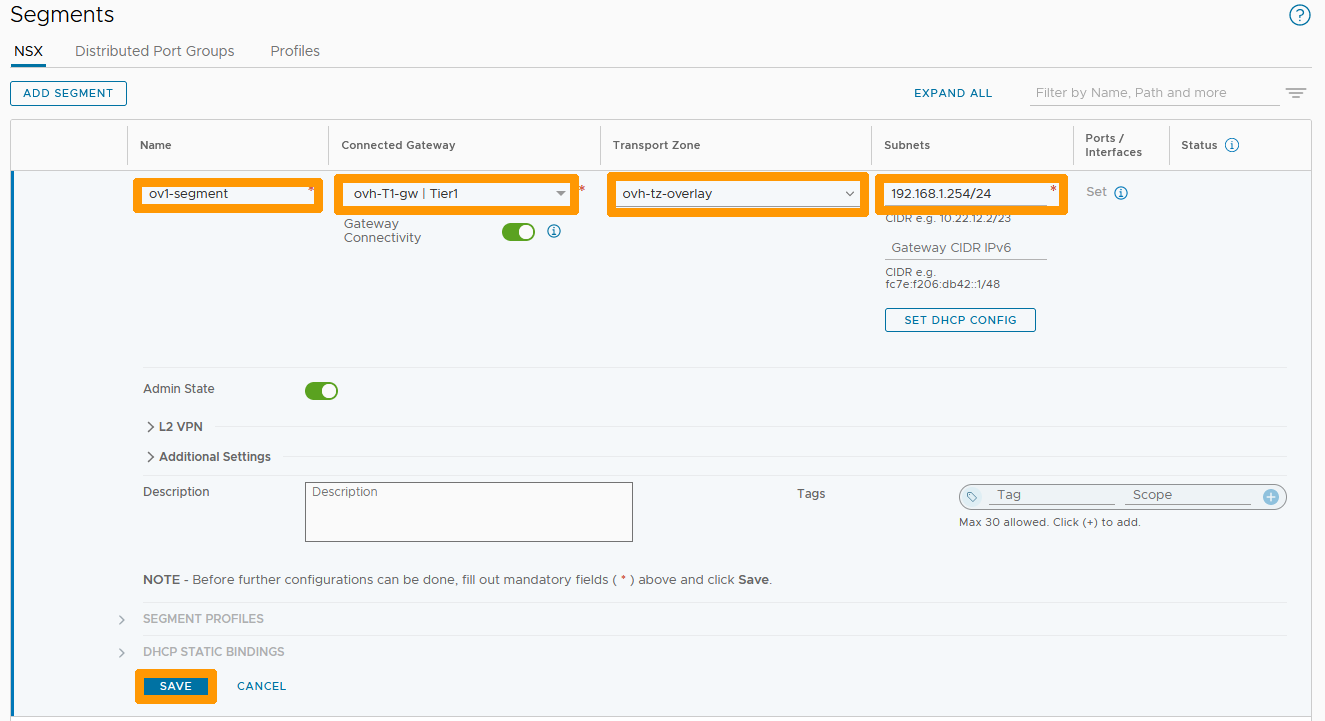
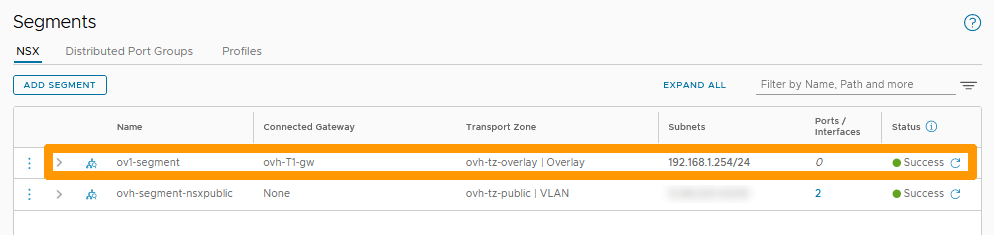
We will create an Overlay-backed segment connected to ovh-T1-gw in a subnet in 192.168.1.0/24 with gateway 192.168.1.254.
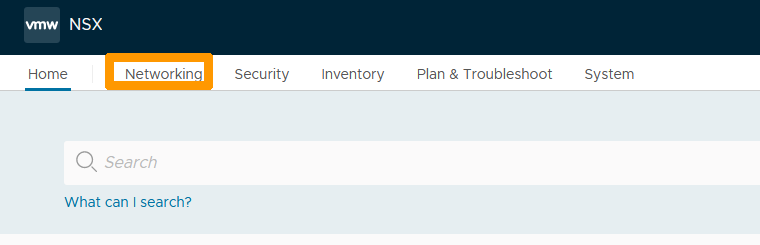
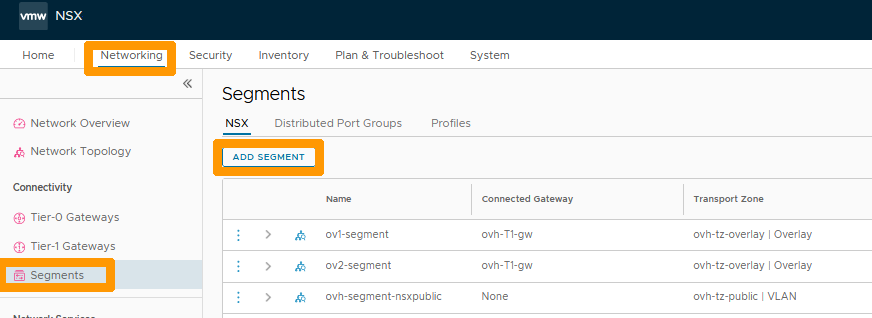
From the NSX interface go to the Networking tab.
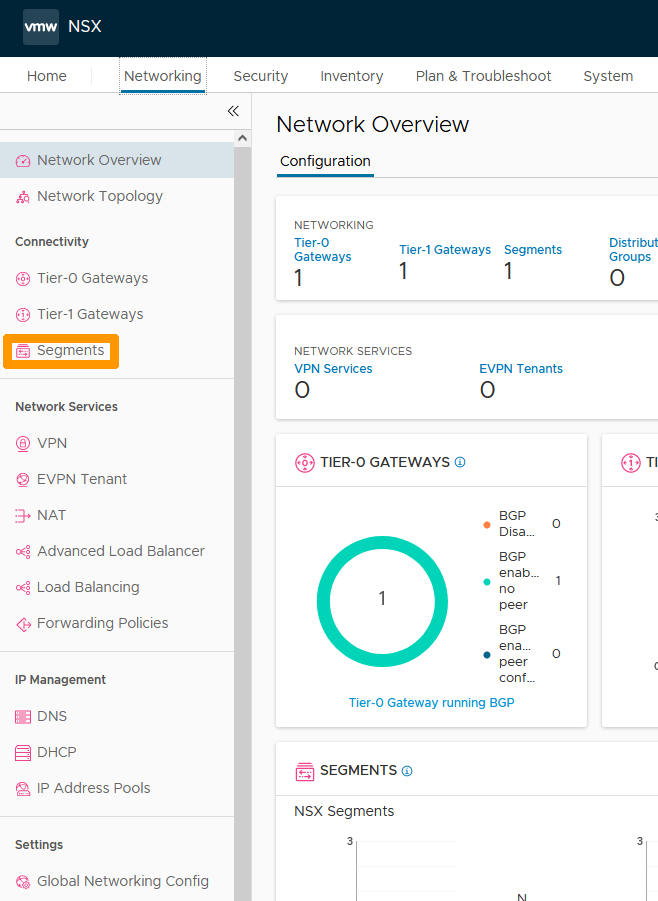
Click on Segments on the left.
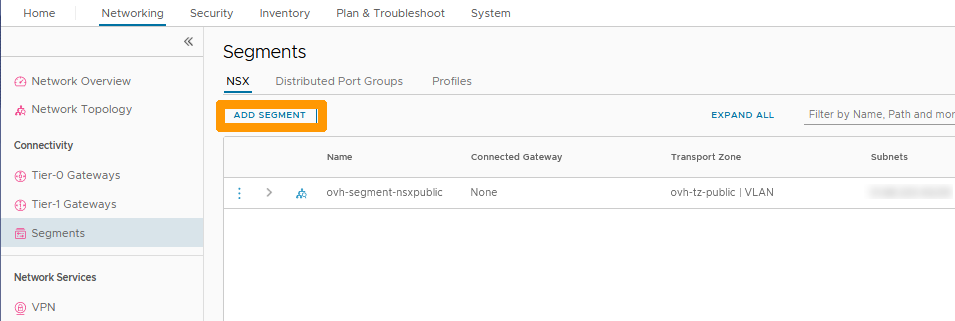
Click on ADD SEGMENT on the right.
Fill-in this information:
- Name: Your segment name.
- Connected Gateway: Predefined gateway ovh-T1-gw | Tier1.
- Transport Zone: ovh-tz-overlay predefined zone.
- Subnet: The gateway address of the segment in this format 192.168.1.254/24.
Then click on SAVE on the right.
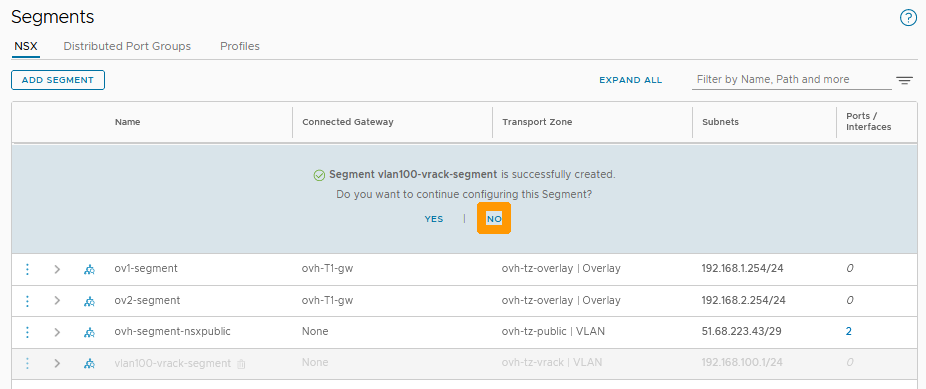
Click NO when prompted.
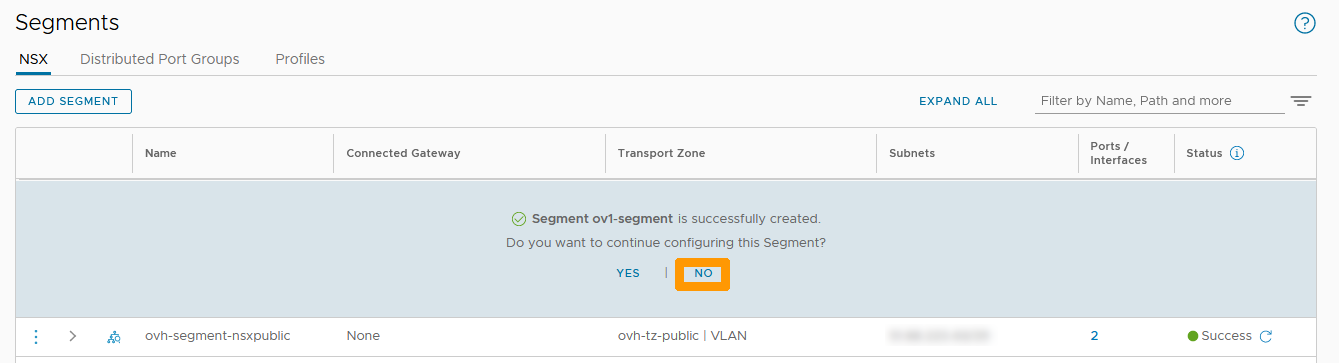
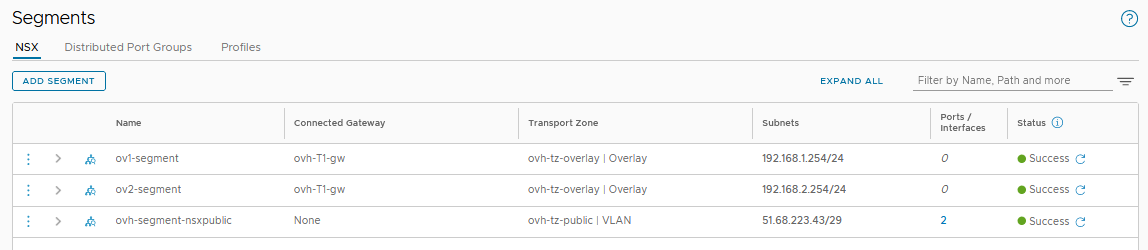
The new segment appears in the list.
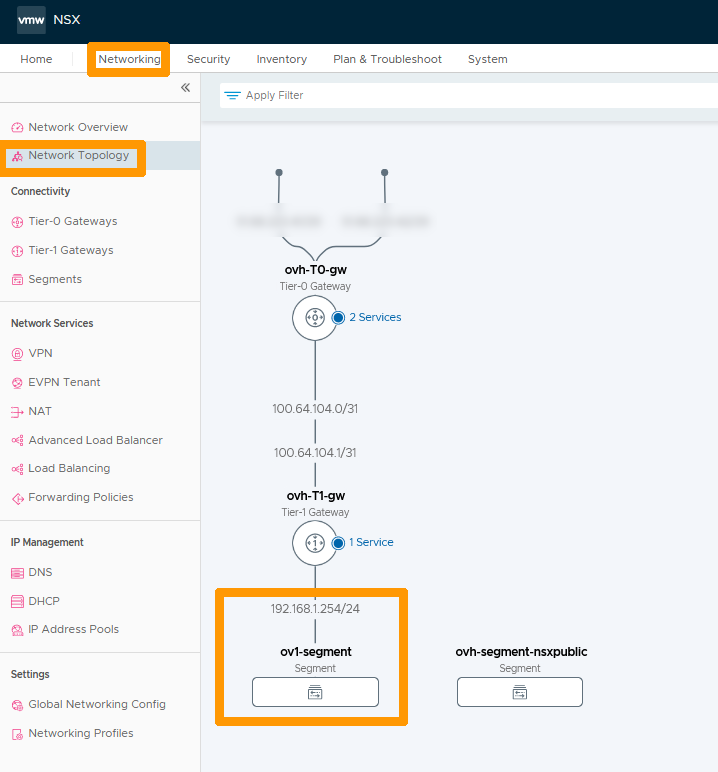
In the Networking tab, click on Network Topology on the left to see the new segment and its location in the network.
Connecting a virtual machine to this segment.
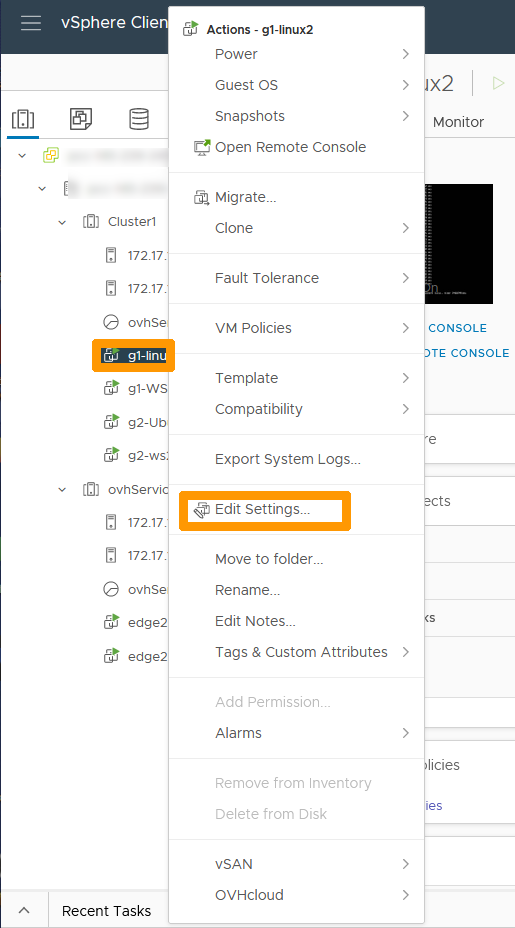
Go to the vCenter interface of your Hosted Private Cloud cluster.
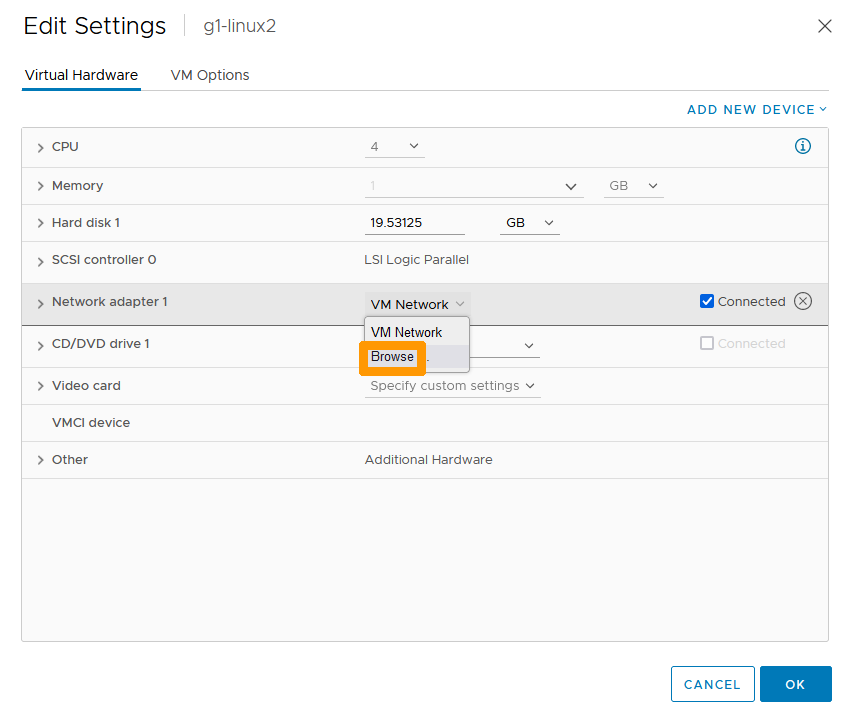
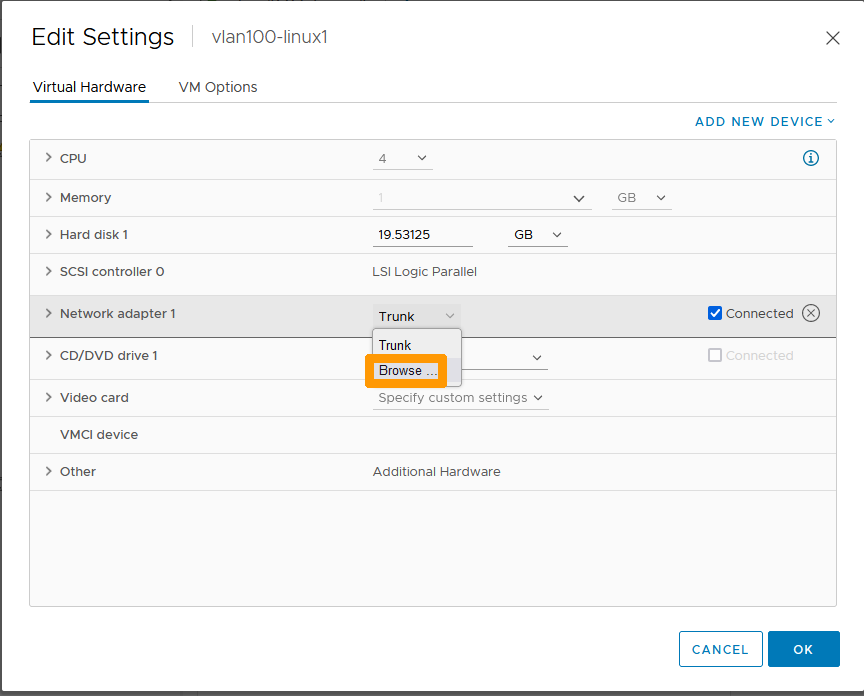
Right-click the virtual machine and click Edit Settings.
Scroll to the right of your network adapter and choose Browse.
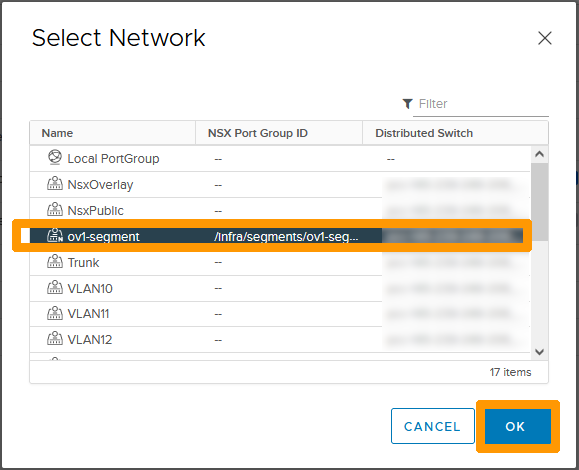
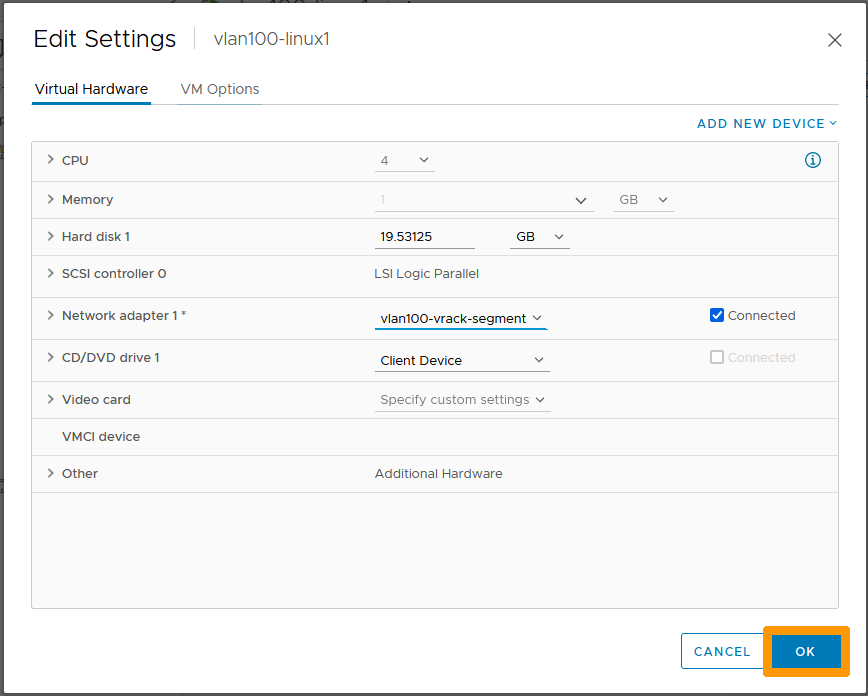
Select the network that is named after your segment and click OK.
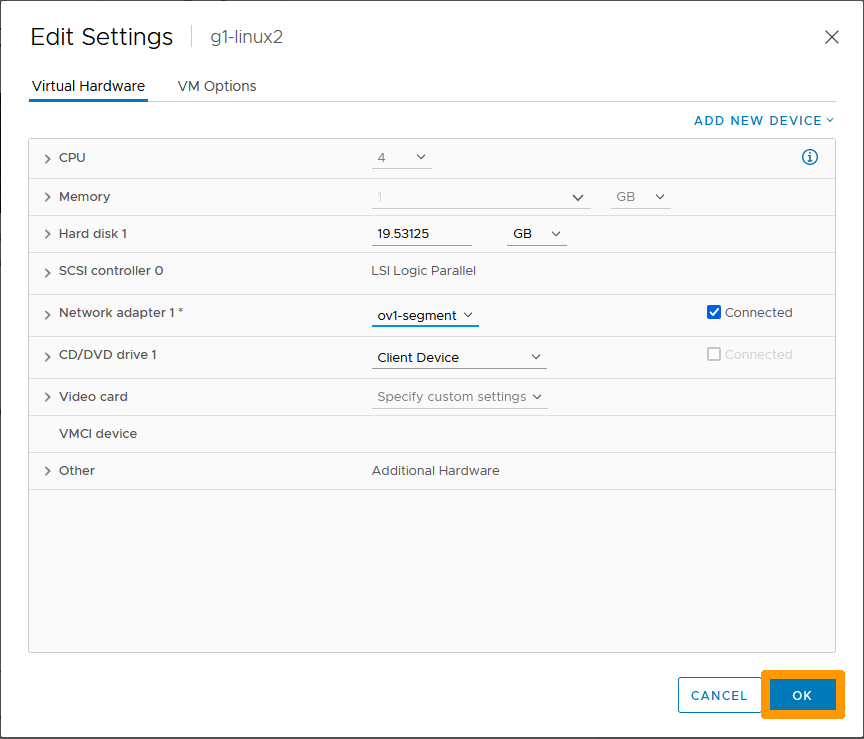
Click OK.
Now that your virtual machine is connected to the segment, go back to the NSX interface.
Go to the Networking tab, choose Network Topology.
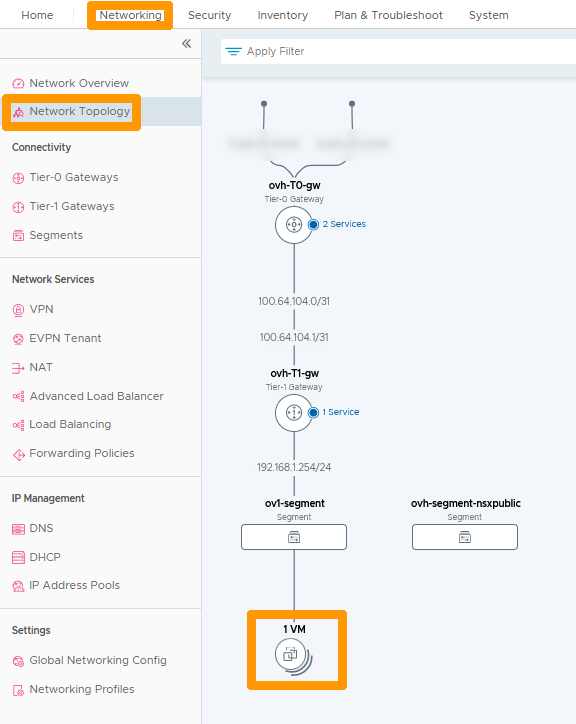
The virtual machine associated with the network appears in the network topology.
Use the first part of the guide to create a second segment named ov2-segment with these parameters 192.168.2.254/24 in order to have two segments connected to ovh-T1-gw.
Then, from the vCenter console, put two virtual machines on the first segment and two more on the second segment.
Return to the NSX interface in Network Topology to bring up the new network configuration.
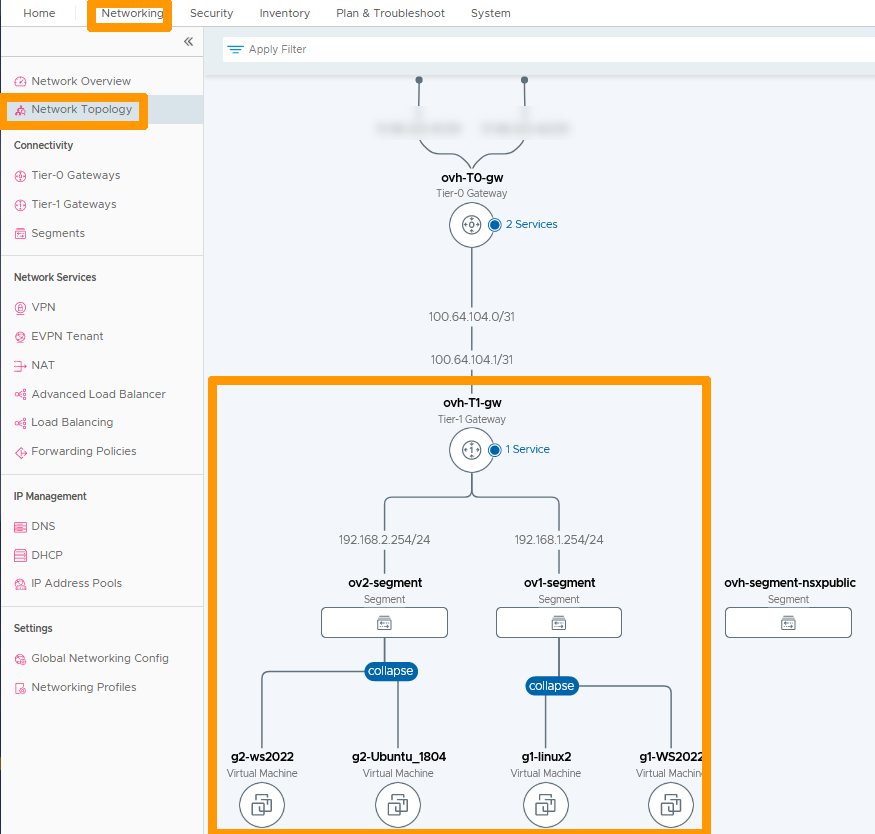
Both segments are connected to the gateway ovh-T1-gw. Routing between the two subnets is enabled without any network restrictions by default.
Creating a segment on a VLAN
Through the NSX interface, click on the Networking tab and click on Segments on the left in the Connectivity section. Then click ADD SEGMENT.
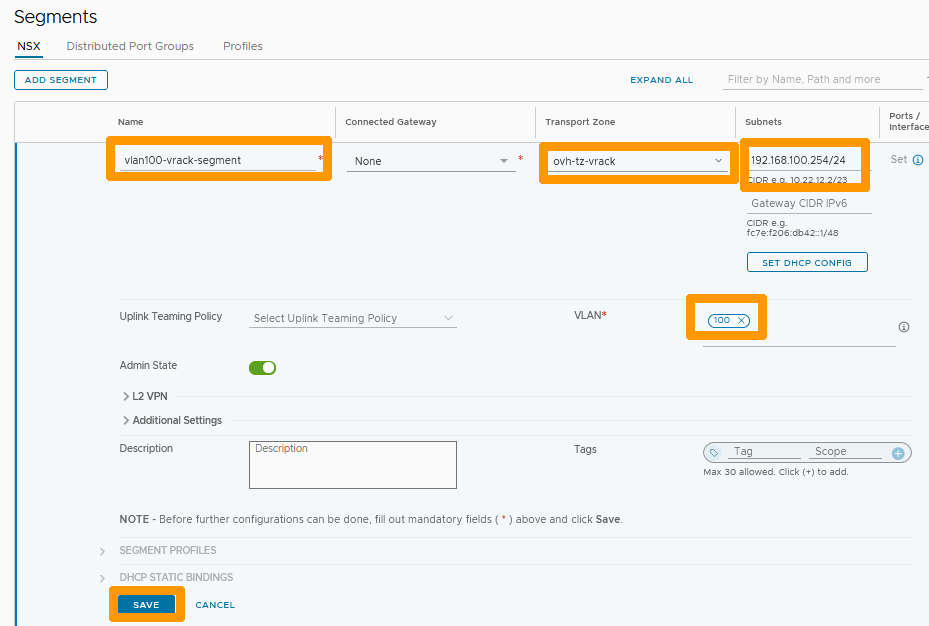
Fill in this information :
- Name : Type
vlan100-vrack-segment. - Transport Zone : Select
ovh-tz-vrack. - VLAN : Write the number
100. - Subnets : Enter the gateway address and range on this segment
192.168.100.254/24
Then click SAVE.
Click NO when prompted.
Connecting a VLAN segment to the ovh-T1-gw gateway
You can route the network from a VLAN segment to the Internet and other segments by creating an interface on the ovh-T1-gw gateway. When creating the interface, use the same IP address as the one specified in the segment subnet.
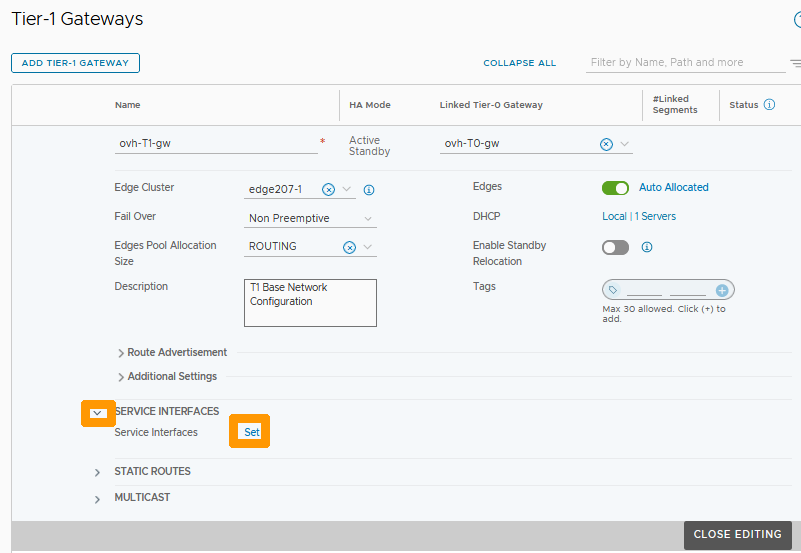
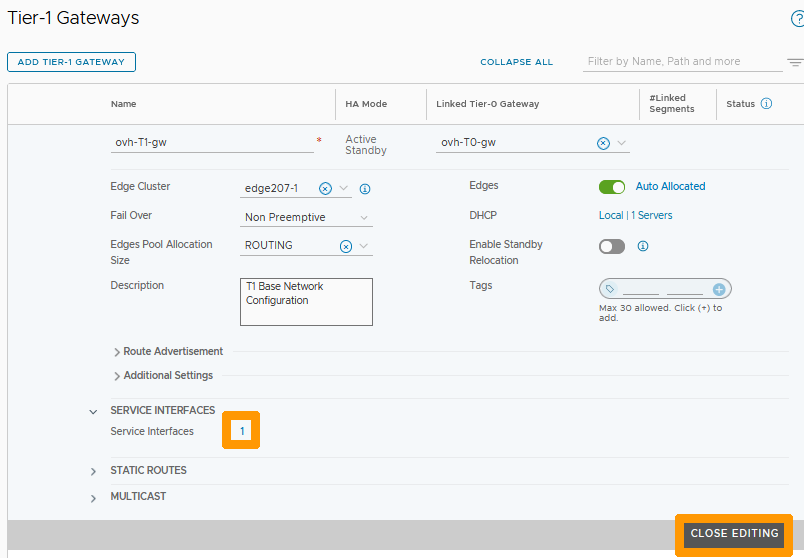
Through the NSX interface go to the Networking tab and click on Tier-1 Gateways on the left in the Connectivity section.
Then click on the three vertical points and choose Edit from the menu.

Click on the Down Arrow to the left of SERVICE INTERFACES and click the Set button that just appeared to the right of Service Interfaces.
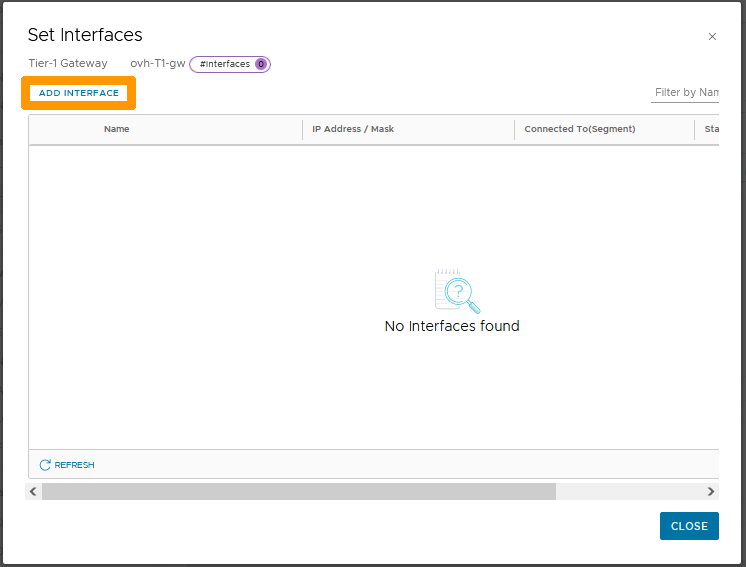
Click ADD INTERFACE.
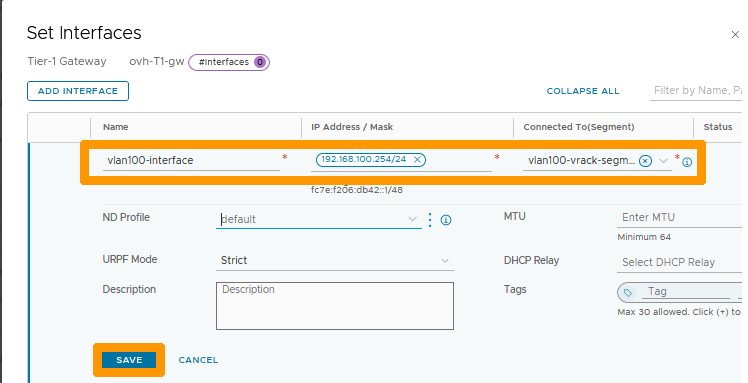
Choose this information :
- Name : Type
vlan100-interfaceas the name of your interface. - IP Address / Mask : Enter the IP address of the interface
192.168.100.254/24that should match the gateway. - Connected To(Segment) : Take the segment that is on vlan 100 on the vRack named
vlan100-vrack-segment.
Then click SAVE to confirm the creation of the interface on ovh-T1-gw.
Click CLOSE.
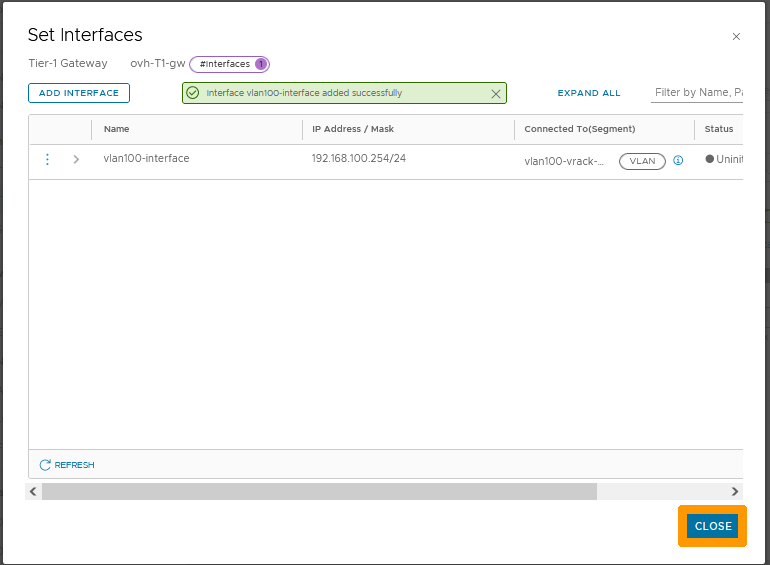
The number 1 next to Service Interfaces indicates that the interface is created, click CLOSE EDITING to complete the creation of the interface.
You can now connect outside this segment through the interface with gateway 192.168.100.254/24.
Assigning a VLAN Segment to a Virtual Machine
Go to your vSphere interface; right-click your virtual machine and choose Change settings.

Go to your network adapter and click Browse.
Click the segment associated with your VLAN and click OK.

Click OK to commit the changes.
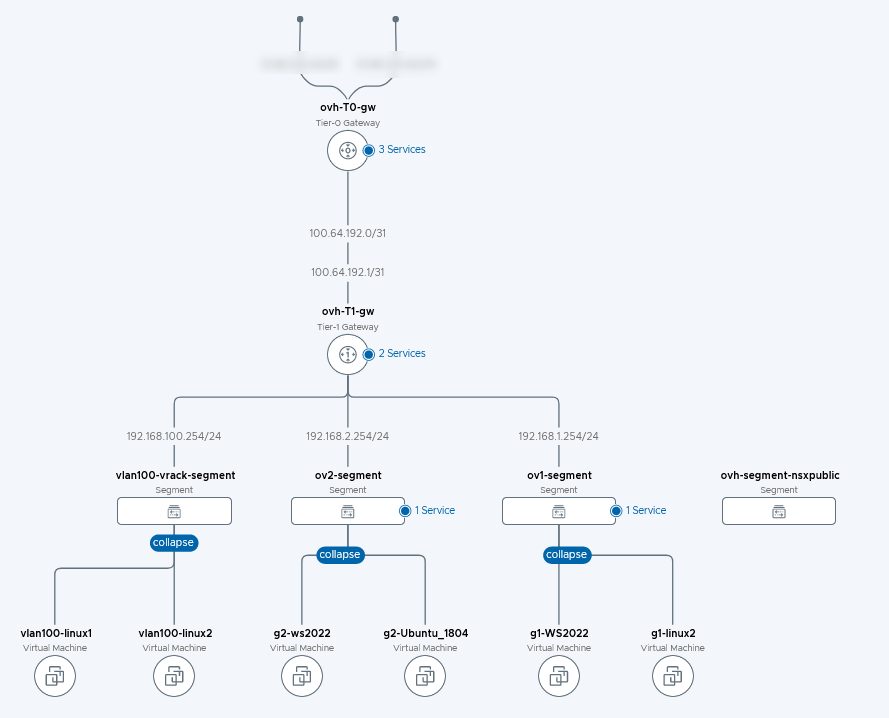
Displaying a network topology with overlay segments and other segments on VLANs
Go back to the NSX interface, go to the Networking tab and click on Network Topology on the left to view a graphical view of the network. You will see networks of type Overlay and those of type VLAN connected through an interface on ovh-t1-gw.
Go further
If you need training or technical assistance to implement our solutions, contact your sales representative or click on this link to get a quote and ask our Professional Services experts for a custom analysis of your project.
Join our community of users on https://community.ovh.com/en/.

