How to route an Additional IP
68 Views
Objective
An Additional IP is an IP address that can be switched from one service to another. This capability helps you maintain infrastructure continuity by mitigating issues such as hardware failures, service overload, or maintenance downtime.
For more information on Additional IPs, please consult our webpage.
The OVHcloud Load Balancer solution provides load balancing features for various protocols, including HTTP, HTTPS, TCP, and UDP. Linking it to an Additional IP allows you to switch your existing infrastructure to the Load Balancer without service interruption. Since you continue using the Additional IP, you avoid the need to change your public IP address and wait for DNS zone propagation. Using an additional IP means you avoid the need to change your service's IP address, and no longer have to wait for your DNS zone to propagate changes.
For more information on the OVHcloud Load Balancer solution, please read our Introduction to the OVHcloud Load Balancer guide.
This guide explains how to use an Additional IP with the OVHcloud Load Balancer service.
Requirements
- A configured OVHcloud Load Balancer
- An Additional IP
- Access to the OVHcloud API
Required Load Balancer configuration
Once you confirm the changes in the list of Additional IPs associated with the Load Balancer, the configuration needs to be refreshed. Several conditions must be met for this to work:
-
vRack configuration: If the Load Balancer is in a vRack, all farms must also be in the vRack, and the Load Balancer must have its vLAN defined. Otherwise, there should be no farms in a vRack.
-
Front-end validity: At least one front-end must exist, and all front-ends must be valid. They can be enabled or disabled, but must have either: - a valid route (with routing rules) - a redirection (
redirectLocation) - a default farm -
Configuration state: The Load Balancer must not be undergoing any other refresh process. A Load Balancer cannot be refreshed several times at once, as this would prevent changes from being applied to the resulting configuration.
OVHcloud Control Panel Access
- Direct link: Load Balancer
- Navigation path:
Network>Load Balancer> Select your service
Instructions
In this document, we will cover two distinct use cases:
- linking an Additional IP to the overall OVHcloud Load Balancer service
- linking an Additional IP to a single front-end of the OVHcloud Load Balancer service
Add an Additional IP to the OVHcloud Load Balancer
You can link these IPs to your OVHcloud Load Balancer via the OVHcloud API. The API call for this is:
You can then list the Additional IPs linked to your OVHcloud Load Balancer with the following API call:
Additional IPs linked this way are available for all your front-ends. This differs from the next case, where an Additional IP is linked to a single front-end.
Add a dedicated Additional IP to a front-end
Regardless of the front-end type, you can define a list of dedicated Additional IPs to be linked to it. In this specific case, your Additional IP will be attached to only one single front-end. As a result, it will only grant access to the service provided by that front-end. Services for your other front-ends will remain accessible via your IP Load Balancer’s primary IP address.
Via the API
If you are creating a front-end:
From the OVHcloud API, you can use the following calls to define one or more Additional IPs on a front-end during its creation:
- HTTP protocol
- TCP protocol
- UDP protocol
If you are updating an existing front-end:
From the OVHcloud API, you can use the following calls to define one or more Additional IPs on an existing front-end:
- HTTP protocol
- TCP protocol
- UDP protocol
Via the OVHcloud Control Panel
You can define dedicated Additional IPs via the OVHcloud Control Panel.
Once you have selected the Load Balancer you want to modify, navigate to the Front-ends tab, where you can either create a new front-end or edit an existing one.
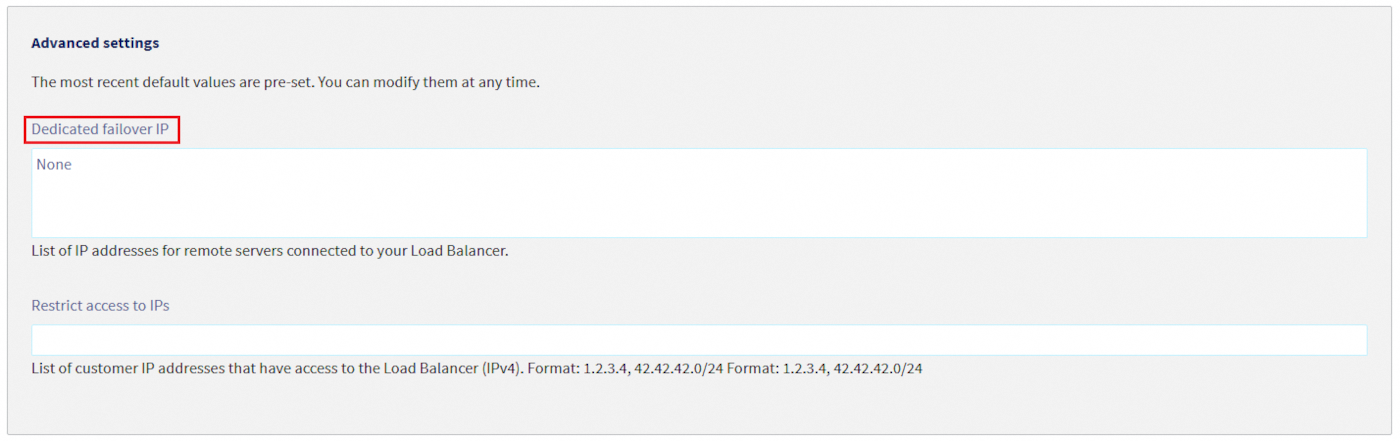
In Advanced settings, you can select the Additional IPs you would like to associate with your front-end.
Once the front-end has been configured, click Add or Modify, depending on whether you are configuring a new or existing front-end.
Remember to deploy the configuration. There are two ways to do this:
-
via the
Statussection of theHometab of your OVHcloud Control Panel, by clicking on the...button next to your Load Balancer's ID and selectingApply configuration -
via the reminder box in the OVHcloud Control Panel, which notifies you that the configuration has not been applied, by clicking
Apply configuration.

Go further
Join our community of users.

