Configuring an OVHcloud Load Balancer service with redirects
72 Views
Objective
The OVHcloud Load Balancer operates by default as a proxy. It can also be configured to redirect client traffic to a third-party website. This functionality is essential for scenarios such as domain name migration or enforcing the HTTPS version of a website. This is known as HTTP redirection.
This guide outlines the process for integrating your web services behind an OVHcloud Load Balancer utilizing HTTP redirections.
Requirements
- Have an OVHcloud Load Balancer offer in your OVHcloud account.
- Have access to the OVHcloud API.
OVHcloud Control Panel Access
- Direct link: Load Balancer
- Navigation path:
Network>Load Balancer> Select your service
Instructions
Overview
An HTTP redirect looks like this:
Custom redirects must be formatted as <scheme>://<net_loc>/<path>;<params>?<query>#<fragment>. Only one redirect can be specified per frontend.
Custom redirects can be specified via the OVHcloud Control Panel or via the API, on a new or existing frontend.
Adding a custom redirect from the OVHcloud Control Panel
This can be done either on a new frontend during its creation, or on an existing frontend.
Adding a new frontend
In the Frontends section, click on the Add a frontend button to create a new one.
In the frontend editing page, select the HTTP or HTTPS protocol.
Configure the information as usual. However, it is unnecessary to specify the Default backend, as it will not be used.
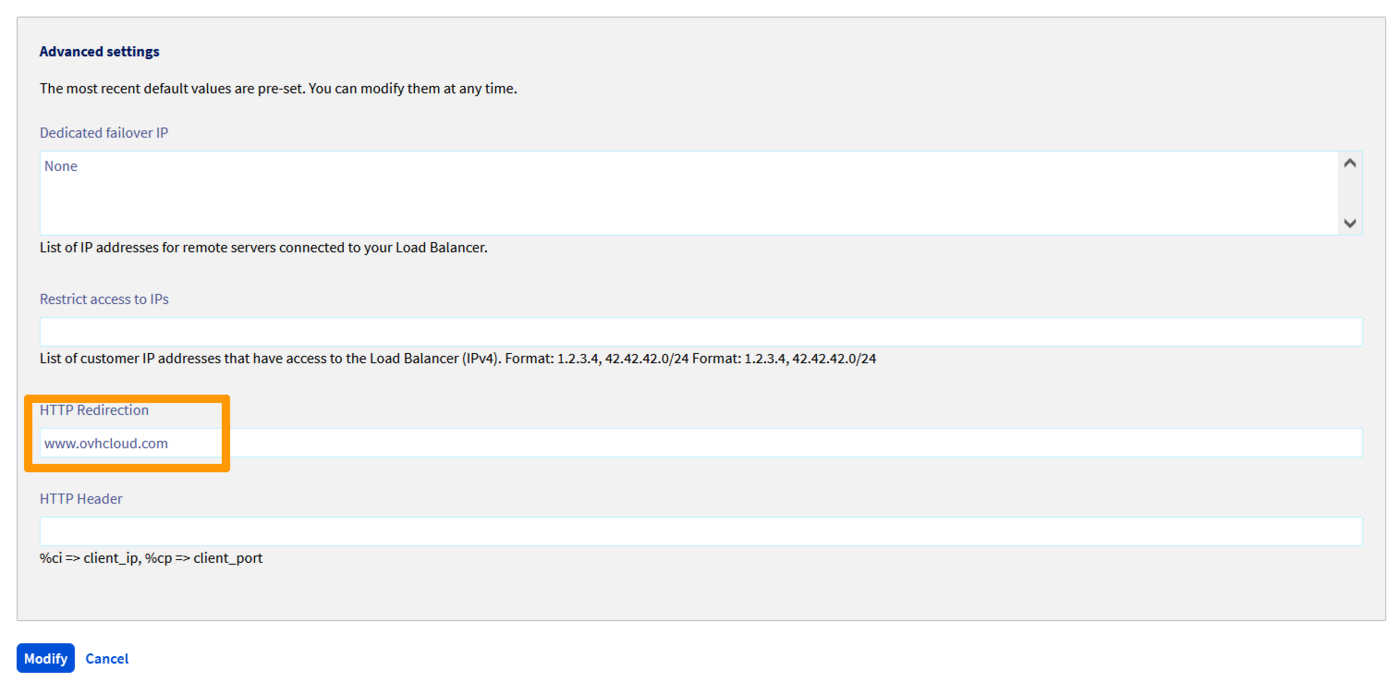
In the advanced settings, fill in the HTTP redirect.
Editing an existing frontend
In the Frontends section, click on the ... button to the right of the relevant frontend and select Edit.
Make sure the selected frontend is of the HTTP or HTTPS protocol. Complete the configuration if necessary.
However, it is unnecessary to specify the Default backend, as it will not be used.
In the advanced settings, fill in the HTTP redirect.
Once the frontend is configured, click on Add or Edit depending on whether you are configuring a new frontend or an existing one.
Do not forget to deploy the configuration.
To do this, you can either:
-
In the
Statussection of theHometab, click on the...button of your Load Balancer and then click onApply the configuration. -
In the reminder banner informing you that the configuration is not applied, click on
Apply the configuration.

Adding a custom redirect from the OVHcloud API
In the OVHcloud API, redirects are specified in the redirectLocation string:
Creating a new frontend
| Parameter | Meaning |
|---|---|
| serviceName | Identifier of your Load Balancer service |
| port | Port(s) of the frontend |
| zone | Deployment zone of the frontend |
| redirectLocation | HTTP redirect URL |
Updating an existing frontend
| Parameter | Meaning |
|---|---|
| serviceName | Identifier of your Load Balancer service |
| frontendId | Identifier of the frontend to update |
| redirectLocation | HTTP redirect URL |
Applying the changes
| Parameter | Meaning |
|---|---|
| serviceName | Identifier of your Load Balancer service |
| zone | Deployment zone of the frontend |
Go further
Join our community of users.

