Zimbra - Set up a WebDAV folder on your computer
36 Views
Objective
Zimbra Pro email accounts have a storage space, called Briefcase, which can be used to exchange files via the WebDAV feature. This feature is available via the Zimbra Webmail and can also be set up on your computer to display the Briefcase as a storage volume.
Find out how to mount a Zimbra WebDAV folder on your computer.
Requirements
- An OVHcloud Zimbra Pro email address.
- A Windows or macOS computer.
- The credentials related to the email address attached to the Zimbra Pro account.
Instructions
WebDAV (Web-based Distributed Authoring and Versioning) is an extension of the HTTP protocol that allows you to manage files remotely on a server and modify them as if they were local.
The storage space allocated to your Zimbra email account is shared between your emails and the files in the Briefcase. Each file uploaded to the Zimbra Briefcase cannot exceed 100 MB.
In this documentation, we will use the example email address john.smith@mydomain.ovh and we will mount the Briefcase folder which is present by default.
Mount a folder from Windows
Before you can connect to your WebDAV folder from the Windows Explorer, you need to enable and configure the services related to connecting to a WebDAV volume.
1. Enable the WebClient service
- Open
Servicesfrom the Windows Start menu.
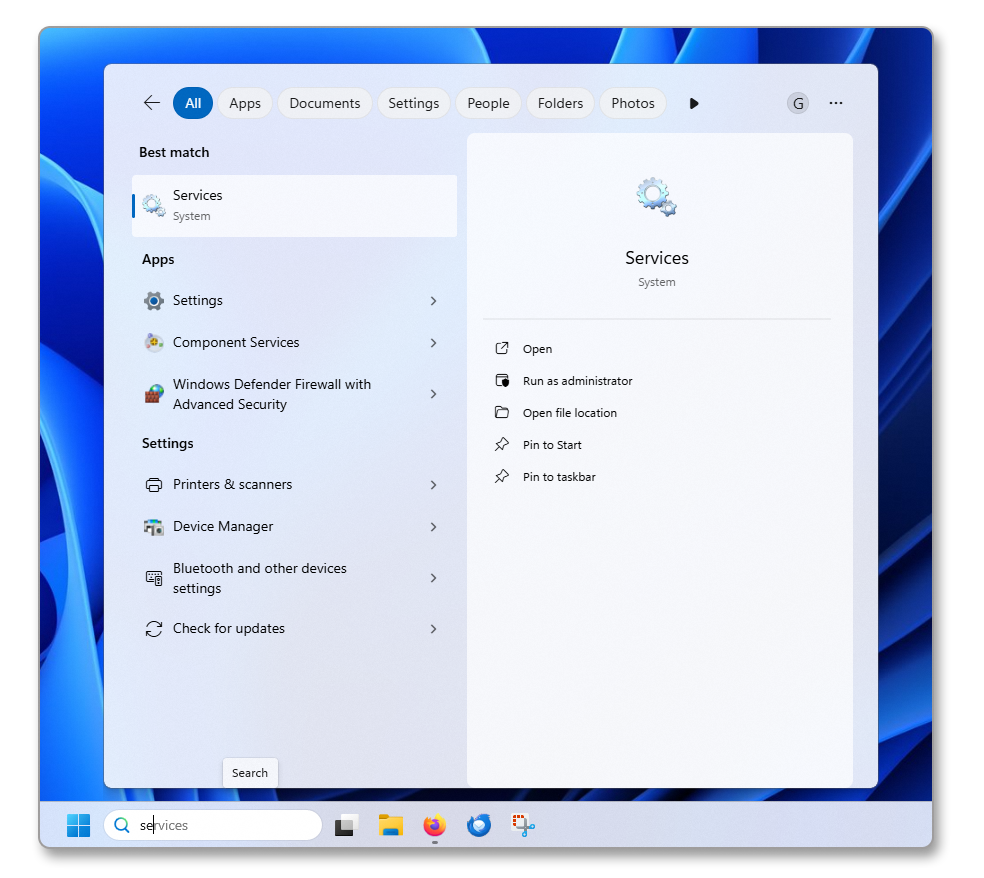
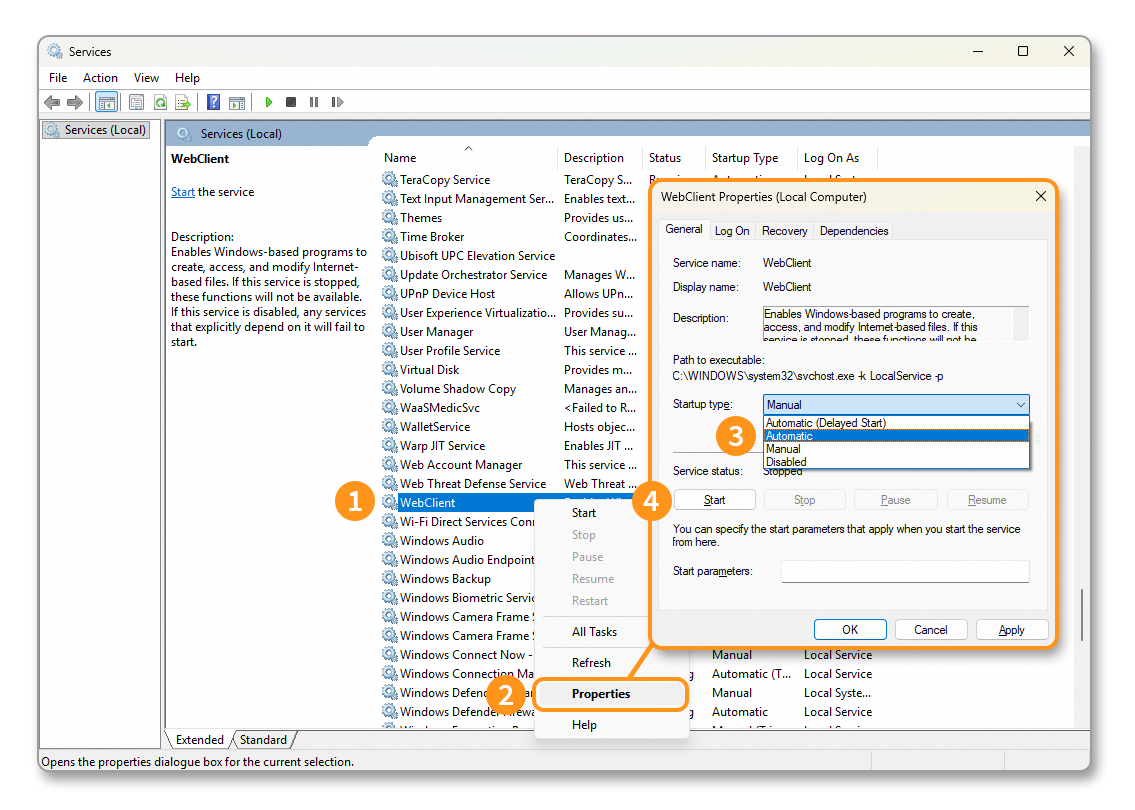
- Identify the WebClient service in the list.
- Right-click on WebClient, then click on
Properties. - Switch the Startup type to Automatic.
- Click on
Startto start the service, then click onOKto confirm the changes.
2. Modify the WebClient registry key
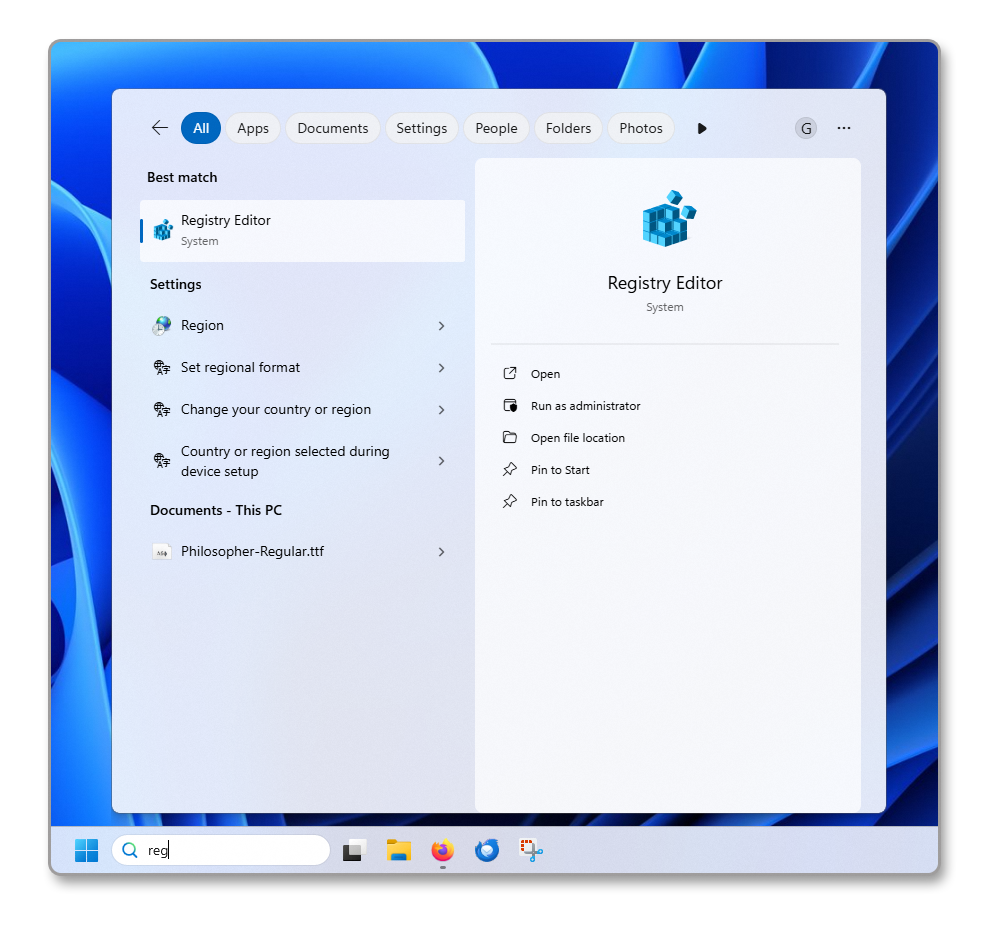
- Open the
Registry Editorfrom the Windows Start menu.
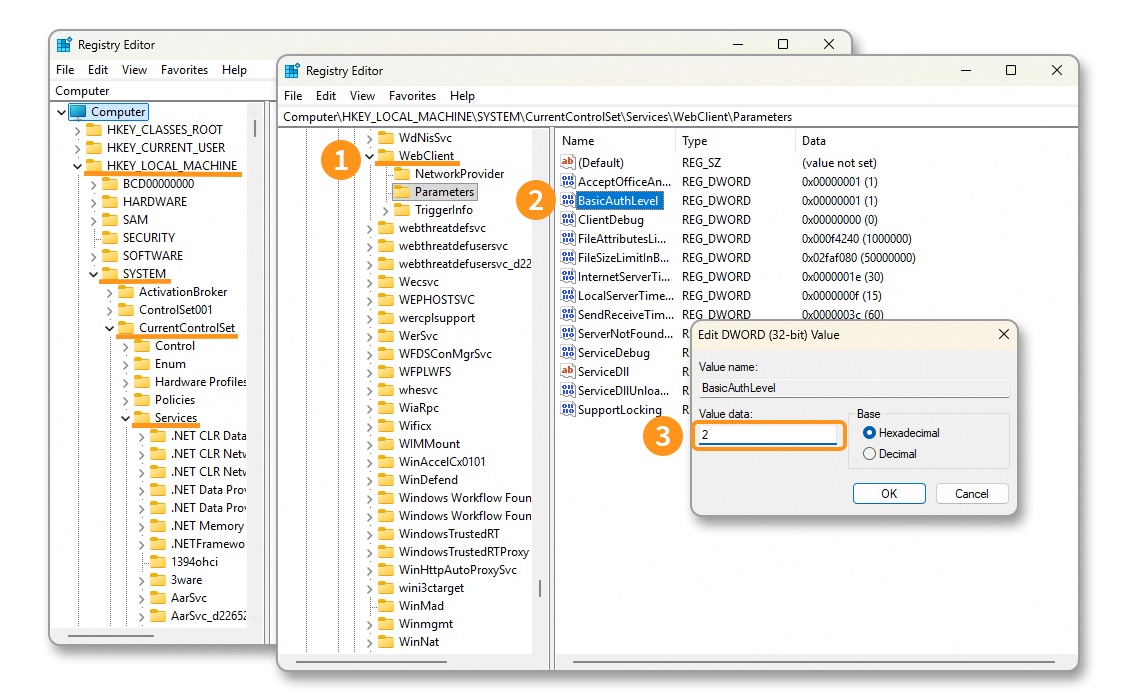
- Identify the WebClient service in the
HKEY_LOCAL_MACHINE\SYSTEM\CurrentControlSet\Services\WebClient\Parameters\BasicAuthLeveltree. - Double-click on the registry key
BasicAuthLevel. - Change the Value data: by default set to
1, replace it with the value2and then click onOKto confirm the changes.
3. Import the Zimbra server SSL certificate
To export the SSL certificate, we used the Mozilla Firefox browser.
- Open your web browser, load the page https://zimbra1.mail.ovh.net/, then click on the padlock icon in the address bar.
- Click on
Secure Connection. - Click on
More information.
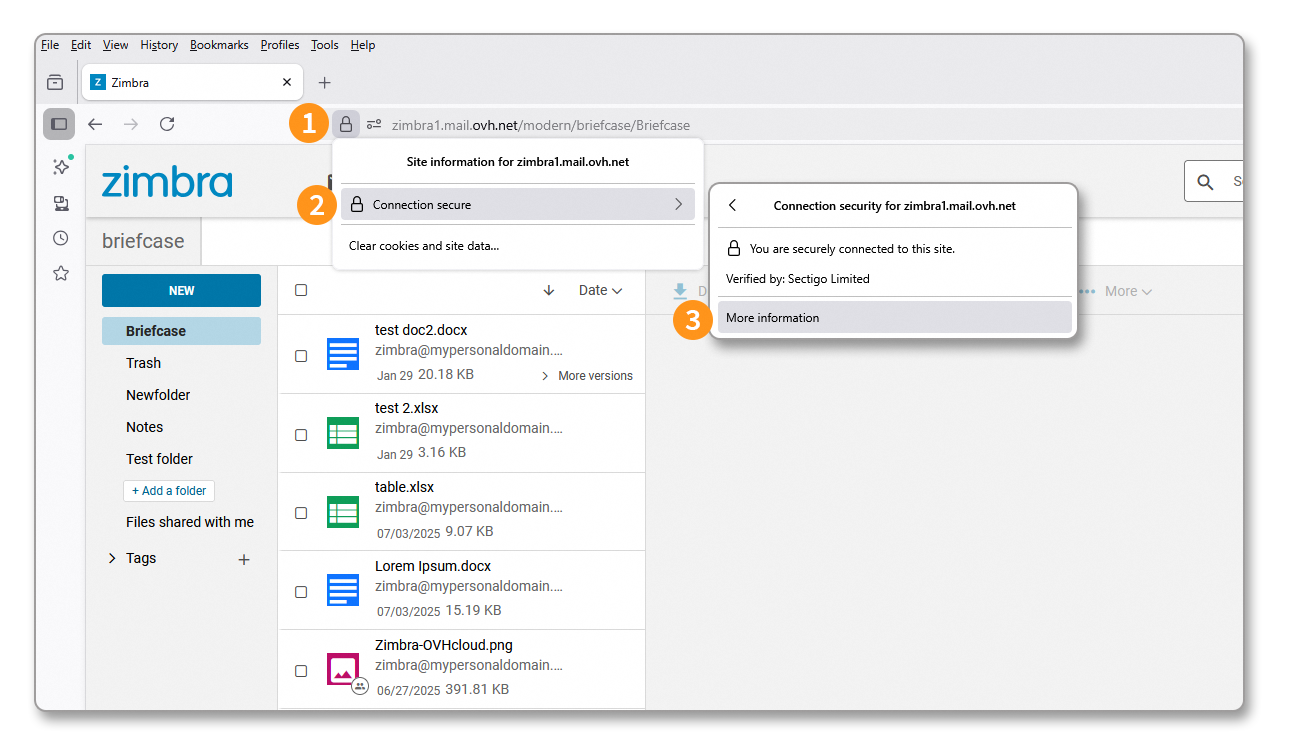
- Click on
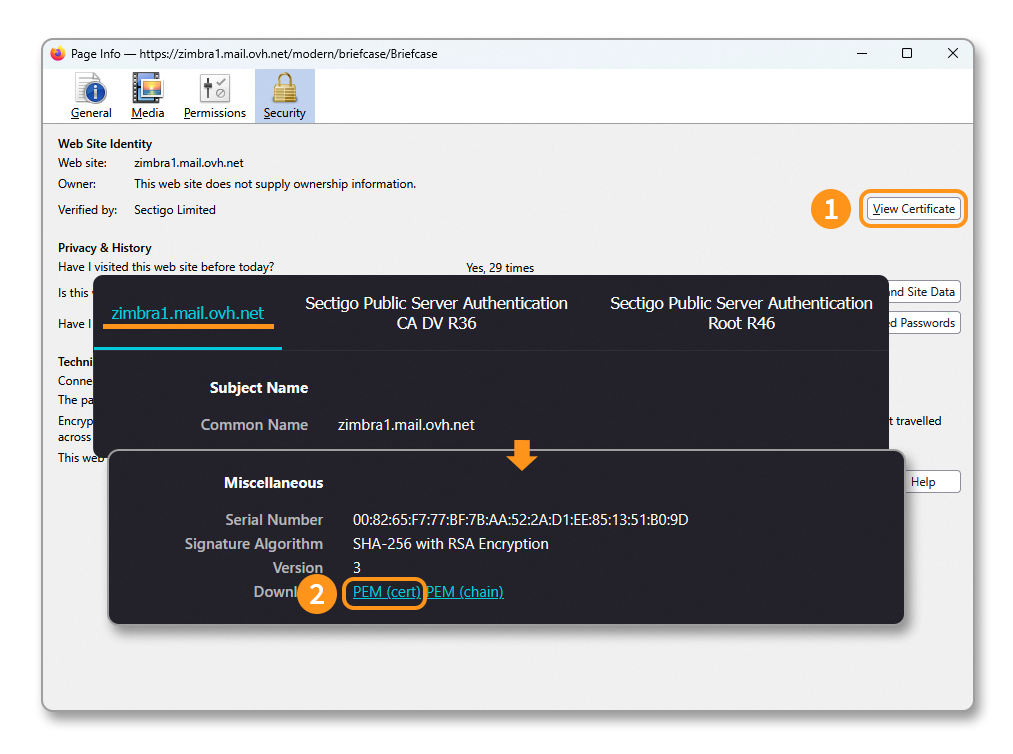
View Certificate. - From the window that appears, stay on the
zimbra1.mail.ovh.nettab and click onPEM (cert)to download the SSL certificate.
- Change the file extension from
.pemto.cer.
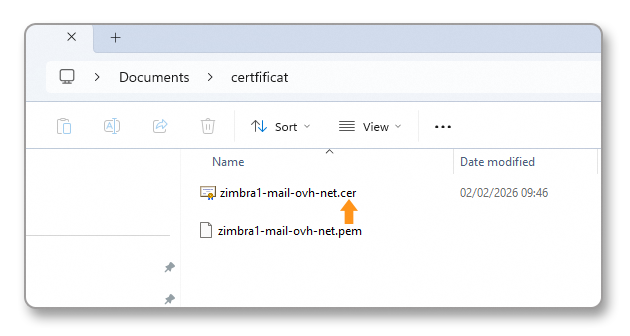
- Open the file
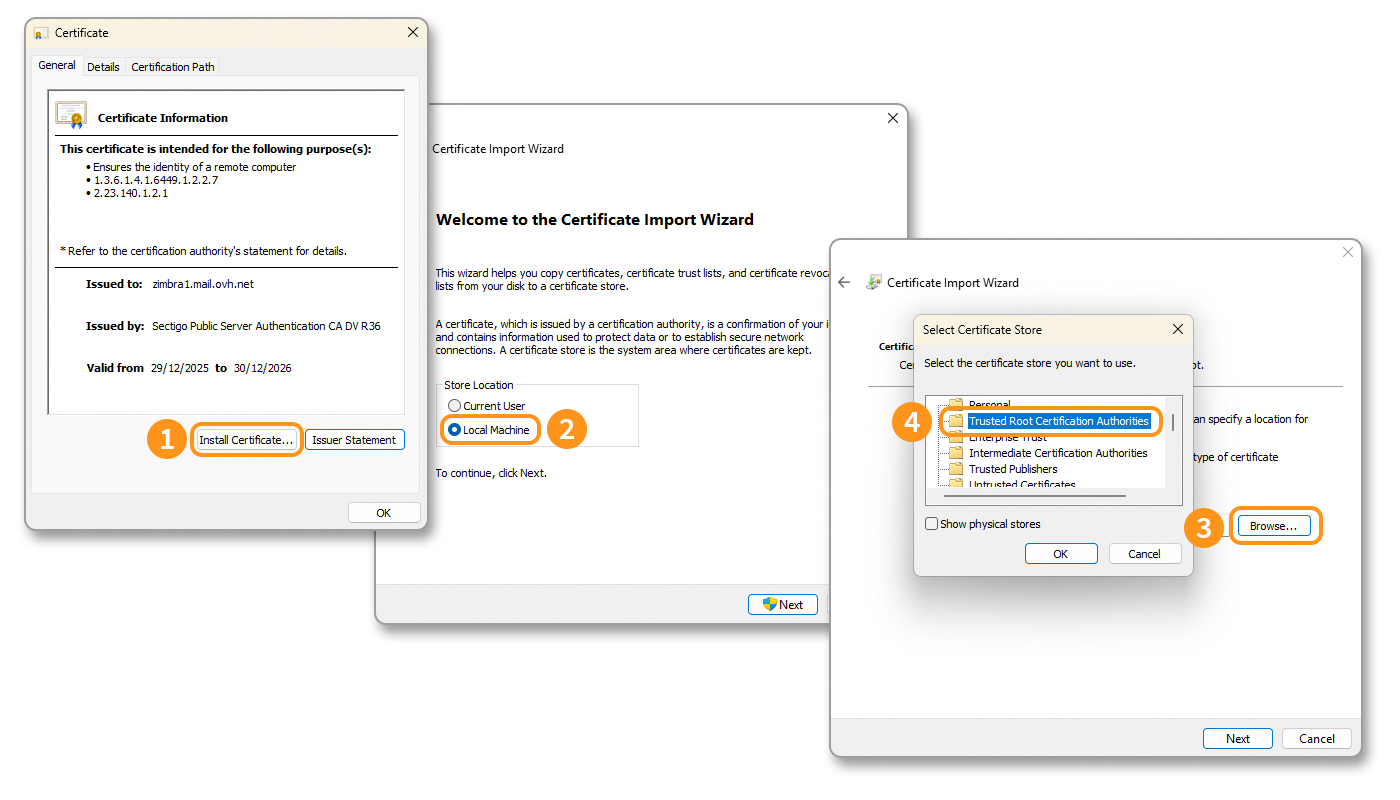
zimbra1-mail-ovh-net.cer, then click onInstall Certificate…. - Click on
Local Machine, then click onNext. - Check
Place all certificates in the following store, then click onBrowse…. - Select the
Trusted Root Certification Authoritiesfolder, then click onOK.
4. Mount the volume
In our example, we are using the Zimbra account email address john.smith@mydomain.ovh and the Briefcase folder, created by default in the Zimbra storage space.
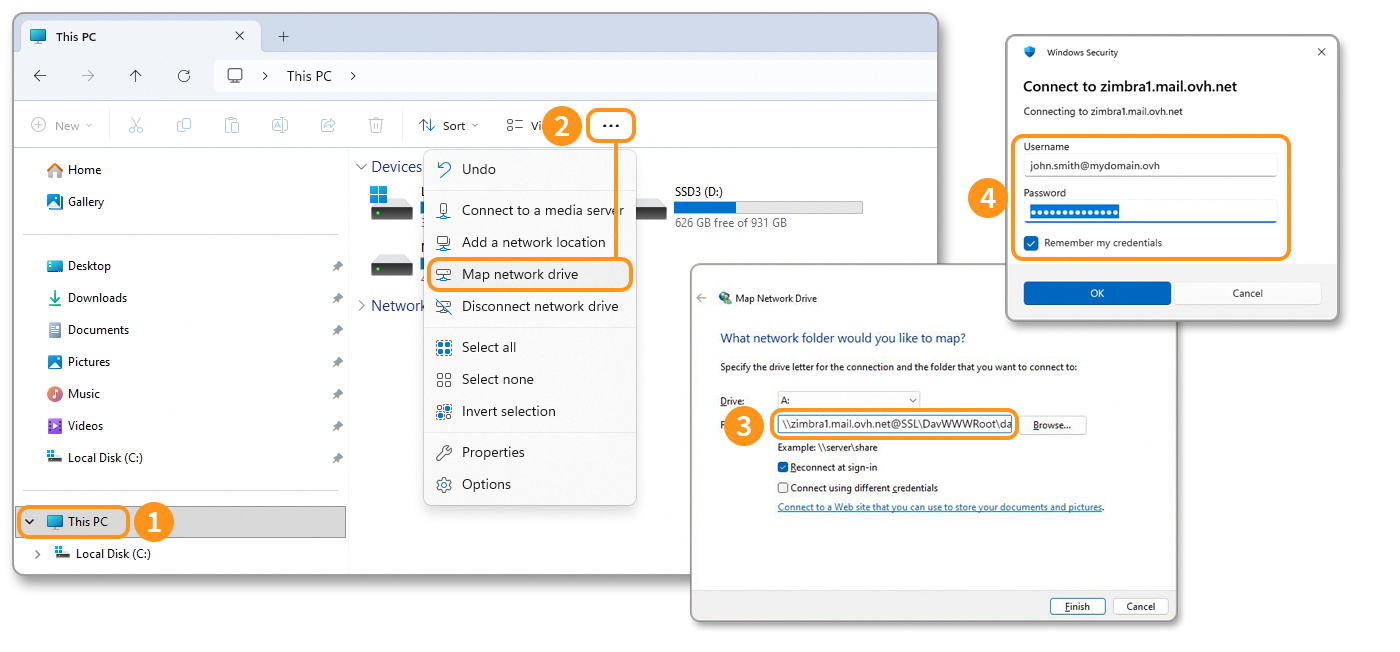
- Open the Windows file explorer and click on
This PC. - In the top bar, click on the button
…, then onMap network drive. - In the window that appears, enter the folder path. According to our example, the path is
\\zimbra1.mail.ovh.net@SSL\dav\john.smith@mydomain.ovh\Briefcase. Click onFinish. - An authentication window opens, enter the
Usernamecorresponding to the full email address and thePasswordassociated with it. Click onOK.
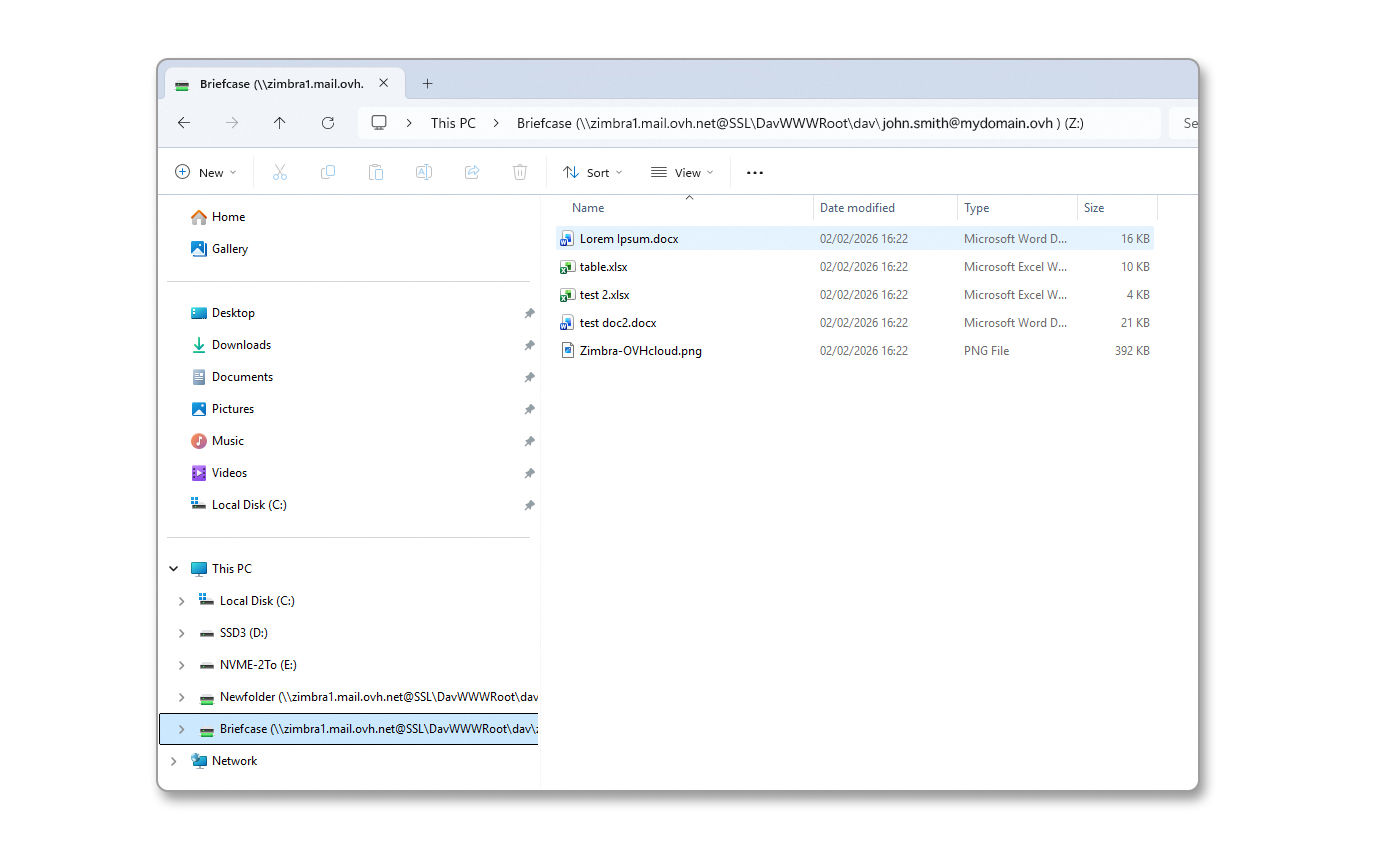
Your network volume is now displayed. You can place your files in it, up to a limit of 100 MB per file.
Mount a folder from macOS
On macOS, it is not necessary to enable a service or register the SSL certificate, you just need to mount the volume directly from the Finder.
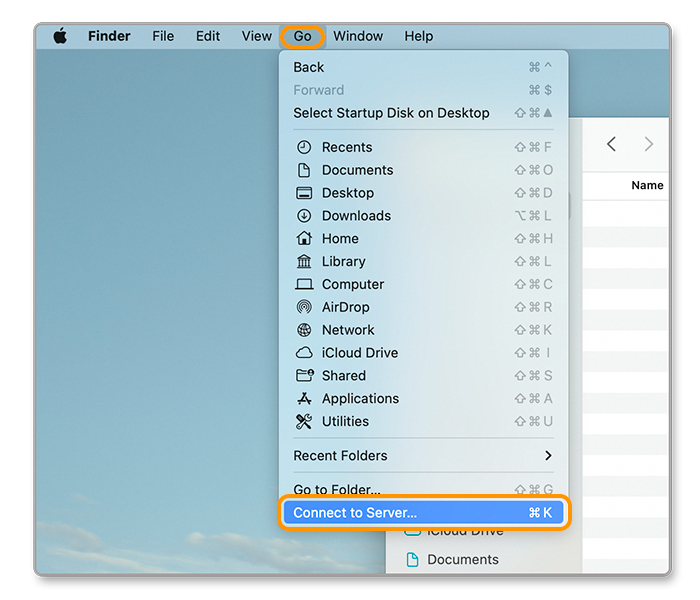
- Open the Finder.
- In the top bar, click on the
Gomenu. - Click on
Connect to Server(⌘ + K).
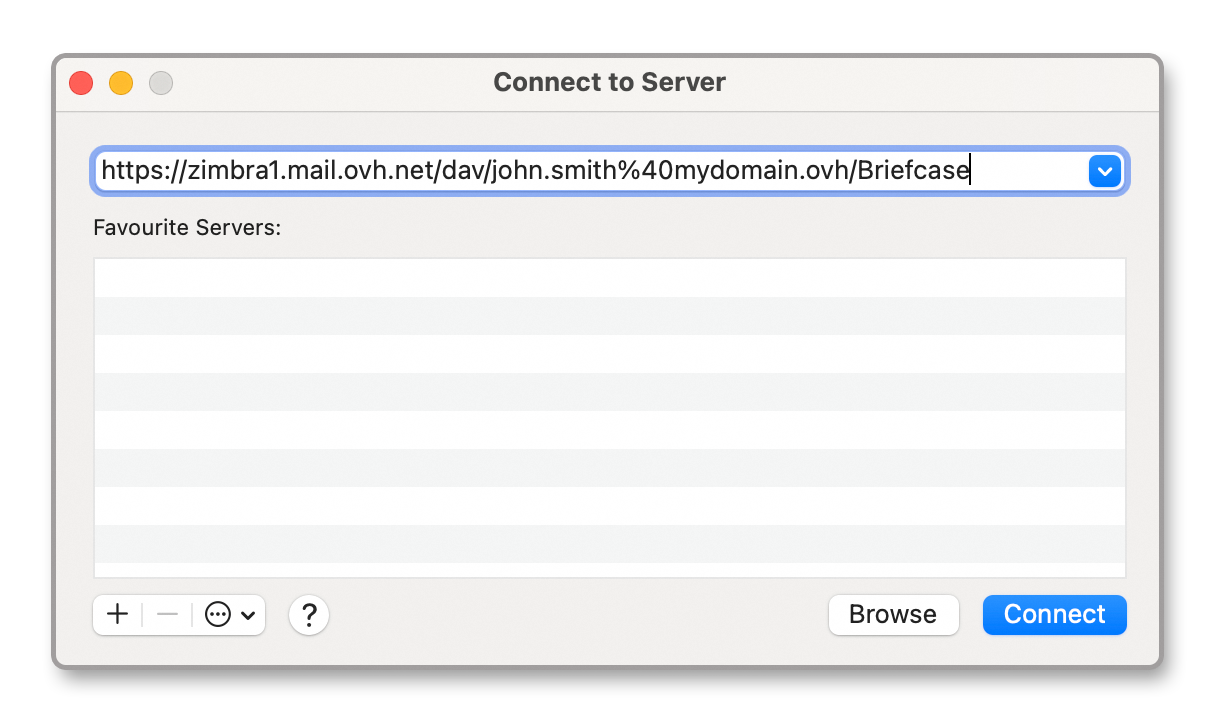
It is important to replace the @ in your email address with %40 in the path entry.
- From the window that appears, enter the connection path suitable for your email address and the folder you want to connect. According to our example, the path is
https://zimbra1.mail.ovh.net/dav/john.smith%40mydomain.ovh/Briefcase. - Click on
Connect.
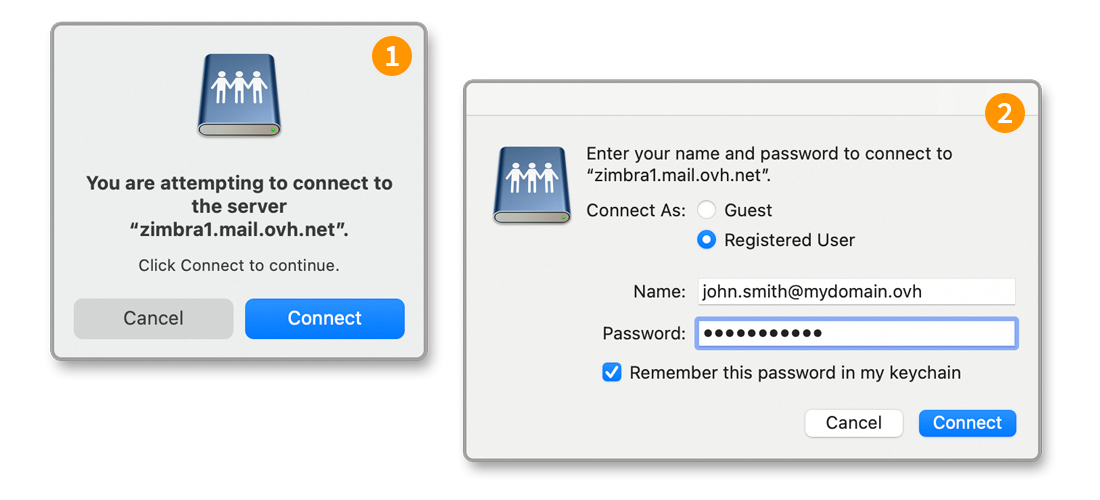
- A server validation window for
zimbra1.mail.ovh.netappears, click onConnect. - A new window will ask you to enter the
Namecorresponding to your full email address and thePasswordassociated with it. CheckRemember this password in my keychainif you want to keep it for a future connection to another folder. Click onConnectto mount the volume.
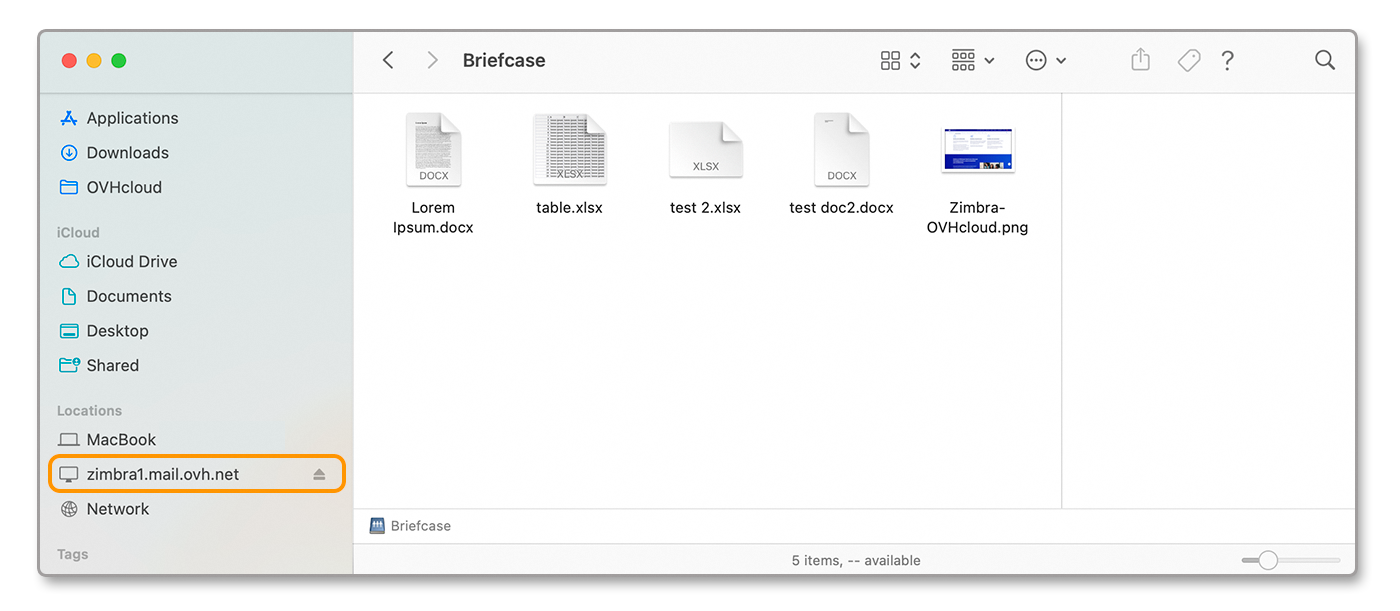
You now have access to your Zimbra Briefcase storage space. You can place any type of file in it that does not exceed 100 MB.
Go further
Getting started with the Zimbra offer
Set up your Zimbra email address on an email client
For specialized services (SEO, development, etc.), contact the OVHcloud partners.
If you need assistance with the use and configuration of your OVHcloud solutions, we offer you to consult our various support offers.
Join our community of users.

