Resolving a “Site not installed” error
7775 Views
Objective
You may see the error page “Site not installed” displayed on your web browser, particularly when your website is first installed.
This guide explains how to identify and resolve the "Site not installed" error page.
OVHcloud provides services for which you are responsible with regard to their configuration and management. It is therefore your responsibility to ensure that they function correctly.
This guide is designed to help you with common tasks. Nevertheless, we recommend contacting a specialist provider or reach out to the OVHcloud community if you encounter any difficulties. We will not be able to assist you. You can find more information in the Go further section of this guide.
Requirements
- An OVHcloud web hosting plan
- Administrative access to the DNS zone your domain name is attached to.
OVHcloud Control Panel Access
- Direct link: Web hosting
- Navigation path:
Web Cloud>Hosting plans> Select your web hosting plan
Instructions
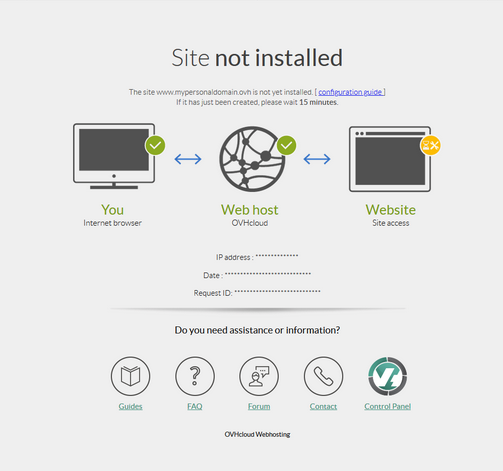
The “Site not installed” page appears for two reasons:
- 1: Your domain name or subdomain is not declared correctly on your web hosting plan.
- 2: Your domain name is not linked to the IP address of your web hosting plan..
The following steps will allow you to correct the “Site not installed” error in both cases.
1 - Verify the declaration of your domain name or subdomain on your web hosting plan
Click on the tabs below to view each of the 4 steps in succession.
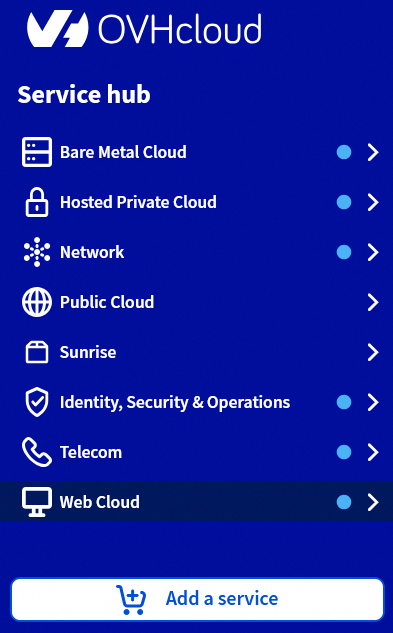
Log in to the OVHcloud Control Panel, then go to the Web Cloud section.
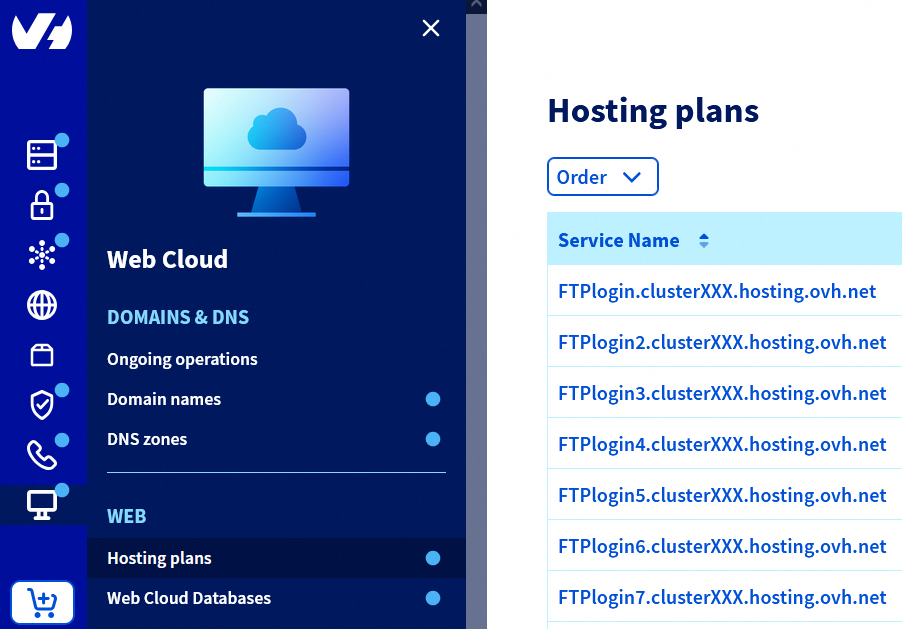
Click the Hosting plans menu, then select the web hosting plan concerned.
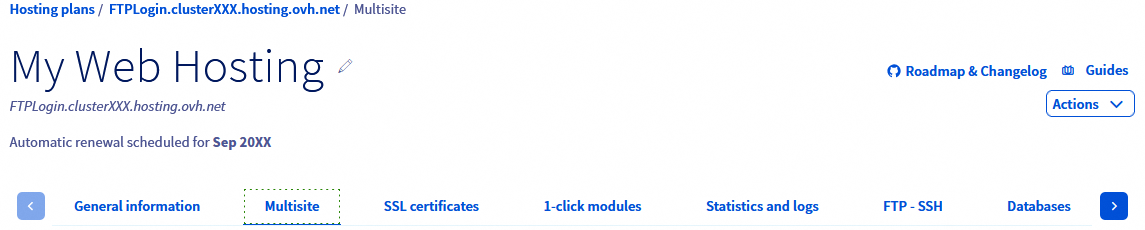
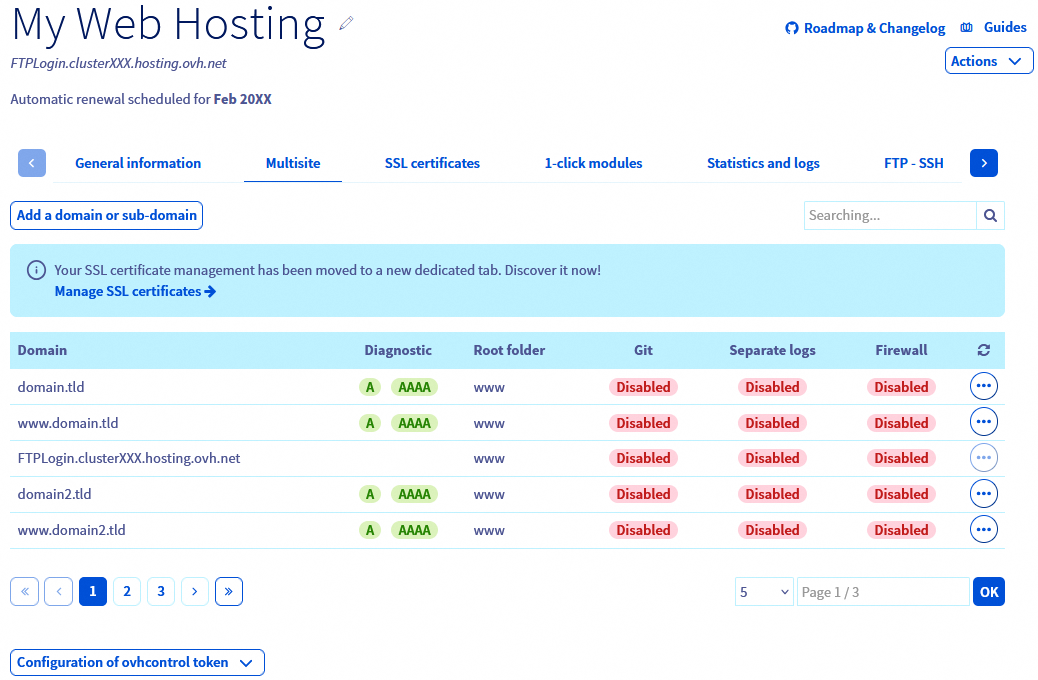
On the page that pops up, click on the Multisite tab.
On the new page that opens, a table appears.
| Scenarios | Actions to Take |
|---|---|
| The domain name or subdomain linked to your website appears in the “multisite” table. | If you have just added your domain name or subdomain to the Multisite section of your web hosting plan, please wait around twenty minutes, then refresh your web browser cache. If the message “Site not installed” still appears, go to part 2. |
| The domain or subdomain linked to your website does not appear in the “multisite” table. | Add your domain or subdomain to the Multisite section by following the dedicated section in the guide “Hosting multiple websites on your web hosting plan - adding a domain or subdomain”. |
| The domain or subdomain has been removed from the "multisite" table without any action on your part. | Your domain or its DNS zone may be managed from another account. Add your domain or subdomain in the Multisite section by following the dedicated section of the guide “Hosting multiple websites on your Web Hosting plan - adding an external domain name”. |
2 - Check the IP pointing in your domain name’s active DNS zone
This step involves checking that your domain or subdomain points to your Web Hosting plan’s IP address from its active DNS zone.
To find out more about DNS, visit the following pages:
2.1 Identify the IP address of your OVHcloud web hosting plan
Click on the tabs below to view each of the 3 steps in turn.
Log in to the OVHcloud Control Panel, then go to the Web Cloud section.
Click the Hosting plans menu, then select the web hosting plan concerned.
In the General information box, you will see the address under IPv4.
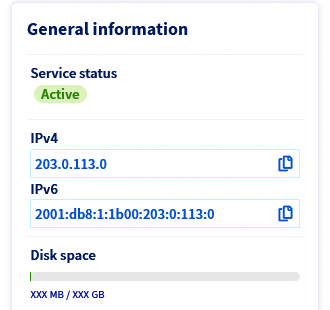
Copy the IPv4 address, then continue reading the guide.
You can also find the IP address associated with your Web Hosting plan in our guide “Web Hosting - List of IP addresses by cluster”.
2.2 Verify the IP address recorded in your domain name’s active DNS zone
You will now need to check that your Web Hosting plan’s IP address appears in your domain name’s active DNS zone.
Before you continue, whenever a change occurs in a domain name’s active DNS zone, you may need to wait between 4 and 24 hours to update the information on the DNS network.
If you modify the DNS servers associated with your domain name directly, this period can be up to 48 hours maximum.
To do this, click on the tabs below to display each of the 4 steps in succession.
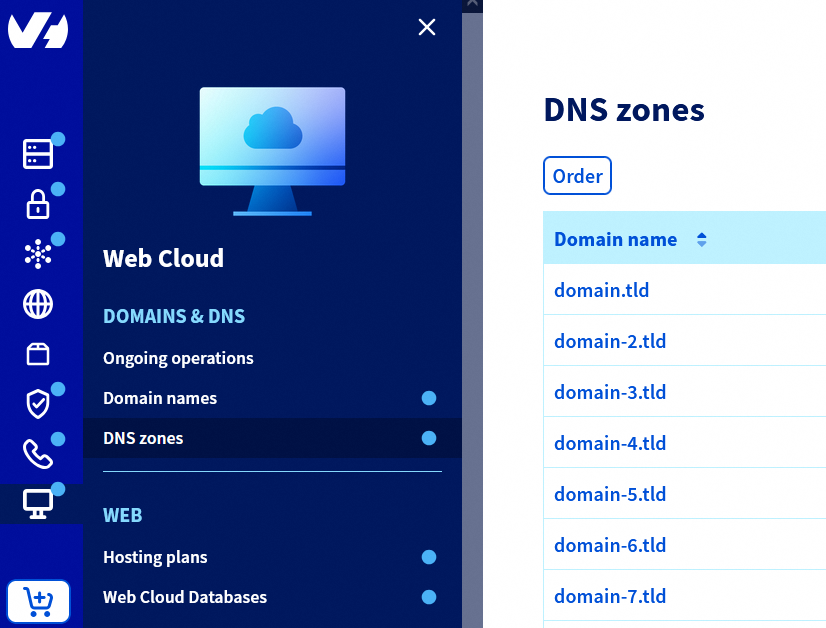
Log in to the OVHcloud Control Panel, then go to the Web Cloud section.
Click the DNS zones menu, then choose the domain name concerned.
If your domain name does not appear in the list that appears, it means that its DNS zone is not managed from your OVHcloud Control Panel.
Determine its registrar and the DNS servers associated with it via our WHOIS tool.
Find and modify the DNS zone concerned accordingly by following the dedicated section of the guide “Hosting multiple websites on your Web Hosting plan - adding an external domain name”.
The table that appears will display a DNS record for each row, linked to your domain name at OVHcloud. You can filter the table content by record type or by domain name.

If the DNS Zone tab of your domain name appears as follows: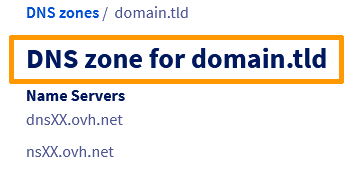
This means that your domain name is not managed from the OVHcloud Control Panel.
Determine its registrar and the DNS servers associated with it using our WHOIS tool.
Find and modify the DNS zone concerned accordingly by following the dedicated section of the guide “Hosting multiple websites on your website - adding an external domain name”.
Go to step 4 to view the various possible scenarios and the actions to be taken.
| Possible Scenarios | Action to Take |
|---|---|
In the active DNS zone, your domain or subdomain points to your Web Hosting plan's IP address with an A record (for an IPv4 address) or an AAAA record (for an IPv6 address).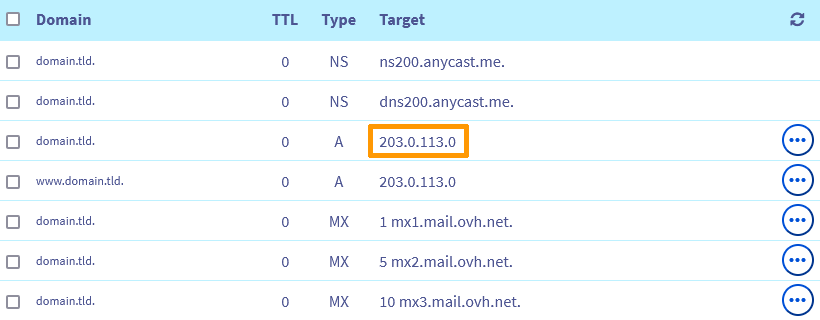 | This indicates that your domain name is correctly configured. Wait for the DNS propagation time to complete if the change is recent. Restart your PCs, devices, and clear your browser cache. Your domain name’s previous configuration may still be cached, which could delay your update from being displayed. |
| The current DNS zone does not have A or AAAA records that link your domain name or subdomain to the IP address of your Web Hosting plan. | Add the new A or AAAA DNS record or correct the existing record by following this guide. |
| The existing A or AAAA DNS record in the DNS zone for your domain name or subdomain points to an IP address other than your Web Hosting plan’s. | Add the new A or AAAA DNS record or correct the existing record by following this guide. |
This warning is displayed in the DNS Zone: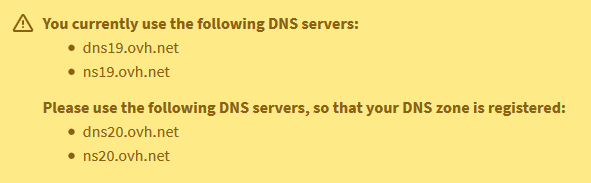 | Modify your domain name’s DNS servers accordingly by following our guide on "How to modify the DNS servers of an OVHcloud domain name". |
Go further
List of IP addresses for clusters and web hosting
Hosting multiple websites on your web hosting plan
Modify the DNS servers of an OVHcloud domain name
For specialised services (SEO, development, etc.), contact OVHcloud partners.
If you would like assistance using and configuring your OVHcloud solutions, please refer to our support offers.
Join our community of users.

