Web Hosting - Activating the 100M free hosting plan
6177 Views
Objective
With 100M free hosting, OVHcloud offers you a 100 MB web hosting plan, and an email account with 5 GB of storage.
This guide will show you how to activate a 100M free hosting on your domain name.
This 100 MB free hosting plan is suitable for a simple webpage presentation, it does not include a database.
It is also suitable if you do not need several MX plan email accounts.
If you would like to set up a website with several pages and require a database, such as a CMS (WordPress, Joomla!, PrestaShop, Drupal, etc.), please order one of our web hosting plans directly from our website or your OVHcloud Control Panel.
Find out how to activate your 100M free hosting plan.
Requirements
- A domain name in your OVHcloud Control Panel, detached from any web hosting plan, and with no associated MX Plan
The free 100M hosting is only available to our customers in Europe.
OVHcloud Control Panel Access
- Direct link: Domain names
- Navigation path:
Web Cloud>Domain names> Select your domain name
Instructions
To activate your free 100M hosting plan, click on the tabs below to view each of the 3 steps.
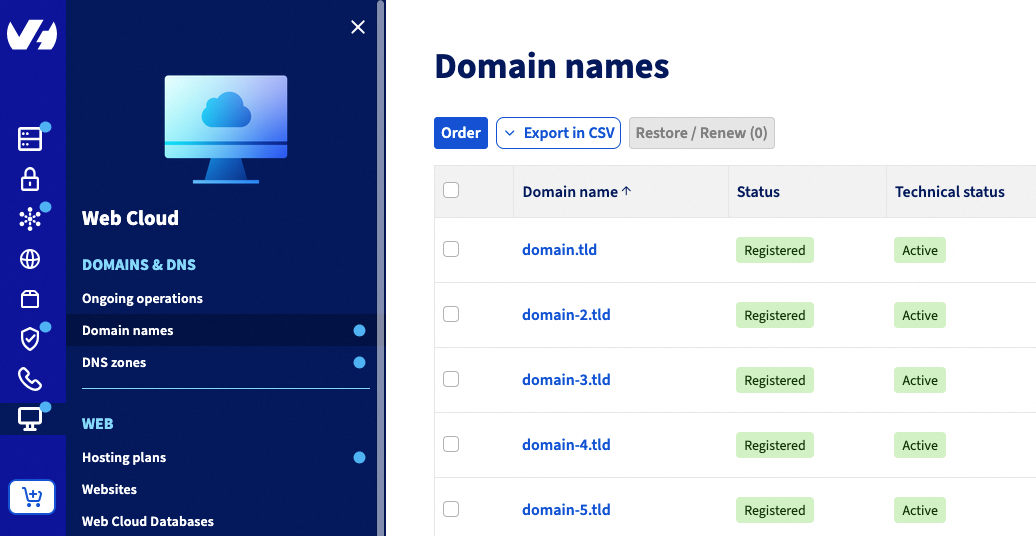
Go to the Domain names page, then choose the domain name concerned.
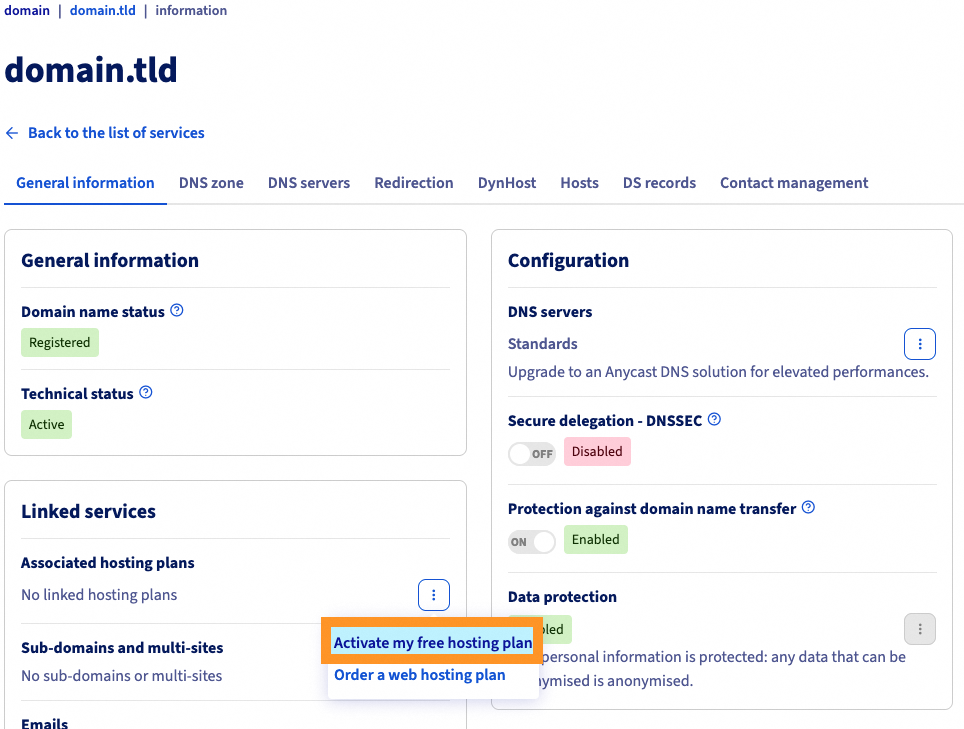
In the General information box, you will see Free web hosting and email. Click ... on the right-hand side, then Enable.
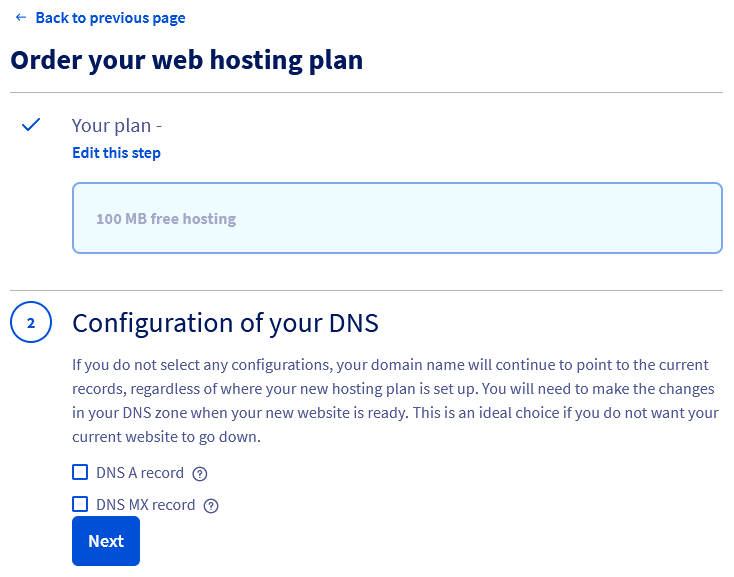
The activation window will appear. Section 1 will detail the plan and its price — click Next. For section 2, choose the changes you need to make to your DNS zone:
| Choice | Description |
|---|---|
| DNS A record | The domain name will point to the IP address of the 100M free hosting plan. |
| MX DNS record | The email servers (mx1.mail.ovh.net, mx2.mail.ovh.net, mx3.mail.ovh.net, etc.) of OVHcloud will be applied to the domain name. |
If you tick one or both of the DNS A record and DNS MX record boxes, this will overwrite the configuration originally set up in your domain's DNS zone.
Tick both boxes to automatically configure your domain name with the free 100M hosting and email service included.
If your DNS zone is not managed in your OVHcloud Control Panel, you will need to make the modifications manually in your external DNS zone.
For more details, please refer to our guide on Editing an OVHcloud DNS zone.
Section 3 reminds you of the pricing of the offer.
During section 4, you must read the contracts and confirm your order.
If your project will quickly evolve to a hosting plan with a database, larger storage space or more email accounts, you can switch directly and only from 100M free hosting to a Personal hosting plan from your OVHcloud Control Panel.
To switch to the Pro or Performance plan, you will need to switch from the 100M free hosting to the Personal plan beforehand.
You can also choose to delete the free offer after backing up your hosting data and the contents of your email account.
For more details, see our hosting offers.
Once your order has been confirmed, you will be sent an email with the information for the FTP connection to your 100M free hosting plan.
Please refer to our guide on Creating an MX Plan email account to take advantage of the email account included with your 100M free hosting plan.
Go further
Logging in to your Web Hosting plan’s storage space
Creating an email address with an MX Plan solution
Managing SSL certificates on a Web Hosting plan
For specialised services (SEO, development, etc.), contact OVHcloud partners.
If you would like assistance using and configuring your OVHcloud solutions, please refer to our support offers.
Join our community of users.

