Configuring vRack for Public Cloud using OpenStack CLI

Knowledge Base

Configuring vRack for Public Cloud using OpenStack CLI


Icons/System/eye-open Created with Sketch. 153 Views 13.01.2025 Cloud / Network Gateway for Public Cloud

Objective

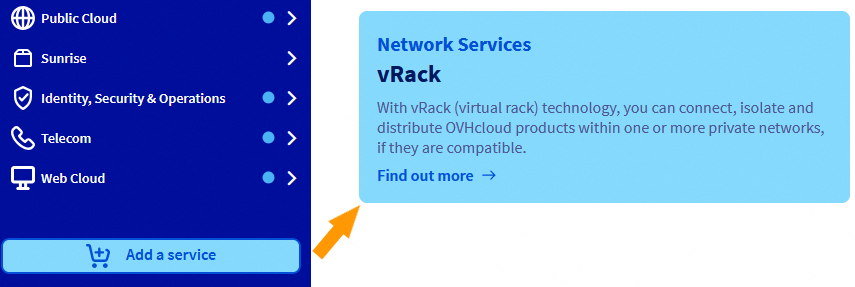
The OVHcloud vRack is a private network solution that enables our customers to route traffic between OVHcloud dedicated servers as well as other OVHcloud services. At the same time, it allows you to add Public Cloud instances to your private network to create an infrastructure of physical and virtual resources.

This guide provides some basic information on creating and configuring the vRack on Public Cloud using OpenStack CLI.

Requirements

Before you get started, make sure you read these guides to properly setup your OpenStack environment:

Instructions

Content overview

Step 1: Activating and managing a vRack

vRack is managed at the OVHcloud infrastructure level, meaning you can only administrate it in the OVHcloud Control Panel and the OVHcloud APIv6.

In the OVHcloud Control Panel

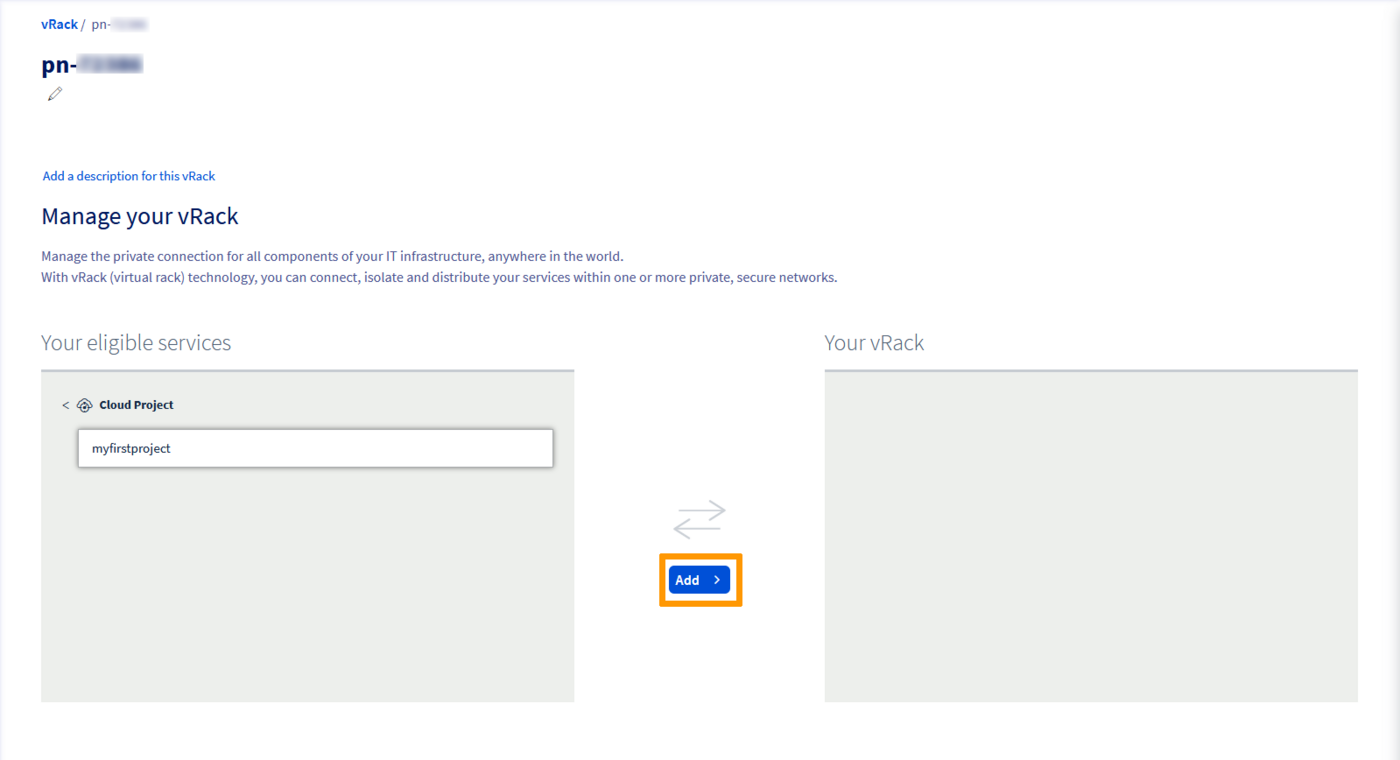
This does not apply to newly created projects which are now automatically delivered with a vRack. To view the vRack once the project has been created, open the Network menu in the left-hand sidebar and click on vRack private network to view the vRack(s).

If you have an older project and don't have a vRack, you need to order one. Using the vRack itself is free of charge and it can be delivered within a few minutes.

Log in to your OVHcloud Control Panel and click the button Add a service (shopping cart icon) in the left-hand menu. Use the filter at the top of the page or scroll down to find the service vRack.

vRack bestellen

You will be redirected to another page to validate the order, it will take a few minutes for the vRack to be setup in your account.

Once the service is active, you will find it in your Control Panel in the Nerwork section > vRack private network. Labelled "pn-xxxxxx".

From the list of eligible services, select the project you want to add to the vRack and click the Add button.

add project to vrack

With the OVHcloud APIv6

To activate and manage a vRack using the OVHcloud APIv6, please refer to this section of the corresponding guide.

Step 2: Creating a private network in the vRack

It is necessary to create a private network with a virtual local area network (VLAN) so that the connected instances can communicate with each other.

With the Public Cloud service, you can create up to 4,000 VLANs within one vRack. This means that you can use each private IP address up to 4,000 times. Thus, for example, 192.168.0.10 of VLAN 2 is different from IP 192.168.0.10 of VLAN 42. This can be useful in order to segment your vRack between multiple virtual networks.

In order to create the same private network, we need to create 2 OpenStack objects: network and subnet.

In the following example we specify the VLAN_ID to which we want the network to be part of through --provider-network-type and --provider-segment.

You can remove those parameters. In that case, an available VLAN_ID will be used.

openstack network create --provider-network-type vrack --provider-segment 42 OS_CLI_private_network
openstack subnet create --dhcp --network OS_CLI_private_network OS_CLI_subnet --subnet-range 10.0.0.0/16

Step 3: Integrating an instance into vRack

To intergrate an instance into the vRack, you need to link it to a private network.

There are two possible scenarios:

  • The instance to be integrated does not exist yet.
  • An existing instance needs to be added to the vRack.

In case of a new instance

The following steps are necessary to create an instance directly in the vRack.

Retrieving the required information

Public and private networks:

openstack network list

+--------------------------------------+------------+-------------------------------------+
| ID                                   | Name       | Subnets                             |
+--------------------------------------+------------+-------------------------------------+
| 12345678-90ab-cdef-xxxx-xxxxxxxxxxxx | MyVLAN-42  | xxxxxxxx-yyyy-xxxx-yyyy-xxxxxxxxxxxx|
| 34567890-12ab-cdef-xxxx-xxxxxxxxxxxx | Ext-Net    | zzzzzzzz-yyyy-xxxx-yyyy-xxxxxxxxxxxx|
| 67890123-4abc-ef12-xxxx-xxxxxxxxxxxx | MyVLAN_0   | yyyyyyyy-xxxx-xxxx-yyyy-xxxxxxxxxxxx|
+--------------------------------------+------------+-------------------------------------+

or

nova net-list

+--------------------------------------+------------+------+
| ID                                   | Label      | CIDR |
+--------------------------------------+------------+------+
| 12345678-90ab-cdef-xxxx-xxxxxxxxxxxx | MyVLAN-42  | None |
| 34567890-12ab-cdef-xxxx-xxxxxxxxxxxx | Ext-Net    | None |
| 67890123-4abc-ef12-xxxx-xxxxxxxxxxxx | MyVLAN_0   | None |
+--------------------------------------+------------+------+

You will need to note the network IDs of interest:
- Ext-Net for a public IP address
- The VLAN(s) required for your configuration

Also note the information detailed in this guide:

  • ID or name of the OpenStack SSH key
  • ID of the instance type (flavor)
  • ID of the desired image (operating system, snapshot, etc.)

Deploying the instance

With the previously retrieved items, an instance can be created, including it directly in the vRack:

nova boot --key-name SSHKEY --flavor [ID-flavor] --image [ID-Image] --nic net-id=[ID-Network 1] --nic net-id=[ID-Network 2] [instance name]

Example:

nova boot --key-name my-ssh-key --flavor xxxxxx-xxxx-xxxx-xxxx-xxxxxxxxxxxx --image yyyy-yyyy-yyyy-yyyy-yyyyyyyyyyyy --nic net-id=[id_Ext-Net] --nic net-id=[id_VLAN] NameOfInstance

+--------------------------------------+------------------------------------------------------+
| Property                             | Value                                                |
+--------------------------------------+------------------------------------------------------+
| OS-DCF:diskConfig                    | MANUAL                                               |
| OS-EXT-AZ:availability_zone          |                                                      |
| OS-EXT-STS:power_state               | 0                                                    |
| OS-EXT-STS:task_state                | scheduling                                           |
| OS-EXT-STS:vm_state                  | building                                             |
| OS-SRV-USG:launched_at               | -                                                    |
| OS-SRV-USG:terminated_at             | -                                                    |
| accessIPv4                           |                                                      |
| accessIPv6                           |                                                      |
| adminPass                            | xxxxxxxxxxxx                                         |
| config_drive                         |                                                      |
| created                              | YYYY-MM-DDTHH:MM:SSZ                                 |
| flavor                               | [Flavor type] (xxxxxx-xxxx-xxxx-xxxx-xxxxxxxxxxxx)   |
| hostId                               |                                                      |
| id                                   | xxxxxx-xxxx-xxxx-xxxx-xxxxxxxxxxxx                   |
| image                                | [Image type] (xxxxxx-xxxx-xxxx-xxxx-xxxxxxxxxxxx)    |
| key_name                             | [Name of key]                                        |
| metadata                             | {}                                                   |
| name                                 | [Name of instance]                                   |
| os-extended-volumes:volumes_attached | []                                                   |
| progress                             | 0                                                    |
| security_groups                      | default                                              |
| status                               | BUILD                                                |
| tenant_id                            | zzzzzzzzzzzzzzzzzzzzzzzzzzzzzzzz                     |
| updated                              | YYYY-MM-DDTHH:MM:SSZ                                 |
| user_id                              | zzzzzzzzzzzzzzzzzzzzzzzzzzzzzzzz                     |
+--------------------------------------+------------------------------------------------------+

or

openstack server create --key-name SSHKEY --flavor [ID-flavor] --image [ID-Image] --nic net-id=[ID-Network 1] --nic net-id=[ID-Network 2] [instance name]

Example:

openstack server create --key-name my-ssh-key --flavor xxxxxx-xxxx-xxxx-xxxx-xxxxxxxxxxxx --image yyyy-yyyy-yyyy-yyyy-yyyyyyyyyyyy --nic net-id=[id_Ext-Net] --nic net-id=[id_VLAN] NameOfInstance

+--------------------------------------+------------------------------------------------------+
| Property                             | Value                                                |
+--------------------------------------+------------------------------------------------------+
| OS-DCF:diskConfig                    | MANUAL                                               |
| OS-EXT-AZ:availability_zone          |                                                      |
| OS-EXT-STS:power_state               | 0                                                    |
| OS-EXT-STS:task_state                | scheduling                                           |
| OS-EXT-STS:vm_state                  | building                                             |
| OS-SRV-USG:launched_at               | -                                                    |
| OS-SRV-USG:terminated_at             | -                                                    |
| accessIPv4                           |                                                      |
| accessIPv6                           |                                                      |
| adminPass                            | xxxxxxxxxxxx                                         |
| config_drive                         |                                                      |
| created                              | YYYY-MM-DDTHH:MM:SSZ                                 |
| flavor                               | [Flavor type] (xxxxxx-xxxx-xxxx-xxxx-xxxxxxxxxxxx)   |
| hostId                               |                                                      |
| id                                   | xxxxxx-xxxx-xxxx-xxxx-xxxxxxxxxxxx                   |
| image                                | [Image type] (xxxxxx-xxxx-xxxx-xxxx-xxxxxxxxxxxx)    |
| key_name                             | [Name of key]                                        |
| metadata                             | {}                                                   |
| name                                 | [Name of instance]                                   |
| os-extended-volumes:volumes_attached | []                                                   |
| progress                             | 0                                                    |
| security_groups                      | default                                              |
| status                               | BUILD                                                |
| tenant_id                            | zzzzzzzzzzzzzzzzzzzzzzzzzzzzzzzz                     |
| updated                              | YYYY-MM-DDTHH:MM:SSZ                                 |
| user_id                              | zzzzzzzzzzzzzzzzzzzzzzzzzzzzzzzz                     |
+--------------------------------------+------------------------------------------------------+

You can set the IP address of the instance of your vRack interface at the OpenStack level.

To do this, you can add a single argument to the function "--nic":

--nic net-id=[ID-Network],v4-fixed-ip=[IP_static_vRack]

Example:

--nic net-id=[ID-vRack],v4-fixed-ip=192.168.0.42

Verifying the instance

After a few moments you can check the list of existing instances to find the server you created:

openstack server list
+--------------------------------------+---------------------+--------+--------------------------------------------------+--------------------+
| ID                                   |       Name          | Status | Networks                                         |     Image Name     |
+--------------------------------------+---------------------+--------+--------------------------------------------------+--------------------+
| xxxxxx-xxxx-xxxx-xxxx-xxxxxxxxxxxxxx | [Name of instance] | ACTIVE | Ext-Net=[IP_V4], [IP_V6]; MyVrack=[IP_V4_vRack] | [Name-of-instance]|
+--------------------------------------+---------------------+--------+--------------------------------------------------+--------------------+
nova list
+--------------------------------------+--------------------+--------+------------+-------------+--------------------------------------------------+
| ID                                   | Name               | Status | Task State | Power State | Networks                                         |
+--------------------------------------+--------------------+--------+------------+-------------+--------------------------------------------------+
| xxxxxx-xxxx-xxxx-xxxx-xxxxxxxxxxxx   | [Name of instance]| ACTIVE | -          | Running     | Ext-Net=[IP_V4], [IP_V6]; MyVrack=[IP_V4_vRack] |
+--------------------------------------+--------------------+--------+------------+-------------+--------------------------------------------------+

In case of an existing instance

The following steps are necessary to integrate an existing instance into the vRack.

Retrieving the required information

Identify your instances:

openstack server list

+--------------------------------------+--------------+--------+------------------------------------------------------------------------+------------+
| ID                                   | Name         | Status | Networks                                                               | Image Name |
+--------------------------------------+--------------+--------+------------------------------------------------------------------------+------------+
| 12345678-90ab-cdef-xxxx-xxxxxxxxxxxx | My-Instance | ACTIVE | Ext-Net=xx.xx.xx.xx, 2001:41d0:yyyy:yyyy::yyyy; MyVrack=192.168.0.124 | Debian 9   |
+--------------------------------------+--------------+--------+------------------------------------------------------------------------+------------+

or

nova list

+--------------------------------------+--------------+--------+------------+-------------+----------------------------------------------------------------------+
| ID                                   | Name         | Status | Task State | Power State | Networks                                                             |
+--------------------------------------+--------------+--------+------------+-------------+----------------------------------------------------------------------+
| 12345678-90ab-cdef-xxxx-xxxxxxxxxxxx | My-Instance | ACTIVE | -          | Running     | Ext-Net=xx.xx.xx.xx,2001:41d0:yyyy:yyyy::yyyy;MyVrack=192.168.0.124 |
+--------------------------------------+--------------+--------+------------+-------------+----------------------------------------------------------------------+

Public and private networks:

openstack network list

+--------------------------------------+------------+-------------------------------------+
| ID                                   | Name       | Subnets                             |
+--------------------------------------+------------+-------------------------------------+
| 12345678-90ab-cdef-xxxx-xxxxxxxxxxxx | MyVLAN-42  | xxxxxxxx-yyyy-xxxx-yyyy-xxxxxxxxxxxx|
| 34567890-12ab-cdef-xxxx-xxxxxxxxxxxx | Ext-Net    | zzzzzzzz-yyyy-xxxx-yyyy-xxxxxxxxxxxx|
| 67890123-4abc-ef12-xxxx-xxxxxxxxxxxx | MyVLAN-0   | yyyyyyyy-xxxx-xxxx-yyyy-xxxxxxxxxxxx|
+--------------------------------------+------------+-------------------------------------+

or

nova net-list

+--------------------------------------+------------+------+
| ID                                   | Label      | CIDR |
+--------------------------------------+------------+------+
| 12345678-90ab-cdef-xxxx-xxxxxxxxxxxx | MyVLAN-42  | None |
| 34567890-12ab-cdef-xxxx-xxxxxxxxxxxx | Ext-Net    | None |
| 67890123-4abc-ef12-xxxx-xxxxxxxxxxxx | MyVLAN-0   | None |
+--------------------------------------+------------+------+

You will need to note the network IDs of interest:
- Ext-Net for a public IP address
- The VLAN(s) required for your configuration

Adding a private network interface

In order to attach a new interface, execute the following command:

nova interface-attach --net-id <ID-VLAN> <ID-instance>

Example:

nova interface-attach --net-id 12345678-90ab-cdef-xxxx-xxxxxxxxxxxx 12345678-90ab-cdef-xxxx-xxxxxxxxxxxx

You can verify that the action has been performed:

nova show <ID-instance>

+--------------------------------------+----------------------------------------------------------+
| Property                             | Value                                                    |
+--------------------------------------+----------------------------------------------------------+
| Ext-Net network                      | xx.xx.xx.xx, 2001:41d0:xxx:xxxx::xxxx                    | => your public IP
| MyVLAN-42 network                    | 192.168.0.x                                              | => your private IP
[...]

or

openstack server show <ID-instance>
+--------------------------------------+-------------------------------------------------------------------------+
| Field                                | Value                                                                   |
+--------------------------------------+-------------------------------------------------------------------------+
[...]
| addresses                            | Ext-Net=xx.xx.xx.xx, 2001:41d0:xxx:xxxx::xxxx ; MyVLAN-42=192.168.0.x  | => your public IP ; your private IP                                                                     
[...]

Removing a network interface

Detaching a network interface is permanent.

However, it is important to note that if you detach the "Ext-Net" interface (public IP), this address will be released and put back into circulation. It is not possible to just reassign it.
This action is only required if you wish to isolate your server in the vRack (private network), or if you wish to remove it from one or more VLANs.

In order to detach an interface, you will first need to identify the Neutron port that has been created.

You can do this by using the following commands:

neutron port-list
+--------------------------------------+------+-------------------+---------------------------------------------------------------------------------------------------+
| id                                   | name | mac_address       | fixed_ips                                                                                         |
+--------------------------------------+------+-------------------+---------------------------------------------------------------------------------------------------+
| 12345678-abcd-ef01-2345-678910abcdef |      | fa:xx:xx:xx:xx:xx | {"subnet_id": "01234567-8901-abscdef12345678910abcd", "ip_address": "192.168.0.x"}                |
| 09876543-210a-bcde-f098-76543210abcd |      | fa:yy:yy:yy:yy:yy | {"subnet_id": "65432109-abcd-ef09-8765-43210abcdef1", "ip_address": "2001:41d0:xxx:xxxx::xxxx"}   |
|                                      |      |                   | {"subnet_id": "abcdef12-3456-7890-abcd-ef1234567890", "ip_address": "YY.YY.YY.YY"}                |
+--------------------------------------+------+-------------------+---------------------------------------------------------------------------------------------------+

or

openstack port list
+--------------------------------------+------+-------------------+-------------------------------------------------------------------------------------------+
| ID                                   | Name | MAC Address       | Fixed IP Addresses                                                                        |
+--------------------------------------+------+-------------------+-------------------------------------------------------------------------------------------+
| 12345678-abcd-ef01-2345-678910abcdef |      | fa:xx:xx:xx:xx:xx | ip_address='192.168.0.xx', subnet_id='301234567-8901-abscdef12345678910abcd'              |
| 09876543-210a-bcde-f098-76543210abcd |      | fa:yy:yy:yy:yy:yy | ip_address='2001:41d0:xxx:xxxx::xxxx', subnet_id='65432109-abcd-ef09-8765-43210abcdef1'   |
|                                      |      |                   | ip_address='YY.YY.YY.YY', subnet_id='abcdef12-3456-7890-abcd-ef1234567890'                |
+--------------------------------------+------+-------------------+-------------------------------------------------------------------------------------------+

Once you have identified the port to remove, you can execute the following command:

nova interface-detach <ID_instance> <port_id>

Example:

nova interface-detach 12345678-90ab-cdef-xxxx-xxxxxxxxxxxx 12345678-abcd-ef01-2345-678910abcdef

Go further

Configuring vRack for Public Cloud using OVHcloud APIv6.

Creating multiple vLANs in a vRack.

If you need training or technical assistance to implement our solutions, contact your sales representative or click on this link to get a quote and ask our Professional Services experts for assisting you on your specific use case of your project.

Join our community of users.

Related articles