Configuring multi-attach persistent volumes with OVHcloud NAS-HA
1207 Views
Objective
OVHcloud Managed Kubernetes natively integrates Block Storage as persistent volumes. This technology may however not be suited to some legacy or non cloud-native applications, often requiring to share this persistent data accross different pods on multiple worker nodes (ReadWriteMany or RWX). If you would need to do this for some of your workloads, one solution is to use NFS volumes. OVHcloud NAS-HA is a managed solution that lets you easily configure an NFS server and multiple NFS volumes. In this tutorial we are going to see how to configure your OVHcloud Managed Kubernetes cluster to use OVHcloud NAS-HA as an NFS provider for Kubernetes Persistent Volumes.
Requirements
This tutorial assumes that you already have a working OVHcloud Managed Kubernetes cluster, and some basic knowledge of how to operate it. If you want to know more on those topics, please look at the deploying a Hello World application documentation.
It also assumes you have an OVHcloud NAS-HA already available. If you don't, you can order one in the OVHcloud Control Panel.
You also need to have Helm installed on your workstation, please refer to the How to install Helm on OVHcloud Managed Kubernetes Service tutorial.
Instructions
Step 1 - Creating a partition and granting your Managed Kubernetes Service access to it
Your NAS-HA can expose multiple partitions, and supports a variety of protocols. Each partition is accessible only from a specific range of IPs. We will create one exposing NFS and make it accessible from your Kubernetes worker nodes.
Access the UI for OVHcloud NAS-HA by clicking the HA-NAS and CDN menu in the Bare Metal Cloud section of the OVHcloud Control Panel
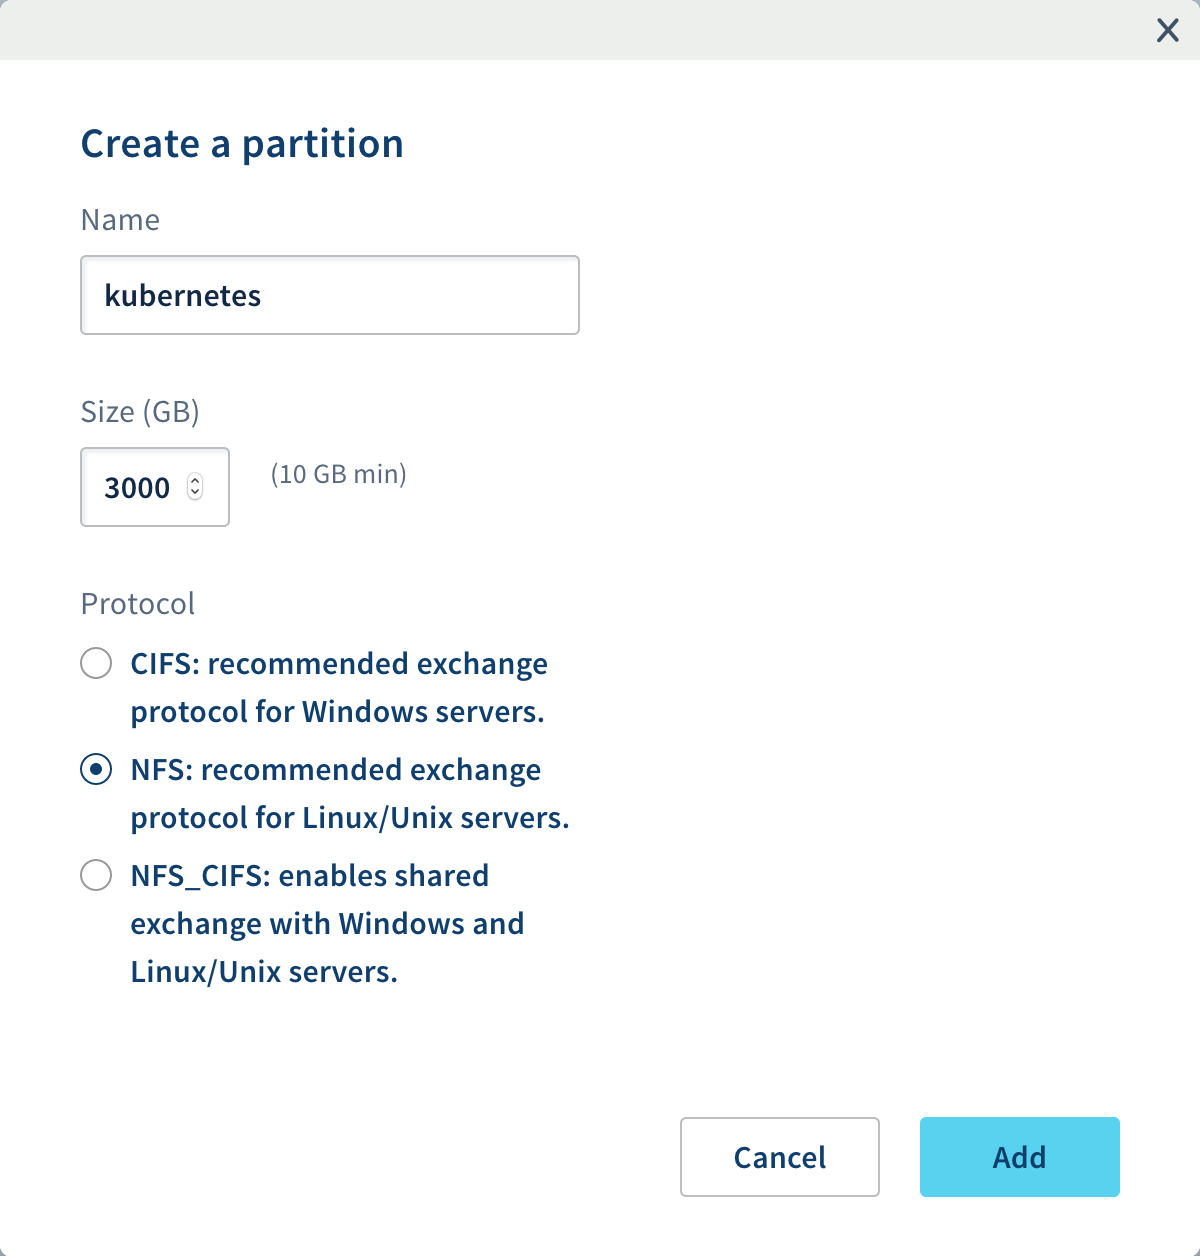
Click on your NAS, then on the Partitions tab, then on the Create a partition button and create the new NFS partition with the following content:
Your cluster is installed with Public Network or a private network without using an OVHcloud Internet Gateway or a custom one as your default route
Once the partition is created, we need to allow our Kubernetes nodes to access our newly created partition.
Get our Kubernetes nodes IP:
Your cluster is installed with Private Network and a default route via your Private Network (OVHcloud Internet Gateway/OpenStack Router or a custom one)
Because your nodes are configured to be routed by the private network gateway, you need to add the gateway IP address to the ACLs.
By using Public Cloud Gateway through our Managed Kubernetes Service, Public IPs on nodes are only for management purposes: MKS Known Limits
You can get your OVHcloud Internet Gateway's Public IP by navigating through the OVHcloud Control Panel:
Public Cloud > Select your tenant > Network / Gateway > Public IP
You can also get your OVHcloud Internet Gateway's Public IP by using our APIs:
You can find more details about how to use OVHcloud APIs with this guide: First Steps with the OVHcloud APIs
If you want to use your Kubernetes cluster to know your Gateway Public's IP, you can run these commands:
This command will create a temporary pod and open a console.
You may have to wait a bit to let the pod be created. Once the shell appears, you can run this command:
The Public IP of the Gateway you're using should appear.
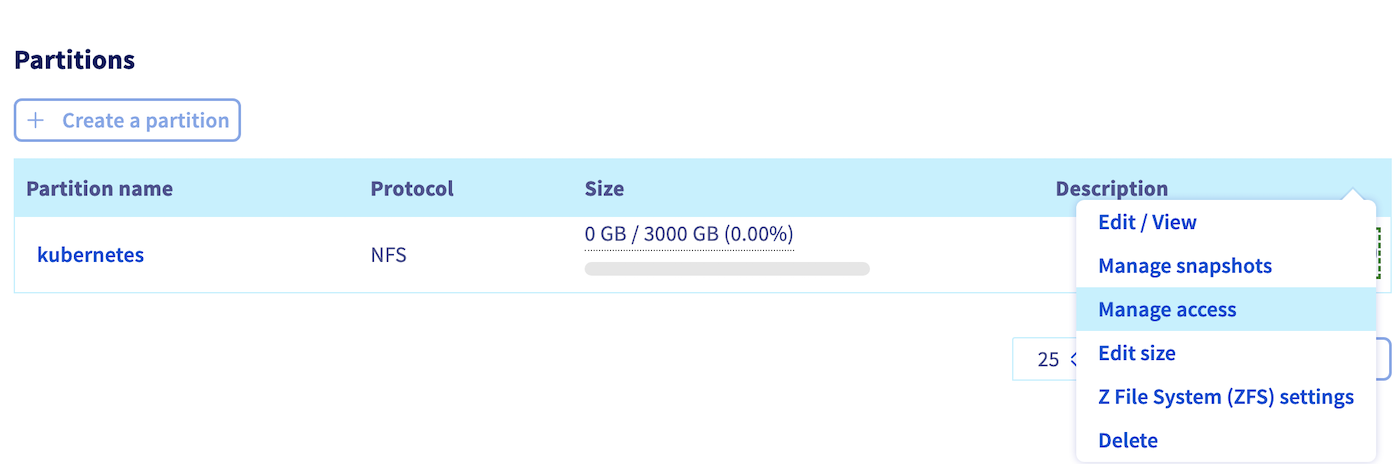
Click on the Manage Access menu of our newly created partition:
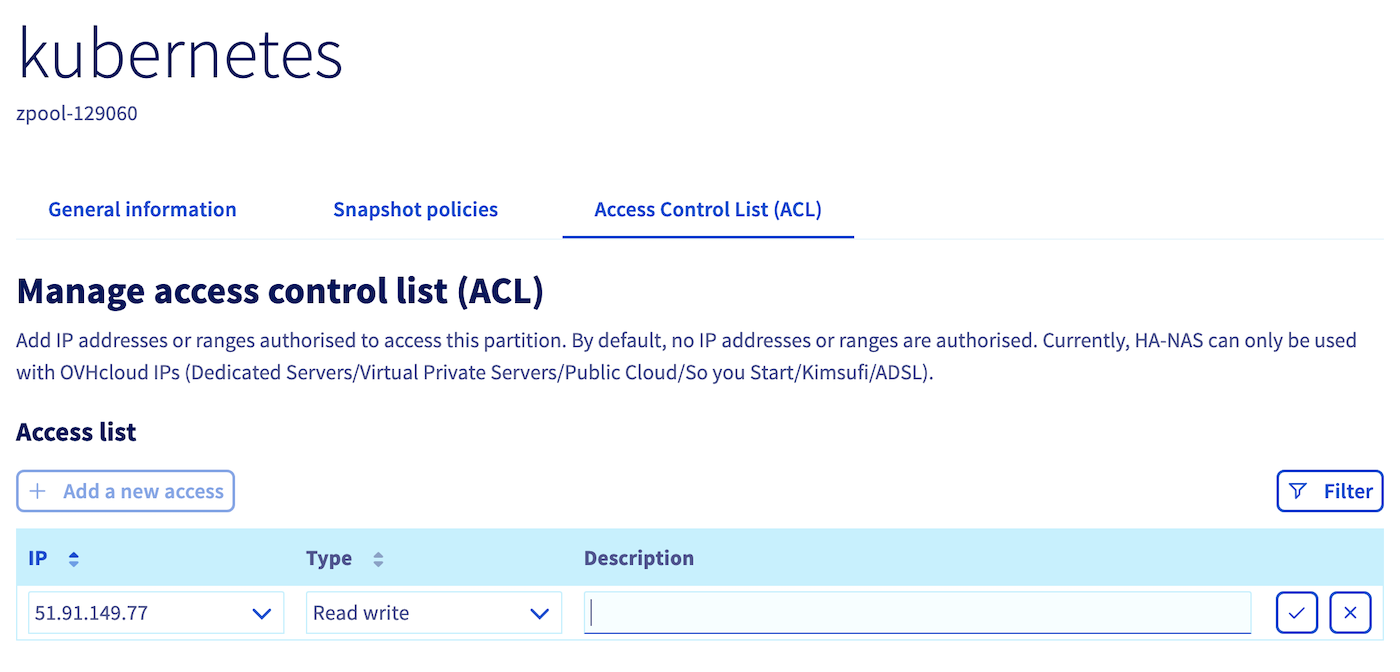
Add either the nodes' IPs one by one or the Gateway's Public IP depending on your configuration:
You should now have something similar to this:
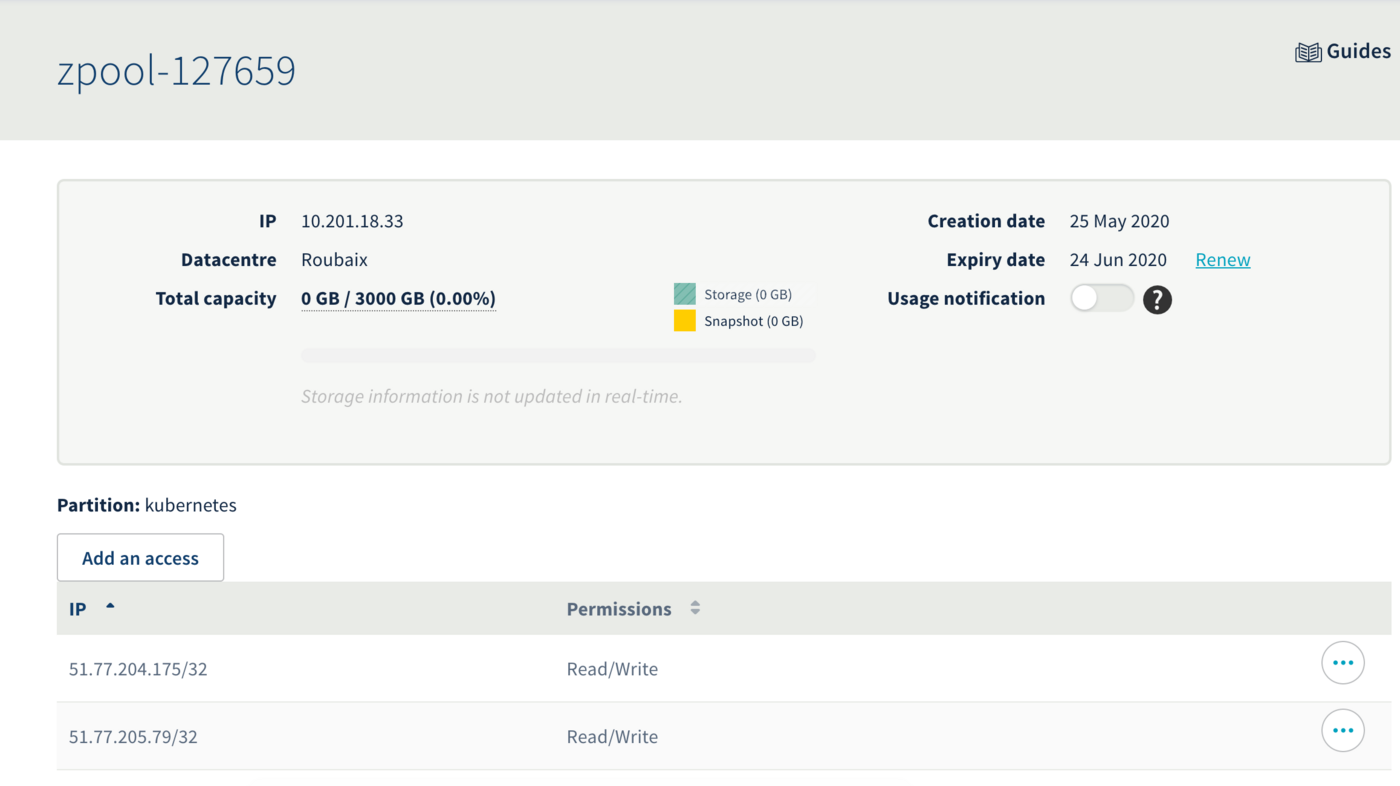
In this example our ZPOOL_IP is 10.201.18.33, our ZPOOL_NAME is zpool-127659, and our PARTITION_NAME is kubernetes. Please modify this accordingly in the later steps.
Step 2 - Configuring Kubernetes to use our newly created NFS partition
Your Kubernetes cluster needs some additionnal piece of software to make use of the NFS partition. We will install those and then create a first volume, shared accross multiple pods.
To do so, you can install the csi-driver-nfs:
Let's verify our installation:
Step 3 - Create the NFS StorageClass Object
Let's create a nfs-storageclass.yaml file:
Don't forget to replace [ZPOOL_IP], [ZPOOL_NAME] and [PARTITION_NAME] with the correct information.
The rsize and wsize parameters define the maximum number of bytes of data that the NFS client can receive for each READ or WRITE request.
The tcp parameter instructs the NFS mount to use the TCP protocol.
Then apply the YAML file to create the StorageClass:
Step 4 - Create and use an NFS persistent volume
Let’s create a nfs-persistent-volume-claim.yaml file:
And apply this to create the persistent volume claim:
You can find more information about the PVC by running this command:
The external provisioner (here the HA-NAS) is provisioning your volume. Wait a bit and the volume should appear:
If you encounter errors such as:
or such as:
It mostly means that something went wrong with the HA-NAS ACLs. Check the authorized IPs which can access to the wanted partition on the ACLs list.
If the number of PersistentVolumes to schedule simultaneously is too important, some slowness can be encountered and volume creation can be delayed.
Let’s now create a DaemonSet of Nginx pods using the persistent volume claim as their webroot folder.
Using a DaemonSet will create a pod on each deployed node and make troubleshooting easier in case of a misconfiguration or to isolate a node issue.
Let's create a file named nginx-daemonset.yaml:
And apply this to create the Nginx DaemonSet:
Both pods should be running:
Let’s enter inside the first Nginx pod and container to check if the zpool is properly mounted and create a file on the NFS persistent volume:
Check if the zpool is mounted on the Nginx pod:
You can test HA-NAS IOPS and speed by installing and running FIO tool inside a container:
And then running those commands (don't forget to move into the folder mounted from the HA-NAS):
At the end of the bench, you should have an output like this:
Now, we will check if the HA-NAS is properly shared between the deployed pods.
Create a new index.html file:
And exit the Nginx container:
Let’s try to access our new web page:
Generate the URL to open in your broswer:
You can open the URL which is displayed to access the Nginx Service.
Now let’s try to see if the data is shared with the second pod (if you have more than one node deployed).
You can open the URL which is displayed to access the Nginx Service on the other pod.
As you can see the data is correctly shared between the two Nginx pods running on two different Kubernetes nodes.
Congratulations, you have successfully set up a multi-attach persistent volume with OVHcloud NAS-HA!
Go further
To learn more about using your Kubernetes cluster the practical way, we invite you to look at our OVHcloud Managed Kubernetes doc site.
- If you need training or technical assistance to implement our solutions, contact your sales representative or click on this link to get a quote and ask our Professional Services experts for assisting you on your specific use case of your project.
Join our community of users.

