Configure incoming connections of a Public Cloud Databases for MongoDB service
887 Views
Objective
Public Cloud Databases allow you to focus on building and deploying cloud applications while OVHcloud takes care of the database infrastructure and maintenance in operational conditions.
This guide explains how to configure your MongoDB instance to accept incoming connections.
Requirements
- A Public Cloud project in your OVHcloud account
- A MongoDB database running on your OVHcloud Public Cloud Databases (this guide can help you to meet this requirement)
OVHcloud Control Panel Access
- Direct link: Public Cloud Projects
- Navigation path:
Public Cloud> Select your project
Instructions
Configure your MongoDB instance to accept incoming connections
Before making a connection, we need to verify that our MongoDB instance is correctly configured.
Click on Databases in the left-hand navigation bar and select your MongoDB instance.
Step 1: Verify your user roles and password
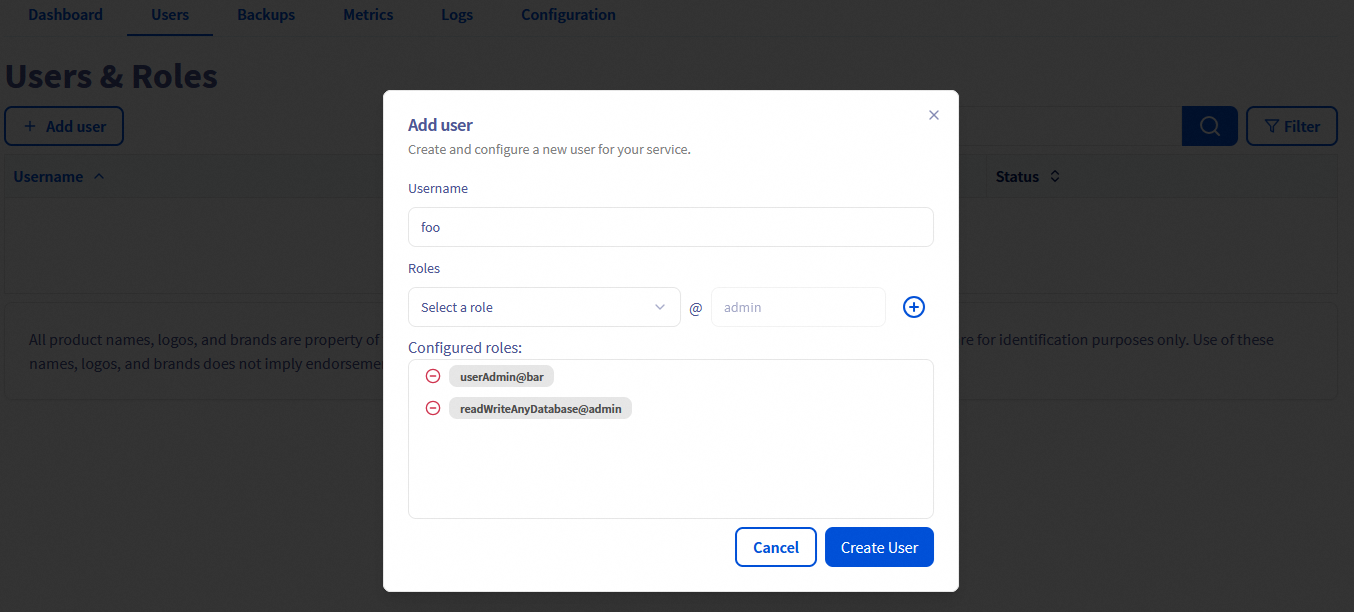
Select the Users tab. Verify that you have a user with sufficient rights and a configured password. If you don't remember the user's password, you can either create a new user or regenerate the password of an existing user. Be careful! By doing so you will need to update all the places where you already use this user/password pair.
We provide official MongoDB built-in roles. Please read the official MongoDB documentation to select the right roles for your use case.
In our example, we will create a new user called foo with the role userAdmin on the bar database and the role readWriteAnyDatabase on any database as its name implies:
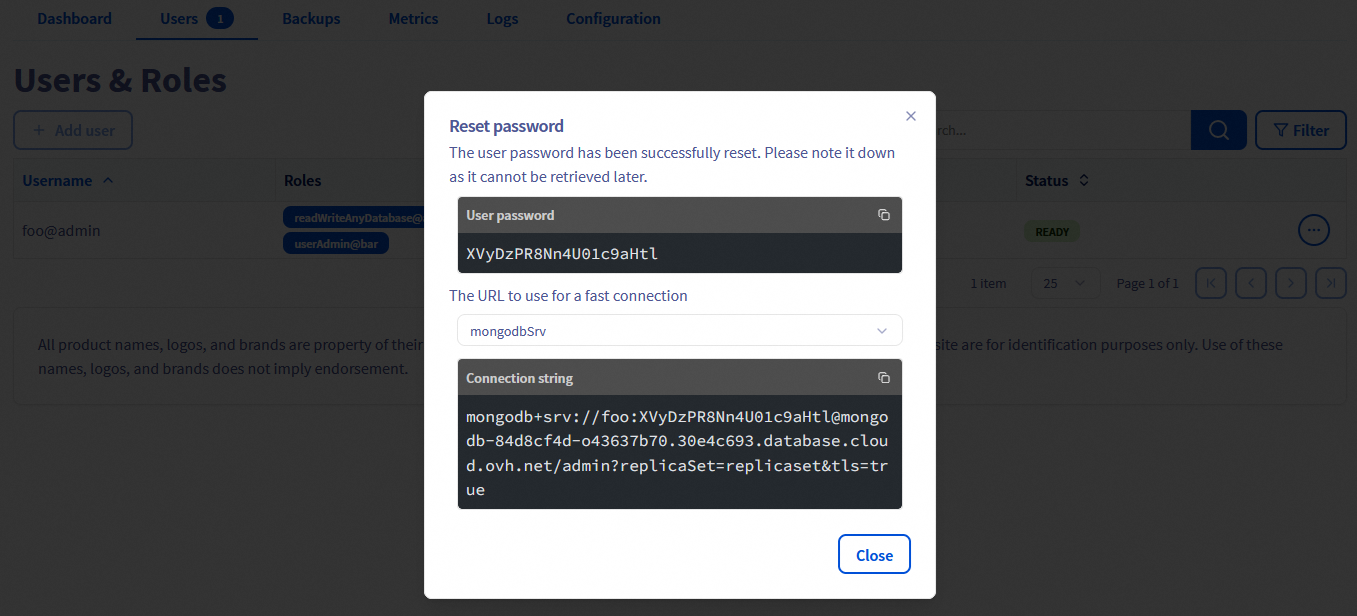
After a few seconds the user is ready with the "Enabled" status, you can then reset and note its password.
Step 2: Authorise incoming connections from the MongoDB client
In this step, select the Authorised IP's tab (Access Control List).
By default, a Public Cloud Database does not accept any form of connection from the outside world.
This way we can help prevent intrusive connection attempts.
Click to authorise a new IP. In our case we will enter 109.190.200.59:
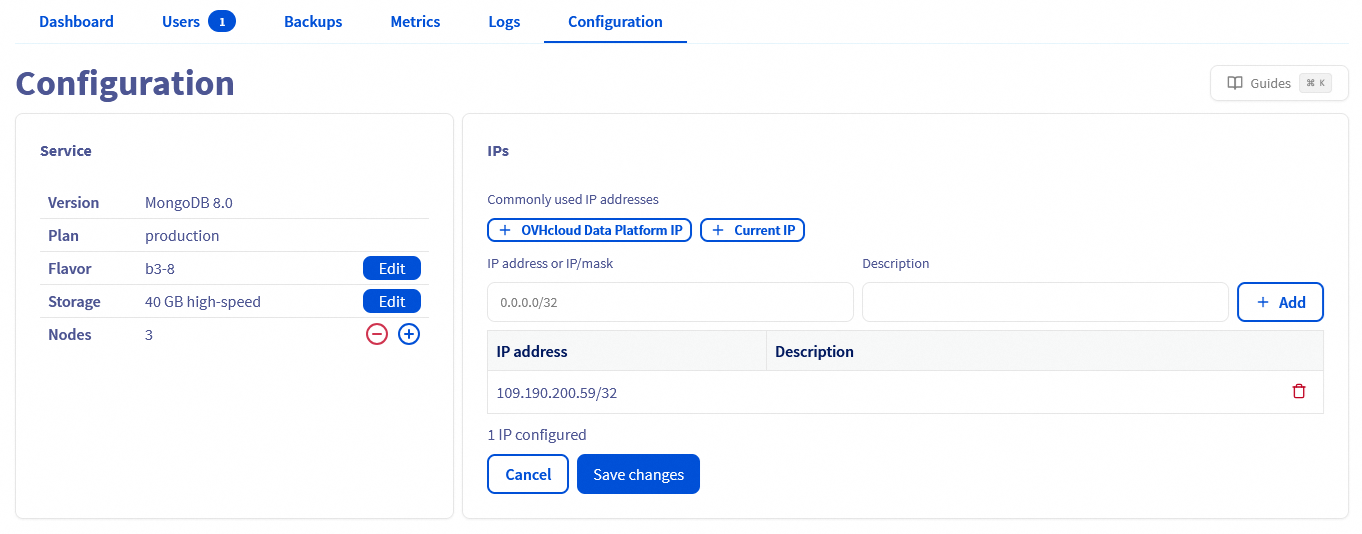
If you want to allow any connections from the outside, you can enter the IP 0.0.0.0/0. Please use it carefully. Every IP will be authorised.
Get your connection information (URI)
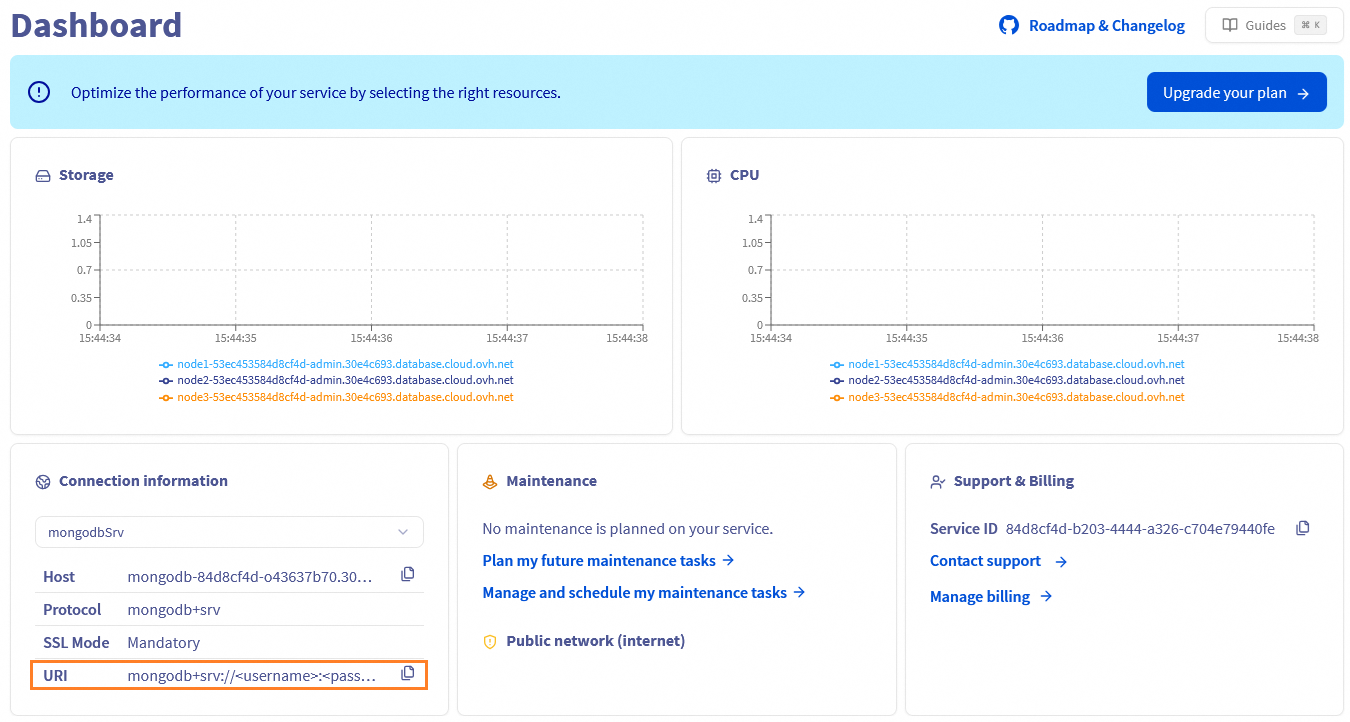
Select the Dashboard tab. In the Connection Information section, copy the Service URI.
You can specify the MongoDB connection string using either:
- Service -> mongoDB for the Standard Connection String format (soon deprecated).
- Service -> mongodbSrv for the DNS Seed List Connection String format.
MongoDB 3.6 introduced the concept of a seed list that is specified using DNS records, specifically SRV and TXT records. This allows a client to connect to a replica set even if one of the nodes that the client specifies is unavailable.
The use of SRV records eliminates the requirement for every client to pass in a complete set of state information for the cluster. Instead, a single SRV record identifies all the nodes associated with the cluster (and their port numbers) and an associated TXT record defines the options for the URI.
Learn more here.
It should be similar to this when you have a single node:
mongodb://<username>:<password>@<hostname>/admin?tls=trueAnd like this when you have a MongoDB cluster with multiple nodes, called a replica set:
mongodb://<username>:<password>@<hostname node1>,<hostname node 2>,<hostname node 3>/admin?replicaSet=replicaset&tls=trueIt should be similar to this:
mongodb+srv://<username>:<password>@<hostname>/admin?replicaSet=replicaset&tls=trueGo further
Visit the Github examples repository to find how to connect to your database with several languages.
Visit our dedicated Discord channel: https://discord.gg/ovhcloud. Ask questions, provide feedback and interact directly with the team that builds our databases services.
If you need training or technical assistance to implement our solutions, contact your sales representative or click on this link to get a quote and ask our Professional Services experts for a custom analysis of your project.
Join our community of users on https://community.ovh.com/en/.

