Dashboards - Tutorial - How to use the Grafana® API
443 Views
Objective
Using the Grafana® API is not obvious and already clearly documented. This tutorial explains how to configure Grafana® to use the API and how make calls to the exposed API.
Requirements
- A Public Cloud project in your OVHcloud account
- A Dashboards service running on your OVHcloud Public Cloud project (see this guide to create a managed Dashboards service)
Instructions
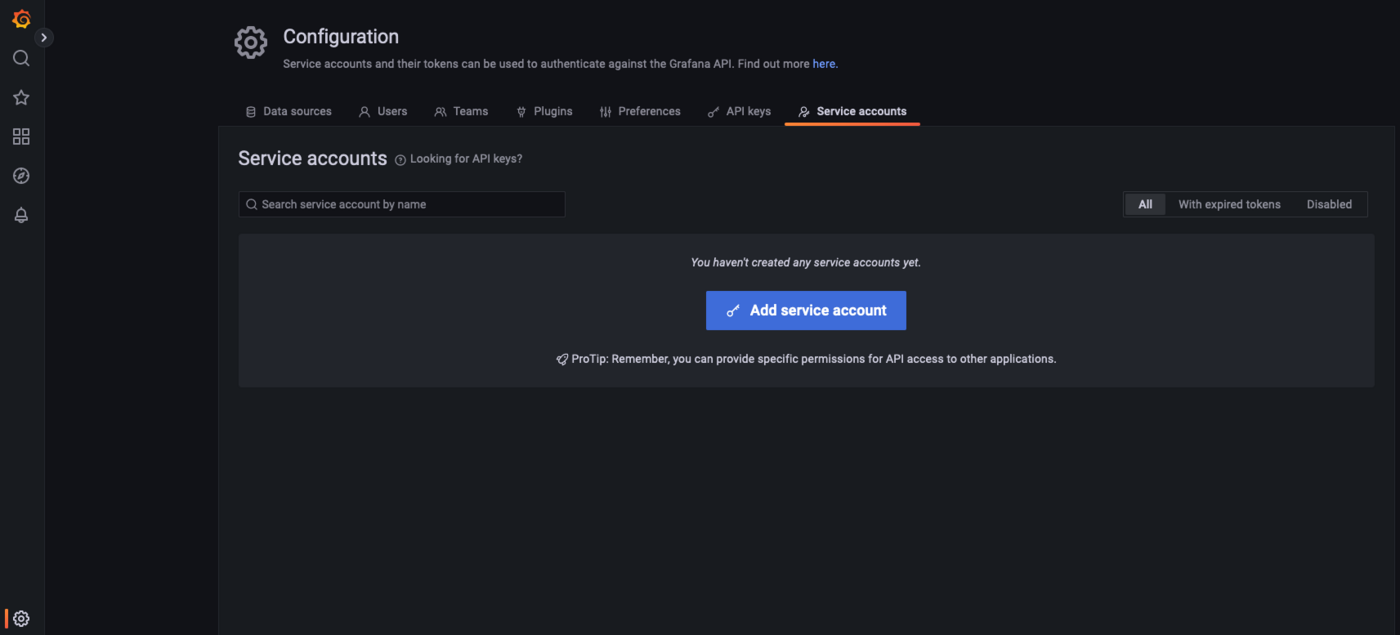
Create a Grafana® service account
In the configuration menu, display the Service accounts tab:
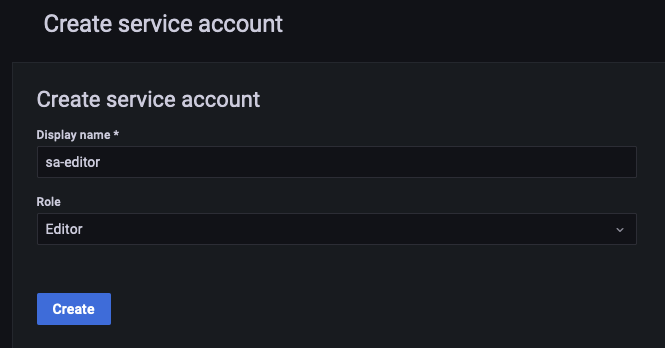
Create a new service account sa-editor with the role Editor:
Click on Add service account token:

Enter the name of the desired token, grafana-sa-token-editor, and click on Generate token:

Copy the generated token:
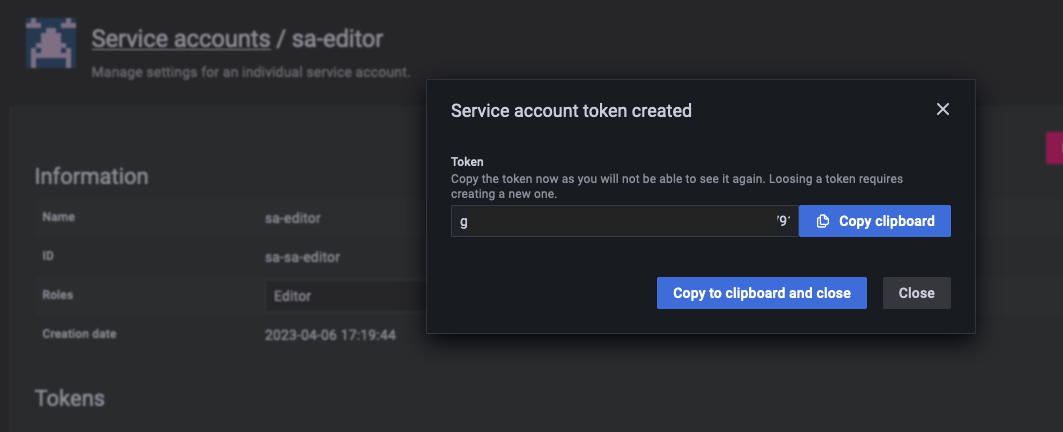
After closing the pop-up, you will no longer be able to display the token!
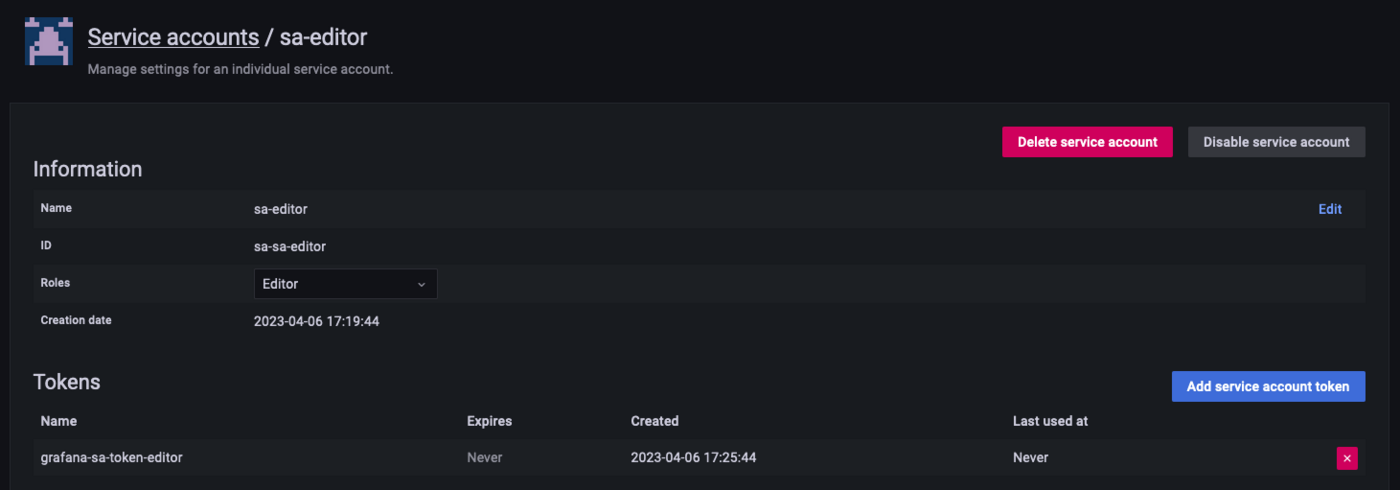
The created token appears in the tokens list:
You are ready to use this token with the Grafana® API.
Use the Grafana® API
Detailed instructions on how to use the API and the possible actions can be found in the official documentation: https://grafana.com/docs/grafana/latest/developers/http_api/
Don't forget to set the Authorised IP addresses in the Dashboards configuration. See our guide on Configuring your Grafana instance to accept incoming connections for more details.
To send a request to the API you must use the previously created token and set it in the request header as a "Bearer token":
Here it is, you can now use all the power of the Grafana® API.
We want your feedback!
We would love to help answer questions and appreciate any feedback you may have.
If you need training or technical assistance to implement our solutions, contact your sales representative or click on this link to get a quote and ask our Professional Services experts for a custom analysis of your project.
Are you on Discord? Connect to our channel at https://discord.gg/ovhcloud and interact directly with the team that builds our databases service!

