How to activate rescue mode on a Public Cloud instance
2085 Views
Objective
Your Public Cloud instance may become inaccessible due to a lost SSH key or configuration errors.
In such circumstances, you can use the rescue mode to reconfigure your instance or to recover your data.
This guide explains how to restart your OVHcloud Public Cloud instance into rescue mode and access your files.
Requirements
- A Public Cloud instance in your OVHcloud account
OVHcloud Control Panel Access
- Direct link: Public Cloud Projects
- Navigation path:
Public Cloud> Select your project
Instructions
To date, rescue mode for Metal instances cannot be accessed via the OVHcloud Control Panel. For more information, please refer to our guide on rescue mode for Metal instances.
Step 1: Activating rescue mode
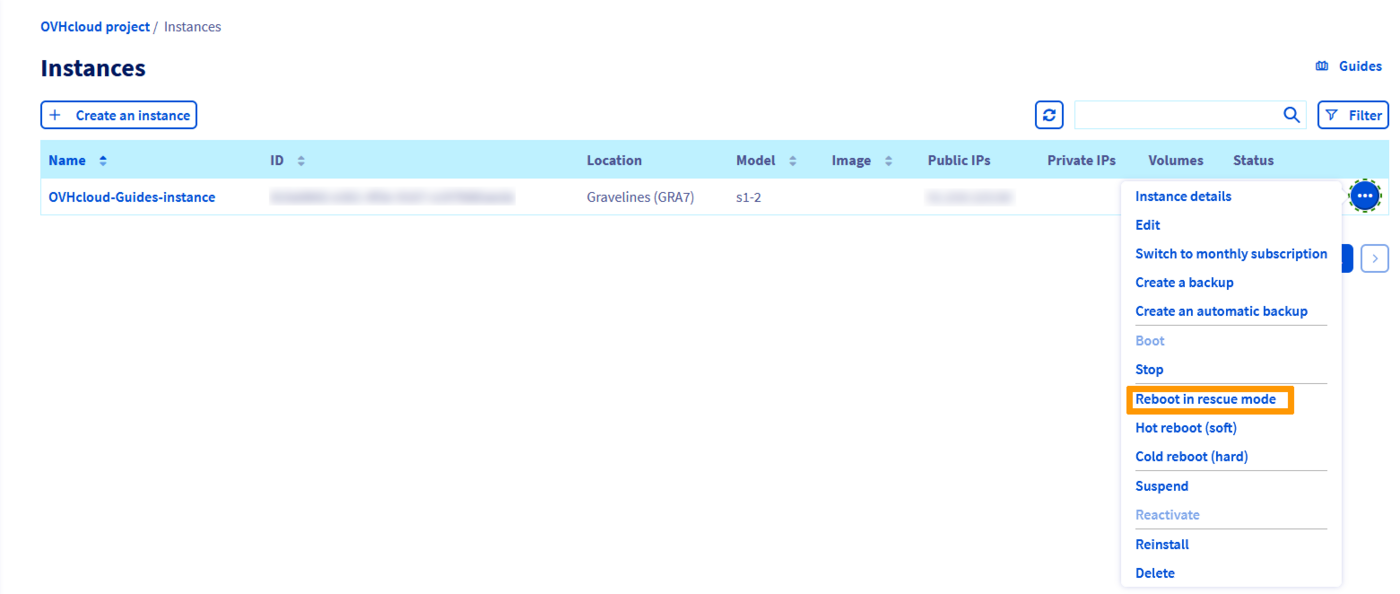
Click on Instances in the left-hand menu.
Click on ... in the row of the instance concerned and select Reboot in rescue mode.
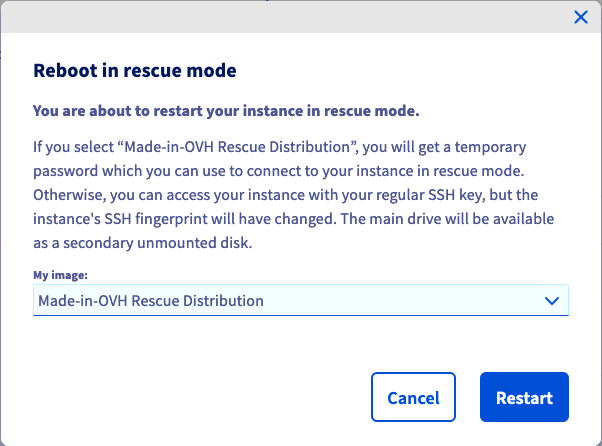
You will now see the Reboot in rescue mode dialog box. Click the drop-down list to select the distribution you would like to use in rescue mode and then click the Restart button.
Once your instance has been rebooted in rescue mode, an information box will display the available ways of access.

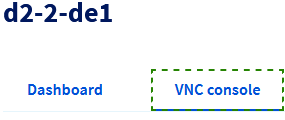
Your temporary rescue mode password will only be shown in the VNC console. Click on your instance in the table, then switch to the tab VNC console to retrieve it.
 |  |
Step 2: Accessing your data
When rescue mode has been activated, your instance's data will be attached as an additional disk. You will now need to mount it, by taking the following steps.
Establish an SSH connection to your instance. Once you are connected, verify the available disks with this command:
The result will look similar to the following example output:
In rescue mode, sda is the rescue mode disk and sda1 is the primary rescue partition mounted on /.
In this example, the primary disk is sdb and the system partition is sdb1 (indicated by the size).
Mount this partition with the following command:
Your data will now be accessible from the /mnt folder.
Step 3: Deactivating rescue mode
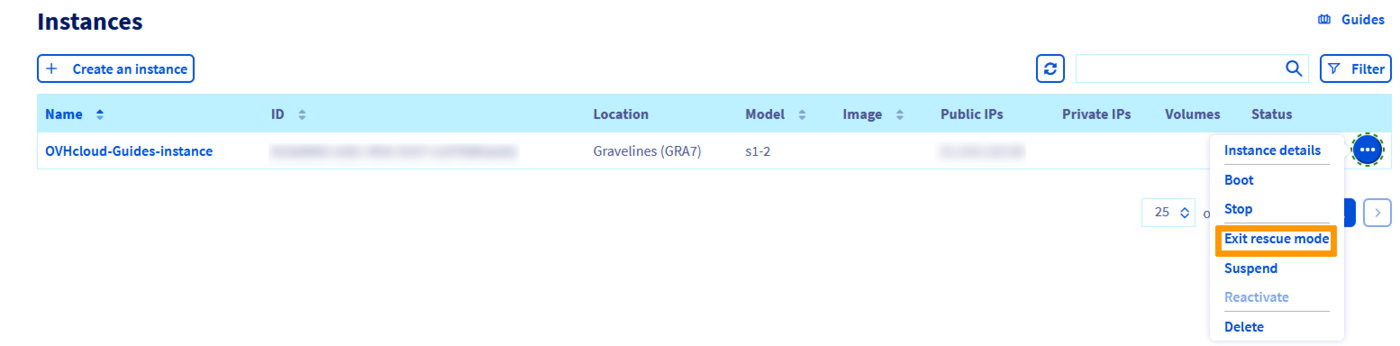
Once you have completed your tasks, you can deactivate rescue mode by rebooting your instance from the Control Panel interface. To execute this, click on ... and select Exit rescue mode.
If the Exit rescue mode button is not displayed while the instance is in rescue mode, we recommend that you refresh your browser tab.
Activating rescue mode using the OpenStack API
You can also activate rescue mode via the OpenStack API using the following command:
To exit rescue mode, use the following command:
Go further
How to replace an SSH key pair on an instance
Join our community of users.

