Using your email address from the Roundcube webmail interface
8901 Views
Objective
With the OVHcloud MX Plan solution, you can send and receive emails from third-party software or via webmail. OVHcloud provides an online email service called Roundcube that lets you access an email account through a web browser.
Find out how to use the Roundcube webmail interface for your OVHcloud email addresses.
Requirements
- An OVHcloud MX Plan email solution, included in our web hosting plans, included with a 100M free hosting plan, or ordered separately as a standalone solution.
- Access to the login details for the MX Plan email address you want to consult. For more information, see our guide Getting started with the MX Plan solution.
- Your OVHcloud MX Plan email solution must use the Roundcube webmail technology. To identify it, follow the instructions below.
How do I identify the technology used on my MX Plan solution?
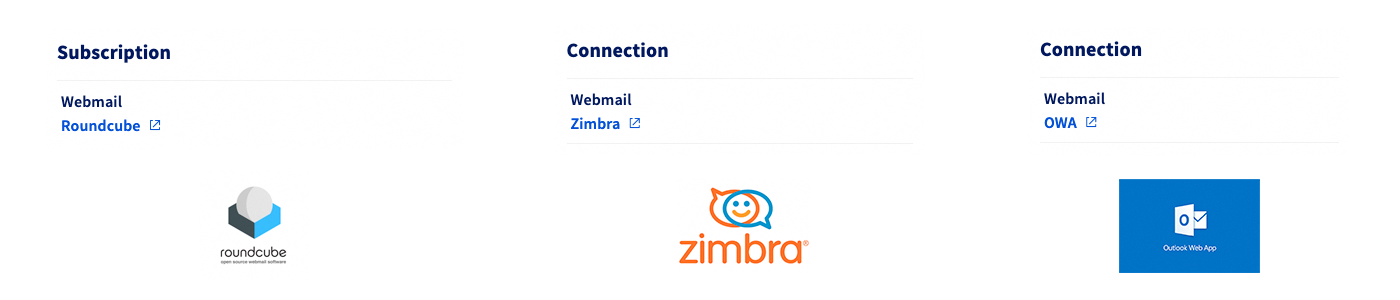
The email technology used for your MX Plan solution is identified by its webmail interface. To identify it from your Control Panel, follow this path:
- Log in to your OVHcloud Control Panel.
- Go to the
Web Cloudsection. - Click
MX Plan. - Select the relevant domain.
- From the
General informationtab (selected by default), check the technology used under the Webmail entry.
OVHcloud Control Panel access
- Direct link: MX Plan
- Navigation path:
Web Cloud>MX Plan> Select your MX Plan service
Instructions
Summary
- Logging in to the Roundcube webmail interface
- Roundcube webmail main page
- Configuring Roundcube interface preferences
- Managing identities and their signatures
- Contact book
- Responses (templates)
- Adding an autoresponder
- Changing your email password
- Writing an email
- Use case
Logging in to the Roundcube webmail interface
Go to the Webmail page. Enter an email address and the password, then click Login.
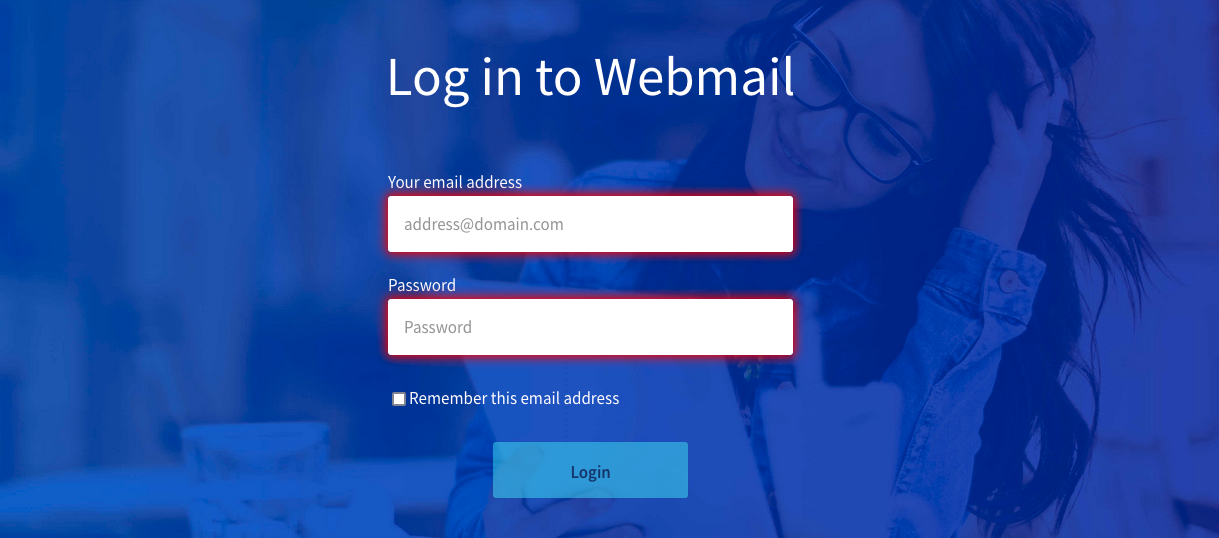
You will then be redirected to the Roundcube interface.
When you first log in to the Roundcube interface, the appearance may be different from what you will see in this documentation. This means that the "classic" appearance has been set on your interface. To change it, follow the "User interface" section and select the "Larry" view. The appearance of the interface will not affect the explanations that follow in this documentation.
If you are redirected to an Outlook Web App (OWA) interface, this means that you are on the latest version of the MX Plan solution. To find out more about your MX Plan solution, see our Getting started with the MX Plan solution page.
To familiarise yourself with the OWA interface, see our guide Using an email account from the OWA interface.
Roundcube webmail main page
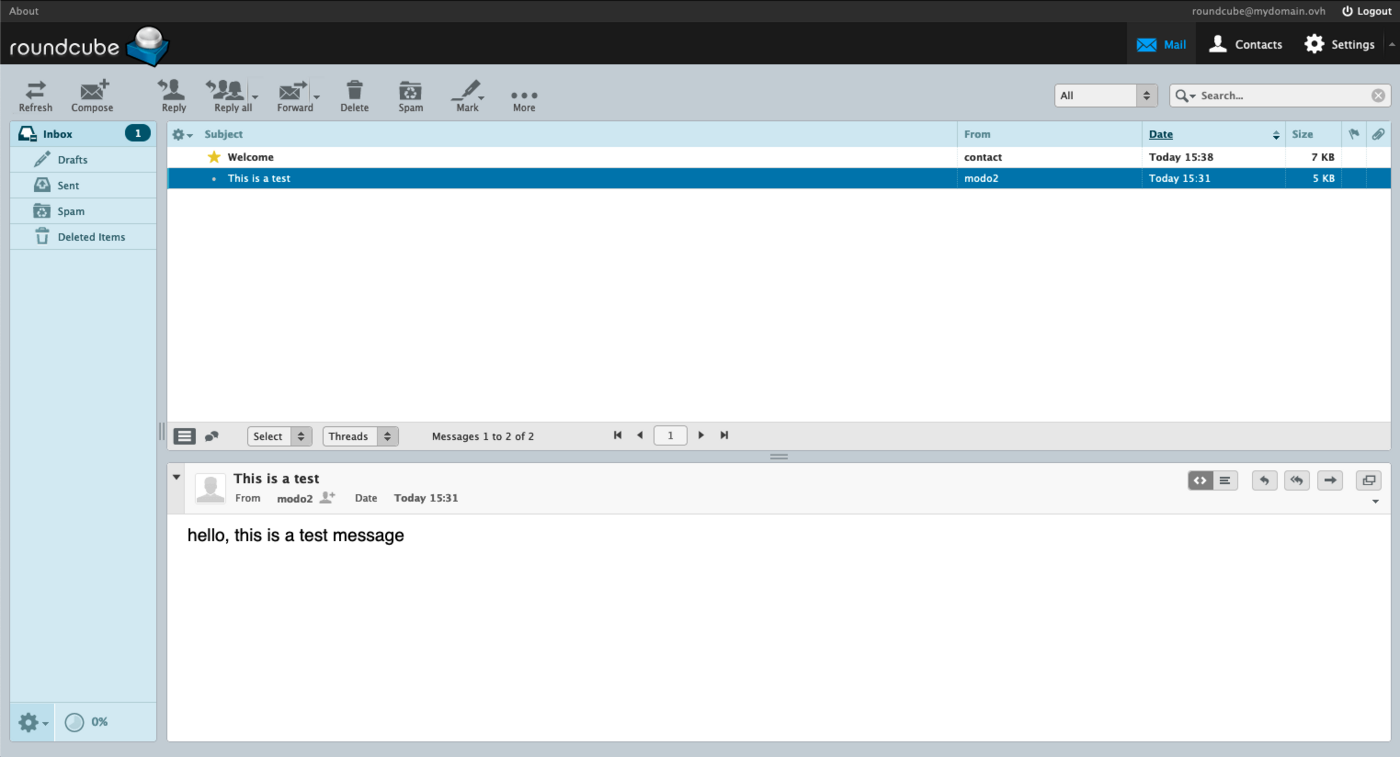
Once logged in to your email account, you have access to the main Roundcube window, which consists of 3 zones:
-
Left column: the tree view of your email account, made up of folders and subfolders. The primary folder is the
Inbox. -
Top window: the list of emails contained in the folder selected in the left column.
-
Bottom window: the content of the email selected in the top window.
Folder management (left column)
In this zone, the folders of your email account are displayed.
To manage folders more precisely, click the cog icon at the bottom of the column, then click Manage folders.
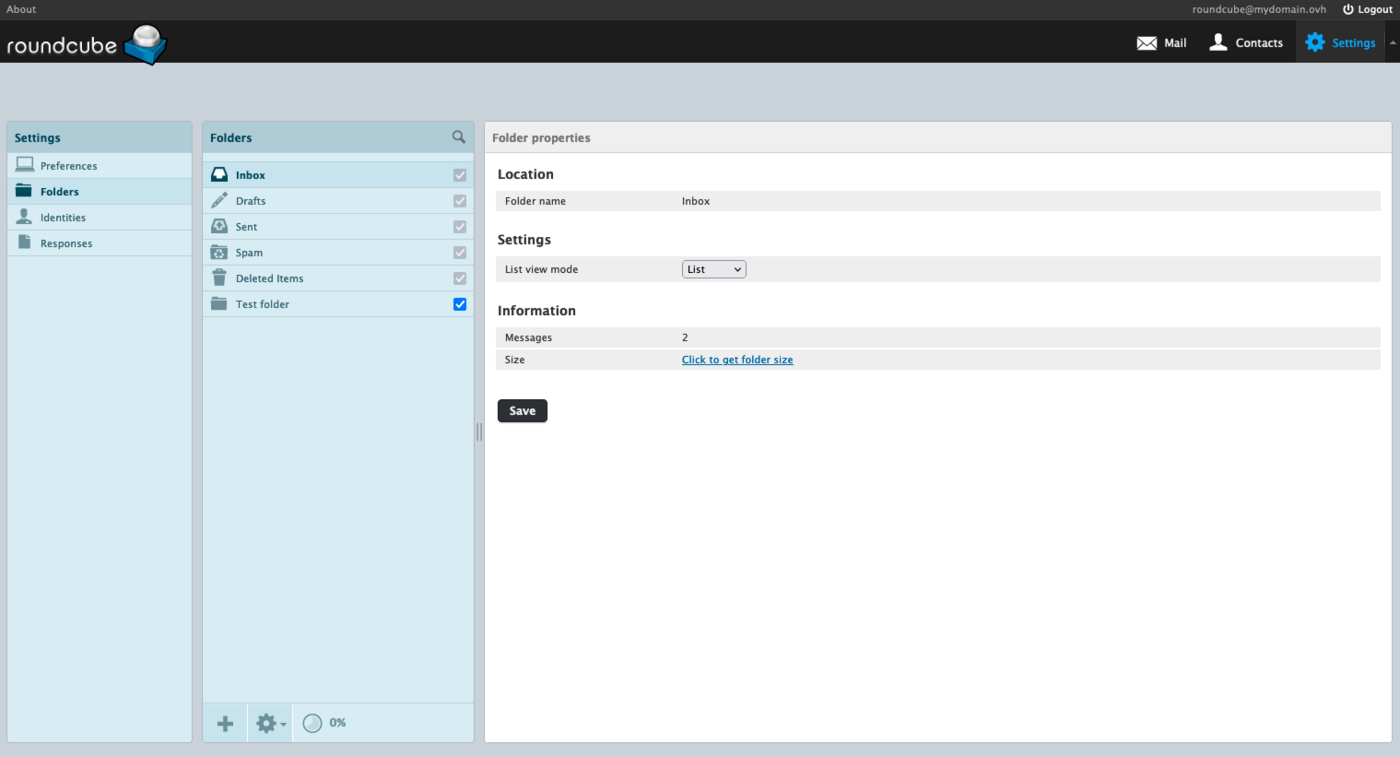
To create a folder, click the + button at the bottom of the Folders column.
To delete a folder, select the relevant folder, click the cog icon at the bottom of the Folders column, then click Delete. To clear the contents but keep the folder, click Empty.
The check boxes next to the folders correspond to "subscriptions". The subscription determines whether the folder is displayed, or not, in the webmail interface or the email software, while still keeping the folder content. The aim is only to hide or show a folder on the email account.
Folders with a grey check box are special folders. You cannot delete them or unsubscribe from them.
List of received/sent emails (top window)
This window displays the contents of the folder selected in the left column.
Display type
This window is presented in a form that can be customised. To do so, click the cog icon at the top left of the window.
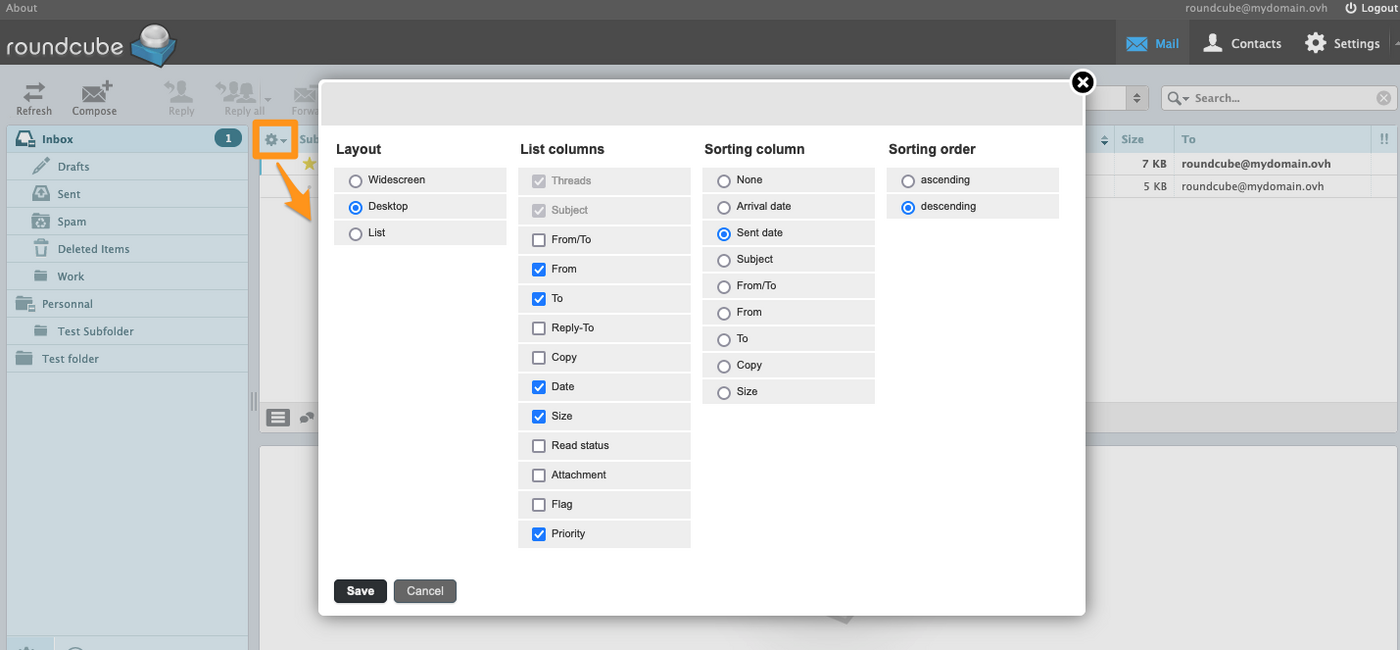
Four parameters can be configured:
-
Layout: defines how the email account management windows are arranged. Three options:
Widescreen: three panels side by side — folders, email list and reading pane aligned horizontally;Desktop: email list at the top, reading pane below (classic layout);List: no reading pane — emails open in full window when clicked.
-
List columns: check boxes that determine the columns displayed in the email list. The Subject and Threads columns are always visible. Optional columns available:
From,To,From/To,Reply-To,Cc,Date,Size,Status,Attachment,Flag,Priority. -
Sort column: lets you choose the default sorting column. Available options:
None,Arrival date,Sent date,Subject,From,To,From/To,CcorSize. -
Sort order: ascending or descending.
Click Save to apply your choices.
You can also sort the list dynamically by clicking directly on the header of a displayed column (for example Date, Subject or Size). A second click on the same column reverses the order.
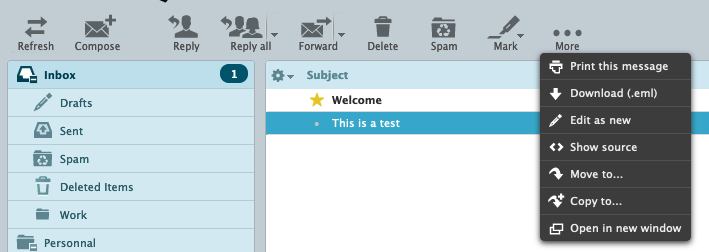
Action on a selected email
When an email is selected, you can perform actions on it. The possible actions are:
Reply: reply directly to the sender.Reply all: reply directly to all the recipients listed in the "To" and "Cc" fields.Forward: forward the selected email to one or more recipients.Delete: move the selected email to the "Trash".Mark as junk: place the selected email directly in the junk mail folder (Junk), labelling it as spam.Mark: manually set the status of an email.MorePrint this message.Download (.eml): retrieve the email header and its content.Edit as new: create a new email based on the selected email.Show source: display the email in its raw form, including the header.Move to: move the email to a folder.Copy to: copy the email to a folder.Open in a new window.
If one of your contacts requests an acknowledgement of receipt when you read their email, you will get the following message: The sender of this message has asked to be notified when you read this message. Do you want to notify the sender?.
Searching for an email
A search tool is available in the upper right-hand part of the interface.
Enter a term in the search field, then confirm with the Enter key: by default, Roundcube searches the entire current folder.
Click the arrow to the right of the magnifying glass to display the search filters: you can restrict the search to specific fields (subject, message body, sender, recipients, etc.) or extend its scope to all folders.
Email content (bottom window)
When an email is selected in the list, it is displayed in the bottom window.
On the right-hand side, you will find shortcuts for the following functions:
Show in HTML format(default)Show in plain text formatReplyReply allForwardOpen in a new window

Configuring Roundcube interface preferences
The following sections of this guide correspond to the tabs that make up the Preferences part of the Roundcube Settings. Their description is not exhaustive.
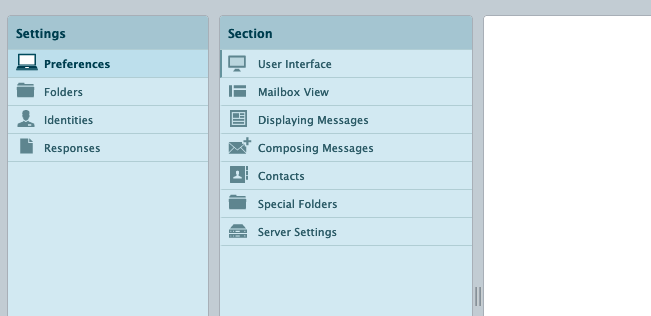
User interface
Here, set the Language of the Roundcube interface, the Time zone, the Time format and the Date format.
The Pretty dates option lets you display the date received/sent with relative terms such as "Today", "Yesterday", etc.
For example: today's date is 19/05/2022, an email sent/received on 17/05/2022 at 17:38 will be displayed as Tue 17:38, because the email corresponds to the previous Tuesday.
The Display the next message after marking as read or moving check box means that after a delete or move action on an email, the item in the row below will then always be selected, regardless of the sort order.
You can choose the look of your interface display. You have a choice between the Classic display or the Larry display.
Mailbox view
Here, set the layout used to view and act on emails. The Layout option lets you arrange the 3 windows described in the List of received/sent emails section.
Displaying messages
Set how emails are displayed.
We recommend keeping the Display HTML box ticked, to ensure that emails formatted by the sender are displayed correctly.
We also recommend keeping the Allow remote resources (images, styles) option set to never. This avoids loading the elements of an email that may seem malicious.
Composing messages
Set the default form when writing an email or a reply.
We recommend setting the Compose HTML messages option to always, to benefit from HTML editing tools by default and to avoid altering an HTML signature.
Contacts
Customise the layout of the information in your address book here.
Special folders
Roundcube has 4 special folders: Drafts, Sent, Junk, Trash.
We do not recommend modifying them, but you can assign the behaviour of a special folder to another folder created later, using the drop-down menus.
For example, you can assign the "Drafts" behaviour to another folder you have created by clicking the drop-down list and choosing that folder. If no folder is assigned to it, it will automatically be set to the "Drafts" option. Emails saved there will then be considered drafts until they are actually sent.
In practice, you create a subfolder called "Client email drafts". Go to
My preferences/Special foldersand choose the "Drafts" option. In the drop-down menu, select the "Client email drafts" folder to replace "Drafts". Emails written in this folder will be considered drafts.
Server settings
In this tab, you can optimise the space used by an email account. The Clear Trash on logout option helps prevent the build-up of items that have been deleted. The Directly delete junk option will automatically delete all emails considered as spam.
We do not recommend enabling the Directly delete junk option in case a false positive (an email wrongly classified as "spam") is flagged as spam by the receiving server. When an email is placed in the "Junk" folder, you can still check whether the email is legitimate.
Encryption
If your browser allows it, you can install and enable the "Mailvelope" extension. This is a browser extension that integrates PGP (Pretty Good Privacy) into your webmail. The PGP encryption system, and consequently the "Mailvelope" extension, lets you:
- Encrypt and decrypt emails in your browser.
- Keep the content of your emails private from your email provider.
This way, only you can read your emails. This extension is a way to secure your webmail if you receive emails of a confidential nature.
For more information, see the "Mailvelope" FAQ at https://mailvelope.com/faq.
Managing identities and their signatures
In Roundcube, click Settings in the top bar, then Identities in the left column. The "Identity" lets you customise the information sent to recipients, such as the display name or the signature.
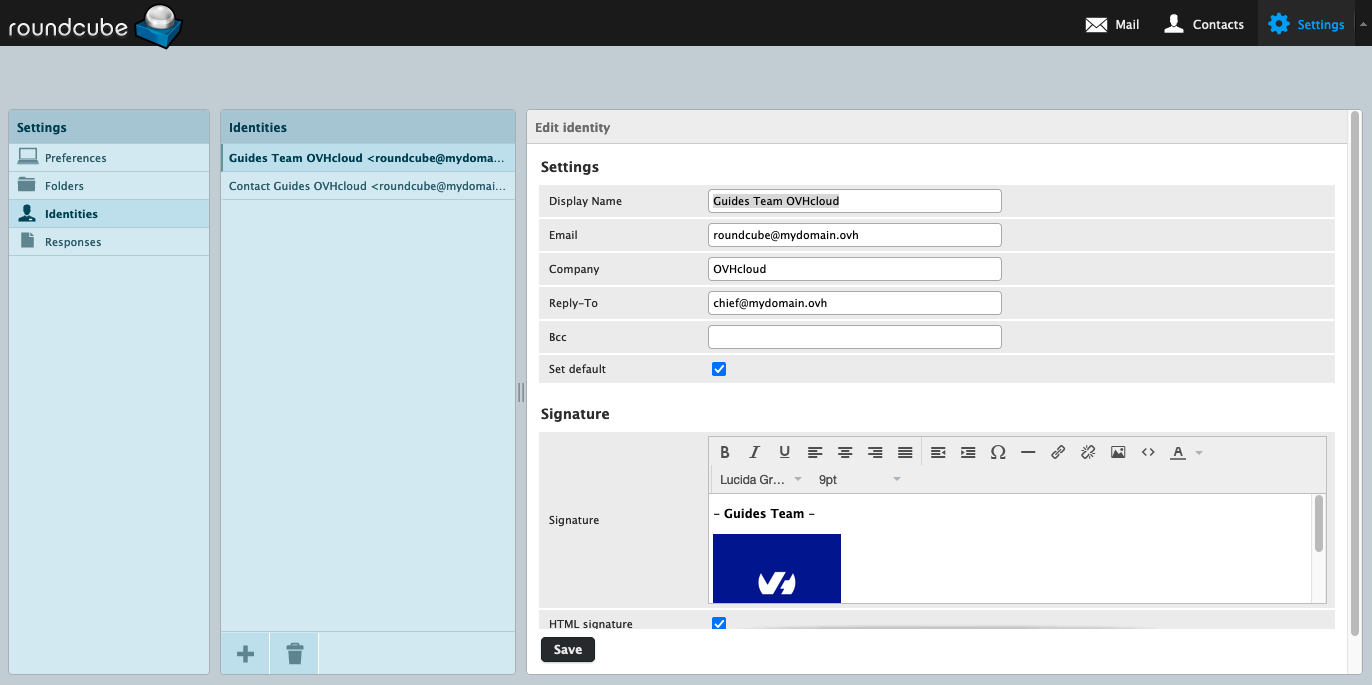
Setting the attributes of an identity
- Display Name: this name will appear in the "sender" section for the recipient.
- Email: the address from which the email is sent.
- Organization: a field for a company name, association, or another entity.
- Reply-To: assign a different reply email address from the sender's.
- Bcc: send a blind copy to an email address when sending.
- Set default: when there are several identities (signatures), set this one as the default.
- Signature: customise the footer of an email when writing it (surname, first name, job title, sentences, images, etc.).
- HTML signature: enables HTML format on the signature.
Filling in the Email field with an email address different from the one you are logged in with is considered electronic identity theft (spoofing). The IP address used for sending may be "banned" and/or considered "spam" by your recipients.
Adding a signature
By default, the Signature field is in "plain text". This format does not allow advanced editing or inserting an image into your signature. To benefit from advanced editing options for a signature, we recommend enabling HTML mode by clicking HTML signature below the input frame.
As a result, if the signature is in HTML format, you will need to switch to HTML mode when writing an email. You can enable this option by default for each email you write, from the Settings section of the Roundcube interface.
Click Preferences in the left-hand column, then Composing messages. For the Compose HTML messages entry, select Always.
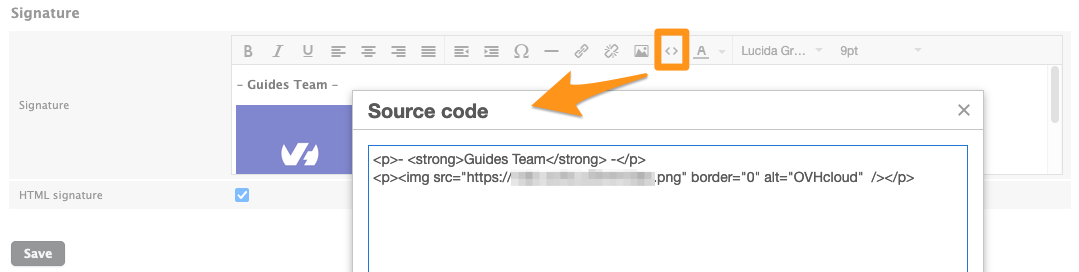
To insert an image into a signature, the image must be hosted on a server (an OVHcloud hosting plan or another).
Uploading an image from a computer will not allow it to be displayed.
Click the < > button in the HTML toolbar, then insert the following code, replacing your-image-url with the URL of the image and text-if-image-is-not-displayed with text that replaces the image if it cannot be displayed.
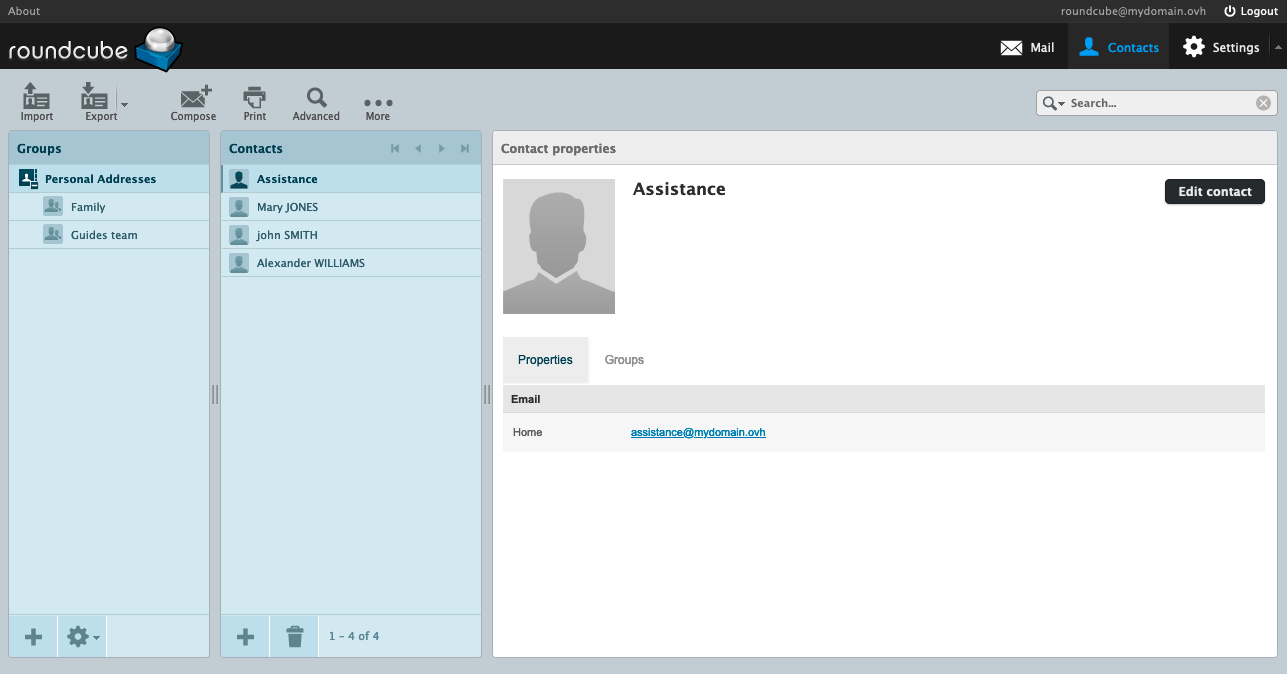
Contact book
Click Contacts in the top bar to access the contact book. It is divided into 3 columns:
- Groups: in the address book, you can create groups to organise contacts.
- Contacts: view the contacts of the address book or the selected group.
- Contact properties or Add contact: this window appears when a contact is selected or being created. You can read or edit the contact information.
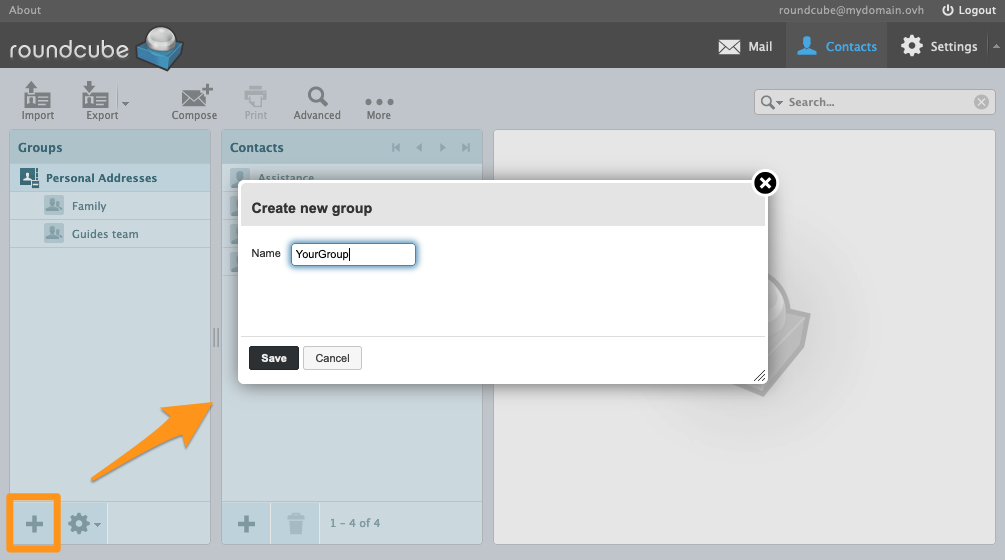
Groups
Groups are subcategories of the address book. They let you organise contacts into subsets. For example, it is easier to find a contact in a group you have created than in your entire address book. They also let you send an email by adding a group as a recipient, instead of adding the contacts of the group one by one.
To create a group, click the + button at the bottom of the Groups column. Set the name of the group, then click Save to confirm.
To assign a contact to one of the groups, select a contact in the Contacts column, then in the window that appears, click the Groups tab. Tick the group you want to assign to the contact.
Contacts
In the Groups column, select the address book or one of the groups.
When you create a contact from a selected group, the contact will automatically be added to the group.
Click the + button at the bottom of the Contacts column to create a contact.
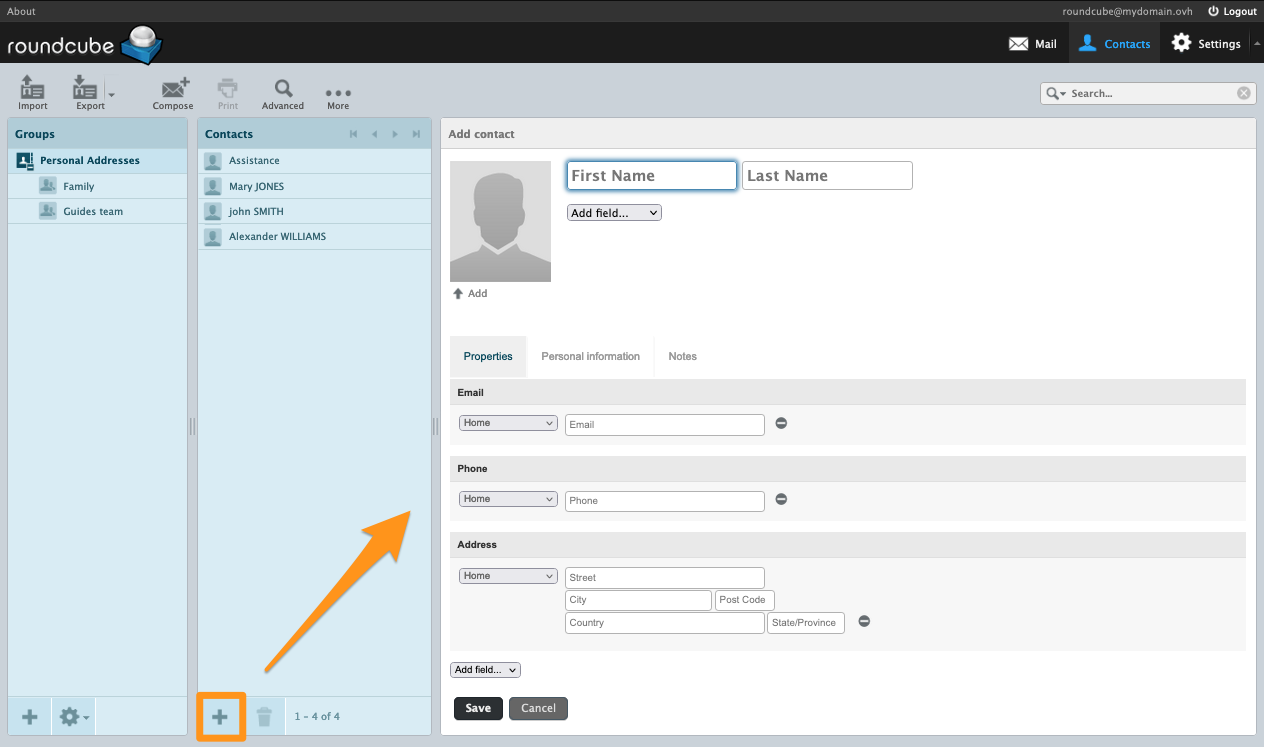
Then fill in the contact information.
You can add additional fields via the Add field... drop-down menu, located below the First name and Address fields.
Importing contacts
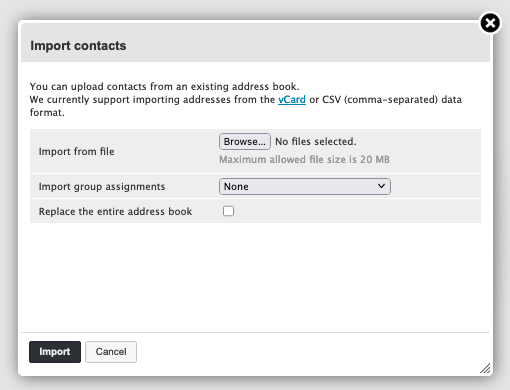
In the Contacts window, in the top bar, click Import to open the import window.
Import from file: select a CSV or vCard file from your computer. Contacts in a CSV file must be separated by commas. The file must not be larger than 20 MB.Import group assignments: if the contacts in your file are sorted by groups, you can enable this option to keep this organisation, or leave this option set tononeso that no group is assigned to the contacts.Replace the entire address book: if a contact book is already configured, we recommend exporting it before ticking this option, or making sure you want to replace it permanently.
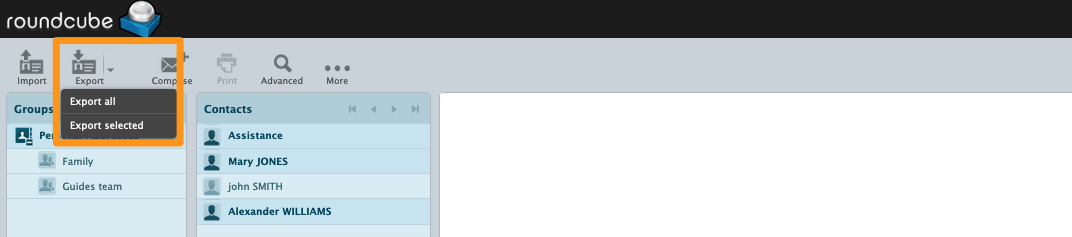
Exporting contacts
In the Contacts window, in the top bar, click the down arrow to the right of the Export button.
You have the choice between:
Export all: all contacts will be exported in a .vcf file.Export selected: export only the items you have selected in theContactscolumn.
Responses (templates)
This feature lets you create response templates when writing an email.
In Roundcube, click Settings in the top bar, then Responses in the left column.
To add a response, click the + button at the bottom of the Responses column.
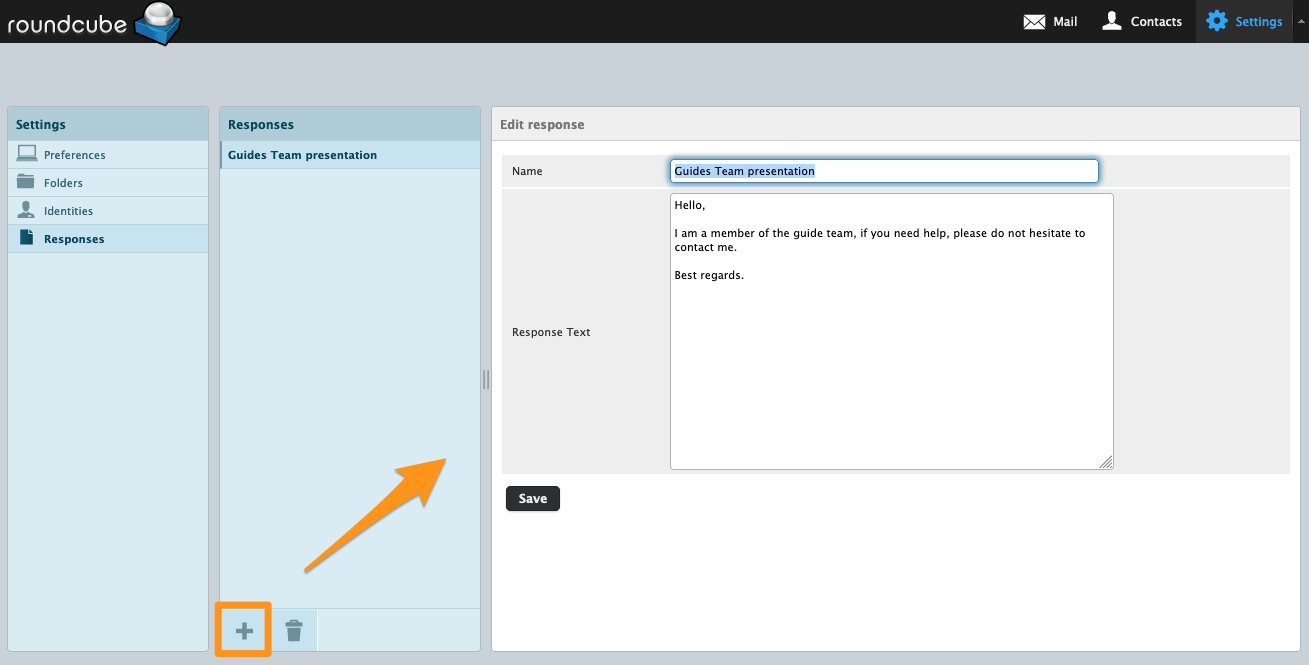
"Responses" are written in "plain text" format.
Adding an autoresponder
You want to add an automatic reply to your email address when you are away or unavailable. This feature cannot be enabled from the webmail interface, but from your OVHcloud Control Panel, in the management interface for your email addresses. See our guide "Creating an autoresponder for your email address".
Changing your email password
To change your email password, you must log in to your OVHcloud Control Panel, in the management interface for your email addresses. See our guide "Changing the password of an email address".
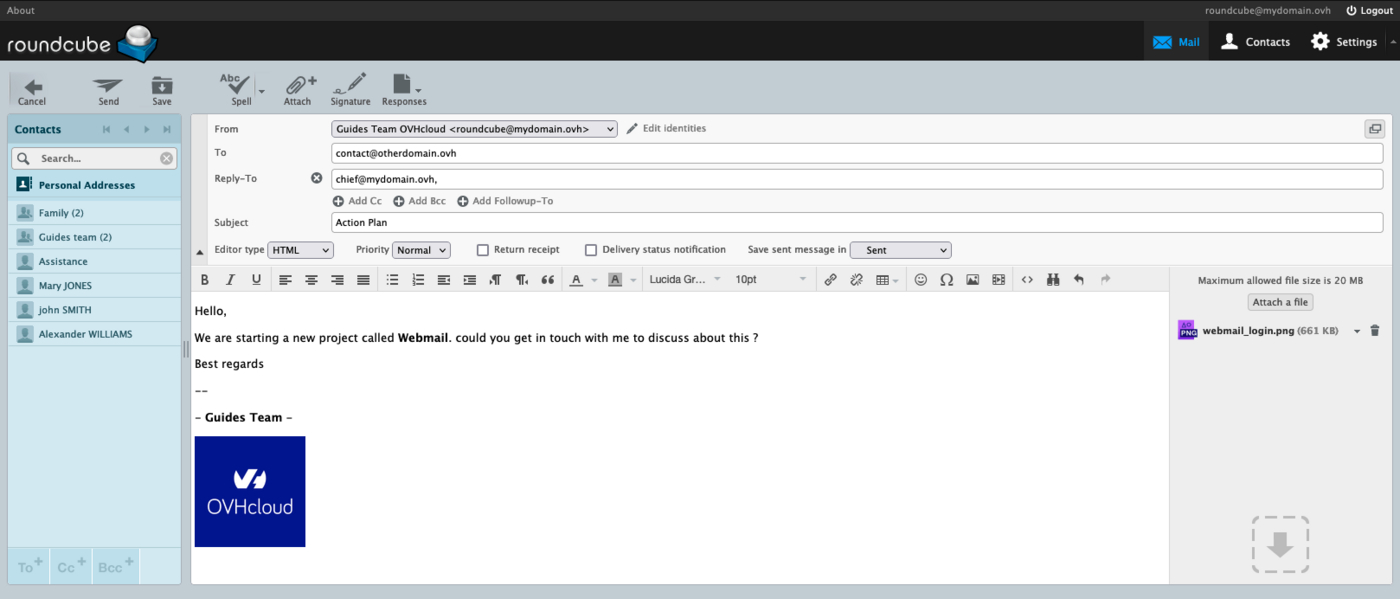
Writing an email
From the Mail tab in the top bar, click Compose.
In the email composition window, you will find the following fields:
- From: choose an identity to set the sender.
- To: add recipients and/or a recipient group. The
+button to the right of the field lets you enter several addresses.
The "To" field must not exceed 100 recipients, this includes contacts within a group.
- Cc: via the
Add Ccbutton, add recipients in simple copy. - Bcc: via the
Add Bccbutton, add recipients in blind copy. The other recipients of the email will not see those in Bcc. - Followup-To: via the
Add Followup-Tobutton, forward the email to recipients. - Editor type:
Plain text: text only, without formatting.HTML: text with formatting. An HTML toolbar appears above the input window.
- Priority of the email.
- Return receipt: an acknowledgement of receipt is requested from the recipient.
- Delivery status notification when the email has been successfully delivered to the recipient.
- Save sent message in: choose the folder where a copy of the email will be stored.
In the top bar, the following actions are available:
Cancelwriting an email, with a confirmation prompt.Sendan email.Savean email in the "Drafts" special folder.Spellcheck the text, with a menu allowing the choice of language.Attacha file to an email.Signature: adds the signature attached to the selected identity.Responses: adds a pre-saved template from the Responses section.
Use case
Request check failed
You are getting the following message when trying to access your Roundcube webmail interface:
As stated in the message, your email account is considered to be already logged in. This is referred to as a "session". It means that your email account is already in use as far as the email server is concerned, and that this previous session must be closed. Check that your email account is not already open on Roundcube. Also clear the cached data in your web browser.
Go further
Getting started with the MX Plan solution
Changing the password of an MX Plan email address
Creating an autoresponder for your email address
Creating filters for your email addresses
Join our community of users.

