Configuring two-factor authentication on an Exchange account
2224 Views
Objective
If you wish to increase the security on your Exchange account, you can enable two-factor authentication (2FA). This will generate a random code that must be entered when you log in, in addition to your password. This code is generated using a one-time password (OTP) app, which must be installed on your smartphone or tablet.
This guide explains how to enable two-factor authentication on your Exchange account.
Requirements
- an OVHcloud Exchange solution already set up
- an OTP mobile application installed on your Android or iOS smartphone or tablet
OTP mobile applications
You can choose from a number of OTP applications. Here are two examples that are free to use.
- For Android: Free OTP
- For iOS: OTP Auth
OVHcloud Control Panel Access
- Direct link: Exchange
- Navigation path:
Web Cloud>Exchange> Select your platform
Instructions
First configuration
Step 1: Enable two-factor authentication on the platform
For the initial configuration, you need to enable two-factor authentication on the Exchange service before enabling it on an account.
Switch to the Security tab.
1. Under “Two-factor authentication”, click on Enabled.
1. To finish, scroll to the bottom of the page and click on Save changes.
Step 2: Enable two-factor authentication on an account
After enabling two-factor authentication on the Exchange service, you can then enable it on each one of your accounts.
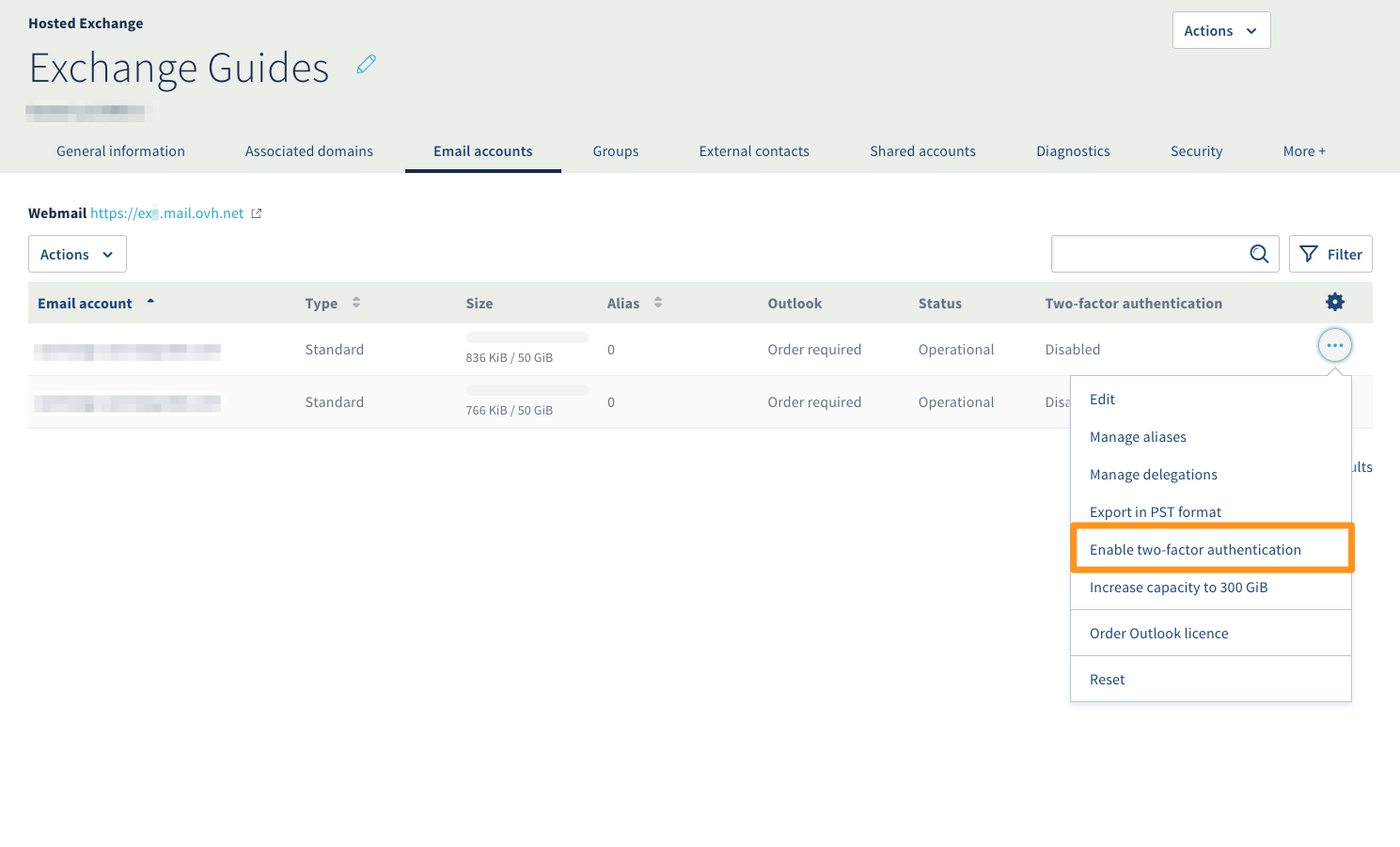
Go to the Email accounts tab and click on ... to the right of the account on which you wish to enable two-factor authentication, then click on Enable two-factor authentication.
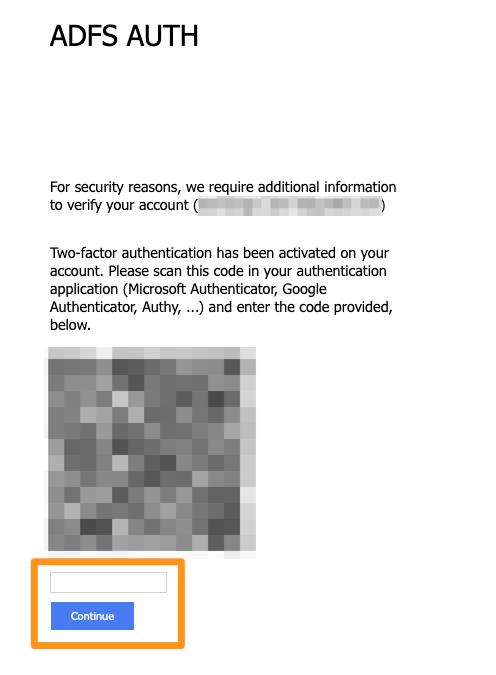
To link the Exchange account to your OTP app, log in to your webmail.
At the first attempt to log in, a QR code will appear. Use your OTP app to scan it, then enter the code that the app generates to log in.
When you next log in, webmail will only ask for the code generated by the app.
Disabling two-factor authentication
You can disable two-factor authentication on your account in three ways.
From the Email accounts tab, click on ... to the right of the account on which two-factor authentication is already enabled.
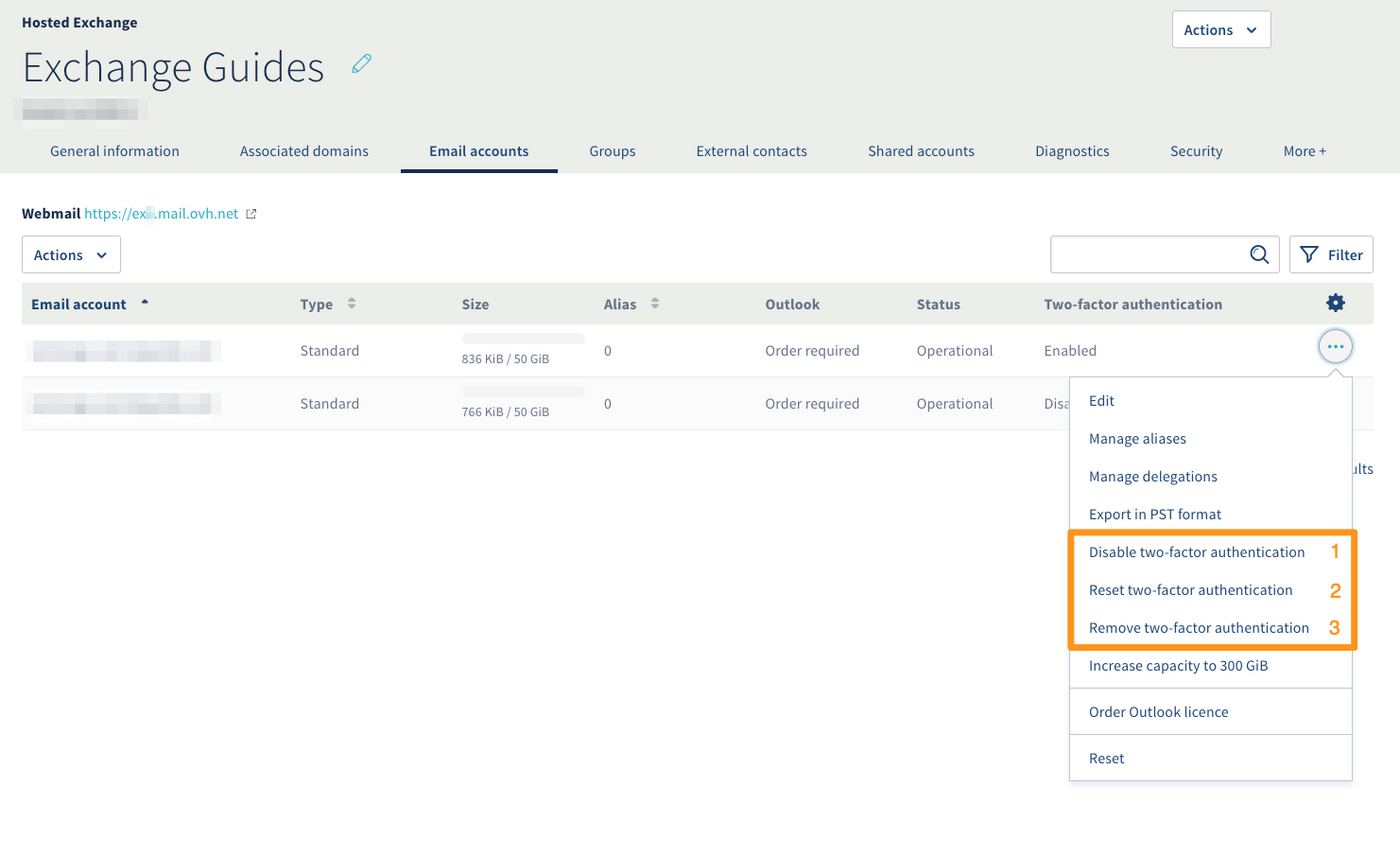
Select the option that you need according to the table below:
| No. | Purpose | Description |
|---|---|---|
| 1. | “Disable two-factor authentication” | Suspends two-factor authentication for a defined number of hours. Once the time period has passed, the two-factor authentication will be reactivated. For example: a user has forgotten their phone and cannot authenticate themselves with the OTP app. |
| 2. | “Reset two-factor authentication” | Resets the QR code requested when you first log in to webmail. For example: a user has changed phones and needs to reconfigure their OTP application. |
| 3. | “Remove two-factor authentication” | Fully removes two-factor authentication from the account. |
Go further
Join our community of users.

