Deleting an email account
1090 Views
Objective
You want to:
- Delete an email account you no longer use.
- Reset an email account to use it with a new email address.
- Reset an email account in order to cancel it.
This guide explains how to delete or reset an email account of your email solution.
Requirements
- A preconfigured OVHcloud email solution:
- MX Plan, available with a web hosting plan, included in a 100M free hosting, or ordered separately.
- Exchange.
- Email Pro.
- Zimbra.
- Be the Admin contact of the email service concerned
- Access details for the email accounts concerned
OVHcloud Control Panel Access
MX Plan:
- Direct link: MX Plan
- Navigation path:
Web Cloud>MX Plan> Select your MX Plan service
Zimbra:
- Direct link: Zimbra
- Navigation path:
Web Cloud>Zimbra Mail
Email Pro:
- Direct link: Email Pro
- Navigation path:
Web Cloud>Email Pro> Select your platform
Exchange:
- Direct link: Exchange
- Navigation path:
Web Cloud>Exchange> Select your platform
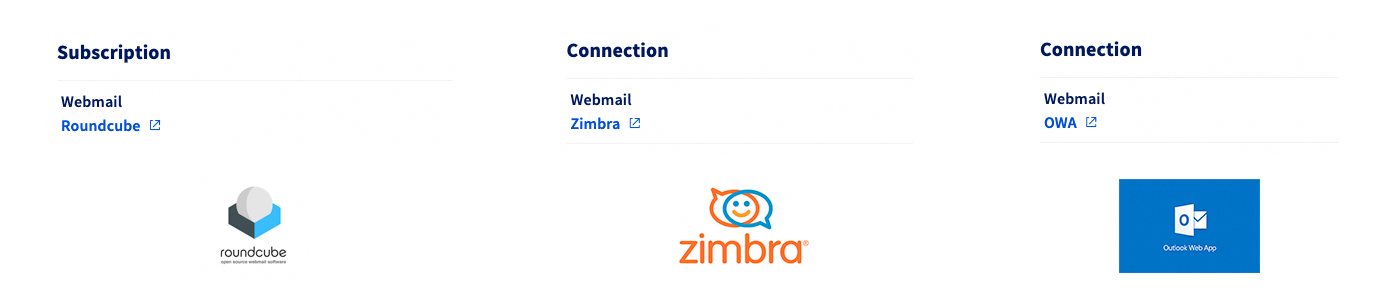
Identifying the email technology of your MX Plan solution.
Depending on when your MX Plan solution was activated or on a recent migration, the associated email technology may differ. This technology is characterised by the interface of its webmail. To identify it:
- From the
General informationtab, note the technology used under the Webmail heading in theSubscriptionbox.
Instructions
OVHcloud offers 4 email solutions, and the concept of account deletion differs depending on which email solution you choose.
- MX Plan email: This offer contains a certain number of email accounts as a bundle. When you delete an account, you free up an account "slot" of the email service.
- Email Pro, Hosted Exchange and Zimbra: These offers are on-demand. You order an individual subscription per email account. If you want to delete an email account, you will need to reset it. Once you have reset your email account, you can use this account again to create a new email address. You can also cancel the subscription for this account if you wish to permanently delete it.
Delete or reset an email account
Select the tab corresponding to your email solution:
To identify the email technology associated with your MX Plan service, please refer to the "Identifying the email technology of your MX Plan solution" section of this guide.
- Go to the
Email accountstab. The window that appears will display the existing email accounts. - Click the
...button to the right of the account you want to modify, then clickDisable account.
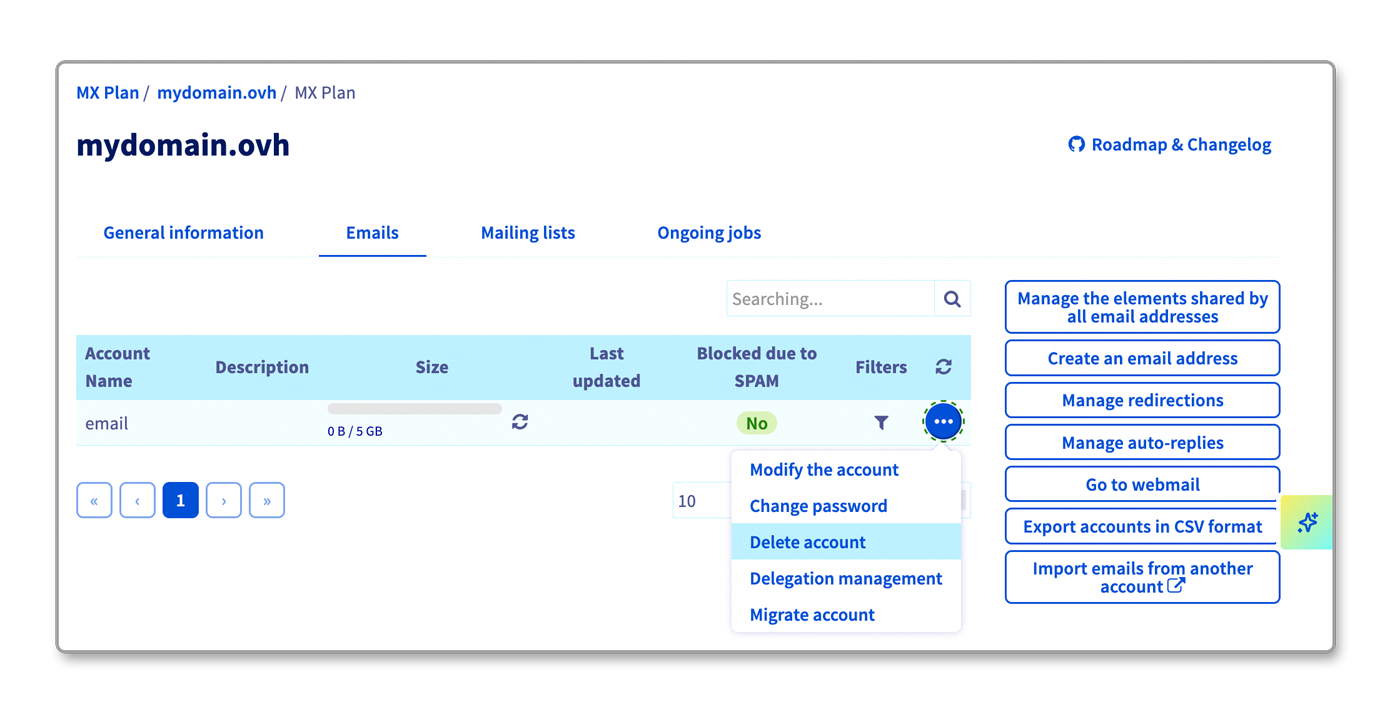
To identify the email technology associated with your MX Plan service, please refer to the "Identifying the email technology of your MX Plan solution" section of this guide.
- Go to the
Email accountstab. The window that appears will display the existing email accounts. - Click the
...button to the right of the account you want to modify, then clickReset this account.
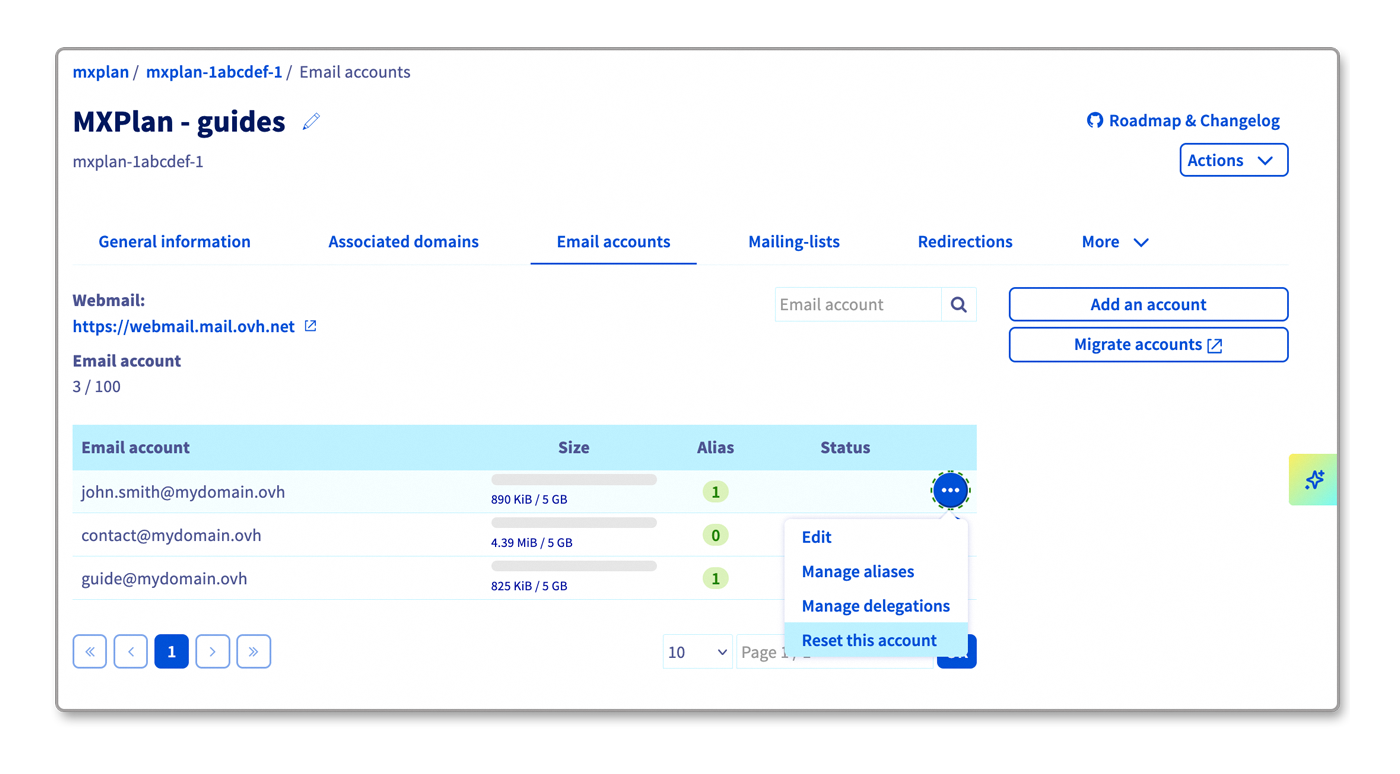
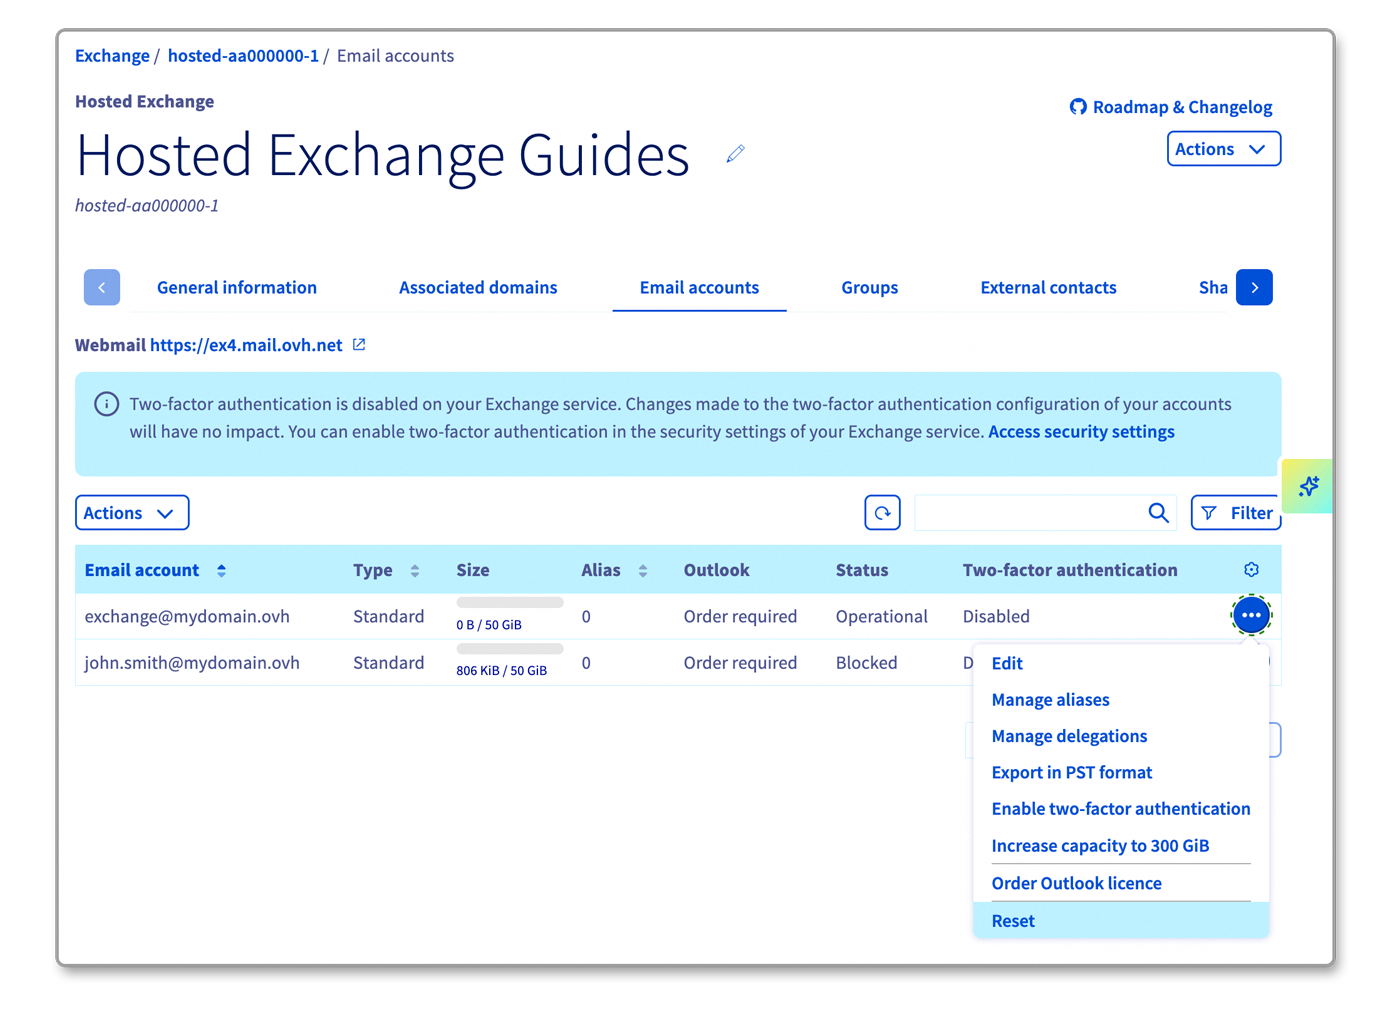
- Go to the
Email accountstab. The window that appears will display the existing email accounts. - Click the
...button to the right of the account you want to modify, then clickReset this account.
After resetting your account, if you want to permanently delete it, you must cancel it. To do this, please refer to our guide "Managing the billing for your Email Pro accounts".
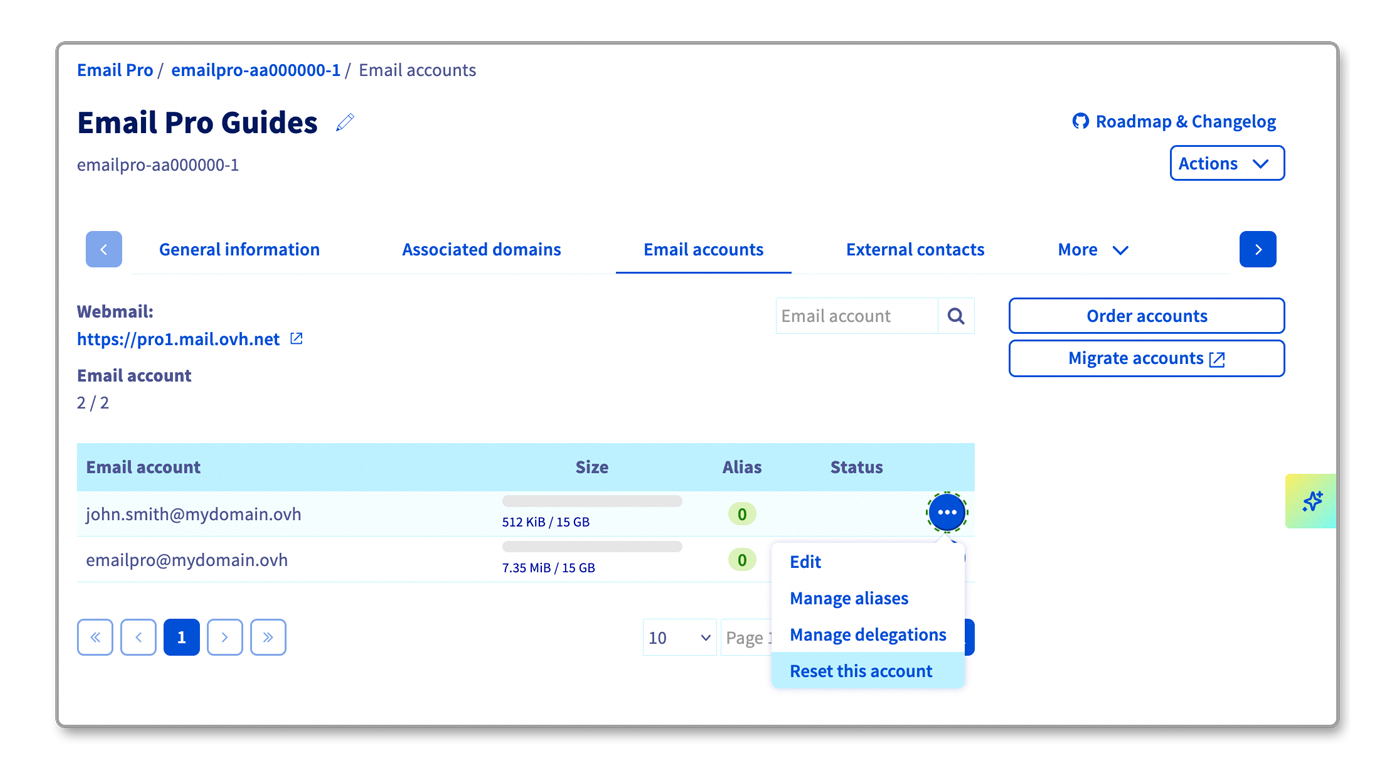
- Go to the
Email accountstab. - Click the
...button to the right of the account you want to modify, then clickReset.
After resetting your account, if you want to permanently delete it, you must cancel it. To do this, please refer to our guide "Managing the billing for your Exchange accounts".
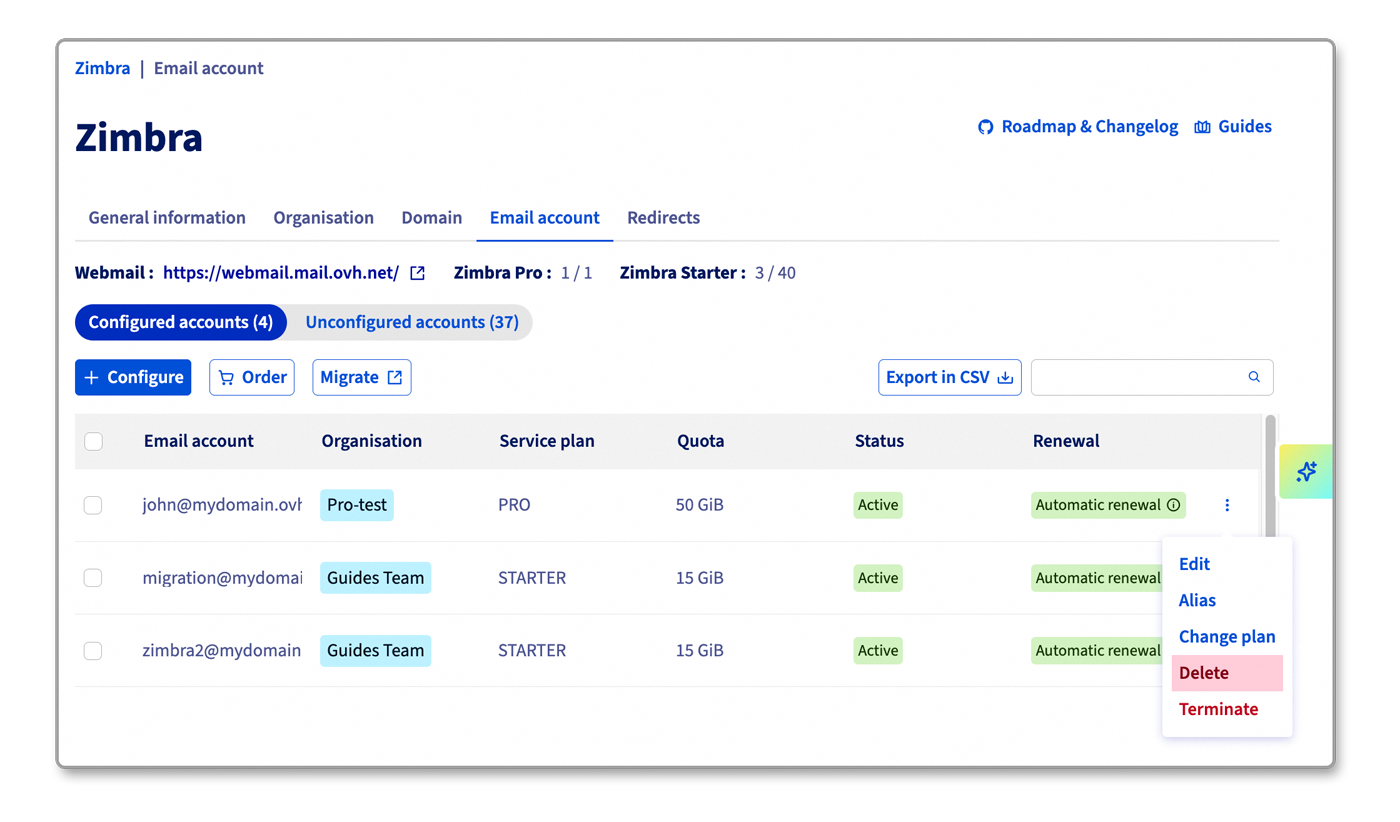
- Go to the
Email accounttab. The window that appears will display the existing email accounts. - Click the
⋮button to the right of the account you want to modify, then clickDelete.
Go further
Getting started with Email Pro
Getting started with Hosted Exchange
Managing the billing of your Email Pro accounts
Managing the billing of your Exchange accounts
If you would like assistance using and configuring your OVHcloud solutions, please refer to our support offers.
Join our community of users.

